
This survey will take about 1 minute.
Your answers will help us to improve our website.
Hyrule Warriors: Age of Calamity
Taming the Savage Lynel Challenge Walkthrough
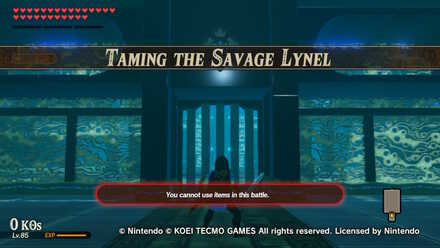
This is a guide for Taming the Savage Lynel, a Challenge in Hyrule Warriors: Age of Calamity. Read on to learn the best way to clear the challenge as well as obtainable rewards, materials and more!
List of Contents
Taming the Savage Lynel Basic Information
| Taming the Savage Lynel | |
|---|---|
| Challenge Level Range | 51-60 |
| Recommended Level | 57 |
| Region | Lanayru |
| Special Conditions | No Healing Items Appear Time Limited No Carried Items |
| Unlock Conditions | Clear the Challenge: Reclaim the Land |
| First-Clear Rewards |
・
・
・
・
|
|---|
Taming the Savage Lynel - Materials and Enemies
Battlefield-Specific Materials
| Does not drop battlefield specific materials |
Main Enemies
|
・
|
Taming the Savage Lynel Walkthrough

| Objectives |
|---|
|
Taming the Savage Lynel - Tips and Strategy Guide
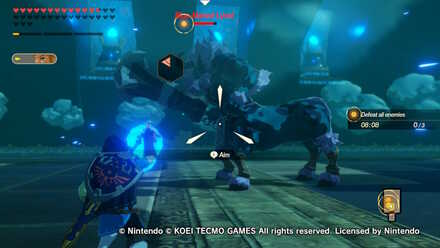
This challenge can be difficult when not approached properly as this will pit you against three Lynels - a normal Lynel, a White-Maned Lynel, and a Malice Lynel.
At first, the challenge will make you fight a normal Lynel and a White-Maned Lynel. When one of the two is defeated, the Malice Lynel will appear immediately!
Here are some tips to more effectively clear this challenge!
Do Not Lock-on the Lynels

When fighting multiple Lynels, do not lock-on any of them. This allows you to see the movements of both enemies to better execute Perfect Dodges.
Age of Calamity Controls and Controller Options
Always Aim For a Flurry Rush

Always try to execute Flurry Rushes by dodging at the last time! This does not only provide free hits, but it also gives you invulnerability from the attacks of the other Lynel!
Use Sheikah Runes
Use Stasis to Extend the Weak-Point Gauge

The Stasis rune allows you to extend the hitting duration of an enemy's Weak-Point Gauge. Just use it when the Weak-Point Gauge is exposed to attacks.
Use Remote Bombs to Hit the Weak-Point Gauge Directly
Take note that the Remote Bomb rune deals damage directly to the enemy's Weak-Point Gauge. Do not hesitate to use it when the full Weak-Point Gauge is close to breaking.
Sheikah Runes Guide: How to Use Runes in Battle
Use Cooking

Since this challenge do not allow using items like rods and apples, we suggest cooking recipes that promote survivability:
| Survivability | Health at the Start of Battle Damage from Enemies -% Recover Health Every 10 Seconds |
|---|
Cooking Guide and List of Recipes
Set the Difficulty to Easy

If you are stuck and at the end of your wits, we suggest setting the difficulty mode to Easy. Enemies are easier to defeat, and they do not hit that hard in this difficulty, so this may solve the problem with the time constraint and survivability.
Of course, you can always change the difficulty back afterward!
Difference Between Difficulty Modes: Which Difficulty Should You Choose?
Related Links
Comment
Author

Taming the Savage Lynel Challenge Walkthrough
Please participate in our site
improvement survey
03/2026
improvement survey
03/2026
Would you assist in
improving Game8's site?
improving Game8's site?

×
We are listening to our users' valuable opinions and discussing how to act on them.
The information collected through this survey will be used for the purpose of improving our services. In addition, the information will only be disclosed a part of a statistic in a format that will not allow identification of personal information.
Begin Survey
Not Now
×
Please rate each item regarding Game8.co's Advertisements.
Amount of Ads
Very Dissatisfied
Somewhat Dissatisfied
Fine
Somewhat Satisfied
Highly Satisfied
Placement of Ads
Timing of Ad Display
Ad Loading Speed
Safeness of Ads
Content of Ads
×
Please rate each item regarding Game8.co's Quality of Articles.
Amount of information
Very Dissatisfied
Somewhat Dissatisfied
Fine
Somewhat Satisfied
Highly Satisfied
Frequency of updates
Speed of new information
Accuracy of articles
Understandibility of articles
Readability of sentences
×
Please rate each item regarding Game8.co's Usability of the Site.
Ease of finding information
Very Dissatisfied
Somewhat Dissatisfied
Fine
Somewhat Satisfied
Highly Satisfied
Loading Speed
Use of Color
Font Size
Visibility of Images
Easy to Understand Layout
×
Please rate each item regarding Game8.co's Message Boards, Comments.
Ease of Writing
Very Dissatisfied
Somewhat Dissatisfied
Fine
Somewhat Satisfied
Highly Satisfied
Readability
Ease in Finding Information
Comment Quality
Comment Quantity
Admin Response
×
Please rate each item regarding Game8.co's Site's new design.
Please rate our site's new design
Very Dissatisfied
Somewhat Dissatisfied
Fine
Somewhat Satisfied
Highly Satisfied
Do you think that the website's design change makes the site easier to use?
Has the new design made it easier for you to find information on the site?
Has the new design improved the overall visual appeal of the site?
How would you rate your overall satisfaction with the new design of the site?
×
How likely are you to recommend Game8 to someone you know?
Very Unlikely
0
1
2
3
4
5
6
7
8
9
10
Very Likely
If you have other opinions regarding potential improvement to the website, please share them with us. We would appreciate your honest opinion.
Note: This is a free response section, so you can proceed without entering anything.
Note: Please be sure not to enter any kind of personal information into your response.
Note: Please be sure not to enter any kind of personal information into your response.
×
Thank You
×
Thank you for participating in our survey! Your answers will help us to improve the quality of our website and services.
We hope you continue to make use of Game8.
We hope you continue to make use of Game8.
Close
Rankings
- We could not find the message board you were looking for.
Gaming News


![Everwind Review [Early Access] | The Shaky First Step to A Very Long Journey](https://img.game8.co/4440226/ab079b1153298a042633dd1ef51e878e.png/thumb)

![Monster Hunter Stories 3 Review [First Impressions] | Simply Rejuvenating](https://img.game8.co/4438641/2a31b7702bd70e78ec8efd24661dacda.jpeg/thumb)
Popular Games

Genshin Impact Walkthrough & Guides Wiki
Honkai: Star Rail Walkthrough & Guides Wiki
Umamusume: Pretty Derby Walkthrough & Guides Wiki
Pokemon Pokopia Walkthrough & Guides Wiki
Resident Evil Requiem (RE9) Walkthrough & Guides Wiki
Monster Hunter Wilds Walkthrough & Guides Wiki
Wuthering Waves Walkthrough & Guides Wiki
Arknights: Endfield Walkthrough & Guides Wiki
Pokemon FireRed and LeafGreen (FRLG) Walkthrough & Guides Wiki
Pokemon TCG Pocket (PTCGP) Strategies & Guides Wiki


Recommended Games
Diablo 4: Vessel of Hatred Walkthrough & Guides Wiki
Fire Emblem Heroes (FEH) Walkthrough & Guides Wiki
Yu-Gi-Oh! Master Duel Walkthrough & Guides Wiki
Super Smash Bros. Ultimate Walkthrough & Guides Wiki
Pokemon Brilliant Diamond and Shining Pearl (BDSP) Walkthrough & Guides Wiki
Elden Ring Shadow of the Erdtree Walkthrough & Guides Wiki
Monster Hunter World Walkthrough & Guides Wiki
The Legend of Zelda: Tears of the Kingdom Walkthrough & Guides Wiki
Persona 3 Reload Walkthrough & Guides Wiki
Cyberpunk 2077: Ultimate Edition Walkthrough & Guides Wiki


All rights reserved
© Nintendo © KOEI TECMO GAMES All rights reserved. Licensed by Nintendo.
The copyrights of videos of games used in our content and other intellectual property rights belong to the provider of the game.
The contents we provide on this site were created personally by members of the Game8 editorial department.
We refuse the right to reuse or repost content taken without our permission such as data or images to other sites.