This survey will take about 1 minute.
Your answers will help us to improve our website.
Zelda: Breath of the Wild (BotW)
Divine Beast Vah Medoh Dungeon Walkthrough
★ Sequel: Tears of the Kingdom Guide here!
★ Get a head start with our Beginner's Guide
┗ The Best Recipes to Cook | Rupee Farming
★ Shrines Locations | Korok Seeds Locations
★ Explore after the story with our Post Game Guide
This is a dungeon walkthrough for Divine Beast Vah Medoh in The Legend of Zelda: Breath of the Wild (BotW). To learn how to find and activate all terminals, how to beat Windblight Ganon, get all the Treasure Chests, and get Revali's Gale, please read on.
List of Contents
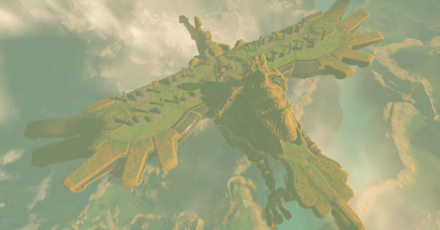
How to Find Divine Beast Vah Medoh
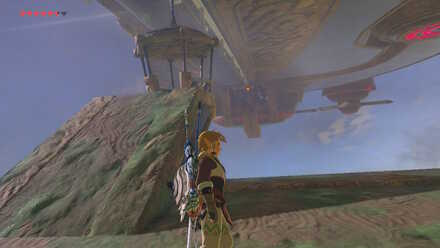
Above Hebra Mountains
| Map Location | Overworld Location |
|---|---|
 View Full Image |
 View Full Image |
Divine Beast Vah Medoh can be found in the skies of Hebra Mountains. You can enable its waypoint after you destroy its cannons with Rito Warrior Teba.
Divine Beast Vah Medoh Rewards
Dungeon Rewards
| Divine Beast Vah Medoh Rewards | ||
|---|---|---|
| Heart Container | Revali's Gale | |
Divine Beast Vah Medoh Walkthrough
Guide Overview
|
|
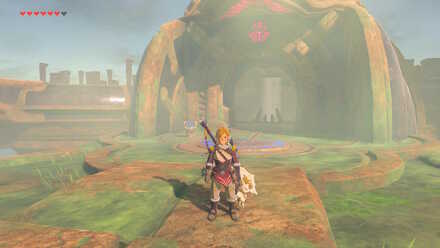
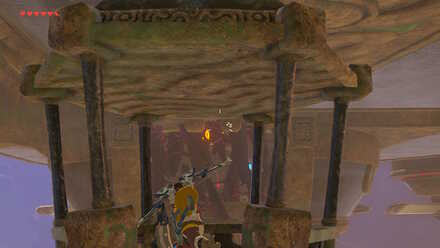
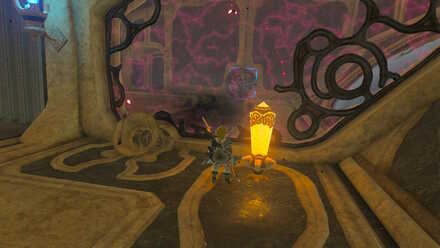
Activate the Guidance Stone
| Activate the Guidance Stone Walkthrough | |
|---|---|
| 0 |
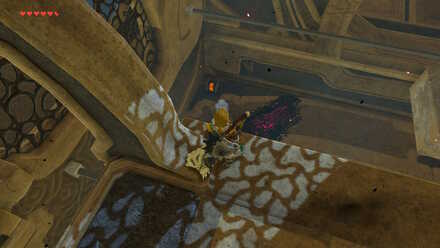
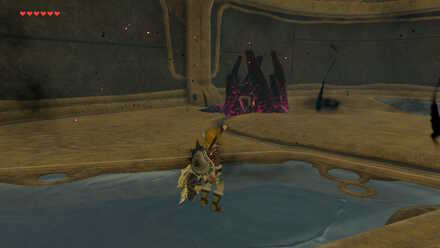
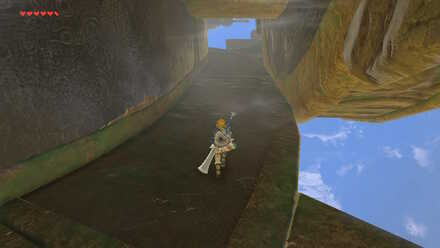
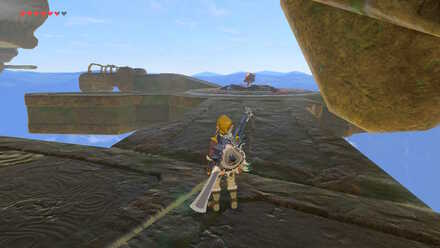
 Optional: Get the Treasure Chest on Vah Medoh's Tail Before you go in, you can turn around and make your way to the end of Vah Medoh's tail. You can find a Treasure Chest containing a Sapphire. |
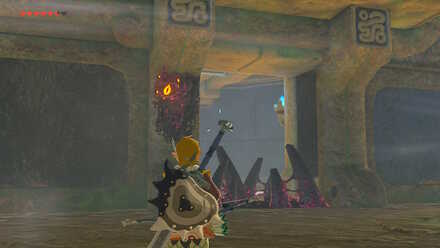
| 1 |
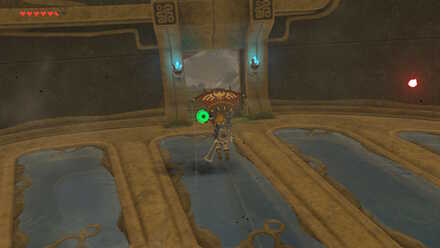
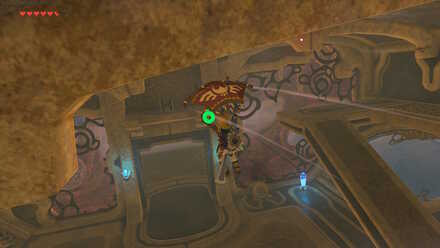
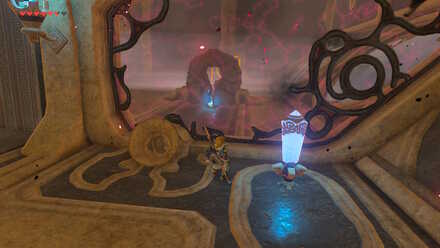
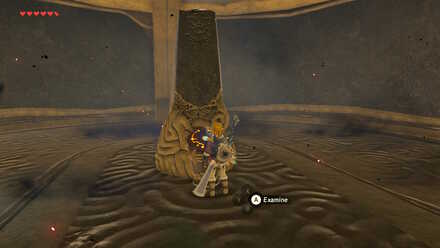
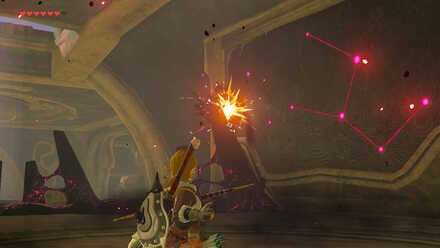 Destroy the Eyeballs Before you can go in any further, kill the eyeball at the entrance to get rid of the black goo or malice. Another one can be found to the left wall in the next room. |
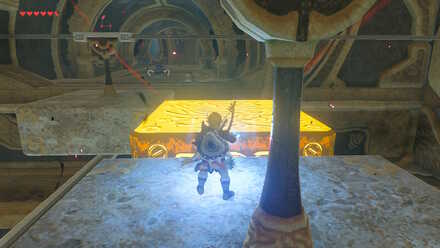
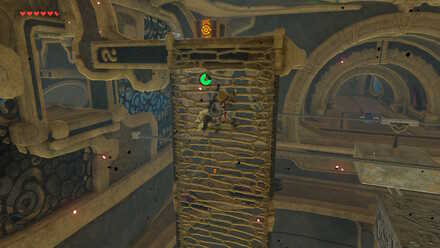 Optional: Get the Treasure Chest on the Higher Platform Up a ladder in the room, there is a Treasure Chest containg an Ancient Core. To get there, use the updraft, and glide until you reach the ladder. Aim for the latter and climb to get to the Chest. |
|
 Optional: Get the Treasure Chest on the Lower Platform If you were able to get the first Treasure Chest, glide down to the left to get to the lower platform. Open the Chest for 5 Bomb Arrows. |
|
| 2 |
 Use Magnesis to Move the Platforms To get to the other side, use Magnesis on the metal blocks to use as a bridge. If you fall down, just go south and use the updraft to get back to the main room. |
| 3 |
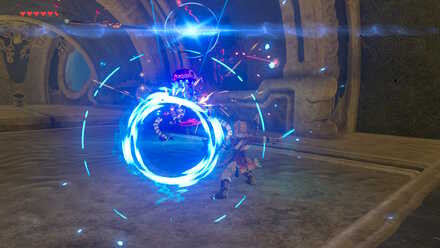 Defeat the Guardian Waiting on the other side is a Guardian Scout II. Defeat it to get a Guardian Spear. |
| 4 |
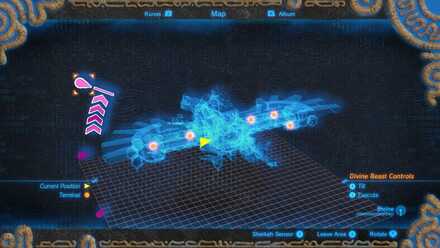
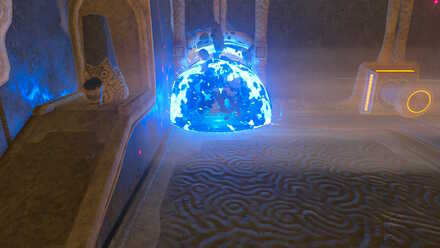
 Activate the Guidance Stone Activate the Guidance Stone up ahead. You will get the ability to tilt the Divine Beast left and right. |
Activate Terminal 1
| Activate Terminal 1 Walkthrough | |
|---|---|
| 5 |
 Go Down to the Bottom Floor Go back to the main room and jump down to get to the room below. |
 Optional: Get the Treasure Chest At the bottom floor, there is a Treasure Chest covered in malice. Shoot the eyeball inside to open it and get the Ancient Shaft inside. |
|
| 6 |
 Go Outside There are two doorways, but the left one is blocked. Go through the right one which leads outside to the right wing. |
| 7 |
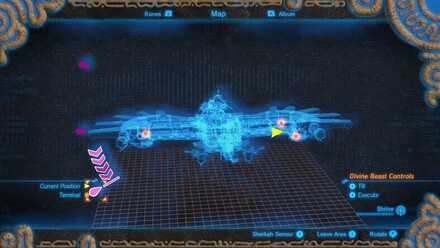
 Tilt the Beast to the Left On the right wing you will see a cart at the far end. Open the map by pressing the Minus button (-) and tilt Vah Medoh to the left. This will cause the cart to slide over to your side. |
| 8 |
 Ride the Cart and Tilt Again Ride the cart, and tilt the beast to go forward. A wall of malice will block your way, so tilt the Beast to get the cart into a good position, and shoot the eyeball. Note: You will not be able to shoot the eyeball while moving forward. |
| 9 |
 Activate the Terminal After entering the unlocked room, go up the the ramps and activate the first terminal. The gate to the next room will open. |
Activate Terminal 2
| Activate Terminal 2 Walkthrough | |
|---|---|
| 10 |
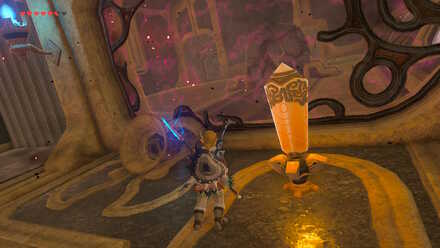
 Hit the Lever Hit the orange lever to open the windows by the wall. This will let gusts of wind in, turning the small windmill, and opening the first gate along the rail. |
 Optional: Destroy the Eyeball Shoot the eyeball on the ceiling to get a Treasure Chest containing 10 Ice Arrows. |
|
| 11 |
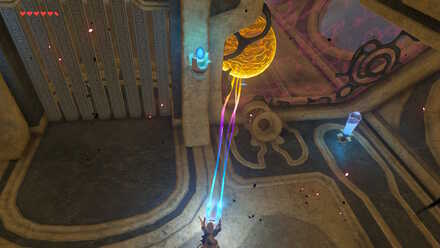
 Drag the Second Windmill Another gate will block the rail. Look over to the other end of the room to see a second small windmill. Use Magnesis to drag it to the wind, opening the second gate along the rail. |
| 12 |
Tilt the Beast Watch Out: To gain full momentum, rotate the Beast to the right, and after it has gone all the way, tilt it all the way to the left again. The next step should be done fast, so be ready! |
| 13 |
 Hold the Second Windmill in Place When you tilt the Beast to the opposite direction, the second windmill will slide too. Quickly use Magnesis or Stasis to hold it in place. |
| 14 |
 Activate the Terminal A pillar should ram into the opposite side, pushing the button, and opening the gate to the second terminal. |
 Optional: Get the Treasure Chest On a raised platform is a Treasure Chest containing a Knight's Bow. To get it, hit the level to let the wind in. Run to the far edge of the room, and tilt the Beast to the left. You should be in a good place to jump and glide your way down to the platform. |
Activate Terminal 3
| Activate Terminal 3 Walkthrough | |
|---|---|
| 15 |
 Glide to the Opposite Room To get to the room on the other side, run to the far edge of the room while the Beast is tilted left, and glide your way across. |
 Optional: Get the Treasure Chest While you are high in the air, you can continue gliding forward to get to the high platform to get the Treasure Chest containing a Knight's Claymore. |
|
| 16 |
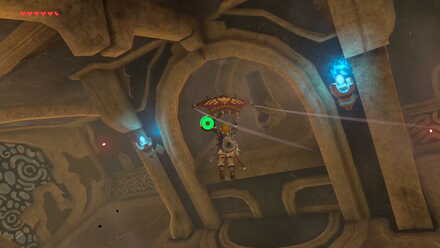
 Shoot the Eyeball On the wall to the left is malice covering the way to the next terminal. Shoot the eyeball in the center to get rid of it. |
| 17 |
 Hit the Lever In the back of the room is another orange lever, hit it to let gusts of wind enter the room. |
| 18 |
 Tilt the Beast and Fly Up Tilt the Beast to the right, and go up any ramp. Jump and glide to the wind which will carry you up to the terminal's platform. |
| 19 |
 Activate the Terminal Activate the third terminal. Before you continue, make sure to turn off the lever and winds. |
Activate Terminal 4
| Activate Terminal 4 Walkthrough | |
|---|---|
| 20 |
Tilt the Beast In the same room is the next terminal, locked by a gate. There is an opening where you can put Remote Bombs in, but for it to roll over, you need to tilt the Beast to the left. |
| 21 |
 Detonate a Remote Bomb on the Rail Place a spherical Remote Bomb inside the opening, and detonate it when it reaches the blocker on the rail. |
| 22 |
 Destroy the Wall to the Left Do it again, but first turn the winds back on with the lever so the Remote Bomb is pushed to the left. Detonate it when it reaches the wall, revealing a metal ball. |
| 23 |
 Tilt the Beast to the Right To be able to reach the ball, tilt the Beast to the right so it slides over to your side. |
| 24 |
 Use Magnesis on the Ball Go over to the side of the ball, and use Magnesis to drag the ball into the rail. |
| 25 |
 Till the Beast to Roll the Ball into the Button Hit the lever to stop the wind, and tilt the Beast to the right so that the ball rolls over to the button. The gate will open, giving you access to the terminal. |
| 26 |
 Activate the Terminal Go inside the unlocked room, and run up the ramp to the left. Activate the fourth terminal. |
Activate Terminal 5
| Activate Terminal 5 Walkthrough | |
|---|---|
| 27 |
Go Down to the Bottom Floor Go back to the main room and jump down to the room at the bottom. |
| 28 |
 Go Around the Beast Since the left doorway is still blocked, take the right door again to go outside. Once outside, turn left to get onto the other wing, where the last terminal is. |
 Optional: Destroy the Malice on the Doorway You can make a shortcut to the bottom room by going forward until you reach the doorway that is blocked by malice. Shoot the eyeball just beside it to get rid of the blockade. |
|
| 29 |
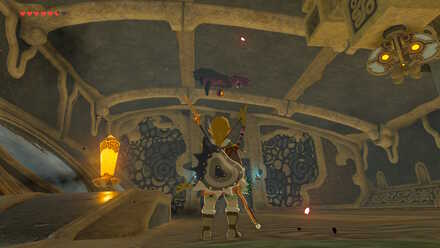
 Destroy the Eyeball Out on the wing, destroy the eyeball to uncover a wind turbine. |
| 30 |
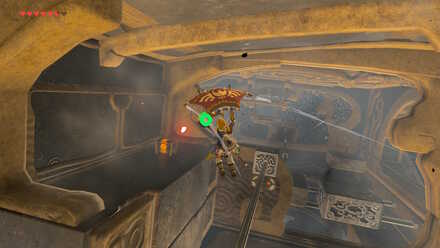
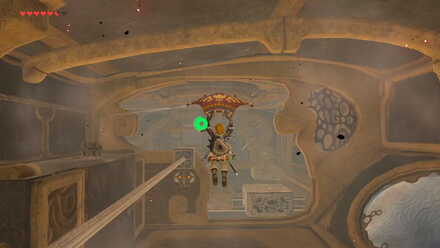
 Glide to the Right Wing Look to your left and you will see a small room where the terminal is. Using the updraft, go high and float down to the entrance of the right wing. |
| 31 |
 Activate the Terminal Activate the fifth and last terminal. To get back to the main room, turn the Beast to the right, and glide down. |
Defeat Windblight Ganon
| Defeat Windblight Ganon Walkthrough | |
|---|---|
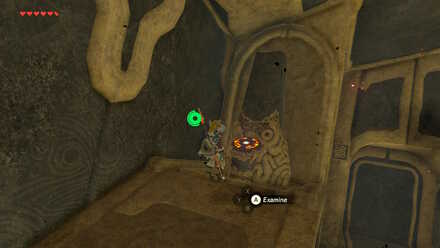
| 32 |
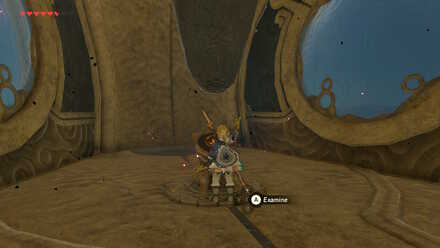
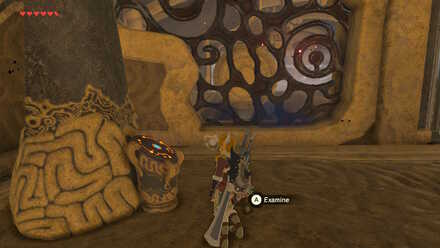
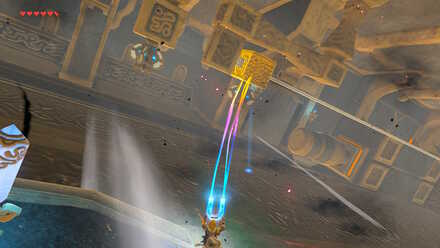
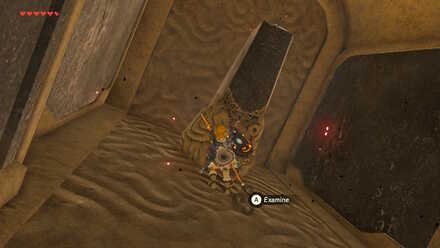
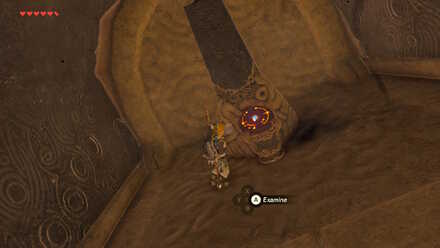
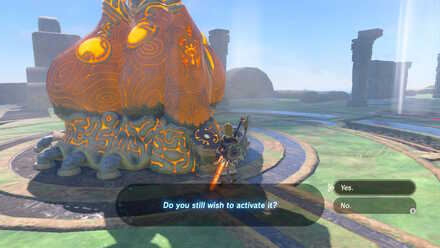
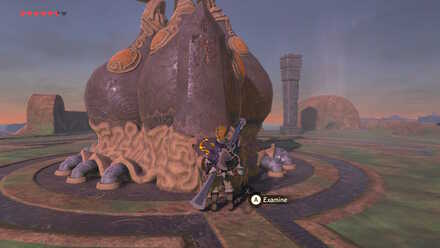 Examine the Main Control Unit You can use any of the updrafts from the wind turbines to get to the top of Vah Medoh where the main control unit is. Make sure you are prepared at this point because activating it will start the fight against Windblight Ganon. You are free to leave to prepare and come back when you are ready. |
 Optional: Get the Treasure Chest on Vah Medoh's Beak There is a Treasure Chest on the tip of Vah Medoh's beak containing a Giant Ancient Core. To get there, go the end of any of Vah Medoh's wing. Tilt the Beast to the opposite direction, and use the updraft to glide your way down. |
|
| 33 |
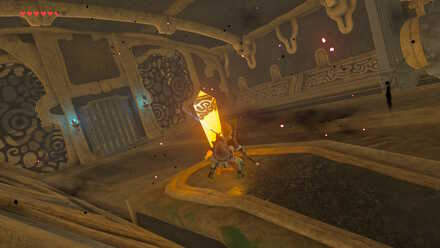
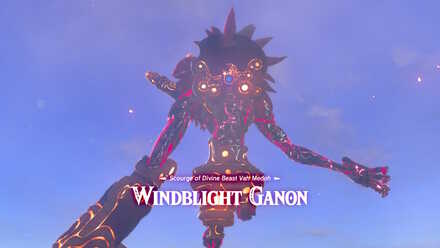
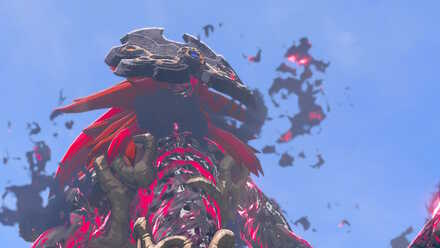 Defeat Windblight Ganon You will need to defeat Windblight Ganon to take back Divine Beast Vah Medoh. ➤ Windblight Ganon Boss Guide |
| 34 |
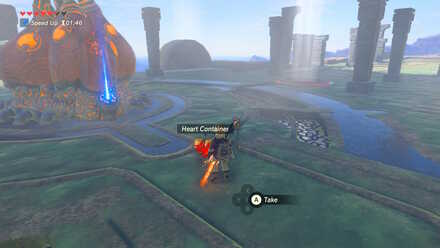 Take the Heart Container After the battle, you will receive a Heart Container, as well as the divine power, Revali's Gale. |
| 35 |
 Activate the Main Control Unit Use the terminal to go back to Rito Village. Report to Elder Kaneli and finish the main quest. ➤ Divine Beast Vah Medoh Quest Guide |
How to Beat Windblight Ganon
Use a Bow and Aim for Its Eye
The Windblight Ganon fight has two phases, with its attack patterns changing after it reaches 50% HP.
Use the wind turbines on Vah Medoh's back to fly high and get slow-motion shots at the boss. Hide behind pillars to avoid the lasers and ignore the turrets Windblight Ganon summon in the second phase, focusing your attacks on the boss itself.
The boss teleports around a lot, so we recommend using your bow and aiming for its eye, unleashing a flurry of blows once it's stunned!
Divine Beast Vah Medoh Tips and Tricks
Save Your Bomb Arrows
Collect and save the Bomb Arrows you get from Treasure Chests and from Teba, because these deal heavy damage to Windblight Ganon.
Equip the Falcon Bow
Bows are crucial to winning the fight against Windblight Ganon. Make sure you equip the Falcon Bow that you can get from Teba after passing his test. It has a long range, so you can target Ganon's eye even from afar.
Stock Up on Food and Elixirs
Make sure to cook food and elixirs to gain an advantage in battle. If you have a small number of hearts, consider packing defense-boosting food, or getting sleeping on a Rito-down bed at Swallow's Roost to get extra temporary hearts and stamina.
The Best Recipes You Need to Cook
You are Free to Leave the Area Anytime
During your stay in Vah Medoh, you can leave and come back anytime, as you can fast-travel to it. Take note that every time you leave, you will always arrive at the Travel Gate. Press the Minus Button (-) to open up the map, and press X Button to leave the area.
If you find yourself in a tough situation against Windblight Ganon, you can retreat and prepare for your return.
Get Everything Before You Leave for Good
After defeating Windblight Ganon, and using the main terminal to leave, you cannot come back inside the Divine Beast anymore, so if you want to get all the chests, do so before leaving for good.
Check the next section for locations of all the Treasure Chests in Divine Beast Vah Medoh.
How to Get the Treasure in Divine Beast Vah Medoh
All Treasure Chests
Treasure Chest 1
| Treasure Chest 1 Walkthrough | |
|---|---|
| 1 |
Before you go in, you can turn around and make your way to the end of Vah Medoh's tail. You can find a Treasure Chest containing a Sapphire. |
Treasure Chest 2
| Treasure Chest 2 Walkthrough | |
|---|---|
| 1 |
Up a ladder in the main room, there is a Treasure Chest containing an Ancient Core. To get there, use the updraft, and glide until you reach the ladder. Quickly let go of the paraglider, and climb to get to the Chest. |
Treasure Chest 3
| Treasure Chest 3 Walkthrough | |
|---|---|
| 1 |
Glide down from the first Chest to get to the lower platform. Open the Chest for 5 Bomb Arrows. You can also use Magnesis on the metal blocks to cross to the other side of the main room, and jump down from there. |
Treasure Chest 4
| Treasure Chest 4 Walkthrough | |
|---|---|
| 1 |
At the bottom floor, there is a Treasure Chest covered in malice. Shoot the eyeball inside to open it and get the Ancient Shaft inside. |
Treasure Chest 5
| Treasure Chest 5 Walkthrough | |
|---|---|
| 1 |
In the room to the right wing, shoot the eyeball on the ceiling to get a Treasure Chest containing 10 Ice Arrows. |
Treasure Chest 6
| Treasure Chest 6 Walkthrough | |
|---|---|
| 1 |
On a raised platform in the right wing's room is a Treasure Chest containing a Knight's Bow. To get it, hit the level to let the wind in. Run to the far edge of the room, and tilt the Beast to the left. You should be in a good place to jump and glide your way down to the platform. |
Treasure Chest 7
| Treasure Chest 7 Walkthrough | |
|---|---|
| 1 |
In the left wing's room is a Treasure Chest on a high platform. From the right room, tilt the Beast down and glide to the opposite room. While you are high in the air, you can continue gliding forward to get to the Chest containing a Knight's Claymore. |
Treasure Chest 8
| Treasure Chest 8 Walkthrough | |
|---|---|
| 1 |
There is a Treasure Chest on the tip of Vah Medoh's beak containing a Giant Ancient Core. To get there, go the end of either of Vah Medoh's wing. Tilt the Beast to the opposite direction, and use the updraft to glide your way down. |
Zelda: BotW Related Guides

All BotW Dungeons by Type
| BotW Dungeons | |
|---|---|
| Shrines | Divine Beasts |
| Hyrule Castle | |
List of All Divine Beasts
| Divine Beasts | |
|---|---|
| Divine Beast Vah Ruta | Divine Beast Vah Rudania |
| Divine Beast Vah Medoh | Divine Beast Vah Naboris |
| Divine Beast Tamer's Trial | |
Comment
1  Anonymous over 4 years
Weapons in chest can be different depending on the players kill level (the lvl also determines what enchantments you can get and over wold mob aparece)
Author

The Legend of Zelda: Breath of the Wild Walkthrough & Guides Wiki
Divine Beast Vah Medoh Dungeon Walkthrough
Please participate in our site
improvement survey
03/2026
improvement survey
03/2026
Would you assist in
improving Game8's site?
improving Game8's site?

×
We are listening to our users' valuable opinions and discussing how to act on them.
The information collected through this survey will be used for the purpose of improving our services. In addition, the information will only be disclosed a part of a statistic in a format that will not allow identification of personal information.
Begin Survey
Not Now
×
Please rate each item regarding Game8.co's Advertisements.
Amount of Ads
Very Dissatisfied
Somewhat Dissatisfied
Fine
Somewhat Satisfied
Highly Satisfied
Placement of Ads
Timing of Ad Display
Ad Loading Speed
Safeness of Ads
Content of Ads
×
Please rate each item regarding Game8.co's Quality of Articles.
Amount of information
Very Dissatisfied
Somewhat Dissatisfied
Fine
Somewhat Satisfied
Highly Satisfied
Frequency of updates
Speed of new information
Accuracy of articles
Understandibility of articles
Readability of sentences
×
Please rate each item regarding Game8.co's Usability of the Site.
Ease of finding information
Very Dissatisfied
Somewhat Dissatisfied
Fine
Somewhat Satisfied
Highly Satisfied
Loading Speed
Use of Color
Font Size
Visibility of Images
Easy to Understand Layout
×
Please rate each item regarding Game8.co's Message Boards, Comments.
Ease of Writing
Very Dissatisfied
Somewhat Dissatisfied
Fine
Somewhat Satisfied
Highly Satisfied
Readability
Ease in Finding Information
Comment Quality
Comment Quantity
Admin Response
×
Please rate each item regarding Game8.co's Site's new design.
Please rate our site's new design
Very Dissatisfied
Somewhat Dissatisfied
Fine
Somewhat Satisfied
Highly Satisfied
Do you think that the website's design change makes the site easier to use?
Has the new design made it easier for you to find information on the site?
Has the new design improved the overall visual appeal of the site?
How would you rate your overall satisfaction with the new design of the site?
×
How likely are you to recommend Game8 to someone you know?
Very Unlikely
0
1
2
3
4
5
6
7
8
9
10
Very Likely
If you have other opinions regarding potential improvement to the website, please share them with us. We would appreciate your honest opinion.
Note: This is a free response section, so you can proceed without entering anything.
Note: Please be sure not to enter any kind of personal information into your response.
Note: Please be sure not to enter any kind of personal information into your response.
×
Thank You
×
Thank you for participating in our survey! Your answers will help us to improve the quality of our website and services.
We hope you continue to make use of Game8.
We hope you continue to make use of Game8.
Close
Rankings
- We could not find the message board you were looking for.
Gaming News


![Marathon Review [First Impressions] | Playing The Long Game](https://img.game8.co/4435736/b9b1ec1e9219416dfc2599f85295d6ef.png/thumb)


Popular Games

Genshin Impact Walkthrough & Guides Wiki
Honkai: Star Rail Walkthrough & Guides Wiki
Umamusume: Pretty Derby Walkthrough & Guides Wiki
Pokemon Pokopia Walkthrough & Guides Wiki
Resident Evil Requiem (RE9) Walkthrough & Guides Wiki
Monster Hunter Wilds Walkthrough & Guides Wiki
Wuthering Waves Walkthrough & Guides Wiki
Arknights: Endfield Walkthrough & Guides Wiki
Pokemon FireRed and LeafGreen (FRLG) Walkthrough & Guides Wiki
Pokemon TCG Pocket (PTCGP) Strategies & Guides Wiki


Recommended Games
Fire Emblem Heroes (FEH) Walkthrough & Guides Wiki
Diablo 4: Vessel of Hatred Walkthrough & Guides Wiki
Yu-Gi-Oh! Master Duel Walkthrough & Guides Wiki
Super Smash Bros. Ultimate Walkthrough & Guides Wiki
Pokemon Brilliant Diamond and Shining Pearl (BDSP) Walkthrough & Guides Wiki
Elden Ring Shadow of the Erdtree Walkthrough & Guides Wiki
Monster Hunter World Walkthrough & Guides Wiki
The Legend of Zelda: Tears of the Kingdom Walkthrough & Guides Wiki
Persona 3 Reload Walkthrough & Guides Wiki
Cyberpunk 2077: Ultimate Edition Walkthrough & Guides Wiki


All rights reserved
© 2020 Nintendo. The Legend of Zelda, Wii U, and Nintendo Switch are trademarks of Nintendo.
The copyrights of videos of games used in our content and other intellectual property rights belong to the provider of the game.
The contents we provide on this site were created personally by members of the Game8 editorial department.
We refuse the right to reuse or repost content taken without our permission such as data or images to other sites.
fuckily fuck