Walkthrough Part 4: Preparations Before the Final Dungeon
This is a walkthrough guide for the preparations before the final dungeon in Dragon Quest 1 HD-2D Remake (DQ1). Read on for a full walkthrough guide to each area, including all enemies and bosses, sparkly spot locations, secret spots, and mini medal locations!
| ◀ Previous Guide | Next Guide ▶︎ |
|---|---|
| Weirdwood to Weeping Isle | Dragonlord's Castle and Final Boss |
List of Contents
 Attention! Attention! |
This page contains major spoliers for Dragon Quest 1 HD-2D Remake! Continue reading on at your own risk. |
|---|
Preparations Before the Final Dungeon Walkthrough Guide
| Jump to an Area Walkthrough! | |||
|---|---|---|---|
| 1 | Return to Faerie Village and Kol | 2 | Grave of Galen |
| 3 | Return to the Shrine of Rain | 4 | Shrine of the Spirit |
| 5 | Sanctum | 6 | - |
Return to Faerie Village and Kol
| 1 | 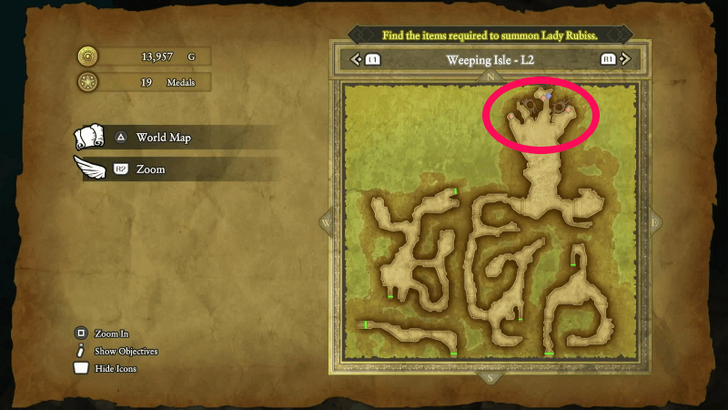 After the cutscene at Cantlin, zoom back to the Weeping Isle to get the remaining loot inside the treasure chests on L2, which are: ・A Mimic holding a Sage's Elixir ・Ruby Wristband ・Pirate King's Pendant ・Garish Garb The Mimic is much stronger than a Cannibox. If you feel like you can’t defeat it just yet, better return later. |
|---|---|
| 2 | You’ll also want to examine the pots and barrels beside the treasure chests to get: ・Rousing Ring ・Ice Shield ・Rabbit Tail ・Oomph Powder ・Copper Sword |
| 3 | 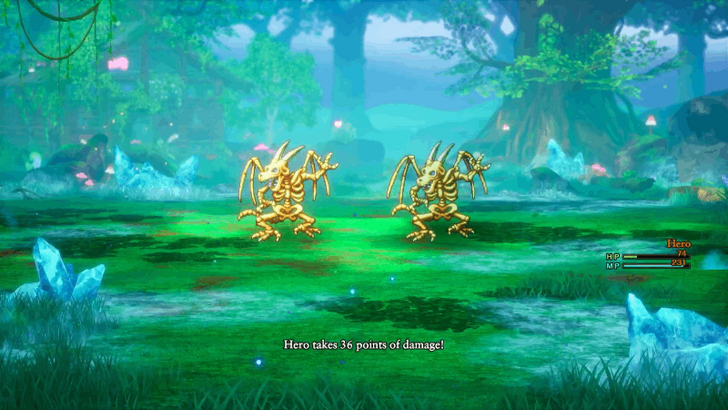 After getting all the treasures, zoom yourself to a nearby inn and rest up. You’re going to need it because the next destination will be a boss battle in the Faerie Village. As a precaution before the battle, make sure you’re wearing the Rousing Ring you just got, since the enemies will try to inflict Sleep, and equip armor that resists Ice and Fire damage, such as Dragon Mail, Dragon Shield, or Fire Earrings. Additionally, if you haven’t reached Level 30 yet, make sure you do because the spell Kasizz (learned at Level 30) is crucial for this fight. |
| 4 | 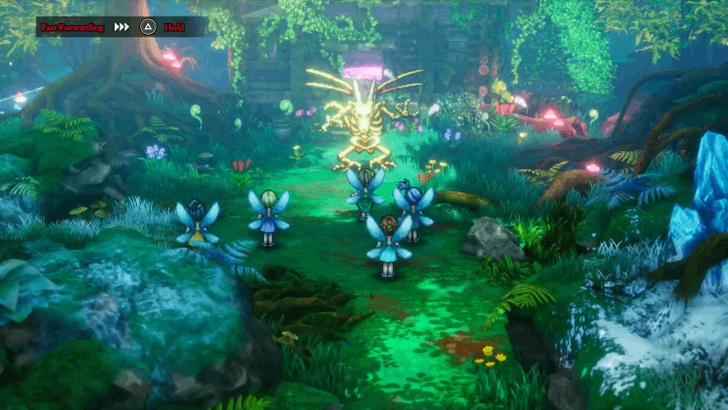 Once rested, zoom yourself to Faerie Village to watch a cutscene. After that, you’ll face 2 Dragon Zombies. They’re weak to Kasizz, so keep using it, it’s an AoE spell that’ll burn them both down quickly. ▶︎How to Beat Dragon Zombie |
| 5 | Once done, zoom to a nearby inn and rest, because tomorrow’s going to be another boss battle day. |
| 6 | Next on the list: head to the village of Kol for another boss fight. It’s recommended to be at least Level 32, as the enemy here is quite strong. ▶︎ EXP Farm: How to Level Up Fast |
| 7 | 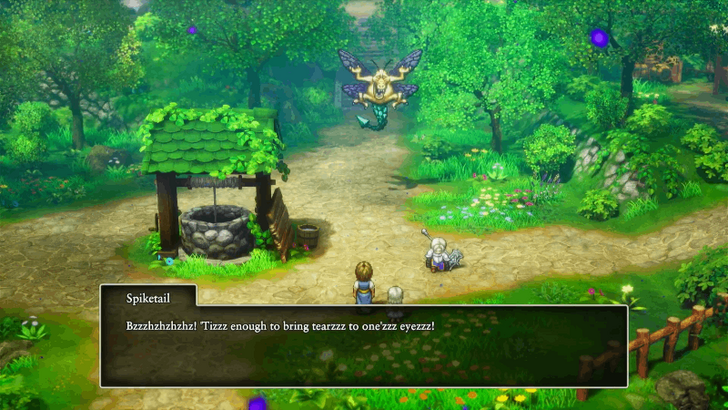 Zoom yourself to Kol, but equip the Swallowtail first as this weapon can attack all monsters at once. You’ll get the Swallowtail by exchanging 17 Mini Medals with the Monarch at the Citadel. Don’t change your other equipment before the fight. Once at Kol, you'll be put into a boss battle instantly after the cutscene, so prepare for a boss battle with Spiketail. ▶︎ How to Beat Spiketail |
| 8 | 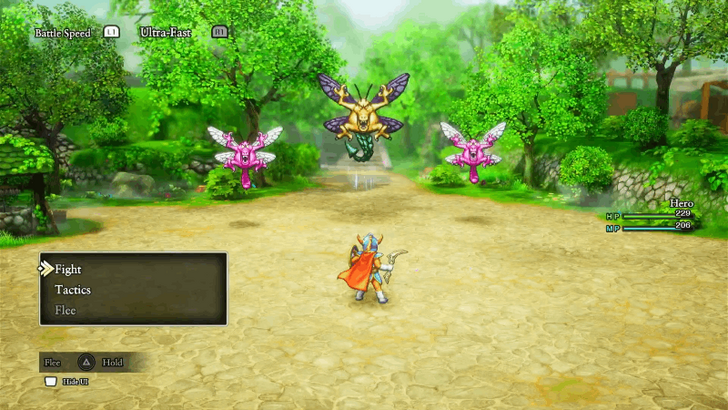 Once the battle begins, immediately cast Wild Side on yourself, which lets you attack twice per turn. During this fight, alternate between attacking with your Swallowtail and casting Kasizz on Spiketail. Use Swallowtail every time he calls forth an ally, and Kasizz (or Dragon Slash if you’re low on MP) when he’s alone. After the battle, Spiketail drops the Ultimate Key, which opens the remaining locked doors and chests you couldn’t access before. |
Grave of Galen
| 1 | 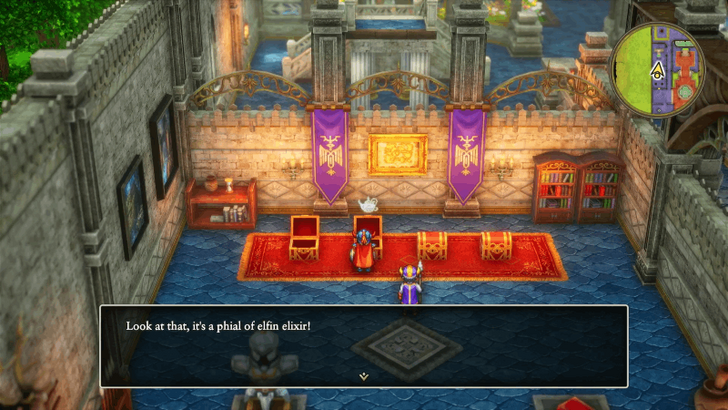 Before continuing, head back to Tantegel Castle and open the locked door to the left with your new key to access four treasure chests containing: ・12,000 Gold ・Elfin Elixir ・Headsman’s Axe ・Snoop Scroll |
|---|---|
| 2 | 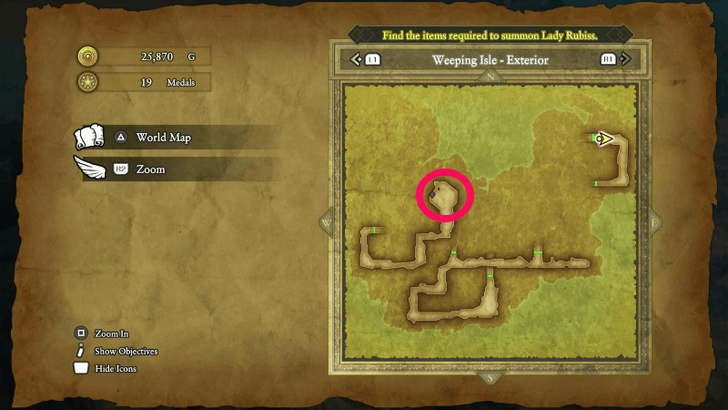 After getting the loot, zoom back to the Weeping Isle to open the treasure chest found just outside L2, in the Weeping Isle Exterior. Examine the chest, pots, and barrels to claim the following items: ・Erdrick’s Shield ・Staff of Sentencing ・Kacrack Scroll ・2 Jeeper Creepers ・Thorn Whip ・3 Magic Water Additionally, grab the Stardust by examining the sparkly spot in the middle. |
| 3 | 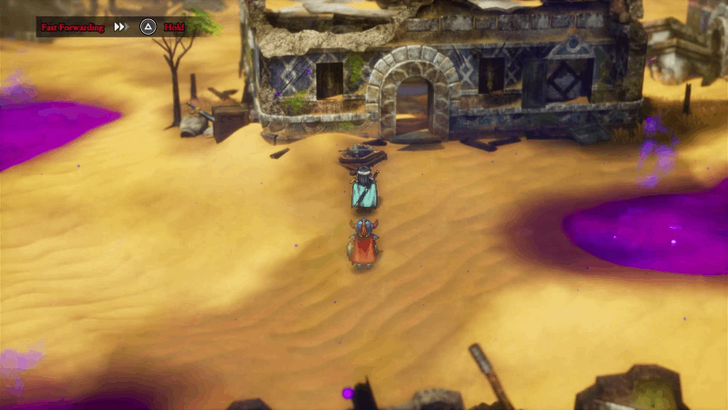 Next, zoom to Damdara and find Zalen there, he’s the only person in the ruined town. Talk to him for a cutscene. You can also find a Demon Demeaner Scroll inside a barrel in the only accessible house, so don’t miss it before leaving. Note that the Knight Aberrant is also here, but you’ll need to examine a blue exclamation mark to trigger a boss battle. Don’t do that yet and leave after the cutscene. ▶︎Zalen Sidequest Locations and Where to Find Him |
| 4 | 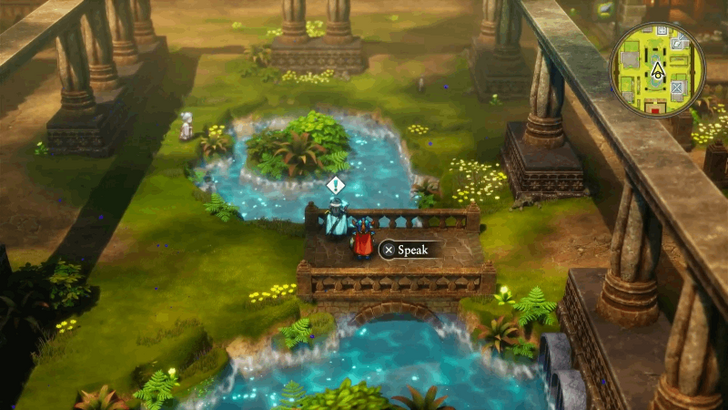 Zoom back to Cantlin and meet Zalen near the bridge in the middle of town. This marks the last conversation you’ll have with him. However, if you haven’t spoken to him in the Forgotten Ruins, Nameless Ruins, and Damdara (in that order), he might not appear, so backtrack if he doesn’t show up. |
| 5 | 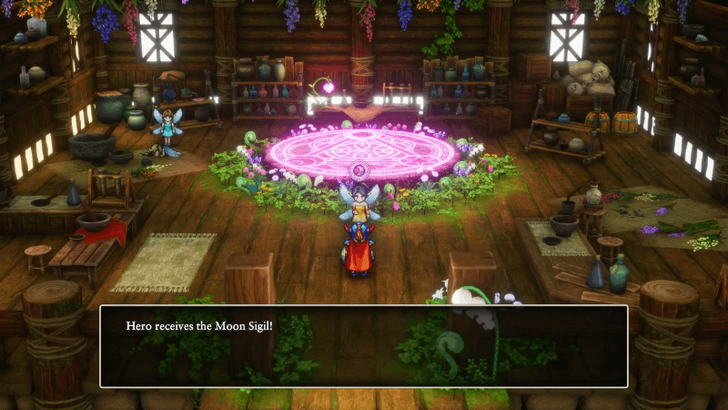 Teleport to Faerie Village and surrender your Undying Flame to receive the Sun Sigil (enables critical hits with abilities), your Moonbeam Dew to obtain the Moon Sigil (critical spell hits), and your Stardust to create the Star Sigil (regenerates MP when defending in battle). |
| 6 | 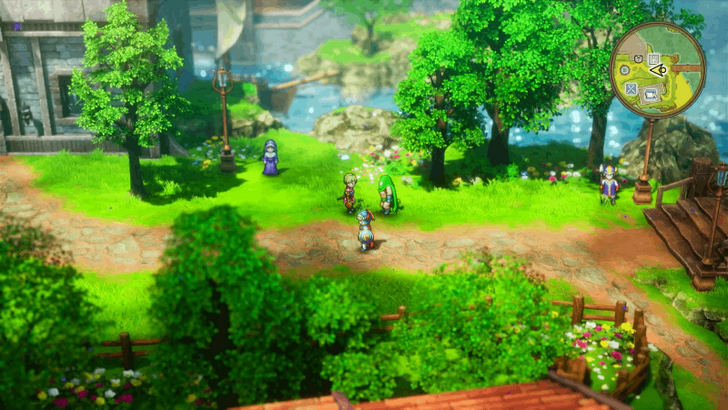 Finally, head to Galenholm. After teleporting, a cutscene will trigger with Robbin 'Ood. Once that’s over, enter the locked building beside the bridge to access Galen’s Grave. |
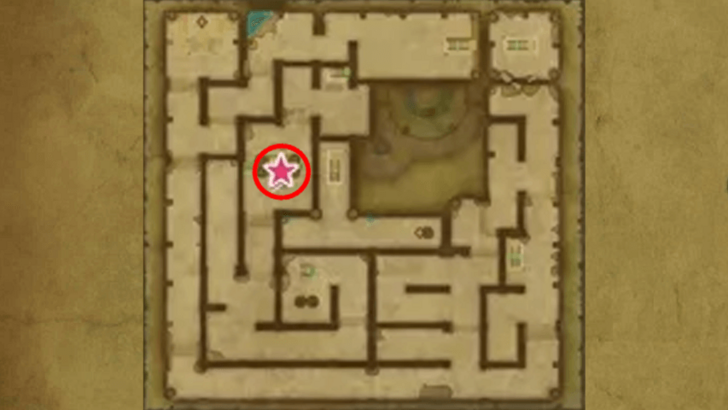
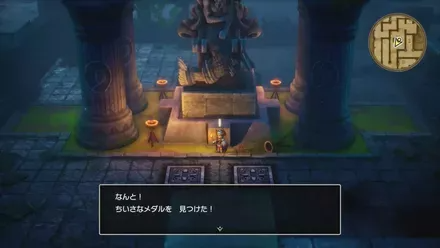
| 7 | 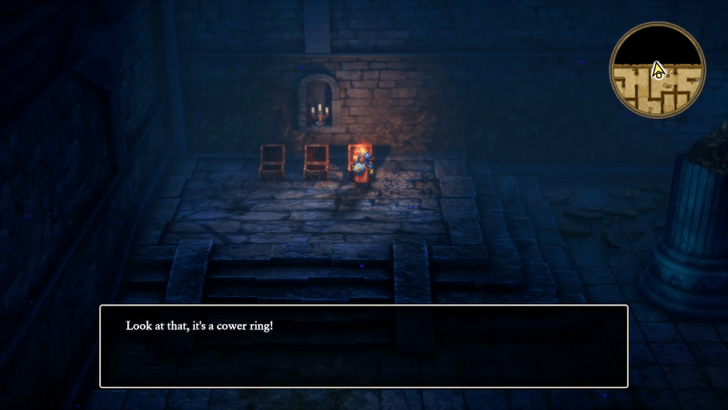 From there, start exploring the dungeon and opening up any treasure chests you find. On the way down on B3, you'll come across a large statue. Make sure to interact with the front of it to pick up the Mini Medal hidden in the floor. ▶︎ All 40 Mini Medal Locations and Rewards |
| 8 | 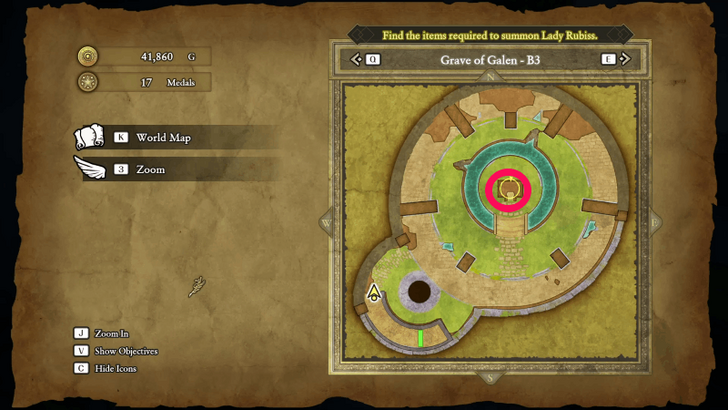 Keep going through the dungeon until you go through B4 to head back up to B3. At the center of the room, you'll find the Lyre of Ire, which you'll need to continue your quest. ▶︎ Galen’s Grave Dungeon Guide |
Return to the Shrine of Rain
| 1 | 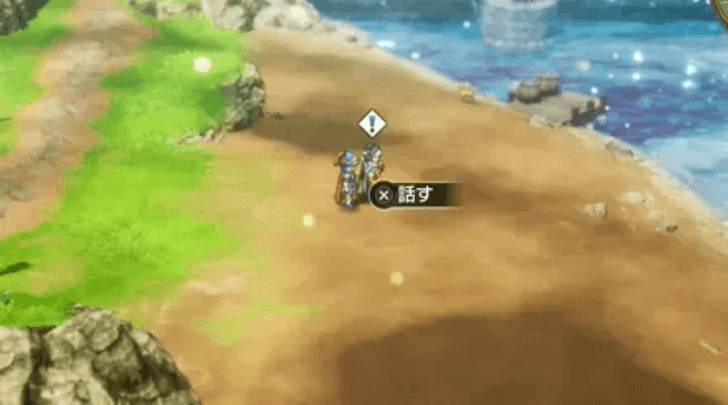 Once you're done, feel free to Zoom out of the dungeon back to Galenholm. Now that you have the lyre, Zalen will appear on the beach, so talk to him to continue his sidequest. ▶︎ Zalen Sidequest Locations |
|---|---|
| 2 | 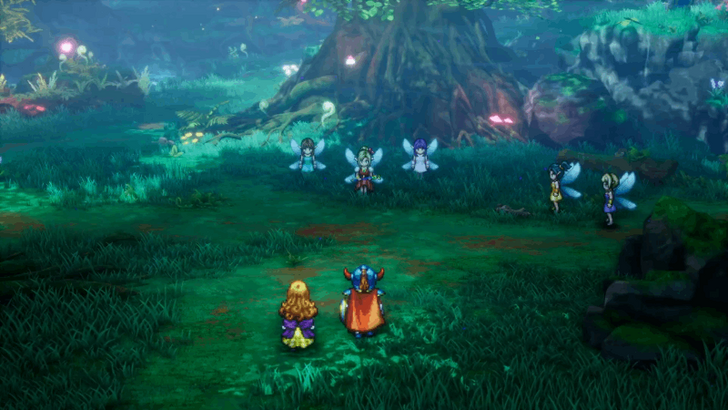 After that, teleport back to the Faerie Village to continue the main story. Now that you have the Faerie Flute, Lyre of Ire, and 5 Sigils, a cutscene will play out and you'll be asked to meet the Faeries at the Shrine of Rain. |
| 3 | 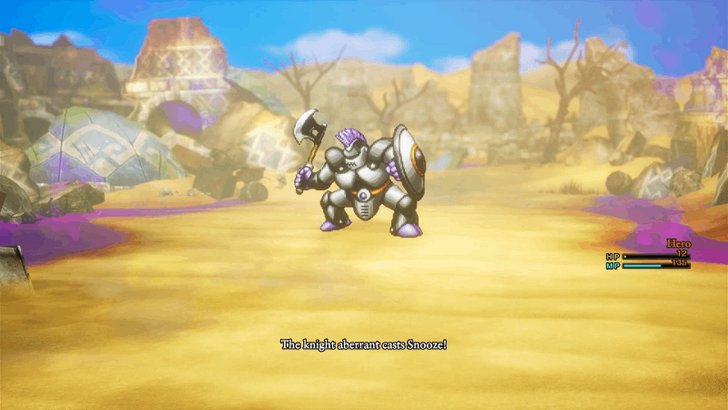 Before going there, now's a good time to stop by Damdara again to take on the Knight Aberrant. Once you're ready, head through the destroyed house in the center of the village to face the boss. If you're having a hard time defeating the knight, consider farming some Metal Slimes first to level up first ▶︎ How to Beat Knight Aberrant |
| 4 | Once that boss has been defeated, a sparkly spot will appear behind them. Inspect it to receive Erdrick's Armour, one of the best armor pieces in the game! ▶︎ How to Get Erdrick's Equipment Set |
| 5 | 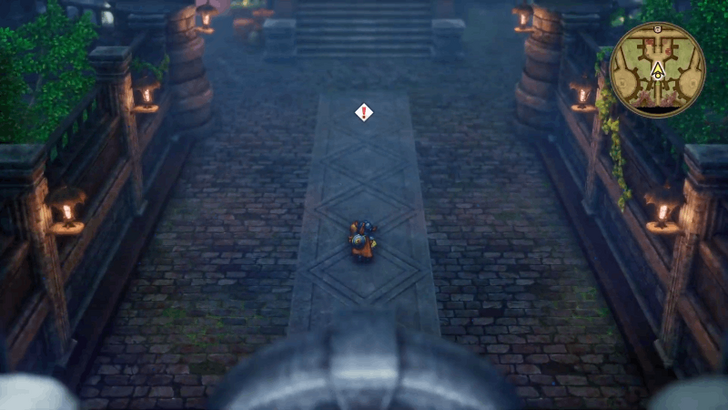 Now that you have an upgraded chest piece, you're free to head to the Shrine of Rain to meet up with the Faeries. After a short cutscene, you'll now be able to go through the door to climb up the former Tower of Rubiss. |
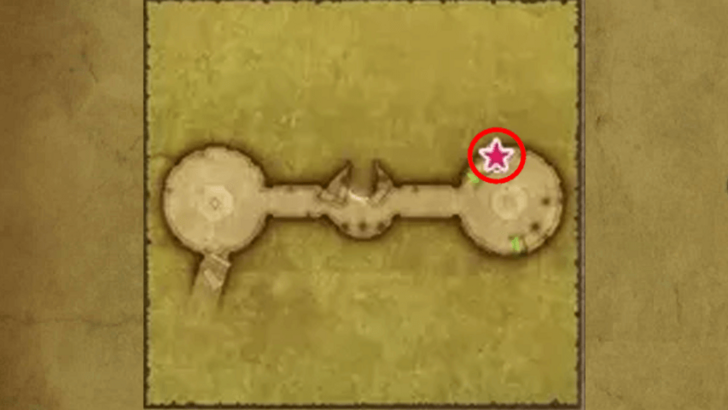
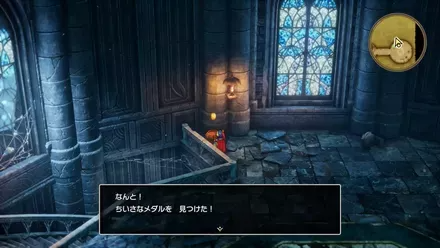
| 6 | 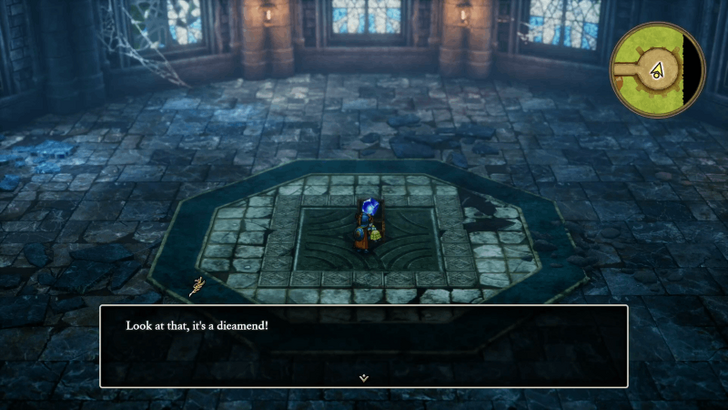 On the way up, make sure to explore the tower for any treasures you may find. Some of the important items you want to look out for are the Mini Medal on 3F, as well as the stat seeds littered throughout the containers in the tower. ▶︎ All 40 Mini Medal Locations and Rewards |
| 7 | 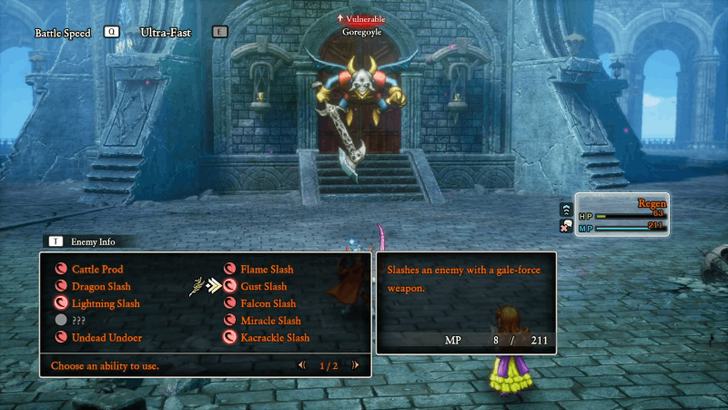 When you're ready, head towards the central chamber on the top floor to face the Goregoyle. They like to use physical attacks and are weak to lightning, so it's recommended to level up to 35 so that the Hero can learn Kazap. |
| 8 | 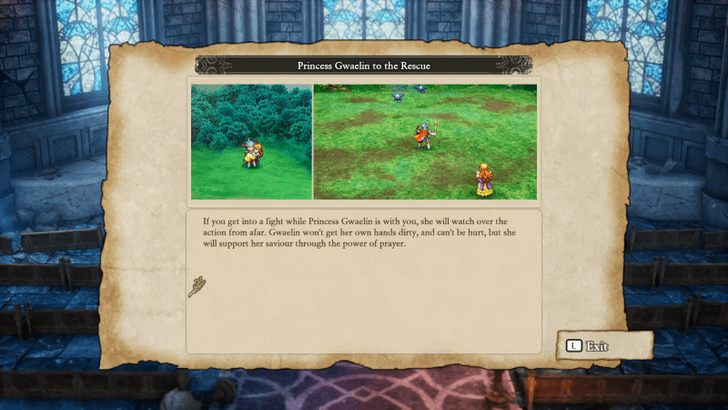 After the boss has been defeated, a cutscene will play out with the Faeries and Rubiss. If you're still carrying around Gwaelin with you during this cutscene, she will also unlock the ability to support you from the sidelines in battle. |
| 9 |  Before leaving the tower, exit the chamber and head around to the exterior left side of it to pick up a Mini Medal from the chest. ▶︎ All 40 Mini Medal Locations and Rewards |
| 10 | 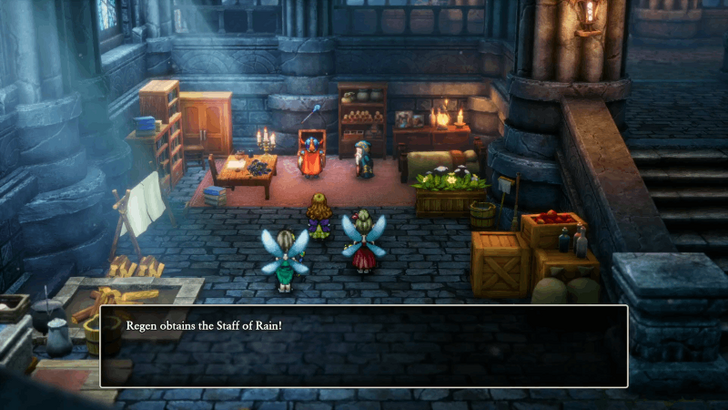 Once you're done, head back down to the first floor so that you can speak with the Sage to receive the Staff of Rain. Make sure to keep this item in your inventory since you can use it to cast Fizzle even if you've been Fizzled yourself! |
Shrine of the Spirit
| 1 | After the events at the Shrine of Rain, four new Secret Spots will appear on the map. Make sure to visit and explore these locations so that you can get incredible items, like Mini Medals, a Mirror Shield, a Duplic Hat, and an Yggdrasil Dress Coat! ▶︎ All Secret Spot Locations |
|---|---|
| 2 | 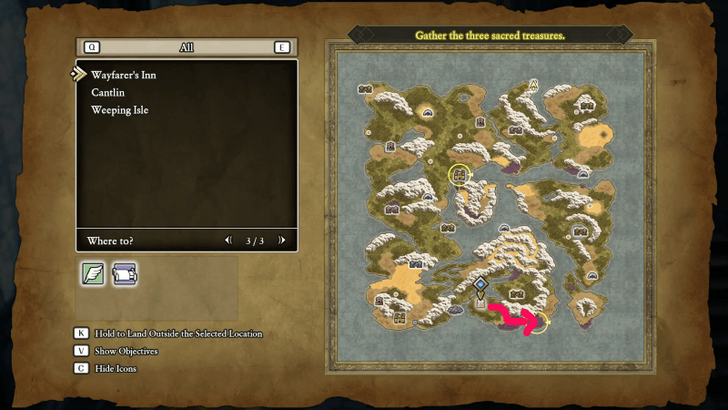 With some new and powerful equipment in hand, teleport to the Wayfarer's Inn so you can head southeast through the swamp to reach the Shrine of the Spirit. As long as you're wearing Erdrick's Armour, you don't have to worry about taking damage from the poison swamp. |
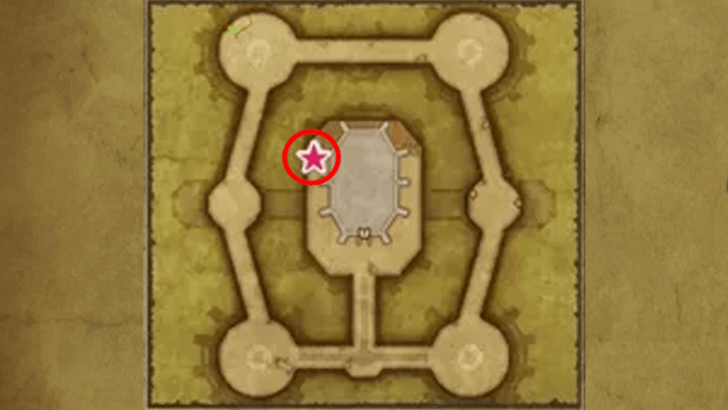
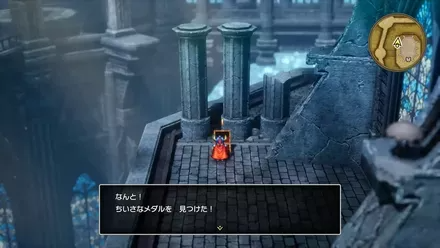
| 3 | 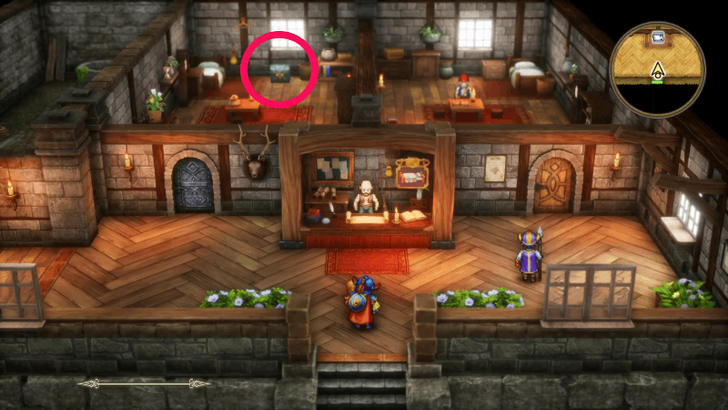 Head inside, and after a short cutscene, look around the backleft of the room before heading up to find a Mini Medal. ▶︎ All 40 Mini Medal Locations and Rewards |
| 4 | 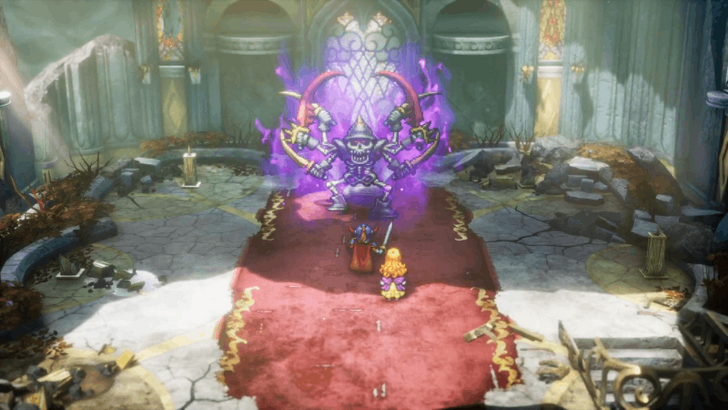 When you're ready, head up the stairs and interact with the seat to fight the Armageddon. Make sure to bring healing items and equip a Full Moon Ring since this boss can Fizzle and paralyze you. Also, it's recommended to use the Fire Blade and spam Pearly Gates so that you can target both of this boss' weaknesses. |
| 5 | Once that boss has been defeated, you'll be rewarded with the Mark of Erdrick, which also happens to be one of the best accessories in the game! |
Sanctum
| 1 | 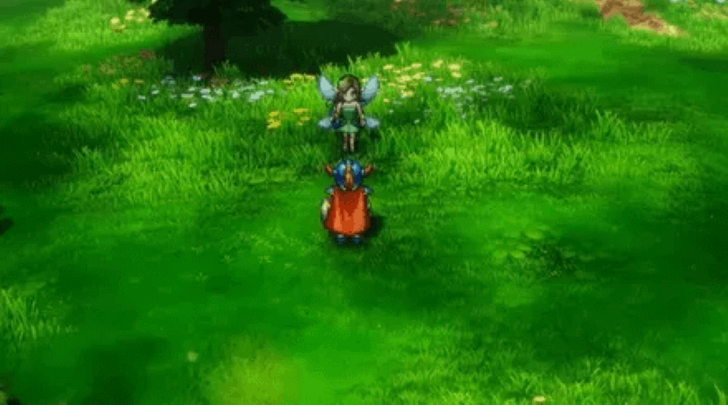 Before heading to the Sanctum, you'll want to make a few more detours to finish up Zalen's Sidequest. First, head to the Field of Flowers so that you can talk to Over-Seer. This will play out a short cutscene, and you can head to the Shrine of Rain afterwards. ▶︎ Zalen Sidequest Locations and Where to Find Him |
|---|---|
| 2 | 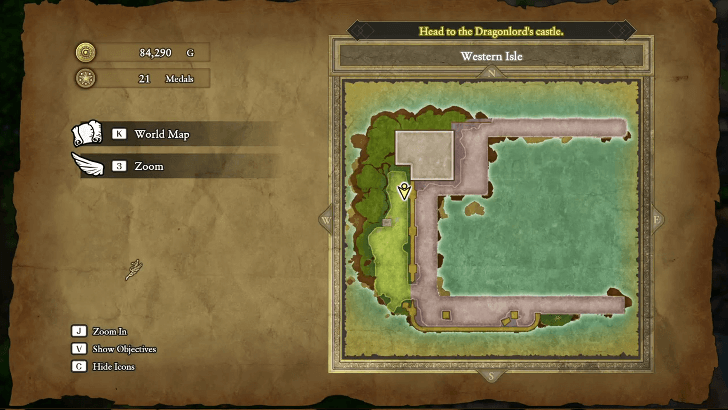 Teleport to the shrine, and once you're inside, talk to Dream-Whisperer. She will teleport you to the Western Isle, where you'll be able to pick up Erdrick's Helm after the cutscene ends. |
| 3 | While you're here, make sure to explore the island and pick up any items you find. Make sure not to miss out on the Mini Medal located on the top right-most part of the map! ▶︎ All 40 Mini Medal Locations and Rewards |
| 4 | 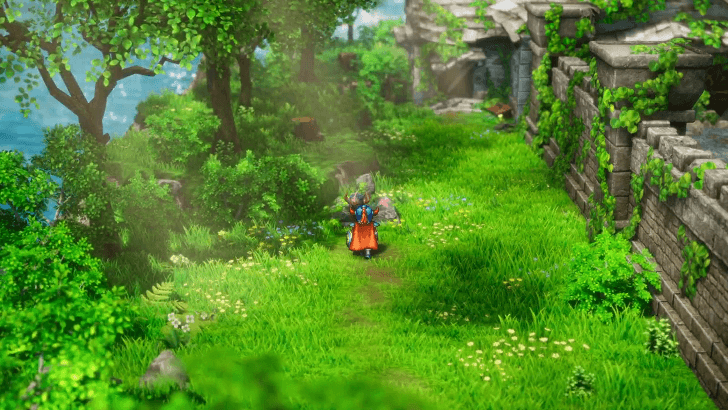 When you're ready to leave, talk to Dream-Whisperer again to teleport back to the Shrine of Rain. Now that you have most of Erdrick's Equipment Set, you can teleport to Rimuldar to continue your journey. |
| 5 | 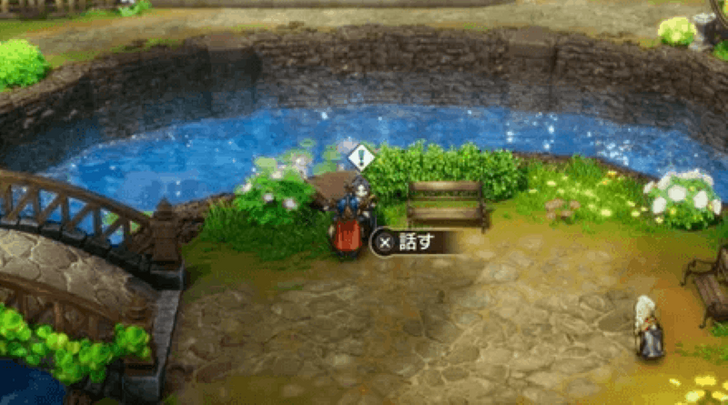 While this step doesn't provide any help for the rest of the story, it's recommended to talk to Zalen in Rimuldar to close out his questline and unlock an achievement. ▶︎Trophy Guide: How to Get Platinum |
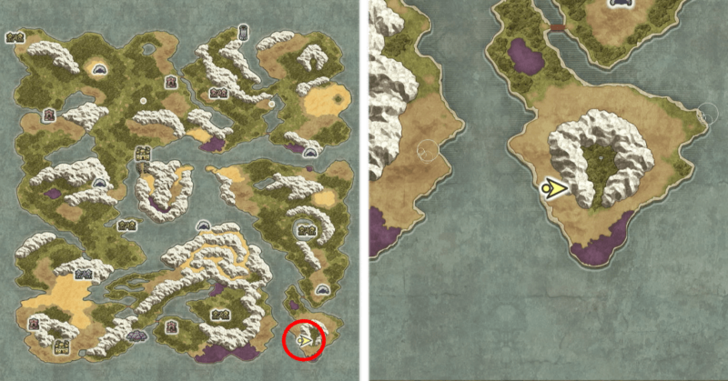
| 6 | 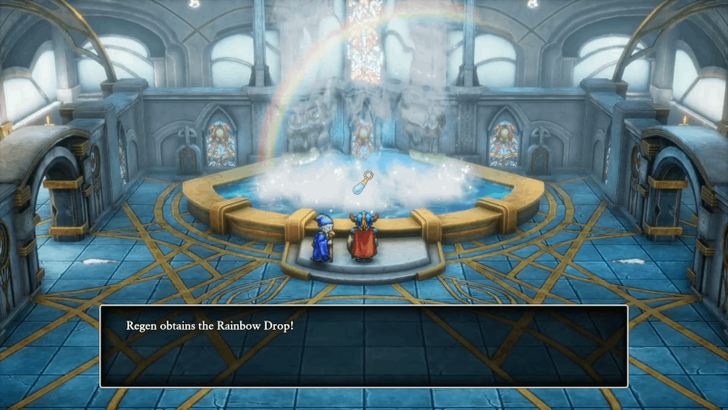 Leave Rimuldar and head south towards the Sanctum, nestled in the center of a mountain range. Talk to the sage here and you'll receive the Rainbow Drop, which will be used to take you to the final dungeon. |
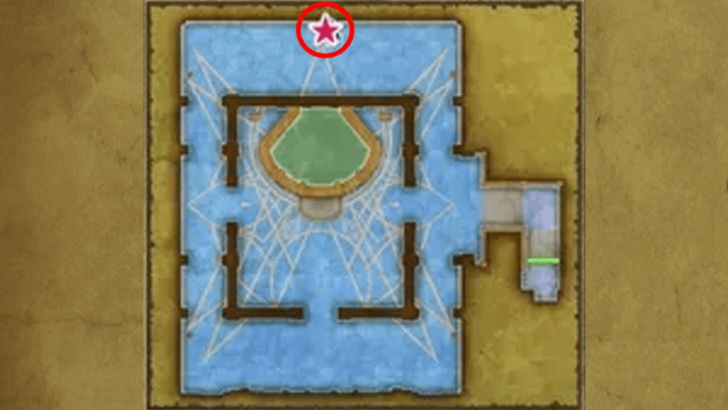
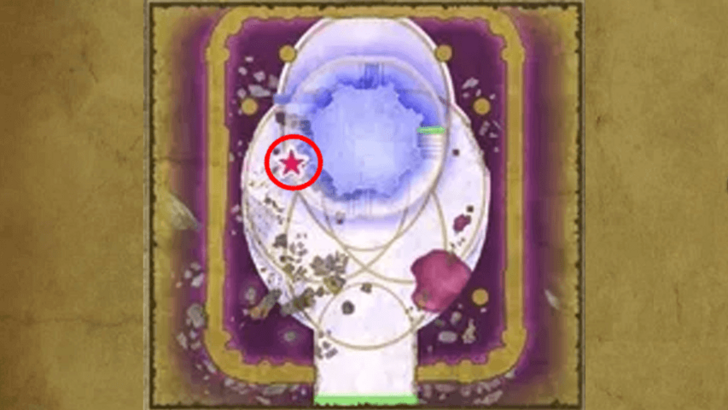
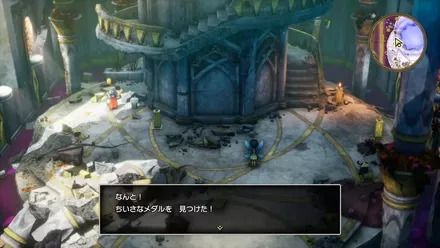
| 7 | Before leaving, make sure to inspect the area behind the fountain to pick up a Mini Medal. ▶︎ All 40 Mini Medal Locations and Rewards |
Encounterable Enemies and Bosses
Enemies
 Skeleton Scrapper
 Death Scorpion
 Chimaera
 Drohl Diabolist
 Raving Lunatick
 Spitegeist
 Blue Dragon
 Stone Golem
 Knight Abhorrent
 Dread Dragon
 Dragonlord
 Shadow
 Walking Corpse
 Hell Niño
 Rumble Bee
 Mean Spirit
 Grillerpillar
 Rottenweiler
 Shell Slime
 Ram Raider
 Freezing Fog
 Skelegon
 Umbra
Umbra Silhouette
 Ghoul
Ghoul Mimic
Mimic Bloody Hand
 Troll
Troll Infernal Armour
List of All Monsters and Enemies
Dragon Zombie
 Dragon Zombie |
|
| EXP | 880 |
|---|---|
| Gold | 21 |
Level up to level 30 and learn Kasizz. Dragon Zombies are weak to this spell, so keep using it, it’s an AoE spell that’ll burn them both down quickly.
Spiketail
 Spiketail |
|
| EXP | 10230 |
|---|---|
| Gold | 3450 |
Once the battle begins, immediately cast Wild Side on yourself, which lets you attack twice per turn. During this fight, alternate between attacking with your Swallowtail and casting Kasizz on Spiketail. Use Swallowtail every time he calls forth an ally, and Kasizz (or Dragon Slash if you’re low on MP) when he’s alone.
Knight Aberrant
 Knight Aberrant |
|
| EXP | 20510 |
|---|---|
| Gold | 7500 |
Knight Aberrant, being a demon, is particularly weak to the Demon Demeaner ability. You can find its scroll inside a barrel in a house in Damdara, it's the only house available to enter so be sure to head here before starting the battle, so you can learn the spell first.
Once you're down to around 50% of your HP, you can now use the Soul Sigil's effect on it to soup it up and transform it to Quadraslash, which deals even more damage.
Armageddon
 Armageddon |
|
| EXP | 22060 |
|---|---|
| Gold | 6680 |
The most effective way to take down Armageddon is with Flame Slash or Undead Undoer, since it’s weak to Fire and counts as an Undead enemy.
Pair either move with Wild Side to attack twice per turn and end the fight much faster.
Other Bosses
- Goregoyle
- Knight Abhorrent
All Sparkly Spot Locations
| Location | Rewards |
|---|---|
  Found just west of Sanctum. |
• Seed of Life x1 • Strong Medicine x1 |
 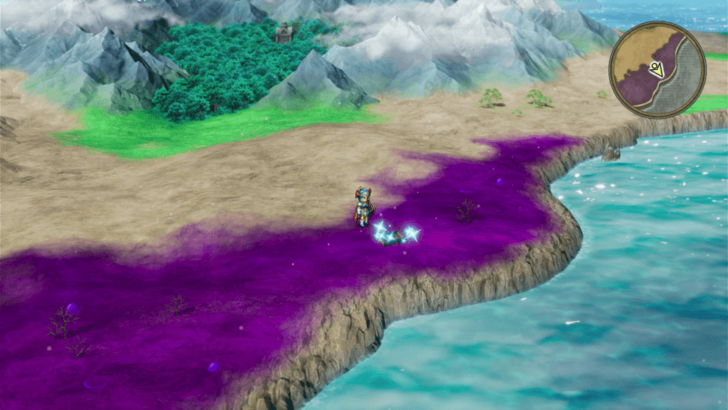 Found on the poisonous ground just south of Sanctum. |
• Frazzeled Feathers x1 • Hapless Helm x1 • Staff of Divine Wrath x1 |
Here is a list of all known Sparkly Spot locations you can find during this part of the walkthrough. We’re still looking for more, so check back soon for updates!
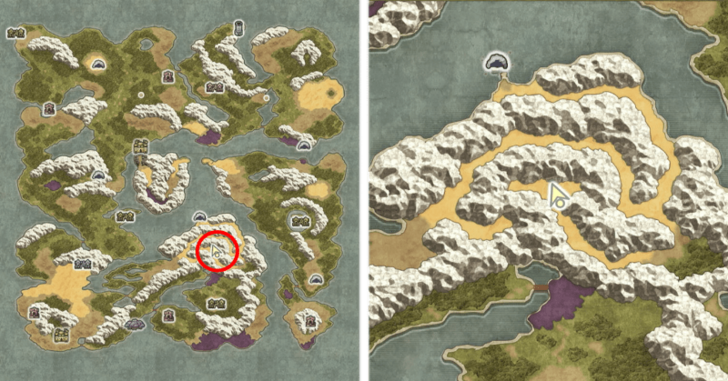
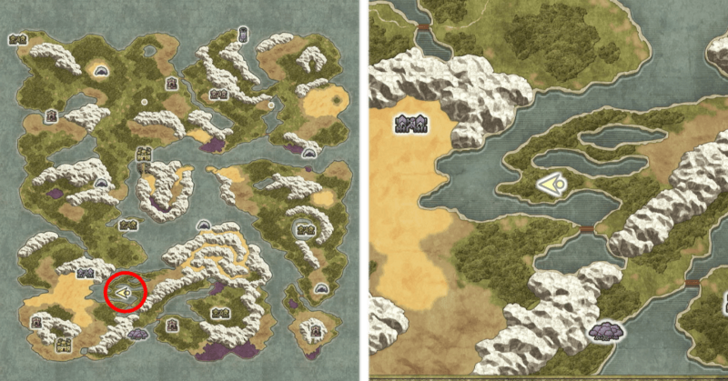
All Secret Spot Locations
| Map Image | World Image |
|---|---|
 |
 |
 |
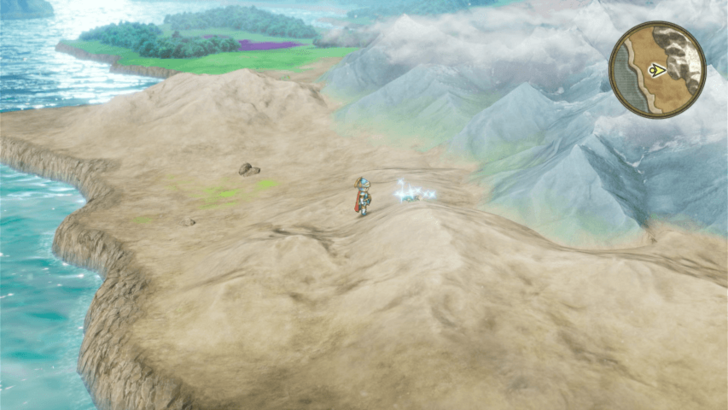
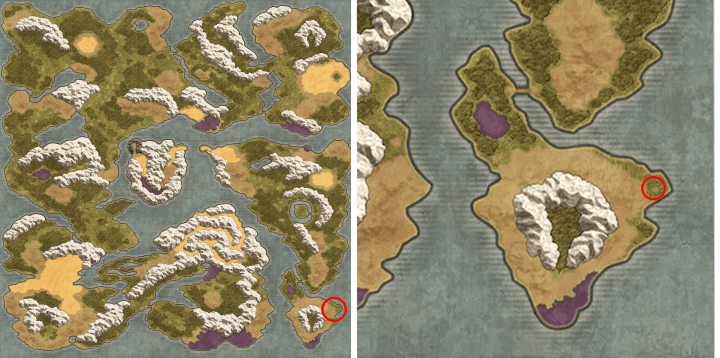
Found along the southeastern coast of the continent directly west of Sanctum island. |
 |
 |
 |
 |
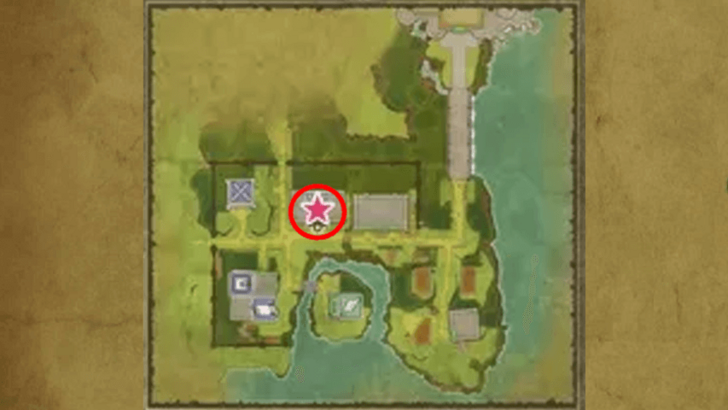
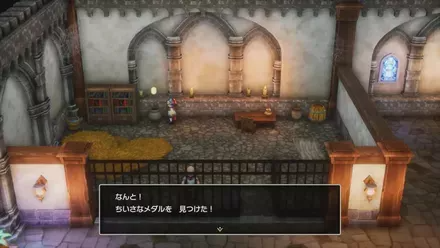
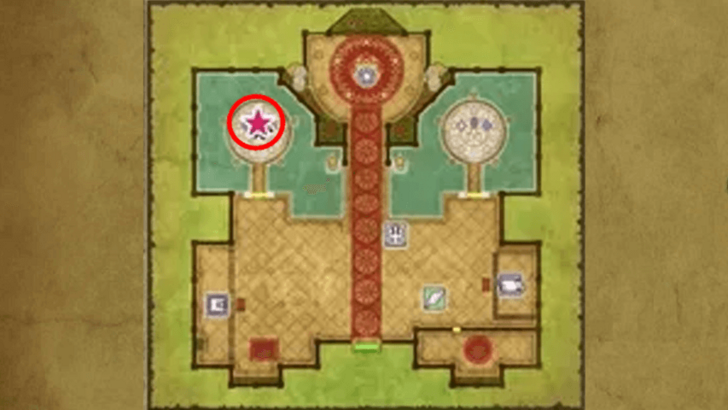
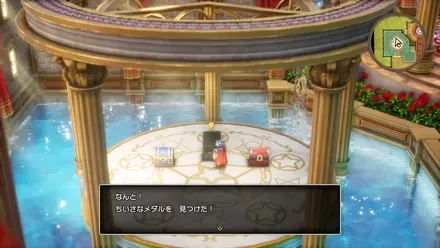
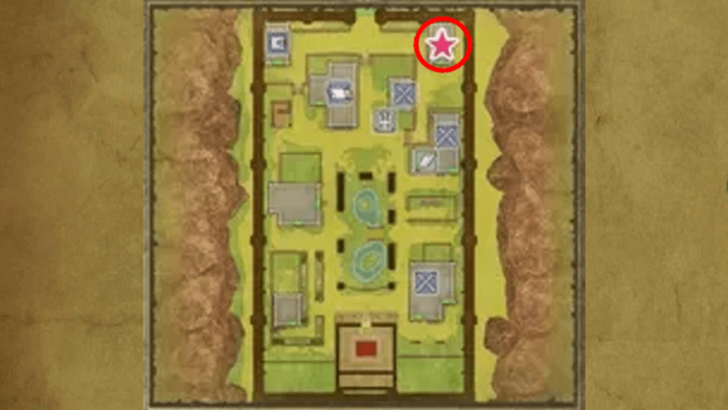
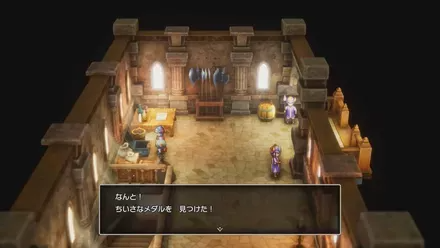
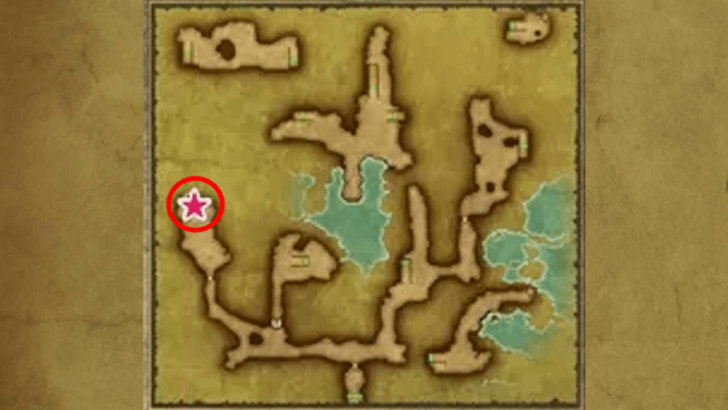
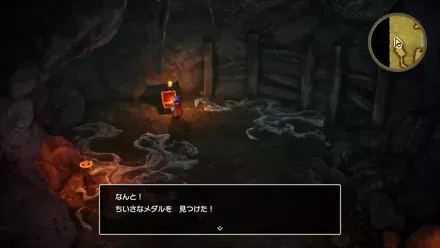
All Mini Medal Locations
| Map Image | World Image |
|---|---|
 |
 |
 |
 |
 |
 |
 |
 |
 |
 |
 |
 |
 |
 |
 |
 |
 |
 |
Here is a list of all known Mini Medal locations you can find during this part of the walkthrough.
All Mini Medal Locations and Rewards
Dragon Quest I & II HD-2D Remake Related Guides
List of All Story Walkthroughs
| 1 | Tantegel Castle to Craggy Cave |
|---|---|
| 2 | Quagmire Cave to Green Dragon Boss Fight |
| 3 | Weirdwood to Weeping Isle |
| 4 | Preparations Before the Final Dungeon |
| 5 | Dragonlord's Castle and Final Boss |
| 6 | List of All Endings |
Comment
Author

Walkthrough Part 4: Preparations Before the Final Dungeon
Rankings
- We could not find the message board you were looking for.
Gaming News

![Star Savior Review [First Impressions] | Engaging, Entertaining, and Expensive](https://img.game8.co/4447603/8f500e9bf666bdb8adb1af478e9dfdbd.png/show)


Popular Games

Genshin Impact Walkthrough & Guides Wiki
Umamusume: Pretty Derby Walkthrough & Guides Wiki
Crimson Desert Walkthrough & Guides Wiki
Monster Hunter Stories 3: Twisted Reflection Walkthrough & Guides Wiki
Honkai: Star Rail Walkthrough & Guides Wiki
Pokemon Pokopia Walkthrough & Guides Wiki
The Seven Deadly Sins: Origin Walkthrough & Guides Wiki
Wuthering Waves Walkthrough & Guides Wiki
Zenless Zone Zero Walkthrough & Guides Wiki
Arknights: Endfield Walkthrough & Guides Wiki


Recommended Games
Fire Emblem Heroes (FEH) Walkthrough & Guides Wiki
Diablo 4: Vessel of Hatred Walkthrough & Guides Wiki
Cyberpunk 2077: Ultimate Edition Walkthrough & Guides Wiki
Yu-Gi-Oh! Master Duel Walkthrough & Guides Wiki
Super Smash Bros. Ultimate Walkthrough & Guides Wiki
Pokemon Brilliant Diamond and Shining Pearl (BDSP) Walkthrough & Guides Wiki
Elden Ring Shadow of the Erdtree Walkthrough & Guides Wiki
Monster Hunter World Walkthrough & Guides Wiki
The Legend of Zelda: Tears of the Kingdom Walkthrough & Guides Wiki
Persona 3 Reload Walkthrough & Guides Wiki


All rights reserved
© ARMOR PROJECT/BIRD STUDIO/SPIKE CHUNSOFT/SQUARE ENIX
© SUGIYAMA KOBO ℗ SUGIYAMA KOBO
The copyrights of videos of games used in our content and other intellectual property rights belong to the provider of the game.
The contents we provide on this site were created personally by members of the Game8 editorial department.
We refuse the right to reuse or repost content taken without our permission such as data or images to other sites.