Walkthrough Part 3: Weirdwood to Weeping Isle
This is a walkthrough guide from Weirdwood up to Weeping Isle in Dragon Quest 1 HD-2D Remake (DQ1). Read on for a full walkthrough guide to each area, including all enemies and bosses, sparkly spot locations, secret spots, and mini medal locations!
| ◀ Previous Guide | Next Guide ▶︎ |
|---|---|
| Quagmire Cave to Green Dragon Boss | Preparations Before the Final Dungeon |
List of Contents
Weirdwood to Weeping Isle Walkthrough Guide
| Jump to an Area Walkthrough! | |||
|---|---|---|---|
| 1 | Weirdwood and Faerie Village | 2 | Wayfarer's Inn |
| 3 | Cantlin and Golem Boss Battle | 4 | On the Way to Weeping Isle |
| 5 | Weeping Isle | 6 | - |
Weirdwood and Faerie Village
| 1 | 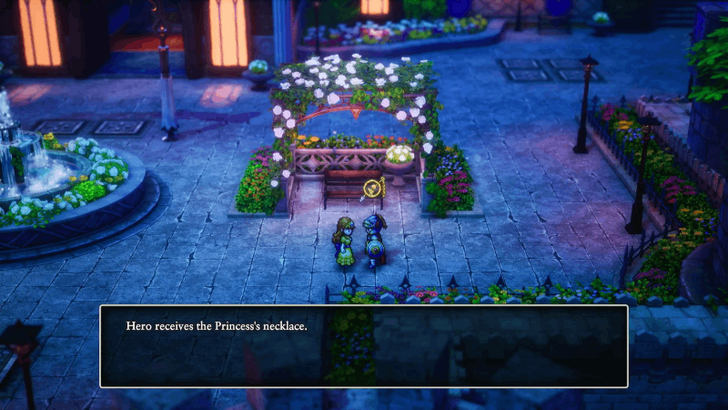 After delivering the princess to Tantegel Castle, head south from the throne room to meet her again in the courtyard. After the cutscene, she’ll give you the Princess’s Necklace. Then it’s time to set off for Weirdwood! |
|---|---|
| 2 | 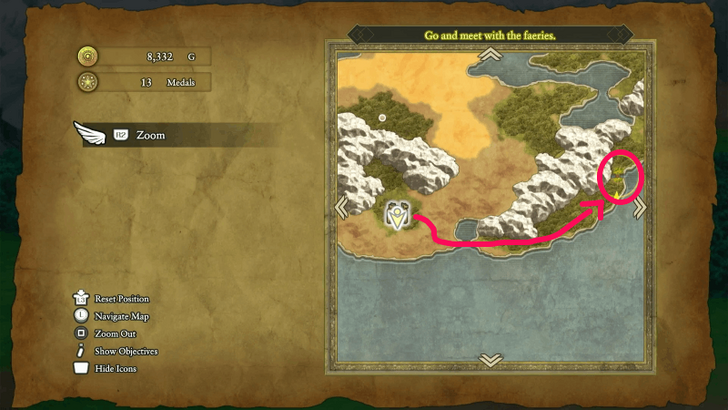 Weirdwood is to the southwest of the map, near the Citadel of the Monarch of Medals, so zoom yourself there and head to the right toward Weirdwood. |
| 3 | 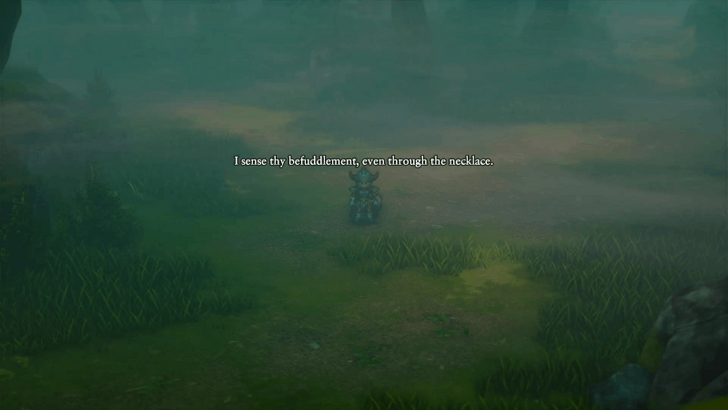 After arriving, you won’t have access to any map yet. You’ll need to wander around until a cutscene triggers, so explore every route until it does. |
| 4 | 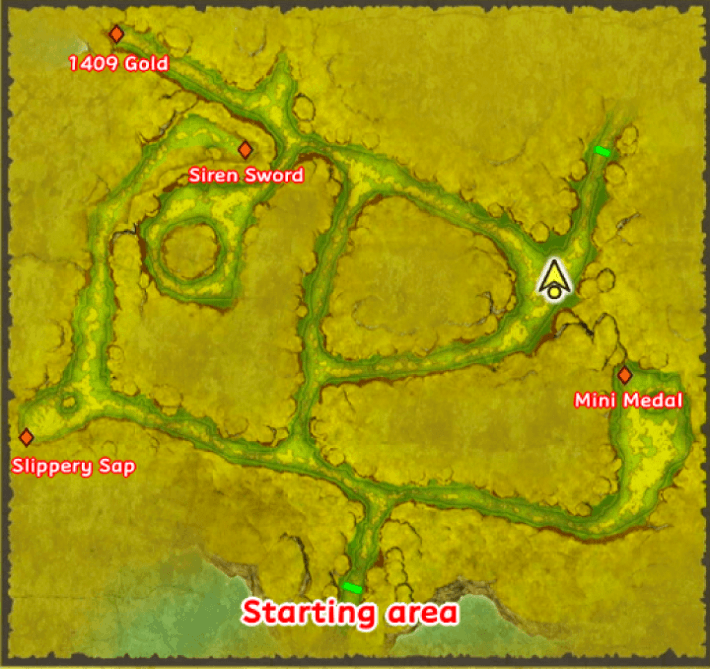 Once the fog clears, your map will unlock. Collect all the treasures here before moving on. You’ll get the following after collecting everything: ・Mini Medal ・2 Slippery Saps ・Siren Sword ・1409 Gold |
| 5 | After grabbing all treasures, move to the next area. If you’re low on HP, MP, or healing items, consider teleporting to a nearby town and returning because there’s a boss fight ahead. |
| 6 | Move forward until a cutscene triggers. Prepare for a boss fight against 3 Mirages. They use spells, so cast Magic Barrier on yourself and optionally Fizzle on them to prevent their spells. Each Mirage has just 200+ HP, so focus on single-target attacks rather than AoE. Best strategy is to fight normally until you come down to 50% HP, then trigger the Soul Sigil effect on your Gust Slash ability to soup it up into Skysplitter (AoE version). This will wipe all three with a single hit and defeat them instantly. ▶︎ How to Beat Mirage |
| 7 | 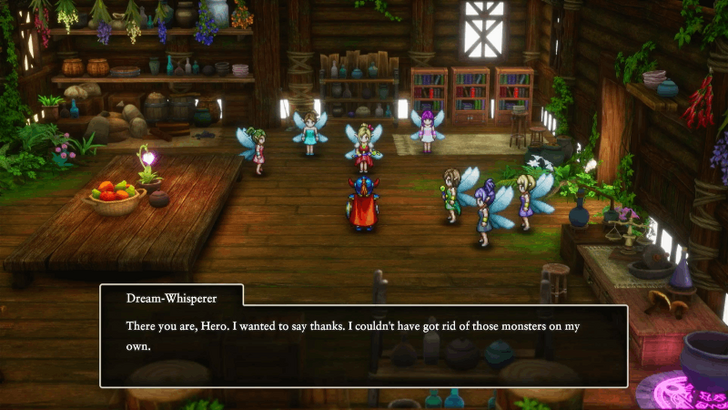 After the fight, you’ll be teleported back to Faerie Village. Talk to the faeries until their boss awakens, then enter the house on the left for another cutscene. Afterwards, zoom back to Weirdwood to explore the second area. |
| 8 | Collect all treasures in Weirdwood’s second area. You’ll find: ・Cannibox holding a Prayer Ring ・Thief’s Turban ・Focus Pocus Scroll ・Undying Flame If you’re strong enough, defeat the Cannibox to get the Prayer Ring. |
| 9 | The Undying Flame will later be used to create the Star Sigil at Faerie Village later. Once everything’s collected, head north to exit the forest. |
Wayfarer's Inn
| 1 | 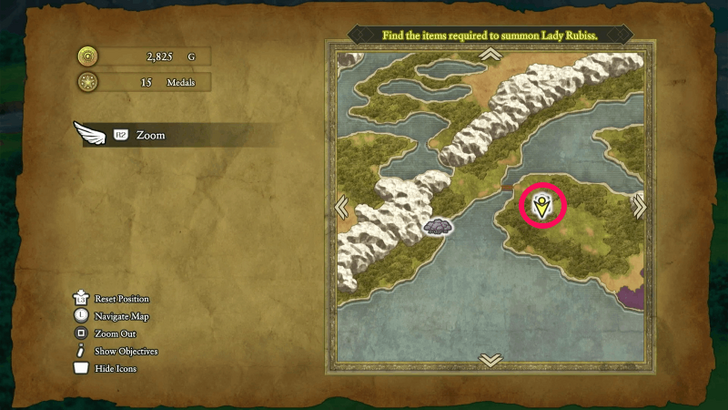 After leaving the forest, head west across the bridge to reach Wayfarer’s Inn and restore HP and MP. |
|---|---|
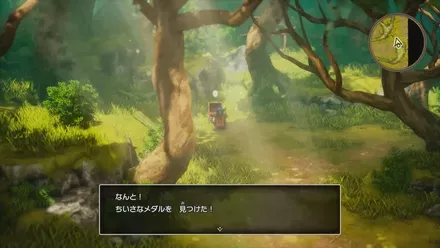
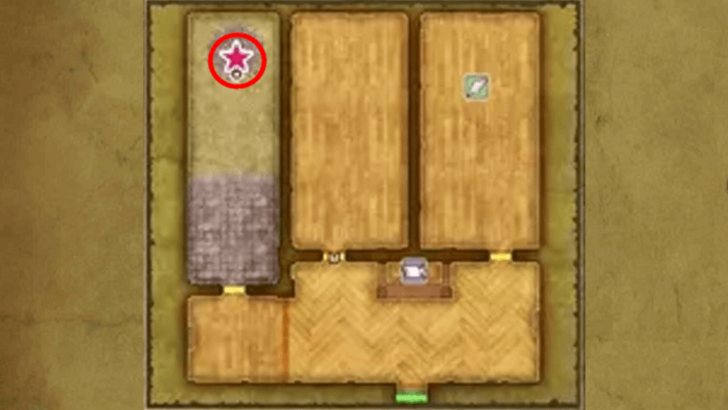
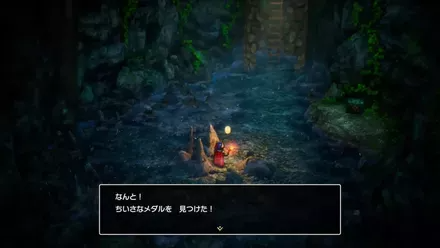
| 2 | 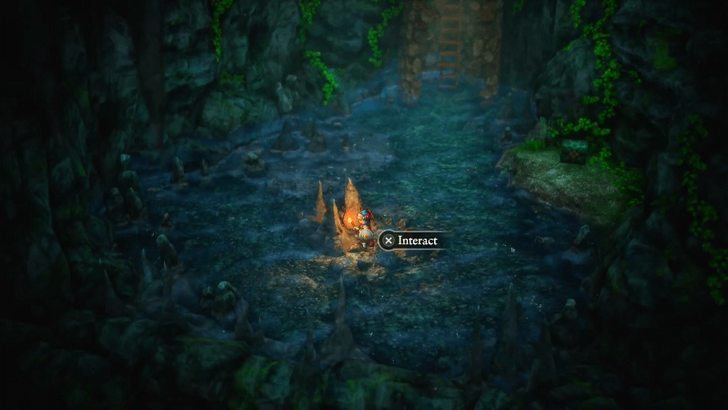 From the left room, climb down the well to grab a Mini Medal from a rock formation. Ignore the chest for now, you’ll need another key later. |
| 3 | 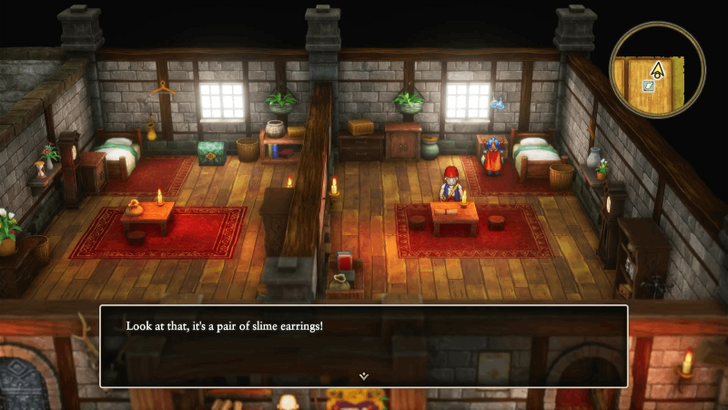 Interact with the cabinet in the Item Shop room to get Slime Earrings. After that, you’re ready to leave for Cantlin. |
Cantlin and Golem Boss Battle
| 1 | 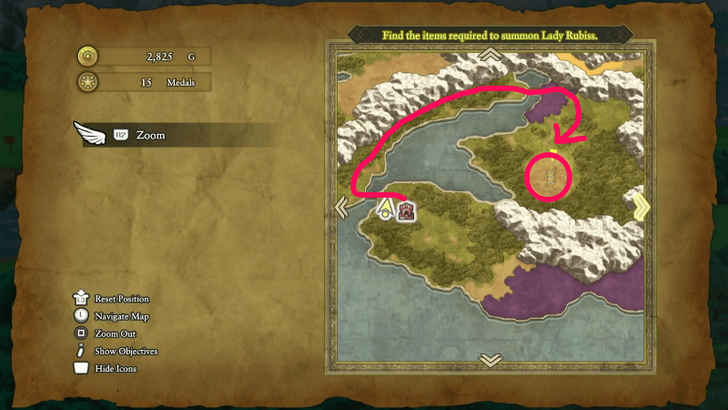 Cantlin is marked on your map. Take the northern path to reach it. While crossing the bridge, you’ll encounter a poisoned path, use Safe Passage to avoid damage. |
|---|---|
| 2 | 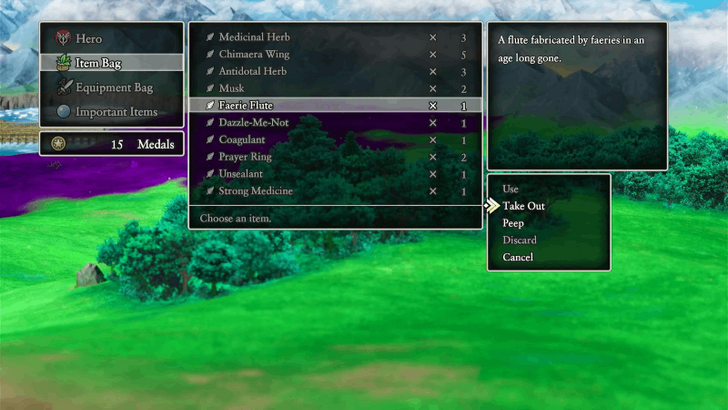 Before entering, make sure Faerie’s Flute is equipped. Entering Cantlin triggers a Boss Battle against Golem, so level up to at least Level 25 before engaging. ▶︎ EXP Farm: How to Level Up Fast |
| 3 | 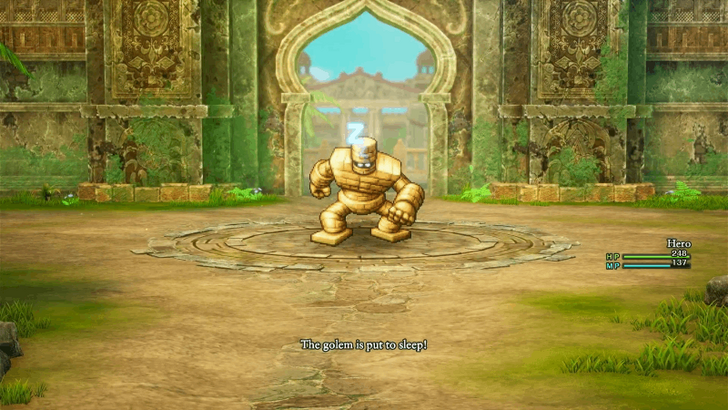 Enter Cantlin and prepare for a fight with Golem. Use the Faerie's Flute immediately on your first turn to put Golem to sleep, making you get free turns and attacks. Golem will eventually wake up, but your Faerie's Flute has unlimited uses, so go spam its effect until you win the battle. ▶︎ How to Beat Golem |
| 4 | 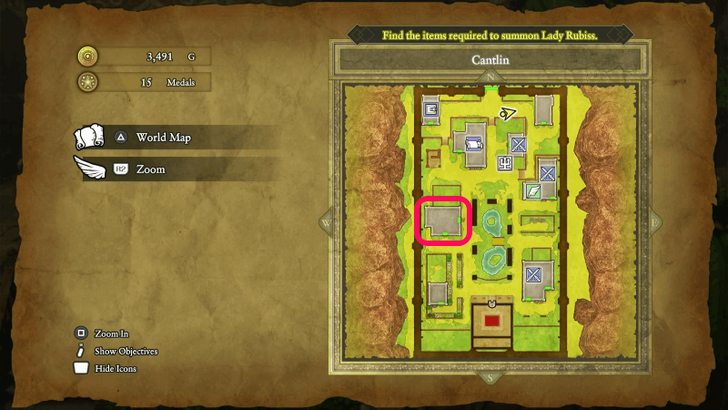 After defeating Golem, explore Cantlin. Head to the large house west of the map for: ・ Seed of Wisdom (first floor pot) ・ Iron Armour, ・Attack Attacker Scroll, ・ Moreheal Scroll (second floor cabinets/bookshelves) |
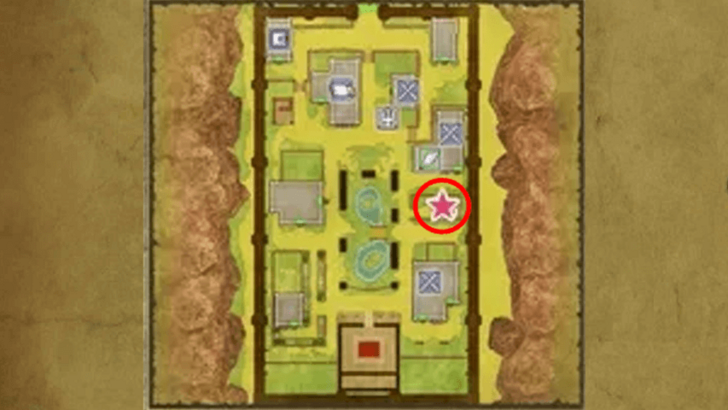
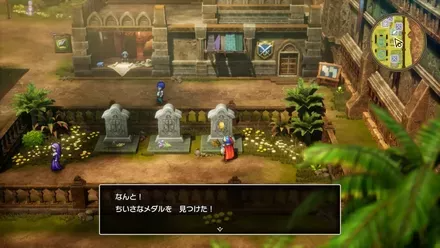
| 5 | 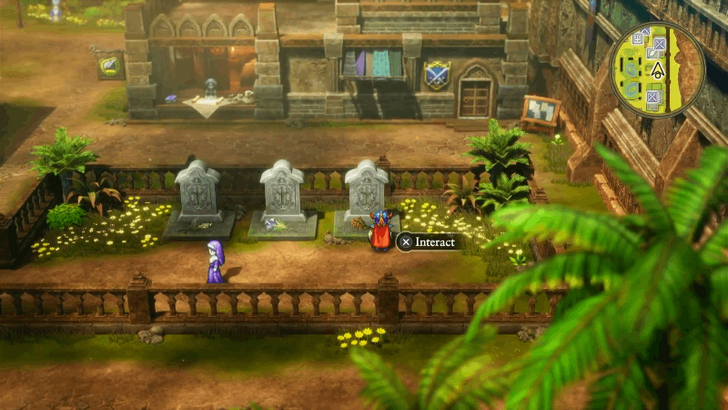 Head outside and explore the graveyard to the right of the map for a Mini Medal. Feel free to search every pots and barrels or shelves this town has for more loot if you wish. |
| 6 | 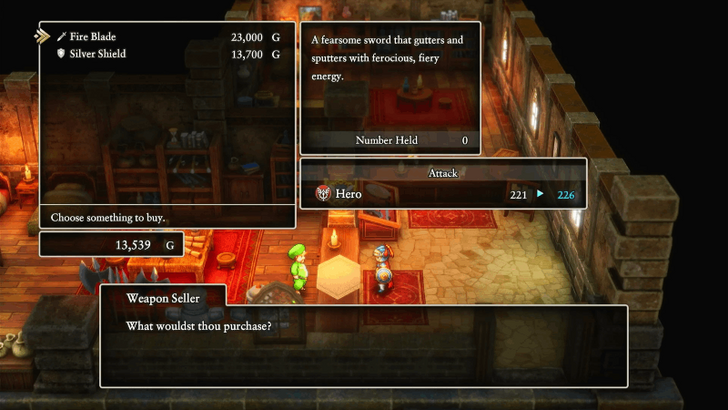 Consider upgrading your gear, as upcoming enemies are tougher. Spend gold if needed for stronger equipment. ▶︎ Best Weapons and Armor |
| 7 | 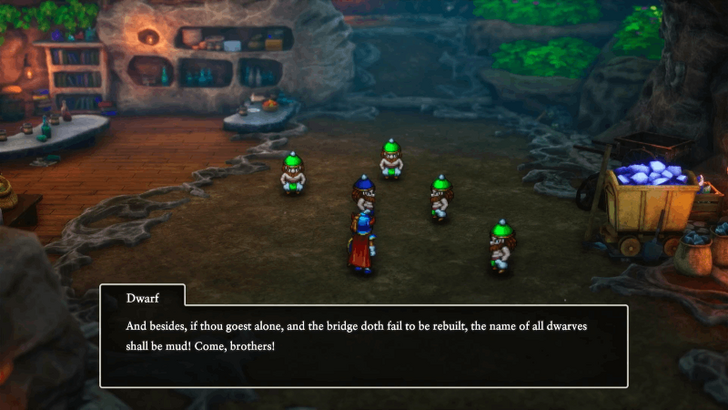 Zoom back to the Cave of the Dwarves and speak to the dwarf in a blue hat and the dwarves will agree to fix the bridge. Cutscene continues back at Cantlin. |
| 8 | 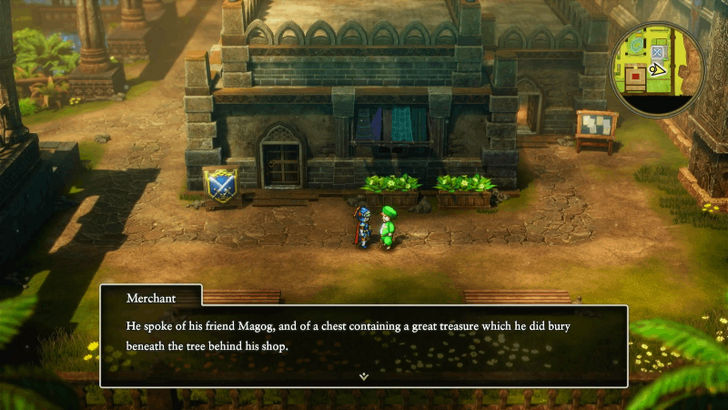 To the southeast of Cantlin, talk to a merchant with a blue exclamation point for a subquest. He’ll talk about his father and will start a sub quest.. |
On the Way to Weeping Isle
| 1 | 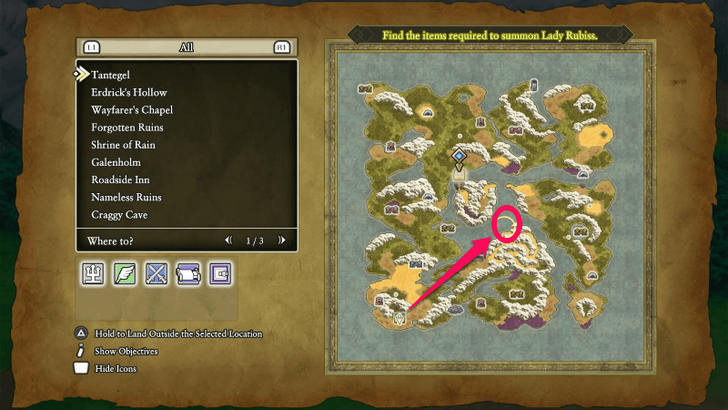 Weeping Isle is north of your current location and it’s marked on the map. You'll need to go here next. The closest teleport point is the Citadel of the Monarch of Medals, so zoom there first. |
|---|---|
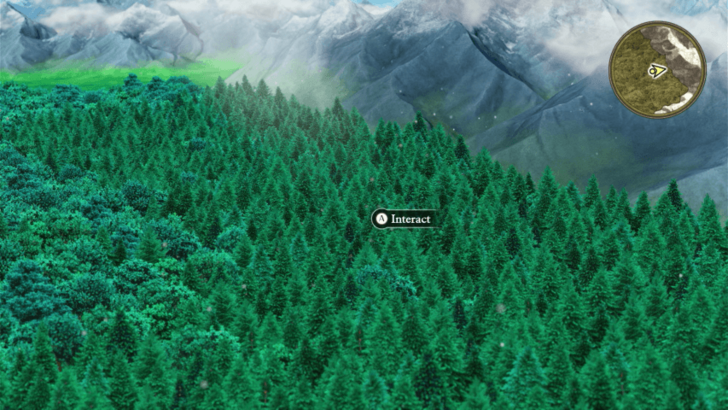
| 2 | 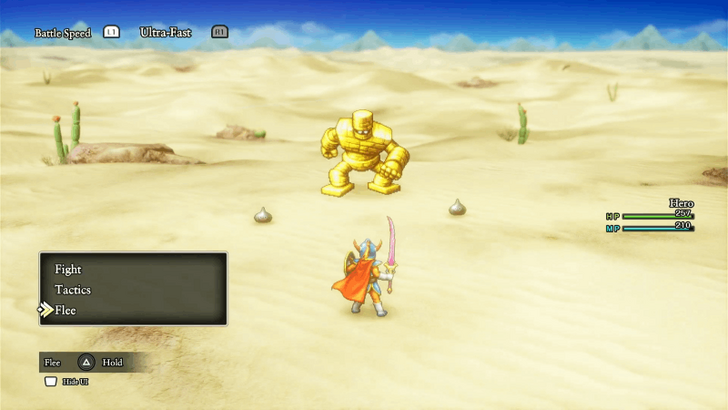 Since this is gonna be a long walk, you'll be fighting monsters along the way, and hopefully come across Metal Slimes, which give a ton of EXP a piece, and Gold Golems which are heavy hitters, but give huge amounts of Gold per each defeated! Do check out all Sparkly Spots you see on the way to the island for more loot! ▶︎ List of All Sparkly Spots |
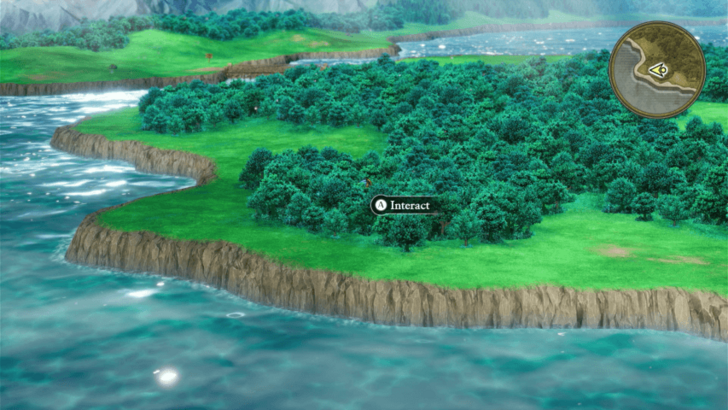
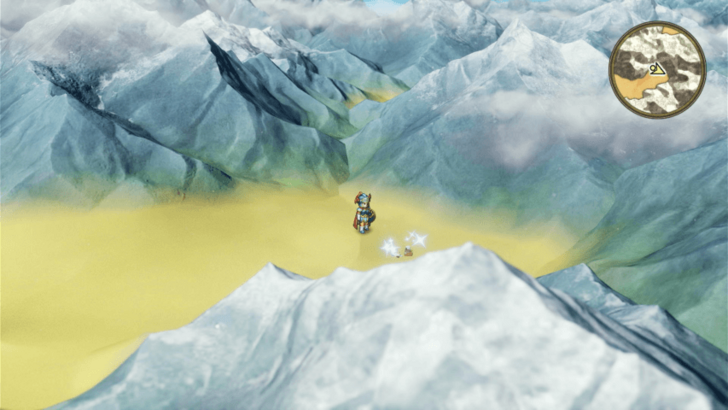
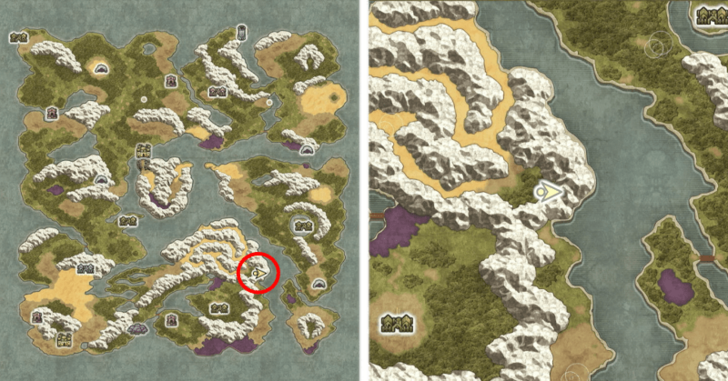
| 3 |  En route to Weeping Isle, consider taking a detour to a Secret Spot below for more loot. Examine the 3 treasure chests here (4 exist but the last one can't be opened right now, so remember to come back to it later). You'll get these items once you open all treasure chests: ・Mini Medal ・Strength Ring ・Spiked Armour |
| 4 | Once complete, you can now go and set your route to Weeping Isle up north! |
Weeping Isle
| 1 | Upon reaching Weeping Isle, check out your map. You'll notice that the area is quite big, it actually has 2 levels and the boss is resting on the second level, so best clear out all the Treasures from L1 first befoere going up. One treasure on L1 requires going up to L2 and back down via a different path. ▶︎ Weeping Isle Dungeon Guide |
|---|---|
| 2 | 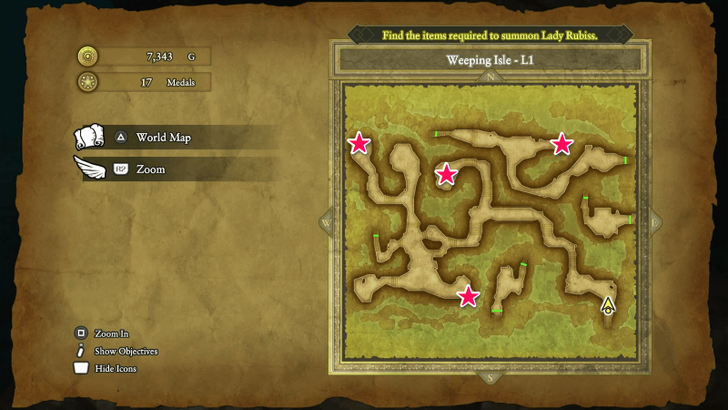 There are a total of 4 treasures on L1 that you can get, namely: ・ Hextract ・Musk ・Mini Medal ・2 Coagulants. |
| 3 | 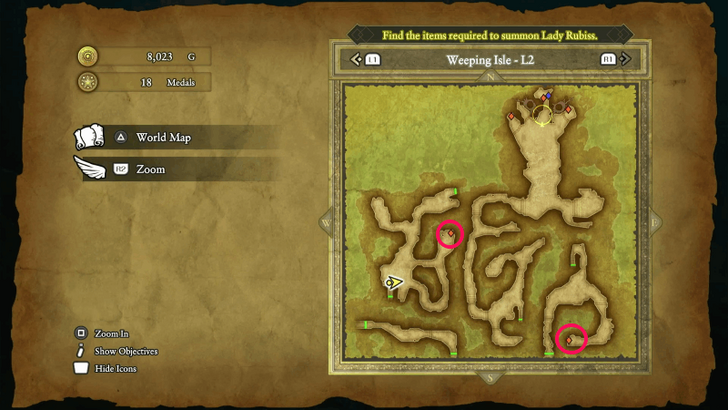 Once you collect all treasures from L1, it's time to go up to L2. There are 5 treasure chests in L2 but 3 of those are only accessible if you defeated the boss. So for now, grab that 4452 Gold from that one treasure chest, and the Mini Medal on the other end. |
| * | The next thing to do here in the cave is to rescue the Priest and complete a boss fight with multiple Dragonflies. However, if your HP and MP can't hold on for much longer, zoom in to a nearby inn and rest then head back here to deal with the boss. |
| 4 | Before heading towards the boss area, make sure to wear equipment that nullifies Fire damage such as the Ice Shield, Tectonic Plate, and the Asbestos Earring since the enemies will use Fire attacks on you. Proceed to the boss area and prepare for a fight.. There will be a total of 6 Dragonflies here, it may seem like a lot but the best strategy is to strike them one by one with Dragon Slash since they are all Dragons. This attack will be the most effective against them. Once you are at 50% HP, use your Soul Sigil's effect to your Undead Undoer ability to soup it up and transform it into Pearly Gates, attacking all enemies at once, and defeating them eventually. ▶︎ How to Beat Dragonfly |
| 5 | 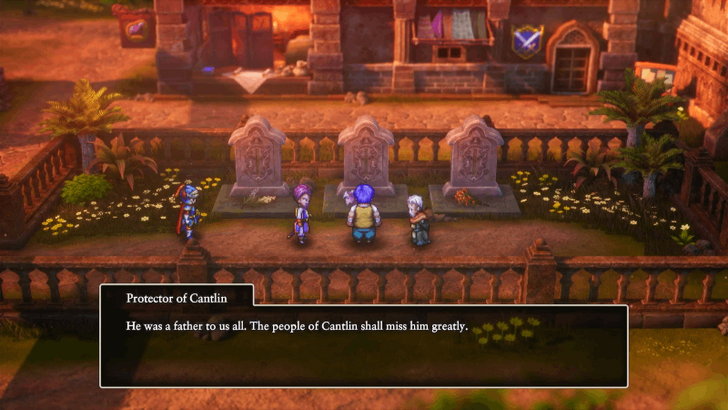 After the fight, you'll be transported back to Cantlin. After the cutscene, examine the graveyard to the right to trigger another cutscene. |
Encounterable Enemies and Bosses
Enemies
 Gold Golem
 Skeleton Soldier
 Dark Skeleton
 Vis Mager
 Cosmic Chimaera
 Hocus Chimaera
 Metal Slime
 Tearwolf
 Deadnaut
 Lump Mage
 Treeface
 Goregon
 Rampage
 Lump Shaman
 Handsome Crab
 Man O' War
 Minidemon
 Heyedra
 Gargoyle
List of All Monsters and Enemies
Golem
 Golem |
|
| EXP | 5110 |
|---|---|
| Gold | 506 |
Before fighting Golem, it's important that you have the Faerie Flute taken out of your bag and equipped to your hero. Use it during the boss fight as many times as you like to make the Golem fall asleep while you sneak it attacks, repeat the cycle until it dies.
Mirage
 Mirage |
|
| EXP | 490 |
|---|---|
| Gold | 82 |
When your HP is below 50%, you will be able to use Skysplitter if you have already learned Gust Slash, which you learn on Level 18.
Once conditions are met, use the Soul Sigil's effect on Gust Slash to activate it's souped up version, Skysplitter to deal massive damage to all enemies. You'll need to manage your HP carefully, but if you do it you can defeat all Mirages with one hit.
Dragonfly
 Dragonfly |
|
| EXP | 195 |
|---|---|
| Gold | 50 |
There will be a total of 6 Dragonflies, it may seem overwhelming but best strategy is to strike them one by one with Dragon Slash since they are all Dragons. This attack will be the most effective against them.
Once you are at 50% HP, use your Soul Sigil's effect to your Undead Undoer ability to soup it up and transform it into Pearly Gates, attacking all enemies at once, and defeating them eventually.
All Sparkly Spot Locations
| Location | Rewards |
|---|---|
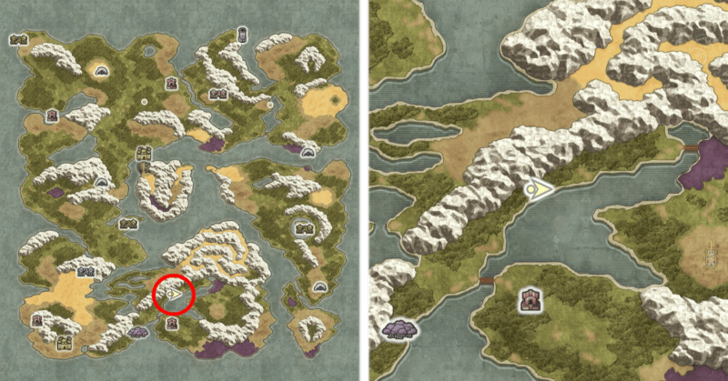
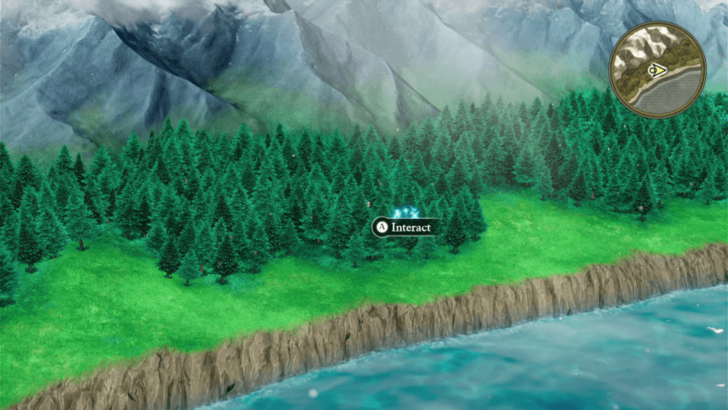
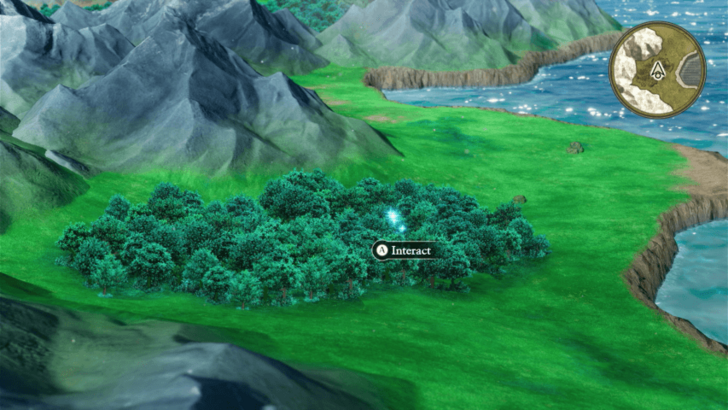
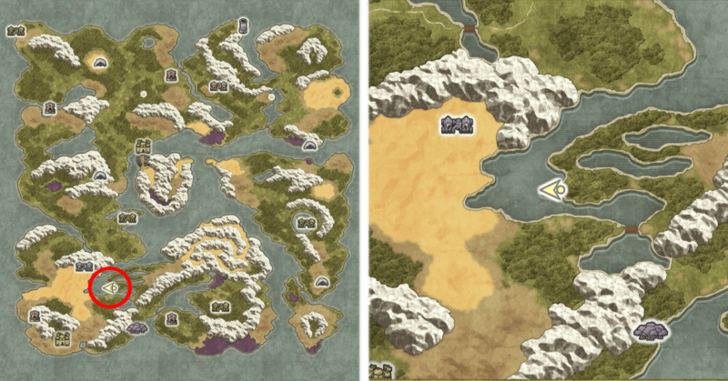
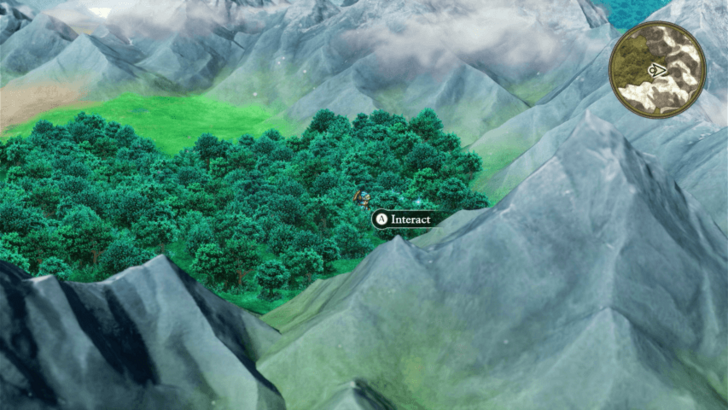
  Found in a bunch of trees just south of the Wayfarer's Inn. |
• Antidotal Herb x1 • Dazzle-me-not x1 • Medicinal Herb x2 |
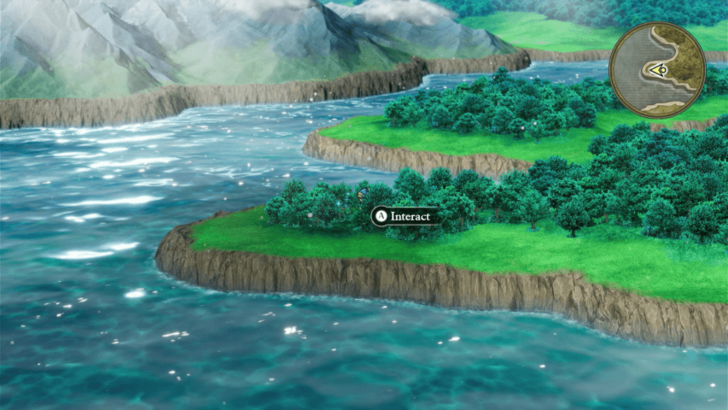
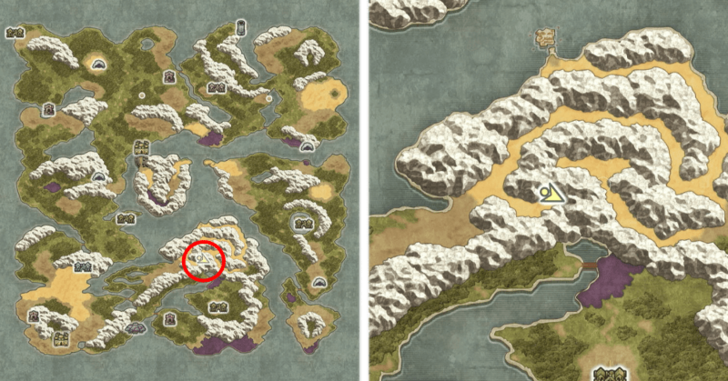
  Found in a bunch of trees between a mountain and the ocean just north of the Wayfarer's Inn. |
• Strong Medicine x1 • Seed of Defence x1 |
 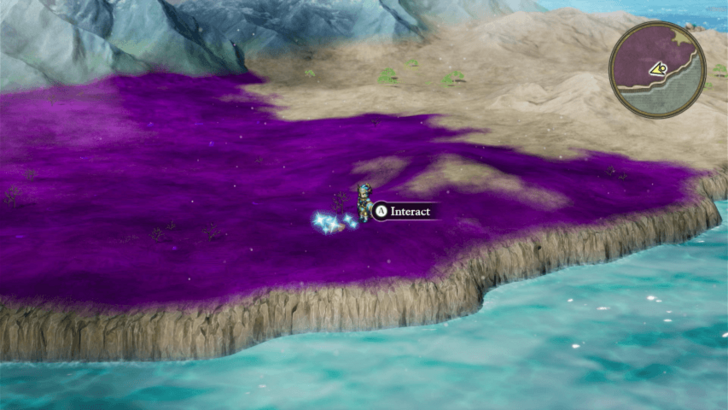 Found on the poisonous ground southeast of Cantlin. |
• Hextract x1 • Seed of Strength x1 • Dieamend x1 |
  Found northeast of Cantlin in a patch of trees near a mountain. |
• Prayer Ring x1 • Anti-freeze Earrings x1 |
  Found in a bunch of trees near the shore just southeast of Damdara. You need to fix the broken bridge first to access the area. |
• Antidotal Herb x3 • Jeeper Creeper x2 • Dieamend x1 |
  Found on the sandy area near the mountain just north of Cantlin. You need to fix the broken bridge first to access the area. |
• Magic Water x1 • Chimaera Wing x1 |
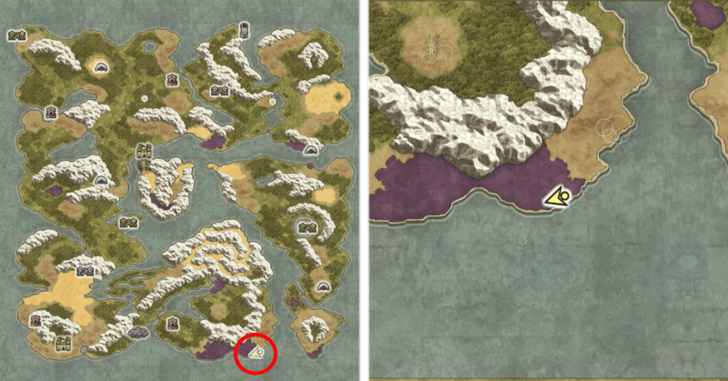
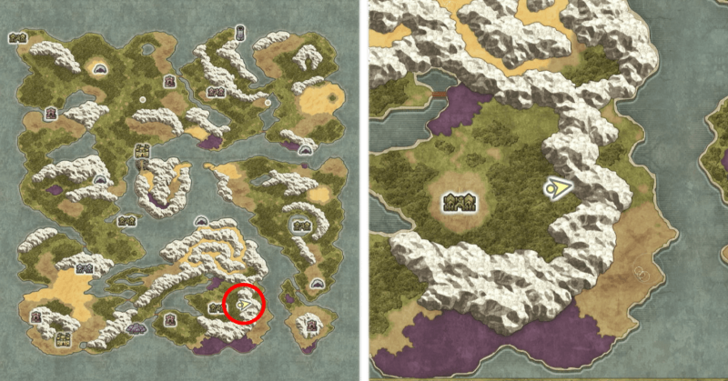
  Found in a bunch of trees in the mountainous area southeast of Weeping Isle. |
• Slippery Sap x2 • Two-leaf Clover x1 • Jeeper Creeper x1 |
  Found in the trees just east of Cantlin. |
• Gold x613 • Light Shield x1 • Edged Boomerang x1 |
Here is a list of all known Sparkly Spot locations you can find during this part of the walkthrough. We’re still looking for more, so check back soon for updates!
All Secret Spot Locations
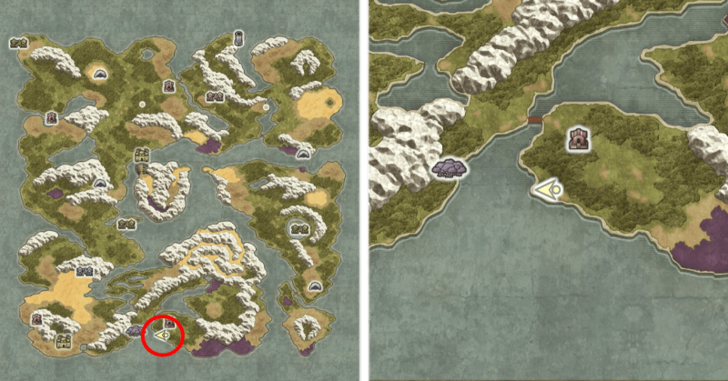
South of Weeping Isle
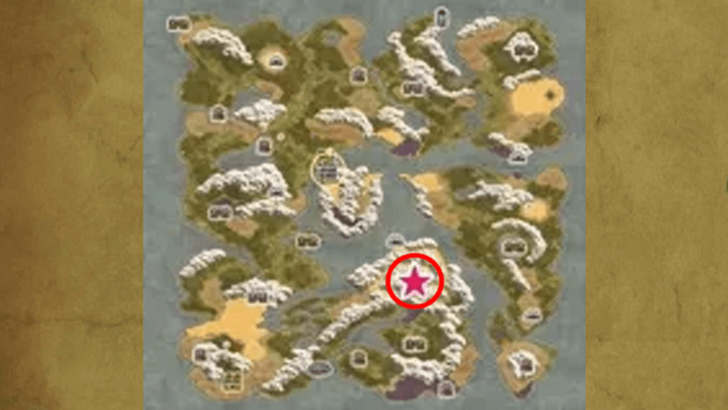
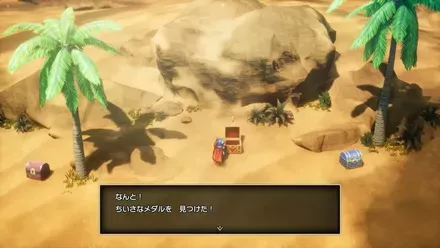
The Secret Spot is found in the desert south of Weeping Isle, examine the 4 treasure chests here . You'll get these items once you open all treasure chests:
・Mini Medal
・Strength Ring
・Spiked Armour
・Seed of Agility
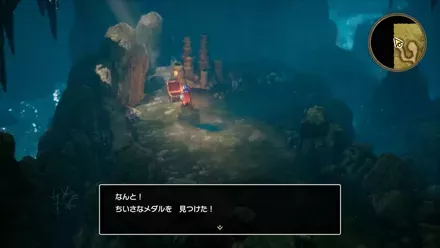
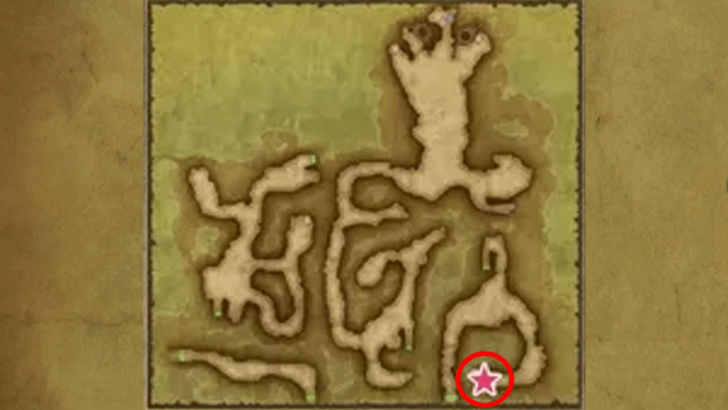
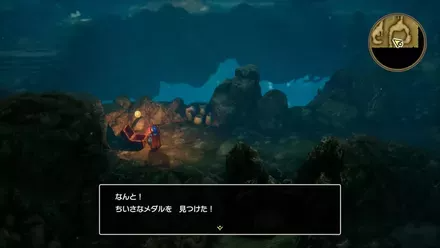
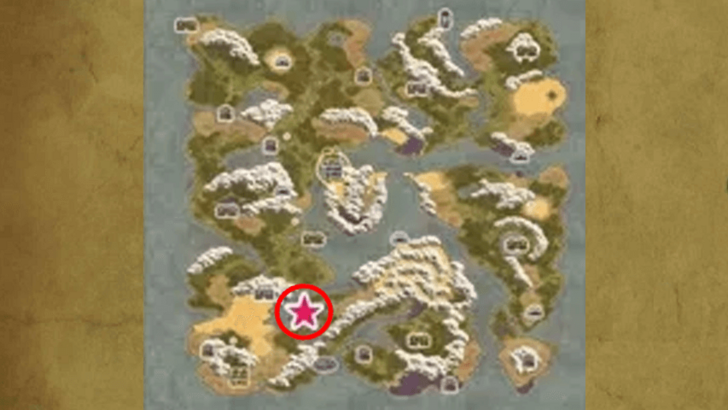
All Mini Medal Locations
| Map Image | World Image |
|---|---|
 |
 |
 |
 |
 |
 |
 |
 |
 |
 |
 |
 |
 |
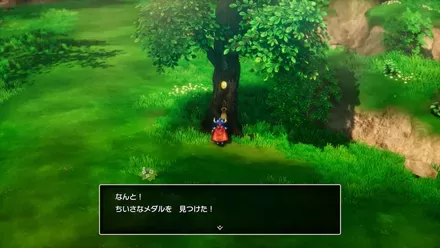 |
Here is a list of all known Mini Medal locations you can find during this part of the walkthrough.
All Mini Medal Locations and Rewards
Dragon Quest I & II HD-2D Remake Related Guides
List of All Story Walkthroughs
| 1 | Tantegel Castle to Craggy Cave |
|---|---|
| 2 | Quagmire Cave to Green Dragon Boss Fight |
| 3 | Weirdwood to Weeping Isle |
| 4 | Preparations Before the Final Dungeon |
| 5 | Dragonlord's Castle and Final Boss |
| 6 | List of All Endings |
Comment
Author

Walkthrough Part 3: Weirdwood to Weeping Isle
Rankings
- We could not find the message board you were looking for.
Gaming News

![Death Stranding 2: On The Beach [PC] Review | A Port That Delivers](https://img.game8.co/4447392/15310a0c9aa1b6843bb713b2ea216930.jpeg/show)


Popular Games

Genshin Impact Walkthrough & Guides Wiki
Umamusume: Pretty Derby Walkthrough & Guides Wiki
Crimson Desert Walkthrough & Guides Wiki
Monster Hunter Stories 3: Twisted Reflection Walkthrough & Guides Wiki
Honkai: Star Rail Walkthrough & Guides Wiki
Pokemon Pokopia Walkthrough & Guides Wiki
The Seven Deadly Sins: Origin Walkthrough & Guides Wiki
Wuthering Waves Walkthrough & Guides Wiki
Zenless Zone Zero Walkthrough & Guides Wiki
Arknights: Endfield Walkthrough & Guides Wiki


Recommended Games
Fire Emblem Heroes (FEH) Walkthrough & Guides Wiki
Diablo 4: Vessel of Hatred Walkthrough & Guides Wiki
Cyberpunk 2077: Ultimate Edition Walkthrough & Guides Wiki
Yu-Gi-Oh! Master Duel Walkthrough & Guides Wiki
Super Smash Bros. Ultimate Walkthrough & Guides Wiki
Pokemon Brilliant Diamond and Shining Pearl (BDSP) Walkthrough & Guides Wiki
Elden Ring Shadow of the Erdtree Walkthrough & Guides Wiki
Monster Hunter World Walkthrough & Guides Wiki
The Legend of Zelda: Tears of the Kingdom Walkthrough & Guides Wiki
Persona 3 Reload Walkthrough & Guides Wiki


All rights reserved
© ARMOR PROJECT/BIRD STUDIO/SPIKE CHUNSOFT/SQUARE ENIX
© SUGIYAMA KOBO ℗ SUGIYAMA KOBO
The copyrights of videos of games used in our content and other intellectual property rights belong to the provider of the game.
The contents we provide on this site were created personally by members of the Game8 editorial department.
We refuse the right to reuse or repost content taken without our permission such as data or images to other sites.