Walkthrough Part 2: Quagmire Cave to Green Dragon Boss
This is a walkthrough guide from Quagmire Cave up to the Green Dragon boss fight in Dragon Quest 1 HD-2D Remake (DQ1). Read on for a full walkthrough guide to each area, including all enemies and bosses, sparkly spot locations, secret spots, and mini medal locations!
| ◀ Previous Guide | Next Guide ▶ |
|---|---|
| Tantegel Castle to Craggy Cave | Weirdwood to Weeping Isle |
List of Contents
 Attention! Attention! |
This page contains major spoliers for Dragon Quest 1 HD-2D Remake! Continue reading on at your own risk. |
|---|
Quagmire Cave to Green Dragon Boss Fight Walkthrough Guide
| Jump to an Area Walkthrough! | |||
|---|---|---|---|
| 1 | Quagmire Cave | 2 | On the Way to Rimuldar |
| 3 | Rimuldar | 4 | Cave of the Dwarves |
| 5 | Faerie Village and Damdara | 6 | On the Way to Field of Flowers |
| 7 | Field of Flowers and Back to Faerie Village | 8 | Detours Before Quagmire Cave |
| 9 | Quagmire Cave (Revisit) | 10 | - |
Quagmire Cave
| 1 | 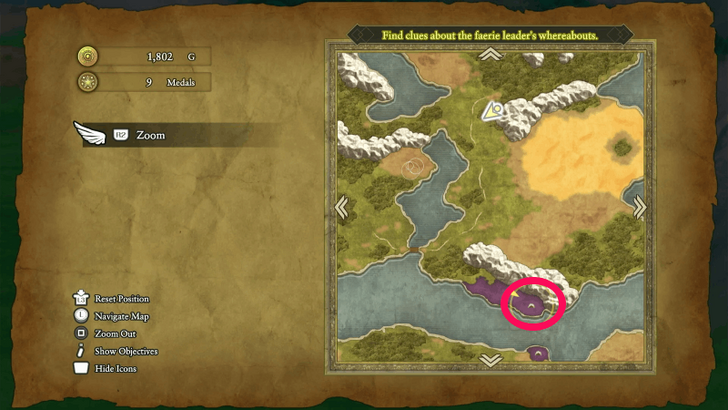 Your next destination is Quagmire Cave, located near Kol. Use your Zoom Spell or a Chimaera Wing to teleport to Kol. From there, head south until you reach a swamp covered in poison, the cave entrance will be nearby. Don’t step on the poison right away as it’ll damage you. Instead, cast Safe Passage so you can float above the terrain safely. ▶︎ Quagmire Cave Dungeon Guide |
|---|---|
| 2 | 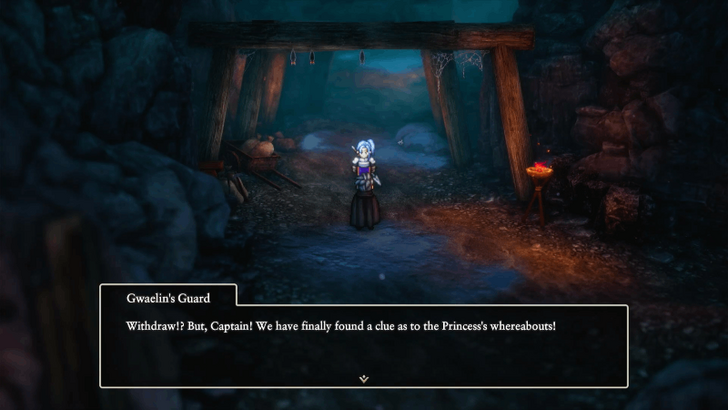 Once inside, head straight down until a cutscene triggers. You can’t explore much of this cave yet since you’ll need a Magic Key to progress further. |
| 3 | 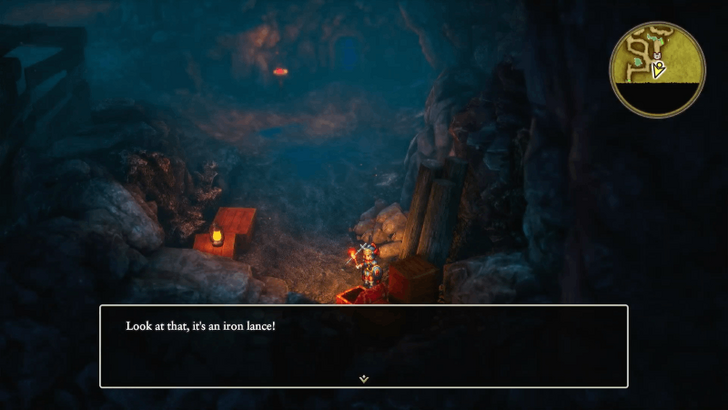 After the cutscene, head to the area below the locked door to find a treasure chest containing an Iron Lance. Once you’ve looted it, take the exit on the left. |
| 3 |  Once you’re back outside, remember to cast Safe Passage again before moving on the path ahead is still poisoned, and walking unprotected will drain your HP. Head south toward your next destination: Rimuldar. ▶︎ How to Safely Cross Damaging Floor Tiles |
On the Way to Rimuldar
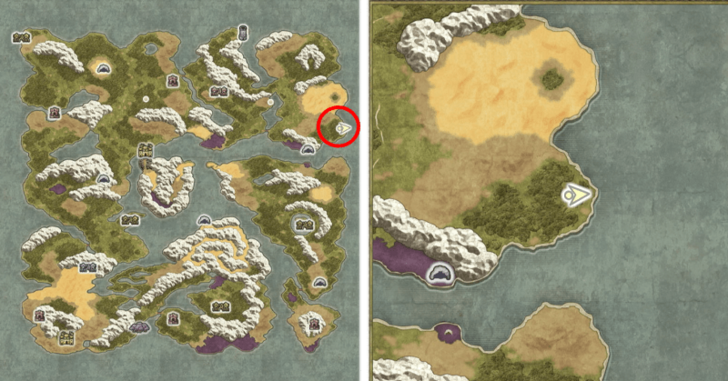
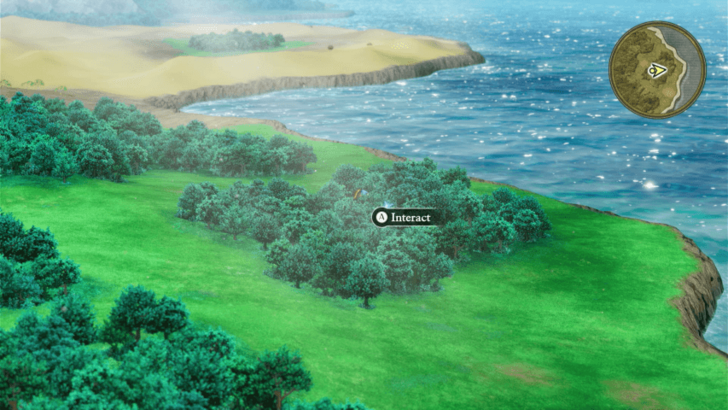
| 1 | 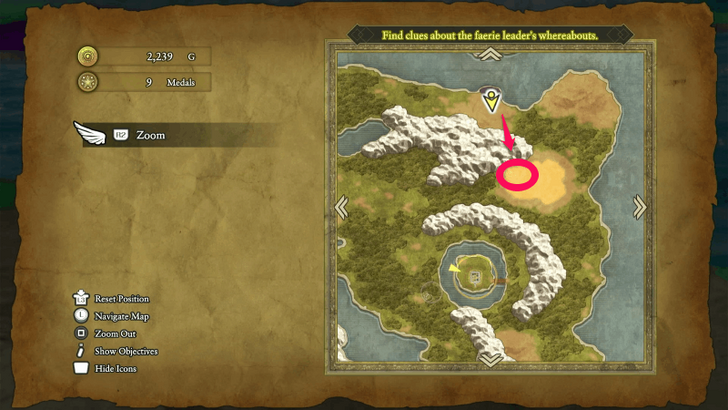 On your way to Rimuldar, you’ll stumble upon a Secret Spot that’ll show up on your map. Head inside and check the barrels near the coconut tree to find a Seed of Agility and 2 Coagulants. ▶︎ All Secret Spot Locations |
|---|---|
| 2 | 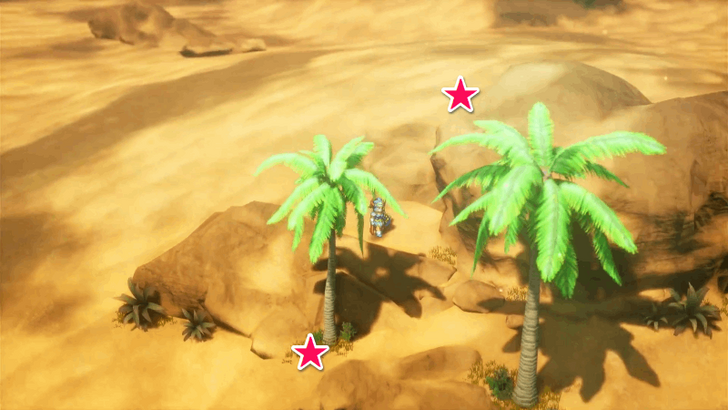 Next, inspect the leftmost tree to get an Edged Boomerang. Finally, search the shadow of the rock just above that tree to uncover a set of Garish Garb, which is better than what you currently have on now. |
| 3 | 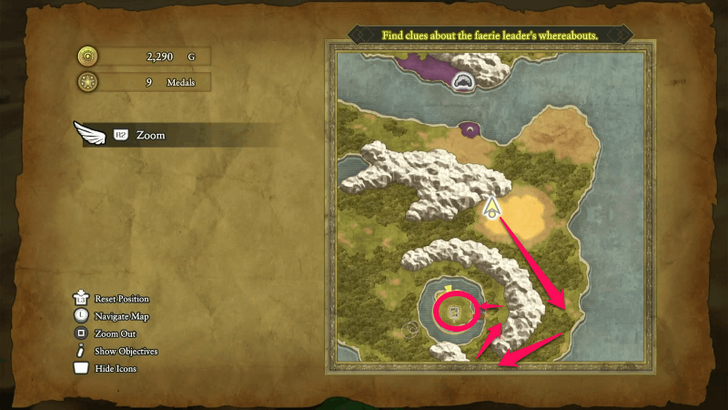 Once you’ve looted everything, continue toward Rimuldar, marked clearly on your map. Don’t forget to check every Sparkly Spot you find along the way for more loot. ▶︎ List of All Sparkly Spots |
Rimuldar
| 1 | 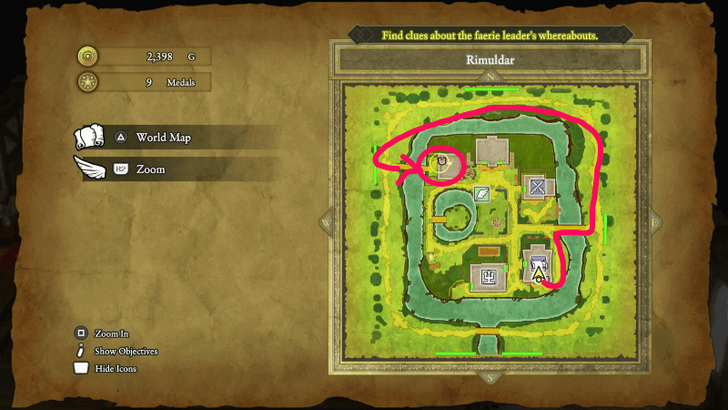 When you reach Rimuldar, a cutscene will play. Once it ends, head for the house on the upper-left corner of town. You can’t walk straight there since the path’s blocked, so loop around the map to reach it. Before going inside, check the pots outside for a Magic Water and a Seed of Wisdom. ▶︎ Rimuldar Location Guide |
|---|---|
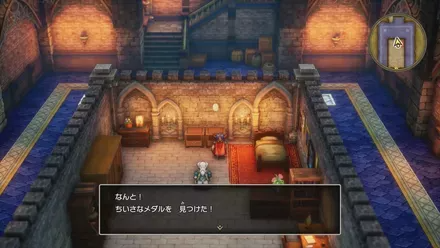
| 2 | 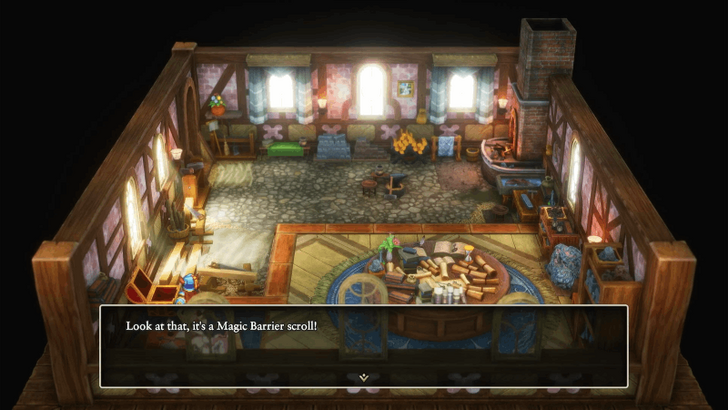 After a brief cutscene inside, open the treasure chest to get the Magic Barrier Scroll. Then, head to the northernmost house and check their drawer for a Mini Medal. Take your time exploring pots, drawers, barrels before heading out to collect more treasure if there are any left. |
| 3 | Since monsters around here start hitting harder, it’s a good idea to upgrade your equipment at the shop and restock healing items. Once you’re strapped and ready, it’s time to head south toward the Cave of the Dwarves. |
Cave of the Dwarves
| 1 | 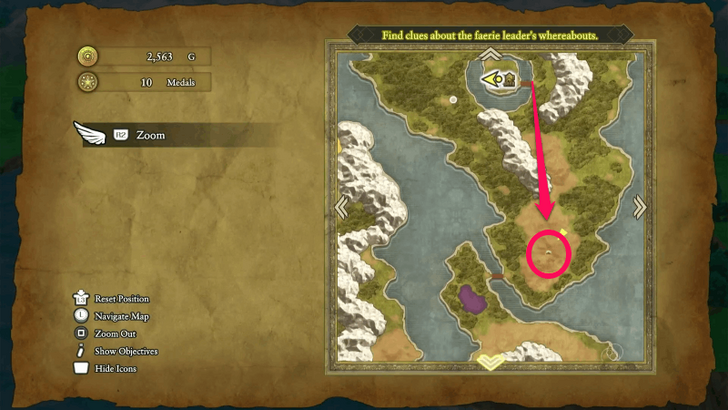 After leaving Rimuldar, open your map and head south to find the Cave of the Dwarves. It’s a sprawling dungeon, so make sure you’re stocked on healing items before you go in. |
|---|---|
| 2 | 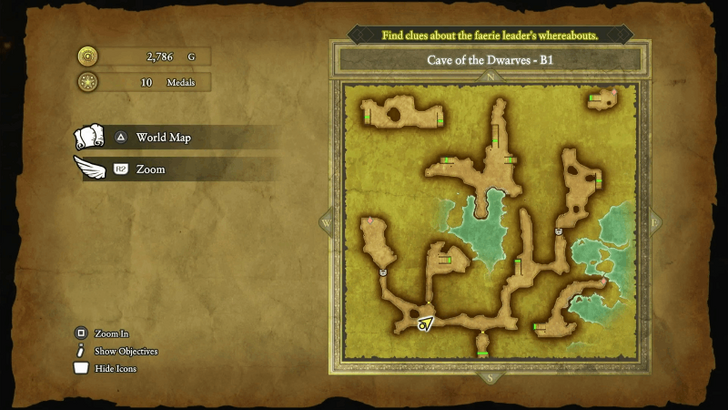 Once inside, check your map carefully, this cave’s full of branching paths and misleading dead ends. The treasure icons will guide you to where you need to go, but you’ll be hopping between B1 and B2 quite a bit to collect everything. ▶︎ Cave of the Dwarves Dungeon Guide |
| 3 | 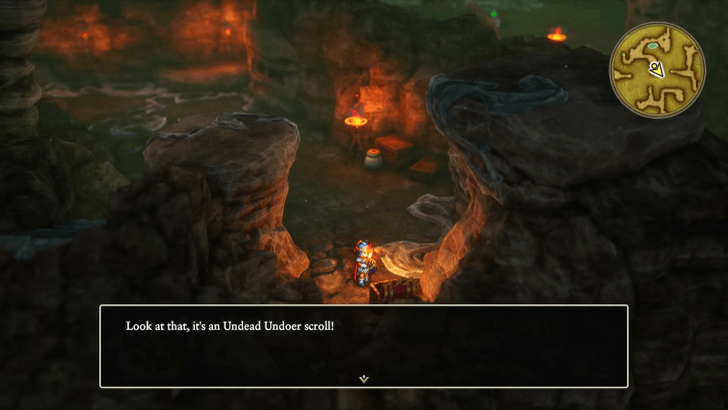 Some treasure spots on B1 are actually only reachable by going down to B2 first, then looping back up. Each staircase connects to a different area, so don’t be afraid to backtrack. Here’s what you can find in the cave: ・Ice Shield ・Miracle Slash Scroll ・Undead Undoer Scroll ・Mini Medal |
| 4 | 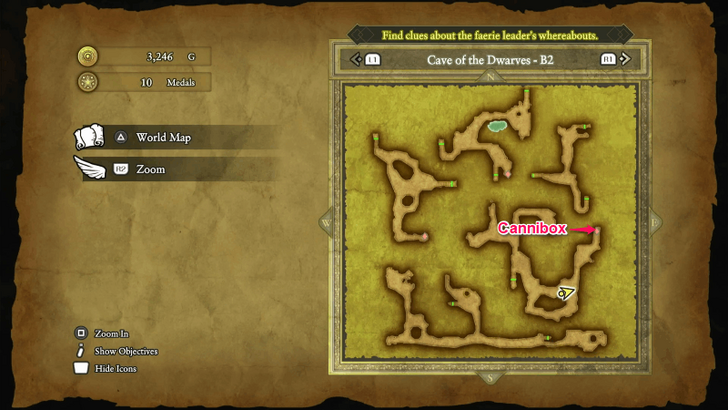 Beware though, as one of these treasure chests, specifically the one found on the rightmost part of the B2 map is actually a Cannibox in disguise. It’s way too strong to beat right now so it's best to just leave it alone for now and move on. |
| 5 | 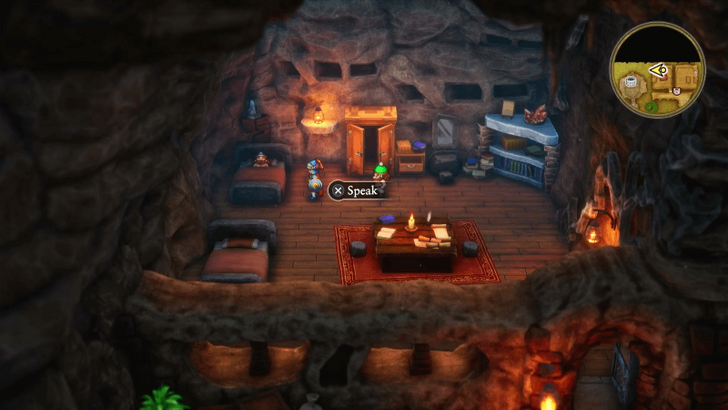 Once you’ve cleaned out the treasures (minus that locked room), head to B3. The stairs down are at the top of the B2 map. Inside the left room, talk to the dwarf for a short cutscene, then search the cabinet and drawer to score an Iron Lance and Oomph Powder. |
| 6 | 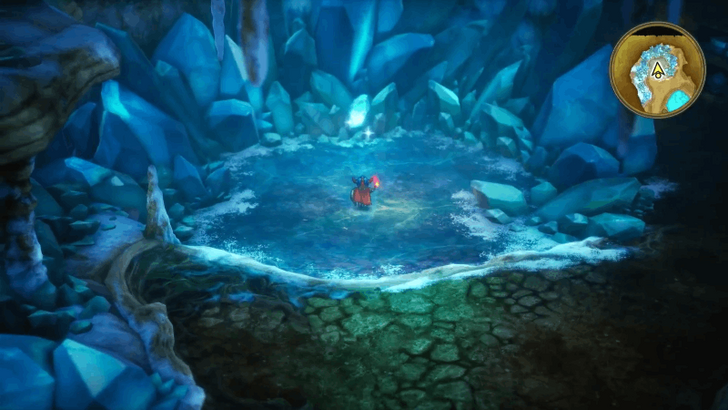 Exit the room and check the well nearby to descend another floor. Continue forward until you find a huge crystal formation with a sparkly light, examine it to obtain a Wellspring Crystal. Once you’ve got it, Zoom back to Faerie Village as that’s your next destination. |
Faerie Village and Damdara
| 1 | 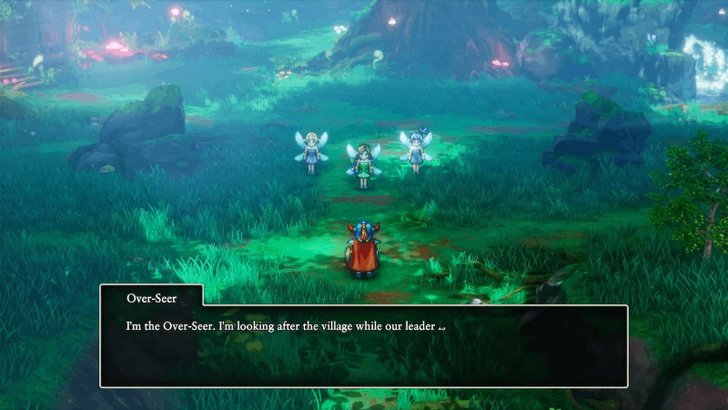 When you arrive at Faerie Village, a short cutscene will play. Afterward, head into the house on the left and speak to the fairy inside to trigger another event. |
|---|---|
| 2 | 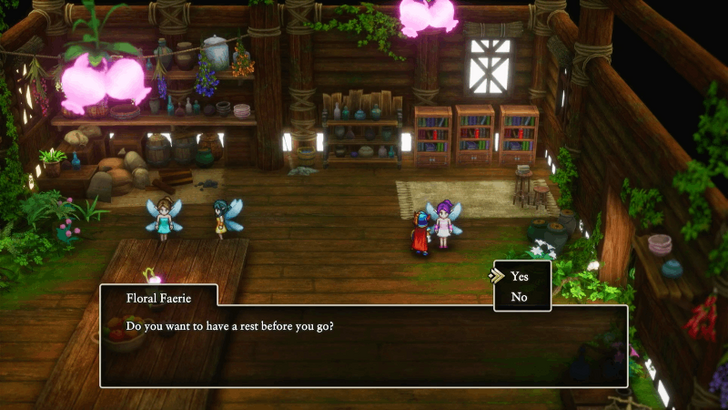 Accept the fairy’s request to rest, and another scene will play. The faeries will then ask you to gather the ingredients needed to craft the Sunup Syrup, found in the Field of Flowers to the west, your map will automatically mark the location for you. |
| 3 | 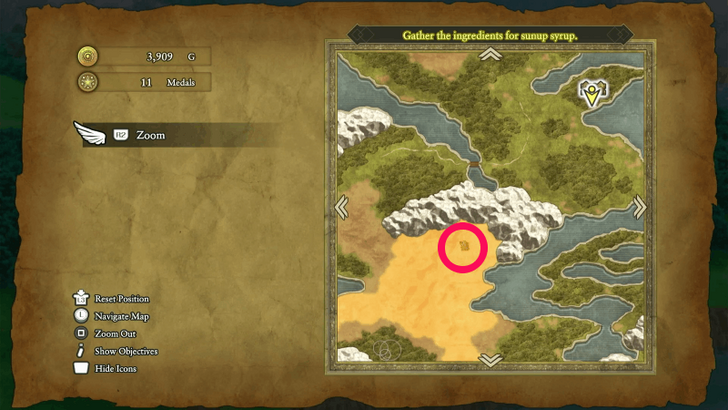 Before heading there, take a short detour to Damdara to unlock it as a Zoom teleport point. Once registered, don’t venture further in as the boss waiting there is far beyond your current level. |
On the Way to Field of Flowers
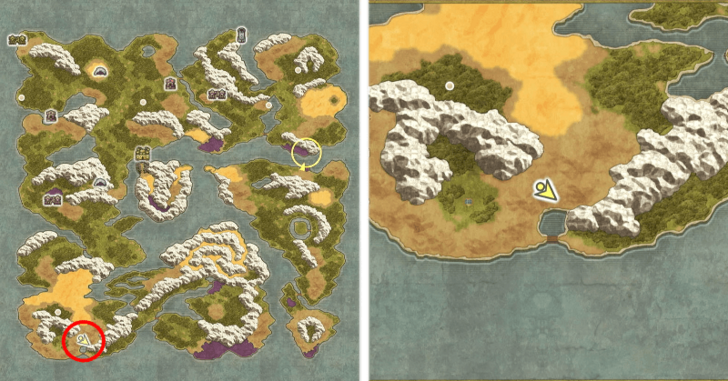
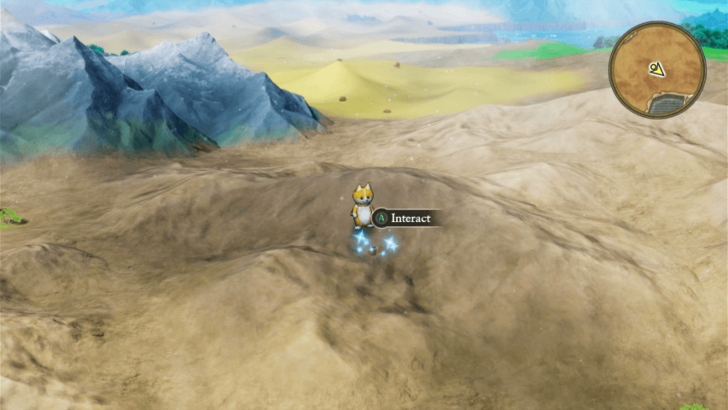
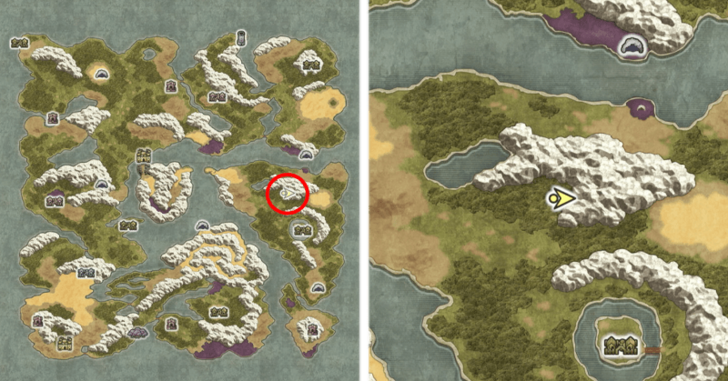
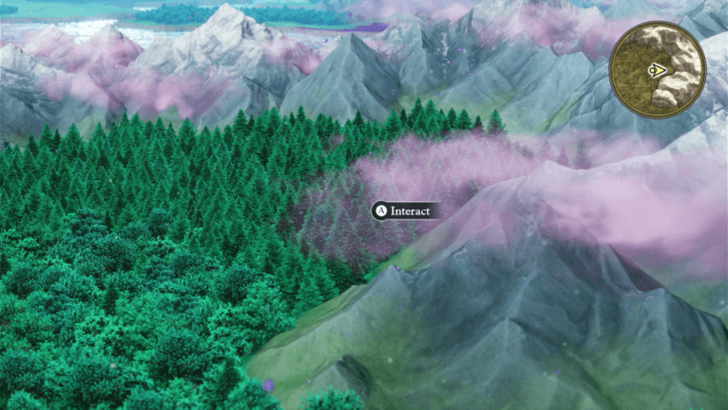
| 1 | 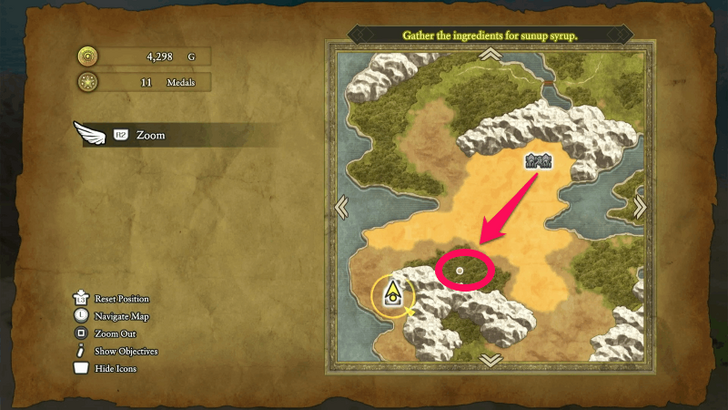 Leave Damdara and head south to discover a Secret Spot (you’ll see it marked if the setting’s toggled on). Enter the area to grab a few hidden treasures. |
|---|---|
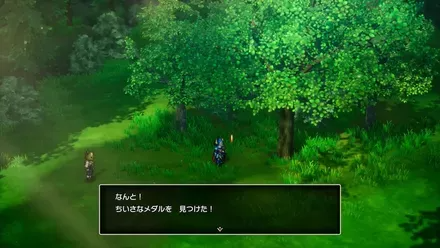
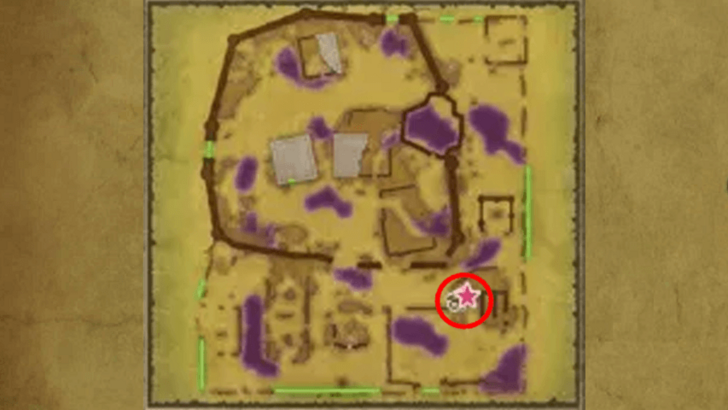
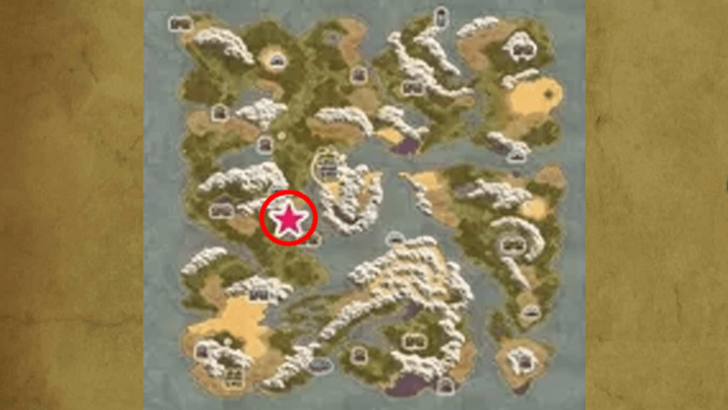
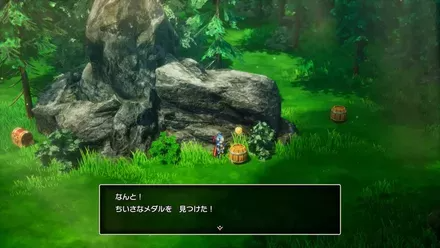
| 2 | 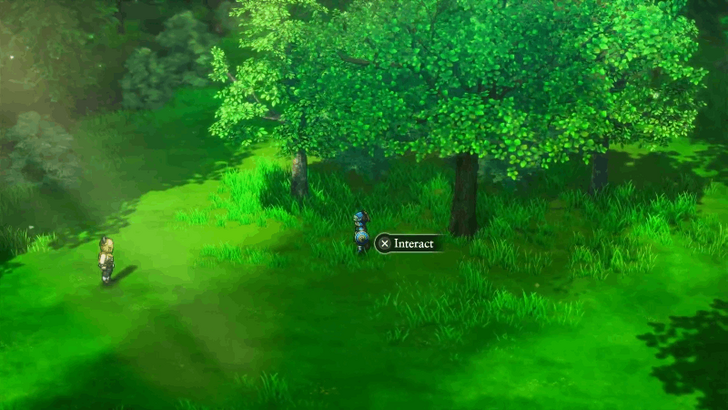 First, check the trees in the center of the map to find a Mini Medal. |
| 3 | 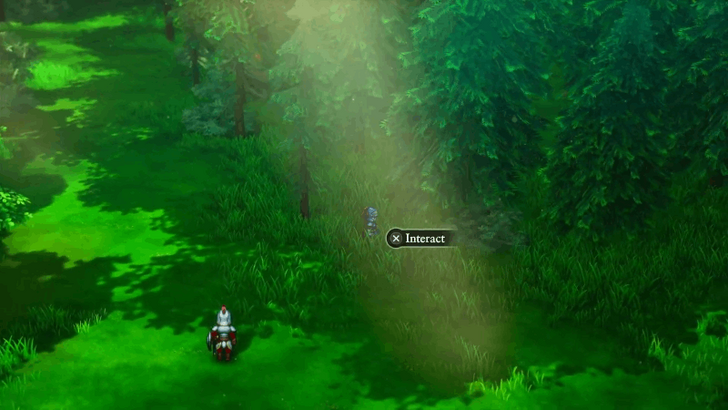 Then, go to the soldier nearby and search the ground around him to uncover a Stealth Suit. |
| 4 | 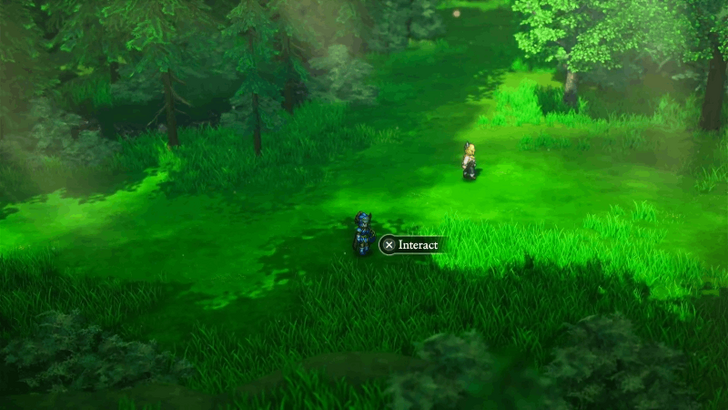 Finally, inspect the shadow beneath the tree near the other NPC to find 2,455 Gold. With all three treasures secured, head back out and make your way toward your next main objective. |
Field of Flowers and Back to Faerie Village
| 1 | The Field of Flowers lies just southwest of Damdara and is marked clearly on your map. Head there to begin collecting the ingredients needed to make the Sunup Syrup. ▶︎ Field of Flowers Location Guide |
|---|---|
| 2 | 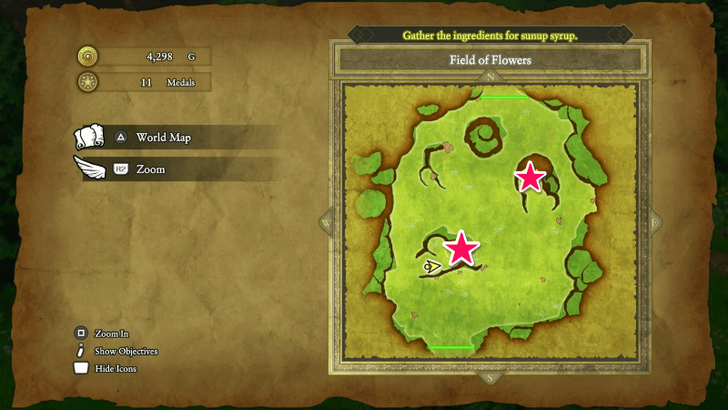 There are three ingredients to gather here: Wakerobin, Glimmergrass, and the Seeds, 2 are marked on the map and the latter appears after collecting both. Once collected, use Zoom to return to Faerie Village immediately. |
| 3 | 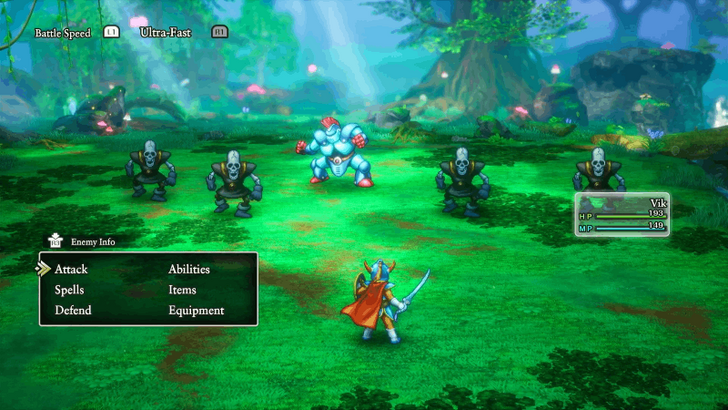 Upon returning to Faerie Village, a boss battle will trigger against a Knight Errant and several Dark Skeletons. Prioritize taking down the Dark Skeletons first as they deal heavy damage if left unchecked. Use the Undead Undoer spell for maximum effect. If the fight feels too tough, don’t sweat it, you can reload from your autosave once you get defeated, which is at the Field of Flowers. Grind a few levels before trying again. ▶︎ Death Penalty: What Happens When You Die? |
| 4 | After winning, you’ll obtain the Sunup Syrup. Make sure to rest and recover before leaving the village, as the upcoming sections feature tougher enemies and longer routes. |
Detours Before Quagmire Cave
| 1 | 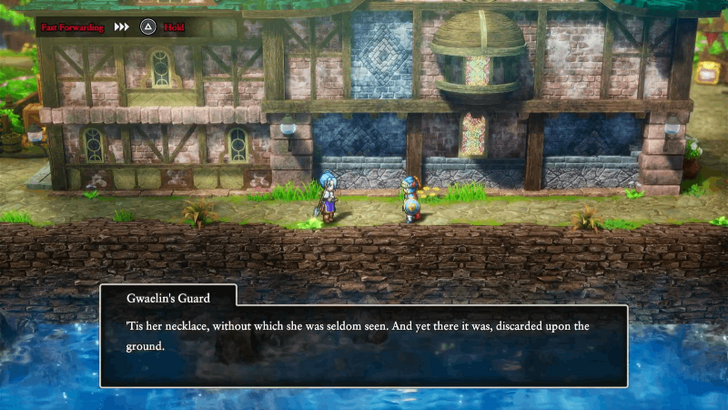 After obtaining the two vials of Sunup Syrup, your next move is to deliver them to your friends, one in Rimuldar and the other in the Cave of the Dwarves. Start by teleporting back to Rimuldar and administering the antidote there. After a brief cutscene, you’ll receive the Princess’s Necklace as a reward for your efforts.. |
|---|---|
| 2 | 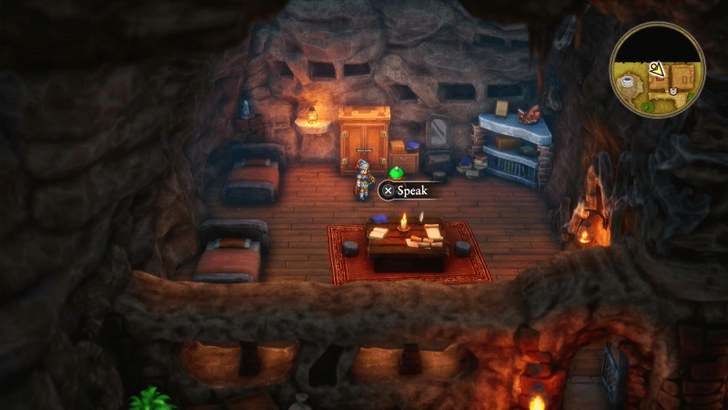 Next, head back to the Cave of the Dwarves and heal your second patient on B3. Once both are cured, your series of detours will now begin. |
| 3 |  Return to Rimuldar and pay another visit to the Warlock of Doorlocks. After a short cutscene, you’ll receive the Magic Key, which opens both Blue Doors and Blue Chests. |
| 4 | 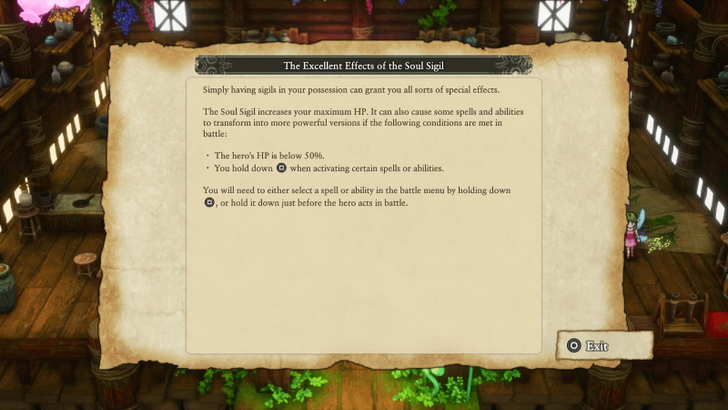 Next stop: Faerie Village. Enter the house on the right and watch a short scene unfold. When it ends, you’ll obtain the Soul Sigil, which boosts your max HP and can evolve your spells into stronger versions under specific conditions. ▶︎How to Get the Soul Sigil and Effects |
| 5 | 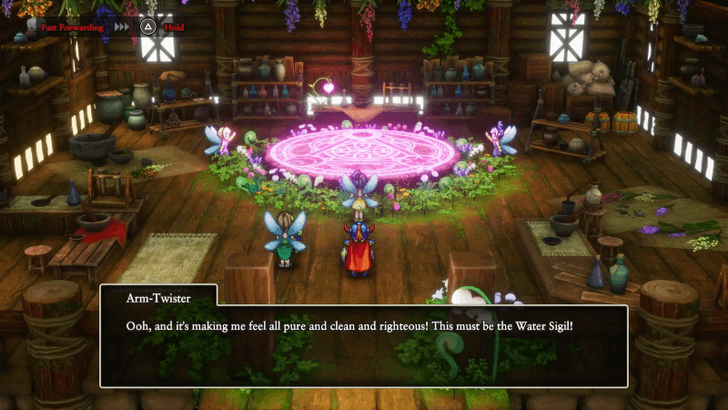 Talk to the faerie again to hand over your Wellspring Crystal. She’ll transform it into a Water Sigil, enhancing the potency of your healing items, and its effects stay active just by keeping it in your inventory. |
| 6 | 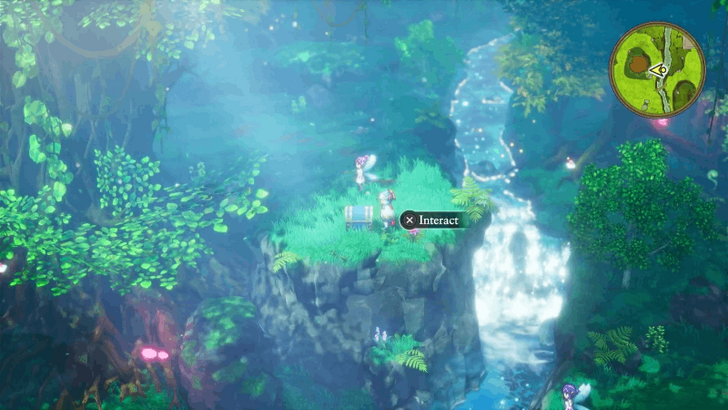 |
| 7 | 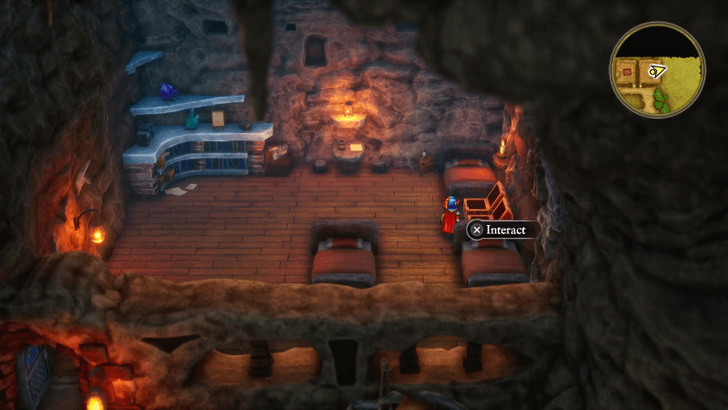 Head back once more to the Cave of the Dwarves, this time using your Magic Key to access the locked room on B3. Inside are two treasure chests containing a Tectonic Plate and a Strength Ring, both are powerful upgrades, so equip them immediately. |
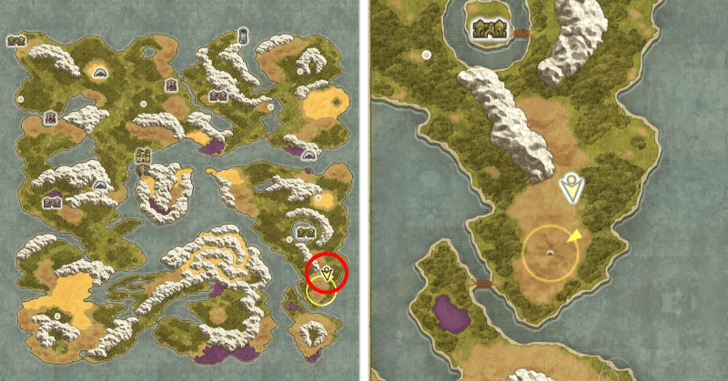
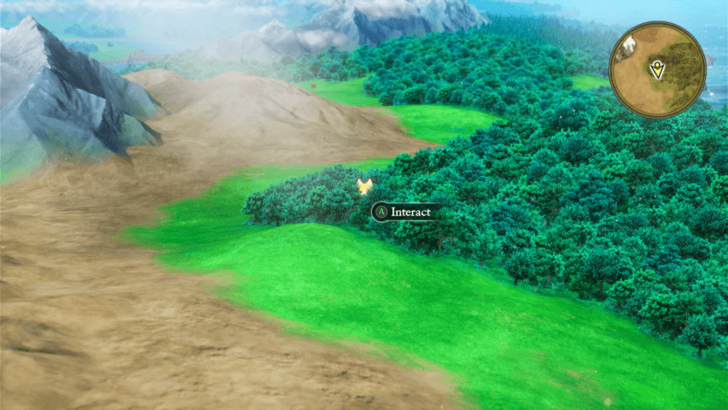
| 8 | 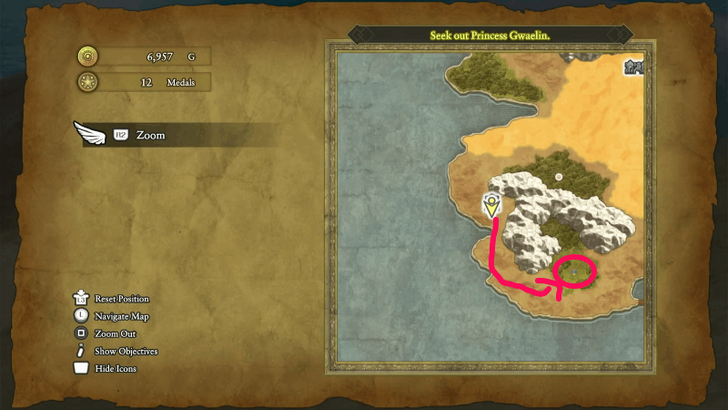 Teleport to the Field of Flowers, then travel southeast to reach the Citadel of the Monarch of Medals. |
| 9 | 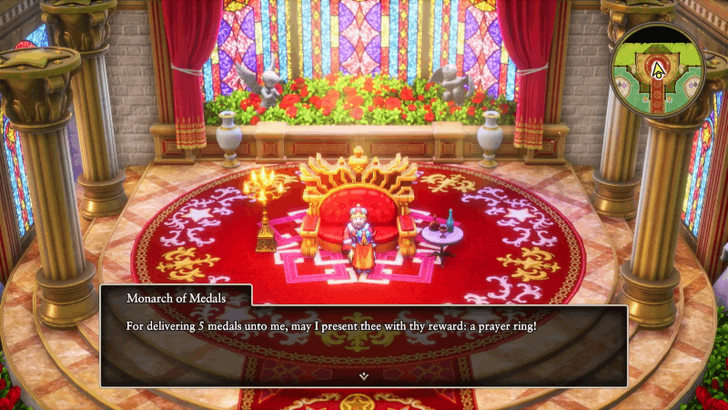 Once you arrive, speak to the Monarch of Medals to exchange your collected Mini Medals for rewards. Aim for at least 10 medals to earn: ・Prayer Ring ・Scholar’s Specs ・Wild Side Scroll ▶︎All Mini Medal Locations and Rewards |
| 10 | 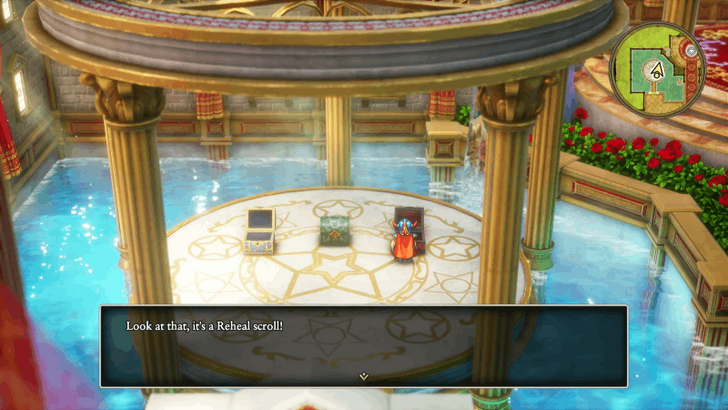 Don’t leave just yet, grab the red and blue chests beside the Citadel doors to claim: ・Phantom Mask ・Sage’s Elixir ・Pirate King’s Pendant ・Reheal Scroll Once you’ve looted everything, it’s time for one last detour: Kol Village. |
| 11 | 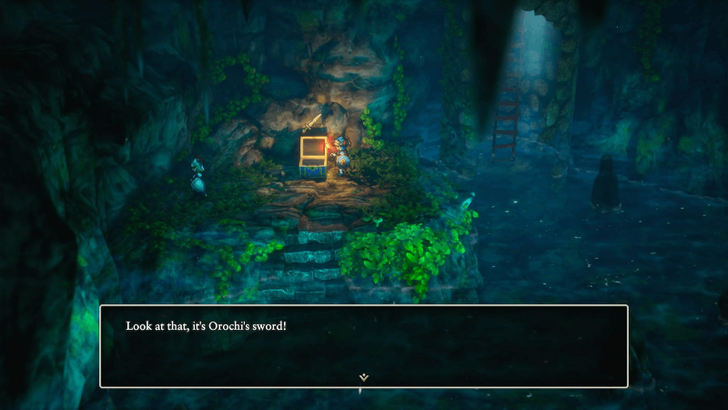 In Kol, check the well in the village center to find a Blue Chest containing the Orochi Sword, a powerful upgrade over your current Faerie Foil. |
| 12 | 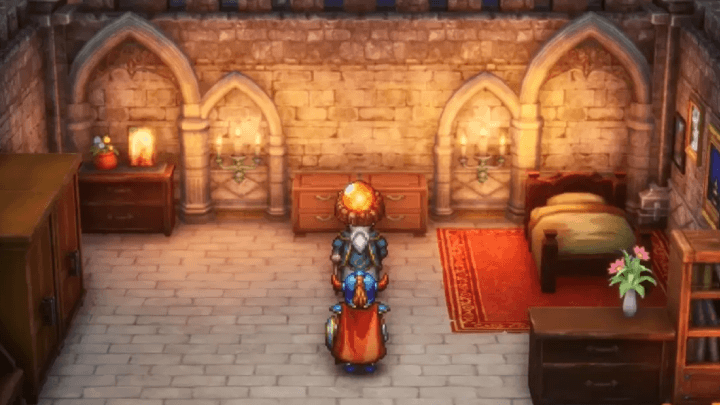 Finally, your last stop will be the basement of Tantegel Castle, which is accessed via the garden. Talk to the sage who resides here to receive the Sunstone, which will play an important role much later in the story. |
| 13 | With all detours done, spend some time leveling up before moving on. The next area, Quagmire Cave, is crawling with tough enemies that can easily wipe you out. Once you’re confident, teleport back to Quagmire Cave. ▶︎ EXP Farm: How to Level Up Fast |
Quagmire Cave (Revisit)
| 1 | Inside Quagmire Cave, unlock the door on the lower right using your newly obtained Magic Key, then proceed deeper into the cave. ▶︎ Quagmire Cave Dungeon Guide |
|---|---|
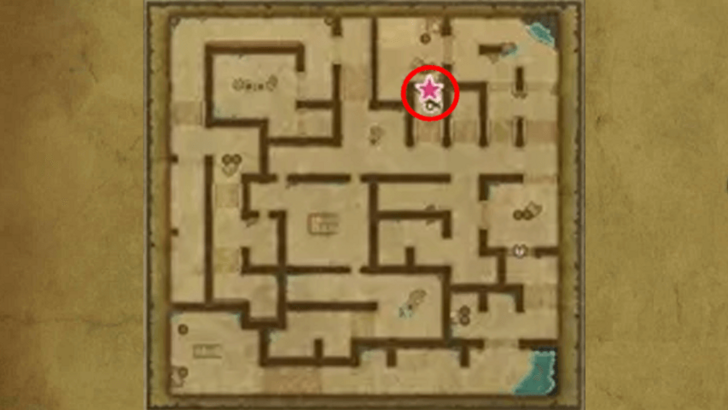
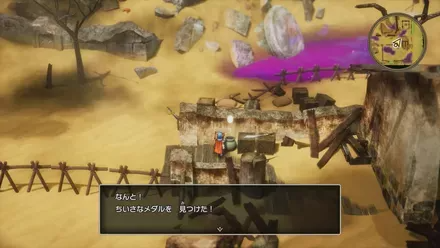
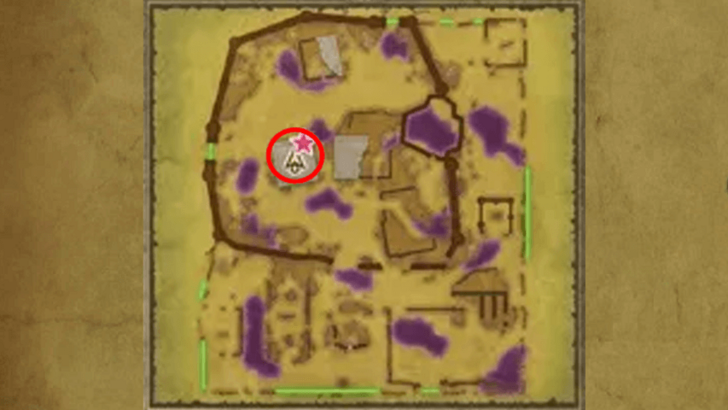
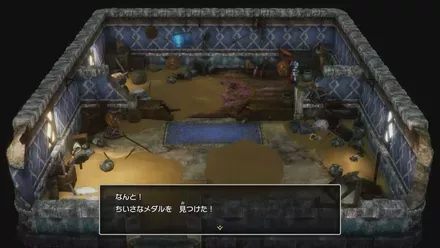
| 2 | 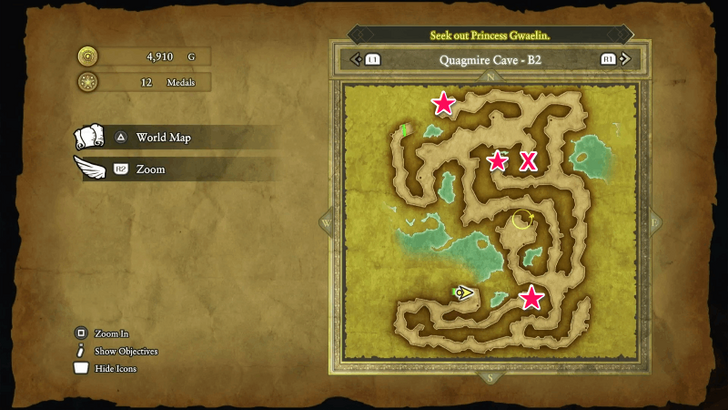 On B2, you’ll find four treasure chests but beware as one of them is a Cannibox. Avoid the one marked X on the image shown here. The safe treasures on this floor include: ・Special Medicine ・Mini Medal ・Mad Cap |
| 3 | There’s also a Moonbeam Dew located in the center of the map, sparkling faintly. Don’t miss it before heading back up. |
| 4 | 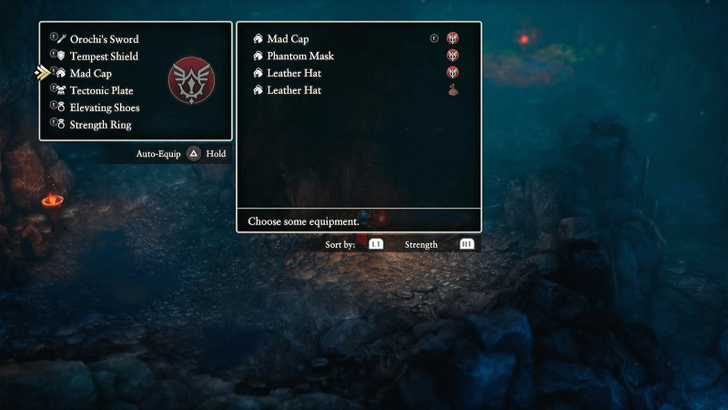 Return to B1, then follow the path to the marked indicator on your map. Your next challenge awaits, the Green Dragon. Equip the Mad Cap beforehand to halve your MP costs, making spellcasting much easier during the fight. |
| 5 | 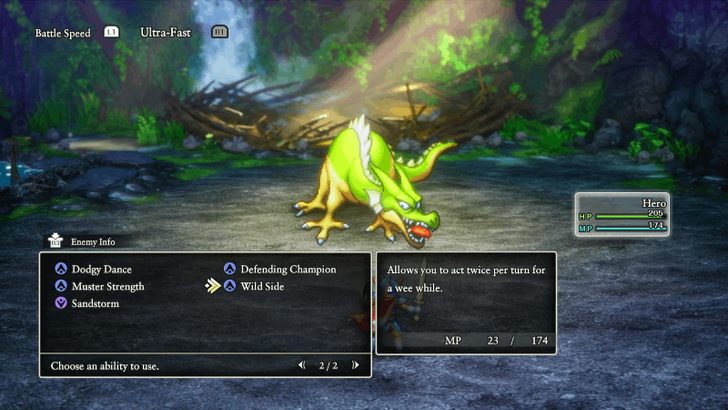 Face the Green Dragon, one of the fiercest bosses in the game. It uses strong normal attacks and Fire Breath, so keep your HP above 40 to survive. A good strategy is alternating between Wild Side and Dragon Slash. The former lets you act twice, and the latter deals heavy damage to dragon-type enemies. With Mad Cap equipped, MP won’t be an issue. When weakened, the Green Dragon may use Wild Side, attacking multiple times in a row, so finish it off quickly! ▶︎ Green Dragon Boss Guide |
| 6 | 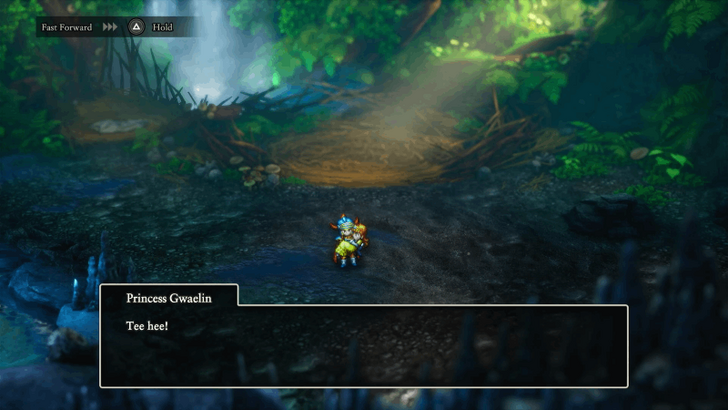 Once defeated, the princess will temporarily join your party as you escort her back to Tantegel Castle. After the boss's defeat, you'll need to escort Princess Gwaelin back to Tantegel Castle. You can take the long way back or use the Chimaera Wing / Zoom Spell to teleport directly to Tantegel Castle. Once at the castle, speak to the princess and she'll give you the Princess's Necklace. |
Encounterable Enemies and Bosses
Enemies
 Ghost Ghost
|
 Drackolyte Drackolyte
|
 Scorpion Scorpion
|
 Skeleton Skeleton
|
 Prestidigitator Prestidigitator
|
 Lunatick Lunatick
|
 Bewarewolf Bewarewolf
|
 Legerdeman Legerdeman
|
 Iron Scorpion Iron Scorpion
|
 Scarewolf Scarewolf
|
 Bag O' Laughs Bag O' Laughs
|
 Imp Imp
|
 Lump Wizard Lump Wizard
|
 Fat Rat Fat Rat
|
 Restless Armour Restless Armour
|
 Antguzzler Antguzzler
|
 Madusa Madusa
|
List of All Monsters and Enemies
Green Dragon
 Green Dragon |
|
| EXP | 2540 |
|---|---|
| Gold | 2200 |
The Green Dragon can be a real drag if you go in unprepared. To make this fight manageable, gear up with your strongest weapons, armor, and accessories, and don’t forget to equip the Mad Cap. You’ll find it inside Quagmire Cave, so getting one shouldn’t be a problem.
The key to victory lies in just two abilities: Wild Ride and Dragon Slash. Wild Ride lets you attack or cast spells twice in one turn, while Dragon Slash deals extra damage to dragon-type enemies. When you combine the two, you can strike the Green Dragon twice with Dragon Slash, dealing massive damage in a single round. Be careful, though, once its HP gets low, the Green Dragon will also use Wild Ride, so finish the battle quickly before it turns the tables.
Knight Errant
 Knight Errant |
||
| EXP | 104 | |
|---|---|---|
| Gold | 58 | |
| Abilities/Spells | ||
|
• Fizzle |
||
Beware of the Knight Errant's strongest trick: silencing you by casting Fizzle. This won't be quite bothersome though since it doesn't stop you from using abilities.
Additionally, he will be joined by 4 Dark Skeletons that will deal massive damage if ignored. Use Undead Undoer on the Skeletons while using the Miracle Slash on the boss, so you'll recover lost HP while you inflict damage.
All Sparkly Spot Locations
| Location | Rewards |
|---|---|
  Found just southwest of Damdara. |
• Chimaera Wing x1 • Handful of Frazzled Feathers x1 • Agility Ring x1 |
  Found at the southmost part of Damdara. |
• Iron Armour x1 • Ring of Clarity x1 |
  Found in the trees south of Rimuldar. |
• Antidotal Herb x2 • Medicinal Herbs x1 • Seed of Wisdom x1 |
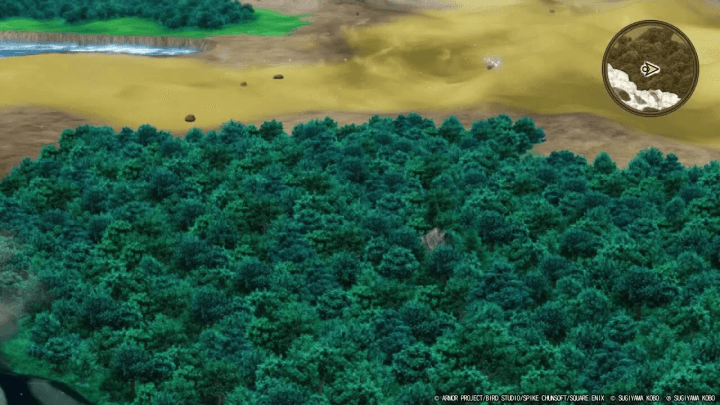
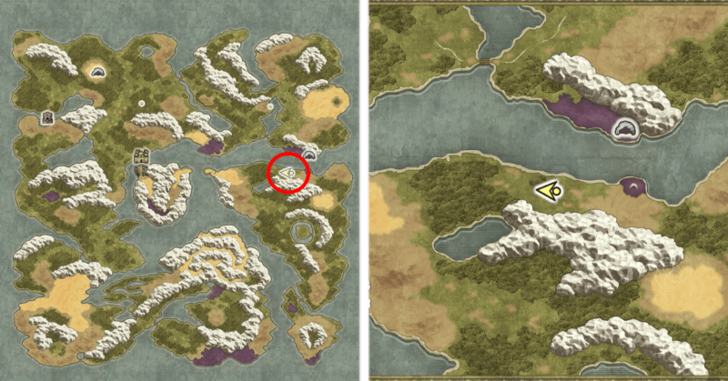 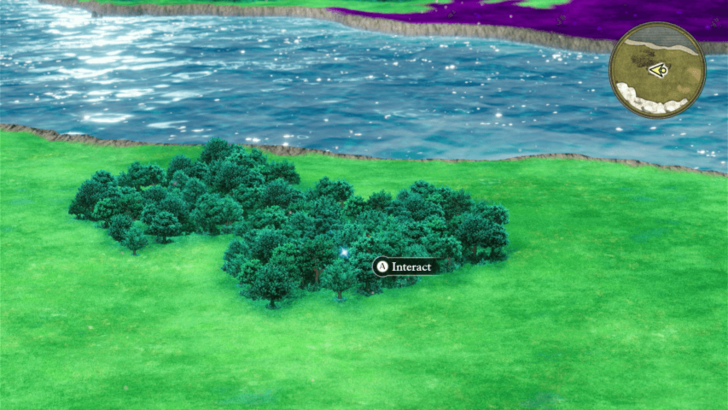 Found in a bunch of trees just west of the southern entrance of Quagmire Cave. |
• Seed of Stamina x1 • Medicinal Herb x2 |
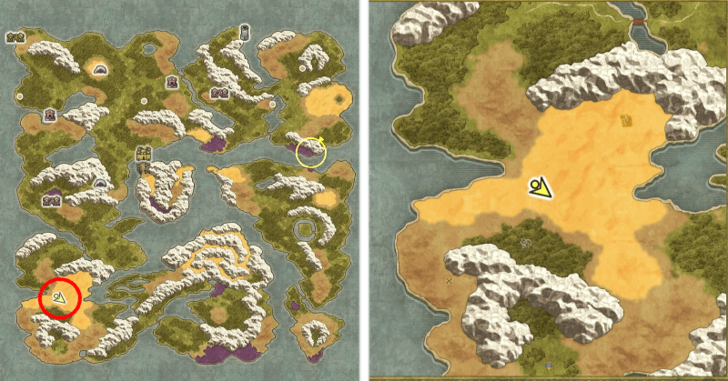
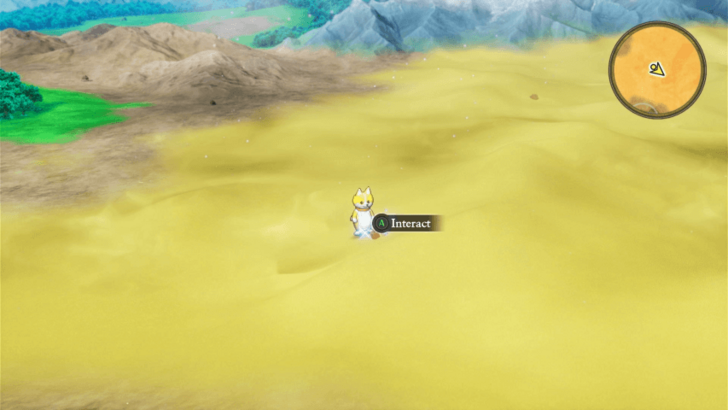
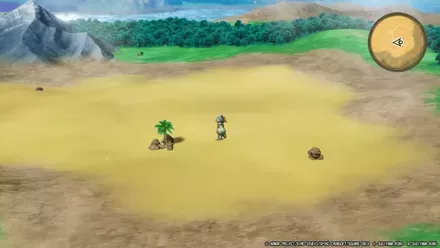
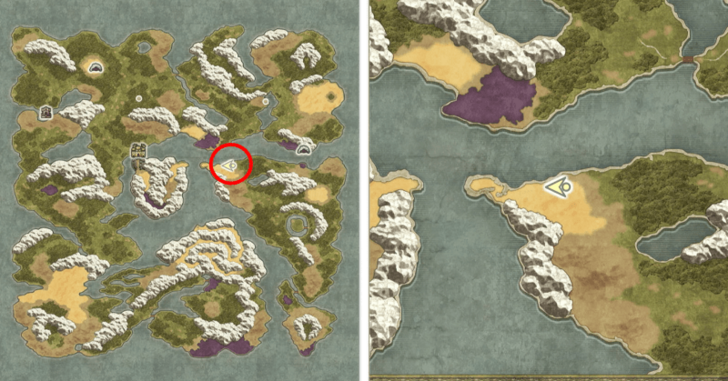 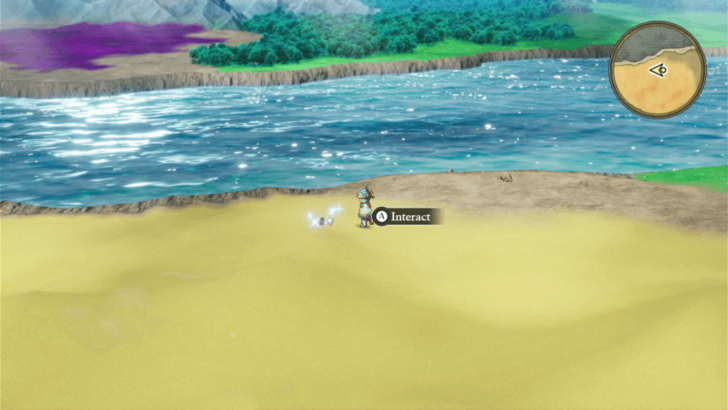 Found in the sandy area far west of the southern entrance of Quagmire Cave. |
• Chimaera Wing x1 • Pouch of Musk x1 • Magic Water x1 |
  Found in a bunch of trees southeast of the southern entrance of Quagmire Cave. |
• Strong Medicine x1 • Seed of Luck x1 |
  Found in a bunch of trees southwest of Rimuldar. |
• Unsealant x2 • Seed of Magic x1 |
  Found in a bunch of trees near the mountain northeast of Damdara. |
• Dazzle-me-not x2 • Strong Medicine x1 • Seed of Strength x1 |
  Found in a bunch of trees at the center of the mountain southwest of Damdara. |
• Gold x173 • Oomph Powder x1 • Asbestos Earrings x1 |
  Found in a bunch of trees just northeast of Quagmire Cave. |
• Antidotal Herb x1 • Seed of Strength x1 |
  Found in the trees near the mountain north of Rimuldar. |
• Leather Suit x1 • Fur Hood x1 |
Here is a list of all known Sparkly Spot locations you can find during this part of the walkthrough. We’re still looking for more, so check back soon for updates!
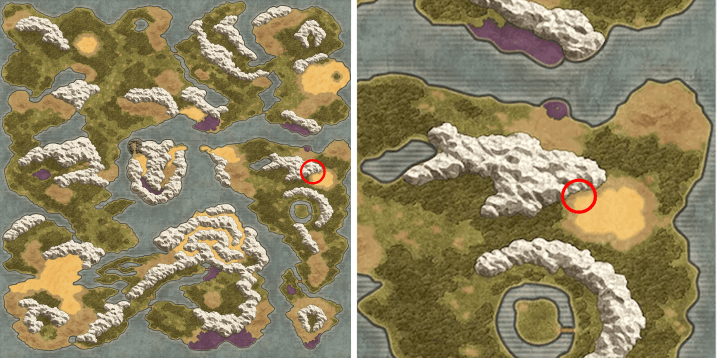
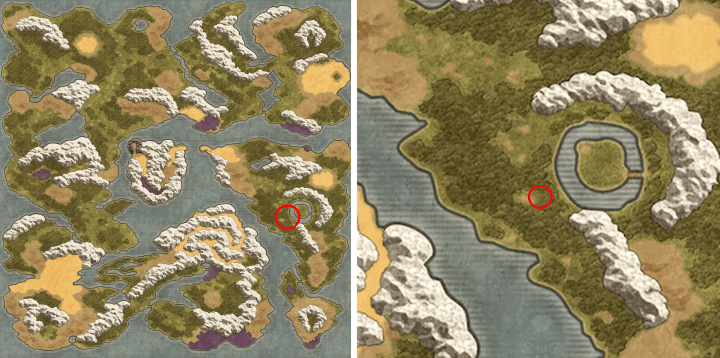
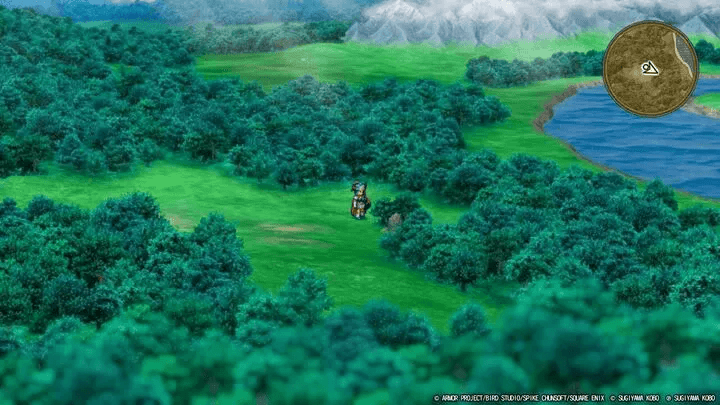
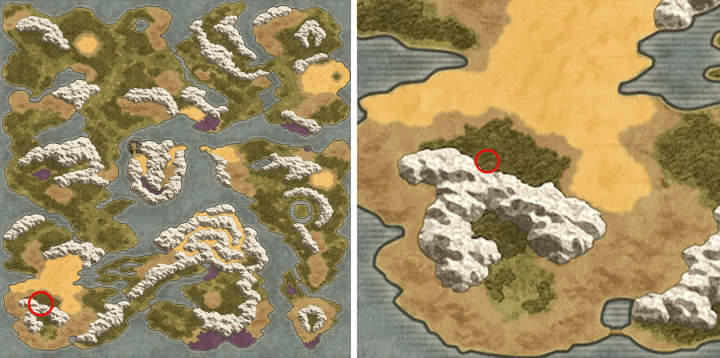
All Secret Spot Locations
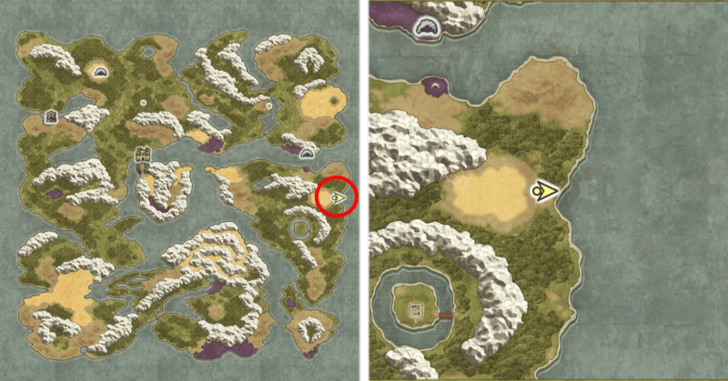
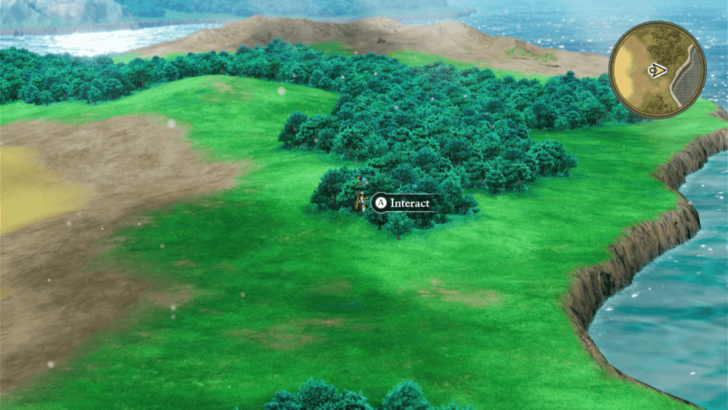
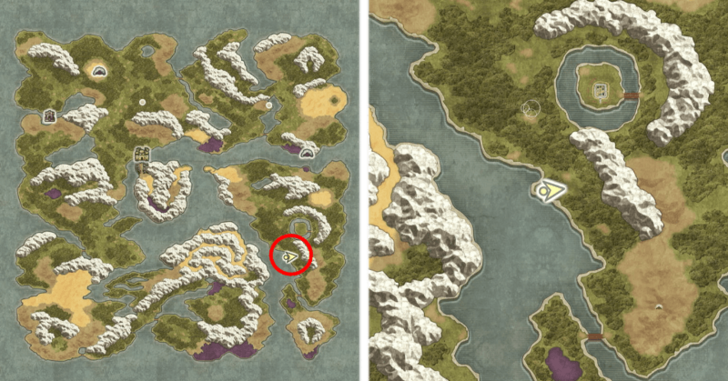
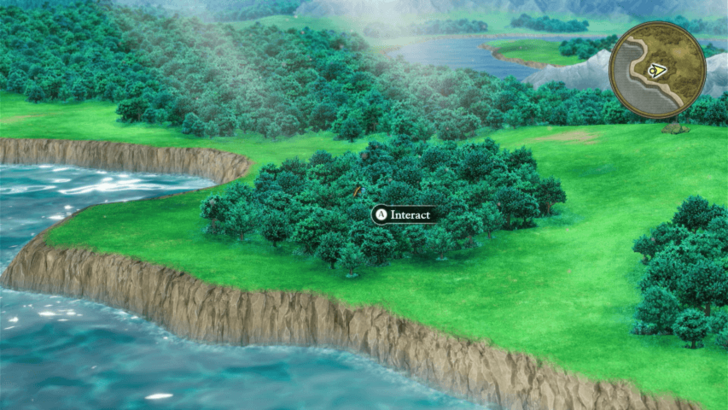
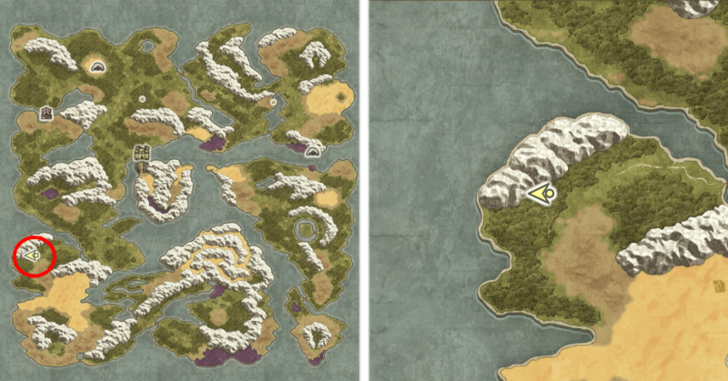
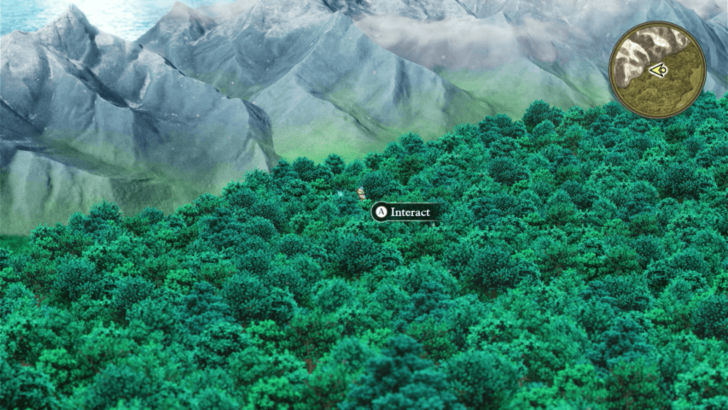
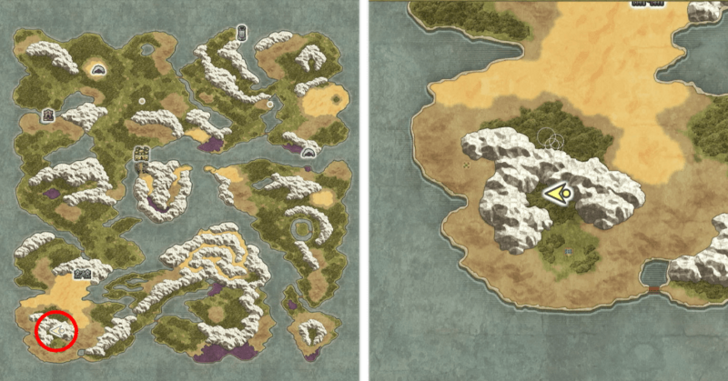
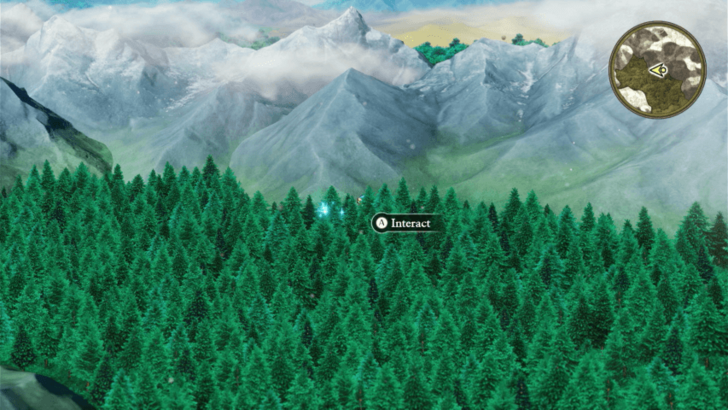
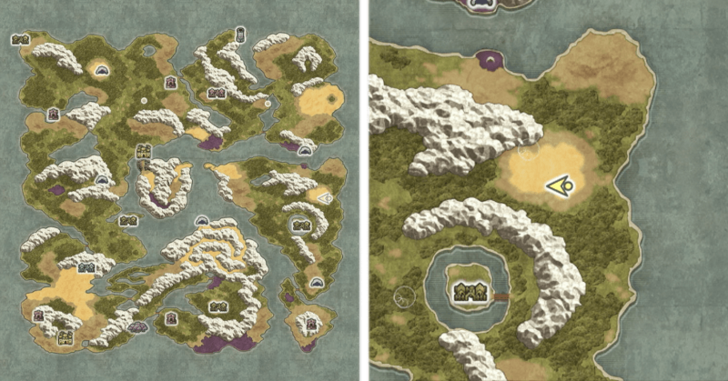
| Map Image | World Image |
|---|---|
 |
 |
 |
 |
 |
 |
 |
 |
Here is a list of all known Secret Spot locations you can find during this part of the walkthrough. We’re still looking for more, so check back soon for updates!
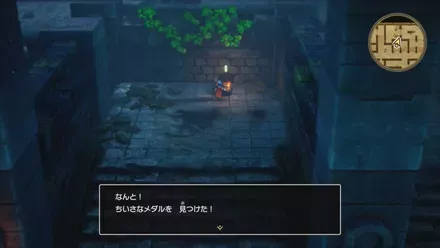
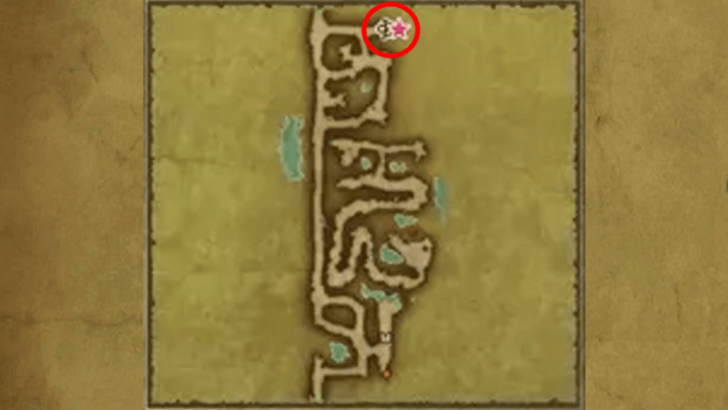
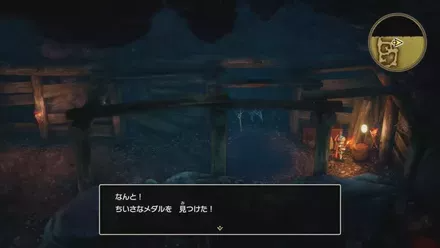
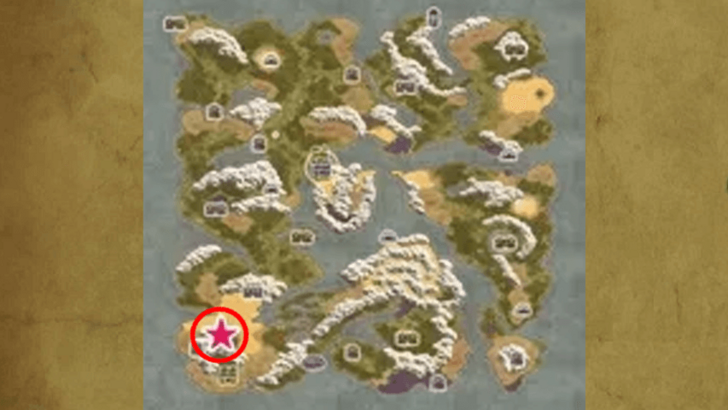
All Mini Medal Locations
| Map Image | World Image |
|---|---|
 |
 |
 |
 |
 |
 |
 |
 |
 |
 |
 |
 |
 |
 |
 |
 |
 |
 |
 |
 |
Here is a list of all known Mini Medal locations you can find during this part of the walkthrough.
All Mini Medal Locations and Rewards
Dragon Quest I & II HD-2D Remake Related Guides
List of All Story Walkthroughs
| 1 | Tantegel Castle to Craggy Cave |
|---|---|
| 2 | Quagmire Cave to Green Dragon Boss Fight |
| 3 | Weirdwood to Weeping Isle |
| 4 | Preparations Before the Final Dungeon |
| 5 | Dragonlord's Castle and Final Boss |
| 6 | List of All Endings |
Comment
Author

Walkthrough Part 2: Quagmire Cave to Green Dragon Boss
Rankings
- We could not find the message board you were looking for.
Gaming News

![Death Stranding 2: On The Beach [PC] Review | A Port That Delivers](https://img.game8.co/4447392/15310a0c9aa1b6843bb713b2ea216930.jpeg/show)


Popular Games

Genshin Impact Walkthrough & Guides Wiki
Umamusume: Pretty Derby Walkthrough & Guides Wiki
Crimson Desert Walkthrough & Guides Wiki
Monster Hunter Stories 3: Twisted Reflection Walkthrough & Guides Wiki
Honkai: Star Rail Walkthrough & Guides Wiki
Pokemon Pokopia Walkthrough & Guides Wiki
The Seven Deadly Sins: Origin Walkthrough & Guides Wiki
Wuthering Waves Walkthrough & Guides Wiki
Zenless Zone Zero Walkthrough & Guides Wiki
Arknights: Endfield Walkthrough & Guides Wiki


Recommended Games
Fire Emblem Heroes (FEH) Walkthrough & Guides Wiki
Diablo 4: Vessel of Hatred Walkthrough & Guides Wiki
Cyberpunk 2077: Ultimate Edition Walkthrough & Guides Wiki
Yu-Gi-Oh! Master Duel Walkthrough & Guides Wiki
Super Smash Bros. Ultimate Walkthrough & Guides Wiki
Pokemon Brilliant Diamond and Shining Pearl (BDSP) Walkthrough & Guides Wiki
Elden Ring Shadow of the Erdtree Walkthrough & Guides Wiki
Monster Hunter World Walkthrough & Guides Wiki
The Legend of Zelda: Tears of the Kingdom Walkthrough & Guides Wiki
Persona 3 Reload Walkthrough & Guides Wiki


All rights reserved
© ARMOR PROJECT/BIRD STUDIO/SPIKE CHUNSOFT/SQUARE ENIX
© SUGIYAMA KOBO ℗ SUGIYAMA KOBO
The copyrights of videos of games used in our content and other intellectual property rights belong to the provider of the game.
The contents we provide on this site were created personally by members of the Game8 editorial department.
We refuse the right to reuse or repost content taken without our permission such as data or images to other sites.