100% Walkthrough Guide
This is a 100% walkthrough guide for Dragon Quest 1 HD-2D Remake (DQ1). It includes all the story steps from the early, mid, and late games, as well as tips on how to beat bosses.
List of Contents
 Attention! Attention! |
This page contains major spoliers for Dragon Quest 1 HD-2D Remake! Continue reading on at your own risk. |
|---|
List of All Story Walkthroughs
There are no chapters or separate main quests in this game, with the hero setting out on one long journey from start to end.
Tantegel Castle to Craggy Cave
| Jump to an Area Walkthrough! | |||
|---|---|---|---|
| 1 | Tantegel Castle and Town | 2 | Erdrick's Hollow |
| 3 | Tantegel Castle and Wayfarer's Chapel | 4 | Forgotten Ruins |
| 5 | The Bridge and Kol | 6 | Shrine of Rain |
| 7 | Galenholm | 8 | Roadside Inn |
| 9 | Nameless Ruins | 10 | Faerie Village |
| 11 | Craggy Cave | 12 | Faerie Village (Revisit) |
Tantegel Castle and Town
| 1 | 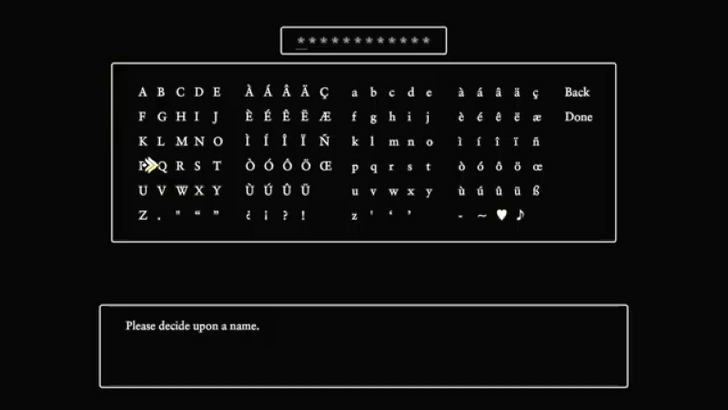 Start the game by naming your character. The first four letters of your name will affect your starting stats, so don’t hesitate to restart and try different names until you land on a set of stats you like. After selecting your game's difficulty, the game will start and you’ll begin inside the throne room of Tantegel Castle. After a brief cutscene, speak to the King to receive your first objective and begin your adventure. ▶Does the Protagonist Have a Canon Name? |
|---|---|
| 2 | 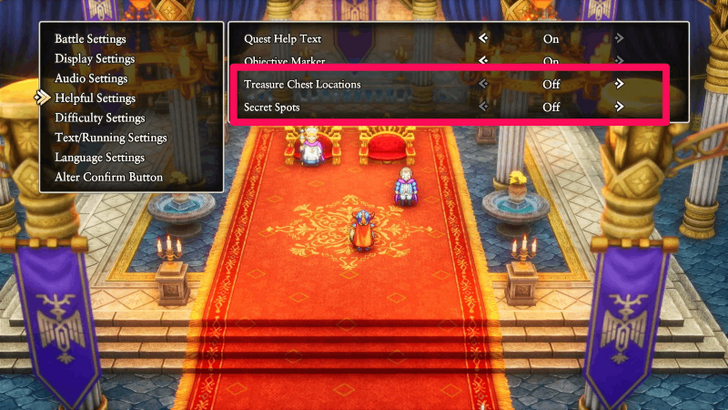 Once you’ve gained control, head into the game settings and tweak the options to your liking. The default setup works fine, but we recommend adjusting the Helpful Settings so that you'll see every treasure and Secret Spots in the map. ▶ All Secret Spot Locations |
| 3 | 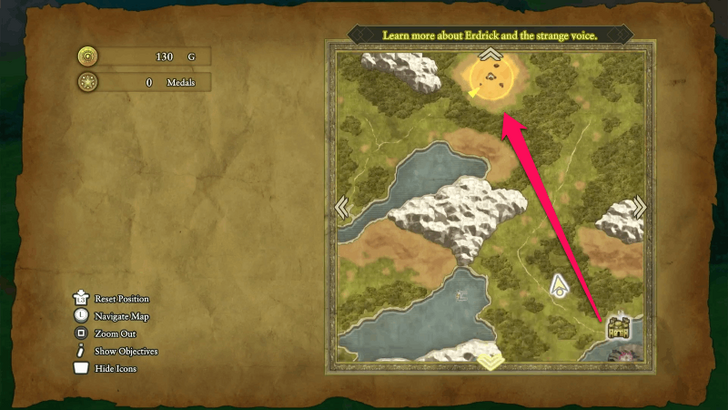 After exploring Tantegel Castle and Town, leave the area and travel north to find Erdrick’s Hollow. Battle monsters along the way to earn EXP and gold, and keep an eye out for Sparkly Spots, which can reward you with useful items or early high quality equipment. ▶ Erdrick’s Hollow Dungeon Guide |
| 4 | 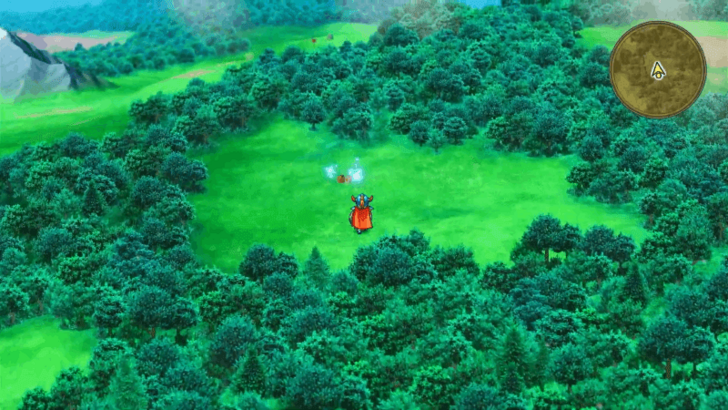 While traveling, you'll notice sparkling glints in the overworld, these are Sparkly Spots. These spots often contain better gear or valuable gold. It’s worth taking short detours to grab these before heading into Erdrick’s Hollow. ▶ List of All Sparkly Spots |
Erdrick's Hollow
| 1 |  You’ll enter Erdrick’s Hollow starting at B1. Move forward to trigger a short cutscene. Afterward, you can proceed to B2, but before doing so, make sure to open all the treasure chests on this floor. You’ll find a Leather Shield, Sand Smoke Scroll, Sacred Knife, and a Dragon Scale, all of which will be useful early on. |
|---|---|
| * | Scrolls teach your Hero new skills once used, so it’s best to use them right away after obtaining them. This lets you access more abilities early, giving you an edge in upcoming battles. ▶ List of All Scrolls and Locations |
| 2 | 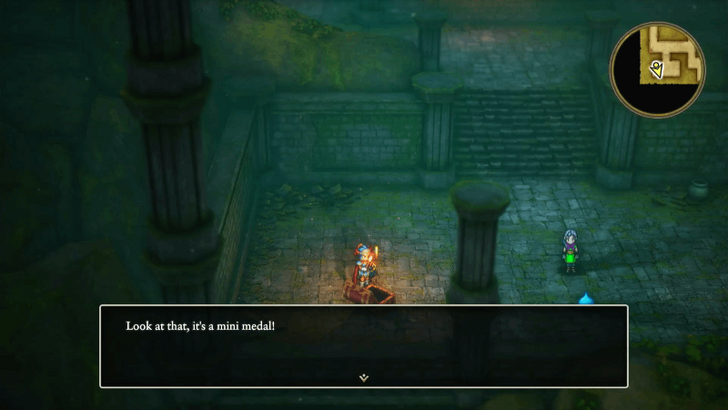 Upon reaching B2, look for a treasure chest near the girl speaking to a Slime, it contains a Mini Medal. Continue following the path to reach Erdrick’s Tablet, opening any remaining chests along the way, and read the inscription on the headstone when you arrive. ▶All Mini Medal Locations and Rewards |
| 3 | After reading the inscription and watching the cutscene, use a Chimaera Wing to exit Erdrick’s Hollow and teleport back to Tantegel. |
Tantegel Castle and Wayfarer's Chapel
| 1 | 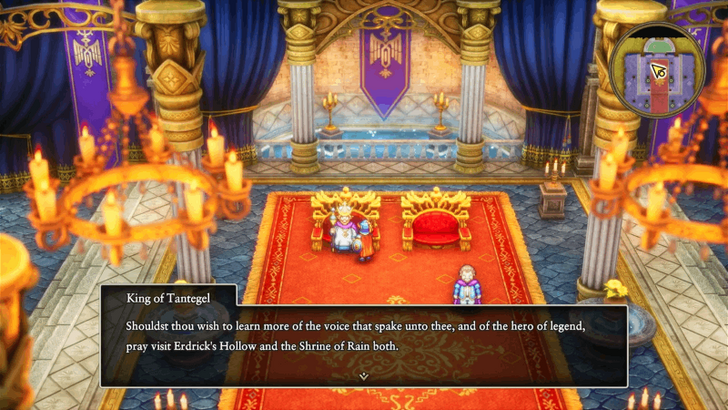 Upon returning to town, head straight back to the castle and talk to the King. Report your progress, and he’ll instruct you to head toward the Shrine of Rain next. |
|---|---|
| 2 | 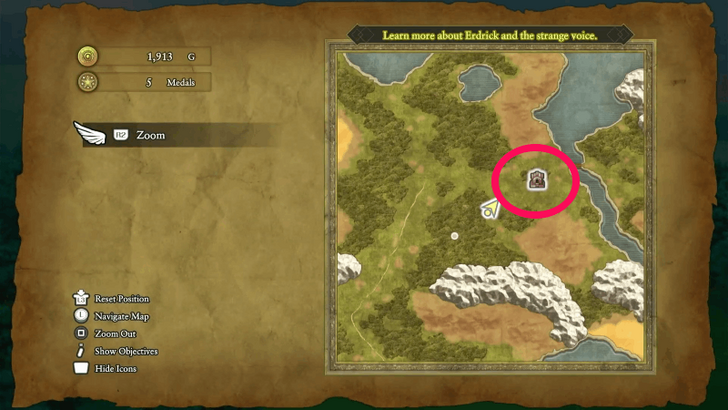 After reporting to the King, travel north until you reach the Wayfarer’s Chapel. Doing so will unlock it as a Zoom/Chimaera Wing teleport point, making future travel easier. |
Forgotten Ruins
| 1 |  Leave the chapel and cross the bridge to reach the Forgotten Ruins. Search the barrel near one of the houses to find a Mini Medal. You’ll also spot an NPC with an exclamation mark near the pond, that’s Zalen. Talk to him before you move on. ▶All Zalen Sidequest Locations |
|---|
The Bridge and Kol
| 1 | 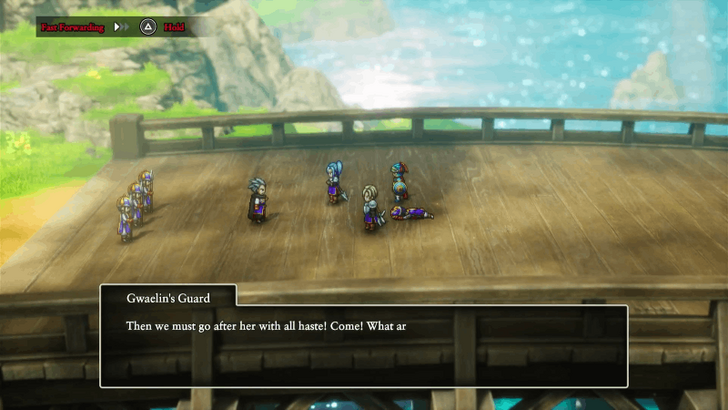 After leaving the Forgotten Ruins, continue south to reach the bridge. A short cutscene will play and once it ends, cross over to the other side. There’s nothing major here, so keep going. |
|---|---|
| 2 | 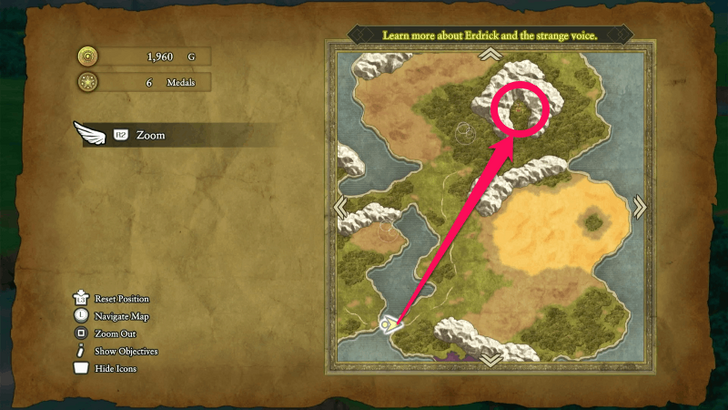 After crossing the bridge, head north to reach the village of Kol, nestled in a forest surrounded by mountains. Check for Sparkly Spots along the way for bonus loot. |
| 3 | Once you arrive, visit the shop on the left to restock essential items, especially Chimaera Wings. If you’ve saved enough gold, consider upgrading your weapons. Don’t forget to check the pots nearby for a hidden Mini Medal before leaving. |
| 4 | 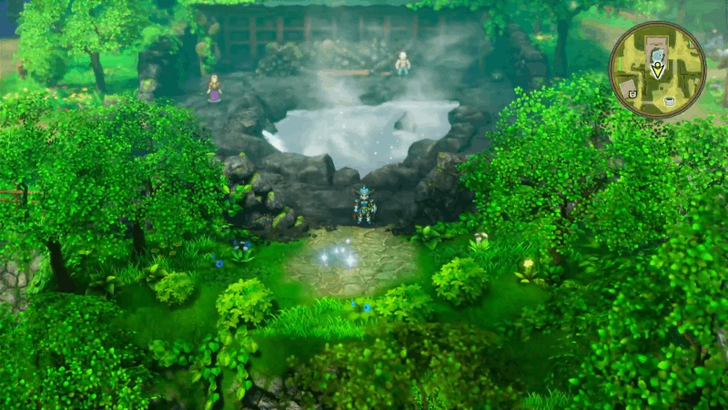 Head to the hot spring next and examine the sparkling glint on the ground to obtain the Faerie Flute, a key item you’ll need for an upcoming boss fight. |
| 5 | 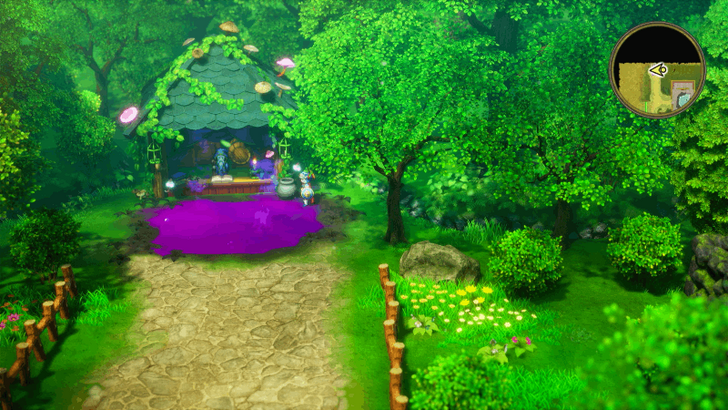 Near the stall with the poison puddle, examine the nearby pot to find another Mini Medal. Feel free to explore Kol and loot every barrel and pot for bonus items, though most equipment gotten from here isn’t worth the detour. Once done, you can leave the village and begin your journey toward the Shrine of Rain. |
Shrine of Rain
| 1 | 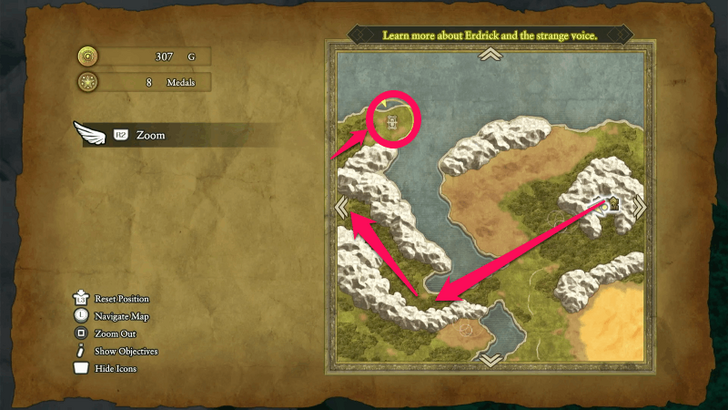 Your next destination is the Shrine of Rain, found west of Kol. It’s marked on the map, but the monsters along the route will be noticeably stronger, so come prepared with good gear and healing items. |
|---|---|
| 2 | 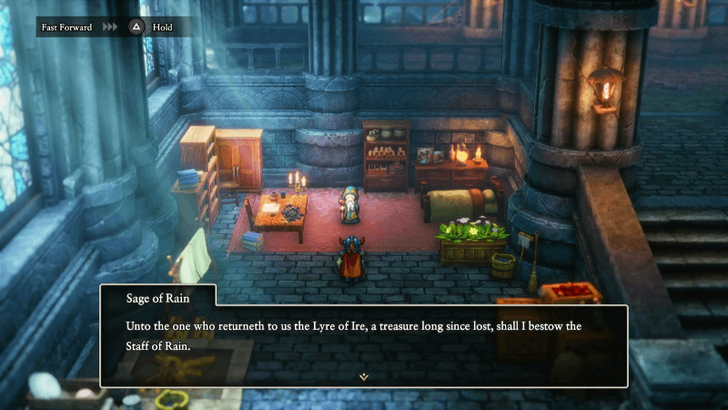 Inside the Shrine, interact with the red exclamation point to trigger a short cutscene with the Sage of Rain. This encounter advances the story, so don’t skip it. |
| 3 | 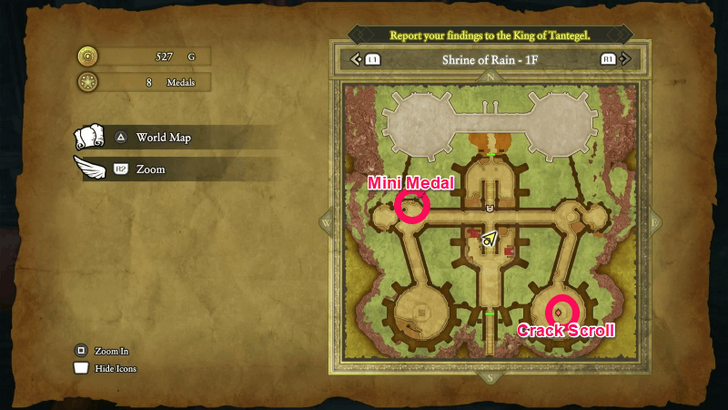 Before heading out, explore the Shrine fully. Open the treasure chest on the right for a Crack Scroll and search the pots on the left for a Mini Medal. Don’t miss these easy pickups! |
| 4 | 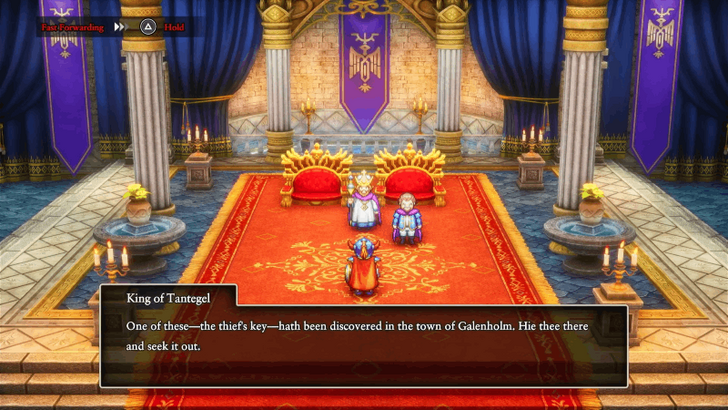 Use Zoom or a Chimaera Wing to fast-travel back to Tantegel Castle. Talk to the King to report your progress, he’ll now direct you toward Galenholm, your next stop. |
Galenholm
| 1 | 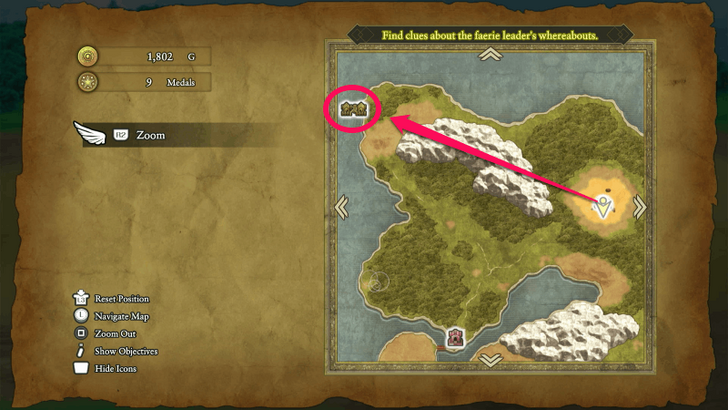 Galenholm is found northwest of Erdrick’s Hollow. Use a Chimaera Wing to return to the hollow, then walk the rest of the way. Once you enter and cross the bridge, a cutscene will automatically trigger, note that this only happens if you’ve already cleared the Shrine of Rain. |
|---|---|
| 2 | Visit the equipment shop and gear up. Save enough gold to buy the Iron Axe and Chain Mail, both are strong early upgrades. Skip buying the Iron Shield for now; you’ll find one later inside the Craggy Cave. |
| 3 | 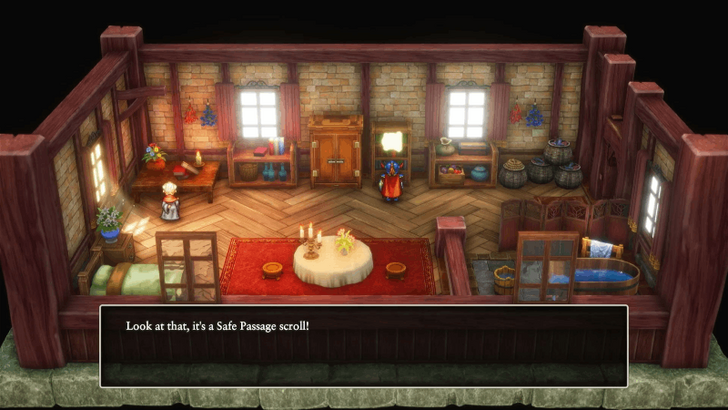 Check the bottom-right house in Galenholm and inspect the bookshelf to find the Safe Passage Scroll, which teaches a spell that prevents floor damage, extremely useful for exploring caves safely. Before leaving, visit the fishing harbor on the left side of town to pick up a Mini Medal. |
Roadside Inn
| 1 | 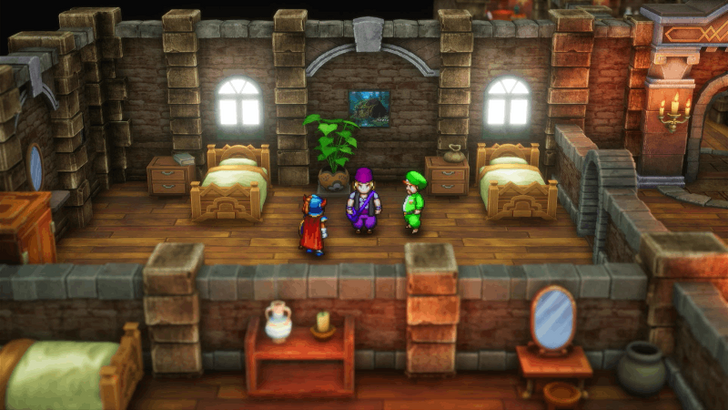 Leave Galenholm and travel south until you reach the Roadside Inn. Enter one of the rooms to trigger a short cutscene, then search the drawers for a Mini Medal. |
|---|---|
| 2 | Spend time here in the overworld area to strengthen your Hero. Monsters in this region are much stronger, perfect for level grinding. |
Nameless Ruins
| 1 | Continue south from the Roadside Inn to reach the Nameless Ruins, located near a poison swamp. |
|---|---|
| 2 | 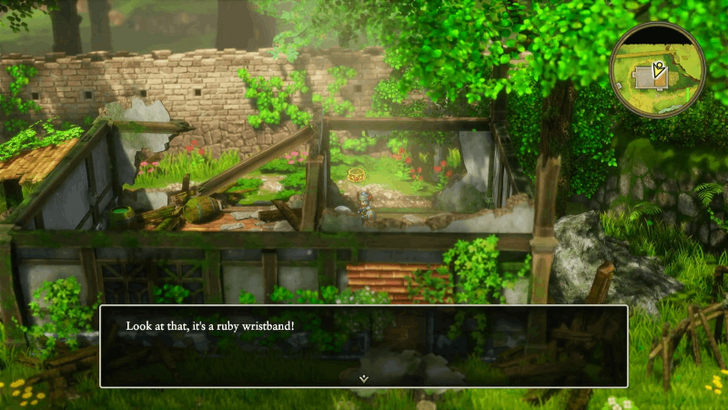 Explore the ruins to find the Ruby Wristband, an accessory that grants +8 Defense, a great accessory for early game. |
| 3 | 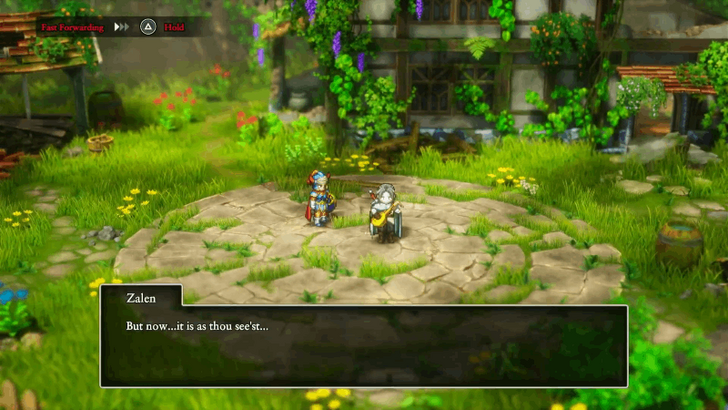 If you previously met Zalen in the Forgotten Ruins, you’ll find him again here. Talk to him before leaving to continue his storyline. |
Faerie Village
| 1 | 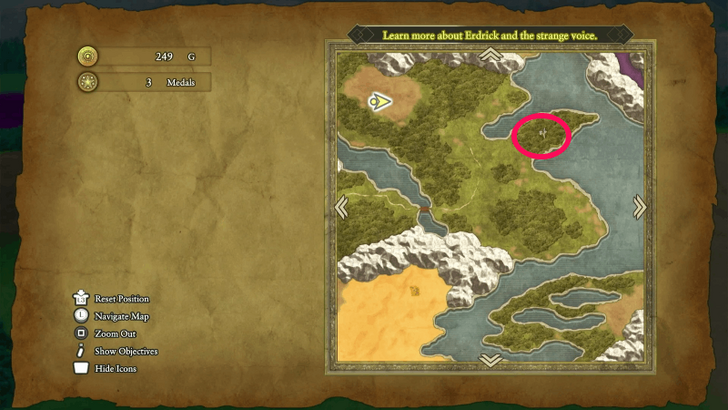 After leaving the Nameless Ruins, travel southeast to reach the Faerie Village, a peaceful settlement filled with treasure and scrolls. |
|---|---|
| 2 | 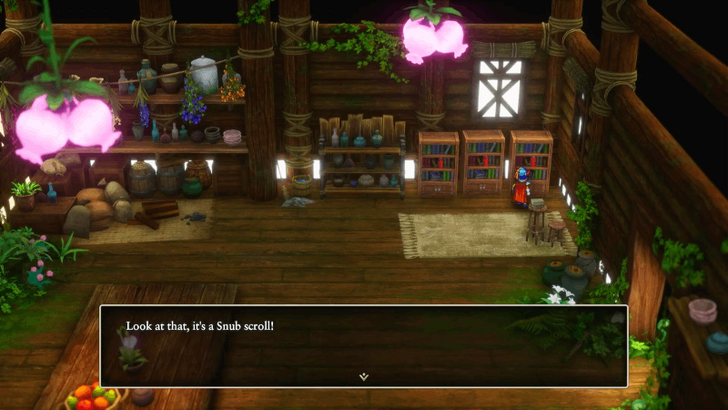 In the left-side house, check the bookshelf for a Snub Scroll and open the treasure chest to find a Crackle Scroll. Both can be learned immediately to enhance your spell repertoire. The Crackle spell in particular, will help greatly in the boss fights to come. |
| 3 | 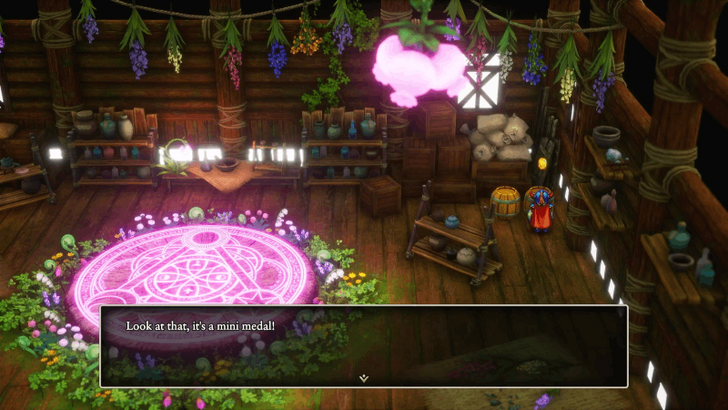 Enter the right-side house and search every container. You’ll find the following: ・Mini Medal ・Full Moon Ring ・Magic Water ・2 Spirit Waters |
Craggy Cave
| 1 | 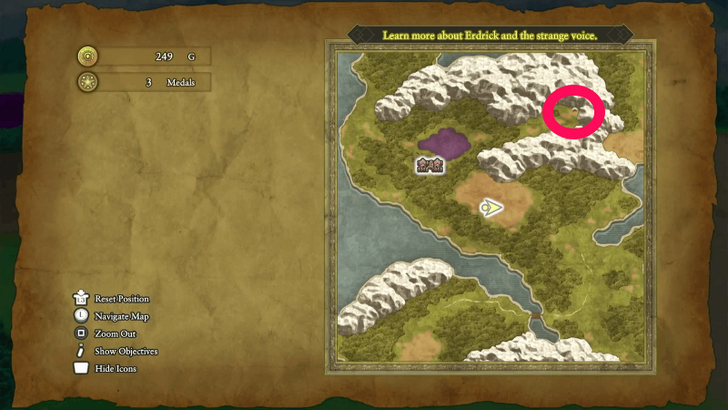 After collecting all the treasures in the Faerie Village, head north, just east of the poison swamp, to reach Craggy Cave. The enemies here hit harder, so stock up and heal before entering. |
|---|---|
| 2 | 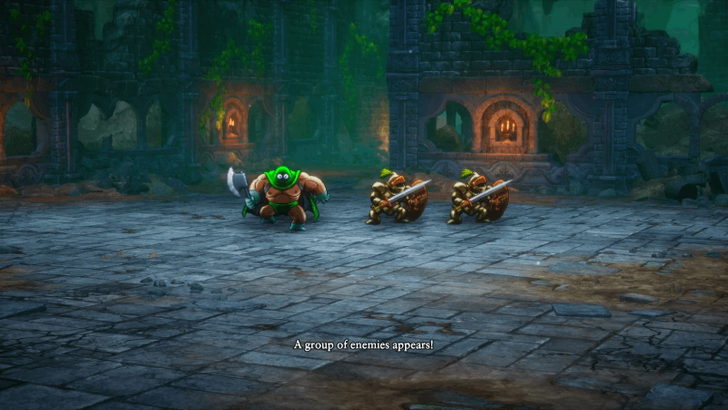 Take a few steps inside to trigger a cutscene and you’ll face Robbin ’Ood and his gang. Focus on defeating the Robbin ’Oodlums first, since they’ll heal their boss. Use AoE spells like Sizzle or Crackle to hit everyone at once. Once the minions are down, unleash high-damage single-target attacks to finish Robbin ’Ood himself. ▶ How to Beat Robbin 'Ood |
| 3 | 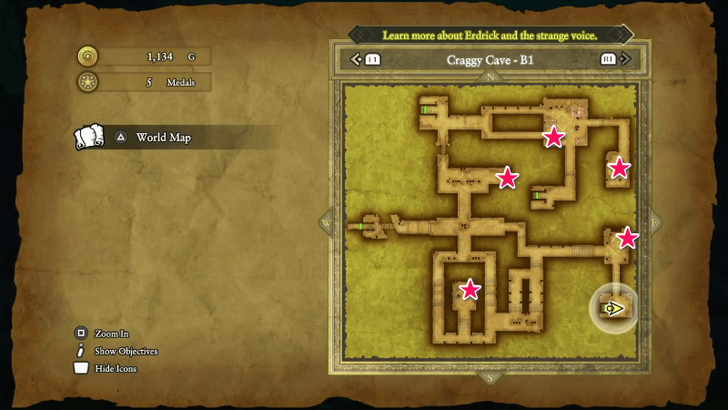 After the battle, Robbin 'Ood will ask you to help one of his comrades lost on B2, but before heading there, you should open every chest on B1 to obtain the following items: ・Mini Medal ・Ten Ton Toupee ・340 Gold ・Boomerang ・Nose for Treasure Scroll |
| 4 | 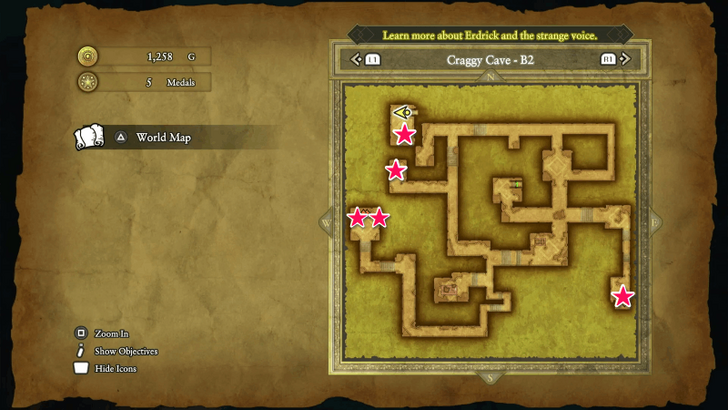 There are three staircases leading to different B2 areas but only the top and middle ones are worth using. The bottom stairs lead to a dead end. Take the top-left stairs first to grab a Muster Strength Scroll, then use the middle stairs to access the main B2 floor. In here, you’ll find: ・ Bronze Shield, ・2 Magic Waters, ・Choker ・Zombie Mail. With the exception of the Choker and Zombie Mail only becoming available after you beat the Sorcerer. |
| 5 | 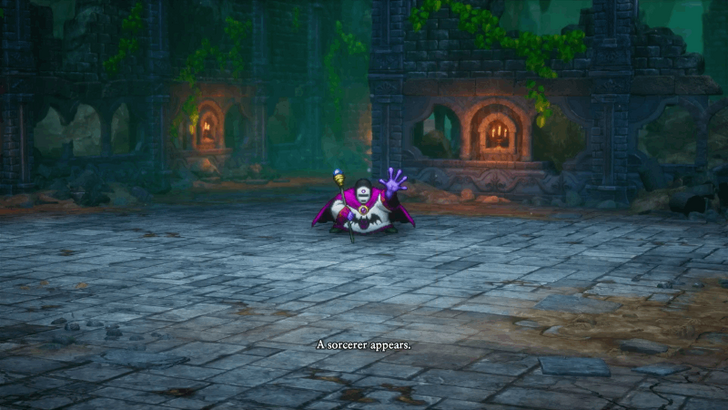 At the bottom-left of the map, approach the marked location to trigger another boss fight against The Sorcerer. Watch out for Fizzle, which prevents you from casting spells. To counter this, rely on your Flame Slash ability, which deals great damage even if it's not a spell. Use healing items if you’re silenced mid-battle. ▶ How to Beat Sorcerer |
| 6 | 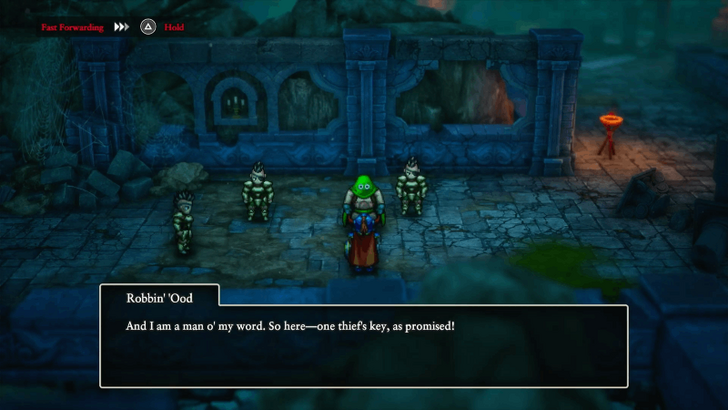 After defeating the Sorcerer, a short cutscene will play, and you’ll gain access to the two treasure chests containing a Choker and Zombie Mail. Return to the cave entrance and speak with Robbin ’Ood to complete his quest and he’ll reward you with the Thief’s Key. |
Faerie Village (Revisit)
| 1 | 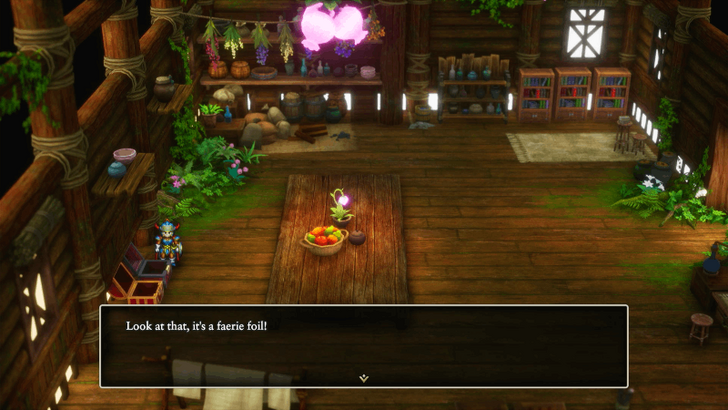 With the Thief’s Key in hand, revisit the Faerie Village. Use it to unlock the chest inside the left house and claim the Faerie Foil, a powerful weapon that’ll serve you well for the next few regions. |
|---|
Quagmire Cave to Green Dragon Boss Fight
| Jump to an Area Walkthrough! | |||
|---|---|---|---|
| 1 | Quagmire Cave | 2 | On the Way to Rimuldar |
| 3 | Rimuldar | 4 | Cave of the Dwarves |
| 5 | Faerie Village and Damdara | 6 | On the Way to Field of Flowers |
| 7 | Field of Flowers and Back to Faerie Village | 8 | Detours Before Quagmire Cave |
| 9 | Quagmire Cave (Revisit) | 10 | - |
Quagmire Cave
| 1 | 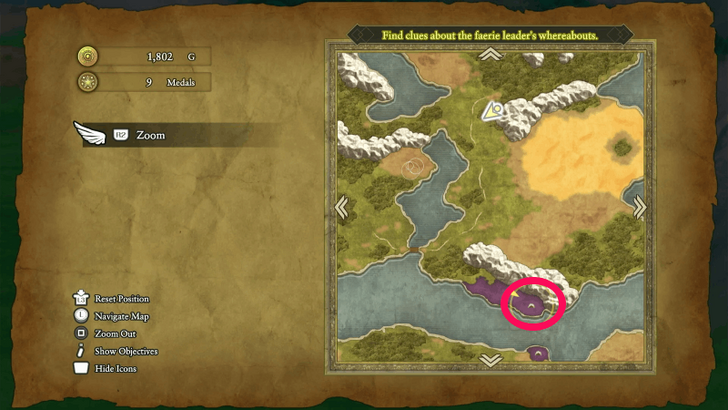 Your next destination is Quagmire Cave, located near Kol. Use your Zoom Spell or a Chimaera Wing to teleport to Kol. From there, head south until you reach a swamp covered in poison, the cave entrance will be nearby. Don’t step on the poison right away as it’ll damage you. Instead, cast Safe Passage so you can float above the terrain safely. ▶︎ Quagmire Cave Dungeon Guide |
|---|---|
| 2 | 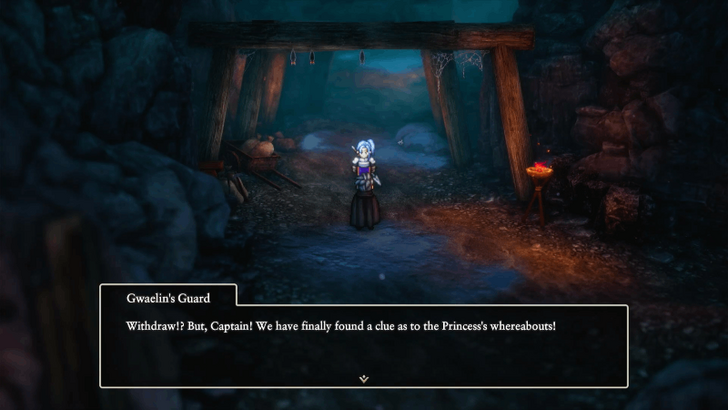 Once inside, head straight down until a cutscene triggers. You can’t explore much of this cave yet since you’ll need a Magic Key to progress further. |
| 3 | 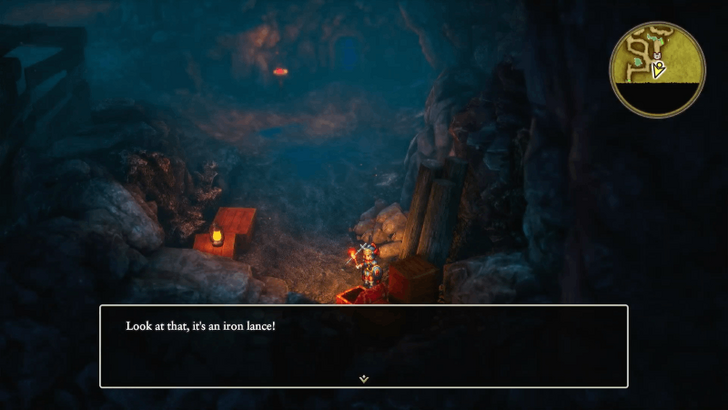 After the cutscene, head to the area below the locked door to find a treasure chest containing an Iron Lance. Once you’ve looted it, take the exit on the left. |
| 3 |  Once you’re back outside, remember to cast Safe Passage again before moving on the path ahead is still poisoned, and walking unprotected will drain your HP. Head south toward your next destination: Rimuldar. ▶︎ How to Safely Cross Damaging Floor Tiles |
On the Way to Rimuldar
| 1 | 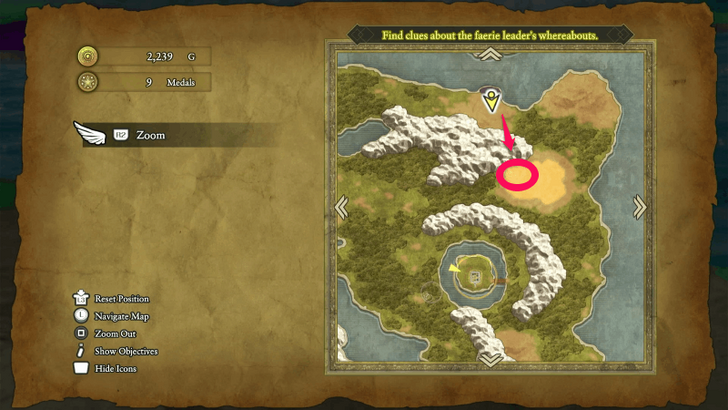 On your way to Rimuldar, you’ll stumble upon a Secret Spot that’ll show up on your map. Head inside and check the barrels near the coconut tree to find a Seed of Agility and 2 Coagulants. ▶︎ All Secret Spot Locations |
|---|---|
| 2 | 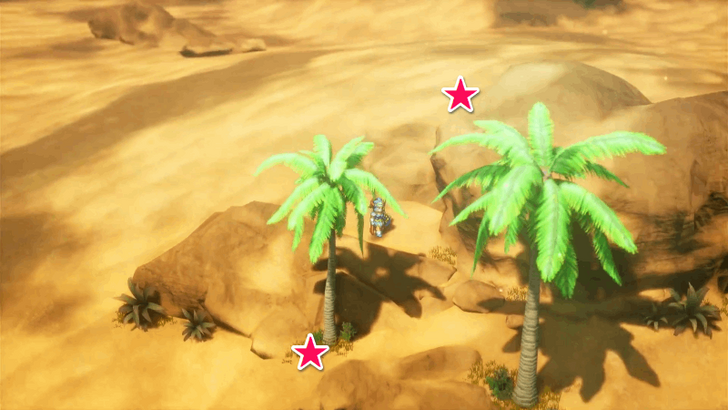 Next, inspect the leftmost tree to get an Edged Boomerang. Finally, search the shadow of the rock just above that tree to uncover a set of Garish Garb, which is better than what you currently have on now. |
| 3 | 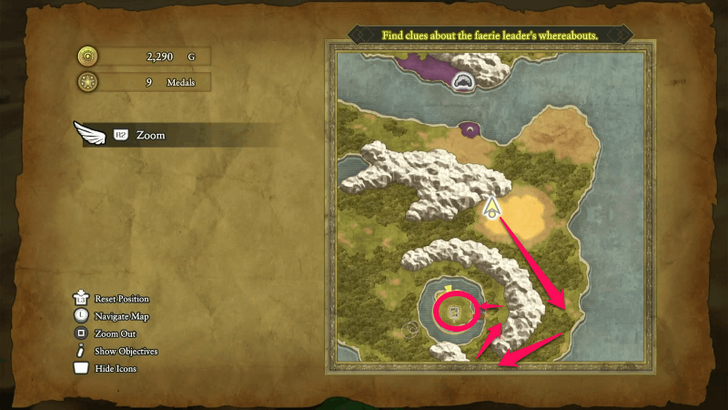 Once you’ve looted everything, continue toward Rimuldar, marked clearly on your map. Don’t forget to check every Sparkly Spot you find along the way for more loot. ▶︎ List of All Sparkly Spots |
Rimuldar
| 1 | 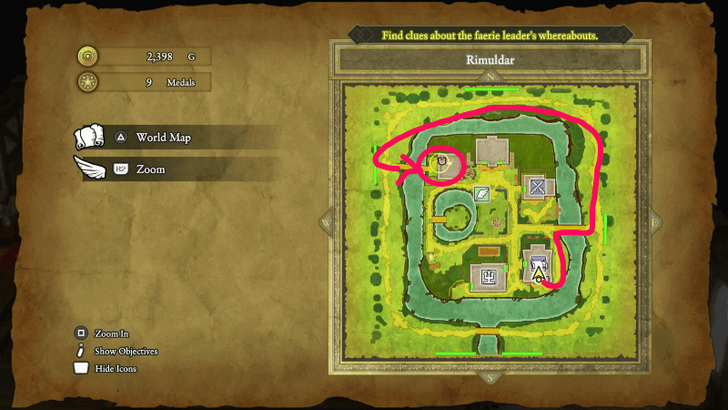 When you reach Rimuldar, a cutscene will play. Once it ends, head for the house on the upper-left corner of town. You can’t walk straight there since the path’s blocked, so loop around the map to reach it. Before going inside, check the pots outside for a Magic Water and a Seed of Wisdom. ▶︎ Rimuldar Location Guide |
|---|---|
| 2 | 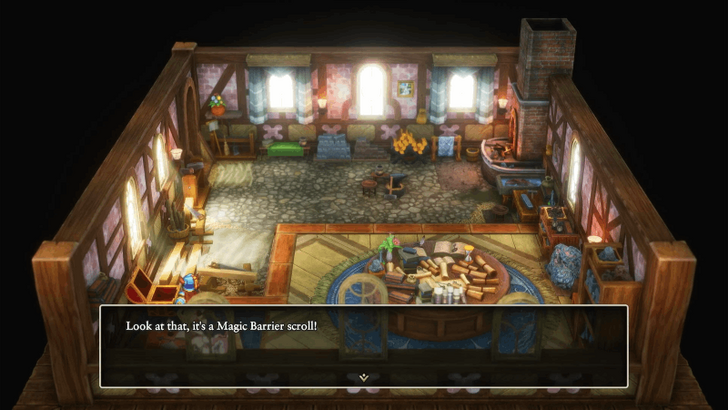 After a brief cutscene inside, open the treasure chest to get the Magic Barrier Scroll. Then, head to the northernmost house and check their drawer for a Mini Medal. Take your time exploring pots, drawers, barrels before heading out to collect more treasure if there are any left. |
| 3 | Since monsters around here start hitting harder, it’s a good idea to upgrade your equipment at the shop and restock healing items. Once you’re strapped and ready, it’s time to head south toward the Cave of the Dwarves. |
Cave of the Dwarves
| 1 | 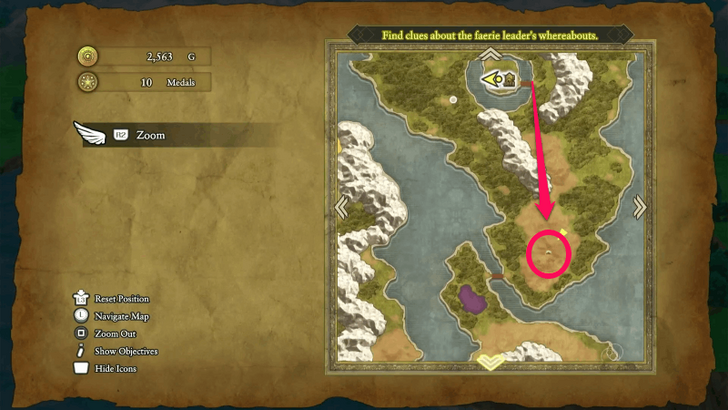 After leaving Rimuldar, open your map and head south to find the Cave of the Dwarves. It’s a sprawling dungeon, so make sure you’re stocked on healing items before you go in. |
|---|---|
| 2 | 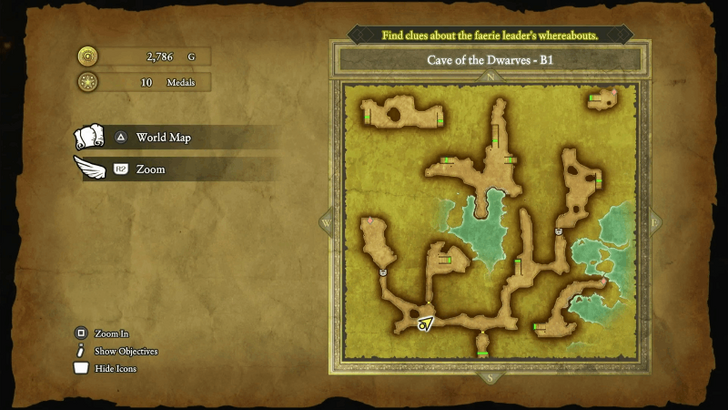 Once inside, check your map carefully, this cave’s full of branching paths and misleading dead ends. The treasure icons will guide you to where you need to go, but you’ll be hopping between B1 and B2 quite a bit to collect everything. ▶︎ Cave of the Dwarves Dungeon Guide |
| 3 | 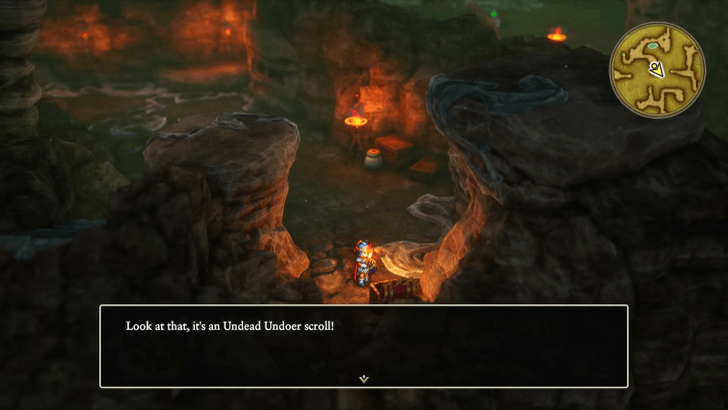 Some treasure spots on B1 are actually only reachable by going down to B2 first, then looping back up. Each staircase connects to a different area, so don’t be afraid to backtrack. Here’s what you can find in the cave: ・Ice Shield ・Miracle Slash Scroll ・Undead Undoer Scroll ・Mini Medal |
| 4 | 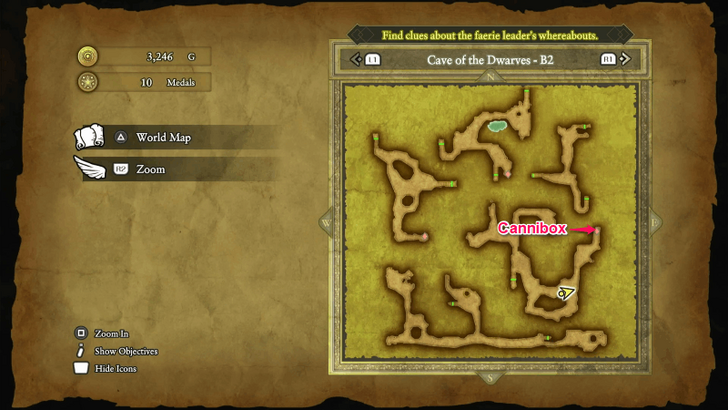 Beware though, as one of these treasure chests, specifically the one found on the rightmost part of the B2 map is actually a Cannibox in disguise. It’s way too strong to beat right now so it's best to just leave it alone for now and move on. |
| 5 | 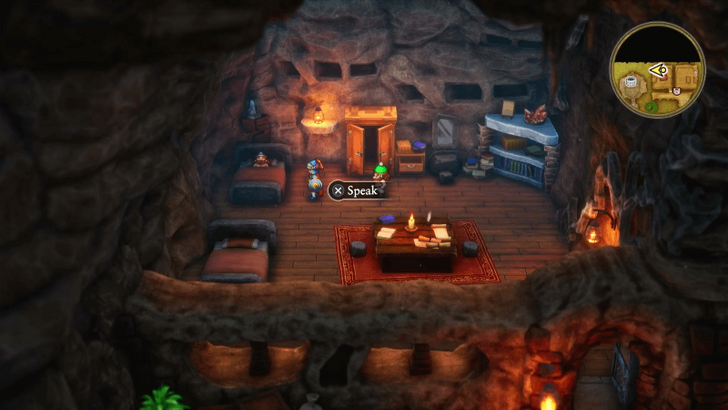 Once you’ve cleaned out the treasures (minus that locked room), head to B3. The stairs down are at the top of the B2 map. Inside the left room, talk to the dwarf for a short cutscene, then search the cabinet and drawer to score an Iron Lance and Oomph Powder. |
| 6 | 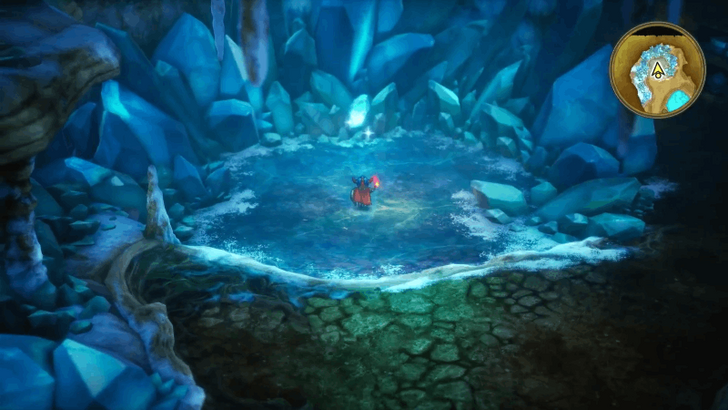 Exit the room and check the well nearby to descend another floor. Continue forward until you find a huge crystal formation with a sparkly light, examine it to obtain a Wellspring Crystal. Once you’ve got it, Zoom back to Faerie Village as that’s your next destination. |
Faerie Village and Damdara
| 1 | 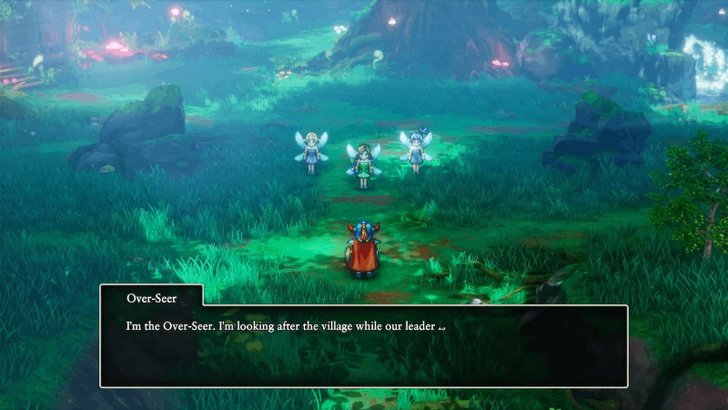 When you arrive at Faerie Village, a short cutscene will play. Afterward, head into the house on the left and speak to the fairy inside to trigger another event. |
|---|---|
| 2 | 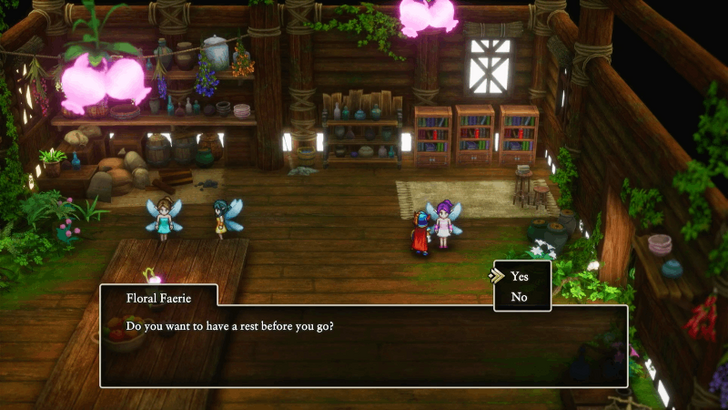 Accept the fairy’s request to rest, and another scene will play. The faeries will then ask you to gather the ingredients needed to craft the Sunup Syrup, found in the Field of Flowers to the west, your map will automatically mark the location for you. |
| 3 | 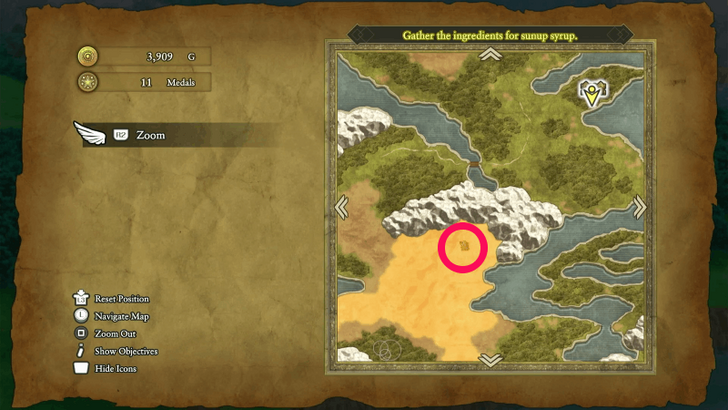 Before heading there, take a short detour to Damdara to unlock it as a Zoom teleport point. Once registered, don’t venture further in as the boss waiting there is far beyond your current level. |
On the Way to Field of Flowers
| 1 | 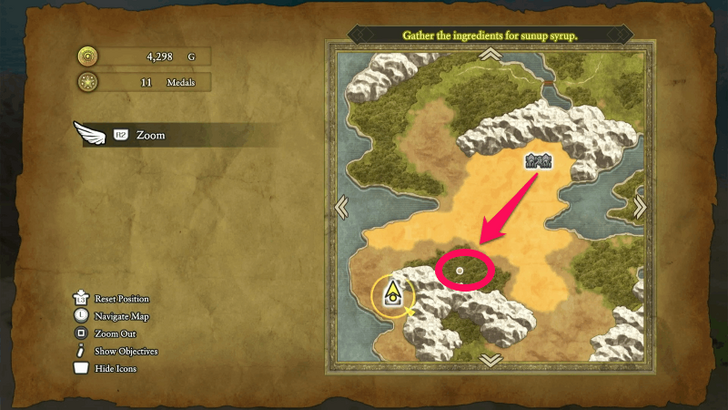 Leave Damdara and head south to discover a Secret Spot (you’ll see it marked if the setting’s toggled on). Enter the area to grab a few hidden treasures. |
|---|---|
| 2 | 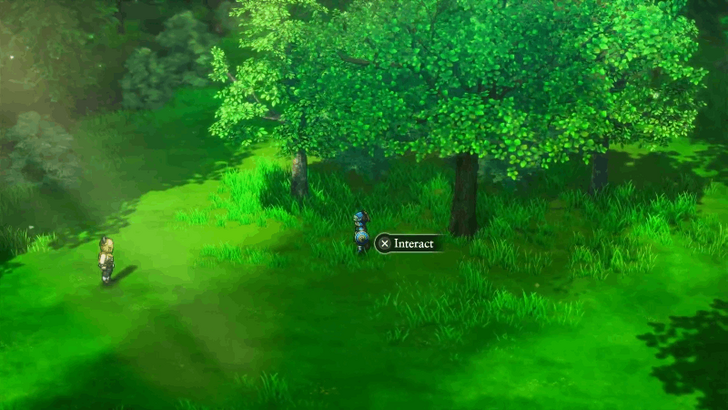 First, check the trees in the center of the map to find a Mini Medal. |
| 3 | 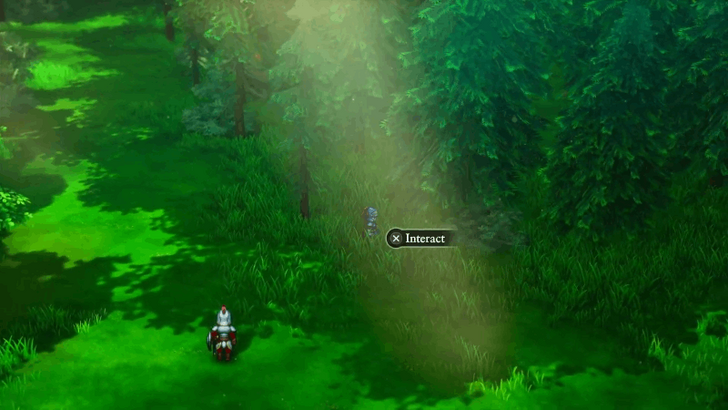 Then, go to the soldier nearby and search the ground around him to uncover a Stealth Suit. |
| 4 | 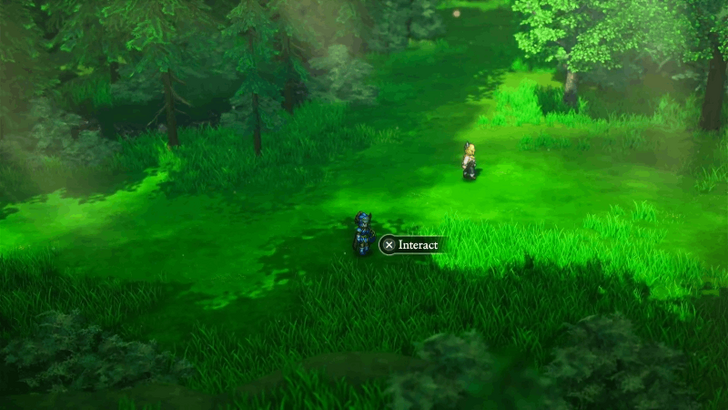 Finally, inspect the shadow beneath the tree near the other NPC to find 2,455 Gold. With all three treasures secured, head back out and make your way toward your next main objective. |
Field of Flowers and Back to Faerie Village
| 1 | The Field of Flowers lies just southwest of Damdara and is marked clearly on your map. Head there to begin collecting the ingredients needed to make the Sunup Syrup. ▶︎ Field of Flowers Location Guide |
|---|---|
| 2 | 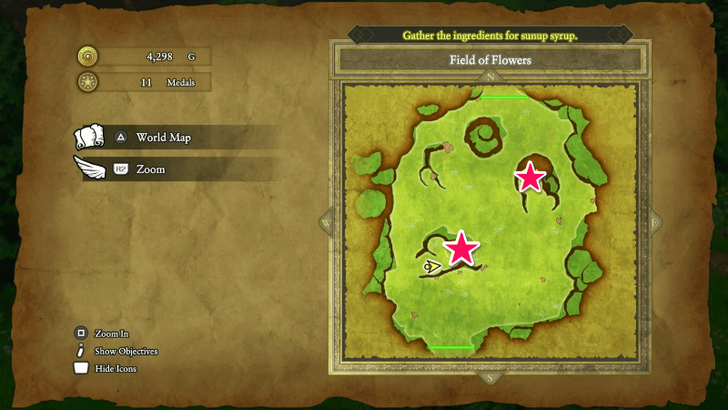 There are three ingredients to gather here: Wakerobin, Glimmergrass, and the Seeds, 2 are marked on the map and the latter appears after collecting both. Once collected, use Zoom to return to Faerie Village immediately. |
| 3 | 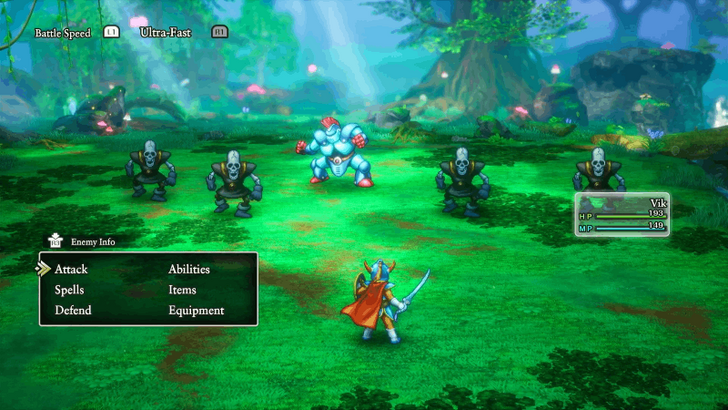 Upon returning to Faerie Village, a boss battle will trigger against a Knight Errant and several Dark Skeletons. Prioritize taking down the Dark Skeletons first as they deal heavy damage if left unchecked. Use the Undead Undoer spell for maximum effect. If the fight feels too tough, don’t sweat it, you can reload from your autosave once you get defeated, which is at the Field of Flowers. Grind a few levels before trying again. ▶︎ Death Penalty: What Happens When You Die? |
| 4 | After winning, you’ll obtain the Sunup Syrup. Make sure to rest and recover before leaving the village, as the upcoming sections feature tougher enemies and longer routes. |
Detours Before Quagmire Cave
| 1 | 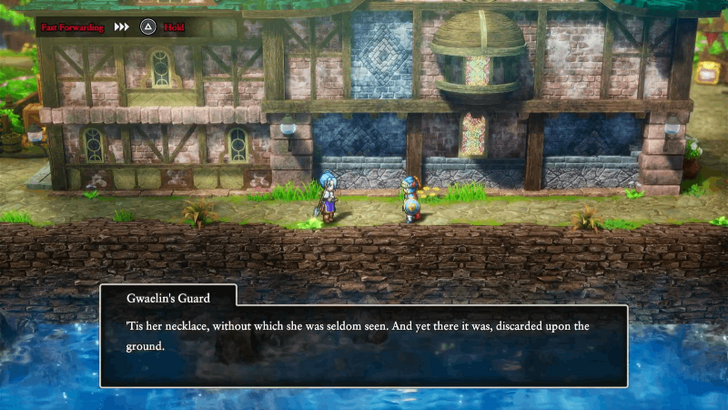 After obtaining the two vials of Sunup Syrup, your next move is to deliver them to your friends, one in Rimuldar and the other in the Cave of the Dwarves. Start by teleporting back to Rimuldar and administering the antidote there. After a brief cutscene, you’ll receive the Princess’s Necklace as a reward for your efforts.. |
|---|---|
| 2 |  Next, head back to the Cave of the Dwarves and heal your second patient on B3. Once both are cured, your series of detours will now begin. |
| 3 |  Return to Rimuldar and pay another visit to the Warlock of Doorlocks. After a short cutscene, you’ll receive the Magic Key, which opens both Blue Doors and Blue Chests. |
| 4 | 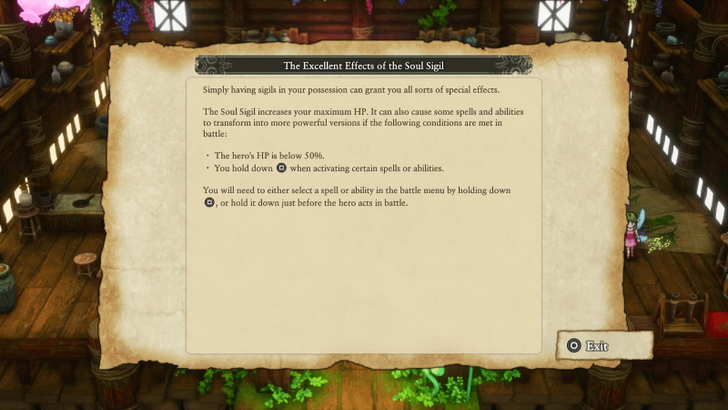 Next stop: Faerie Village. Enter the house on the right and watch a short scene unfold. When it ends, you’ll obtain the Soul Sigil, which boosts your max HP and can evolve your spells into stronger versions under specific conditions. ▶︎How to Get the Soul Sigil and Effects |
| 5 | 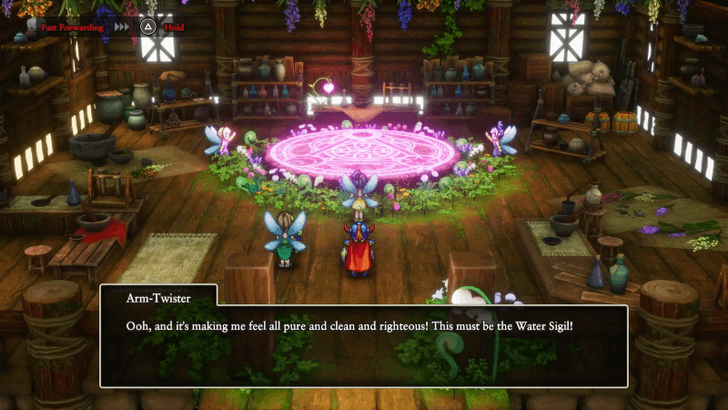 Talk to the faerie again to hand over your Wellspring Crystal. She’ll transform it into a Water Sigil, enhancing the potency of your healing items, and its effects stay active just by keeping it in your inventory. |
| 6 |  |
| 7 |  Head back once more to the Cave of the Dwarves, this time using your Magic Key to access the locked room on B3. Inside are two treasure chests containing a Tectonic Plate and a Strength Ring, both are powerful upgrades, so equip them immediately. |
| 8 | 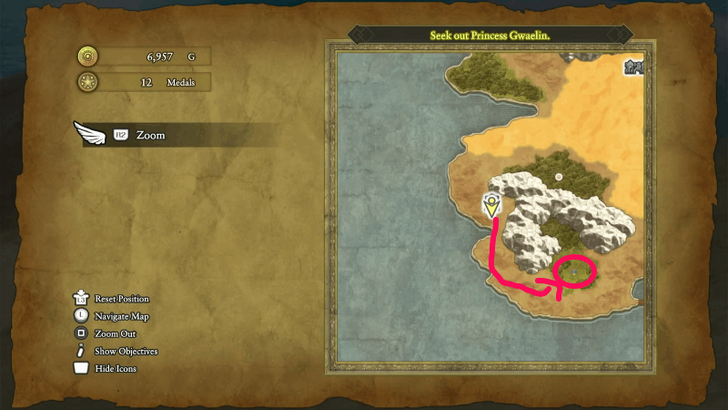 Teleport to the Field of Flowers, then travel southeast to reach the Citadel of the Monarch of Medals. |
| 9 | 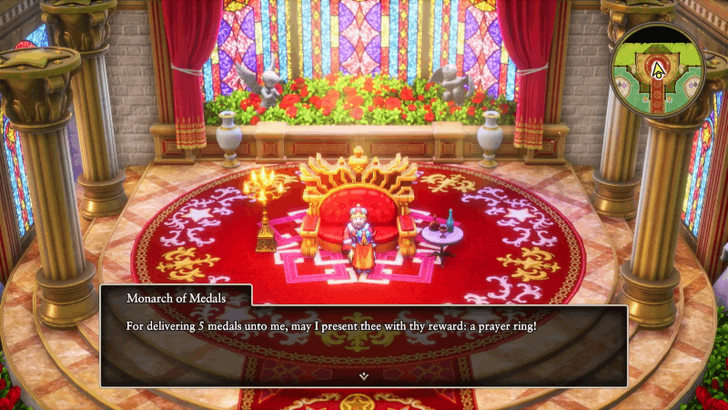 Once you arrive, speak to the Monarch of Medals to exchange your collected Mini Medals for rewards. Aim for at least 10 medals to earn: ・Prayer Ring ・Scholar’s Specs ・Wild Side Scroll ▶︎All Mini Medal Locations and Rewards |
| 10 | 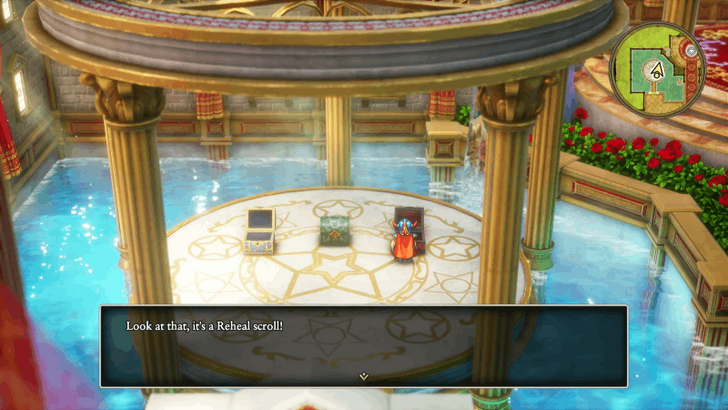 Don’t leave just yet, grab the red and blue chests beside the Citadel doors to claim: ・Phantom Mask ・Sage’s Elixir ・Pirate King’s Pendant ・Reheal Scroll Once you’ve looted everything, it’s time for one last detour: Kol Village. |
| 11 | 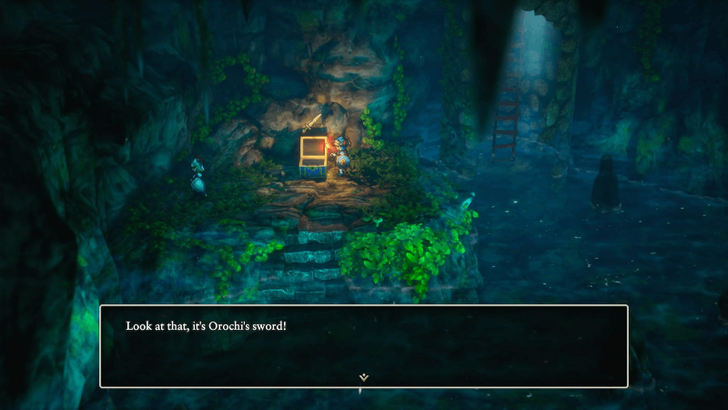 In Kol, check the well in the village center to find a Blue Chest containing the Orochi Sword, a powerful upgrade over your current Faerie Foil. |
| 12 | 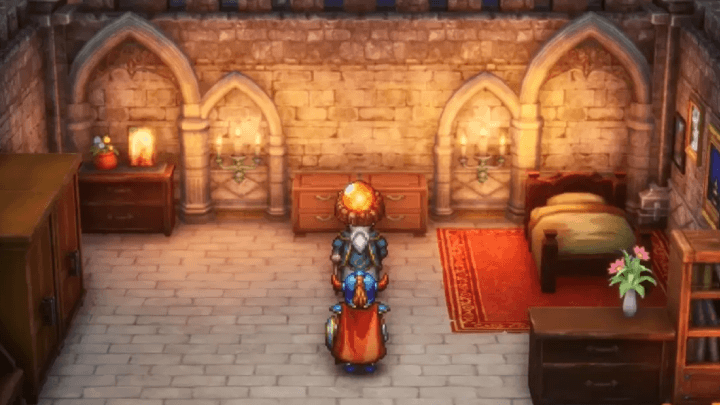 Finally, your last stop will be the basement of Tantegel Castle, which is accessed via the garden. Talk to the sage who resides here to receive the Sunstone, which will play an important role much later in the story. |
| 13 | With all detours done, spend some time leveling up before moving on. The next area, Quagmire Cave, is crawling with tough enemies that can easily wipe you out. Once you’re confident, teleport back to Quagmire Cave. ▶︎ EXP Farm: How to Level Up Fast |
Quagmire Cave (Revisit)
| 1 | Inside Quagmire Cave, unlock the door on the lower right using your newly obtained Magic Key, then proceed deeper into the cave. ▶︎ Quagmire Cave Dungeon Guide |
|---|---|
| 2 | 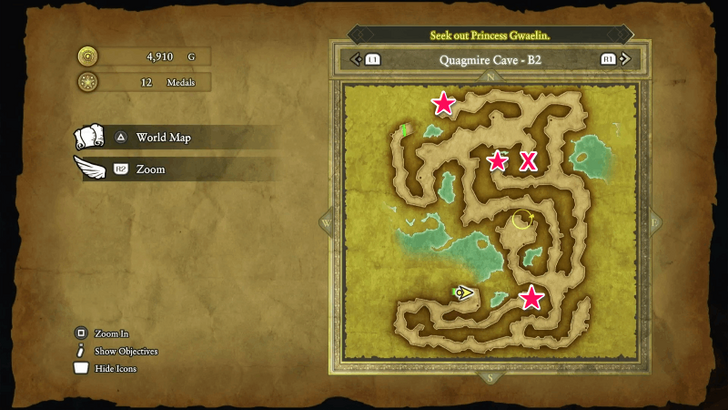 On B2, you’ll find four treasure chests but beware as one of them is a Cannibox. Avoid the one marked X on the image shown here. The safe treasures on this floor include: ・Special Medicine ・Mini Medal ・Mad Cap |
| 3 | There’s also a Moonbeam Dew located in the center of the map, sparkling faintly. Don’t miss it before heading back up. |
| 4 | 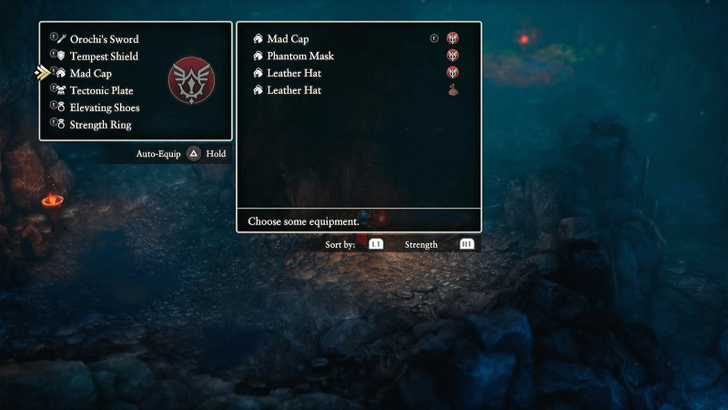 Return to B1, then follow the path to the marked indicator on your map. Your next challenge awaits, the Green Dragon. Equip the Mad Cap beforehand to halve your MP costs, making spellcasting much easier during the fight. |
| 5 | 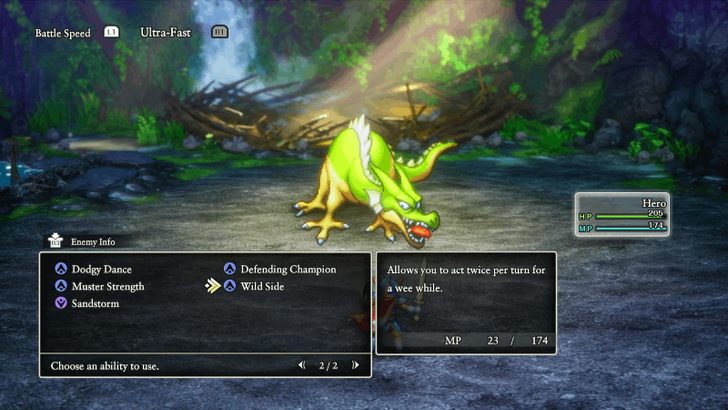 Face the Green Dragon, one of the fiercest bosses in the game. It uses strong normal attacks and Fire Breath, so keep your HP above 40 to survive. A good strategy is alternating between Wild Side and Dragon Slash. The former lets you act twice, and the latter deals heavy damage to dragon-type enemies. With Mad Cap equipped, MP won’t be an issue. When weakened, the Green Dragon may use Wild Side, attacking multiple times in a row, so finish it off quickly! ▶︎ Green Dragon Boss Guide |
| 6 | 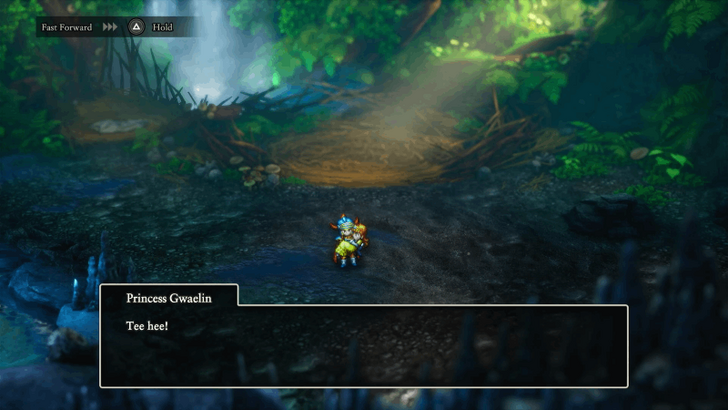 Once defeated, the princess will temporarily join your party as you escort her back to Tantegel Castle. After the boss's defeat, you'll need to escort Princess Gwaelin back to Tantegel Castle. You can take the long way back or use the Chimaera Wing / Zoom Spell to teleport directly to Tantegel Castle. Once at the castle, speak to the princess and she'll give you the Princess's Necklace. |
Weirdwood to Weeping Isle
| Jump to an Area Walkthrough! | |||
|---|---|---|---|
| 1 | Weirdwood and Faerie Village | 2 | Wayfarer's Inn |
| 3 | Cantlin and Golem Boss Battle | 4 | On the Way to Weeping Isle |
| 5 | Weeping Isle | 5 | - |
Weirdwood and Faerie Village
| 1 | 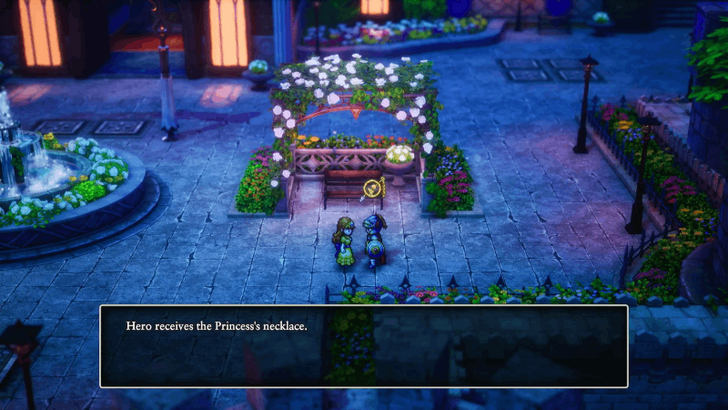 After delivering the princess to Tantegel Castle, head south from the throne room to meet her again in the courtyard. After the cutscene, she’ll give you the Princess’s Necklace. Then it’s time to set off for Weirdwood! |
|---|---|
| 2 | 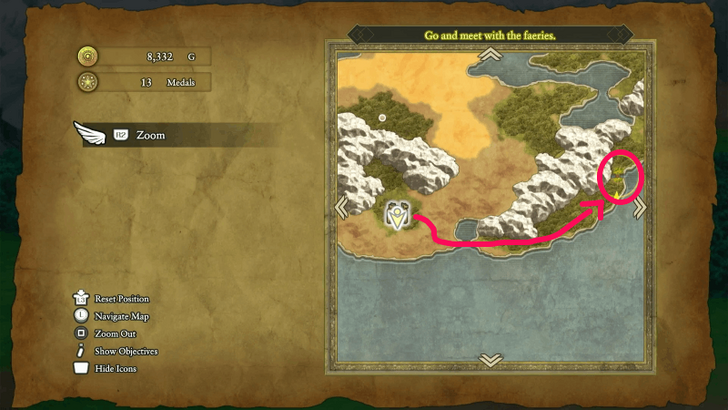 Weirdwood is to the southwest of the map, near the Citadel of the Monarch of Medals, so zoom yourself there and head to the right toward Weirdwood. |
| 3 | 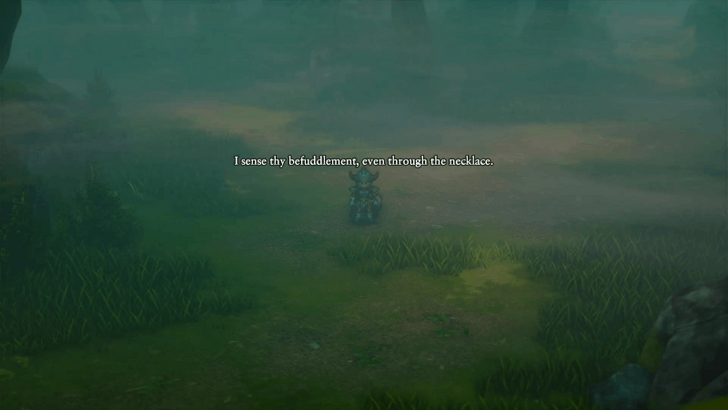 After arriving, you won’t have access to any map yet. You’ll need to wander around until a cutscene triggers, so explore every route until it does. |
| 4 | 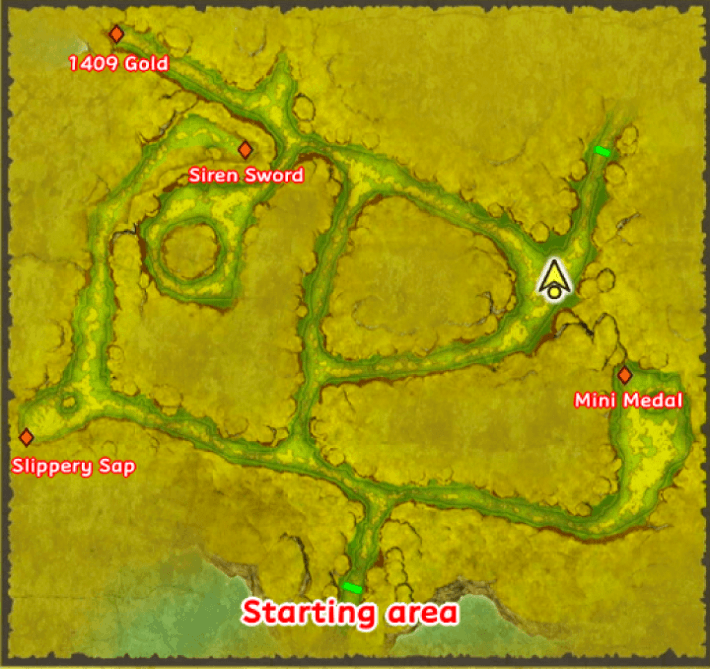 Once the fog clears, your map will unlock. Collect all the treasures here before moving on. You’ll get the following after collecting everything: ・Mini Medal ・2 Slippery Saps ・Siren Sword ・1409 Gold |
| 5 | After grabbing all treasures, move to the next area. If you’re low on HP, MP, or healing items, consider teleporting to a nearby town and returning because there’s a boss fight ahead. |
| 6 | Move forward until a cutscene triggers. Prepare for a boss fight against 3 Mirages. They use spells, so cast Magic Barrier on yourself and optionally Fizzle on them to prevent their spells. Each Mirage has just 200+ HP, so focus on single-target attacks rather than AoE. Best strategy is to fight normally until you come down to 50% HP, then trigger the Soul Sigil effect on your Gust Slash ability to soup it up into Skysplitter (AoE version). This will wipe all three with a single hit and defeat them instantly. ▶︎ How to Beat Mirage |
| 7 | 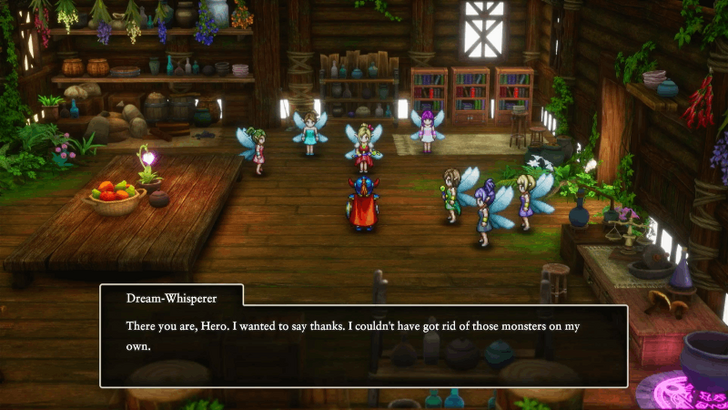 After the fight, you’ll be teleported back to Faerie Village. Talk to the faeries until their boss awakens, then enter the house on the left for another cutscene. Afterwards, zoom back to Weirdwood to explore the second area. |
| 8 | Collect all treasures in Weirdwood’s second area. You’ll find: ・Cannibox holding a Prayer Ring ・Thief’s Turban ・Focus Pocus Scroll ・Undying Flame If you’re strong enough, defeat the Cannibox to get the Prayer Ring. |
| 9 | The Undying Flame will later be used to create the Star Sigil at Faerie Village later. Once everything’s collected, head north to exit the forest. |
Wayfarer's Inn
| 1 | 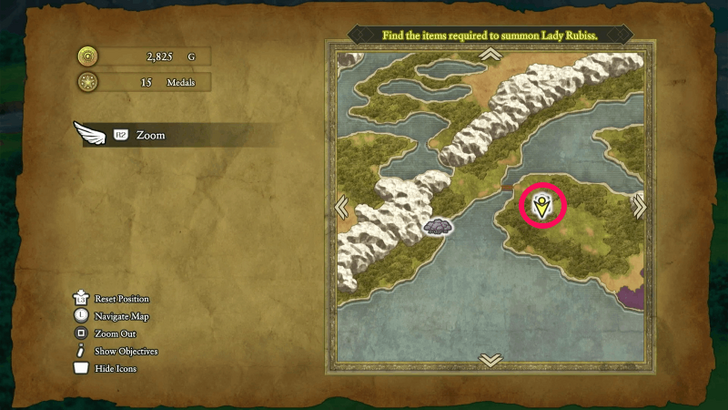 After leaving the forest, head west across the bridge to reach Wayfarer’s Inn and restore HP and MP. |
|---|---|
| 2 | 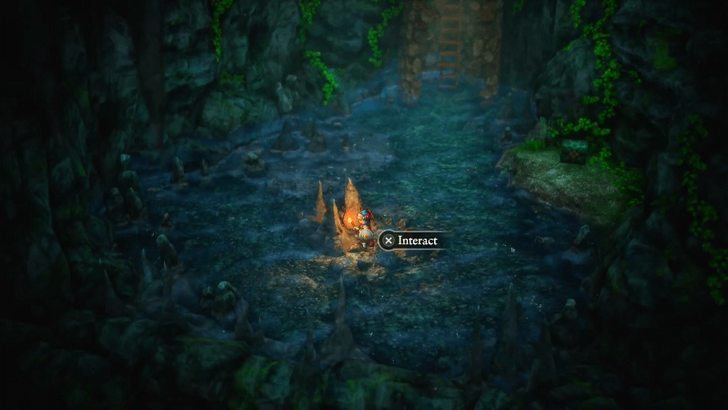 From the left room, climb down the well to grab a Mini Medal from a rock formation. Ignore the chest for now, you’ll need another key later. |
| 3 | 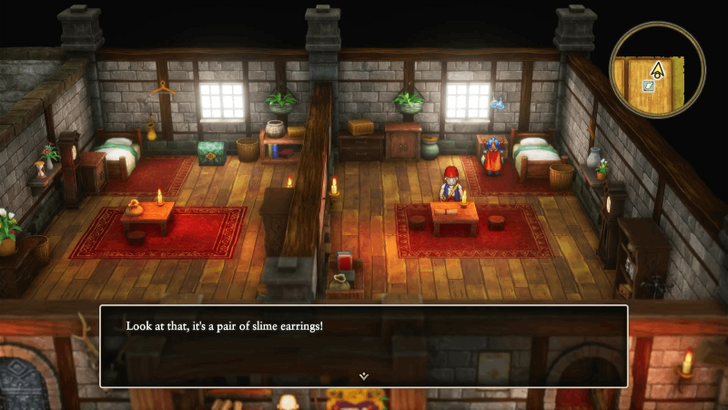 Interact with the cabinet in the Item Shop room to get Slime Earrings. After that, you’re ready to leave for Cantlin. |
Cantlin and Golem Boss Battle
| 1 | 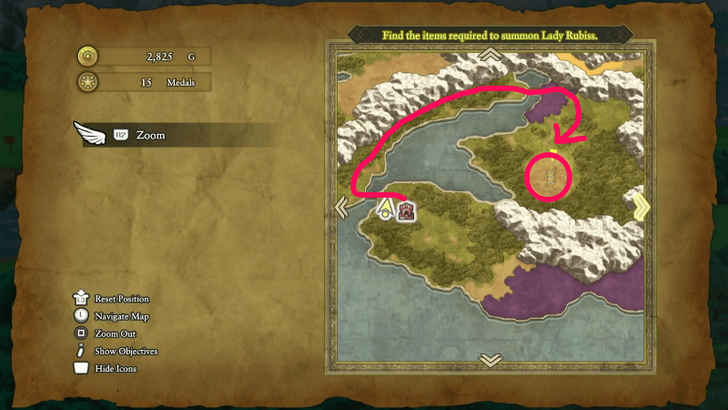 Cantlin is marked on your map. Take the northern path to reach it. While crossing the bridge, you’ll encounter a poisoned path, use Safe Passage to avoid damage. |
|---|---|
| 2 | 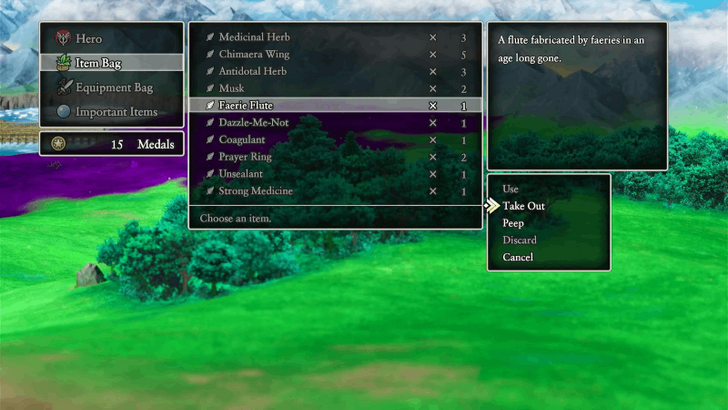 Before entering, make sure Faerie’s Flute is equipped. Entering Cantlin triggers a Boss Battle against Golem, so level up to at least Level 25 before engaging. ▶︎ EXP Farm: How to Level Up Fast |
| 3 | 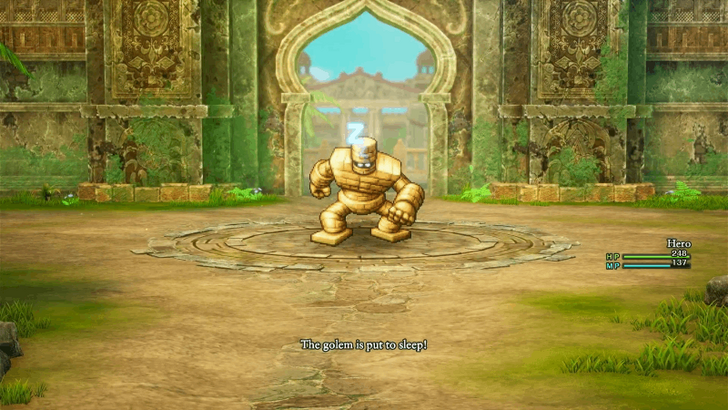 Enter Cantlin and prepare for a fight with Golem. Use the Faerie's Flute immediately on your first turn to put Golem to sleep, making you get free turns and attacks. Golem will eventually wake up, but your Faerie's Flute has unlimited uses, so go spam its effect until you win the battle. ▶︎ How to Beat Golem |
| 4 | 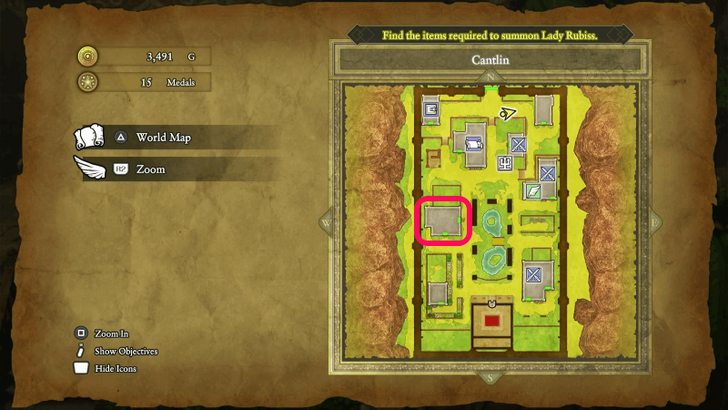 After defeating Golem, explore Cantlin. Head to the large house west of the map for: ・ Seed of Wisdom (first floor pot) ・ Iron Armour, ・Attack Attacker Scroll, ・ Moreheal Scroll (second floor cabinets/bookshelves) |
| 5 | 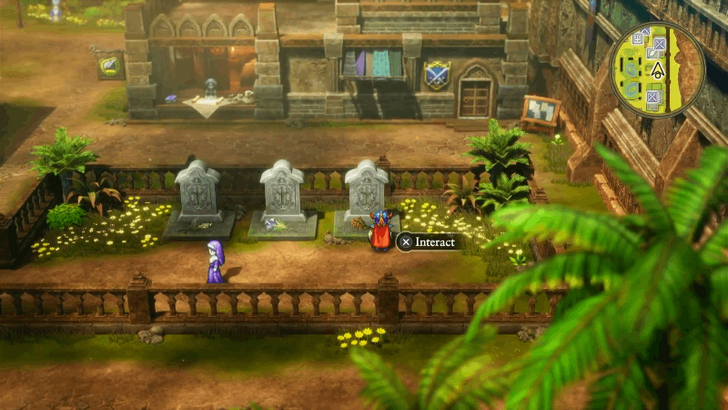 Head outside and explore the graveyard to the right of the map for a Mini Medal. Feel free to search every pots and barrels or shelves this town has for more loot if you wish. |
| 6 | 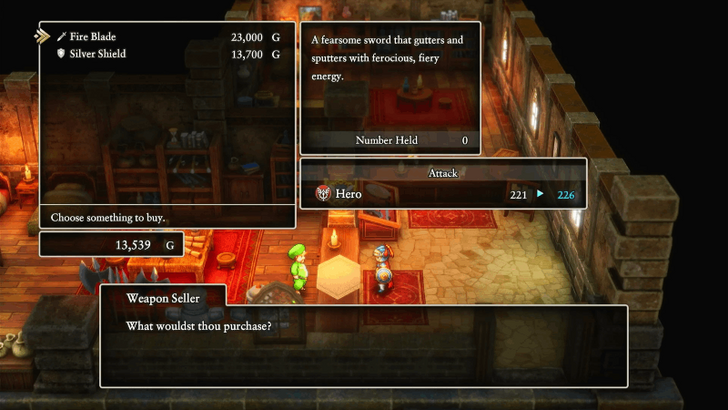 Consider upgrading your gear, as upcoming enemies are tougher. Spend gold if needed for stronger equipment. ▶︎ Best Weapons and Armor |
| 7 | 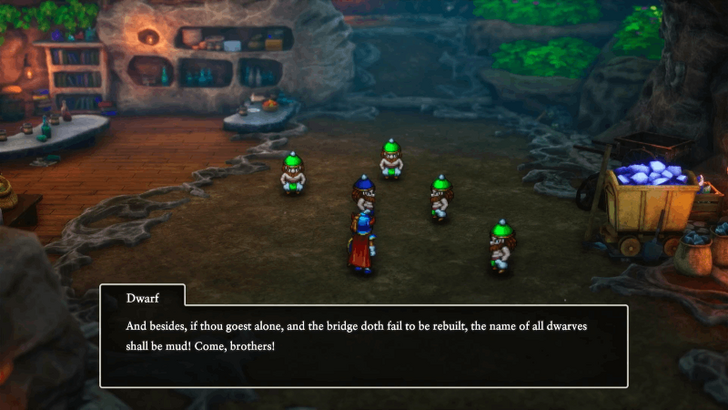 Zoom back to the Cave of the Dwarves and speak to the dwarf in a blue hat and the dwarves will agree to fix the bridge. Cutscene continues back at Cantlin. |
| 8 | 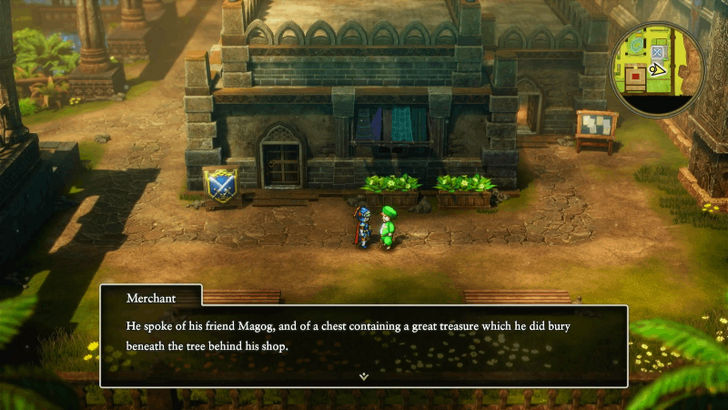 To the southeast of Cantlin, talk to a merchant with a blue exclamation point for a subquest. He’ll talk about his father and will start a sub quest.. |
On the Way to Weeping Isle
| 1 | 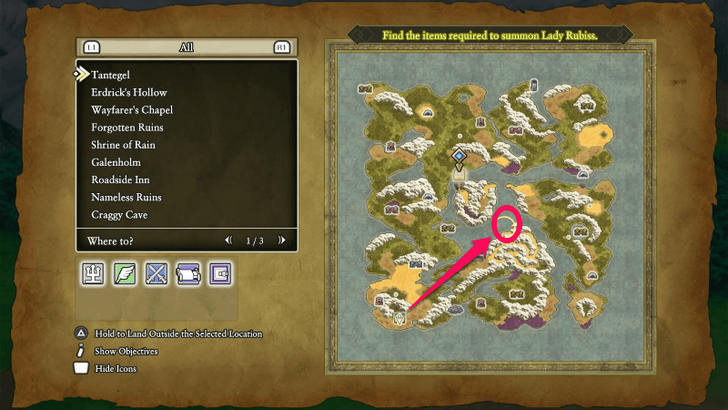 Weeping Isle is north of your current location and it’s marked on the map. You'll need to go here next. The closest teleport point is the Citadel of the Monarch of Medals, so zoom there first. |
|---|---|
| 2 | 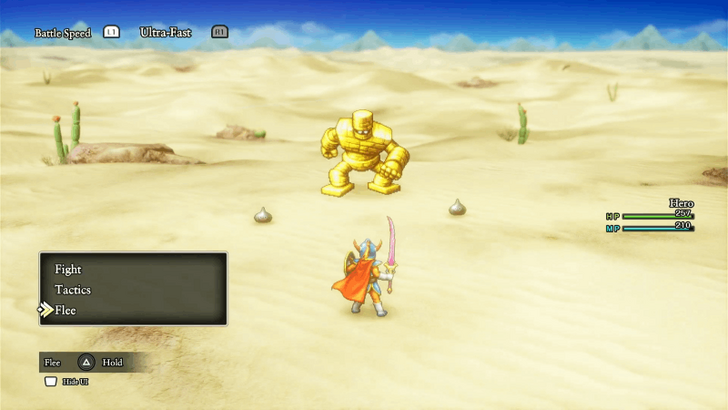 Since this is gonna be a long walk, you'll be fighting monsters along the way, and hopefully come across Metal Slimes, which give a ton of EXP a piece, and Gold Golems which are heavy hitters, but give huge amounts of Gold per each defeated! Do check out all Sparkly Spots you see on the way to the island for more loot! ▶︎ List of All Sparkly Spots |
| 3 |  En route to Weeping Isle, consider taking a detour to a Secret Spot below for more loot. Examine the 3 treasure chests here (4 exist but the last one can't be opened right now, so remember to come back to it later). You'll get these items once you open all treasure chests: ・Mini Medal ・Strength Ring ・Spiked Armour |
| 4 | Once complete, you can now go and set your route to Weeping Isle up north! |
Weeping Isle
| 1 | Upon reaching Weeping Isle, check out your map. You'll notice that the area is quite big, it actually has 2 levels and the boss is resting on the second level, so best clear out all the Treasures from L1 first befoere going up. One treasure on L1 requires going up to L2 and back down via a different path. ▶︎ Weeping Isle Dungeon Guide |
|---|---|
| 2 | 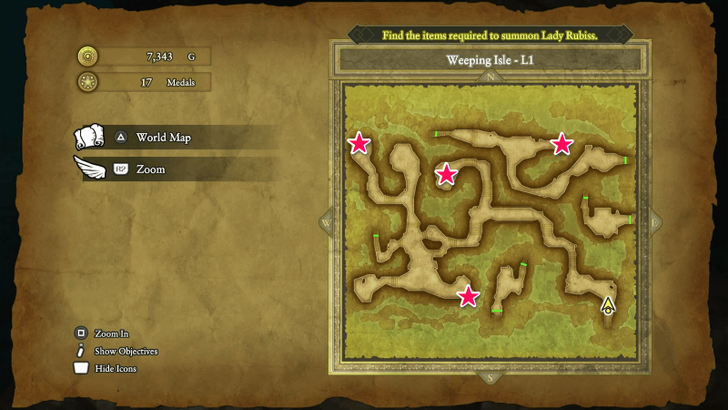 There are a total of 4 treasures on L1 that you can get, namely: ・ Hextract ・Musk ・Mini Medal ・2 Coagulants. |
| 3 | 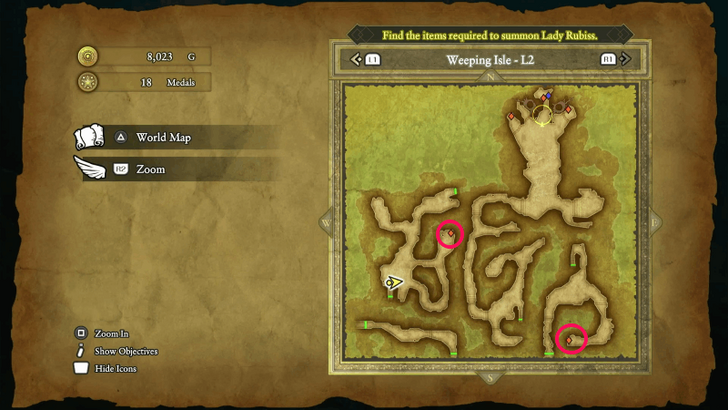 Once you collect all treasures from L1, it's time to go up to L2. There are 5 treasure chests in L2 but 3 of those are only accessible if you defeated the boss. So for now, grab that 4452 Gold from that one treasure chest, and the Mini Medal on the other end. |
| * | The next thing to do here in the cave is to rescue the Priest and complete a boss fight with multiple Dragonflies. However, if your HP and MP can't hold on for much longer, zoom in to a nearby inn and rest then head back here to deal with the boss. |
| 4 | Before heading towards the boss area, make sure to wear equipment that nullifies Fire damage such as the Ice Shield, Tectonic Plate, and the Asbestos Earring since the enemies will use Fire attacks on you. Proceed to the boss area and prepare for a fight.. There will be a total of 6 Dragonflies here, it may seem like a lot but the best strategy is to strike them one by one with Dragon Slash since they are all Dragons. This attack will be the most effective against them. Once you are at 50% HP, use your Soul Sigil's effect to your Undead Undoer ability to soup it up and transform it into Pearly Gates, attacking all enemies at once, and defeating them eventually. ▶︎ How to Beat Dragonfly |
| 5 | 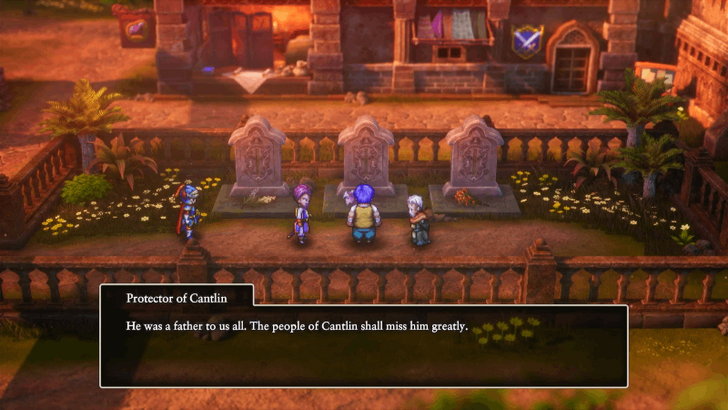 After the fight, you'll be transported back to Cantlin. After the cutscene, examine the graveyard to the right to trigger another cutscene. |
Preparations Before the Final Dungeon
| Jump to an Area Walkthrough! | |||
|---|---|---|---|
| 1 | Return to Faerie Village and Kol | 2 | Grave of Galen |
| 3 | Return to the Shrine of Rain | 4 | Shrine of the Spirit |
| 5 | Sanctum | 6 | - |
Return to Faerie Village and Kol
| 1 | 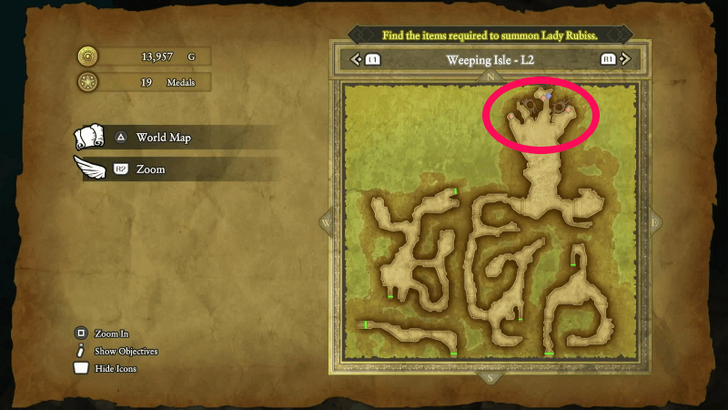 After the cutscene at Cantlin, zoom back to the Weeping Isle to get the remaining loot inside the treasure chests on L2, which are: ・A Mimic holding a Sage's Elixir ・Ruby Wristband ・Pirate King's Pendant ・Garish Garb The Mimic is much stronger than a Cannibox. If you feel like you can’t defeat it just yet, better return later. |
|---|---|
| 2 | You’ll also want to examine the pots and barrels beside the treasure chests to get: ・Rousing Ring ・Ice Shield ・Rabbit Tail ・Oomph Powder ・Copper Sword |
| 3 | 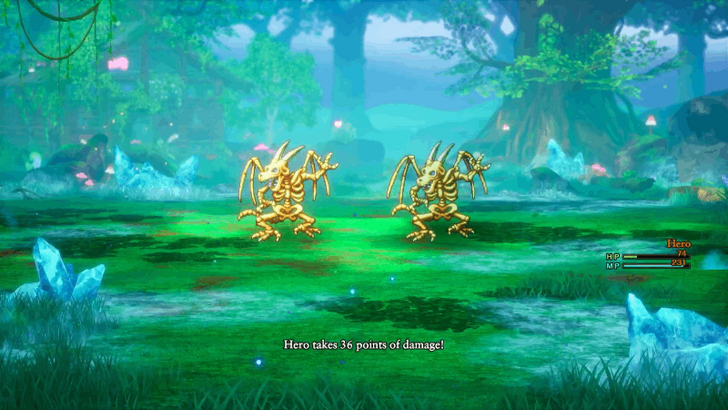 After getting all the treasures, zoom yourself to a nearby inn and rest up. You’re going to need it because the next destination will be a boss battle in the Faerie Village. As a precaution before the battle, make sure you’re wearing the Rousing Ring you just got, since the enemies will try to inflict Sleep, and equip armor that resists Ice and Fire damage, such as Dragon Mail, Dragon Shield, or Fire Earrings. Additionally, if you haven’t reached Level 30 yet, make sure you do because the spell Kasizz (learned at Level 30) is crucial for this fight. |
| 4 | 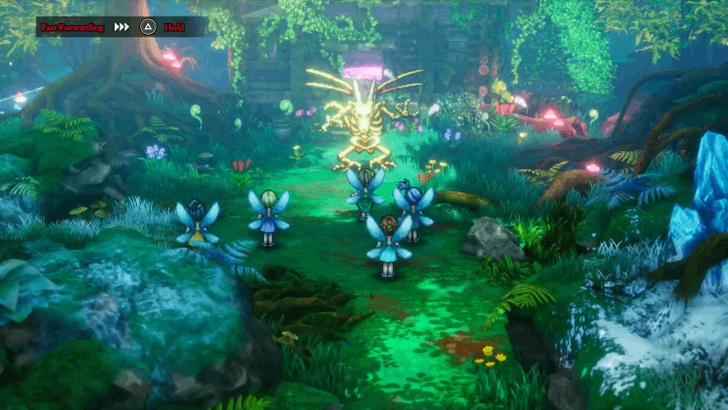 Once rested, zoom yourself to Faerie Village to watch a cutscene. After that, you’ll face 2 Dragon Zombies. They’re weak to Kasizz, so keep using it, it’s an AoE spell that’ll burn them both down quickly. ▶︎How to Beat Dragon Zombie |
| 5 | Once done, zoom to a nearby inn and rest, because tomorrow’s going to be another boss battle day. |
| 6 | Next on the list: head to the village of Kol for another boss fight. It’s recommended to be at least Level 32, as the enemy here is quite strong. ▶︎ EXP Farm: How to Level Up Fast |
| 7 | 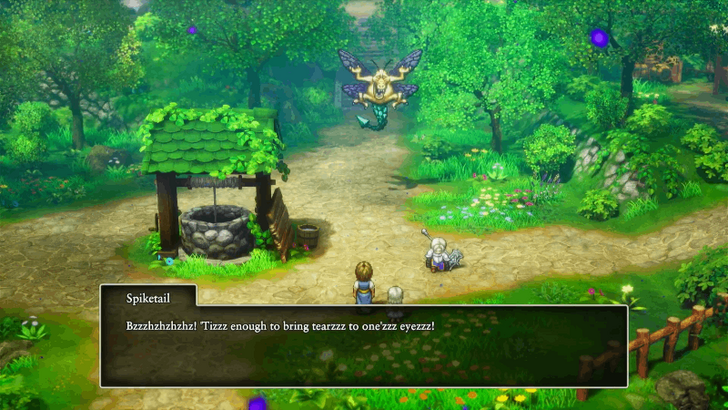 Zoom yourself to Kol, but equip the Swallowtail first as this weapon can attack all monsters at once. You’ll get the Swallowtail by exchanging 17 Mini Medals with the Monarch at the Citadel. Don’t change your other equipment before the fight. Once at Kol, you'll be put into a boss battle instantly after the cutscene, so prepare for a boss battle with Spiketail. ▶︎ How to Beat Spiketail |
| 8 | 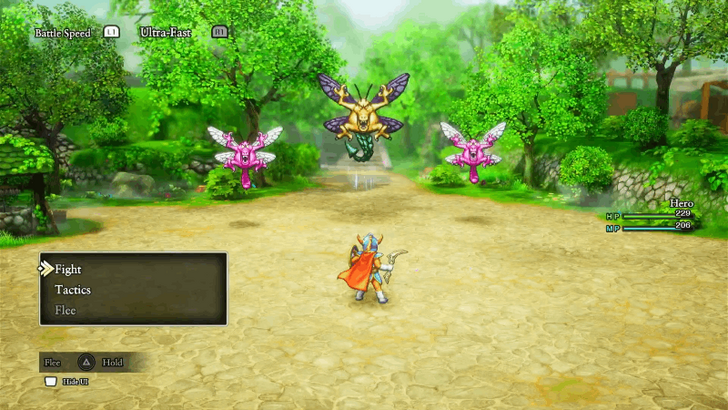 Once the battle begins, immediately cast Wild Side on yourself, which lets you attack twice per turn. During this fight, alternate between attacking with your Swallowtail and casting Kasizz on Spiketail. Use Swallowtail every time he calls forth an ally, and Kasizz (or Dragon Slash if you’re low on MP) when he’s alone. After the battle, Spiketail drops the Ultimate Key, which opens the remaining locked doors and chests you couldn’t access before. |
Grave of Galen
| 1 | 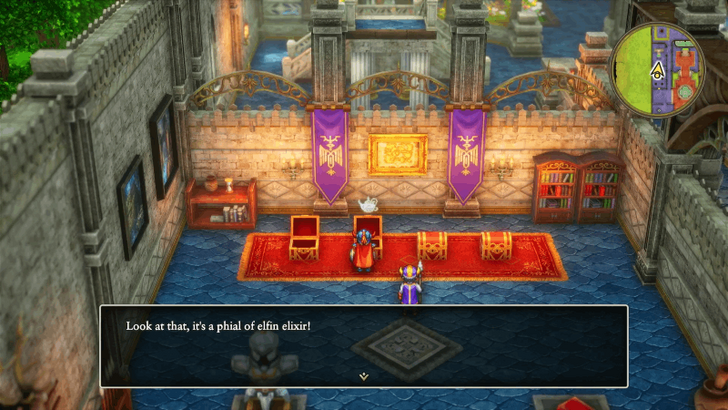 Before continuing, head back to Tantegel Castle and open the locked door to the left with your new key to access four treasure chests containing: ・12,000 Gold ・Elfin Elixir ・Headsman’s Axe ・Snoop Scroll |
|---|---|
| 2 | 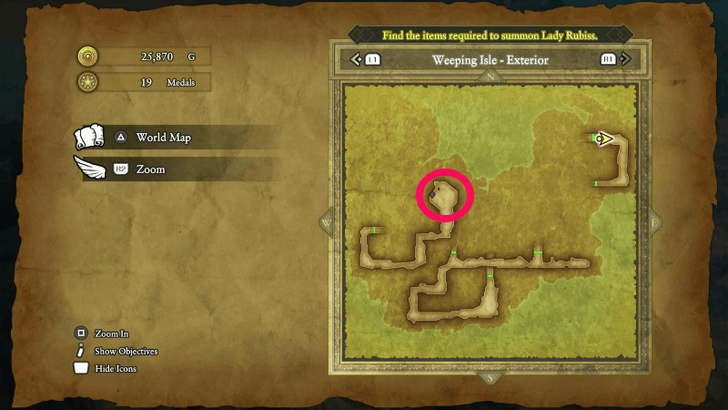 After getting the loot, zoom back to the Weeping Isle to open the treasure chest found just outside L2, in the Weeping Isle Exterior. Examine the chest, pots, and barrels to claim the following items: ・Erdrick’s Shield ・Staff of Sentencing ・Kacrack Scroll ・2 Jeeper Creepers ・Thorn Whip ・3 Magic Water Additionally, grab the Stardust by examining the sparkly spot in the middle. |
| 3 | 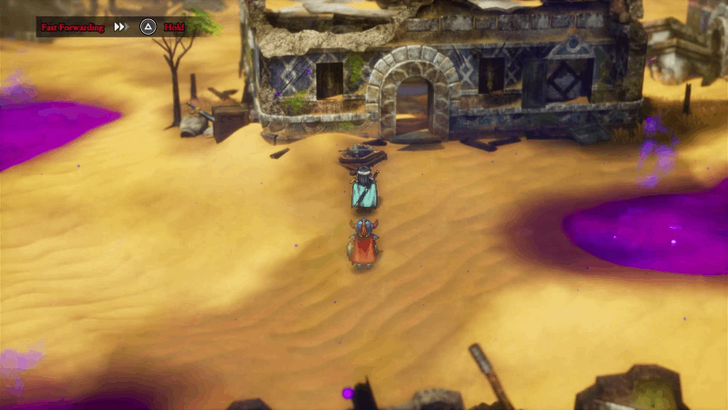 Next, zoom to Damdara and find Zalen there, he’s the only person in the ruined town. Talk to him for a cutscene. You can also find a Demon Demeaner Scroll inside a barrel in the only accessible house, so don’t miss it before leaving. Note that the Knight Aberrant is also here, but you’ll need to examine a blue exclamation mark to trigger a boss battle. Don’t do that yet and leave after the cutscene. ▶︎Zalen Sidequest Locations and Where to Find Him |
| 4 | 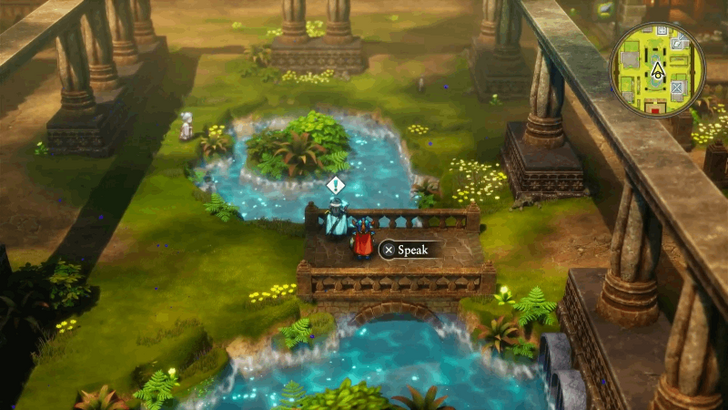 Zoom back to Cantlin and meet Zalen near the bridge in the middle of town. This marks the last conversation you’ll have with him. However, if you haven’t spoken to him in the Forgotten Ruins, Nameless Ruins, and Damdara (in that order), he might not appear, so backtrack if he doesn’t show up. |
| 5 | 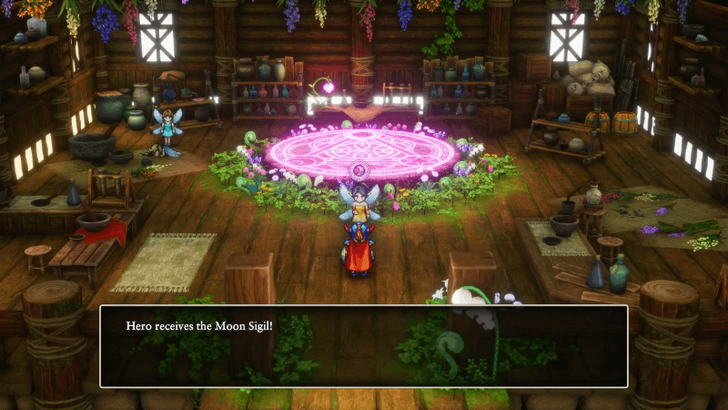 Teleport to Faerie Village and surrender your Undying Flame to receive the Sun Sigil (enables critical hits with abilities), your Moonbeam Dew to obtain the Moon Sigil (critical spell hits), and your Stardust to create the Star Sigil (regenerates MP when defending in battle). |
| 6 | 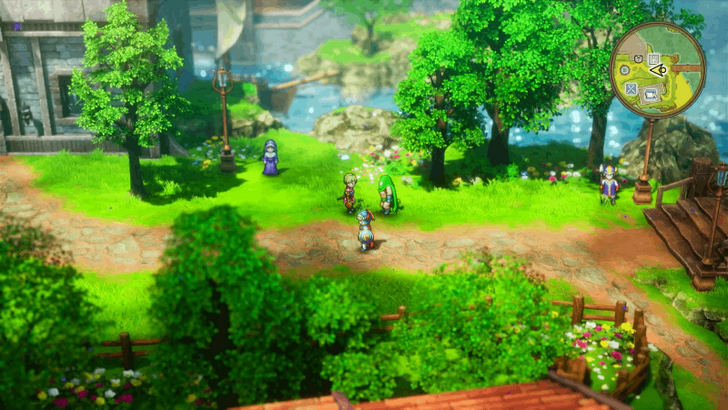 Finally, head to Galenholm. After teleporting, a cutscene will trigger with Robbin 'Ood. Once that’s over, enter the locked building beside the bridge to access Galen’s Grave. |
| 7 | 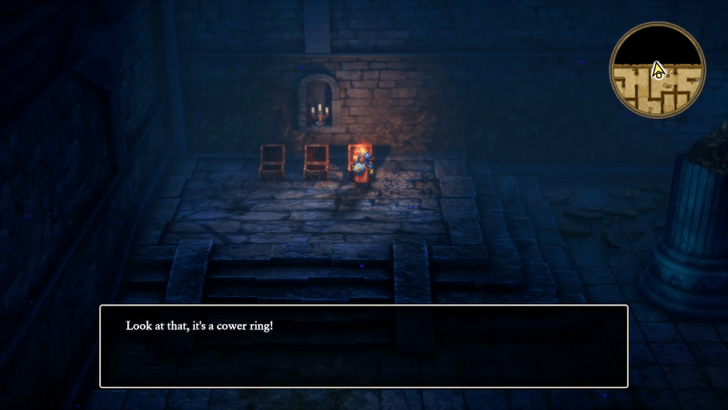 From there, start exploring the dungeon and opening up any treasure chests you find. On the way down on B3, you'll come across a large statue. Make sure to interact with the front of it to pick up the Mini Medal hidden in the floor. ▶︎ All 40 Mini Medal Locations and Rewards |
| 8 | 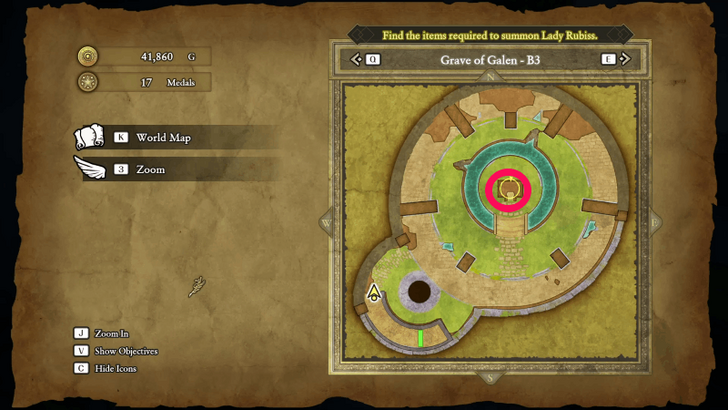 Keep going through the dungeon until you go through B4 to head back up to B3. At the center of the room, you'll find the Lyre of Ire, which you'll need to continue your quest. ▶︎ Galen’s Grave Dungeon Guide |
Return to the Shrine of Rain
| 1 | 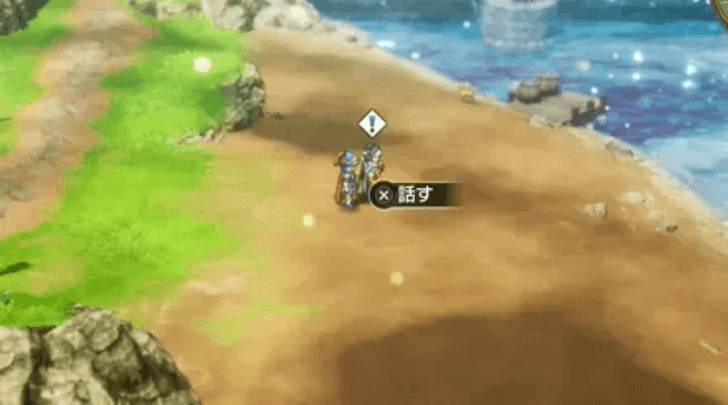 Once you're done, feel free to Zoom out of the dungeon back to Galenholm. Now that you have the lyre, Zalen will appear on the beach, so talk to him to continue his sidequest. ▶︎ Zalen Sidequest Locations |
|---|---|
| 2 | 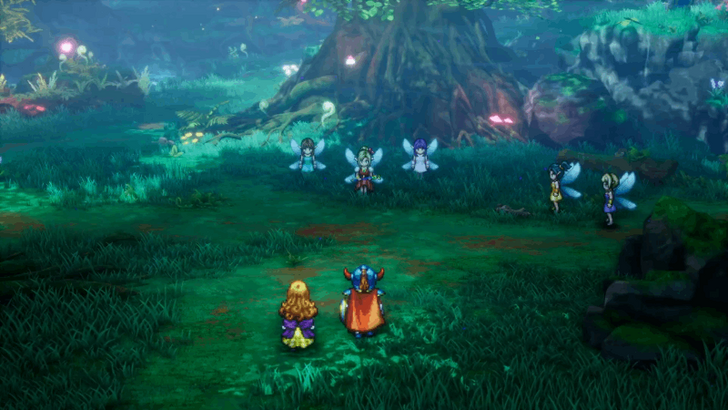 After that, teleport back to the Faerie Village to continue the main story. Now that you have the Faerie Flute, Lyre of Ire, and 5 Sigils, a cutscene will play out and you'll be asked to meet the Faeries at the Shrine of Rain. |
| 3 | 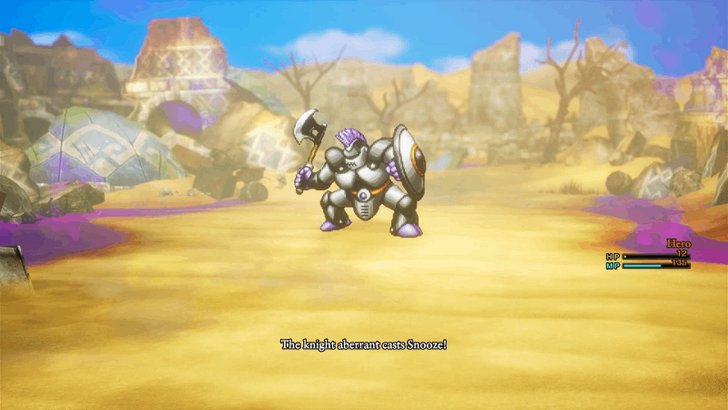 Before going there, now's a good time to stop by Damdara again to take on the Knight Aberrant. Once you're ready, head through the destroyed house in the center of the village to face the boss. If you're having a hard time defeating the knight, consider farming some Metal Slimes first to level up first ▶︎ How to Beat Knight Aberrant |
| 4 | Once that boss has been defeated, a sparkly spot will appear behind them. Inspect it to receive Erdrick's Armour, one of the best armor pieces in the game! ▶︎ How to Get Erdrick's Equipment Set |
| 5 |  Now that you have an upgraded chest piece, you're free to head to the Shrine of Rain to meet up with the Faeries. After a short cutscene, you'll now be able to go through the door to climb up the former Tower of Rubiss. |
| 6 | 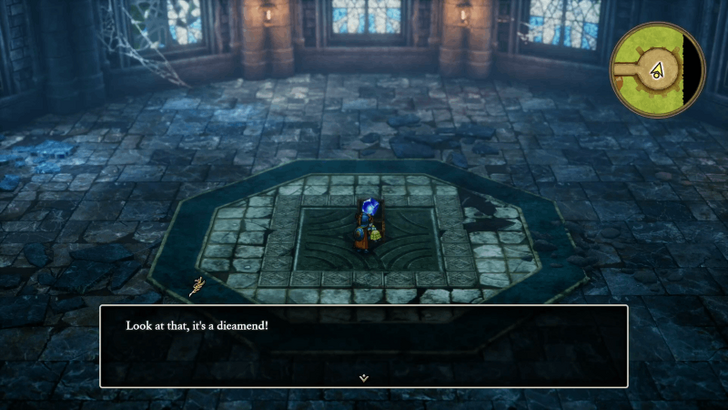 On the way up, make sure to explore the tower for any treasures you may find. Some of the important items you want to look out for are the Mini Medal on 3F, as well as the stat seeds littered throughout the containers in the tower. ▶︎ All 40 Mini Medal Locations and Rewards |
| 7 | 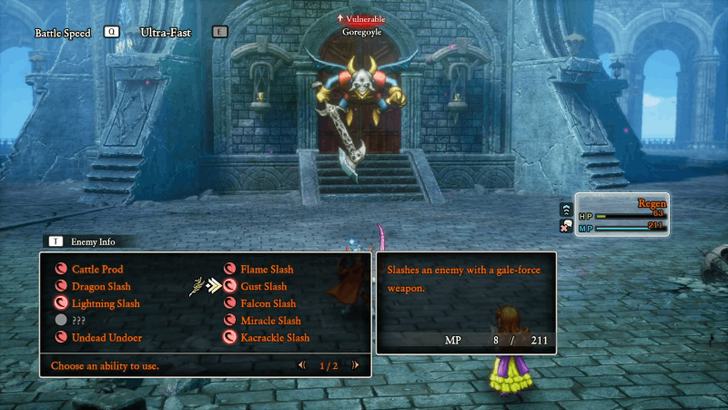 When you're ready, head towards the central chamber on the top floor to face the Goregoyle. They like to use physical attacks and are weak to lightning, so it's recommended to level up to 35 so that the Hero can learn Kazap. |
| 8 | 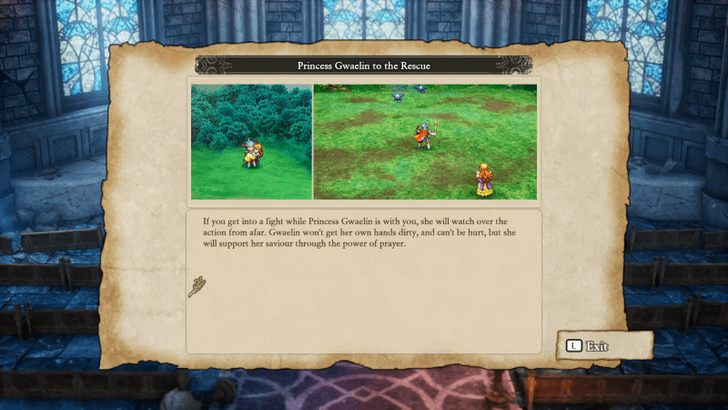 After the boss has been defeated, a cutscene will play out with the Faeries and Rubiss. If you're still carrying around Gwaelin with you during this cutscene, she will also unlock the ability to support you from the sidelines in battle. |
| 9 |  Before leaving the tower, exit the chamber and head around to the exterior left side of it to pick up a Mini Medal from the chest. ▶︎ All 40 Mini Medal Locations and Rewards |
| 10 | 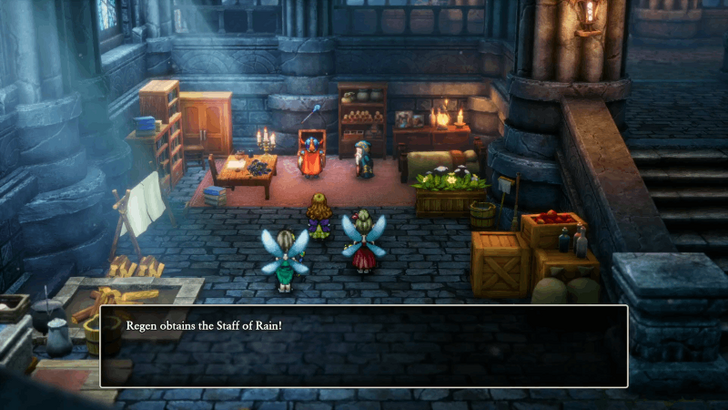 Once you're done, head back down to the first floor so that you can speak with the Sage to receive the Staff of Rain. Make sure to keep this item in your inventory since you can use it to cast Fizzle even if you've been Fizzled yourself! |
Shrine of the Spirit
| 1 | After the events at the Shrine of Rain, four new Secret Spots will appear on the map. Make sure to visit and explore these locations so that you can get incredible items, like Mini Medals, a Mirror Shield, a Duplic Hat, and an Yggdrasil Dress Coat! ▶︎ All Secret Spot Locations |
|---|---|
| 2 | 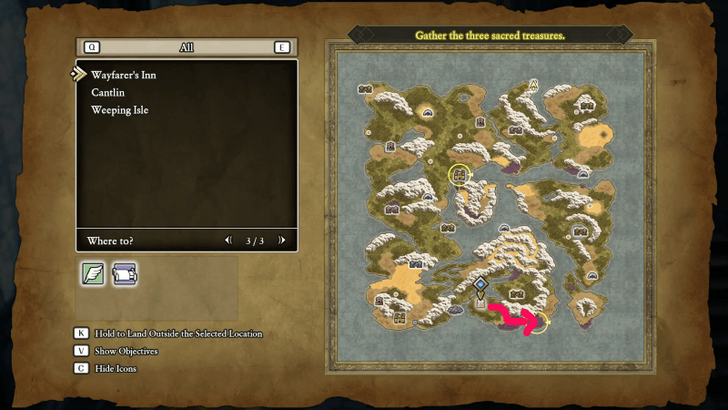 With some new and powerful equipment in hand, teleport to the Wayfarer's Inn so you can head southeast through the swamp to reach the Shrine of the Spirit. As long as you're wearing Erdrick's Armour, you don't have to worry about taking damage from the poison swamp. |
| 3 | 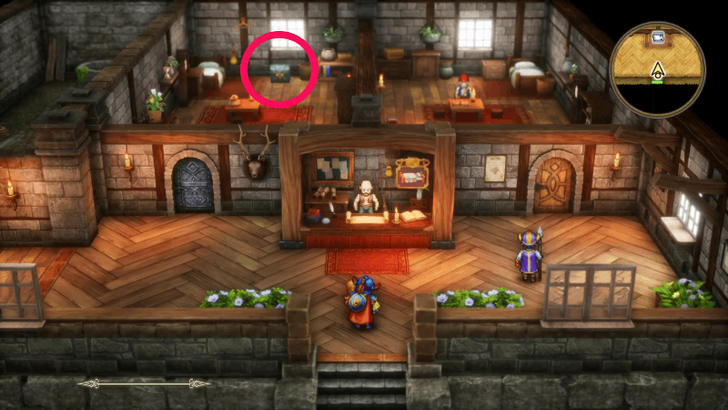 Head inside, and after a short cutscene, look around the backleft of the room before heading up to find a Mini Medal. ▶︎ All 40 Mini Medal Locations and Rewards |
| 4 | 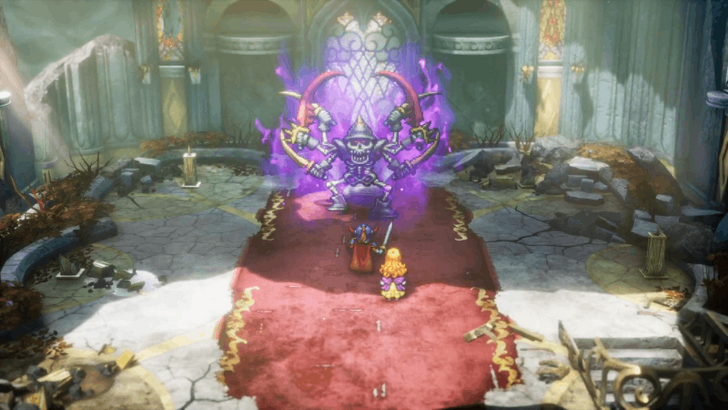 When you're ready, head up the stairs and interact with the seat to fight the Armageddon. Make sure to bring healing items and equip a Full Moon Ring since this boss can Fizzle and paralyze you. Also, it's recommended to use the Fire Blade and spam Pearly Gates so that you can target both of this boss' weaknesses. |
| 5 | Once that boss has been defeated, you'll be rewarded with the Mark of Erdrick, which also happens to be one of the best accessories in the game! |
Sanctum
| 1 | 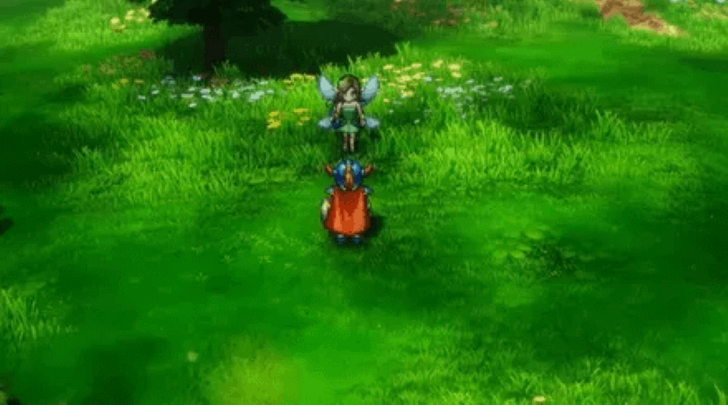 Before heading to the Sanctum, you'll want to make a few more detours to finish up Zalen's Sidequest. First, head to the Field of Flowers so that you can talk to Over-Seer. This will play out a short cutscene, and you can head to the Shrine of Rain afterwards. ▶︎ Zalen Sidequest Locations and Where to Find Him |
|---|---|
| 2 | 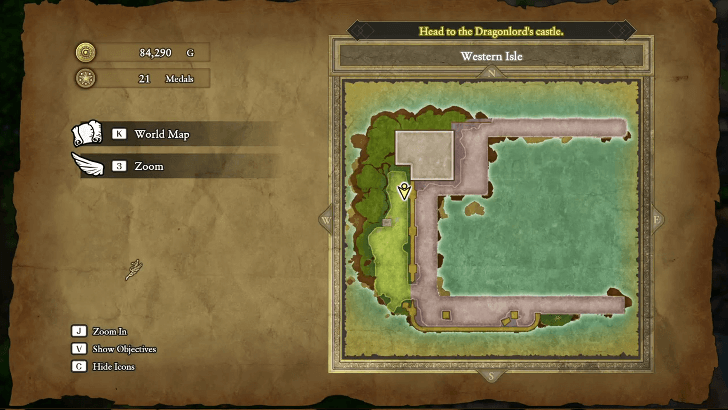 Teleport to the shrine, and once you're inside, talk to Dream-Whisperer. She will teleport you to the Western Isle, where you'll be able to pick up Erdrick's Helm after the cutscene ends. |
| 3 | While you're here, make sure to explore the island and pick up any items you find. Make sure not to miss out on the Mini Medal located on the top right-most part of the map! ▶︎ All 40 Mini Medal Locations and Rewards |
| 4 | 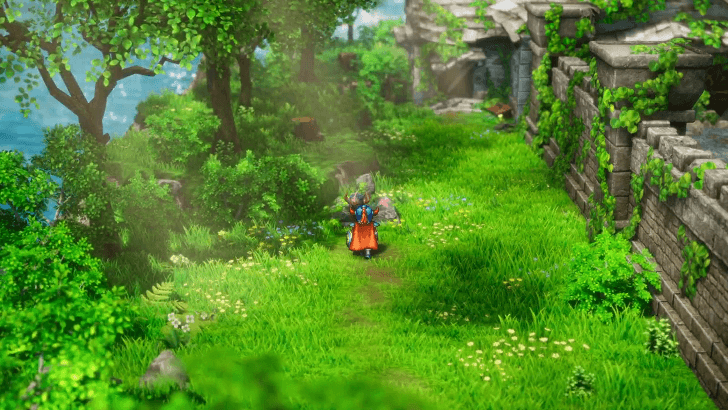 When you're ready to leave, talk to Dream-Whisperer again to teleport back to the Shrine of Rain. Now that you have most of Erdrick's Equipment Set, you can teleport to Rimuldar to continue your journey. |
| 5 | 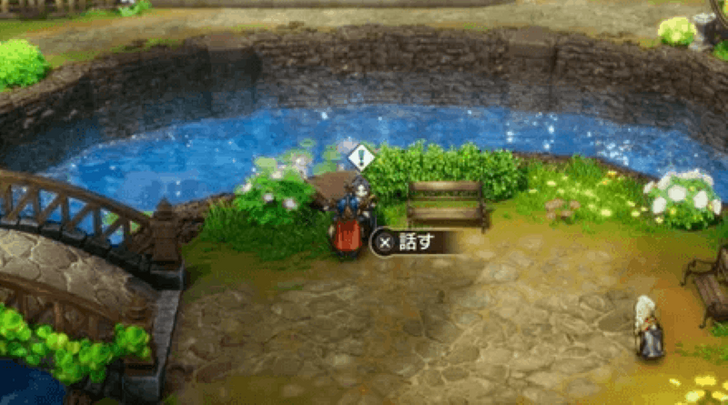 While this step doesn't provide any help for the rest of the story, it's recommended to talk to Zalen in Rimuldar to close out his questline and unlock an achievement. ▶︎Trophy Guide: How to Get Platinum |
| 6 | 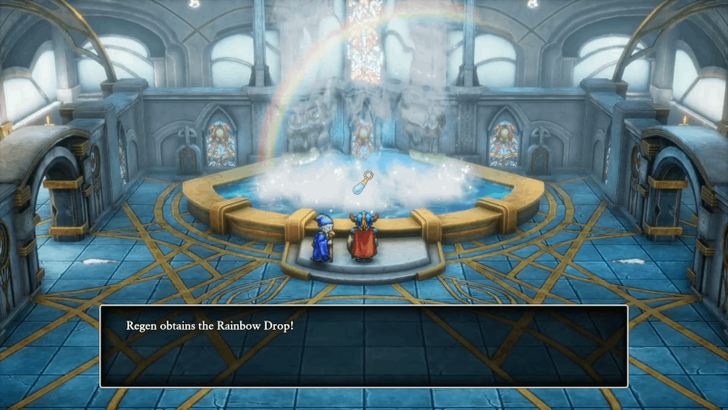 Leave Rimuldar and head south towards the Sanctum, nestled in the center of a mountain range. Talk to the sage here and you'll receive the Rainbow Drop, which will be used to take you to the final dungeon. |
| 7 | Before leaving, make sure to inspect the area behind the fountain to pick up a Mini Medal. ▶︎ All 40 Mini Medal Locations and Rewards |
Dragonlord's Castle and Final Boss
Dragonlord's Castle
| 1 | Teleport to Rimuldar and head northwest until you reach a small area that's close to the island where the Dragonlord's Castle is. After a short cutscene, you will now be able to cross to the island to reach the castle. |
|---|---|
| 2 | When you're ready, head inside the Dragonlord's Castle to face the final dungeon of the game. If you're feeling weak, it's recommended to take some time to farm enemies at the entrance, especially Liquid Metal Slimes, so you can level up a bit. ▶︎ Dragonlord’s Castle Dungeon Guide |
| 3 | Head through the left side of the dungeon and make your way around to the throne room at the back. To open the way forward, head around to the back of the throne and inspect it to open up a hidden passageway. Also, as a note, make sure that you're wearing Erdrick's Armour for this part of the dungeon so that you don't take damage from the floor tiles. |
| 4 | Continue exploring the dungeon and picking up any treasures you find until you reach B4. When you arrive here, make sure to go through the two staircases in the center for some of the most important items in the dungeon. |
| 5 | Start by going through the right staircase, which will lead you to an area with the Mini Medal. Once you've got it, make sure to exit back through the south exit, since taking the north exit will lead you to an infinite loop. ▶︎ All 40 Mini Medal Locations and Rewards |
| 6 | Next, take the left staircase and follow the path until you reach B1. At the end, you will see a sword stuck in the ground, and interacting with it will grant you Erdrick's Sword. This lets you complete Erdrick's Equipment Set, and equipping all 5 pieces will change the Hero's appearance. However, as a note, it's still recommended to use the Duplic Hat instead of the full Erdrick's set. ▶︎ Best Weapons and Armor |
| 7 | Once you've gotten the Sword, head back to B4 and make your way down the top right staircase to continue through the dungeon. |
| 8 | Make your way down to B6, while picking up any items you come across, and step through the teleportal before the final boss. This will open up a shortcut to the entrance of the dungeon, allowing you to freely leave the dungeon or return to the final boss as you please. |
| 9 | Before facing the final boss, it's recommended to tie up any loose ends first. Leave the dungeon and pick up any Scrolls or Mini Medals, as well as visit Secret and Sparkly Spots, that you may have missed. |
| 10 | Also, if you need to farm EXP, it's recommended to do so in the Dragonlord's Castle B6, since Liquid Metal Slimes have a higher chance of spawning here. ▶︎ EXP Farm: How to Level Up Fast |
| 11 | Rest at an inn and make a save before heading back down to B6 of the Dragonlord's Castle. When you're ready, approach the end of the hall to face the final boss, the Dragonlord. |
| 12 | If you're aiming to complete all achievements, it's recommended to accept the Dragonlord's offer to experience the bad ending and unlock the respective trophy. You don't have to worry about anything bad happening since you'll just respawn at an inn afterwards. ▶︎ Trophy Guide: How to Get Platinum |
| 13 | After getting the trophy, you can now deny his offer to finally face him in battle. You'll want to equip as much fire-resistant gear as possible, and make sure to preserve MP for the second phase of the fight. ▶︎ How to Beat the Dragonlord |
| 14 | Once you've defeated his initial form, phase 2 will start, and you'll now need to take down his dragon form. This is the final fight of the game, so make sure to use everything that you've got! |
| 15 | With the Dragonlord gone, you have successfully saved the world! Before going back to Tantegel, it's recommended to visit other areas in the game, like Damdara or the Shrine of Rain, to listen to the new dialogue from NPCs. |
| 16 | If you're satisfied with listening to the new NPC conversations, head back to Tantegel and talk to the king to beat the game. With that being said, you're now free to either reload your completed save and return to Tantegel, or move on to this game's sequel, Dragon Quest 2! ▶︎ Is There Post-Game Content? |
All Endings
Three Possible Endings
There are three possible endings to the game, with only two of them being actual endings with a cutscene at the end. However, the two real endings largely play out the same way, and the true ending only has a few differences from the good ending.
Endings Guide: List of All Endings
Dragon Quest I & II HD-2D Remake Related Guides
Dragon Quest 1 HD-2D Remake Wiki Front
Guides by Category
 Walkthrough Walkthrough |
 Tips and Tricks Tips and Tricks |
 Bosses Bosses |
 Spells and Abilities Spells and Abilities |
 Locations Locations |
 Equipment Equipment |
 Items Items |
 Enemies Enemies |
 Seeds Seeds |
 Characters Characters |
 Remake News Remake News |
- |
Recommended Guides
 All Mini Medal Locations
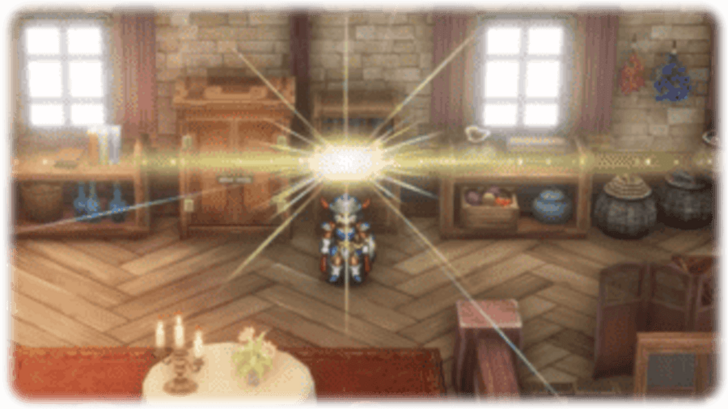 List of All Scrolls and Locations
 All Sparkly Spots Locations
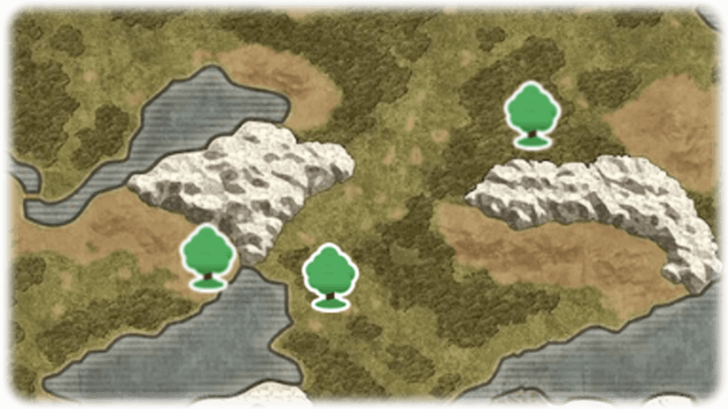 All Secret Spot Locations
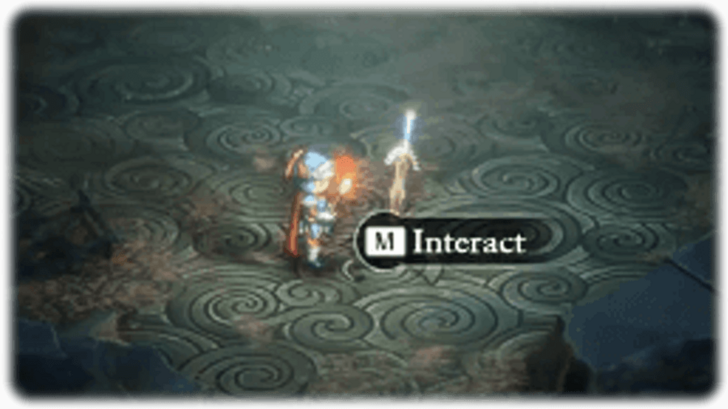 Best Weapons and Armor
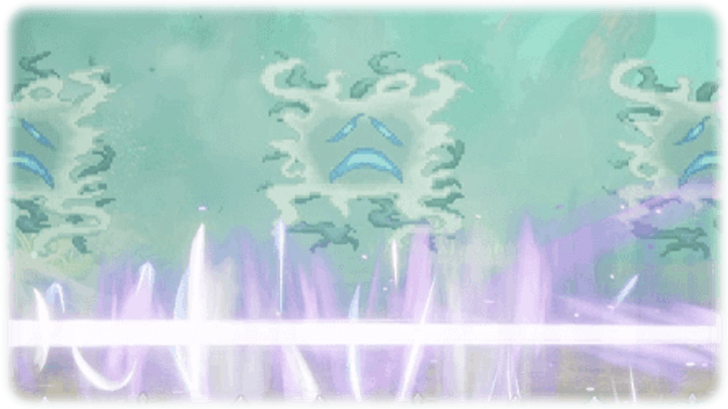 Best Spells and Abilities Tier List
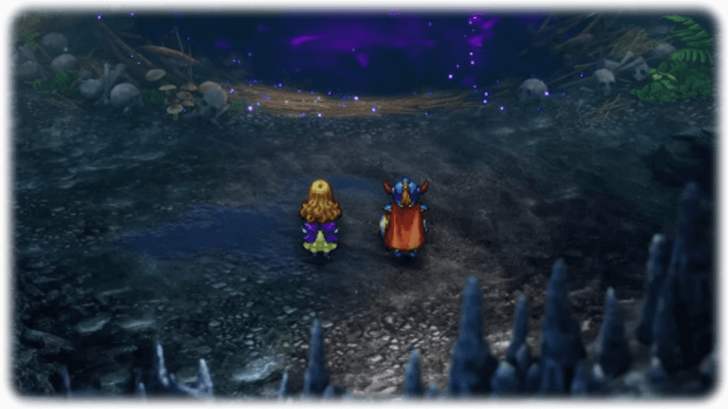 List of Missables
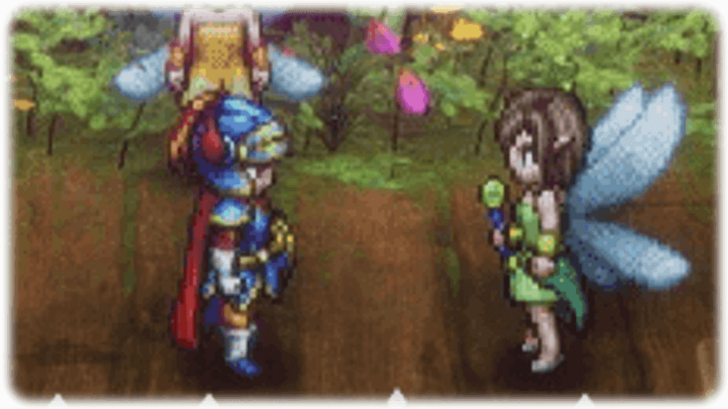 List of All 5 Sigil Locations
 How to Level Up Fast
 How to Earn Gold Fast
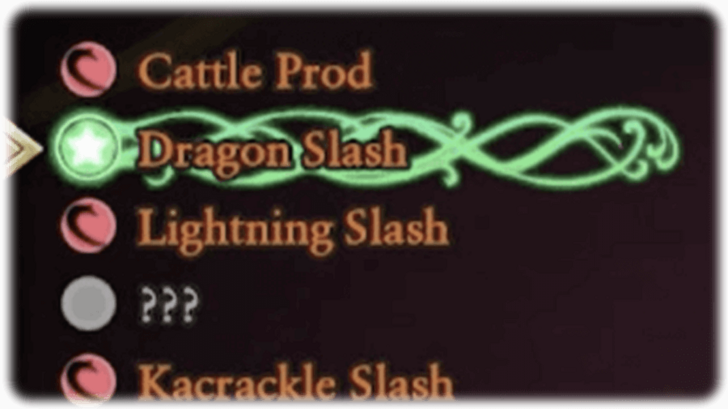 List of All Souped-Up Skills
Comment
Author

100% Walkthrough Guide
Rankings
- We could not find the message board you were looking for.
Gaming News

![Death Stranding 2: On The Beach [PC] Review | A Port That Delivers](https://img.game8.co/4447392/15310a0c9aa1b6843bb713b2ea216930.jpeg/show)


Popular Games

Genshin Impact Walkthrough & Guides Wiki
Umamusume: Pretty Derby Walkthrough & Guides Wiki
Crimson Desert Walkthrough & Guides Wiki
Monster Hunter Stories 3: Twisted Reflection Walkthrough & Guides Wiki
Honkai: Star Rail Walkthrough & Guides Wiki
Pokemon Pokopia Walkthrough & Guides Wiki
The Seven Deadly Sins: Origin Walkthrough & Guides Wiki
Wuthering Waves Walkthrough & Guides Wiki
Zenless Zone Zero Walkthrough & Guides Wiki
Arknights: Endfield Walkthrough & Guides Wiki


Recommended Games
Fire Emblem Heroes (FEH) Walkthrough & Guides Wiki
Diablo 4: Vessel of Hatred Walkthrough & Guides Wiki
Cyberpunk 2077: Ultimate Edition Walkthrough & Guides Wiki
Yu-Gi-Oh! Master Duel Walkthrough & Guides Wiki
Super Smash Bros. Ultimate Walkthrough & Guides Wiki
Pokemon Brilliant Diamond and Shining Pearl (BDSP) Walkthrough & Guides Wiki
Elden Ring Shadow of the Erdtree Walkthrough & Guides Wiki
Monster Hunter World Walkthrough & Guides Wiki
The Legend of Zelda: Tears of the Kingdom Walkthrough & Guides Wiki
Persona 3 Reload Walkthrough & Guides Wiki


All rights reserved
© ARMOR PROJECT/BIRD STUDIO/SPIKE CHUNSOFT/SQUARE ENIX
© SUGIYAMA KOBO ℗ SUGIYAMA KOBO
The copyrights of videos of games used in our content and other intellectual property rights belong to the provider of the game.
The contents we provide on this site were created personally by members of the Game8 editorial department.
We refuse the right to reuse or repost content taken without our permission such as data or images to other sites.