 Best Party and Teams
 Best Build and Stats
 Demon Fusion Guide
 All Aril Rift Locations
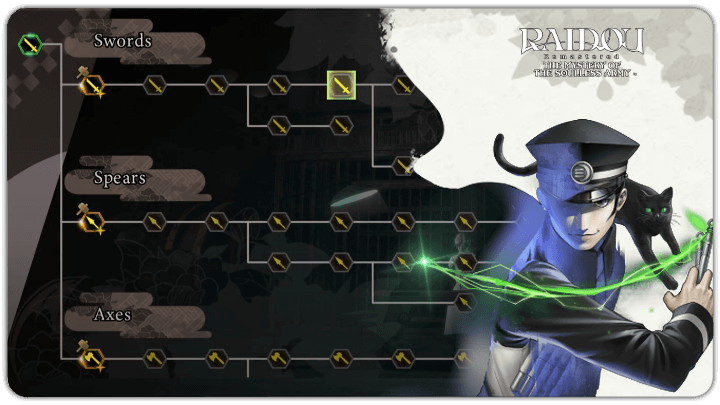 Sword Alchemy Guide
 Best Demons Tier List
 Training Hall Guide
 Best Weapon Upgrades
 List of Missables
 DLC Guide
 Konnou-Ya Shop Guide
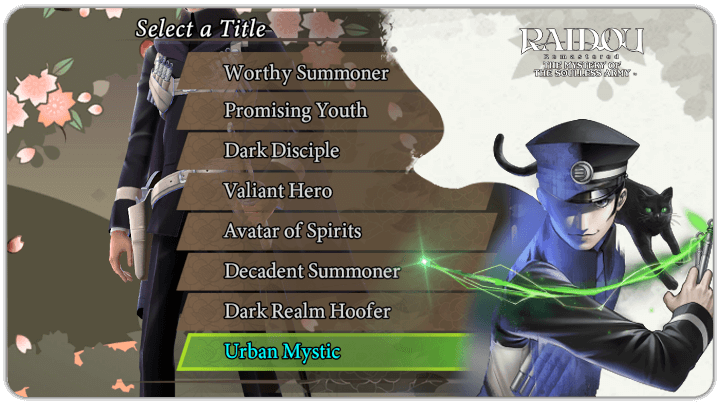 List of All Titles
This survey will take about 1 minute.
Your answers will help us to improve our website.
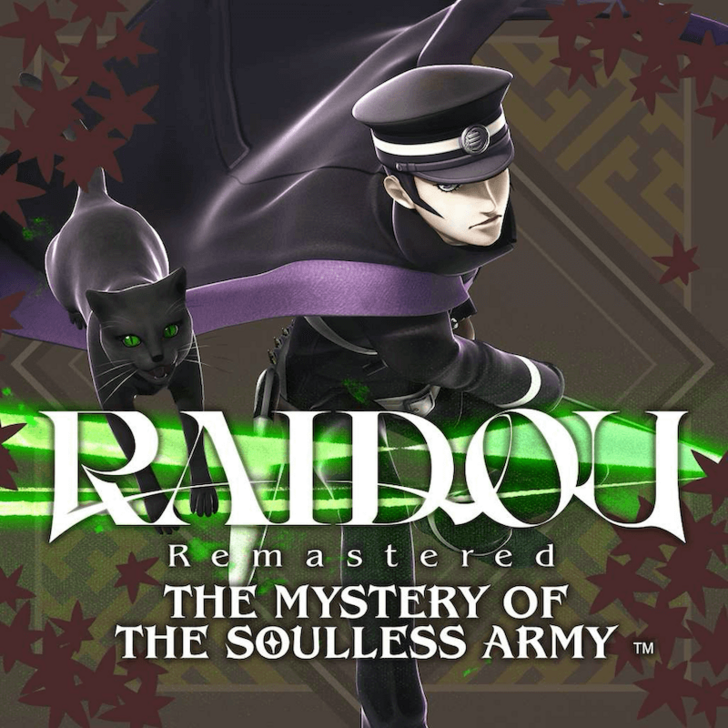
RAIDOU Remastered: The Mystery of the Soulless Army
100% Walkthrough Guide
A 100% Walkthrough Guide for RAIDOU Remastered: The Mystery of the Soulless Army. See all 12 episodes and how to clear each one 100% in this guide.
List of Contents
List of All Episodes
All 12 Episode Guides
RAIDOU Remastered: The Mystery of the Soulless Army has 12 episodes that serve as the main story of the game. Each episode has a set of objectives you need to clear and a boss you must defeat to proceed to the next one.
Episode 0
Prologue Tutorial
| Step-by-Step Guide | |
|---|---|
| 1 | 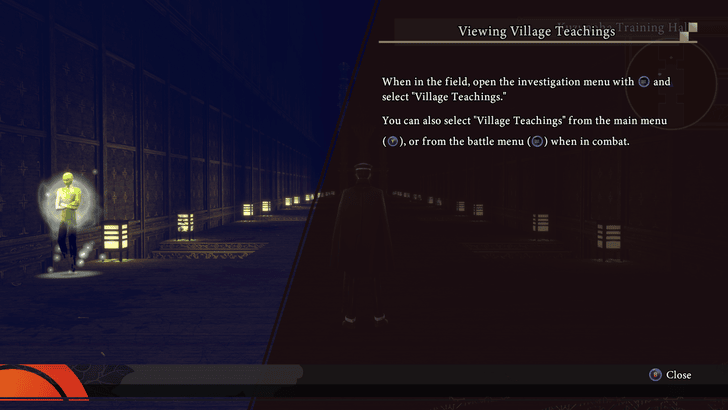 |
| * | Tapping the light attack button twice allows you to do the spinning slash. Hold it while Raidou is spinning and release at the end to complete the combo. |
| 2 | 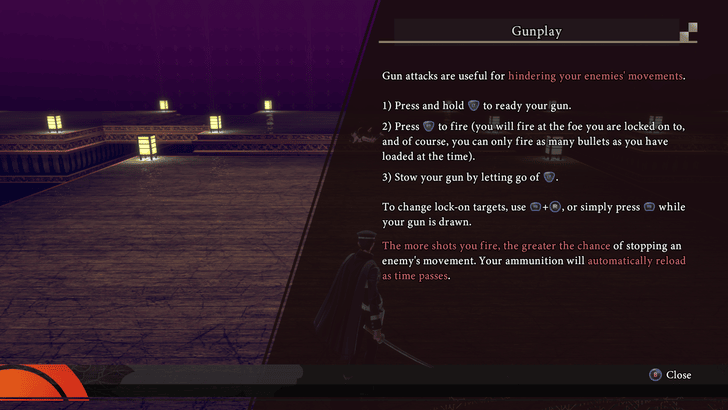 |
| 3 | 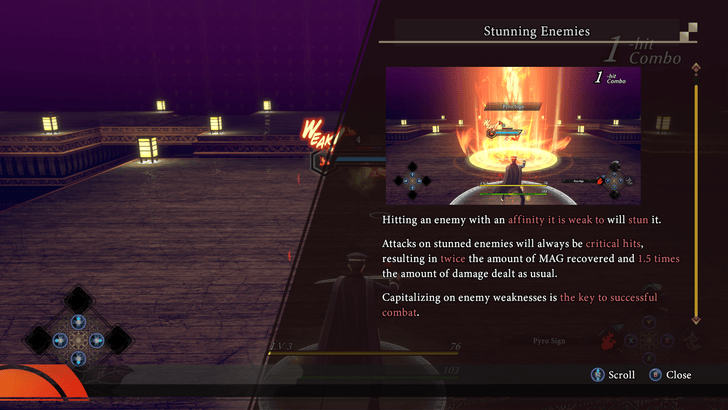 |
| * | 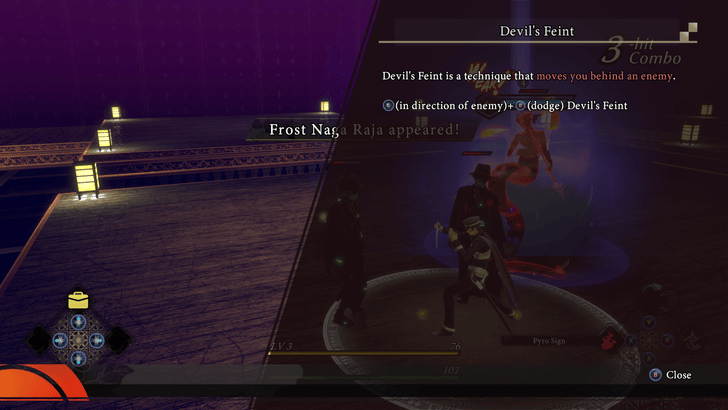 You can also use Devil's Feint to reposition yourself behind enemies. To do this, simply face an enemy head-on, then press the directional button toward it and the dodge button to perform Devil's Feint. |
| 4 |  |
| 5 |  |
| 6 | 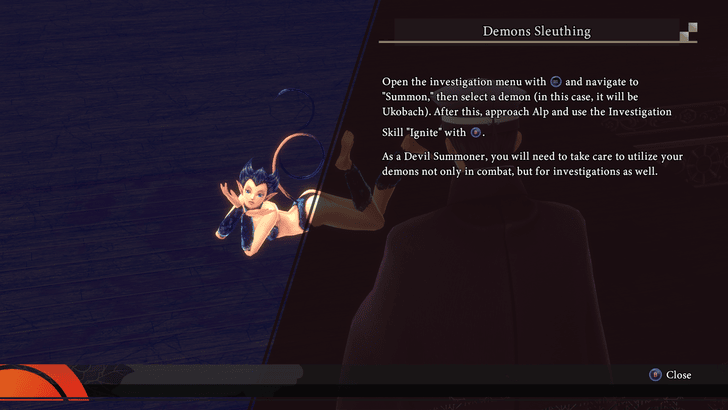 |
| 7 |  |
| 8 | 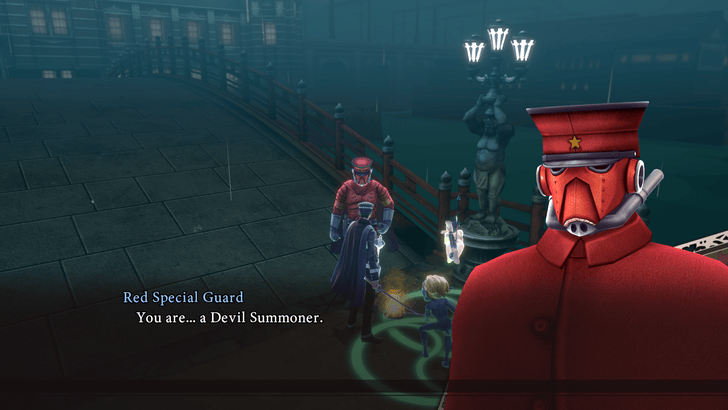 Ushigoma-Gaeri Bridge is the last step in the tutorial before proceeding to Episode 1. This is a fight against the Red Army Gaurds and you cannot defeat them as a group. The only way to complete it is to at least kill one guard. Ushigoma-Gaeri Bridge is the last step in the tutorial before proceeding to Episode 1. This is a fight against the Red Army Gaurds and you cannot defeat them as a group. The only way to complete it is to at least kill one guard. |
Episode 1: The Missing Girl
| Jump to Walkthrough Section | |||
|---|---|---|---|
| 1 | Tsukudo-Cho | 2 | Daidouji Residence |
| 3 | Tsukudo-Cho | 4 | Nameless Shrine |
| 5 | Dark Tsukudo-Cho | 6 | Tsukudo-Cho |
| 7 | Daidouji Residence | 8 | Tsukudo-Cho |
| 9 | Daidouji Residence | 10 | Tsukudo-Cho |
| 11 | Daidouji Residence | - | - |
Episode 1: The Missing Girl Walkthrough Guide
Area 1: Tsukudo-Cho
| Step-by-Step Guide | |
|---|---|
| 1 | 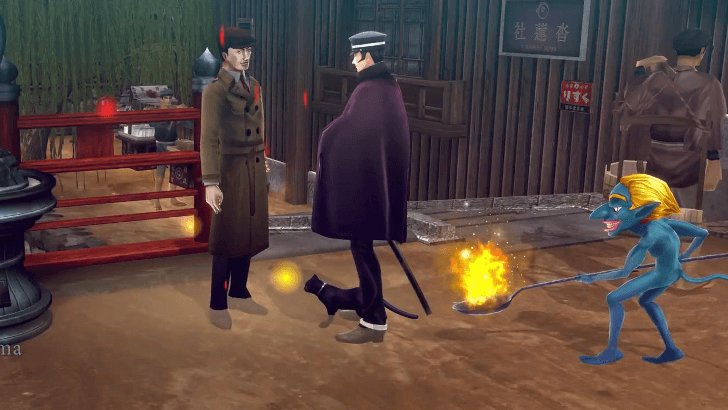 Summon Ukobach. Ignite Detective Kazama to make him talk. Summon Ukobach. Ignite Detective Kazama to make him talk.
|
| 2 | 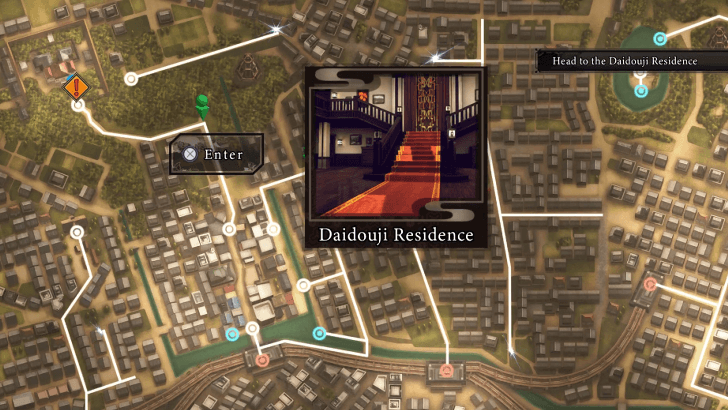 |
Area 2: Daidouji Residence
| Step-by-Step Guide | |
|---|---|
| 3 | 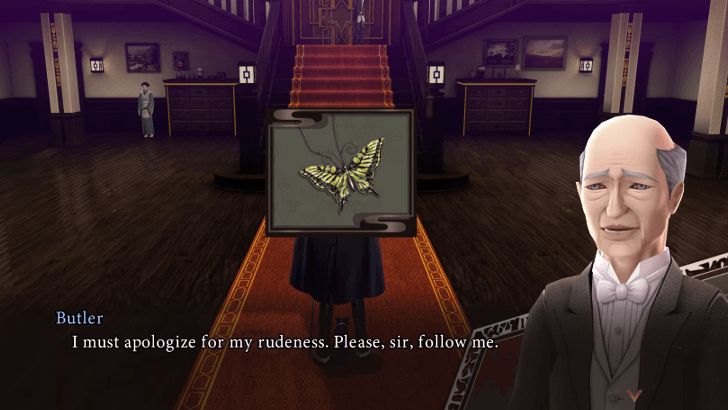 Show the butler the Butterfly Brooch to the butler. Show the butler the Butterfly Brooch to the butler. |
| 4 | 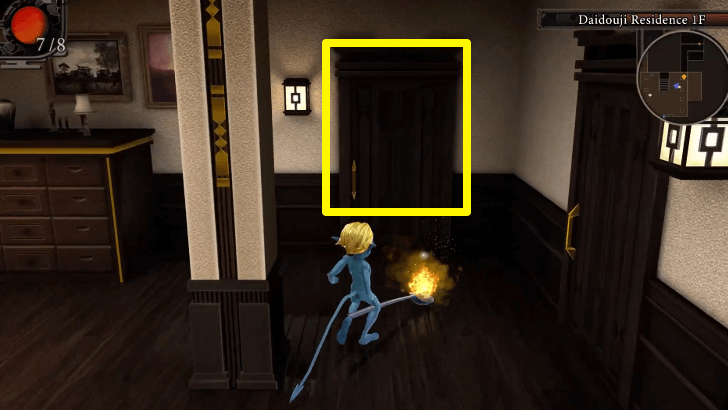 Send a Demon on a solo investigation of Mr. Daidouji’s Study. Send a Demon on a solo investigation of Mr. Daidouji’s Study. |
Area 3: Tsukudo-Cho
| Step-by-Step Guide | |
|---|---|
| 5 |  Show Kaya's Photograph to the highschool girls standing on the left-hand sidewalk of the main street south of Tamonten Shrine. Show Kaya's Photograph to the highschool girls standing on the left-hand sidewalk of the main street south of Tamonten Shrine.
|
| 6 | 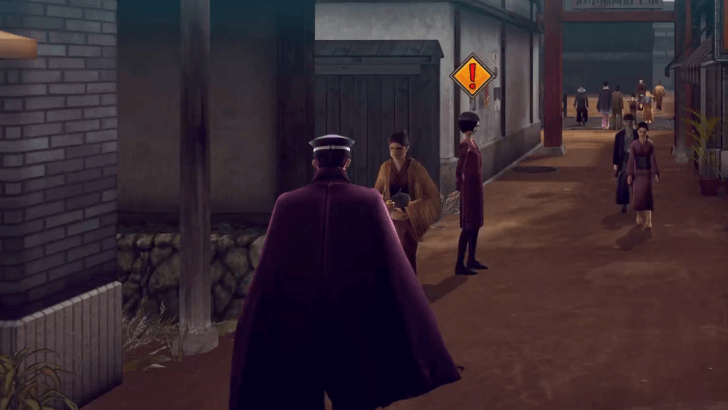 Head down the alley to the east to show the photograph to Rin. She's in the same uniform as those two girls. Head down the alley to the east to show the photograph to Rin. She's in the same uniform as those two girls. |
| 7 | 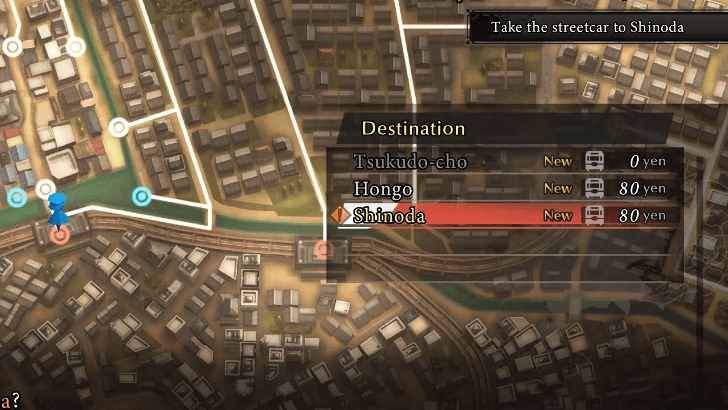 |
Area 4: Nameless Shrine
| Step-by-Step Guide | |
|---|---|
| 8 | 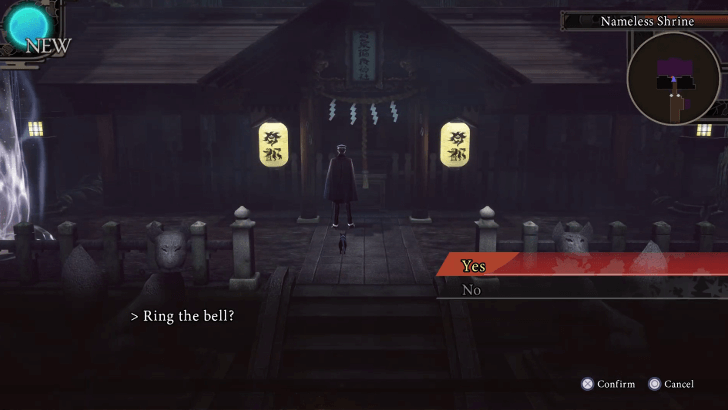 |
Area 5: Dark Tsukudo-Cho
| Step-by-Step Guide | |
|---|---|
| 9 | 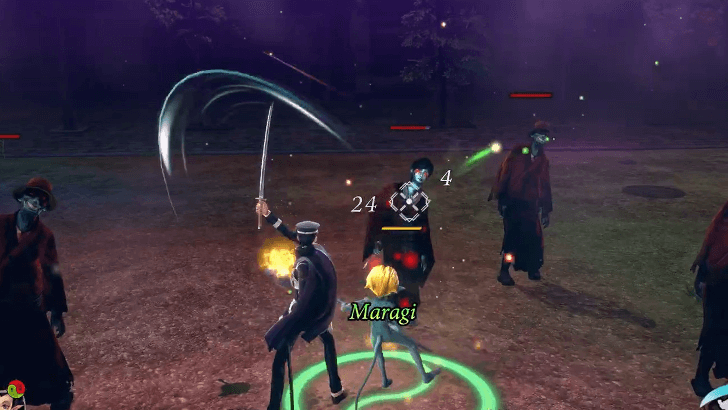 Defeat the Zombies with Ukobach. Defeat the Zombies with Ukobach. |
| 10 | 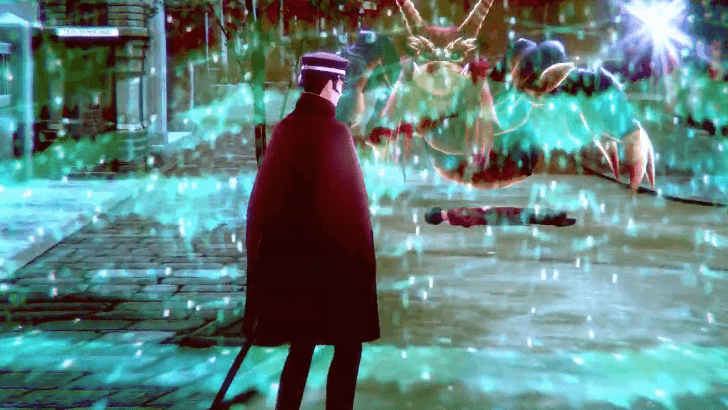 Head north to learn about Dragon's Rise. Head north to learn about Dragon's Rise. |
| 11 | 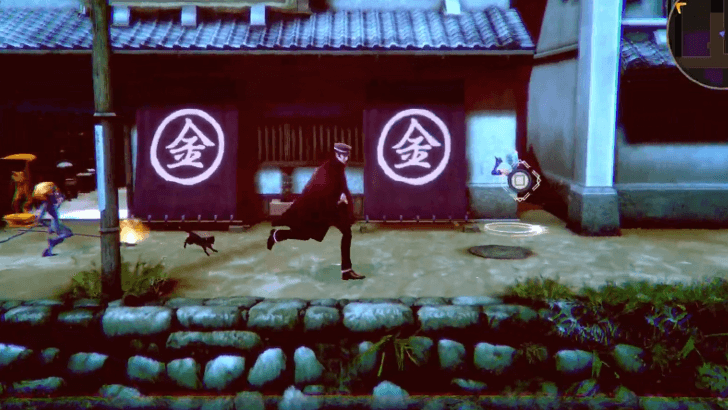 Take the eastern alley, and head north from where Konnou-Ya is located. Take the eastern alley, and head north from where Konnou-Ya is located. |
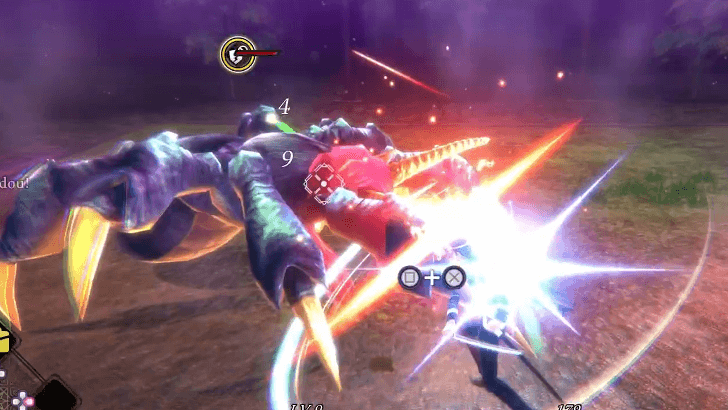
| 12 | 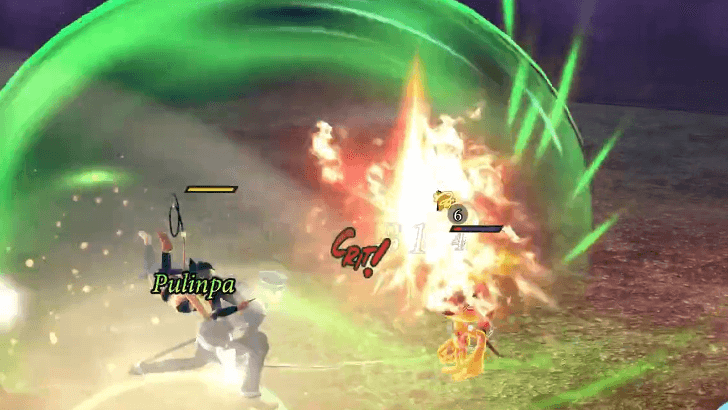 Defeat the three Obariyon. Defeat the three Obariyon. |
| * |  Make sure to capture Azumi before this battle! Azumi can help you exploit Obariyon’s weakness to ice, especially if you’ve run out of Ice Bullets. Make sure to capture Azumi before this battle! Azumi can help you exploit Obariyon’s weakness to ice, especially if you’ve run out of Ice Bullets. |
| 13 | 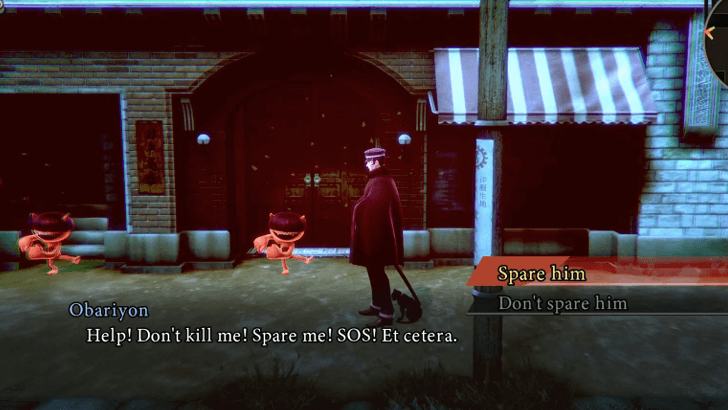 |
| 14 | 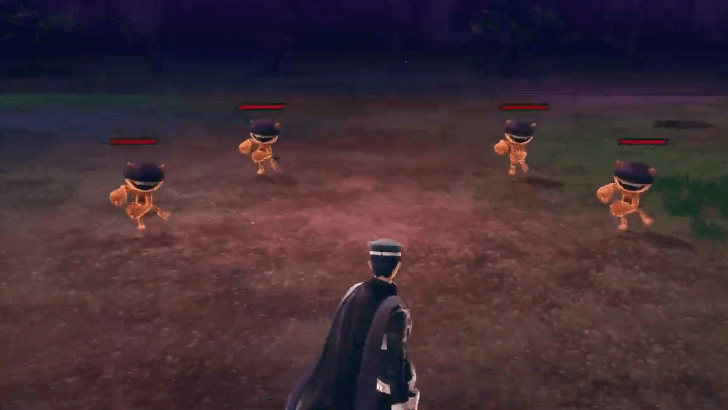 Defeat the Obariyon again to pass. Defeat the Obariyon again to pass. |
| 15 | 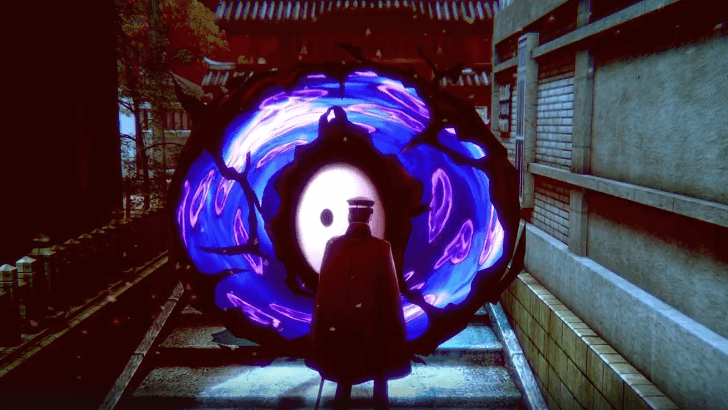 Head along the west alley from the Detective Agency to learn about Nethergate.
. Head along the west alley from the Detective Agency to learn about Nethergate.
. |
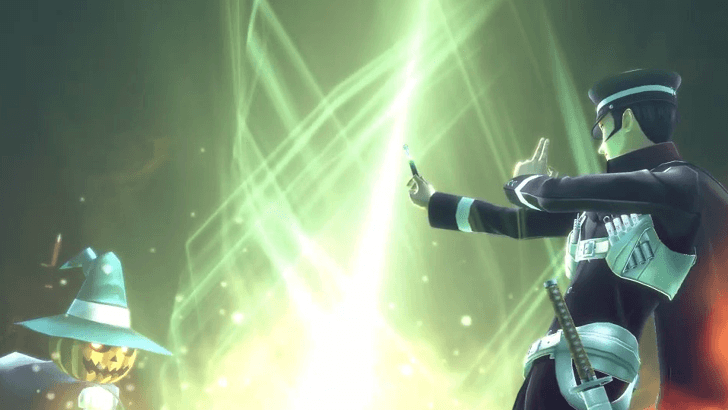
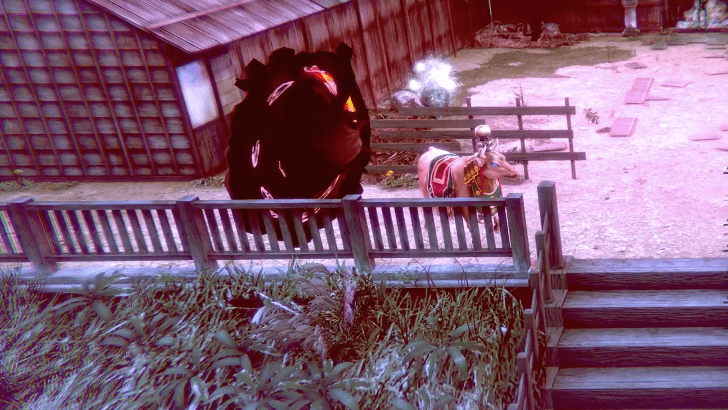
| 16 | 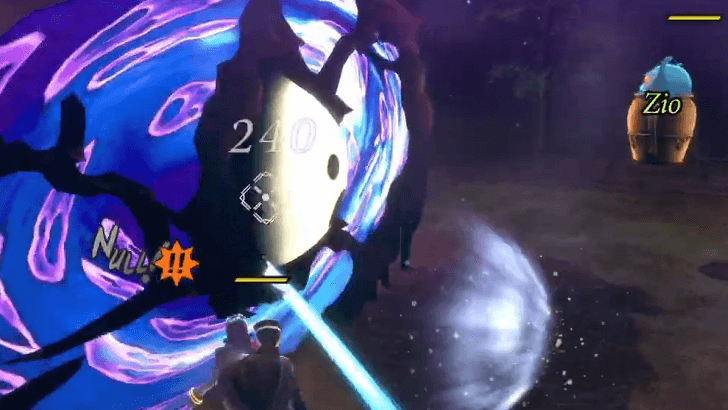 Use a Volt Demon to destroy this Nethergate. For easy access to Volt Skills, simply confine the Agathion nearby and partner with it after. Use a Volt Demon to destroy this Nethergate. For easy access to Volt Skills, simply confine the Agathion nearby and partner with it after. |
| 17 | 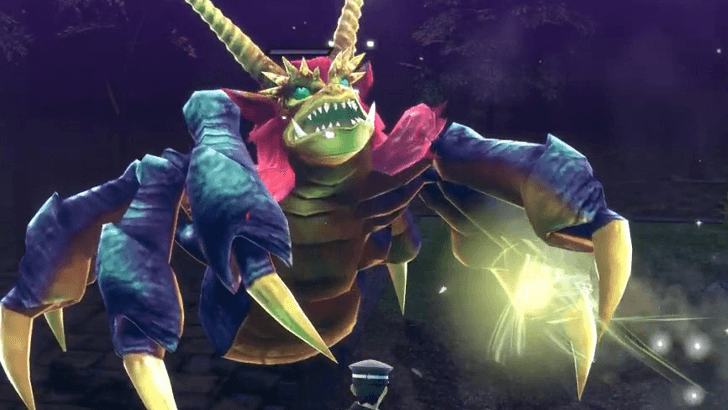 Defeat the Tsuchigumos. Defeat the Tsuchigumos. |
| * |  |
Area 6: Tsukudo-Cho
| Step-by-Step Guide | |
|---|---|
| 18 | 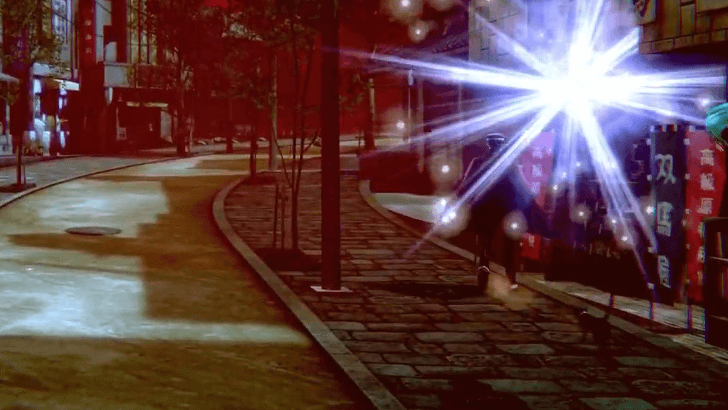 Return to the Real World via the gate to the north. Return to the Real World via the gate to the north. |
| 19 | 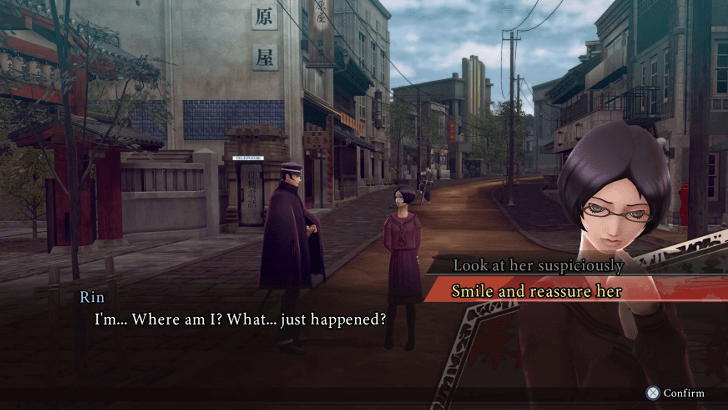 |
Area 7: Daidouji Residence
| Step-by-Step Guide | |
|---|---|
| 20 | 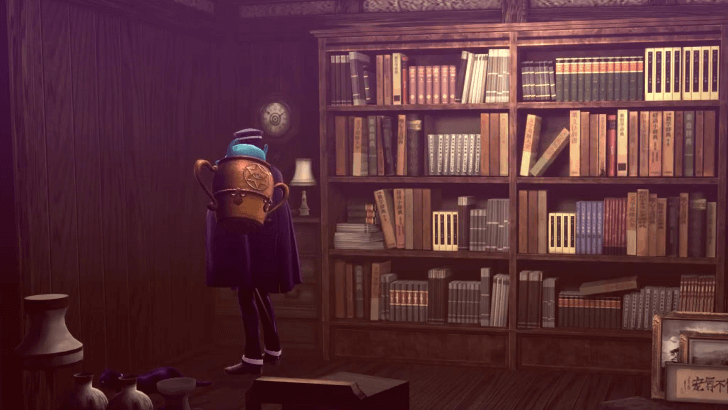 Go to the closet, which is the northern-most room on the west side of the first floor, and use a Volt Demon to Inspect the area.
. Go to the closet, which is the northern-most room on the west side of the first floor, and use a Volt Demon to Inspect the area.
. |
| 21 | 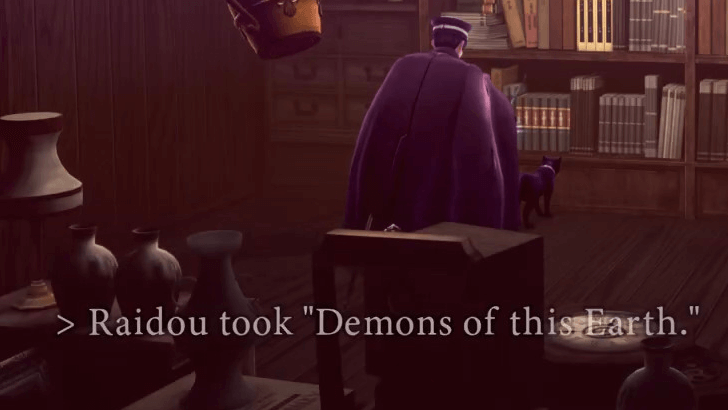 Take the second book; Demons and this Earth. Take the second book; Demons and this Earth. |
| 22 |  Talk to the Tarrasque and he'll ask for some Red Wine. Talk to the Tarrasque and he'll ask for some Red Wine. |
| 23 | 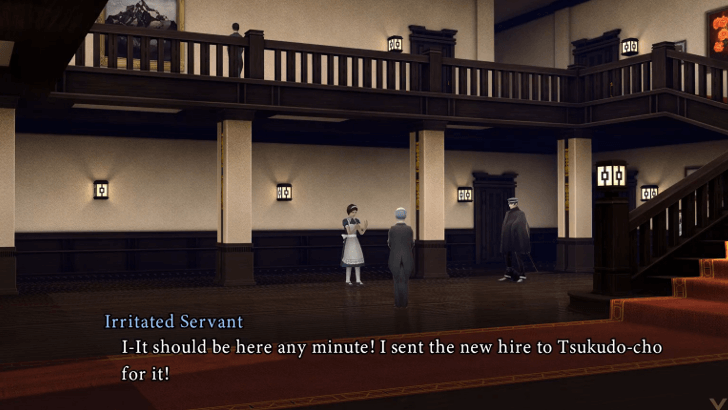 Go back to the first floor and talk to the Irritated Servant who’s standing nearby as you come back to the foyer. Go back to the first floor and talk to the Irritated Servant who’s standing nearby as you come back to the foyer. |
| 24 | 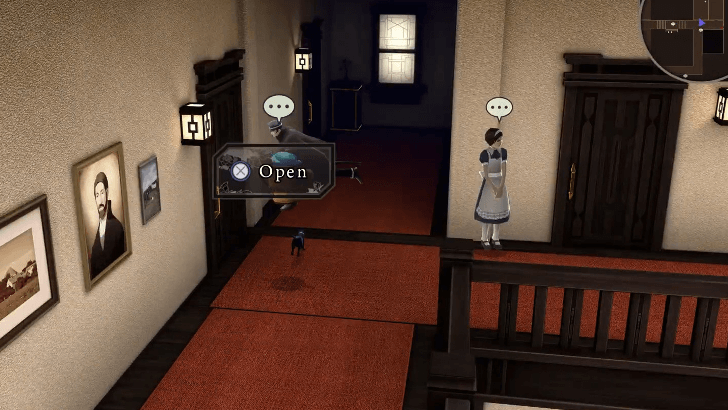 Look inside the Guest Rooms on the east side of the second floor to find a Pricey Beer. Look inside the Guest Rooms on the east side of the second floor to find a Pricey Beer.
|
Area 8: Tsukudo-Cho
| Step-by-Step Guide | |
|---|---|
| 25 | 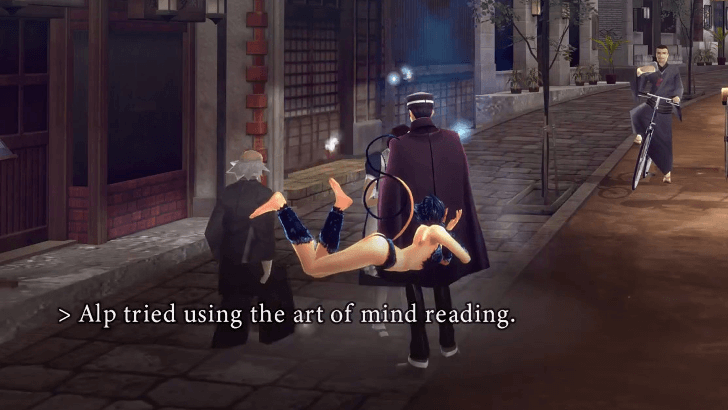 Head to Tsukudo-Cho and use Read Mind on the Exhausted Maid. Comfort her after to get the wine. Head to Tsukudo-Cho and use Read Mind on the Exhausted Maid. Comfort her after to get the wine. |
Area 9: Daidouji Residence
| Step-by-Step Guide | |
|---|---|
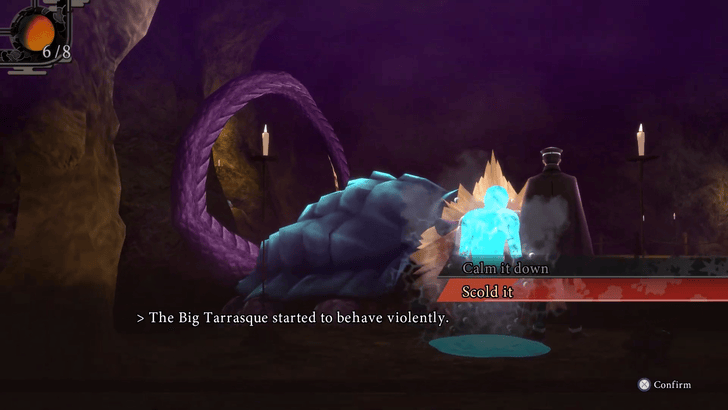
| 26 | 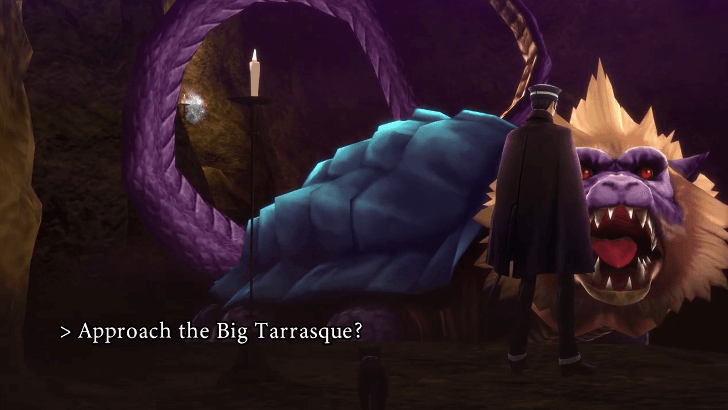 Give the Tarrasque the Red Wine, and move closer. Give the Tarrasque the Red Wine, and move closer. |
| 27 | 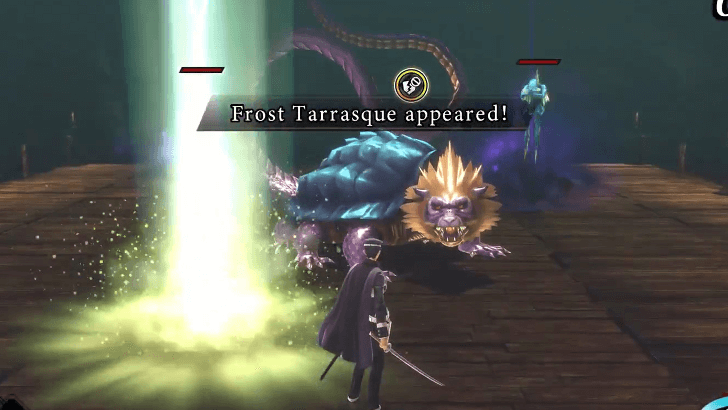 Defeat the Tarrasque. Defeat the Tarrasque. |
| * |  Tarrasque is weak to fire, so you can use Ukobach again, especially if you're out of Fire Bullets. You can also capture the Pyro Jack in the basement if you want an alternative to Ukobach! Tarrasque is weak to fire, so you can use Ukobach again, especially if you're out of Fire Bullets. You can also capture the Pyro Jack in the basement if you want an alternative to Ukobach! |
| 28 | 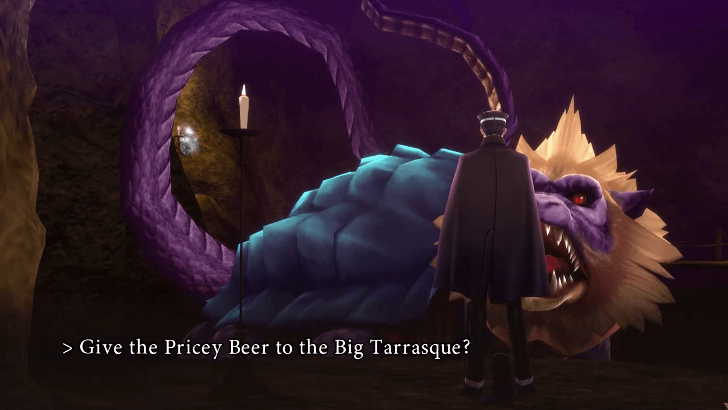 Give the Tarrasque the Pricey Beer to move across. Give the Tarrasque the Pricey Beer to move across.
|
| 29 | 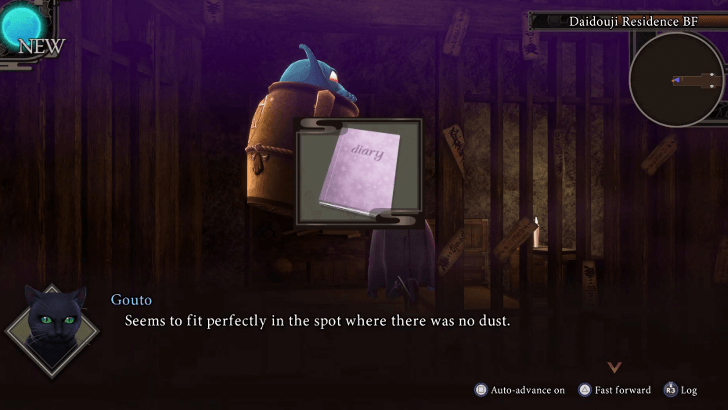 Inspect the area with a Volt Demon, and pick up the book that's found. Inspect the area with a Volt Demon, and pick up the book that's found. |
| 30 | 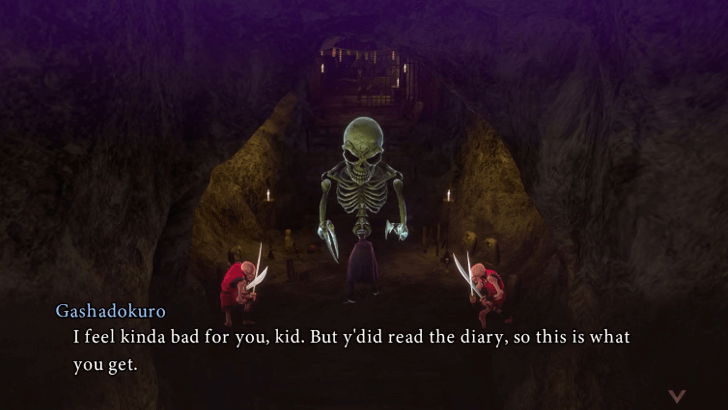 Defeat the two Turdak and Gashadokuro. Defeat the two Turdak and Gashadokuro.
|
| 31 |  Head back to the first floor and send a demon in alone to eavesdrop on the conversation in the living room behind the butler. Head back to the first floor and send a demon in alone to eavesdrop on the conversation in the living room behind the butler. |
Area 10: Tsukudo-Cho
| Step-by-Step Guide | |
|---|---|
| 32 |  Go to the Detective Agency and talk to Narumi. Go to the Detective Agency and talk to Narumi.
|
Area 11: Daidouji Residence
| Step-by-Step Guide | |
|---|---|
| 33 | 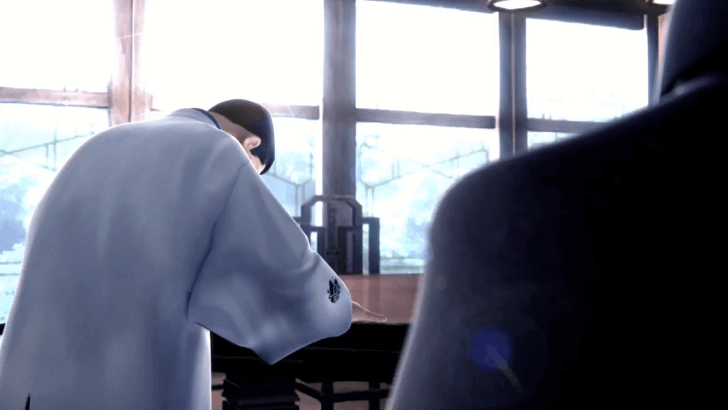 Talk to Kiyoshi and chase after him towards the foyer. Talk to Kiyoshi and chase after him towards the foyer. |
| 34 | 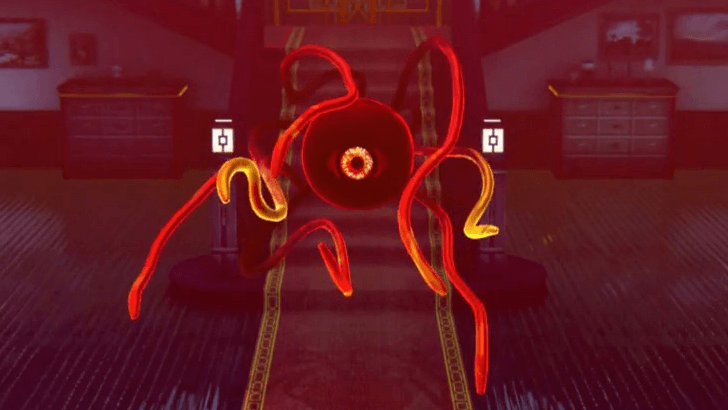 Defeat the Ichimokuren. Defeat the Ichimokuren. |
Episode 2: The Red Cape
| Jump to Walkthrough Section | |||
|---|---|---|---|
| 1 | Ginza-Cho | 2 | Restaurant Ryugu |
| 3 | Fukagawa-Cho | 4 | Dark Fukagawa-Cho |
| 5 | Tsukudo-Cho & Nameless Shrine | 6 | Dark Fukagawa-Cho |
| 7 | Fukagawa-Cho | 8 | Red-Light District & Tsukudo-Cho |
| 9 | Soda Joint Shin-Sekai & Ginza-Cho | 10 | Red-Light District |
| 11 | Restaurant Ryugu & Ginza-Cho | 12 | Nameless Shrine & Dark Ginza-Cho |
Episode 2: The Red Cape Walkthrough Guide
Area 1: Ginza-Cho
| Step-by-Step Guide | |
|---|---|
| 1 | 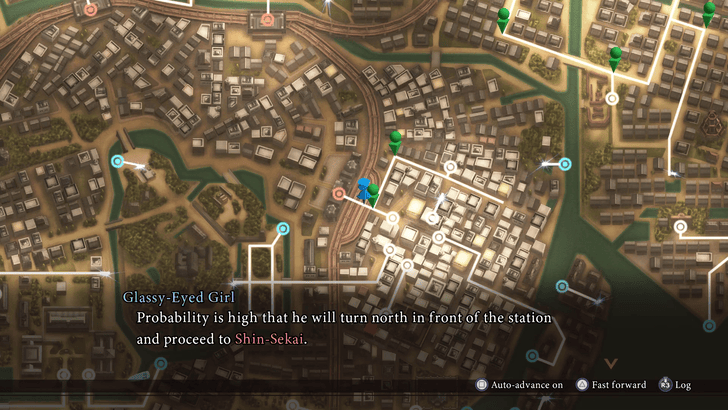 Take the streetcar and head to Chunou-Ku. Talk to the person at the intersection leading north of the train station to learn about Shin-Sekai.
 |
| 2 | 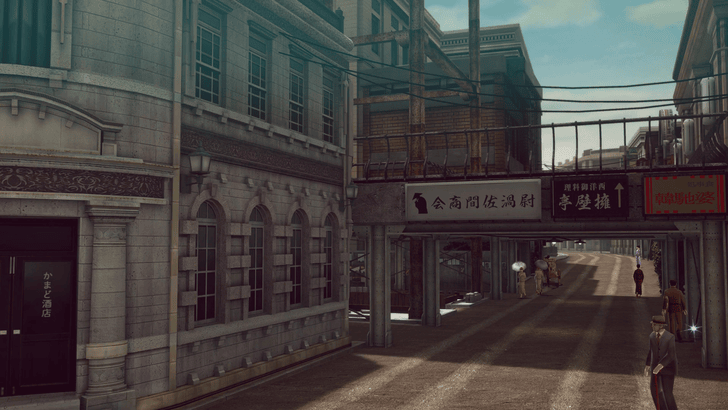 Go to Ginza-Cho and head for the south central exit to reach Restaurant Ryugu. Go to Ginza-Cho and head for the south central exit to reach Restaurant Ryugu. |
Area 2: Restaurant Ryugu
| Step-by-Step Guide | |
|---|---|
| 3 | 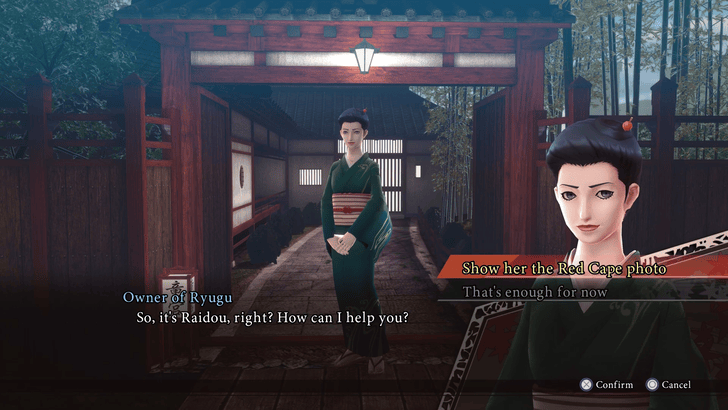 Show the owner the photograph. Ask her about Kiyoshi and Denpachi after. Show the owner the photograph. Ask her about Kiyoshi and Denpachi after. |
| 4 | 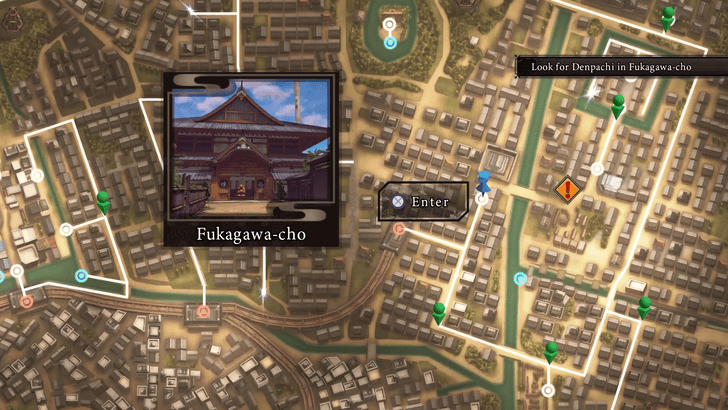 Head back to the train station. Head back to the train station. |
Area 3: Fukagawa-Cho
| 5 | 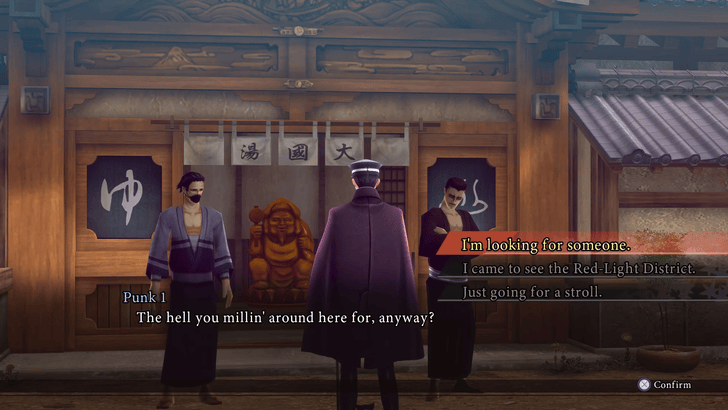 Tell the punks at the gate you're looking for someone. Tell the punks at the gate you're looking for someone. |
|---|---|
| 6 | 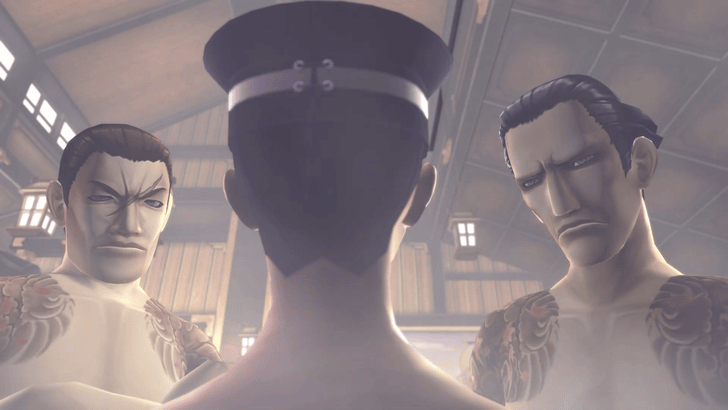 Fight the Gangster in the bathhouse. Fight the Gangster in the bathhouse. |
| * |  Be ready for a fistfight! This should be a quick battle since no other actions are involved. Be ready for a fistfight! This should be a quick battle since no other actions are involved. |
| 7 |  Head east to find Denpachi's House. Head east to find Denpachi's House. |
Area 4: Dark Fukagawa-Cho
| 8 |  Fight off the Zombie Guards. Fight off the Zombie Guards. |
|---|---|
| 9 | 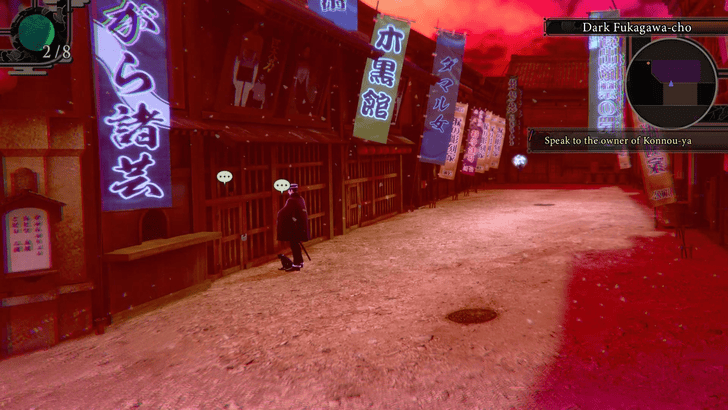 Try to free the imprisoned man. Try to free the imprisoned man. |
| 10 | 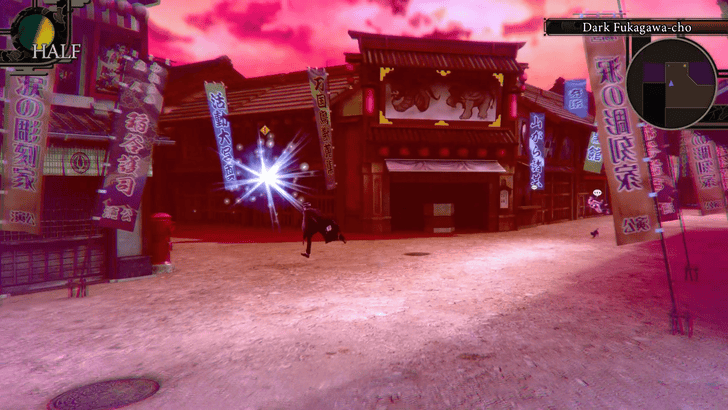 Head northwest to find the exit. Head northwest to find the exit. |
Area 5-6: Tsukudo-Cho & Nameless Shrine
| 11 | 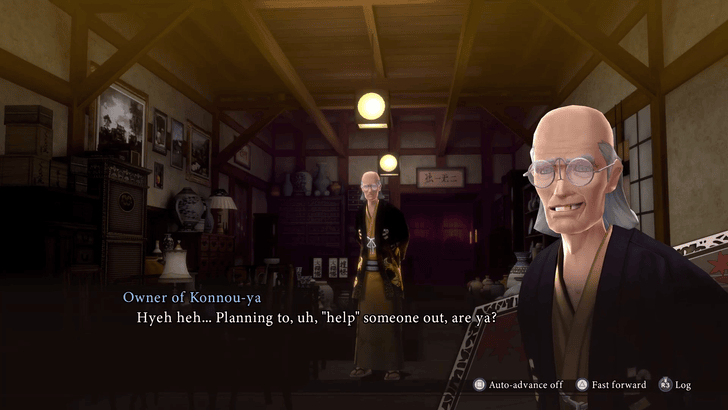 Head to Konnou-Ya and buy a lockpick for 2,000 yen. Head to Konnou-Ya and buy a lockpick for 2,000 yen. |
|---|---|
| 12 | 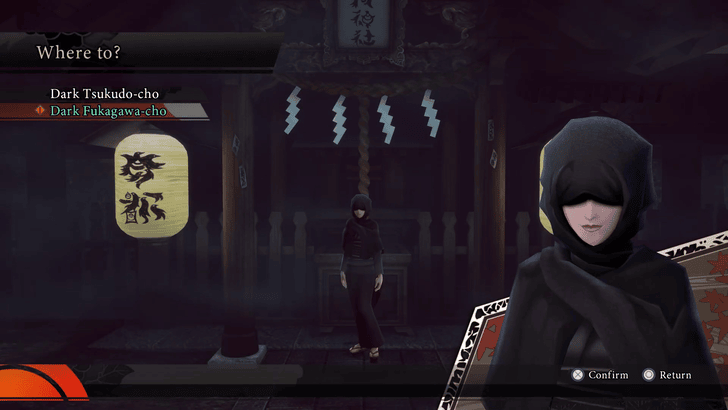 Enter Dark Fukugawa-Cho. Enter Dark Fukugawa-Cho. |
Area 7: Dark Fukagawa-Cho
| 13 | 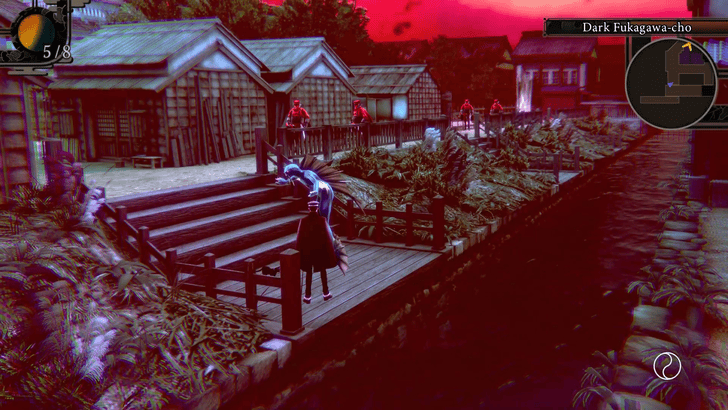 Head east, then take a southern route to the river. Head east, then take a southern route to the river. |
|---|---|
| 14 | 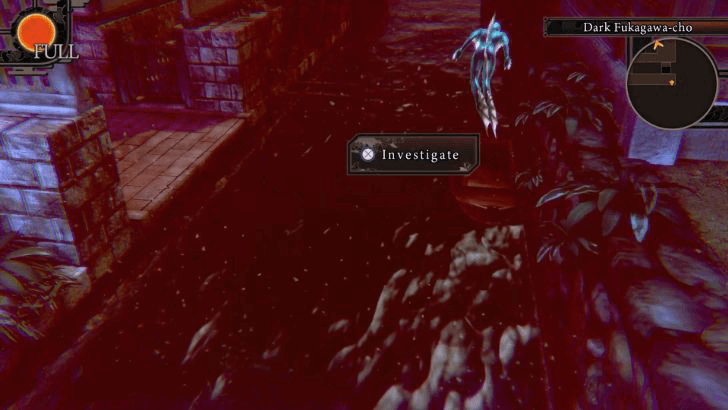 Use a Demon with the Fly ability and take the boat at the far corner of the last pier. Use a Demon with the Fly ability and take the boat at the far corner of the last pier. |
| 15 | 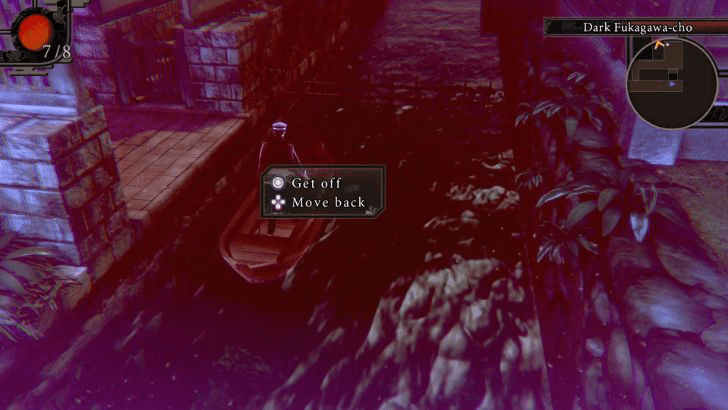 Sail back to the last pier and enter the area from there. Sail back to the last pier and enter the area from there. |
| 16 | 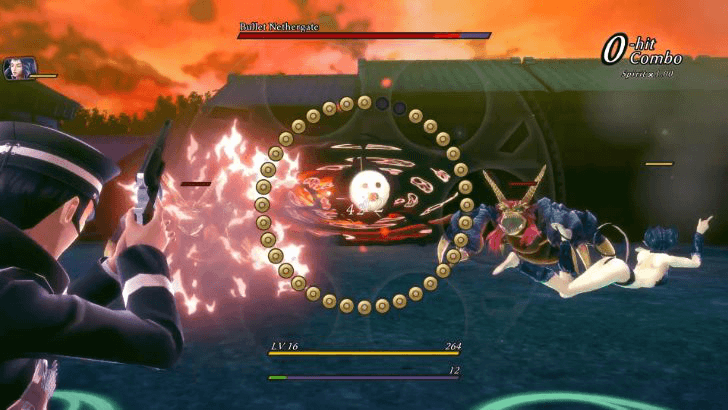 Destroy the Nethergate with Gun attacks. You can also use your own Gun to defeat it. Destroy the Nethergate with Gun attacks. You can also use your own Gun to defeat it. |
| 17 |  Save Denpachi. Save Denpachi. |
| 18 |
 Defeat the Red Soldiers. Defeat the Red Soldiers. |
Area 8: Fukagawa-Cho
| 19 |  Head to Daikoku-Yu and ask Satake about Shizu. Head to Daikoku-Yu and ask Satake about Shizu. |
|---|---|
| 20 |  Head to the north exit to get to the Red-Light District. Head to the north exit to get to the Red-Light District. |
Area 9-10: Red-Light District & Tsukudo-Cho
| 21 |  Talk to Shizu after arriving in the Red-Light District, and help her find her husband's attacker. Talk to Shizu after arriving in the Red-Light District, and help her find her husband's attacker. |
|---|---|
| 22 |
Go to the Detective Agency. |
Area 11-12: Soda Joint Shin-Sekai & Ginza-Cho
| 23 |  Talk to Tae in the Soda Joint Shin-Sekai. Talk to Tae in the Soda Joint Shin-Sekai. |
|---|---|
| 24 |  Run around the south central exit area of Kurisu-Zaka until a Full Moon occurs. Run around the south central exit area of Kurisu-Zaka until a Full Moon occurs. |
| 25 | 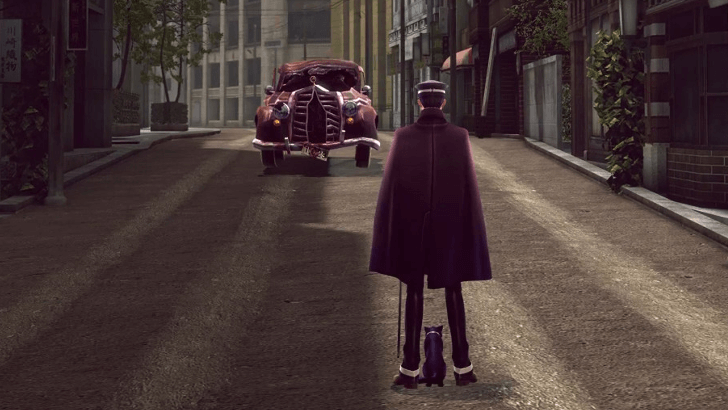 Defeat Oboroguruma.
 |
| * | 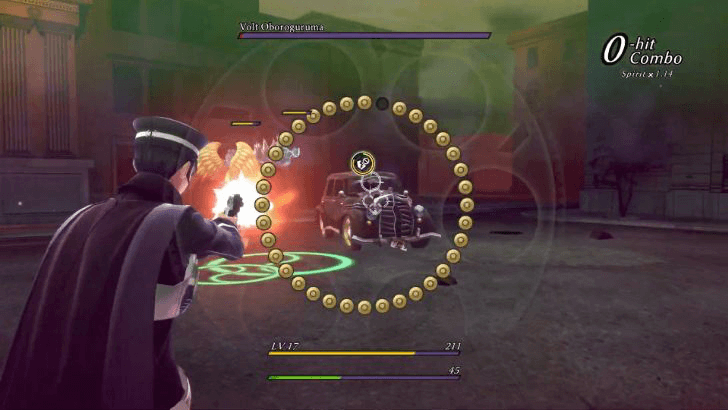 Don't use your gun. Avoid or block its attacks for an easy win. Don't use your gun. Avoid or block its attacks for an easy win. |
| 26 | 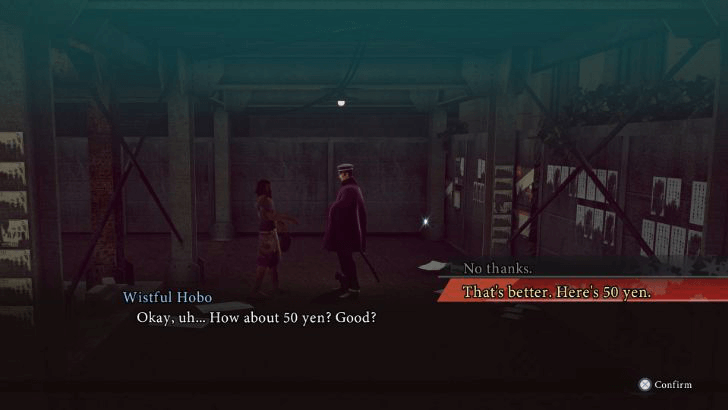 Purchase the Lucky Charm from the Hobo. Purchase the Lucky Charm from the Hobo. |
Area 13 -14 Red-Light District
| 27 | 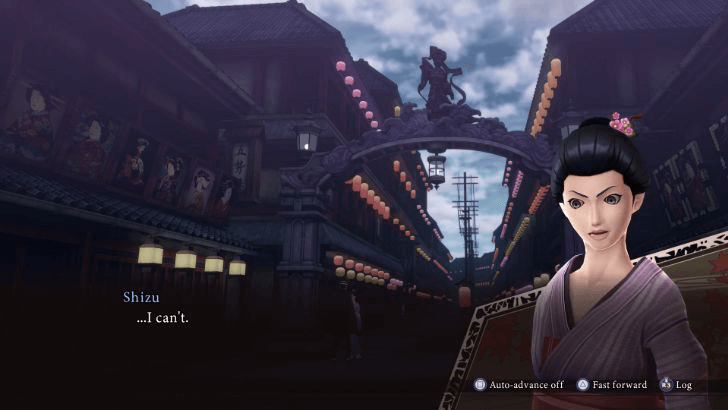 Talk to Shizu at the front gate and hand her the Lucky Charm. Talk to Shizu at the front gate and hand her the Lucky Charm. |
|---|
Area 15-16: Restaurant Ryugu & Ginza-Cho
| 28 | 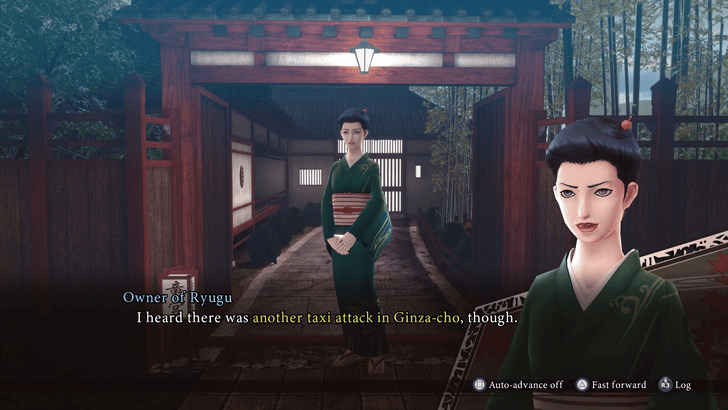 Talk to the owner. Talk to the owner. |
|---|---|
| 29 |  Go to the Construction Site. Go to the Construction Site. |
Area 17-18: Nameless Shrine & Dark Ginza-Cho
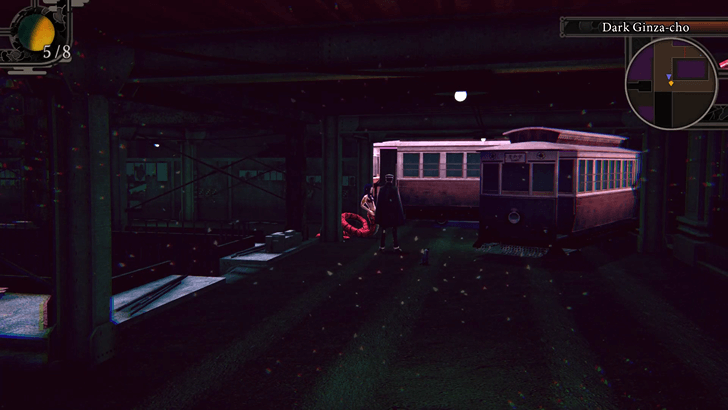
| 30 | 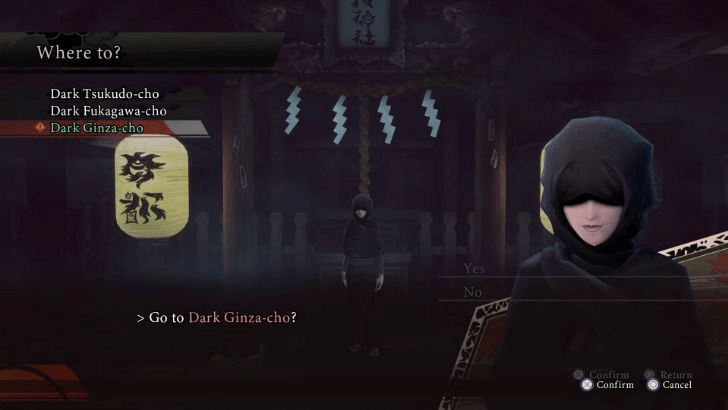 Go to Dark Ginza-Cho Go to Dark Ginza-Cho |
|---|---|
| 31 | 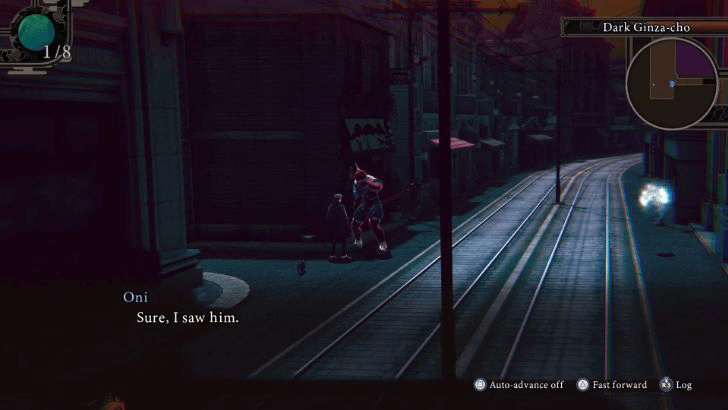 Talk to the Oni on the left and then head up the stairs to find Red Cape. Talk to the Oni on the left and then head up the stairs to find Red Cape. |
| 32 | 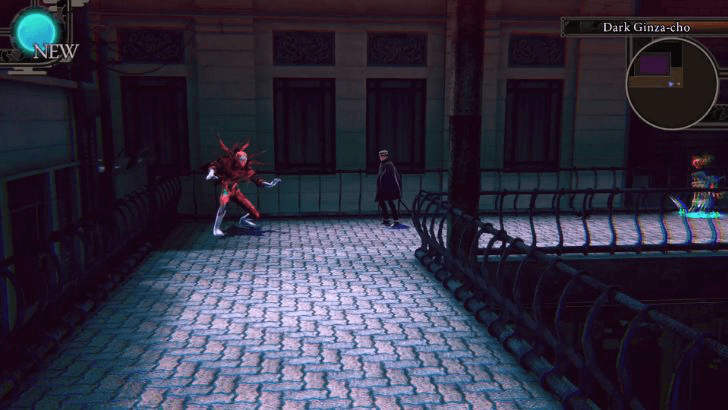 First Location: Southeast corner of the Temporary Overpass. First Location: Southeast corner of the Temporary Overpass. |
| 33 | 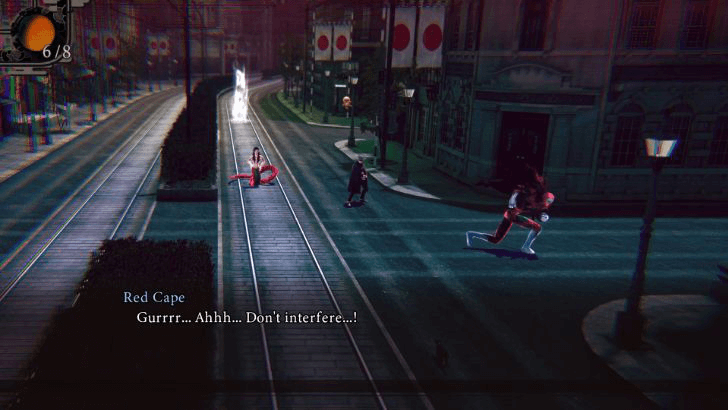 Second Location: Follow it down the stairs and then head west. Second Location: Follow it down the stairs and then head west. |
| 34 | 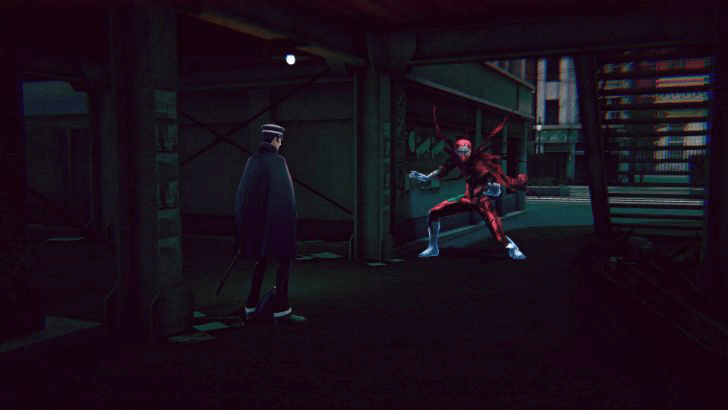 Third Location: Underneath the overpass towards the north stairs. Third Location: Underneath the overpass towards the north stairs. |
| 35 | 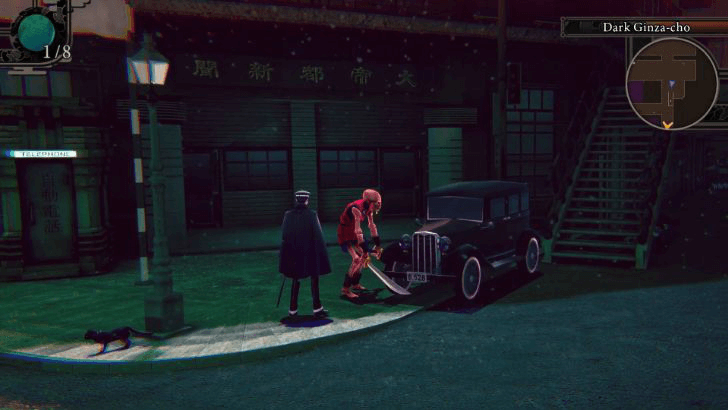 Red Cape will go around in circles from here. Use a Fury Demon to block the path and trigger a battle with the Red Cape. Red Cape will go around in circles from here. Use a Fury Demon to block the path and trigger a battle with the Red Cape. |
| 36 | 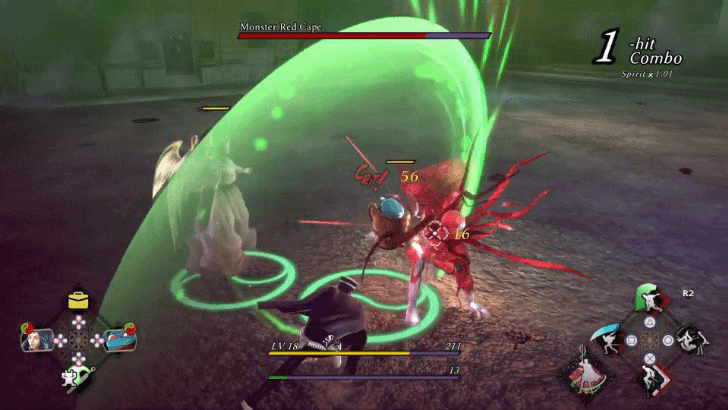 Follow after the Red Cape after the first phase to enter the next phase. Defeat it this time. Follow after the Red Cape after the first phase to enter the next phase. Defeat it this time. |
Episode 3: Dark Summoner
| Jump to Walkthrough Section | |||
|---|---|---|---|
| 1 | Tsukudo-Cho | 2 | Senju-Ku |
| 3 | Daidouji Textiles | 4 | Matrix Labyrinth |
| 5 | Daidouji Textiles | - | - |
Episode 3: Dark Summoner Walkthrough Guide
Area 1: Tsukudo-Cho
| Step-by-Step Guide | |
|---|---|
| 1 |
Ride the Streetcar to Fukagawa-Cho. |
Area 2: Senju-Ku
| Step-by-Step Guide | |
|---|---|
| 2 | 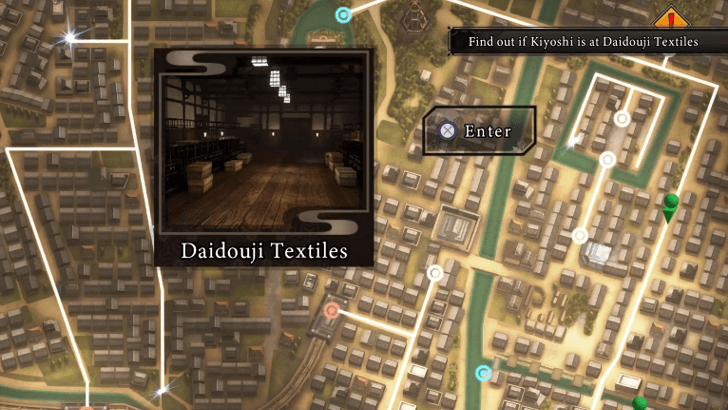 Take the long road around to the north edge of the map to find the Daidouji Textiles. Take the long road around to the north edge of the map to find the Daidouji Textiles. |
Area 3: Daidouji Textiles
| Step-by-Step Guide | |
|---|---|
| 3 | 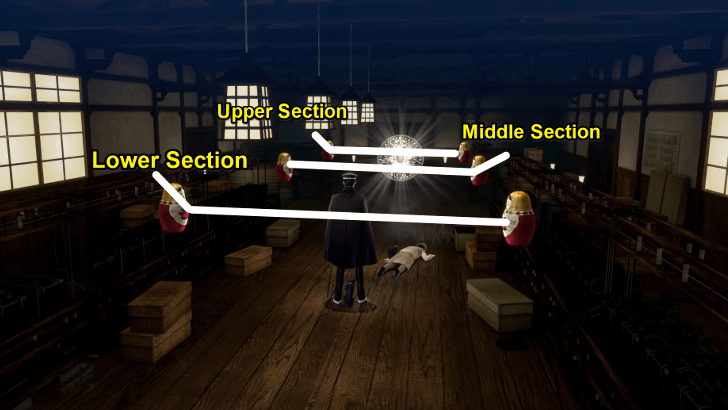 Touch a Floating Doll to enter the Matrix Labyrinth. Touch a Floating Doll to enter the Matrix Labyrinth. |
Area 4: Matrix Labyrinth
| 4 | 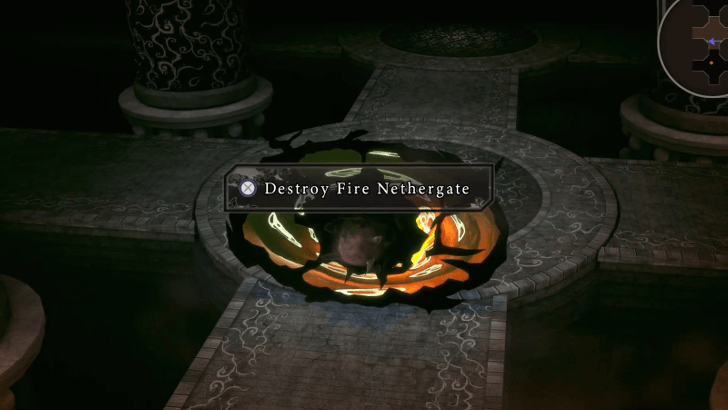 At the lower section of the Matrix Labyrinth, go left and destroy the Ice Nethergate. Take a sharp turn down after and destroy the Fire Nethergate to find the Blue Shard.
 |
|---|---|
| 5 | 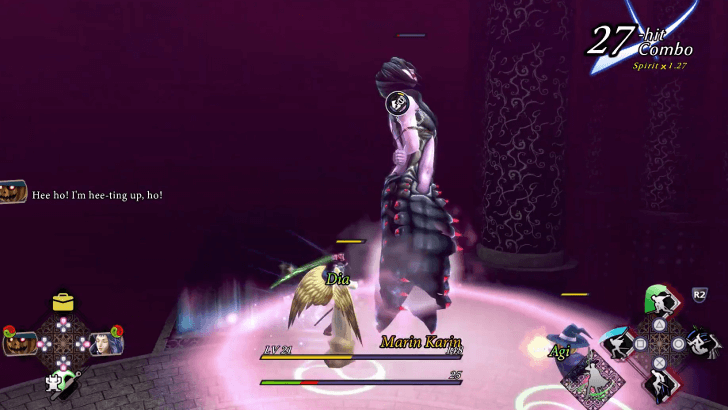 Defeat Okiku-Mushi and take the shard. Exit after.
 |
| * | Use a powerful fire demon such as Oshichi. Use Anti-Minds to nullify the Charm status. |
| 6 | Enter through any of the dolls in the middle to go to the next section. |
| 7 | 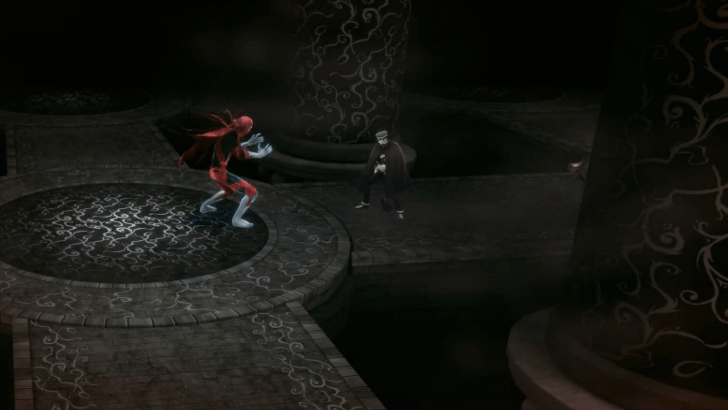 Go left and talk to the Oni. Defeat the Red Cape. Traverse the same path to find the next shard.
 |
| * |  Use the same strategy as the boss battle in Episode 2.
 |
| 8 | Touch any of the last dolls at the back. |
| 10 |  Find a way to reach the north western section. Destroy the Nethergate and take the next shard from Okiku-Mushi.
 |
Area 5: Daidouji Textiles
| 11 |  See if you missed any workers in the Matrix Labyrinth before proceeding to the storage area.
 |
|---|---|
| 12 |  Defeat Chernobog.
 |
Episode 4: The Case of the Missing Shipments
| Jump to Walkthrough Section | |||
|---|---|---|---|
| 1-2 | Tsukudo-Cho & Harumi-Cho | 3 | Fukagawa-Cho |
| 4 | Harumi-Cho | 5 | Dark Harumi-Cho |
| 6 | Harumi-Cho | 7 | Daidouji Residence |
| 8 | Harumi-Cho | 9-10 | Foreign Cemetery & Catholic Church |
Episode 4: The Case of the Missing Shipments Walkthrough Guide
Area 1-2: Tsukodo-Cho & Harumi-Cho
| Step-by-Step Guide | |
|---|---|
| 1 | 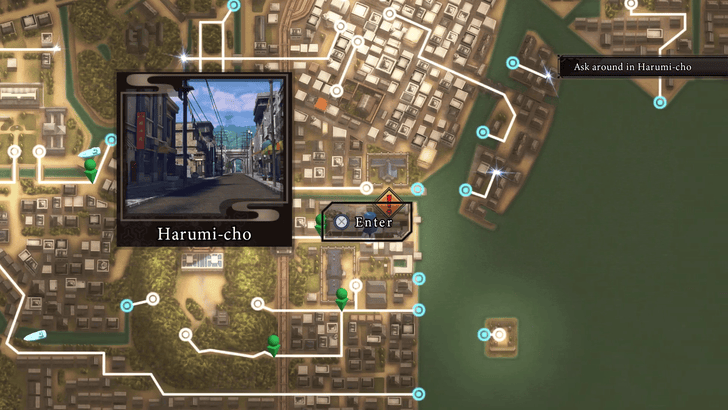 |
| 2 | 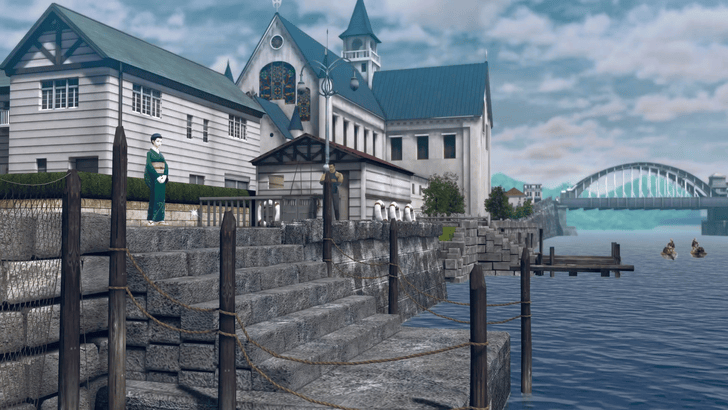 Head to the pier and talk to the Owner of Restaurant Ryugu. Head to the pier and talk to the Owner of Restaurant Ryugu. |
| 3 |
Return to the Agency. |
Area 3: Fukagawa-Cho
| Step-by-Step Guide | |
|---|---|
| 4 | Go to the Bath House and talk to Satake. |
Area 4: Harumi-Cho
| 5 | Talk to the Owner of the Restaurant Ryugu again. Go to the Nameless Shrine after to access Dark Harumi-Cho. |
|---|
Area 5: Dark Harumi-Cho
| 6 |  Save the sailor from the Anzu. Save the sailor from the Anzu. |
|---|---|
| 9 | 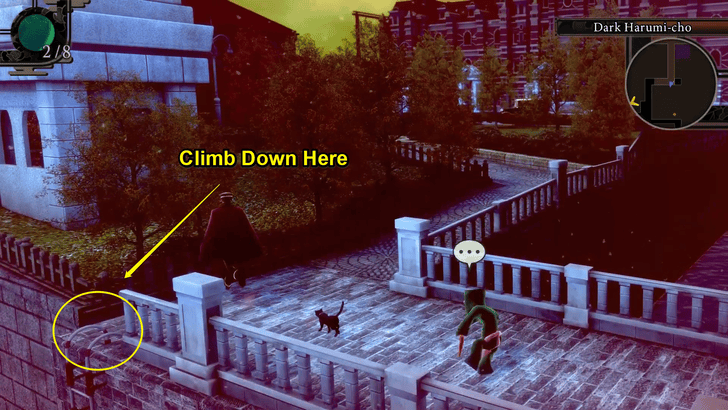 |
| 9 | 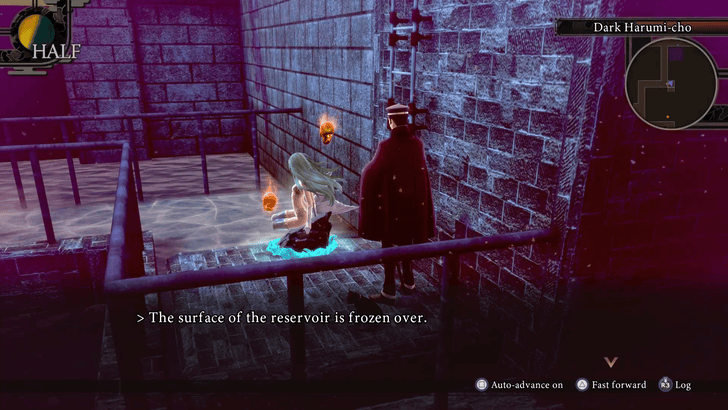 Use a Frost Demon to make a path towards the next sailor. Use a Frost Demon to make a path towards the next sailor. |
| 10 | 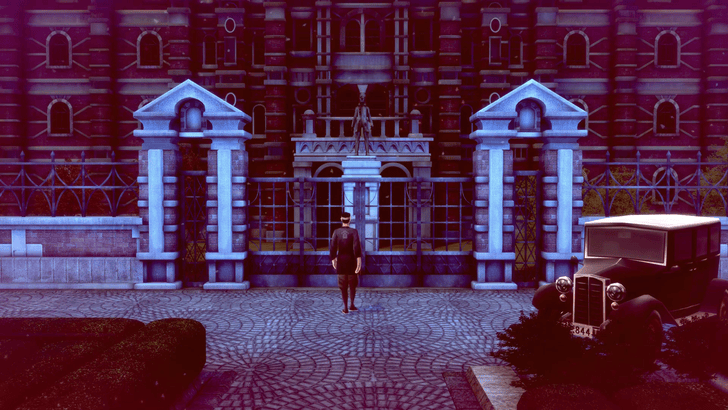 Go back up and go east of the same path to reach and save the last sailor. Go back up and go east of the same path to reach and save the last sailor. |
| 11 | 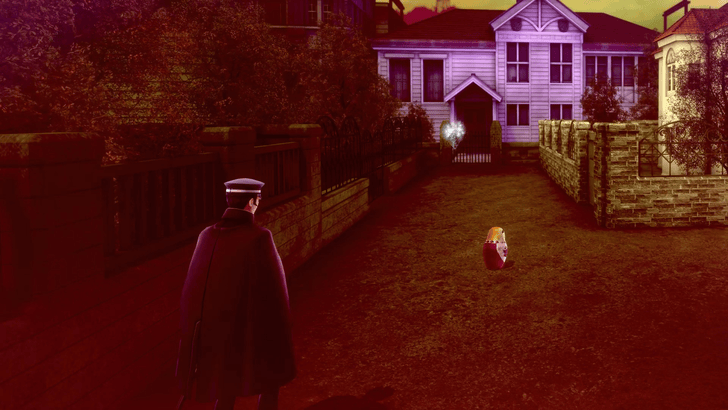 Go in front of the Catholic Church and approach the Matryoshka Doll. Defeat Triglav after. Go in front of the Catholic Church and approach the Matryoshka Doll. Defeat Triglav after. |
Area 6: Harumi-Cho
| 12 | Report back to the Owner of Ryugu. |
|---|
Area 7: Daidouji Residence
| 13 |
Negotiate with Tarrasque. |
|---|---|
| * |  Keep negotiating until you reach 1000 Yen. On Tarrasque's second attempt to ask for 1000 Yen again, scold him. Keep negotiating until you reach 1000 Yen. On Tarrasque's second attempt to ask for 1000 Yen again, scold him. |
Area 8: Harumi-Cho
| 15 | 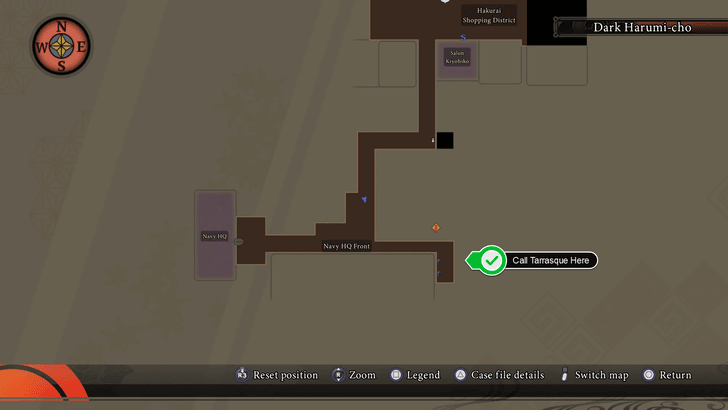 |
|---|---|
| 20 | 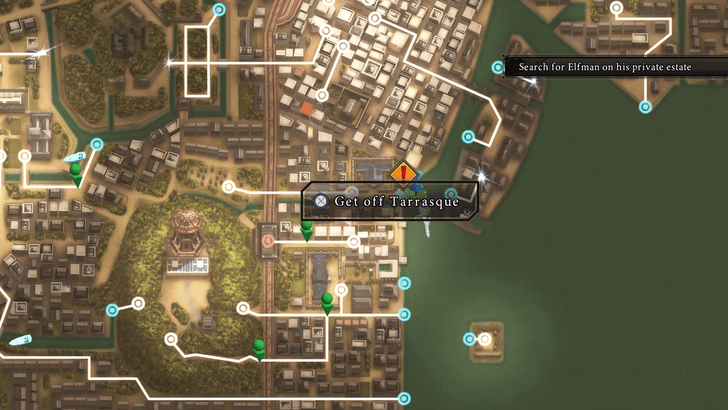 |
Area 9-10: Foreign Cemetery & Catholic Church
| 21 | 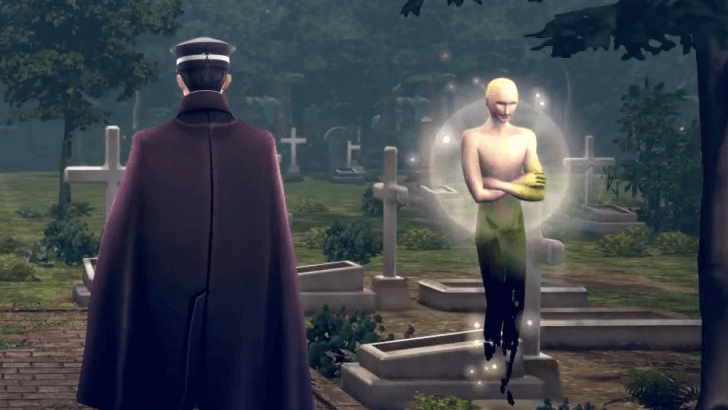 Talk to the ghost in the cemetery. Talk to the ghost in the cemetery. |
|---|---|
| 22 |  Enter the Catholic Church. Defeat Rasputin to end the chapter.
 |
Episode 5: Confrontation
| Jump to Walkthrough Section | |||
|---|---|---|---|
| 1 | Tsukudo-Cho | 2 | Kasumidai |
| 3 | Dark Kasumidai | 4 | Kasumidai |
| 5 | Harumi-Cho | 6 | Cannon Battery No. 4 |
Episode 5: Confrontation Walkthrough Guide
Area 1: Tsukodo-Cho
| Step-by-Step Guide | |
|---|---|
| 1 | 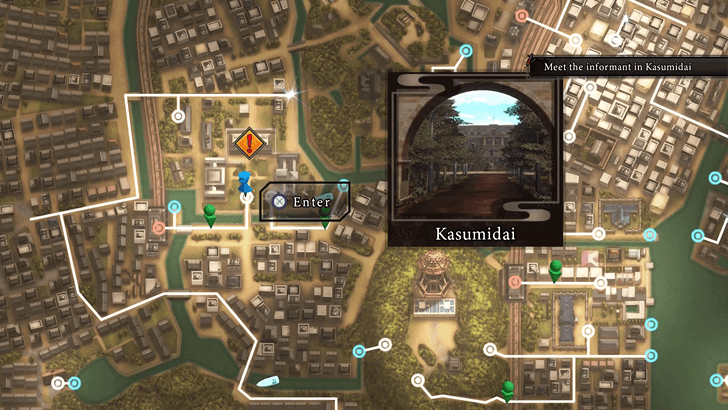 Take the streetcar to Kasumidai.
 |
Area 2: Kasumidai
| Step-by-Step Guide | |
|---|---|
| 2 | 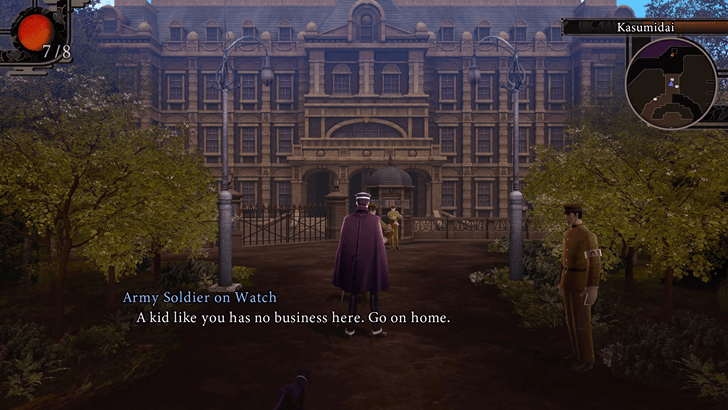 Go north to the military post.
 |
| 3 | 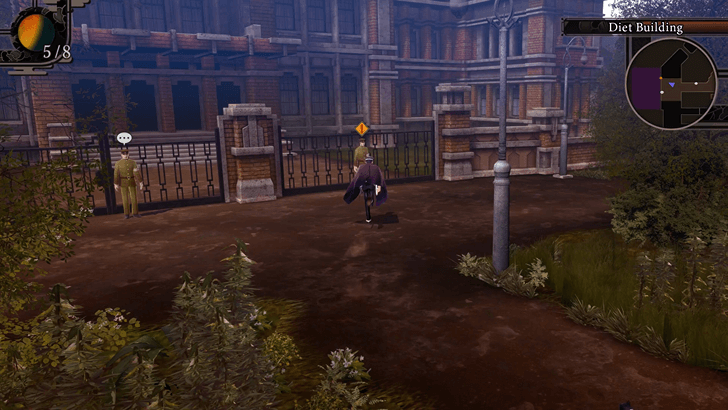 Head west and talk to the soldier stationed in front of the gate.
 |
| 4 | 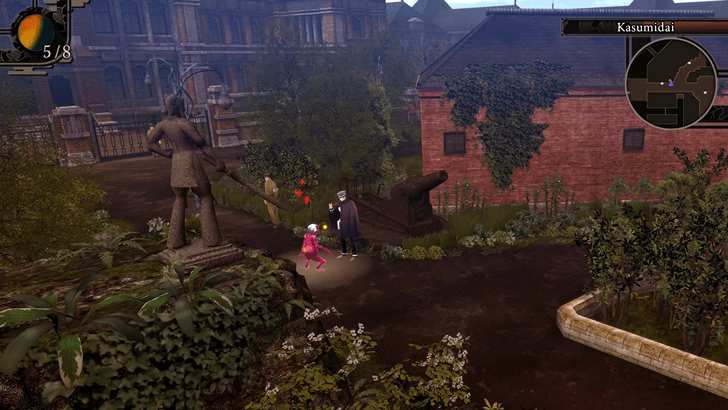 Summon a Pyro Demon with Ignite to use the cannon. Check on Tae after, and head to Konnou-Ya to develop her film.
 |
Area 3: Dark Kasumidai
| 5 |
Head to the Nameless Shrine to access Dark Kasumidai. |
|---|---|
| 6 |  Fight the Zombies upon entering.
 |
| 7 | 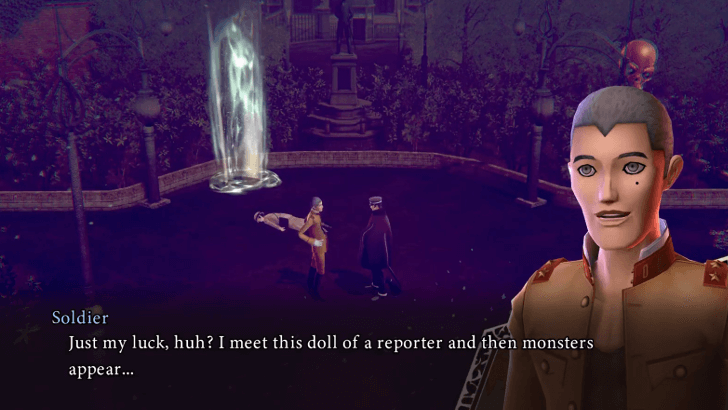 Talk to Sadakichi and help him find all the missing documents. Talk to Sadakichi and help him find all the missing documents. |
| 8 | 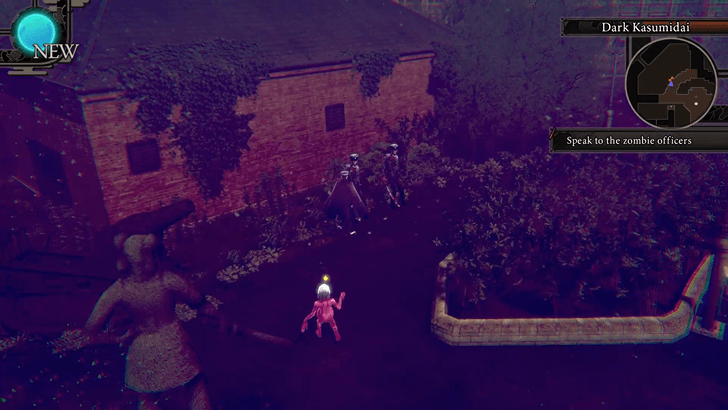 Talk to the Zombie Soldiers to learn more about the document locations. Talk to the Zombie Soldiers to learn more about the document locations. |
| * |  Bring demons with Sleuth, Inspect, Sneak, and Fly. Bring demons with Sleuth, Inspect, Sneak, and Fly. |
| 10 | 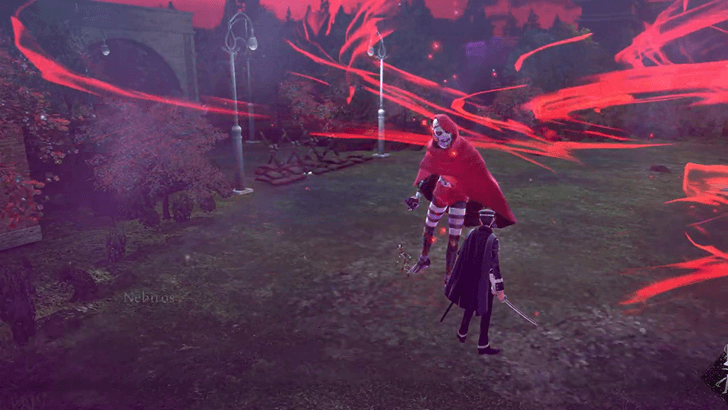 Return all the pages to Sadakichi and fight Nebiros after. Return all the pages to Sadakichi and fight Nebiros after. |
Area 4: Kasumidai
| 11 | 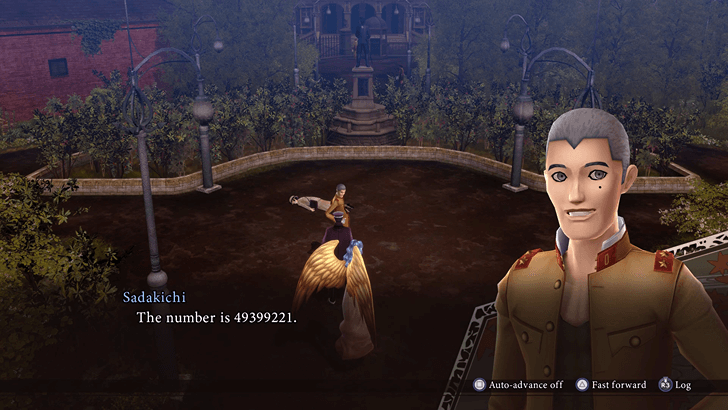 Ask Sadakichi about the Cannon Battery No. 4. Remember the code: 49399221 Ask Sadakichi about the Cannon Battery No. 4. Remember the code: 49399221 |
|---|
Area 5: Harumi-Cho
| 12 |
Go to the same pier in Episode 4 and ride Tarrasque. Direct him towards Cannon Battery No. 4. |
|---|
Area 6: Cannon Battery No. 4
| 13 | 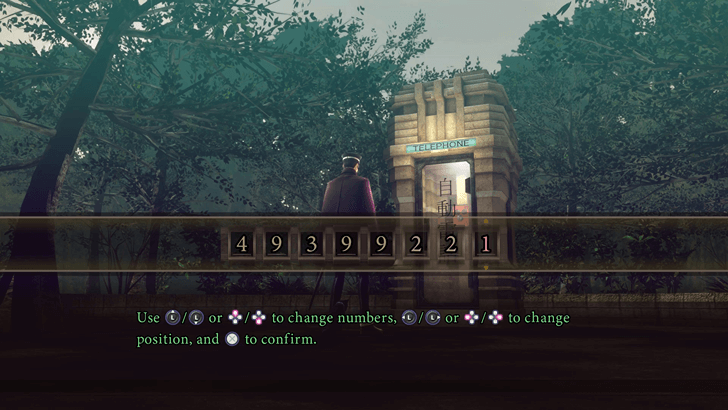 |
|---|---|
| 14 | 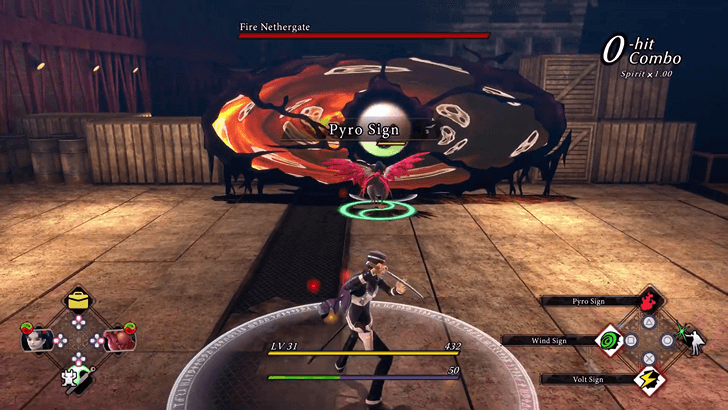 Destroy the Nethergates until you reach the Electric Nethergate. This one will regenerate. Destroy the Nethergates until you reach the Electric Nethergate. This one will regenerate. |
| 15 |  |
| 16 |  Head back and go down using the ladder this time. Continue moving forward until you reach Bullet Nethergates. Destroy all of them. Head back and go down using the ladder this time. Continue moving forward until you reach Bullet Nethergates. Destroy all of them. |
| 17 |  Defeat Nagasunehiko and Abihiko. Defeat Nagasunehiko and Abihiko. |
Episode 5: Confrontation Walkthrough Guide
Episode 6: The Secret of the Radiant Guardians
| Jump to Walkthrough Section | |||
|---|---|---|---|
| 1 | Tsukudo-Cho | 2 | Fukagawa-Cho |
| 3 | Amazing Science Lab | 4 | Soda Joint Shin-Sekai |
| 5 | Ginza-Cho | - | - |
Episode 6: The Secret of the Radiant Guardians Walkthrough
Area 1: Tsukodo-Cho
| Step-by-Step Guide | |
|---|---|
| 1 | 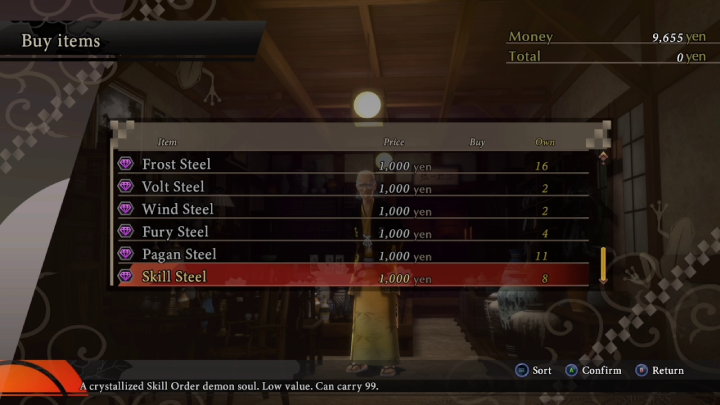 Go to Konnou-Ya to accept Narumi's parcel. Deliver it to the agency after. Go to Konnou-Ya to accept Narumi's parcel. Deliver it to the agency after.
|
| 2 |  Go to Goumaden after watching the next cutscenes. Go to Goumaden after watching the next cutscenes.
|
Area 2: Fukagawa-Cho
| Step-by-Step Guide | |
|---|---|
| 4 | Go to the Bath House and talk to Satake. |
Area 3: Amazing Science Lab
| 5 |  Talk to Dr. Tsukumo in the Amazing Science Lab. Talk to Dr. Tsukumo in the Amazing Science Lab. |
|---|
Area 4: Soda Joint Shin-Sekai
| 6 | Head to Soda Joint Shin-Sekai and talk to Tae.
|
|---|
Area 5: Ginza-Cho
| 12 | Head to the Construction Site in Ginza-Cho to end the episode. |
|---|
Episode 7: The Cursed Detective
| Jump to Walkthrough Section | |||
|---|---|---|---|
| 1 | Nameless Shrine | 2 | Dark Fukugawa-Cho |
Episode 7: The Cursed Detective Walkthrough Guide
Area 1: Nameless Shrine
| Step-by-Step Guide | |
|---|---|
| 1 | 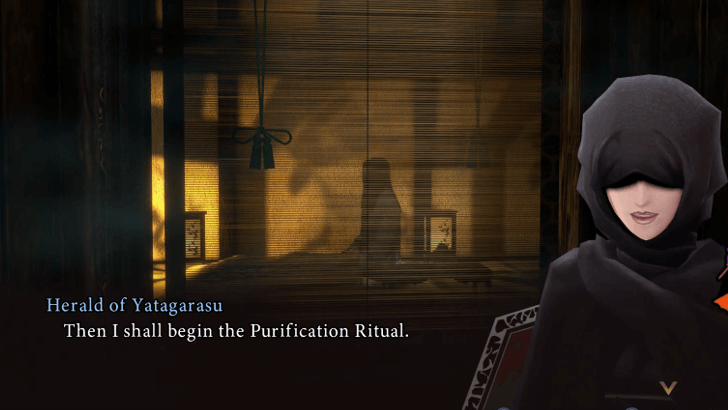 Accept the Herald's plan to perform the purification ritual.
|
Area 2: Dark Fukugawa-Cho
| Step-by-Step Guide | |
|---|---|
| 2 | 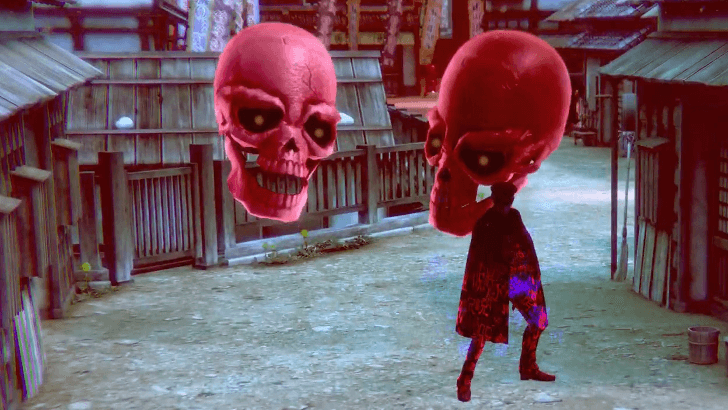 Go to the southern river bank. Repeat until the Utai-Gaikotsu reveals the location of the Talisman.
 |
| * | Due to the curse inflicted, Raidou's HP will deplete over time. Make sure to bring healing items, demons with recovery skills, or talk to Nakisawame to heal Raidou. |
| 3 | 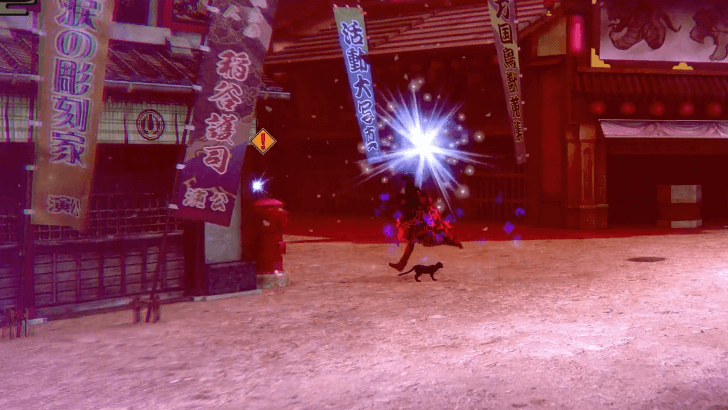 Inspect the postbox and break the Talisman. Defeat the Utai-Gaikotsus after.
 |
| 4 |
 Return to the riverbank and head east. Break all the Nethergates along the way.
 |
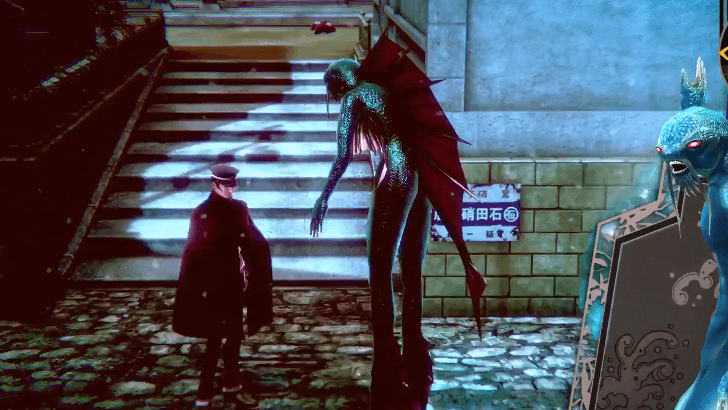
| 5 | 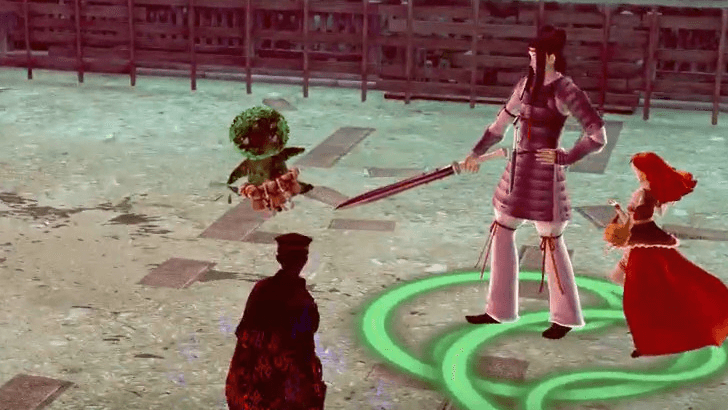 Defeat Hitokotonushi. Defeat Hitokotonushi. |
Episode 8: The Demon and the Steel Tower
| Jump to Walkthrough Section | |||
|---|---|---|---|
| 1 | Harumi-Cho | 2 | Sakuradayama |
| 3 | Dark Sakuradayama | - | - |
Episode 8: The Demon and the Steel Tower Walkthrough Guide
Area 1: Harumi-Cho
| Step-by-Step Guide | |
|---|---|
| 1 | |
| 2 |  |
Area 2: Sakuradayama
| Step-by-Step Guide | |
|---|---|
| 3 | 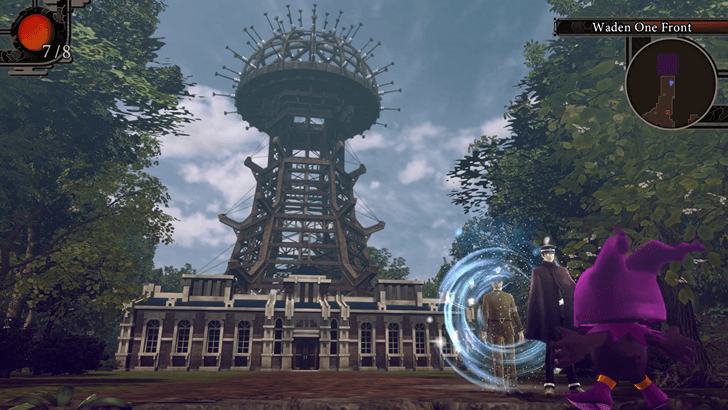 Use Read Mind on the Soldier in front of Waden One. Enter Dark Sakuradayama after. Use Read Mind on the Soldier in front of Waden One. Enter Dark Sakuradayama after. |
Area 3: Dark Sakuradayama
| 4 | 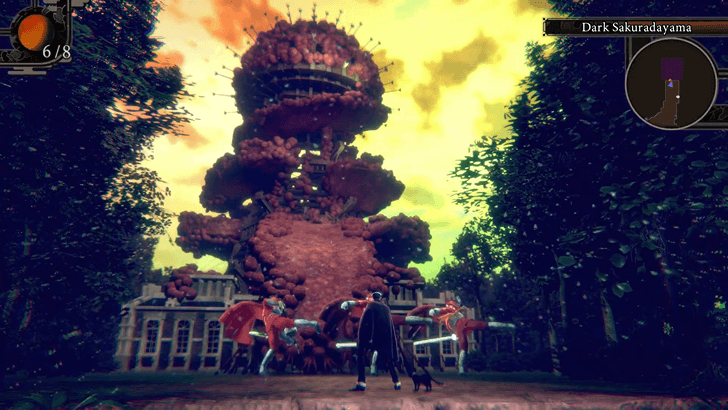 Head to Waden One and defeat the soldiers. Climb the tower after. Head to Waden One and defeat the soldiers. Climb the tower after. |
|---|---|
| 5 | 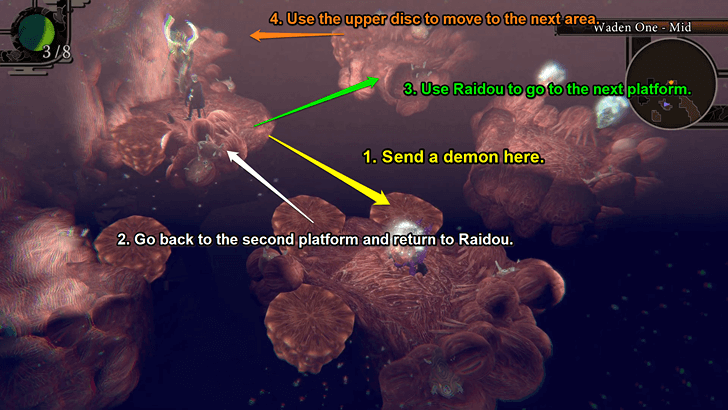 |
| * | 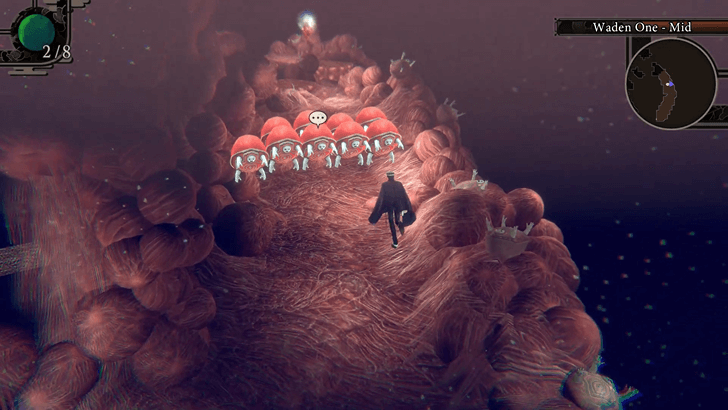 On each block, you'll encounter an army of Hiruko blocking your way. The only way to proceed is to fight them. Use Ice Skills to defeat all of them immediately. On each block, you'll encounter an army of Hiruko blocking your way. The only way to proceed is to fight them. Use Ice Skills to defeat all of them immediately. |
| 7 | 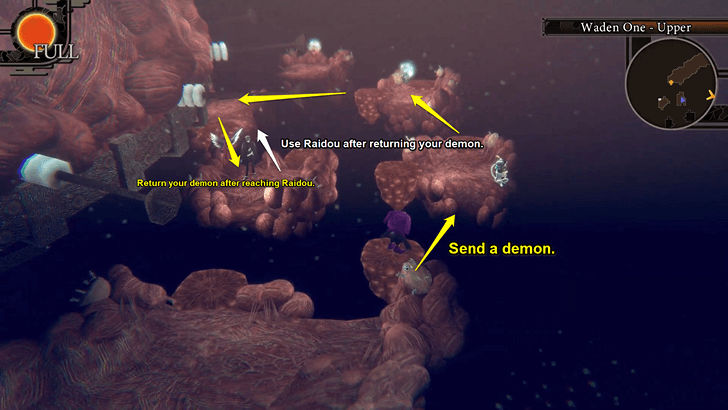 |
| 8 | 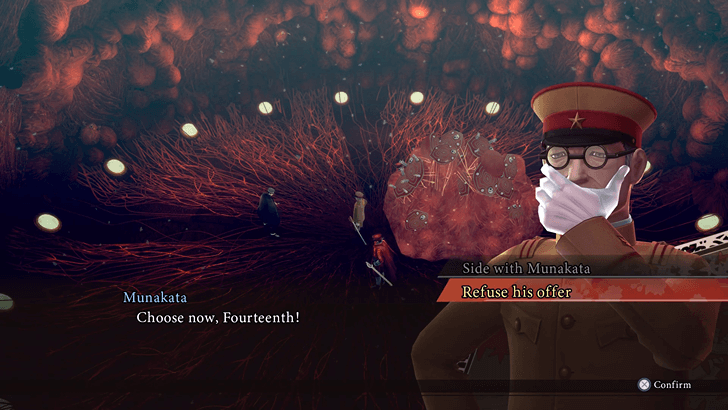 Refuse Munakata's offer and defeat Mishaguji. Refuse Munakata's offer and defeat Mishaguji. |
Episode 9: The Two Summoners
| Jump to Walkthrough Section | |||
|---|---|---|---|
| 1 | Tsukudo-Cho | 2 | Nameless Shrine |
| 3 | Dark Sakuradayama | - | Dark Ginza-Cho |
| 3 | Dark Harumi-Cho | - | - |
Episode 9: The Two Summoners Walkthrough Guide
Area 1: Tsukudo-Cho
| Step-by-Step Guide | |
|---|---|
| 1 | 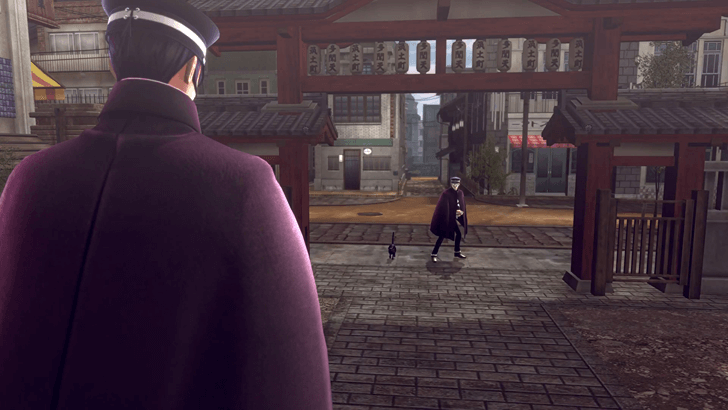 Follow the Black Cat to Tamonten Shrine. Follow the Black Cat to Tamonten Shrine. |
Area 2: Nameless Shrine
| Step-by-Step Guide | |
|---|---|
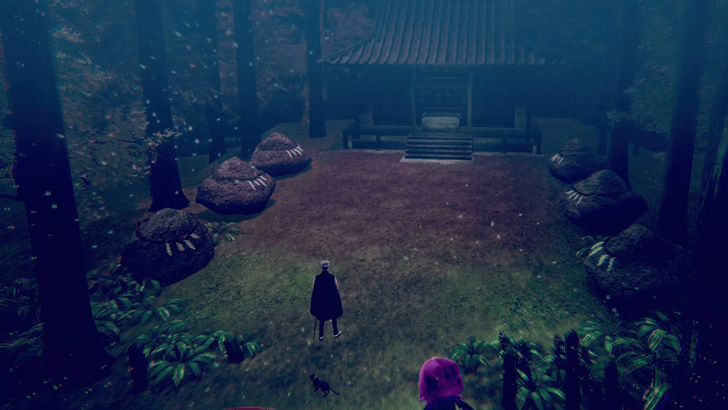
| 2 |  Go to the Nameless Shrine and find out why there are two versions of Raidou in this timeline. The Herald will then task you to gather all the prisms needed to get you back to Taisho 20. Go to the Nameless Shrine and find out why there are two versions of Raidou in this timeline. The Herald will then task you to gather all the prisms needed to get you back to Taisho 20. |
Area 3: Dark Sakuradayama
| 3 |
 If you choose to go to Dark Sakuradayama, simply head east to find the Guardian. If you choose to go to Dark Sakuradayama, simply head east to find the Guardian. |
|---|---|
| 4 | 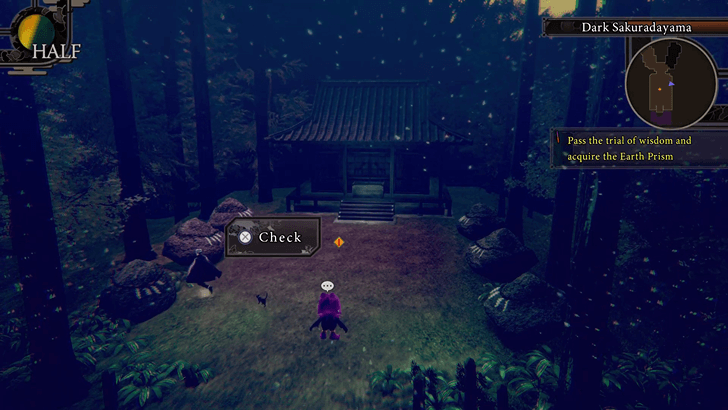 Solve the puzzle and defeat Omitsunu to get the Earth Prism. Solve the puzzle and defeat Omitsunu to get the Earth Prism. ► Puzzle Solution |
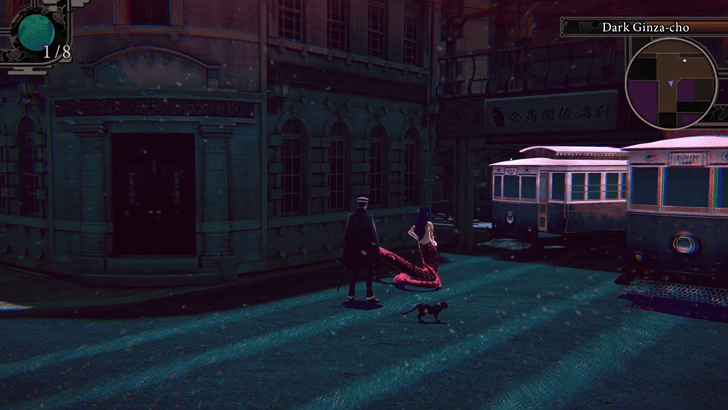
Area 4: Dark Ginza-Cho
| 5 |
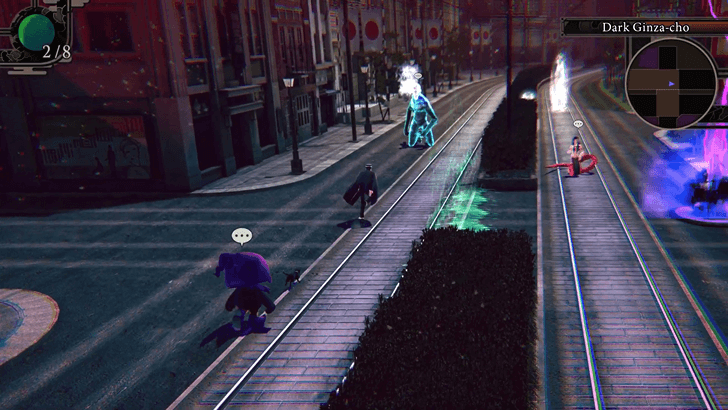 Go north and fight the Muspell ahead.
 |
|---|---|
| 6 |
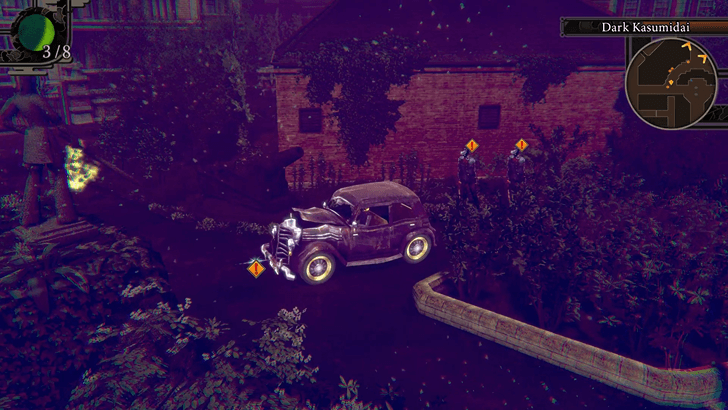
 Take a right and find the path with two cars blocking the way. Summon a Fury Demon to push the car away. Take a right and find the path with two cars blocking the way. Summon a Fury Demon to push the car away. |
| 7 |
 Send a demon to a solo investigation to cross the blocked path on the left. Go right after and fight the Muspell. You won't be joining this fight, so it's up to your demon to finish it.
 |
| 8 |
 Push the same car from the left this time and return to Raidou. Push the same car from the left this time and return to Raidou. |
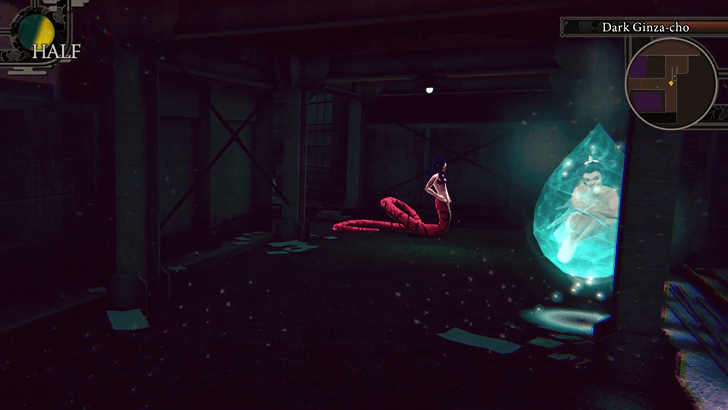
| 9 |  Follow the new path towards the footbridge and defeat Susano-O to get the Fire Prism.
 |
Area 5: Dark Harumi-Cho
| 10 |  Talk to the Shouten on the right.
 |
|---|---|
| 11 | 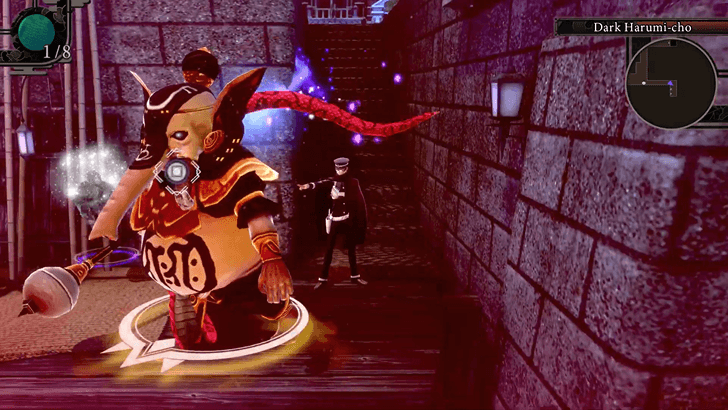 Gather 8 Purity Charms by defeating the roaming Shouten in the area.
 |
| 12 |  Give all the Purity Charms to the Shouten to fight Yamata-no-Orochi. Defeat it to get the Water Prism. Give all the Purity Charms to the Shouten to fight Yamata-no-Orochi. Defeat it to get the Water Prism. |
Episode 10: The Capital in Flames!
| Jump to Walkthrough Section | |||
|---|---|---|---|
| 1 | Tsukudo-Cho | 2 | Harumi-Cho |
| 3 | Kasumi Glade | - | Subterranean Shipyard |
Episode 10: The Capital in Flames! Walkthrough Guide
Area 1: Tsukudo-Cho
| Step-by-Step Guide | |
|---|---|
| 1 | 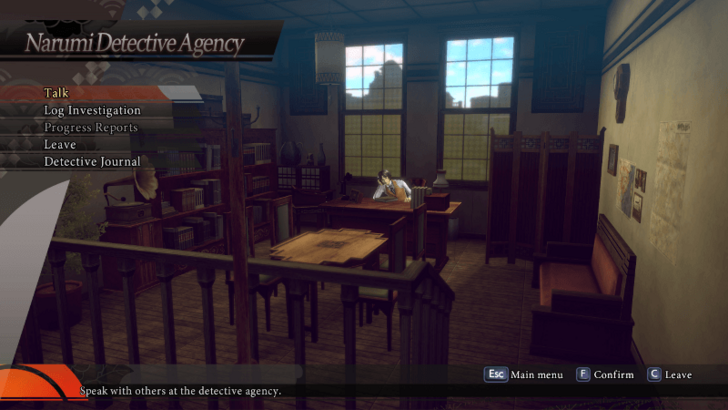 Head to Narumi Detective Agency. Head to Narumi Detective Agency.
|
Area 2: Harumi-Cho
| Step-by-Step Guide | |
|---|---|
| 2 | 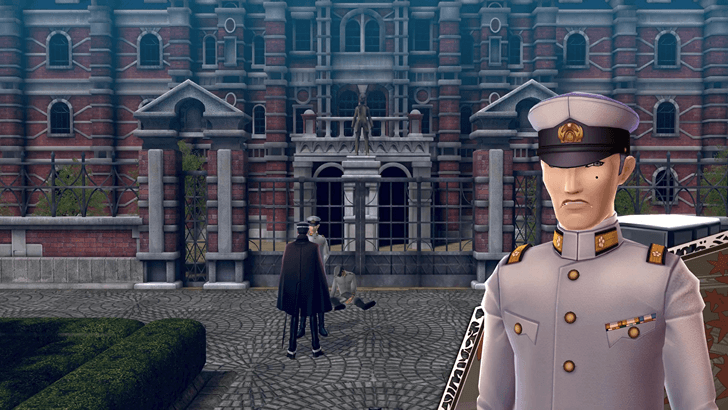 Talk to Sadakichi in Harumi-Cho. Return to the agency after.
 |
| 3 | Head back to Haurmi-Cho and
summon Tarrasque on the dock. |
| 4 | 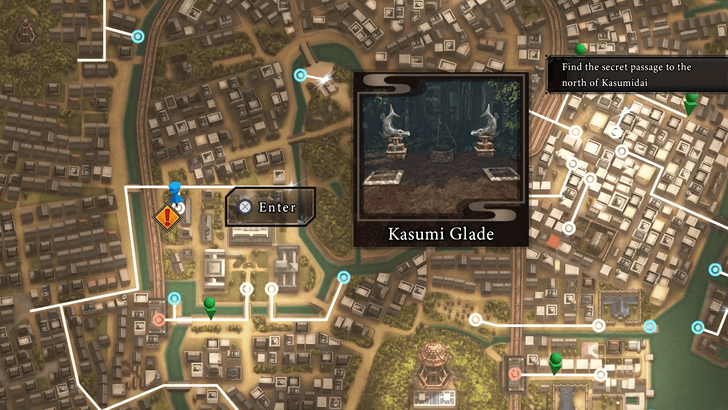 |
Area 3: Kasumi Glade
| 5 | 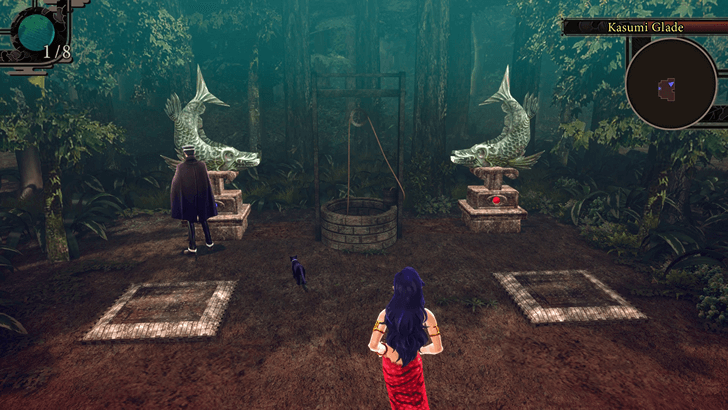 Put the orbs on the statue. Shiomitsu Orb goes on the left, while the Chigaeshi Orb goes on the right. Push the red statue after and make a demon stand on the other side of the platform to complete the quest.
 ► Puzzle Solution |
|---|
Area 4: Subterranean Shipyard
| 6 |
 Destroy the Fire Nethergate.
 |
|---|---|
| 7 |
 Jump down and head right. Destroy the Electric Nethergate up ahead.
 |
| 8 |  Wake up the sleeping Arahabaki. Defeat it after. Wake up the sleeping Arahabaki. Defeat it after. |
| 9 |  Suggest to ask an Ippon-Datara to smash the tainted wall. Head back up to the entrance. Suggest to ask an Ippon-Datara to smash the tainted wall. Head back up to the entrance. |
| 10 |  On the opposite side, destroy the Ice Nethergate. Jump down to the right after and take another leap on the next floor down. On the opposite side, destroy the Ice Nethergate. Jump down to the right after and take another leap on the next floor down. |
| 11 | 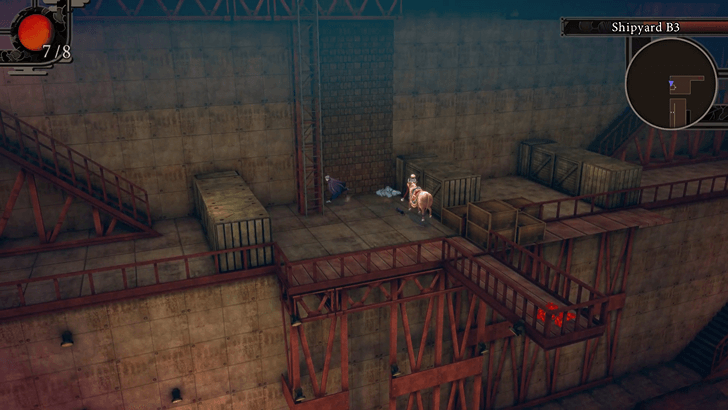 Use the ladder to reach the Ippon-Datara. Destroy the Force Nethergate first to talk to him. Use the ladder to reach the Ippon-Datara. Destroy the Force Nethergate first to talk to him. |
| 12 | 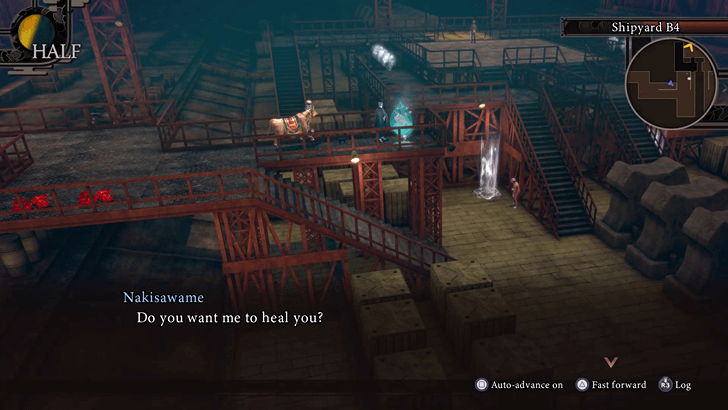 Destroy the Bullet Nethergate to reach Narumi. Destroy the Bullet Nethergate to reach Narumi. |
| 13 |
 Defeat Sukuna-Hikona. Defeat Sukuna-Hikona. |
Episode 11: Mission to Space
| Jump to Walkthrough Section | |||
|---|---|---|---|
| 1 | Tsukudo-Cho | 2 | Amazing Science Lab |
| 3 | Harumi-Cho | 4 | Amazing Science Lab |
| 5 | Goumaden | 6 | Soda Joint Shin-Sekai |
| 7 | Amazing Science Lab | 8 | Satellite Tai-Itsu |
Area 1: Tsukudo-Cho
| Step-by-Step Guide | |
|---|---|
| 1 | Talk to Narumi in the agency.
|
Area 2: Amazing Science Lab
| Step-by-Step Guide | |
|---|---|
| 2 | Head to the Amazing Science Lab and talk to Dr. Tsukomo.
|
Area 3: Harumi-Cho
| Step-by-Step Guide | |
|---|---|
| 3 | Talk to Sadakichi in Harumi-Cho.
|
Area 4: Amazing Science Lab
| Step-by-Step Guide | |
|---|---|
| 4 | Head back to the Amazing Science Lab and talk to Dr. Tsukomo again.
|
Area 5: Goumaden
| 5 |  Go to Goumaden and talk to Victor.
 |
|---|
Area 6: Soda Joint Shin-Sekai
| 6 | 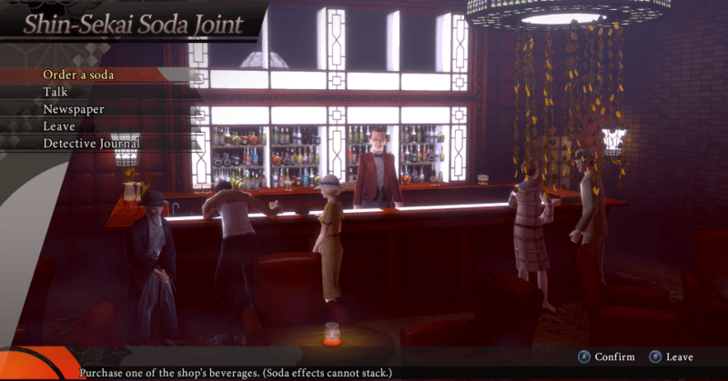 Talk to Rasputin in Soda Joint. Smack him after.
 |
|---|
Area 7: Amazing Science Lab
| Step-by-Step Guide | |
|---|---|
| 7 |
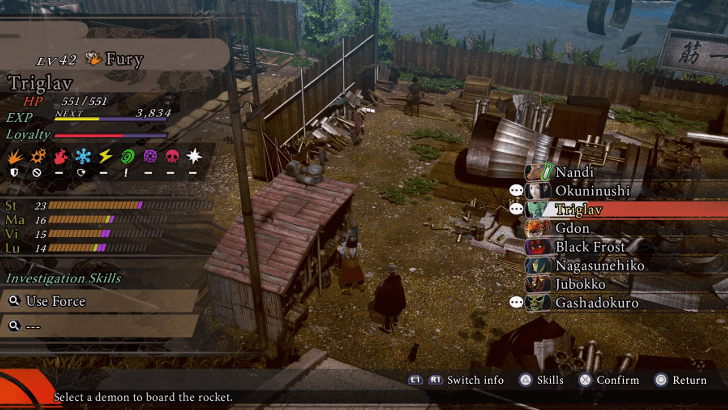 Talk to Dr. Tsukomo. Once you're ready, pick a demon to send to space.
|
| * | Send a demon with a variety of skills, preferably one with Death skills, as the whole place is guarded by several Powers. |
Area 8: Satellite Tai-Itsu
| Step-by-Step Guide | |
|---|---|
| 7 |
 Take down the Tai-Itsu Core. Take down the Tai-Itsu Core.
|
Episode 12: In the Present, for the Future Walkthrough
Episode 12: In the Present, for the Future Walkthrough Guide
Area 1: Fukagawa-Cho, Soda Joint, or Amazing Science Lab
| Step-by-Step Guide | |
|---|---|
| 1 |
Talk to Satake, Dr. Tsukomo, and Tae. This can be done in any order.
|
Area 2: Dark Tsukudo-Cho
| Step-by-Step Guide | |
|---|---|
| 2 | 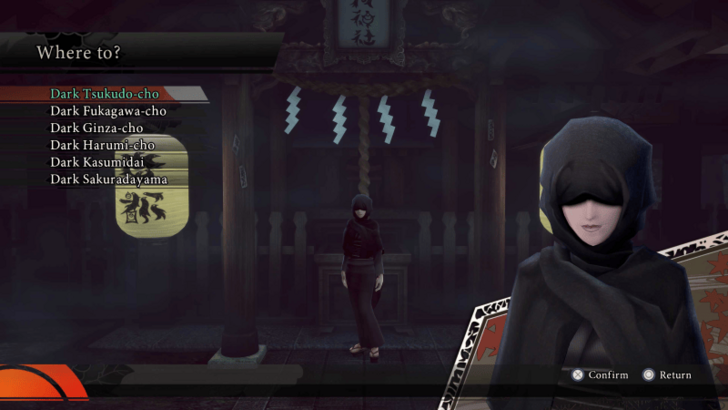 Head to the Nameless Shrine to access Dark Tsukudo-Cho. Head to the Nameless Shrine to access Dark Tsukudo-Cho.
|
Area 3: Akarana Corridor 1940-1950
| Step-by-Step Guide | |
|---|---|
| 3 | 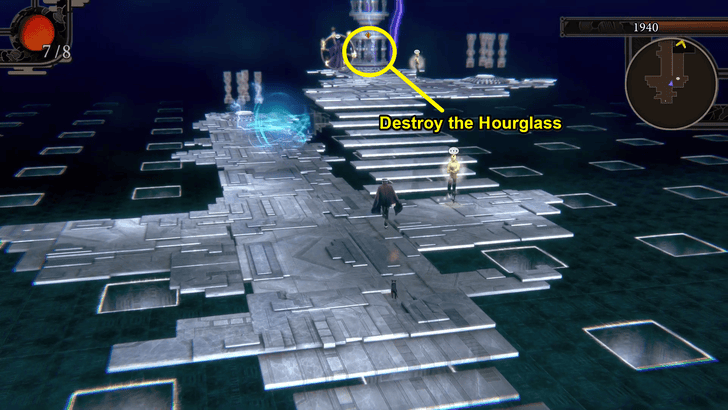 |
| 4 | 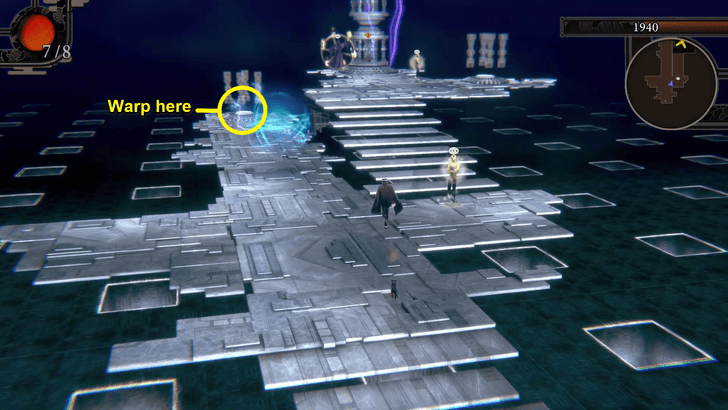 |
Area 4: Akarana Corridor 1960-1970
| Step-by-Step Guide | |
|---|---|
| 5 |
 |
| 6 |
 |
| 7 |  |
Area 5: Akarana Corridor 1990-2020
| 8 | 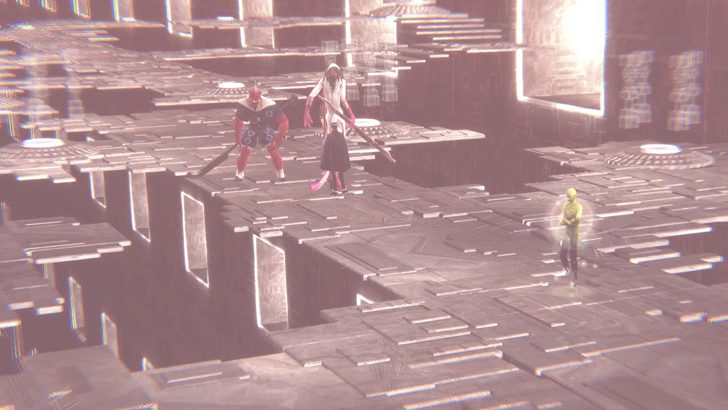 |
|---|---|
| 9 | 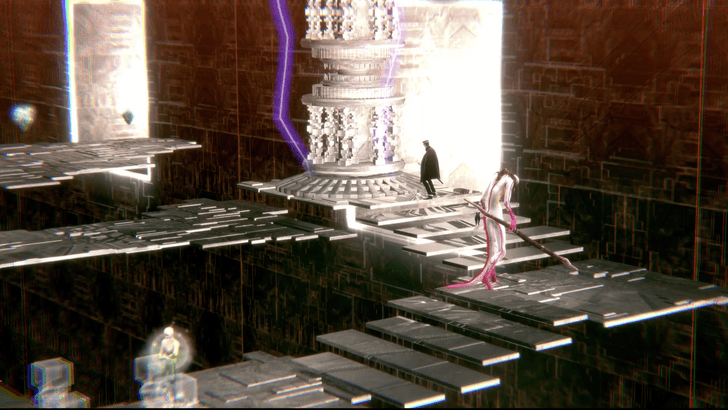 |
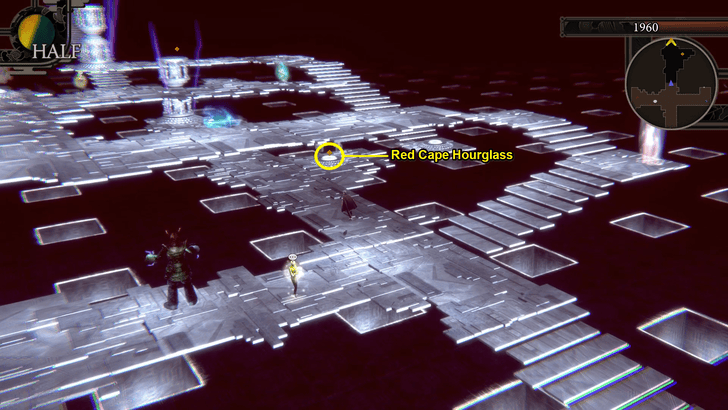
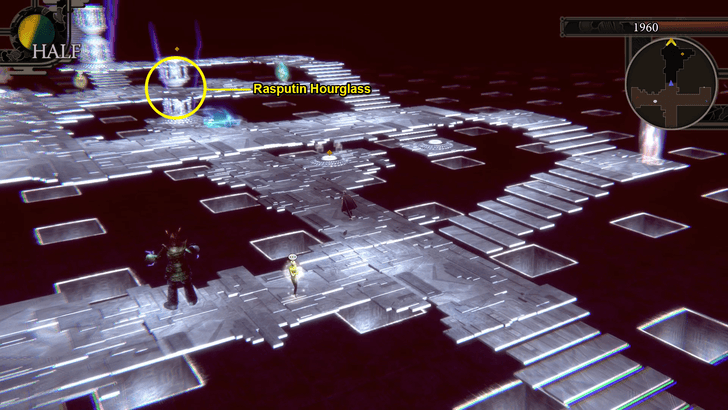
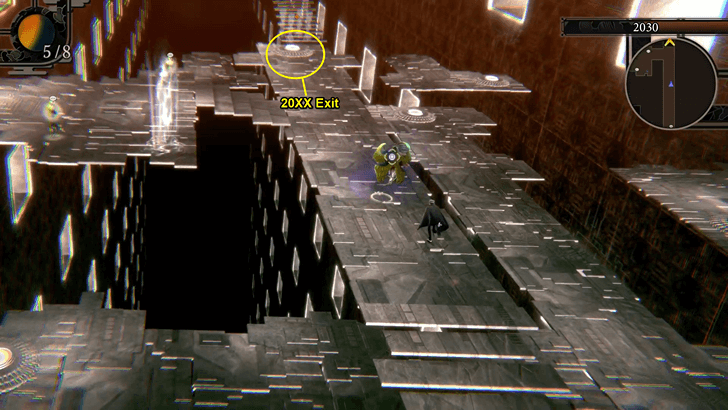
Area 6: Akarana Corridor 2040
| 10 | Use Read Mind on the Nekomata. Send a demon on a solo investigation and make it follow the directions given: Left, Right, Right. Defeat Hitokotonushi after reaching the hourglass ahead. |
|---|
Area 7: Akarana Corridor 2010
| Step-by-Step Guide | |
|---|---|
| 11 | Head back to 1990 and access 2010 through 2000. Use Cool Down on the Ukobach and Ignite on the Okuninushi. The directions they'll give are Left, Left, Right. Make Raidou follow the first two Lefts, and send a demon on a solo investigation for the Right. Defeat Hitokotonushi afterward. |
Area 8: 2050
| Step-by-Step Guide | |
|---|---|
| 12 |
 |
Area 9: 20XX
| Step-by-Step Guide | |
|---|---|
| 13 | 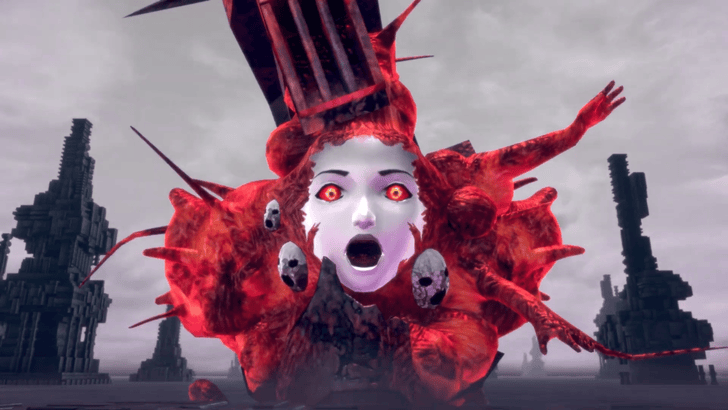 Defeat Raidou XL, Battleship Yasomagatsu & Soulless God Yasomagatsu to complete the episode.
|
New Game Plus
Unlock New Features
After beating the game, you can start a new game plus by loading your clear save to have access to more demons, case files, and weapons!
What Carries Over to New Game Plus?
How Many Episodes are There?
There are 12 Episodes
RAIDOU Remastered has a total of 12 Episodes, with it increasing to 13 if you include the Episode 0 Prologue. Some episodes are shorter than others, so make sure you're always prepared whenever a new episode starts.
RAIDOU Remastered: The Mystery of the Soulless Army Related Guides
RAIDOU Remastered: The Mystery of the Soulless Army Wiki
Guides by Category
| List of Categories | |
|---|---|
 Walkthrough Walkthrough |
 Demons Demons |
 Tips and Tricks Tips and Tricks |
 Characters Characters |
 Case Files Case Files |
 Skills Skills |
 Bosses Bosses |
 Weapons Weapons |
 Materials Materials |
 Locations Locations |
 Items Items |
 News News |
Recommended Guides
Author
RAIDOU Remastered: The Mystery of the Soulless Army Walkthrough & Guides Wiki
100% Walkthrough Guide
Please participate in our site
improvement survey
03/2026
improvement survey
03/2026
Would you assist in
improving Game8's site?
improving Game8's site?

×
We are listening to our users' valuable opinions and discussing how to act on them.
The information collected through this survey will be used for the purpose of improving our services. In addition, the information will only be disclosed a part of a statistic in a format that will not allow identification of personal information.
Begin Survey
Not Now
×
Please rate each item regarding Game8.co's Advertisements.
Amount of Ads
Very Dissatisfied
Somewhat Dissatisfied
Fine
Somewhat Satisfied
Highly Satisfied
Placement of Ads
Timing of Ad Display
Ad Loading Speed
Safeness of Ads
Content of Ads
×
Please rate each item regarding Game8.co's Quality of Articles.
Amount of information
Very Dissatisfied
Somewhat Dissatisfied
Fine
Somewhat Satisfied
Highly Satisfied
Frequency of updates
Speed of new information
Accuracy of articles
Understandibility of articles
Readability of sentences
×
Please rate each item regarding Game8.co's Usability of the Site.
Ease of finding information
Very Dissatisfied
Somewhat Dissatisfied
Fine
Somewhat Satisfied
Highly Satisfied
Loading Speed
Use of Color
Font Size
Visibility of Images
Easy to Understand Layout
×
Please rate each item regarding Game8.co's Message Boards, Comments.
Ease of Writing
Very Dissatisfied
Somewhat Dissatisfied
Fine
Somewhat Satisfied
Highly Satisfied
Readability
Ease in Finding Information
Comment Quality
Comment Quantity
Admin Response
×
Please rate each item regarding Game8.co's Site's new design.
Please rate our site's new design
Very Dissatisfied
Somewhat Dissatisfied
Fine
Somewhat Satisfied
Highly Satisfied
Do you think that the website's design change makes the site easier to use?
Has the new design made it easier for you to find information on the site?
Has the new design improved the overall visual appeal of the site?
How would you rate your overall satisfaction with the new design of the site?
×
How likely are you to recommend Game8 to someone you know?
Very Unlikely
0
1
2
3
4
5
6
7
8
9
10
Very Likely
If you have other opinions regarding potential improvement to the website, please share them with us. We would appreciate your honest opinion.
Note: This is a free response section, so you can proceed without entering anything.
Note: Please be sure not to enter any kind of personal information into your response.
Note: Please be sure not to enter any kind of personal information into your response.
×
Thank You
×
Thank you for participating in our survey! Your answers will help us to improve the quality of our website and services.
We hope you continue to make use of Game8.
We hope you continue to make use of Game8.
Close
Rankings
- We could not find the message board you were looking for.
Gaming News


![Monster Hunter Stories 3 Review [First Impressions] | Simply Rejuvenating](https://img.game8.co/4438641/2a31b7702bd70e78ec8efd24661dacda.jpeg/thumb)
Popular Games

Genshin Impact Walkthrough & Guides Wiki
Honkai: Star Rail Walkthrough & Guides Wiki
Umamusume: Pretty Derby Walkthrough & Guides Wiki
Pokemon Pokopia Walkthrough & Guides Wiki
Resident Evil Requiem (RE9) Walkthrough & Guides Wiki
Monster Hunter Wilds Walkthrough & Guides Wiki
Wuthering Waves Walkthrough & Guides Wiki
Arknights: Endfield Walkthrough & Guides Wiki
Pokemon FireRed and LeafGreen (FRLG) Walkthrough & Guides Wiki
Pokemon TCG Pocket (PTCGP) Strategies & Guides Wiki


Recommended Games
Diablo 4: Vessel of Hatred Walkthrough & Guides Wiki
Cyberpunk 2077: Ultimate Edition Walkthrough & Guides Wiki
Fire Emblem Heroes (FEH) Walkthrough & Guides Wiki
Yu-Gi-Oh! Master Duel Walkthrough & Guides Wiki
Super Smash Bros. Ultimate Walkthrough & Guides Wiki
Pokemon Brilliant Diamond and Shining Pearl (BDSP) Walkthrough & Guides Wiki
Elden Ring Shadow of the Erdtree Walkthrough & Guides Wiki
Monster Hunter World Walkthrough & Guides Wiki
The Legend of Zelda: Tears of the Kingdom Walkthrough & Guides Wiki
Persona 3 Reload Walkthrough & Guides Wiki


All rights reserved
©ATLUS. ©SEGA.
The copyrights of videos of games used in our content and other intellectual property rights belong to the provider of the game.
The contents we provide on this site were created personally by members of the Game8 editorial department.
We refuse the right to reuse or repost content taken without our permission such as data or images to other sites.