Link Usage Guide, Builds, Combos, and How to Unlock

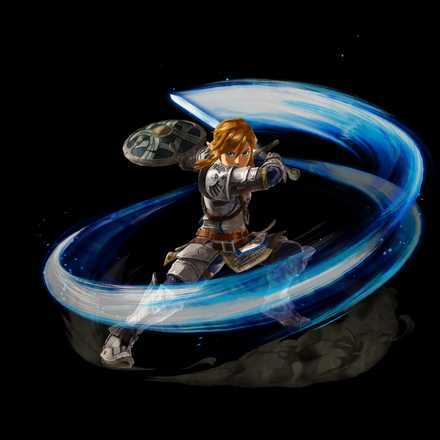
This guide will show how to unlock Link in Hyrule Warriors: Age of Calamity. Additionally, you can find this character's weapon information, builds, combo chart and actions, how to play as Link in Age of Calamity, and more.
List of Contents
How to Unlock Link & Weapon Information
 |
|
| How to Unlock | Unlocked at the start of the game |
|---|---|
| Weapon Used | One-Handed Swords, Two-Handed Swords, Spears, Flails |
| Voice Actor (English) |
Kengo Takanashi |
| Voice Actor (Japanese) |
Kengo Takanashi |
Best Link Builds
Master Sword
| Weapon | Best seal |
|---|---|
 Master Sword Master Sword
|
|
| Alternative seals | |
|
|
|
|
|
|
| Explanation | |
| Damage at Full Hearts amplifies the Master Sword's DPS together with the Sword Beam ability. Take note that this weapon skill is only recommended once you unlock the Master Sword's second hidden seal. You can use either Attack Speed or Regular-Attack Damage for the meantime then just remove it later once you've maxed out the weapon. |
|
One-Handed Sword
| Weapon | Best seal |
|---|---|
 Savage Lynel Sword Savage Lynel Sword
|
|
| Alternative seals | |
|
|
|
|
|
|
| Explanation | |
| After you unlock the combo upgrade where he can force weak-points on enemies, Attack Speed seals will be the best choice of weapon skill to stunlock strong enemies. | |
Two-Handed Sword
| Weapon | Best seal |
|---|---|
 Savage Lynel Crusher Savage Lynel Crusher
|
|
| Alternative seals | |
|
|
|
|
|
|
| Explanation | |
| Stack Damage at 30% Hearts or Less seals and bring your health down by spamming his unique ability to increase his damage. This technique is quite dangerous so don't forget to heal self-inflicted damage with X or his special attack. | |
Spear
| Weapon | Best seal |
|---|---|
 Savage Lynel Spear Savage Lynel Spear
|
|
| Alternative seals | |
|
|
|
|
|
|
| Explanation | |
| Spear Link has a decent attack speed and attack range to begin with so it would be best to increase his damage output. Mix in a couple of Attack Speed seals if you need a faster combo execution. | |
Flail
| Weapon | Best seal |
|---|---|
 Ancient Bladed Flail Ancient Bladed Flail
|
|
| Alternative seals | |
|
|
|
|
|
|
| Explanation | |
| Flail Link has a decent attack range and power, thanks to its copy ability. Use Regular-Attack Damage to increase its damage output and add in Attack Speed if you need faster combos when using a copied two-handed weapon. | |
How to Play as Link
Link Combo Chart
One-Handed Weapon
| Regular Attacks |
|---|
| Strong Attack 1 |
(Hold down to power up) |
| Strong Attack 2 |
└ |
| Strong Attack 3 |
| Strong Attack 4 |
| Strong Attack 5 |
| Strong Attack 6 |
└ |
| Unique Action |
Loose a flurry of arrows |
Two-handed Weapon
| Regular Attack |
|---|
| Recover Self-Inflicted Damage |
| Strong Attack 1 |
(Can start Midair Combo) |
| Strong Attack 2 |
| Strong Attack 3 |
| Strong Attack 4 |
| Midair Regular Attacks |
| Midair Drop Slash |
(While in the air) |
| Midair Strong Attack 1 |
(Press X for a Drop Slash) |
| Midair Strong Attack 2 |
(Press X for a Drop Slash) |
| Midair Strong Attack 3 |
(Press X for a Drop Slash) |
| Unique Action |
Unleash a powerful blow that hurts the user a bit. Use this instead of the X button in the combo. |
Spear
| Regular Attack |
|---|
| Strong Attack 1 |
| Strong Attack 2 |
(Can start Midair Combo) |
| Strong Attack 3 |
| Strong Attack 4 |
(Hold X to charge and change direction of thrusts using Left Stick) |
| Strong Attack 5 |
(Press X two more times) |
| Midair Regular Attacks |
(Final Y input is a drop attack) |
| Midair Drop Attack |
(Use Left Stick to aim and X for drop attack |
| Midair Strong Attack 1 |
(Use Left Stick to aim and X for drop attack) |
| Midair Strong Attack 2 |
(Use Left Stick to aim and X for drop attack) |
| Unique Action |
Unleash a charging thrust toward the enemy. Can be used in the middle of attacks for quick movement. |
Flail
| Regular Attacks |
|---|
| Strong Attack 1 |
Guardian Flail: Long ranged attack Ancient Bladed Flail: Charge beam attack Fortified Flail: Counterattack with shield and expose Weak-Point Gauge. |
| Strong Attack 2 |
| Strong Attack 3 |
| Strong Attack 4 |
(Can start Midair Combo) |
| Strong Attack 5 |
| Strong Attack 6 |
| Strong Attack 7 |
| Midair Regular Attacks |
| Midair Strong Attack 1 |
(Press X to use Finisher) |
| Midair Strong Attack 2 |
(Press X to use Finisher) |
| Midair Strong Attack 3 |
(Press X to use Finisher) |
| Unique Action |
Press ZR to copy an enemy's weapon and power up your attacks |
Press X While Dashing to Shield Surf!

When equipped with a one-handed weapon, pressing X while dashing causes Link to shield surf. This technique is excellent for moving quickly and plowing through enemies!
List of Link's Weapons
One-Handed Weapons
| Weapon | Base Atk | Hidden Seals |
|---|---|---|
|
|
34 | Level 25: Damage at Full Hearts: +8% Level 30: Heal a Percentage of Damage Dealt |
|
|
11 | Level 25: Damage at 30% Hearts or Less: +8% Level 30: Detects Nearby Koroks |
|
|
22 | Level 25: Battlefield-Specific Material Drop Rate: +5% Level 30: Attack Range: +4% |
|
|
27 | Level 25: Attack Range: +5% Level 30: Attack Speed: +4% |
|
|
14 | Level 25: Attack Speed: +4% Level 30: Special-Attack Charge Rate: +4% |
|
|
30 | Level 25: Battle EXP: +10% Level 30: Perfect-Dodge Timing Window: +15% |
|
|
43 | Level 25: Attack Range: +8% Level 30: Special-Attack Charge Rate: +7% |
|
|
71 | Level 25: Attack Speed: +8% Level 30: Auto-Critical Hit after Combos |
|
|
42 | Level 25: Detects Nearby Koroks Level 30: Increased Blupee Encounters |
|
|
31 | Level 25: Special-Attack Charge Rate: +7% Level 30: Damage to Locked-On Target: +11% |
|
|
14 | Level 25: Midair-Attack Damage: +10% Level 30: Damage to Midair Enemies: +17% |
|
|
73 | Level 25: Healing-Item Effect: +13% Level 30: Damage at Full Hearts: +8% |
|
|
15 | Level 25: Monster-Part Drop Rate: +6% Level 30: Fusion Material EXP: +440% |
|
|
29 | Level 25: Monster-Part Drop Rate: +11% Level 30: High-Resell Weapon |
|
|
46 | Level 25: Monster-Part Drop Rate: +15% Level 30: Strong-Attack Damage: +7% |
|
|
30 | Level 25: Monster-Part Drop Rate: +5% Level 30: Attack Speed: +7% |
|
|
21 | Level 25: Monster-Part Drop Rate: +11% Level 30: Battlefield-Specific Material Drop Rate: +11% |
|
|
71 | Level 25: Monster-Part Drop Rate: +18% Level 30: Battlefield-Specific Material Drop Rate: +18% |
|
|
41 | Level 25: Ancient-Part Drop Rate: +10% Level 30: Damage from Enemies: -5% |
|
|
70 | Level 25: Ancient-Part Drop Rate: +10% Level 30: Reduced Damage from Ice |
|
|
64 | Level 25: Ancient-Part Drop Rate: +15% Level 30: Resistance to All Status Effects |
|
|
31 | Level 25: Damage at 30% Hearts or Less: +15% Level 30: Damage Reflected When Guarding: 20% |
|
|
63 | Level 25: Damage Reflected When Guarding: 20% Level 30: Chance of Landing Shockwave: +11% |
|
|
68 | Level 25: Chance to KO Weak Enemies Level 30: Perfect Guard Chance When Guarding: +10% |
|
|
25 | Level 25: High-Resell Weapon Level 30: Attack Range: +7% |
|
|
31 | Level 25: Fusion Material EXP: +160% Level 30: Attack Speed: +4% |
|
|
18 | Level 25: Battle EXP: +10% Level 30: Perfect-Dodge Timing Window: +15% |
|
|
15 | Level 25: Battlefield-Specific Material Drop Rate: +5% Level 30: Attack Range: +4% |
|
|
36 | Level 25: Strong-Attack Damage: +7% Level 30: Strong-Attack Damage: +7% |
Two-Handed Weapons
| Weapon | Base Atk | Hidden Seals |
|---|---|---|
|
|
35 | Level 25: Material Drop Rate from Grass: +17% Level 30: Battle EXP: +11% |
|
|
25 | Level 25: Attack Speed: +5% Level 30: Attack Range: +8% |
|
|
15 | Level 25: Attack Speed: +3% Level 30: Dash-Attack Damage: +15% |
|
|
37 | Level 25: Attack Range: +7% Level 30: Regular-Attack Damage: +7% |
|
|
17 | Level 25: Mineral Drop Rate: +11% Level 30: Mineral Drop Rate: +11% |
|
|
21 | Level 25: Regular-Attack Damage: +8% Level 30: Damage to Foes with Status Effects: +17% |
|
|
45 | Level 25: Damage at 30% Hearts or Less: +8% Level 30: Midair-Attack Damage: +15% |
|
|
41 | Level 25: Attack Range: +7% Level 30: Fusion Material EXP: +400% |
|
|
46 | Level 25: Dash-Attack Damage: +15% Level 30: Damage at 30% Hearts or Less: +18% |
|
|
59 | Level 25: Strong-Attack Damage: +7% Level 30: Damage from Enemies: -5% |
|
|
65 | Level 25: Damage at 30% Hearts or Less: +20% Level 30: Auto-Critical Hit after Combos |
|
|
11 | Level 25: Monster-Part Drop Rate: +5% Level 30: Strong-Attack Damage: +7% |
|
|
28 | Level 25: Monster-Part Drop Rate: +10% Level 30: Healing-Item Drop Rate: +22% |
|
|
48 | Level 25: Monster-Part Drop Rate: +15% Level 30: Chance of Landing Shockwave: +11% |
|
|
24 | Level 25: Strong-Attack Damage: +4% Level 30: Damage to Locked-On Target: +10% |
|
|
22 | Level 25: Attack Range: +8% Level 30: Attack Speed: +5% |
|
|
60 | Level 25: Rare-Material Drop Rate: +17% Level 30: Monster-Part Drop Rate: +17% |
|
|
45 | Level 25: Ancient-Part Drop Rate: +10% Level 30: Damage from Enemies: -5% |
|
|
68 | Level 25: Ancient-Part Drop Rate: +10% Level 30: Reduced Damage from Fire |
|
|
39 | Level 25: Ancient-Part Drop Rate: +15% Level 30: Resistance to All Status Effects |
|
|
44 | Level 25: Damage at 30% Hearts or Less: +18% Level 30: Strong-Attack Damage: +7% |
|
|
50 | Level 25: Auto-Critical Hit after Combos Level 30: Heal by Defeating Enemies |
|
|
66 | Level 25: Damage to Locked-On Target: +10% Level 30: Heal a Percentage of Damage Dealt |
|
|
67 | Level 25: Attack Range: +11% Level 30: High-Resell Weapon |
|
|
Level 25: Damage from Enemies: -5% Level 30: Fusion Material EXP: +400% |
Spears
| Weapon | Base Atk | Hidden Seals |
|---|---|---|
|
|
16 | Level 25: Attack Speed: +3% Level 30: Flurry Rush Damage: +20% |
|
|
25 | Level 25: Sensor-Registered Material Drop Rate: +17% Level 30: Material Drop Rate from Grass: +17% |
|
|
29 | Level 25: Damage to Midair Enemies: +10% Level 30: Dash-Attack Damage: +22% |
|
|
20 | Level 25: Attack Range: +13% Level 30: Heal by Defeating Enemies |
|
|
52 | Level 25: Attack Speed: +7% Level 30: Regular-Attack Damage: +7% |
|
|
62 | Level 25: Attack Range: +13% Level 30: Damage to Locked-On Target: +11% |
|
|
43 | Level 25: Special-Attack Charge Rate: +10% Level 30: Detects Nearby Koroks |
|
|
43 | Level 25: Perfect-Dodge Timing Window: +15% Level 30: Mineral Drop Rate: +11% |
|
|
26 | Level 25: Special-Attack Charge Rate: +3% Level 30: Regular-Attack Damage: +4% |
|
|
41 | Level 25: Damage to Midair Enemies: +22% Level 30: Strong-Attack Damage: +8% |
|
|
45 | Level 25: Fusion Material EXP: +400% Level 30: Midair-Attack Damage: +15% |
|
|
54 | Level 25: Damage to Midair Enemies: +20% Level 30: Damage at Full Hearts: +7% |
|
|
21 | Level 25: Monster-Part Drop Rate: +5% Level 30: Attack Range: +7% |
|
|
28 | Level 25: Monster-Part Drop Rate: +10% Level 30: Auto-Critical Hit after Combos |
|
|
44 | Level 25: Monster-Part Drop Rate: +15% Level 30: Damage to Locked-On Target: +10% |
|
|
26 | Level 25: Attack Range: +5% Level 30: Perfect-Dodge Timing Window: +20% |
|
|
28 | Level 25: Fusion Material EXP: +160% Level 30: Auto-Critical Hit after Combos |
|
|
36 | Level 25: High-Resell Weapon Level 30: Fusion Material EXP: +440% |
|
|
29 | Level 25: Attack Speed: +4% Level 30: Dash-Attack Damage: +20% |
|
|
33 | Level 25: Attack Speed: +4% Level 30: Midair-Attack Damage: +20% |
|
|
60 | Level 25: Attack Speed: +7% Level 30: Strong-Attack Damage: +7% |
|
|
23 | Level 25: Ancient-Part Drop Rate: +5% Level 30: Damage from Enemies: -5% |
|
|
54 | Level 25: Ancient-Part Drop Rate: +10% Level 30: Reduced Damage from Lightning |
|
|
69 | Level 25: Ancient-Part Drop Rate: +15% Level 30: Resistance to All Status Effects |
|
|
47 | Level 25: Attack Speed: +5% Level 30: Auto-Critical Hit after Combos |
|
|
61 | Level 25: Special-Attack Damage: +12% Level 30: Damage Reflected When Guarding: 20% |
|
|
51 | Level 25: Damage at Full Hearts: +7% Level 30: Chance to KO Weak Enemies: +10% |
Flail
| Weapon | Base Atk | Hidden Seals |
|---|---|---|
|
|
65 | Level 25: Attack Range: +12% Level 30: Regular-Attack Damage: +7% |
|
|
65 | Level 25: Regular-Attack Damage: +7% Level 30: Auto-Critical Hit after Combos |
|
|
65 | Level 25: Strong-Attack Damage: +7% Level 30: Damage Reflected When Guarding: 20% |
Link's Quests
| Quest | How to Unlock / Reward |
|---|---|
| Hyrule Swordfighting Academy | Clear the Battle: The Battle of Hyrule Field One-Handed Weapon: Bonus Combo |
| Keeping the Village Peace | Complete the Quest: Hyrule Swordfighting Academy One-Handed Weapon: Bonus Combo |
| A Well-Tended Goddess | Complete the Quest: Traps for Kakariko Village Link: +1 Bonus Hearts |
| A Flower-Adorned Goddess | Clear the Battle: Revali, the Rito Warrior Link: +1 Bonus Hearts Tabantha Wheat x5 |
| Study the Blade | Clear the Battle: Urbosa, the Gerudo Chief One-Handed Weapon: Bonus Combo |
| A Spear-ited Combatant | Clear the Battle: Urbosa, the Gerudo Chief Spear: Bonus Combo |
| Teach a Hylian to Fish | Complete the Quest: A Spear-ited Combatant Spear: Bonus Combo |
| Hateno Defense Squad | Complete the Quest: Making a Monster Two-Handed Weapons: Bonus Combo |
| The Volunteer Army | Complete the Quest: The Hateno Defense Squad Two-Handed Weapons: Bonus Combo |
| The Blade that Pierces the Eye | Clear the Battle: Freeing Korok Forest One-Handed Weapon: Bonus Combo |
| Mount Taran's Solitary Masters | Clear the Battle: The Yiga Clan Attacks! Spear: Bonus Combo |
| A Moss-Covered Goddess | Clear the Battle: Akkala Tower Link: +2 Bonus Hearts |
| Heartfelt Thanks | Complete the Quest: The Blade that Pierces the Eye One-Handed Weapon: Bonus Combo |
| Proof of Sword Mastery | Complete the Quest: Heartfelt Thanks One-Handed Weapon: Enhanced Ability |
| A Frozen-Solid Goddess | Clear the Battle: Relentless as a Waterfall Link: +2 Bonus Hearts |
| The Treasure Hunter's Technique | Clear the Battle: Akkala Tower Two-Handed Weapons: Bonus Combo |
| Training Ground Pest Problem | Clear the Battle: Akkala Tower Spear: Bonus Combo |
| The Knight's Gauntlet | Clear the Battle: Each Step Like Thunder Link: Special-Attack Gauge +1 |
| Training Ground Upgrade | Clear the Battle: Calamity Strikes Spear: Bonus Combo |
| Refuel Motivation | Clear the Battle: Relentless as a Waterfall Two-Handed Weapons: Bonus Combo |
| Frog Side Effects | Clear the Challenge: The Royal Escourt Link: Special-Attack Gauge +1 |
| A Strike to Pierce Stone | Complete the Quest: Training Ground Upgrade Spear: Enhanced Ability |
| Full Bellies Fight Better | Clear the Battle: The Future of Hyrule Two-Handed Weapons: Enhanced Ability |
| Making a Monster | Clear any Two Story Battles in Chapter 2 Two-Handed Weapon: Bonus Combo |
| EX Reunion with the Swordmaster | Complete the Quest: Magnificent Mass Flail: Enhanced Ability |
| EX Secret Plans | Complete the Quest: The Blazing-Blue Blades Flail: Bonus Combo |
| EX The Copy Tournament | Complete the Quest: The Blazing-Blue Blades Flail: Bonus Combo |
| EX The Squad's Training Retreat | Complete the Quest: A Helping Claw Flail: Bonus Combo |
| EX Seeking Wooden Swords | Complete the Quest: A Helping Claw Flail: Bonus Combo |
| EX A Spear Experiment | Complete the Quest: A Helping Claw Flail: Bonus Combo |
| EX Hasty Recovery | Clear the Battle: EX To Zelda's Side Two-Handed Weapon: EX Enhanced Ability |
| EX Spear Master | Clear the Battle: EX To Zelda's Side Spear: EX Enhanced Ability |
| EX The Text of Tomorrow | Clear the Battle: EX The Princess and the King One-Handed Weapon: EX Enhanced Ability |
Hyrule Warriors: Age of Calamity Characters

How to Unlock All Playable Characters
| Main Characters | |||||||||||
|---|---|---|---|---|---|---|---|---|---|---|---|
 Link Link |
 Impa Impa |
 Zelda Zelda |
|||||||||
 Mipha Mipha |
 Daruk Daruk |
 Revali Revali |
 Urbosa Urbosa |
||||||||
| Secret Characters | |||||||||||
 Hestu Hestu |
 Sidon Sidon |
 Yunobo Yunobo |
 Riju Riju |
||||||||
 Teba Teba |
 Master Kohga Master Kohga |
 King Rhoam King Rhoam |
 Great Fairies Great Fairies |
||||||||
 Monk Maz Koshia Monk Maz Koshia |
 Terrako Terrako |
 Calamity Ganon Calamity Ganon |
 Battle-Tested Guardian Battle-Tested Guardian
|
||||||||
 Purah and Robbie Purah and Robbie |
 Sooga Sooga |
||||||||||
| Best Character Tier List | |||||||||||
| Villains | |||||||||||
| Astor | Sooga | ||||||||||
| English and Japanese Voice Actors and Cast | |||||||||||
Author
Link Usage Guide, Builds, Combos, and How to Unlock
improvement survey
03/2026
improving Game8's site?

Your answers will help us to improve our website.
Note: Please be sure not to enter any kind of personal information into your response.

We hope you continue to make use of Game8.
Rankings
- We could not find the message board you were looking for.
Gaming News
Popular Games

Genshin Impact Walkthrough & Guides Wiki

Honkai: Star Rail Walkthrough & Guides Wiki

Umamusume: Pretty Derby Walkthrough & Guides Wiki

Pokemon Pokopia Walkthrough & Guides Wiki

Resident Evil Requiem (RE9) Walkthrough & Guides Wiki

Monster Hunter Wilds Walkthrough & Guides Wiki

Wuthering Waves Walkthrough & Guides Wiki

Arknights: Endfield Walkthrough & Guides Wiki

Pokemon FireRed and LeafGreen (FRLG) Walkthrough & Guides Wiki

Pokemon TCG Pocket (PTCGP) Strategies & Guides Wiki
Recommended Games

Diablo 4: Vessel of Hatred Walkthrough & Guides Wiki

Fire Emblem Heroes (FEH) Walkthrough & Guides Wiki

Yu-Gi-Oh! Master Duel Walkthrough & Guides Wiki

Super Smash Bros. Ultimate Walkthrough & Guides Wiki

Pokemon Brilliant Diamond and Shining Pearl (BDSP) Walkthrough & Guides Wiki

Elden Ring Shadow of the Erdtree Walkthrough & Guides Wiki

Monster Hunter World Walkthrough & Guides Wiki

The Legend of Zelda: Tears of the Kingdom Walkthrough & Guides Wiki

Persona 3 Reload Walkthrough & Guides Wiki

Cyberpunk 2077: Ultimate Edition Walkthrough & Guides Wiki
All rights reserved
© Nintendo © KOEI TECMO GAMES All rights reserved. Licensed by Nintendo.
The copyrights of videos of games used in our content and other intellectual property rights belong to the provider of the game.
The contents we provide on this site were created personally by members of the Game8 editorial department.
We refuse the right to reuse or repost content taken without our permission such as data or images to other sites.


