Bleed Bow Reaver Build
NEW: 0.1.1 Hotfix 1 ▶︎ All Patch Notes
UPDATED: Early Access Roadmap
★ Check our Beginner's Guide
☆ Meta: Builds | Best Class | Best Skills
★ Walkthrough | World Quests | Bosses
☆ Uniques | Weapons | Armor
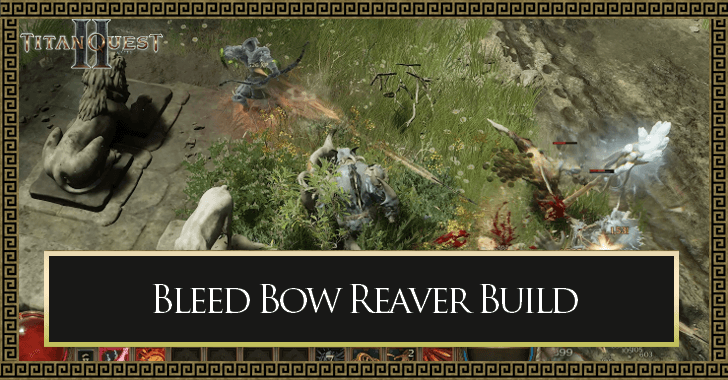
This is a Bleed Bow Rogue Warfare build guide for Titan Quest 2. Check out how the Bleed Bow Reaver build works with their skills, equipment, attribute priorities, and playstyle here!
 Attention! Attention! |
Sign in and select  under the page's title to be notified of any updates! under the page's title to be notified of any updates! |
|---|
List of Contents
Bleed Bow Reaver Build
Build Summary
| Build Setup | |
|---|---|
 Bleed Bow Reaver Build Bleed Bow Reaver Build |
Preparation ・Emit an Aura with a 18m radius.
・Aura grants you and alies 20% increased Poison Damage. ・Aura grants you and allies 20% increased Physical Damage. Vanish ・Gain 30% increased Movement Speed, 30% increased Damgae for 6s.
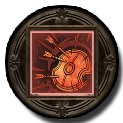
Barrage ・After a short wind up, attack 5 times dealing 35% Weapon Damage.
・Requires Dagger, Sword, Spear or Ranged. ・Can be cancelled by moving. Battlefield Awareness ・Emit an Aura with a 18m radius.
・Aura grants you and allies +15 Armor. Accuracy ・6% increased Damage
・10% increased Critical Hit Chance Deft Hands ・6% increased Damage
・4% increased Attack Speed ・4% increased Cast Speed Anatomy ・12% increased Pierce Damage
・12% increased Bleed Chance Deadly Affliction ・8% increased Ailment Chance
・8% increased Ailment Power Martial Expert ・8% increased Physical Damage
・8% increased Bleed and Stagger Chance |
Tier Ranking: |
|
|
| |
This Bleed Bow build focuses on using Vanish to build Flow and then pelting enemies with a Barrage of arrows, inflicting bleeds and hitting vitals with critical hits. Battlefield Awareness is also included to help answer your energy gain and squishy nature!
Do note that this build is made until Level 22 so you can achieve max Divinity for both classes once you complete all the quests. Any additional points after that level can be slotted into maxing out Vanish and increasing Enhanced Critical Hits.
| August 8, 2025 | Bleed Bow Reaver build was created. |
|---|
Equipment and Affixes
| Gear | Affixes | |
|---|---|---|
| Head (Light Armor) |
・+ Energy Regeneration per second
・- Energy Reserved ・Health ・Any Resistance |
|
| Shoulders (Light Armor) |
・+ Critical Hit Chance
・+ Ailment Power ・+ Ailment Chance | |
| Torso (Light Armor) |
・Vigor
・Might ・Any Resistance |
|
| Arms (Light Armor) |
・+ Critical Hit Chance
・+ Attack Speed ・+ Increased Pierce Damage |
|
| Legs (Light Armor) |
・Increased Movement Speed
・Increased Attack Speed ・Agility ・Any Elemental Resistance |
|
| Necklace | ・+ Critical Hit Chance
・+ Energy ・+ Ailment Power/Chance |
|
| Ring 1 | ・+ Critical Hit Chance
・Weapon Pierce Damage ・Increased Pierce Damage ・Increased Ailment Power |
|
| Ring 2 | ・+ Critical Hit Chance
・Weapon Pierce Damage ・Increased Pierce Damage ・Increased Ailment Power |
|
| Weapon (Heavy Bow) | ・+ Critical Hit Chance
・Weapon Pierce Damage ・Increased Pierce Damage ・Increased Ailment Power ・Increased Ailment Chance |
ψ The stats shown above are a sample build of what you want to go for when building your character.
In terms of offense, the equipment for this build revolves around stacking Critical Hit Chance, Pierce Damage, and Ailment Power. As a general rule, only get Ailment Chance up until you reach 120%+ as most of your damage will still come from Barrage.
Additionally, slot in as much Attack Speed so you can quicken Barrage's DPS by lowering the amount of time spent channeling. As for defense, stock up on the appropriate amount of Health and Resistances, and Energy-related modifiers for utility!
Alternatively, the Moonclaw will be a substantial inclusion for the build as it heavily relies on dealing Critical hits!
| List of Weapons | List of Armor |
Abilities
| Skills | Modifiers |
|---|---|
 Barrage Barrage
(17) |
Consume Flow ・Consumes Flow for 50% more Damage Extended Barrage ・+3 additional attacks. Ramp Up ・Every attack deals 4% more Damage and has 4% more Ailment Chance than the previous. Enhanced Precision ・100% more Critical Hit Chance |
 Preparation Preparation
(17) |
Blade Honing ・Aura grants you and allies +4 Weapon Pierce Damage. ・Grants you 100% Weapon Damage converted to Pierce Damage. ・+30 Energy reserved. Enhanced Critical Hits ・Aura grants you and allies 10% increased Critical Hit Chance. ・Aura grants you and allies 4% increased Critical Damage Multiplier. ・+10 Energy reserved. Shadow Dagger ・Whenever you crit with an active ability, there is a 30% chance a Shadow Dagger backstabs the enemy dealing 16 Poison Damage. ・+15 Energy reserved. |
 Battlefield Awareness Battlefield Awareness
(9) |
Inspiration ・Aura grants you and allies: ・+2 Energy Regeneration ・+10 Energy reserved Conservation ・-20 Energy Reserved |
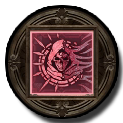 Vanish Vanish
(5) |
Flow Gain ・On use gain Flow. ・+2s Base Cooldown Duration. Enhanced Ailments ・Grants 30% increased Ailment Chance. ・Grants 8% increased Ailment Power. |
The main offensive skill will be Barrage, which is modified with the Consume Flow for a significant damage increase when paired with Vanish. Furthermore, with Barrage's high Attack-per-second (APS), it can easily stack up 10-12 Bleeds with the right amount of Ailment Chance. A good leveling alternative before Barrage would be Trick Shot!
To further amp up the Bleed, Preparation is included as well to sharpen the arrows you shoot out, leading to massive Weapon Pierce Damage. As an additional means of damage, this build also includes Shadow Daggers, as multiple critical hits are pretty common with this build!
With the way Extended Barrage works by extending your attack but with no difference in cost, Battlefield Awareness's additional energy regeneration should allow you to have little to no downtime between attacks.
Lastly, Vanish is slotted in to be the main provider of Flow and as an additional means of mobility and Ailment Power. As an alternative to getting Flow early on, you can use the Primary Attack.
Mob Clear
For situations when you are getting swarmed, such as the crabs before the Hippokampos fight, opt to change Barrage's Enhanced Precision with Projectile Penetration to answer them quickly before swapping back to critical hit chance.
Passives
| Skills | Modifiers |
|---|---|
 Deft Hands Deft Hands
(12) |
Critical Hit Chance ・20% increased Critical Hit Chance Attack and Cast Speed ・6% increased Attack Speed ・6% increased Cast Speed |
 Anatomy Anatomy
(8) |
Bleed Chance ・20% increased Bleed Chance ・20% increased Bleed Power Pierce Damage ・20% increased Pierce Damage ・+5% Pierce Penetration |
 Deadly Affliction Deadly Affliction
(12) |
Ailment Power ・20% increased Ailment Power Ailment Amount ・+2 Maximum stacks to all Ailments |
 Accuracy Accuracy
(12) |
Critical Hit Chance ・20% increased Critical Hit Chance Critical Hit Damage ・+15% Critical Damage Multiplier |
 Martial Expert Martial Expert
(1) |
- |
The passives for this build mainly enhance the following stats: Critical Hit Chance, Weapon Damage, Bleed/Pierce Damage, and Ailment Amount as a basic foundation for the build starting at 22. Onwards, build up on Martial Expert to further increase your Bleed capabilities.
Leveling Priority
As a general rule for modifiers early on, it would be better to get Ailment Chance and Weapon Damage for Deft Hands and Deadly Affliction up until you are comfortable enough to transition to Critical Hits.
Divinity Allocation Points
| Divinity Allocation |
|---|
| Rogue ▶ Warfare |
For your Divinity, make sure to unlock Tier 2 of Rogue first so you can get Preparation early to start dealing Pierce and Bleed Damage while using Trick Shot first. Once you have that, you can start focusing on Warfare to get your main skill: Barrage.
Attribute Priority
| Attribute Prioritization |
|---|
| Agility ▶ Might |
Your Attributes mainly consist of Agility to help you build up on Fitness and allow you to equip Light/Medium Armor.
However, you should also take points in Might as not only does it increase your Fitness, but it also allows you to equip Heavy Bows, which have better overall stats when it comes to Bleed and Critical Hit Rates.
Keep in mind that as you progress, you should increase your attributes at a 2:1 ratio, where every 2 Agility should add 1 Might.
Playstyle and Skill Rotation
The Bleed Bow Reaver build revolves around using Flow to enhance Barrage, dealing critical hits, and stacking bleeds on bosses to melt their health bar! The rotation is as follows:
- Activate Preparation and Battlefield Awareness to enable your Pierce and Energy Regeneration.
- Use Vanish as the fight starts to gain Flow.
- Empty your arrows on the boss by using Barrage, and then reposition when necessary.
- Rinse and repeat starting from step 2.
Titan Quest 2 Related Guides
List of All Builds Ranked
| Rank | Build |
|---|---|
 |
|
 |
|
 |
|
 |
Comment
Author
Bleed Bow Reaver Build
Rankings
- We could not find the message board you were looking for.
Gaming News


Popular Games

Genshin Impact Walkthrough & Guides Wiki
Umamusume: Pretty Derby Walkthrough & Guides Wiki
Crimson Desert Walkthrough & Guides Wiki
Monster Hunter Stories 3: Twisted Reflection Walkthrough & Guides Wiki
Honkai: Star Rail Walkthrough & Guides Wiki
Pokemon Pokopia Walkthrough & Guides Wiki
The Seven Deadly Sins: Origin Walkthrough & Guides Wiki
Wuthering Waves Walkthrough & Guides Wiki
Zenless Zone Zero Walkthrough & Guides Wiki
Arknights: Endfield Walkthrough & Guides Wiki


Recommended Games
Fire Emblem Heroes (FEH) Walkthrough & Guides Wiki
Diablo 4: Vessel of Hatred Walkthrough & Guides Wiki
Cyberpunk 2077: Ultimate Edition Walkthrough & Guides Wiki
Yu-Gi-Oh! Master Duel Walkthrough & Guides Wiki
Super Smash Bros. Ultimate Walkthrough & Guides Wiki
Pokemon Brilliant Diamond and Shining Pearl (BDSP) Walkthrough & Guides Wiki
Elden Ring Shadow of the Erdtree Walkthrough & Guides Wiki
Monster Hunter World Walkthrough & Guides Wiki
The Legend of Zelda: Tears of the Kingdom Walkthrough & Guides Wiki
Persona 3 Reload Walkthrough & Guides Wiki


All rights reserved
© 2023 by THQ Nordic GmbH, Austria
The copyrights of videos of games used in our content and other intellectual property rights belong to the provider of the game.
The contents we provide on this site were created personally by members of the Game8 editorial department.
We refuse the right to reuse or repost content taken without our permission such as data or images to other sites.