This survey will take about 1 minute.
Your answers will help us to improve our website.
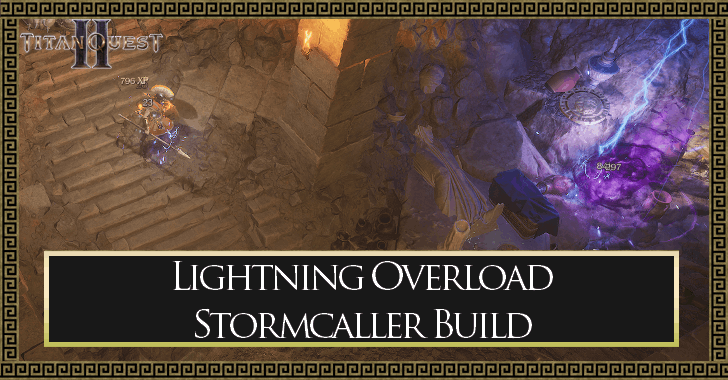
Titan Quest 2
Lightning Overload Storm Build
NEW: 0.1.1 Hotfix 1 ▶︎ All Patch Notes
UPDATED: Early Access Roadmap
★ Check our Beginner's Guide
☆ Meta: Builds | Best Class | Best Skills
★ Walkthrough | World Quests | Bosses
☆ Uniques | Weapons | Armor
This is an Lightning Overload Storm build guide for Titan Quest 2. Check out how the Lightning Overload Storm build works with their skills, equipment, attribute priorities, and playstyle here!
 Attention! Attention! |
Sign in and select  under the page's title to be notified of any updates! under the page's title to be notified of any updates! |
|---|
List of Contents
Lightning Overload Stormcaller Build
Build Summary
| Build Setup | |
|---|---|
 Lightning Overload Stormcaller Build Lightning Overload Stormcaller Build |
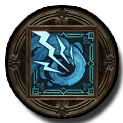
Call Lightning ・Call down lightning at target location dealing 21 Lightning Damage in a 1.5m radius.
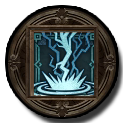
Storm Nimbus ・Emit an Aura with a 18m radius.
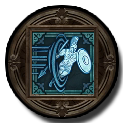
・Aura grants you and allies 20% increased Cold Damage. ・Aura grants you and allies 20% increased Lightning Damage. Blink ・Instantly teleport to target location.
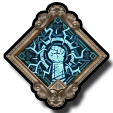
・While this ability is on cooldown, you can reactivate it once to teleport back to the start location. Raging Mind ・Unlocks Spell Rage.
・6% increased Spell Damage ・4% increased Cast Speed Arcane Influx ・3% increased Energy Regeneration
・1% increased Energy Storm Attunement ・8% increased Lightning Cold Damage
・8% increased Cold Damage Overcharge ・10% increased Damage with Overload abilities
Storm Adaptation ・ +20% Barrier Decay Threshold
・+4% Cold Resistance ・+4% Lightning Resistance |
Tier Ranking: |
|
|
| |
Lightning Overload Stormcaller is a single-mastery Storm build for Level 22 focusing on Lightning Call's incredible ability to land ranged-AoE Lightning damage paired with the Overload effect to destroy mobs beyond distance and damage bosses before they attack while maintaining mobility and survivability.
This build is reliant on your capability to micromanage your health, barrier activation and positioning, which can be detrimental to some players' experience. You are also reliant on energy regeneration affixes for the most part as Lightning Call and the stored energy requirement for Storm Nimbus causes your energy pool to whittle down quickly.
| August 11, 2025 | Lightning Overload Stormcaller Build was created. |
|---|
Equipment and Affixes
| Gear | Affixes |
|---|---|
| Head (Magos Robes) |
・Energy Regeneration
・Any Elemental Resistances ・Knowledge ・Energy Barrier |
| Shoulders (Magos Robes) |
・Knowledge
・Increased Lightning Damage ・Any Elemental Resistances ・Energy Regeneration |
| Torso (Magos Robes) |
・Any Elemental Resistances
・Energy ・Increased Lightning Damage ・Energy Barrier |
| Arms (Magos Robes) |
・Increased Lightning Damage
・Increased Spell Damage ・Any Elemental Resistances ・Energy Regeneration |
| Legs (Magos Robes) |
・Increased Lightning Damage
・Increased Spell Damage ・Vigor ・Energy |
| Necklace | ・Knowledge
・Any Elemental Resistances ・Energy Regeneration ・Energy Barrier |
| Ring 1 | ・Knowledge
・Increased Lightning Damage ・Any Elemental Resistances ・Energy |
| Ring 2 | ・Increased Lightning Damage
・Increased Shocked Stacks ・Any Elemental Resistances ・Vigor |
| Weapon (Staff) |
・Knowledge
・Increased Lightning Damage ・Increased Spell Damage ・Energy Regeneration ・Any Elemental Resistances |
The stats shown above is a general reference of what you want to go for when building your character.
Preferably, you will want to solve your character's energy issues to be able to commit to multiple Lightning Calls via Energy Regeneration while also increasing your survivability by investing in some Energy Barrier and Vigor modifiers for your equipment.
You are also advised to stack up on Lightning Damage, Knowledge and Spell Damage to increase your raw damage against enemies. Follow the stat order below to make the build efficient!
- Energy Regeneration
- Energy
- Knowledge
- Increased Lightning Damage
- Increased Spell Damage
- Elemental Resistances
- Energy Barrier
- Vigor
Note: These stats are randomly-generated, so you can keep farming for weapons to build your character properly.
| List of Weapons | List of Armor |
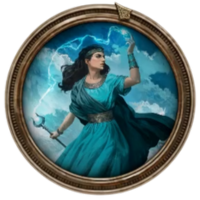
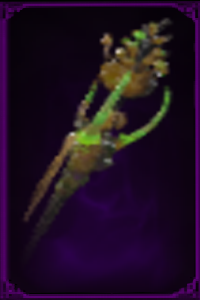
Recommended Unique Weapons
 Thyrsus Thyrsus |
・X% increased Poison Damage
・+X Energy Barrier ・+X Energy Regeneration per second ・Activating Barrier inflicts Pierce Damage to enemies around you |
|---|---|
 Katharsis Katharsis |
・+X% increased Energy
・+X% increased Lightning Damage ・+X% increased Attack Speed ・+X% Cast Speed ・When you have full overwhelm, generating more spends it on an explosion dealing Lightning Damage in a 3m area around you |
There are currently only two Unique 2H Staves in-game and the most compatible for the build is Thyrsus, which provides you with extra Energy Regeneration and Energy Barrier. Thrysus will require Knowledge as the main stat requirement. This weapon will primarily serve as a stat stick for this build.
Alternatively, the more fitting weapon for this build is Katharsis, which improves all of the stats needed in the build. However, you may have to invest slowly on Agility for later levels as the stat priority for this weapon contradicts with the priority stat investment you'll need.
Abilities and Passives
| Skills | Modifiers |
|---|---|
 Barrier Barrier
(3) |
Guard ・400% increased global Barrier Decay Rate. ・100% increased global Free Barrier. ・On use Barrier Decay is paused for 2.0s. ・-4s Base Cooldown Duration. ・Cooldown starts after 2.0s. Reflecting Guard ・For 2.0s after use, reflect 40% of Damage ・Taken from Hits as True Damage. |
 Call Lightning Call Lightning
(17) |
Overload ・On use gain 1 Overload. ・10% more Damage and 10% more Cast Speed. ・10% less Energy Cost. Thunderstorm ・When directly used, enemies in a 3.0m radius around target location have a 20% chance to be hit by Lightning Strike. ・+2 Energy Cost. Energy Drain ・Deals 20 Energy Drain Damage in a 2.5m radius and enemies hit lose 20 Energy. ・+2 Energy Cost. |
 Storm Nimbus Storm Nimbus
(16) |
Conservation ・-20 Energy reserved Storm Enhancement ・Aura grants an additional 8% increased Cold and Lightning Damage. ・+10 Energy reserved. Thunderstorm ・Grants you 20% increased Lightning Strike Damage. ・Every 2s you have a 15% chance to hit a random enemy within the aura with a Lightning Strike ・+15 Energy reserved. |
 Blink Blink
(11) |
Repeat ・For 3s you can reuse the ability 1 times. The cooldown starts afterwards. Thunderstorm ・Enemies in a 3m radius around the target location have a 60% chance to be hit by Lightning Strikes |
 Overcharge Overcharge
(10) |
Duration ・Overload has 100% increased Duration ・Take 40% less Damage from Overload Energy ・Recover 3 Energy for every Overload cleansed |
 Storm Adaptation Storm Adaptation
(10) |
Overload ・Take 10% less Damage from Overload Lightning Resistance ・+3% Maximum Lightning Resistance ・+10% Lightning Resistance |
 Storm Attunement Storm Attunement
(6) |
Spell Damage ・10% increased Cold and Lightning Spell Damage ・4% increased Cast Speed |
 Raging Mind Raging Mind
(12) |
Ailment Chance ・30% increased Spell Ailment Chance Critical Chance ・30% increased Spell Critical Hit Chance |
 Arcane Influx Arcane Influx
(8) |
Energy Regeneration ・10% increased Energy Regeneration Energy ・+30 Maximum Energy ・Unlocks Ether Shield - While above 50% Energy, 10% of Damage Taken is absorbed by Energy |
The core of this build is focused on Call Lightning and Overcharge, a passive that provides a dramatic damage increase to active skills with their Overload modifier enabled at the cost of burning some health. Directly benefiting this is investment in Storm Nimbus and Thunderstorm, which provides a sustained aura that magnifies Lightning damage at the cost of reserving some energy.
To counter these, focus on passives such as Arcane Influx with the Energy modifiers and Storm Nimbus' Conservation to mitigate energy loss. Upgrade Barrier and Storm Adaptation to tank enemy hits and be resistant enough to the self-damage effects of Overload stacks.
Finally, to boost your mobility, equip Blink with the Repeat and Thunderstorm modifer to allow yourself to deal damage while moving across the map and allow you to reposition properly especially against bosses.
Attribute Priority
| Attribute Prioritization |
|---|
| Knowledge ▶ Vigor |
Focus on getting your Lightning Damage up by investing on Knowledge first and foremost which also allows you to equip Staffs to improve elemental stats even more.
You can then focus on Vigor to keep yourself at a decent health to tank your Overload self-damage and improve your Resistances. We recommend a 1:2 ratio for these two stats, with 1 Vigor for every 2 Knowledge being a good balance.
Playstyle and Skill Rotation
The Lightning Overload Stormcaller build uses a simple play rotation, primarily requiring you to only keep your Storm Nimbus active at all times and pressing one skill, Lightning Call a few paces ahead of the enemy to hit them properly.
The micromanagement part requires you to use your Barrier key to mitigate enemy attacks and self-damage while using Blink and Dash to reposition yourself whenever swarmed. Using energy and health potions in between is also crucial. The rotation is as follows:
- Activate Storm Nimbus, no need to turn it off again unless it does so, in which case, turn it on again.
- Use your Call Lightning at a distance from the enemy. Make sure to pre-fire the skill close and not on the exact position of the enemy to avoid misses.
- Should you need to tank hits or reposition, activate your Barrier or use Blink and Dash to hold your ground and keep on attacking or move to check your health or energy.
- Use your Health and Energy potions whenever needed.
Titan Quest 2 Related Guides
List of All Builds Ranked
| Rank | Build |
|---|---|
 |
|
 |
|
 |
|
 |
Comment
Author
Lightning Overload Storm Build
Please participate in our site
improvement survey
04/2026
improvement survey
04/2026
Would you assist in
improving Game8's site?
improving Game8's site?

×
We are listening to our users' valuable opinions and discussing how to act on them.
The information collected through this survey will be used for the purpose of improving our services. In addition, the information will only be disclosed a part of a statistic in a format that will not allow identification of personal information.
Begin Survey
Not Now
×
Please rate each item regarding Game8.co's Advertisements.
Amount of Ads
Very Dissatisfied
Somewhat Dissatisfied
Fine
Somewhat Satisfied
Highly Satisfied
Placement of Ads
Timing of Ad Display
Ad Loading Speed
Safeness of Ads
Content of Ads
×
Please rate each item regarding Game8.co's Quality of Articles.
Amount of information
Very Dissatisfied
Somewhat Dissatisfied
Fine
Somewhat Satisfied
Highly Satisfied
Frequency of updates
Speed of new information
Accuracy of articles
Understandibility of articles
Readability of sentences
×
Please rate each item regarding Game8.co's Usability of the Site.
Ease of finding information
Very Dissatisfied
Somewhat Dissatisfied
Fine
Somewhat Satisfied
Highly Satisfied
Loading Speed
Use of Color
Font Size
Visibility of Images
Easy to Understand Layout
×
Please rate each item regarding Game8.co's Message Boards, Comments.
Ease of Writing
Very Dissatisfied
Somewhat Dissatisfied
Fine
Somewhat Satisfied
Highly Satisfied
Readability
Ease in Finding Information
Comment Quality
Comment Quantity
Admin Response
×
Please rate each item regarding Game8.co's Site's new design.
Please rate our site's new design
Very Dissatisfied
Somewhat Dissatisfied
Fine
Somewhat Satisfied
Highly Satisfied
Do you think that the website's design change makes the site easier to use?
Has the new design made it easier for you to find information on the site?
Has the new design improved the overall visual appeal of the site?
How would you rate your overall satisfaction with the new design of the site?
×
How likely are you to recommend Game8 to someone you know?
Very Unlikely
0
1
2
3
4
5
6
7
8
9
10
Very Likely
If you have other opinions regarding potential improvement to the website, please share them with us. We would appreciate your honest opinion.
Note: This is a free response section, so you can proceed without entering anything.
Note: Please be sure not to enter any kind of personal information into your response.
Note: Please be sure not to enter any kind of personal information into your response.
×
Thank You
×
Thank you for participating in our survey! Your answers will help us to improve the quality of our website and services.
We hope you continue to make use of Game8.
We hope you continue to make use of Game8.
Close
Rankings
- We could not find the message board you were looking for.
Gaming News

![Forza Horizon 6 Review [Preview] | Beautiful Roads With a Whole Lot of Oversteer](https://img.game8.co/4460981/a7254c24945c43fbdf6ad9bea52b5ce9.png/show)


![Forza Horizon 6 Review [Preview] | Beautiful Roads With a Whole Lot of Oversteer](https://img.game8.co/4460981/a7254c24945c43fbdf6ad9bea52b5ce9.png/thumb)
Popular Games

Genshin Impact Walkthrough & Guides Wiki
Crimson Desert Walkthrough & Guides Wiki
Umamusume: Pretty Derby Walkthrough & Guides Wiki
Honkai: Star Rail Walkthrough & Guides Wiki
Monster Hunter Stories 3: Twisted Reflection Walkthrough & Guides Wiki
Wuthering Waves Walkthrough & Guides Wiki
The Seven Deadly Sins: Origin Walkthrough & Guides Wiki
Pokemon TCG Pocket (PTCGP) Strategies & Guides Wiki
Pokemon Pokopia Walkthrough & Guides Wiki
Zenless Zone Zero Walkthrough & Guides Wiki


Recommended Games
Monster Hunter World Walkthrough & Guides Wiki
Fire Emblem Heroes (FEH) Walkthrough & Guides Wiki
Pokemon Brilliant Diamond and Shining Pearl (BDSP) Walkthrough & Guides Wiki
Super Smash Bros. Ultimate Walkthrough & Guides Wiki
Diablo 4: Vessel of Hatred Walkthrough & Guides Wiki
Cyberpunk 2077: Ultimate Edition Walkthrough & Guides Wiki
Yu-Gi-Oh! Master Duel Walkthrough & Guides Wiki
Elden Ring Shadow of the Erdtree Walkthrough & Guides Wiki
The Legend of Zelda: Tears of the Kingdom Walkthrough & Guides Wiki
Persona 3 Reload Walkthrough & Guides Wiki


All rights reserved
© 2023 by THQ Nordic GmbH, Austria
The copyrights of videos of games used in our content and other intellectual property rights belong to the provider of the game.
The contents we provide on this site were created personally by members of the Game8 editorial department.
We refuse the right to reuse or repost content taken without our permission such as data or images to other sites.