 All Korok Seed Locations
 Best Characters Tier List
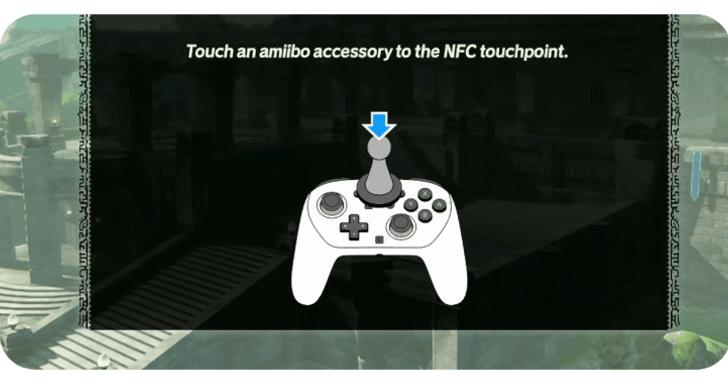 All amiibo Rewards and Unlocks
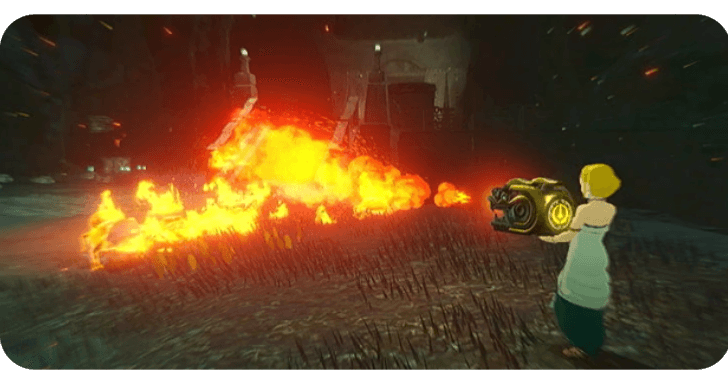 Best Zonai Devices
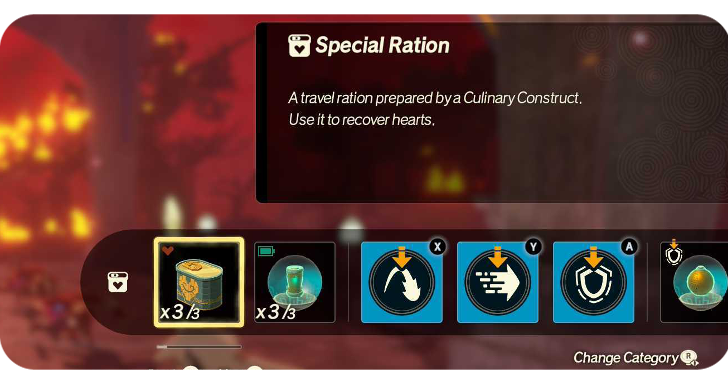 List of All Consumable Items
 List of Voice Actors and Cast
 Best Supply Materials
 Post-Game Guide
 Best Party and Team Composition
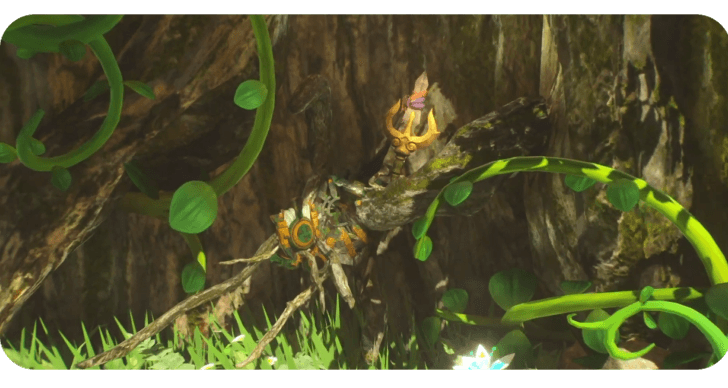 Ending Explained
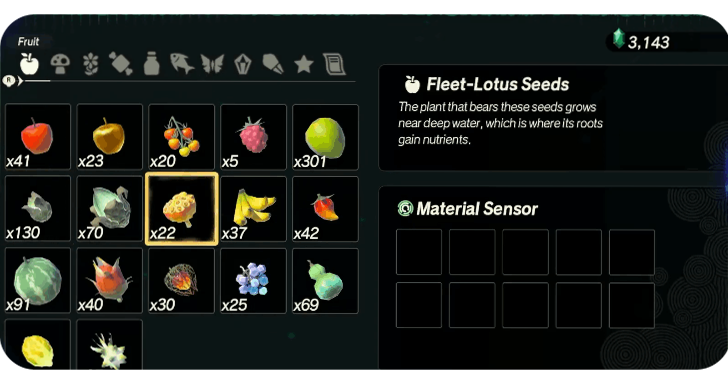 Material Farming Guide
 Rupee Farming Guide
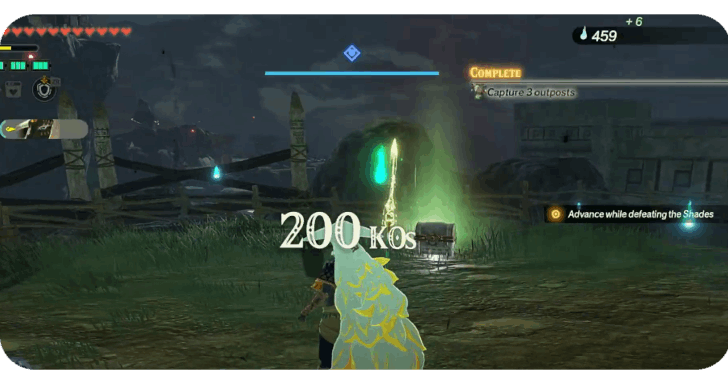 Poe Farming Guide
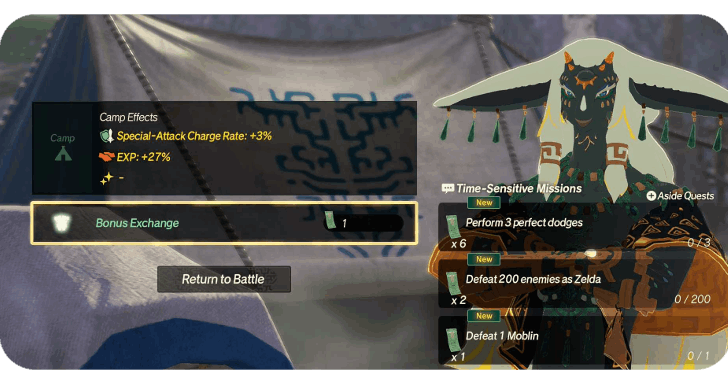 Bonus Exchange Guide
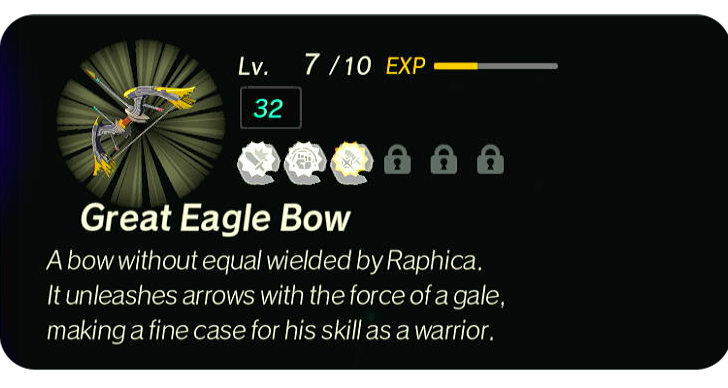 Best Seals to Use for Weapons
 Best Weapons
This survey will take about 1 minute.
Your answers will help us to improve our website.
Hyrule Warriors: Age of Imprisonment
Complete Walkthrough and Chapters List
Here is a complete walkthrough for all 6 Chapters in Hyrule Warriors: Age of Imprisonment. See walkthrough guides for all Chapters and each of the 28 Battles in the game, how many Chapters are there, and how to complete them here!
List of Contents
List of All Chapters
All Chapter Guides
| Jump to a Section! | |
|---|---|
| Chapter 1 |
01. To the Great Plateau 02. The Art of the Blade 03. Where Ancient Wisdom Sleeps |
| Chapter 2 |
04. Raging Sands 05. The Hands of Evil 06. Growing Suspicion 07. Striking North 08. Beneath the Blood Moon 09. The Howling Tempests |
| Chapter 3 |
10. Shadows in the Snow 11. Lanayru Defiled 12. The Behemoth in the Crater 13. Crisis on Death Mountain 14. Under the Cover of Mist |
| Chapter 4 |
15. Terror of the Sands 16. Crimson Omen 17. A Time for Action 18. The Counterstrike 19. Ambush in the Depths 20. Purging the Shadows 21. Fire and Sand |
| Chapter 5 |
22. Into the Fray 23. The Archfiend's Return 24. The Battle of Hyrule Castle 25. The Demon King, Ensnared 26. The Battle of Hyrule Field 27. The Final Confrontation |
| Chapter 6 | 28. A Clash of Constructs |
The story of Hyrule Warriors: Age of Imprisonment is divided into multiple Chapters, which are further divided into Battles. The main story is six chapters long, one chapter shorter than Hyrule Warriors: Age of Calamity.
Chapter 1 Walkthrough
| Jump to a Walkthrough! | |||
|---|---|---|---|
| 1 | To the Great Plateau | 2 | The Art of the Blade |
| 3 | Where Ancient Wisdom Sleeps | - | |
To the Great Plateau
| 1 | 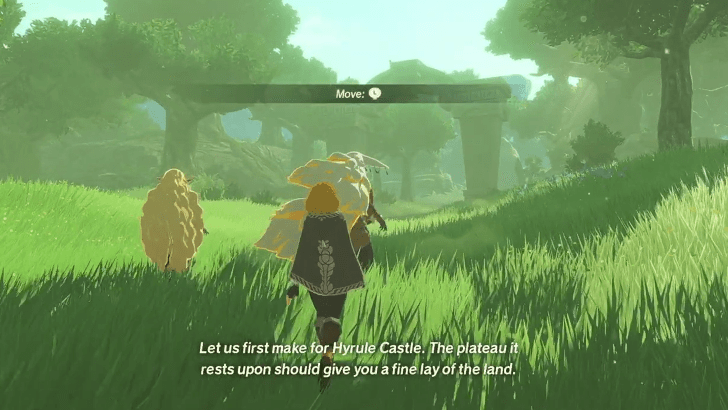 After watching the opening cutscenes, follow Rauru and Sonia as Zelda and try to get used to the basic movement and camera controls. |
|---|---|
| 2 |  Another cutscene will start after meeting with the soldiers and you will experience your first battle afterwards. |
| * | Here, you will learn the basic combat controls and test them out on the group of shades that appears. Although each playable character has a different moveset and mechanics, these basic controls are usable on all of them.
Y - Regular attack X - Strong attack. Can be used after regular attacks to end a combo. B - Dodge enemy attacks. Pressing the button as the attack hits triggers a perfect dodge that can be followed by a Flurry Rush ZL (hold) - Block enemy attacks |
| 3 |  Continue following Rauru and Sonia after the fight until you reach the Great Plateau and complete the first battle! |
To the Great Plateau Walkthrough
The Art of the Blade
| 1 | 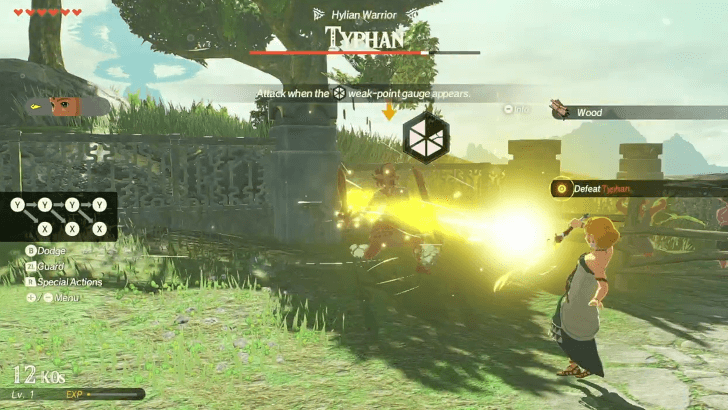 You'll be up against a powerful enemy this time, which is also indicated by the health bar at the top of your screen with their name and epithet. Defeat Typhan to complete the objective. Make sure to counter his Charge attacks with Piercing Light to expose his weak-point. |
|---|---|
| * |
Powerful enemies and bosses are stronger and tankier than the regular mobs that you see everywhere, but you can "expose" their weak-point gauges and deplete them to perform a Weak-Point Smash. Using Unique Skills, countering the red attacks called Dangerous Attacks, or performing Flurry Rushes expose a powerful enemy's weak-point gauge. |
| 2 | 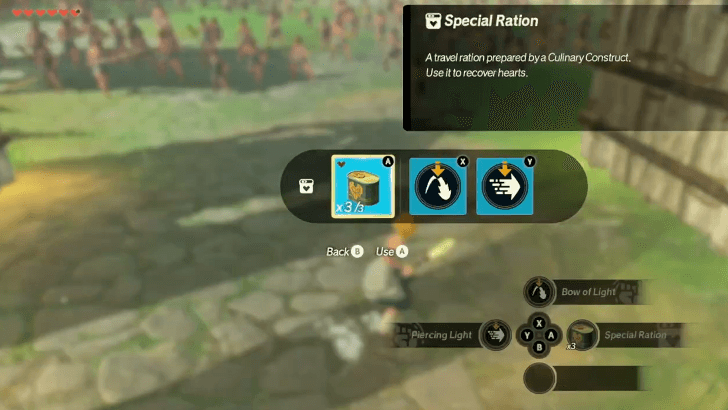 Move to the next area and try to capture the outpost by defeating enough enemies to make a powerful enemy reveal themselves and defeating them. You can also use the Special Rations given to you to recover health. |
| 3 | 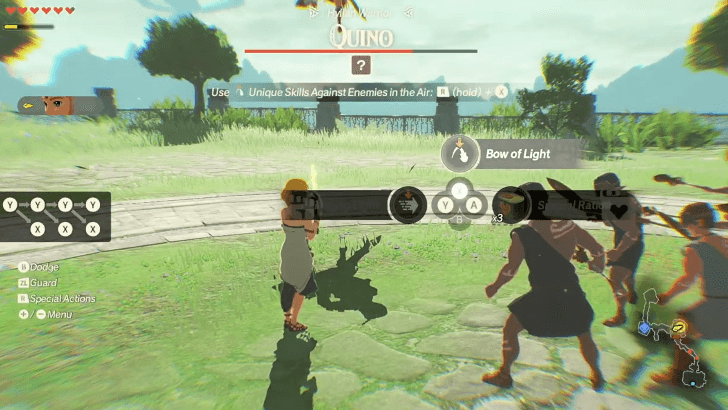 After capturing the outpost, move to the next one that has another named powerful enemy, Quino. Unlike Typhon who uses Charge attacks, Quino uses Jump attacks, which can be countered by Bow of Light. |
| 4 | 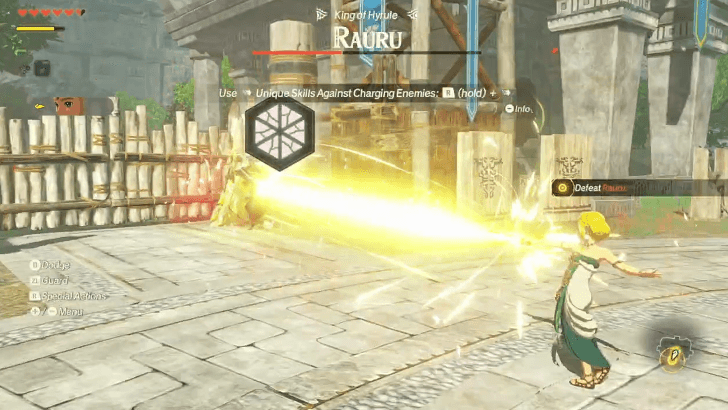 Defeat Quino and move to the final outpost, where you'll face King Rauru himself. He can use both Charge and Jump attacks, so be sure to use the correct Unique Skill to interrupt them and expose Rauru's weak-point. |
| * | You'll be able to use your first Sync Strike with Sonia once Rauru's HP drops to about 25%. These are extremely powerful attacks that can be performed by any two characters close to each other while both having full sync gauges by simply pressing the L button. |
| 5 | 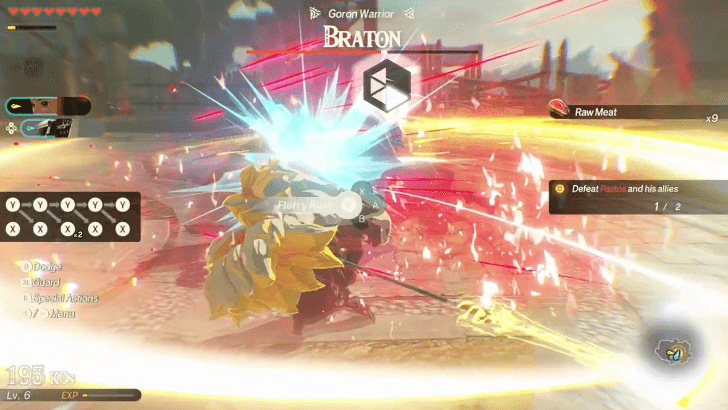 For the last part of your training, Rauru will join your side to spar with Pastos, Braton, and finally, Agraston. Now that you have another playable character, you can switch between them using the D-pad anytime during the fight and while exploring in later battles. When against more than one powerful enemy, use the Right Stick to change which target to lock-on to. Finish off Agraston by any means necessary to complete the battle. |
The Art of the Blade Walkthrough
Where Ancient Wisdom Sleeps
| 1 | 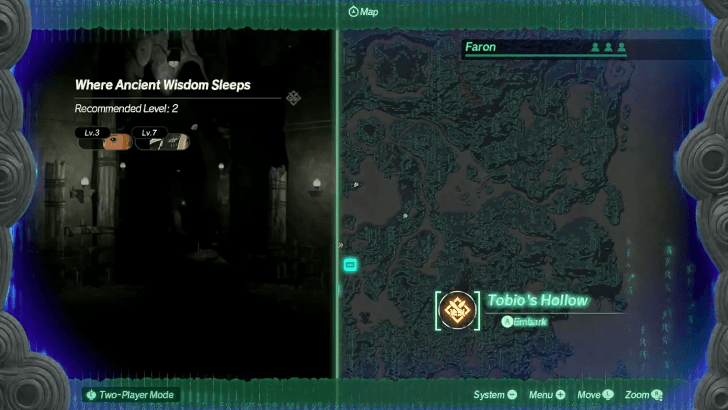 Start the battle through Tobio's Hollow in the Faron Region. |
|---|---|
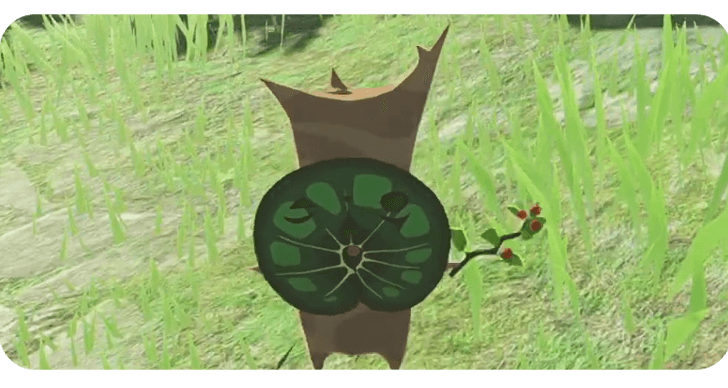
| 2 | 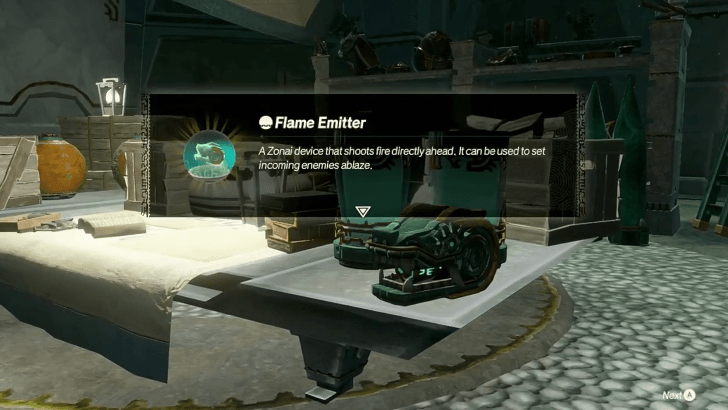 Follow Mineru and Rauru through the hollow until you reach the workshop, where a construct will give you the Flame Emitter Zonai device. |
| 3 | 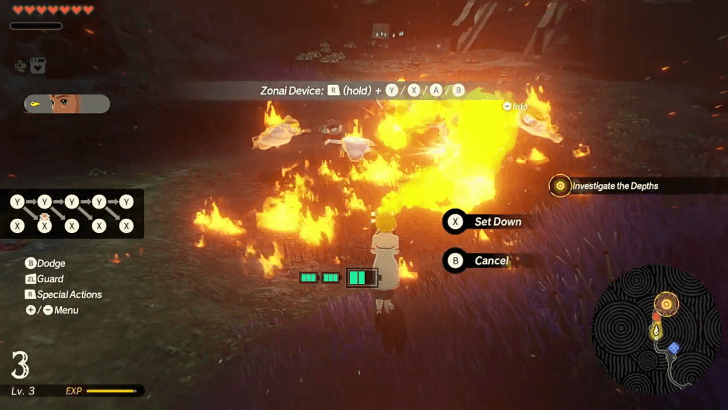 As you continue investigating the ruins, you will run into a group of Little Froxes. This is the perfect opportunity for a Flame Emitter field test! |
| * | Similar to Items and Unique Skills, you can assign Zonai devices by opening the Special Actions menu and assigning them to a face button. You can then use them by holding the R button and pressing the button you assigned them to. |
| 4 | 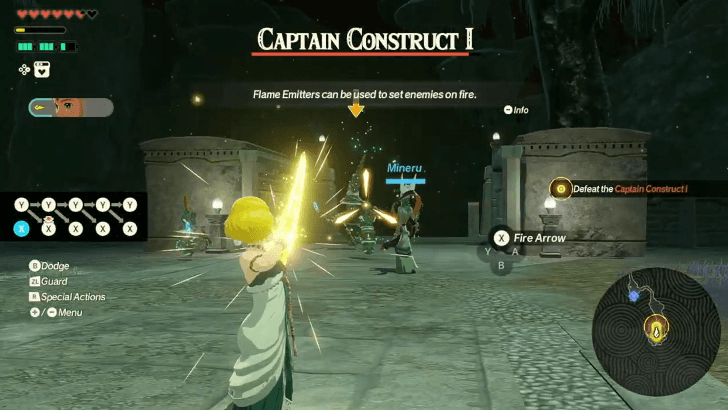 Go up the platform and defeat the Captain Construct I. This enemy uses Charge attacks, so have your Piercing Light ready. |
| 5 | 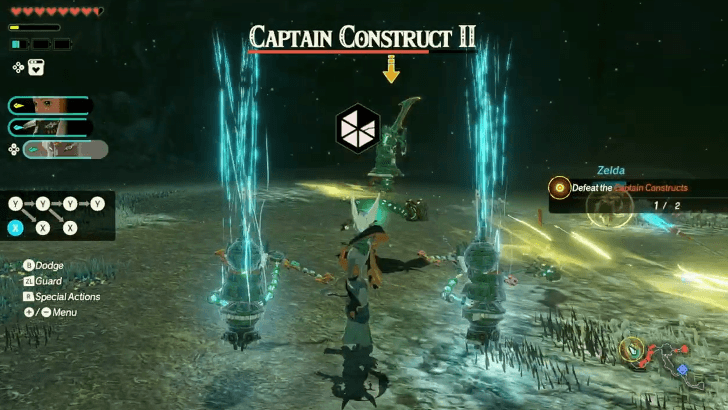 Mineru is now playable! You can explore her moveset in the next fight against the two Captain Construct II further into the hollow. However, her attacks are better suited for one-on-one battles against powerful enemies, so you might want to clear the horde of Little Froxes first with Rauru. |
| 6 | 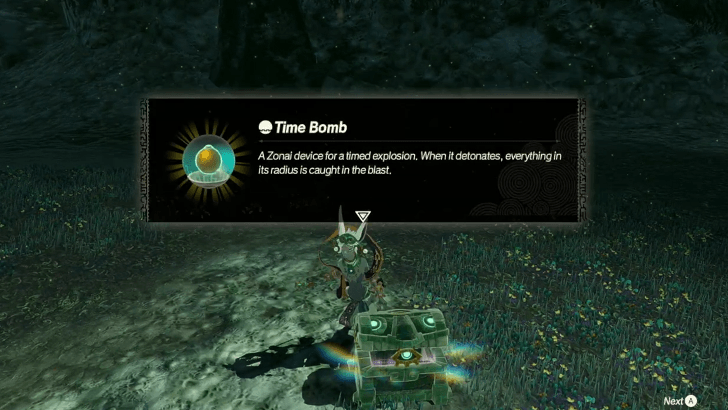 Open the chest that the last Captain Construct drops to obtain the Time Bomb Zonai device. This is a surprise device that will help you later. When you're ready, approach the large stone door ahead. |
| 7 |  Defeat the Frox. One unique way to stagger this boss is to throw a Time Bomb at its mouth when it starts inhaling to deal decent damage and expose its weak-point. Successfully countering its dangerous attacks also allows you to hop on its back and attack the ore deposits to deal more damage. |
| 8 |  Go to the northwest corner of the map for the next objective to find more ruins and reveal the other half of this stage's full map. Once you reach the center, you'll face a Stone Talus. |
| 9 | 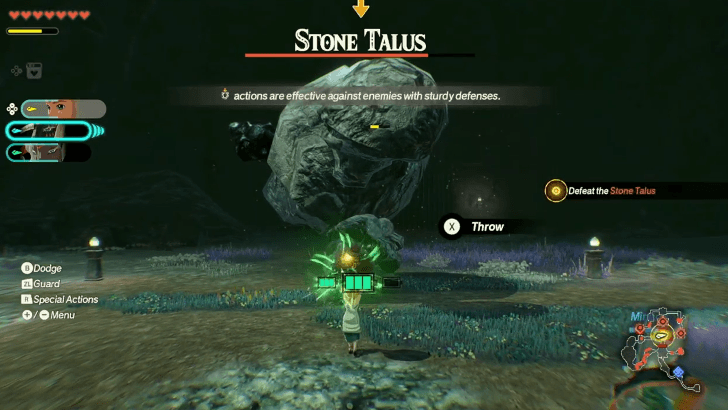 The Stone Talus has a fortified weak-point gauge that is more difficult to deplete than regular ones. Use more of those Time Bombs on all three characters to quickly break through its defenses and execute a Weak-Point Smash. |
| 10 | 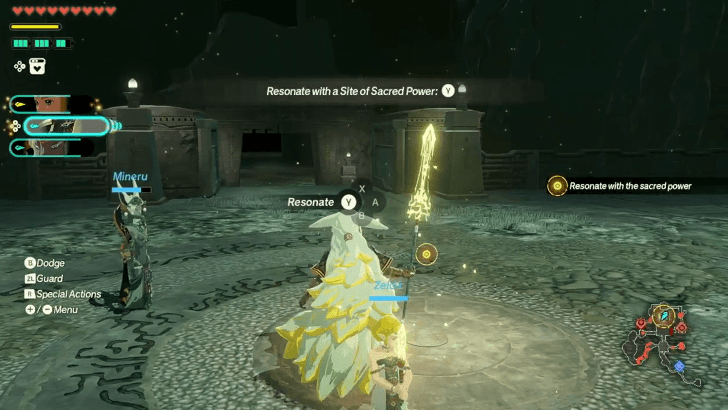 Move to the next room and defeat the Captain Construct III. After the battle, approach the center of the platform and resonate with it to open the path ahead. |
| 11 | 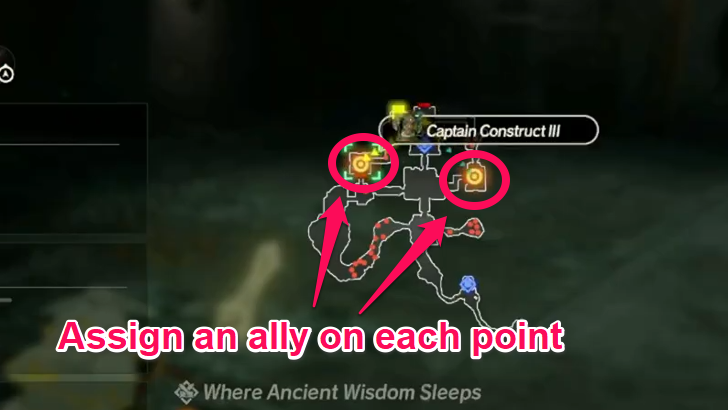 You'll need to resonate with two more emblems to proceed, but they are located on the opposite sides of the ruins. To save time, you can order your allies to move to a specific point of the map, then switch to them once they arrive to complete the objectives yourself. |
| * | In the Allies menu, you can select an ally and order them to move to a specific point in the map. They will start moving to that area immediately after closing the menu. These allies will ignore enemies along the way and will not stop moving until they reach their destination. Not to worry, as they also won't be attacked until you switch to them. |
| 12 | 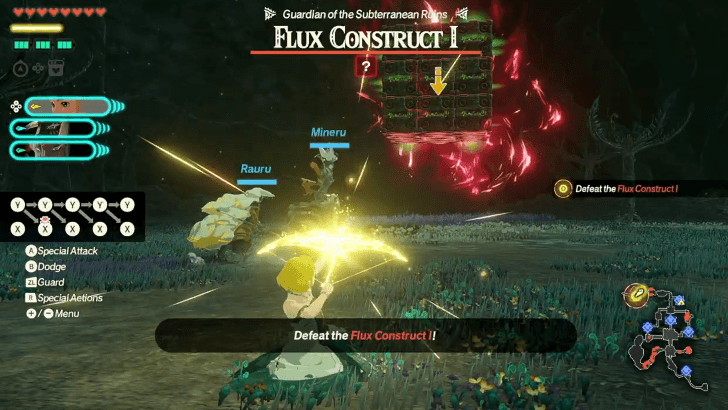 The group will rendezvous back at the newly unlocked door after resonating with the other two emblems. Press onward and reach the next objective marker at the end of this path to enter a fight against a Flux Construct I. Defeat the boss to complete the mission. |
| * | This boss fight has two phases where it uses mostly the same attacks but with different counters to its dangerous attacks. When it uses its dangerous attack during the first phase, counter it with an air attack while the Flux Construct I is in midair to interrupt it. But in the second phase, wait for it to land then use a charge attack as it rolls forward. |
Where Ancient Wisdom Sleeps Walkthrough
Chapter 2 Walkthrough
| Jump to a Walkthrough! | |||
|---|---|---|---|
| 4 | Raging Sands | 5 | The Hands of Evil |
| 6 | Growing Suspicion | 7 | Striking North |
| 8 | Beneath the Blood Moon | 9 | The Howling Tempests |
Raging Sands
| 1 | 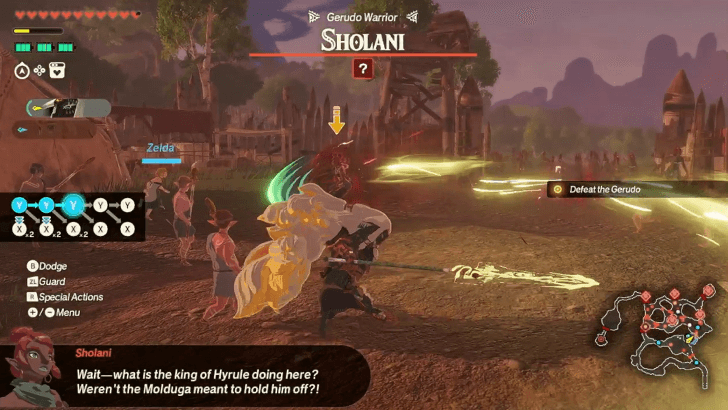 Press on until you reach the entrance of the first outpost on the east side of the map. As soon as you set foot in the outpost, a Gerudo named Sholani will rush from the other side. Exploit her Charge-type dangerous attacks to defeat her quickly and reclaim the outpost. |
|---|---|
| * | 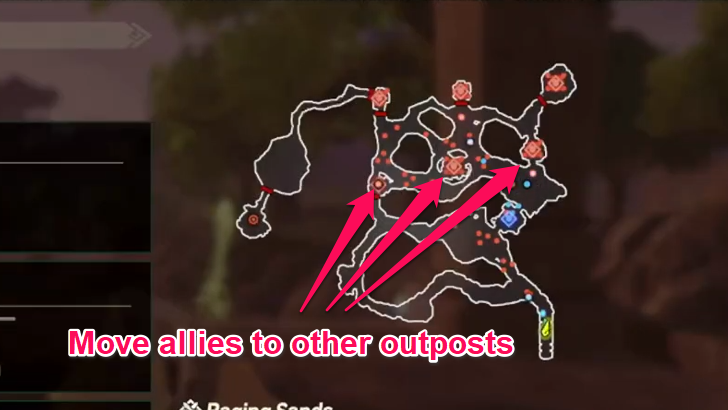 To speed up the Battle completion, you can execute a divide-and-conquer strategy by immediately ordering an ally to move to one of the outposts. You can then simply switch to your ally once they reach the outpost and reclaim it without moving them manually. |
| * | 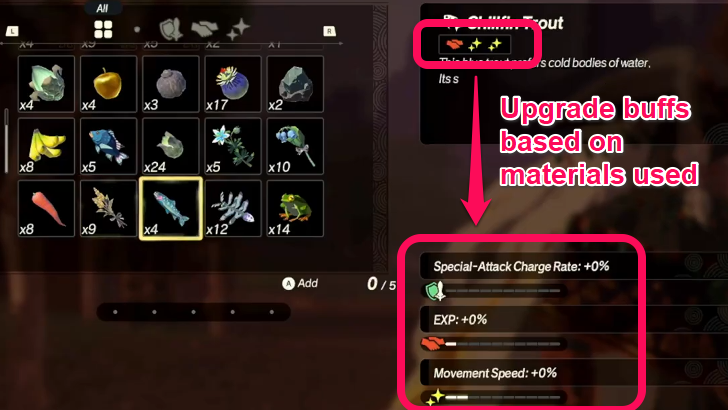 After defeating Sholani, you can set up a Camp on the outpost where you can replenish Rations, health, and batteries. You can also upgrade the buffs that you get from Camps by supplying specific materials. Be sure to check the effects of each material to know which parameters they can boost further! |
| 2 | 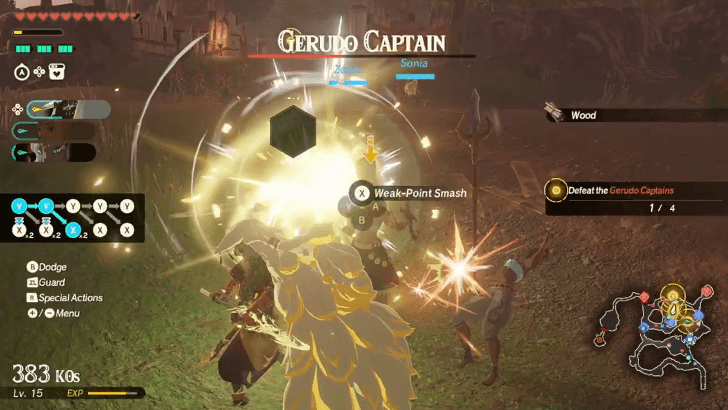 Defeat the four Gerudo Captains. Only two Gerudo Captains will be marked initially, but two more will appear after defeating one of them. Utilize the order function for this objective as they are scattered across the upper half of the map. |
| 3 | 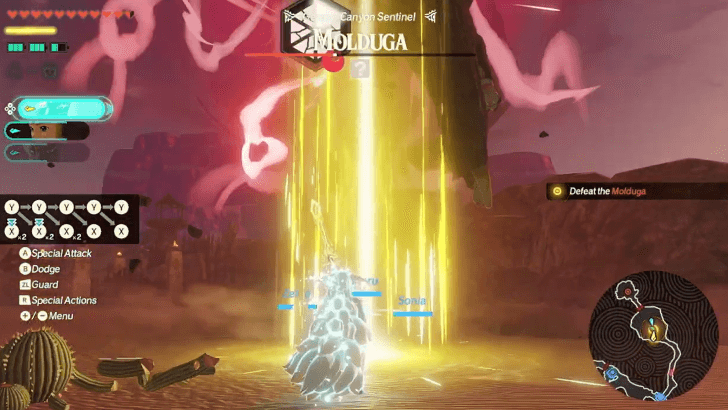 After defeating all the Gerudo Captains in the field, head to the open area past the northwest outpost to fight a Molduga. Unlike the Moldugas in the other games, this Molduga will not stay underground for the most part. However, if it does go underground to prepare a dangerous attack, ready an anti-air Unique Skill and use it while the Molduga is in midair. |
| 4 |  The Gerudo Commander, Ardi, will reveal herself after defeating the Molduga. Make use of wide-ranged attacks in this fight as Ardi is accompanied by two more Captains. Defeat all three Gerudo to complete the Battle. |
The Hands of Evil
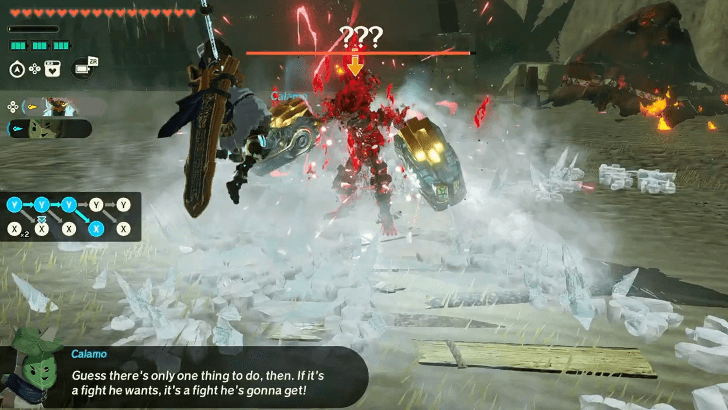
| 5 | 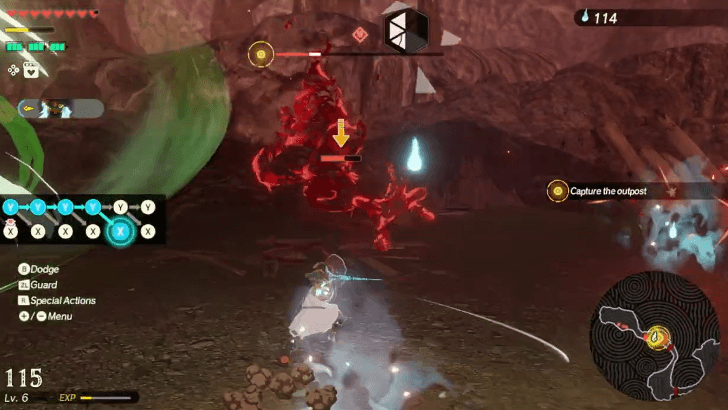 After the cutscenes, you will take control of the Mysterious Construct and start a special Battle titled, The Hands of Evil. Capture the outpost ahead by defeating the powerful shade guarding it then open the chest Calamo found to obtain the Rocket Zonai device. |
|---|---|
| * |  Make use of the Rocket to move to the next objectives quickly, but keep an eye on your Batteries while using it as you might not be able to use other Zonai devices if you run out of charges. |
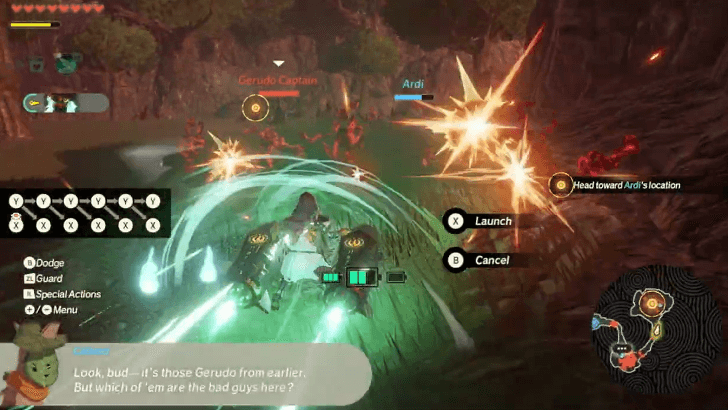
| 6 |  Head to Ardi's position and defeat the two Gerudo Captains that ambushed her unit. One attack that you should watch out for is their dual-charging attack. When they both jump to the center of the field, prepare an anti-charge skill to counter the attack and interrupt both of them. |
Growing Suspicion
| 1 |  Capture the first outpost while defeating the shades along the way. We recommend a full sweep of the shades to farm Poes that you can use later. |
|---|---|
| 2 | 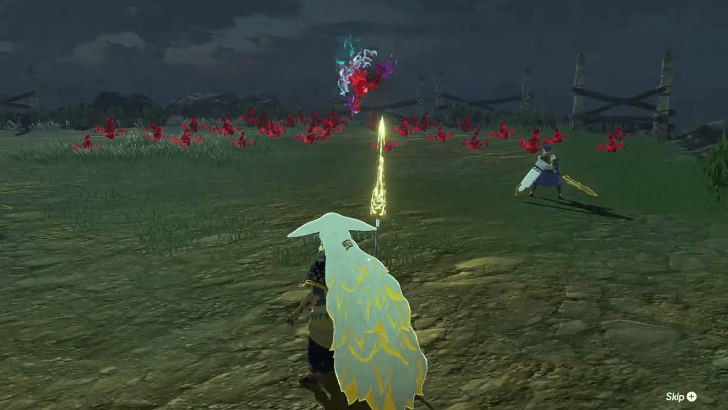 Move to the next outpost at the northernmost point of the map to find a special shade that should be defeated to proceed to the next objective. |
| 3 | 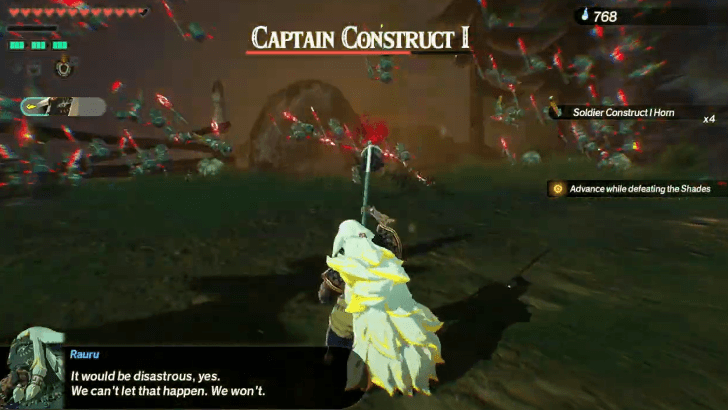 The next outpost down south is guarded by a corrupted constructs led by a Captain Construct I. Defeat the powerful enemy to open the path to the next objective at the end of the map. |
| 4 | 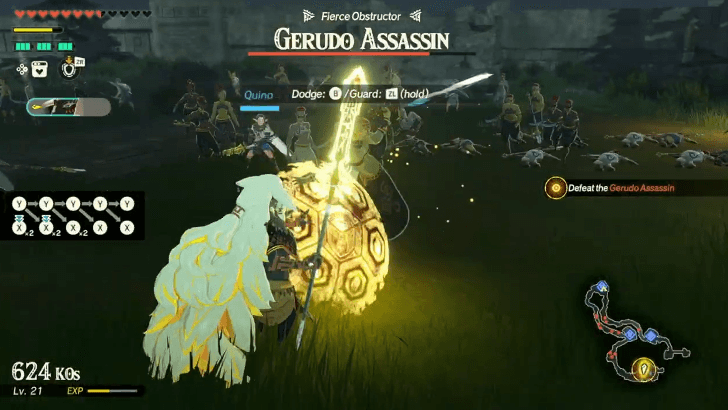 Once you reach the last outpost, you'll face one of the Gerudo Assassins in a boss fight. It will be difficult to trigger perfect dodges against the assassin due to her very short-ranged melee attacks, so it's better to block her attacks instead to expose her weak-point gauge more efficiently. |
| 5 | 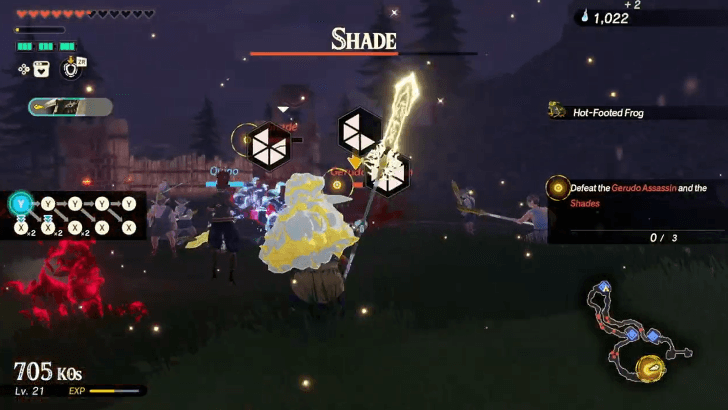 Lowering the assassin's HP to below 50% causes two more special shades to appear. To avoid dragging the fight by fighting them one-by-one, try to group them closely together to maximize Rauru's wide-ranged attacks and deplete their weak-point gauges simultaneously. |
| 6 | 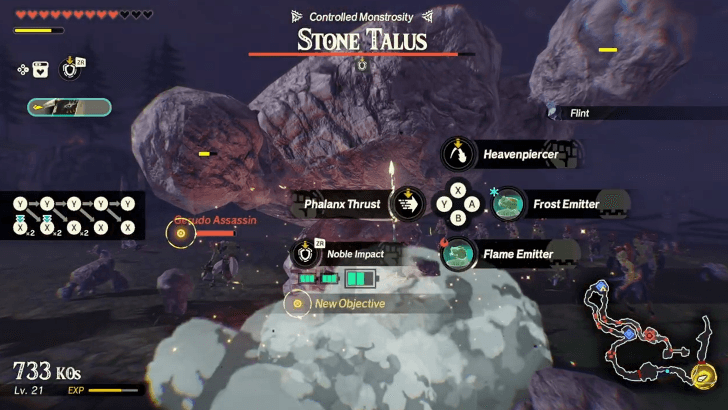 After defeating the enemies in the outpost, move to the clearing to the east to fight a Stone Talus and another Gerudo Assassin. Don't forget to use shield breaker attacks like Rauru's Noble Impact or Time Bombs to break the Stone Talus' defenses quickly. Once both enemies are defeated, head north to Hyrule Castle for a cutscene. |
| 7 | 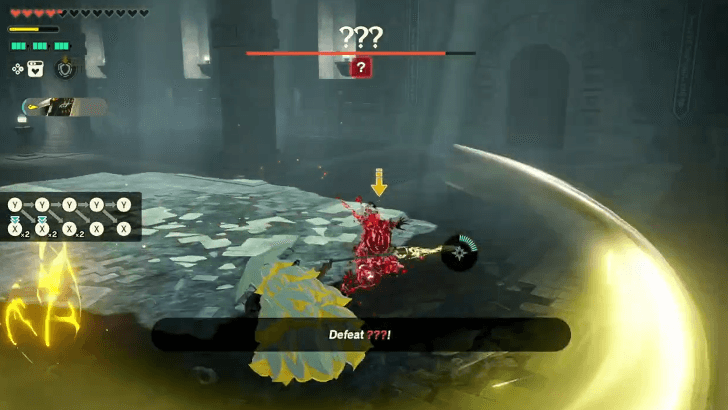 Defeat the nameless corrupted construct with Rauru. This enemy is a lot more agile than the ones you've fought so far. Avoid using your Unique Skills randomly and save them for when the construct uses a dangerous attack. You'll only have a short moment to react and counter, so immediately hold the R button when you see a red glow around the construct to slow down the time and pick the correct counter skill. |
Striking North
| 1 |  Start by following the path that leads to the southwest corner of the map. You'll run into Moblins that, while optional, are recommended to defeat as they drop valuable materials. A new enemy called Boss Bokoblin will meet you at the curve. Defeat it to open the gate ahead. |
|---|---|
| 2 | 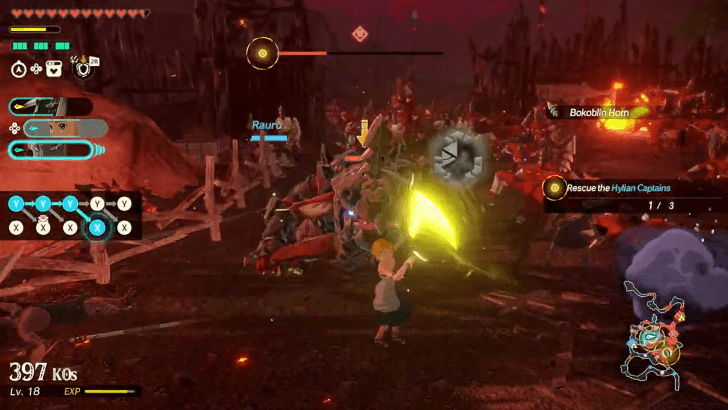 Order your two allies to each move to the central and east outposts while you take on the west outpost so you can simply swap to them once you're done capturing your assigned outpost and rescued the first Hylian Captain. Rescue the three Hylian Captains in the outposts to continue. |
| 3 | 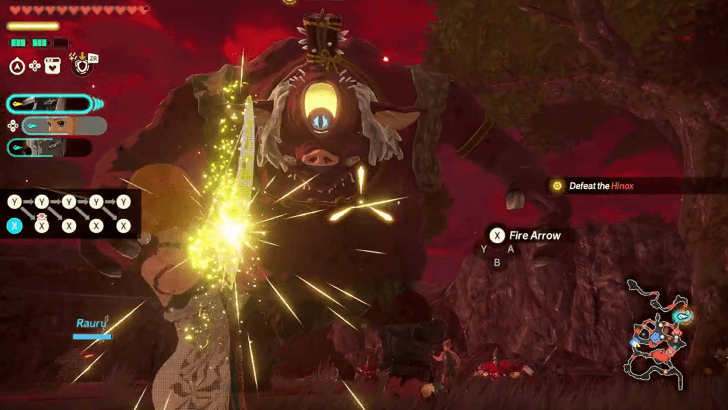 Head to the northeast path of the map where you'll find a Hinox. Zelda's Bow of Light works well here as an arrow to the Hinox's eye instantly staggers it. To use Zelda's Bow, simply press the X button to enter aiming mode and press it again to shoot arrows. |
| 4 |  After defeating the Hinox, the path to the objective that has been blinking since the start will finally be clear. Follow the winding path northwest and take on a Lynel. Just keep your distance when it roars, continue attacking after the explosion, and the rest of the fight should be pretty straightforward. |
Beneath the Blood Moon
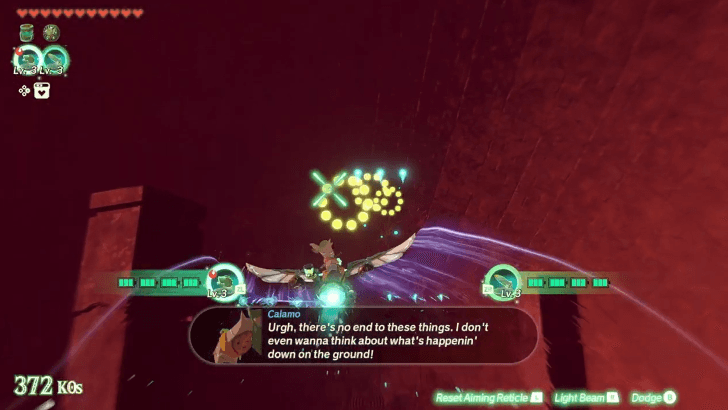
| 5 | 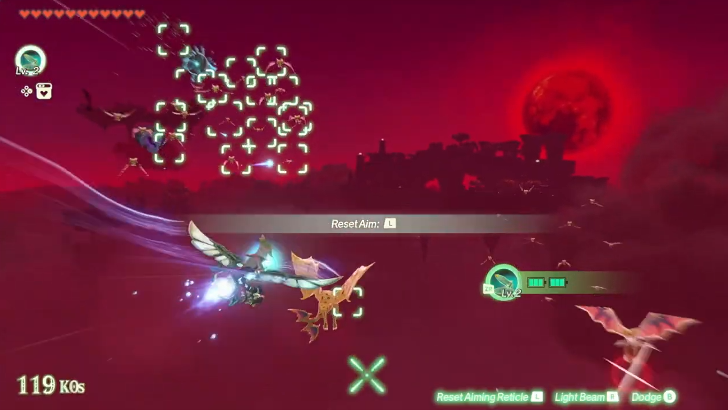 Another interlude Battle, Beneath the Blood Moon, will start after the cutscenes where you control the Mysterious Construct while in flight mode. The Mysterious Construct can fire light beams at enemies and even use the Zonai devices you can find floating along the way. |
|---|---|
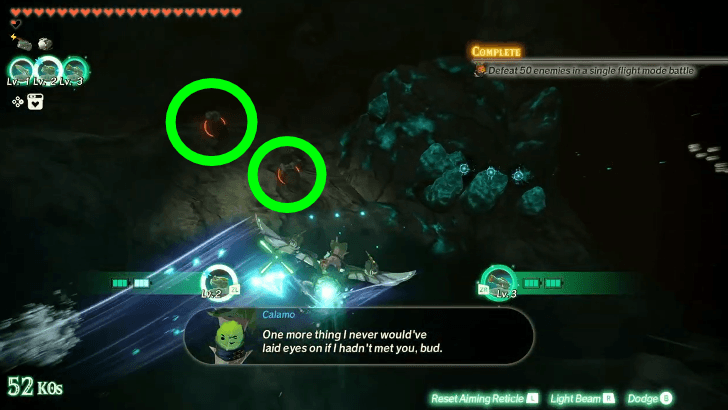
| * |  Soon after you pick up the Lv.2 Rocket enhancement, you'll spot glowing rings along the flight route. Make sure to pass through each ring to obtain a Korok Seed. |
| * |  Another set of rings that gives a Korok Seed appears inside the sphere that you enter soon after getting the Fan Zonai device. |
| 6 | 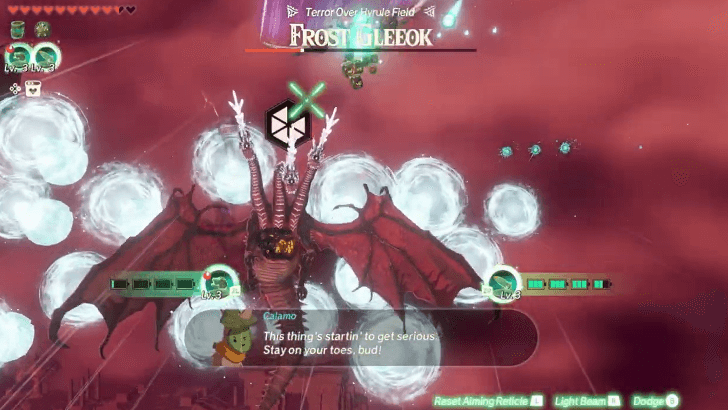 Eventually, a boss fight against a Frost Gleeok will start. Go all out with both the Flame Emitter and Rocket devices to deplete its weak-point gauge quickly. The Fan can also deflect some of the Frost Gleeok's attacks by dodging right before they hit. Once the Frost Gleeok goes down, the Battle will end with the Mysterious Construct landing near Zelda's group. |
Beneath the Blood Moon Walkthrough
The Howling Tempests
| 7 |  Head west and help the Hylian Captain retake the outpost from the Moblin. |
|---|---|
| * | 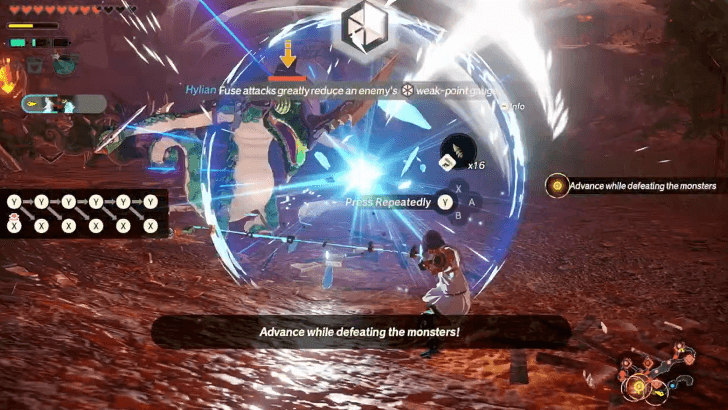 You'll unlock Fuse attacks after capturing the first outpost, which enhances your attacks by consuming monsters parts. Fuse attacks can easily shred weak-point gauges at the expense of using up materials. |
| 8 |  After capturing the second outpost guarded by a Boss Bokoblin, Calamo will be added as a playable character! Calamo's fruits can infuse his attacks with different elements and status effects without having to rely on certain Zonai devices. Now that you have two characters in the battle, you can assign orders to quickly capture the remaining three outposts in the upper half of the map. |
| 9 | 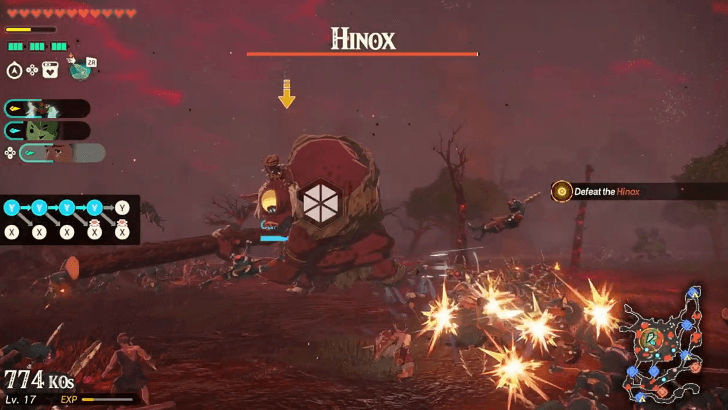 Helping the Hylian Captains on both marked outposts unlocks Typhan as a playable character, who specializes in heavy attacks to overwhelm enemies. At this point, you can split up the entire party to capture the remaining outposts, but your main objective is defeating the Hinox in the middle of the field. |
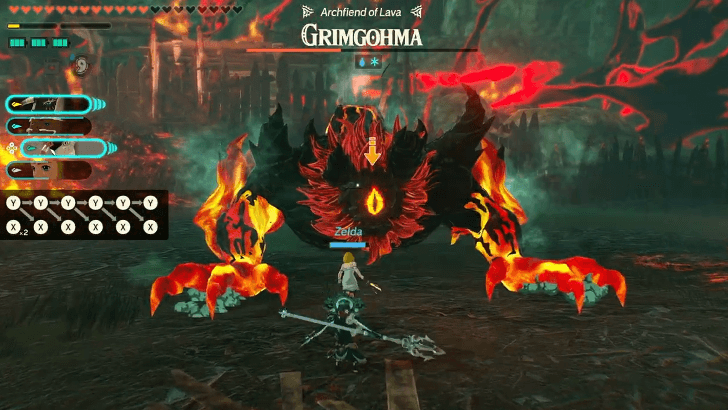
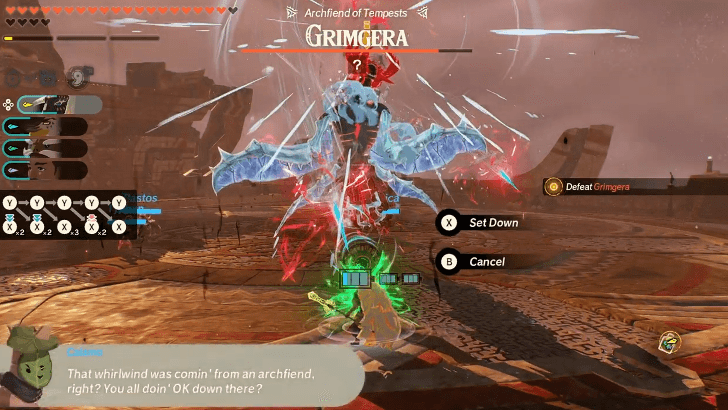
| 10 | 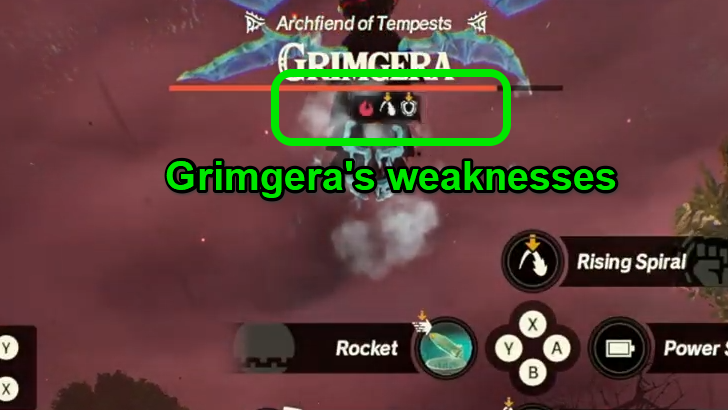 Grimgera will finally take on the stage for this Battle's main boss. Grimgera's weak-point is protected by an ice shield. This means that other than anti-flying skills, those under the shield breaker and fire skill categories can also help deplete the gauge easier. |
| 11 |  Defeating Grimgera completes the Battle and adds the three new characters to your roster. You will also be able to redeem the Save Data Link rewards if you have the corresponding save data from related game titles on your console. |
The Howling Tempests Walkthrough
Chapter 3 Walkthrough
| Jump to a Walkthrough! | |||
|---|---|---|---|
| 10 | Shadows in the Snow | 11 | Lanayru Defiled |
| 12 | The Behemoth in the Crater | 13 | Crisis on Death Mountain |
| 14 | Under the Cover of Mist | - | |
Shadows in the Snow
| 1 | 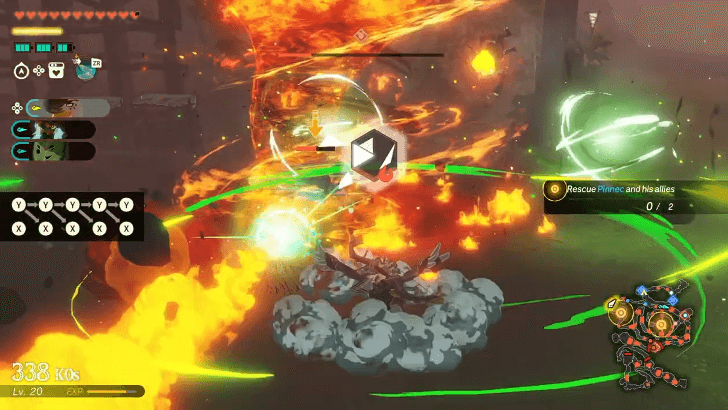 Raphica will be unlocked as a playable character right off the bat. His wind attacks can be imbued with elements coming from certain Zonai devices to further spread their effects, making Raphica a good crowd control unit. You can test his moveset by capturing the outposts on the west and south paths. |
|---|---|
| 2 |  Next, order allies to move to one of the objectives to rescue Pinnec and his allies. It is strongly recommended to split the group for this objective as the targets as too far apart and are separated by winding paths. |
| * |  After completing the objective, the Mysterious Construct will be able to "fuse" Zonai devices with its strong attacks, making them easier to use. However, using Zonai devices this way will still consume energy, so keep an eye on your batteries while doing combos or utilize the Mysterious Construct's Power Surge skill to save energy. |
| 3 | 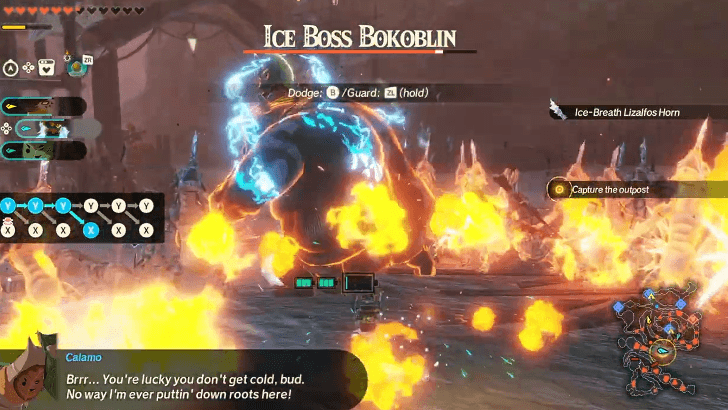 The next objective outpost is guarded by an Ice Boss Bokoblin. Test out your new ability here by abusing Flame Emitter-enhanced strong attacks! |
| 4 | 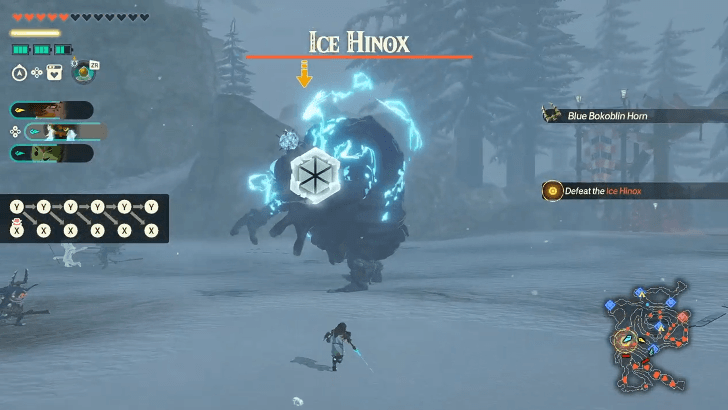 Follow the path west and defeat the Ice Hinox that appeared. This one's also weak to fire attacks, so your Flame Emitter attacks are still effective here. |
| 5 | 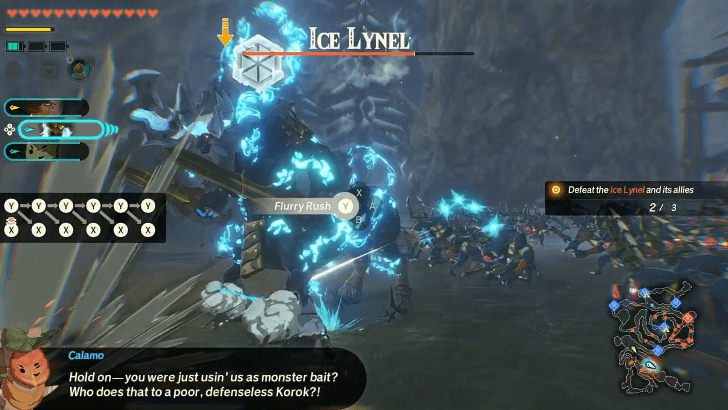 An Ice Lynel and two Ice Moblins will appear from the southeast, but they will be weakened by the Rito support fire almost immediately. This will cause the two Ice Moblins to be weak-point smash ready and the Ice Lynel already reduced to 75% HP. Defeat all three powerful enemies to complete the Battle. |
Shadows in the Snow Walkthrough
Lanayru Defiled
| 1 | 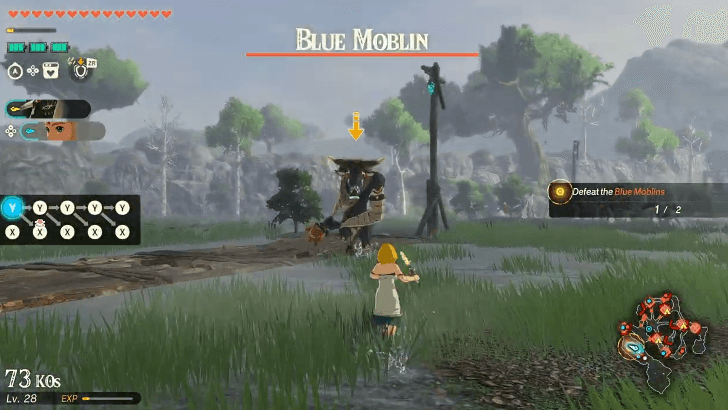 The Battle opens with the objective of dealing with the two Blue Bokoblins along the path. |
|---|---|
| 2 | 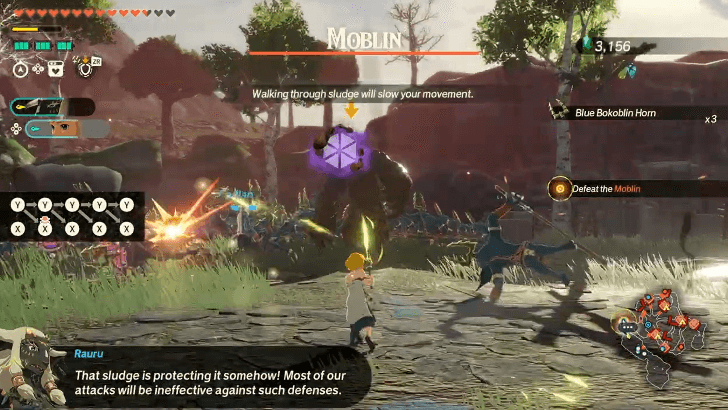 A Moblin will appear further along the path, which will get covered in thick sludge. While it can still be countered with special actions, regular attacks won't do much on its weak-point until the sludge is removed. Water attacks like using the Hydrant Zonai device is one way to remove this coating. |
| 3 | 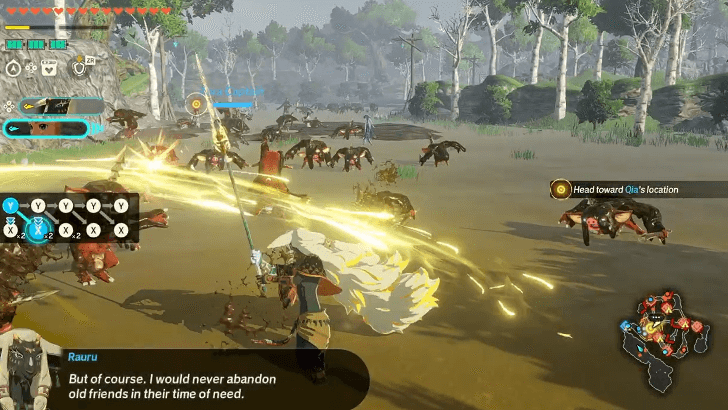 Head east to the center of the map to meet with Qia. Once you reach the location, hold your ground for a while and wait for the dialogue to finish. A cutscene will play afterwards showing a new sludge enemy: a Sludge Like. |
| 4 | 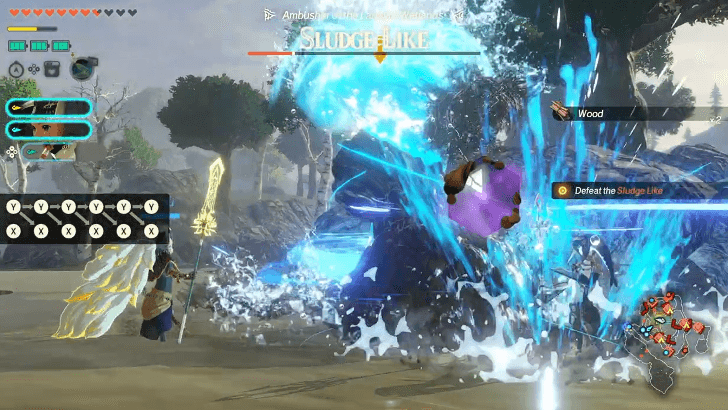 Qia is now playable! Her strong attacks are imbued with water and are very effective against sludge enemies. Her Torrential Wave skill also deals water damage, which you can use as an opening attack against the Sludge Like. |
| * | 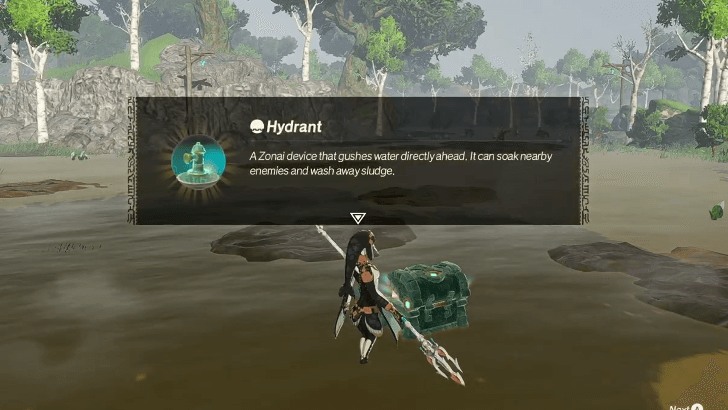 Sludge Like will drop a chest containing the Hydrant Zonai device! Your non-Zora characters will now be able to deal water damage to counter sludge-covered enemies. |
| 5 | 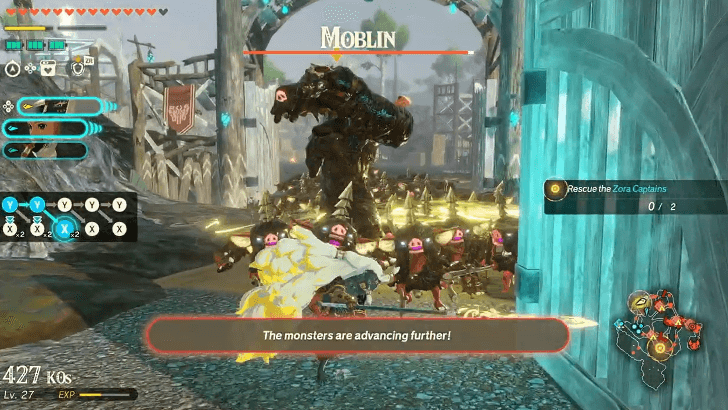 Split the group into two and order allies to move to the two marked locations on your map. Have your Hydrants prepared as more sludge enemies will appear after taking one of the marked outposts. |
| 6 | 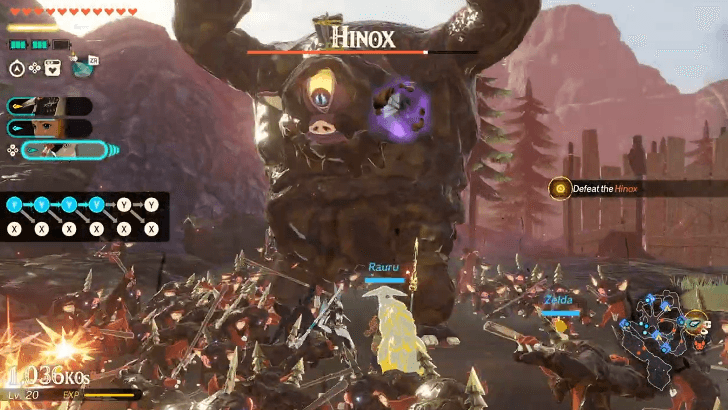 Regroup and go to the easternmost path of the map and defeat the sludge Hinox along the way. |
| 7 |  Further down south from the sludge Hinox outpost is the last outpost where you'll fight Grimtorok. Like most sludge enemies, water-imbued attacks are also effective against Grimtorok, but only until the first weak-point break. Once the red sludge covering its head is removed, Grimtorok's weak-point will be normally damaged by any attack, even those that are not water-based. |
The Behemoth in the Crater
| 1 | 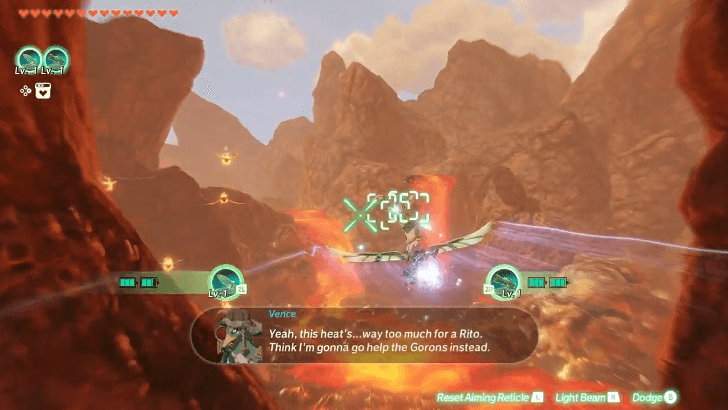 You'll be equipped with the Rocket and Cannon Zonai devices at the start of the Battle before any actual aerial combat happens. Once you're near Death Mountain, prepare your weapons as enemies will start appearing along the flight path. While both Zonai devices can easily deal with any threat along the way, the Rockets are better suited for groups as they can lock on multiple targets. On the other construct hand, the Cannon shots are better for chunky targets like the Stone Taluses. |
|---|---|
| 2 |  Eventually, you'lll reach Moragia at Death Mountain's crater. Be sure to save a bit of charge for both Zonai devices for when Moragia starts creating a giant boulder. Go all out with both weapons when this happens so you can land that weak-point smash afterwards. |
| 3 | 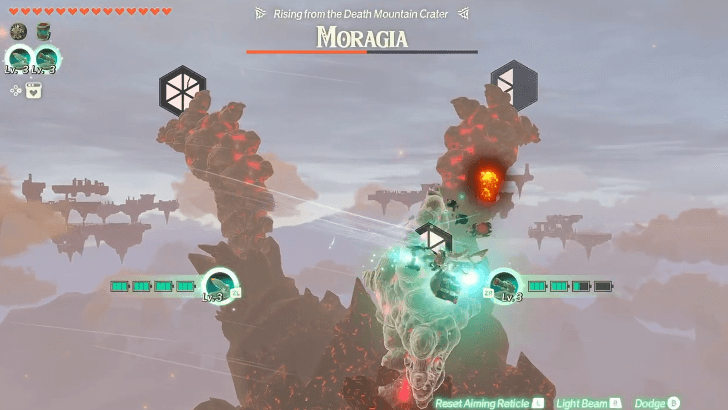 The weak-point smash will weaken all of Moragia's three heads. This will be your chance to bombard each of them until the last head is destroyed. |
The Behemoth in the Crater Walkthrough
Crisis on Death Mountain
| 1 | 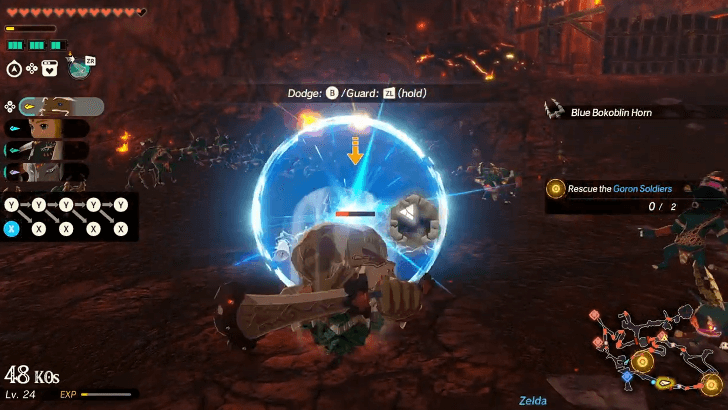 You'll unlock Agraston, whose attacks have an innate shield-breaker effect and can deal fire damage with strong attacks and abilities, right at the start of the battle. For your first objective, head to the southeast corner of the map to rescue the first group of Goron Soldiers. The path to the outpost is blocked by a wall of rocks, which Agraston can easily break. |
|---|---|
| * |  The Fire Moblin (and any enemy shrouded in flame) is weak to water and ice attacks. The ice weakness can be further exploited by using ice attacks until it's frozen and striking it by a strong attack to deal heavy damage. |
| 2 | 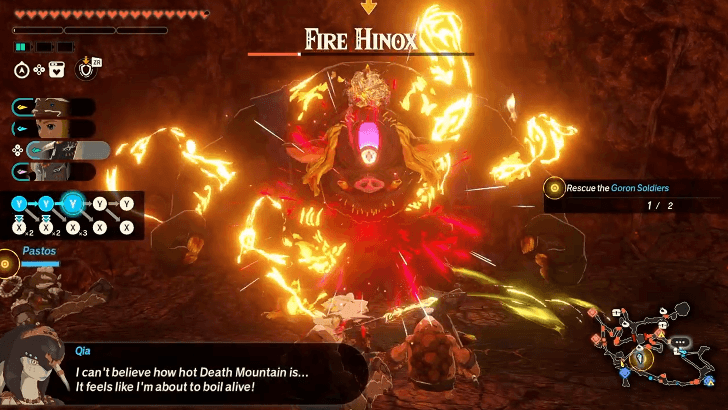 Move to the next marked outpost on the west side of the map and defeat the Fire Hinox guarding it. |
| 3 | 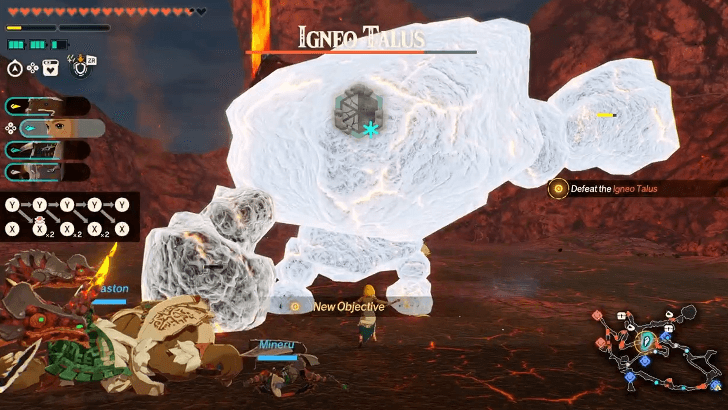 Head to the next objective just north of the last outpost and defeat the Igneo Talus. Use ice and shield-breaker attacks to quickly deplete its weak-point gauge. |
| 4 | 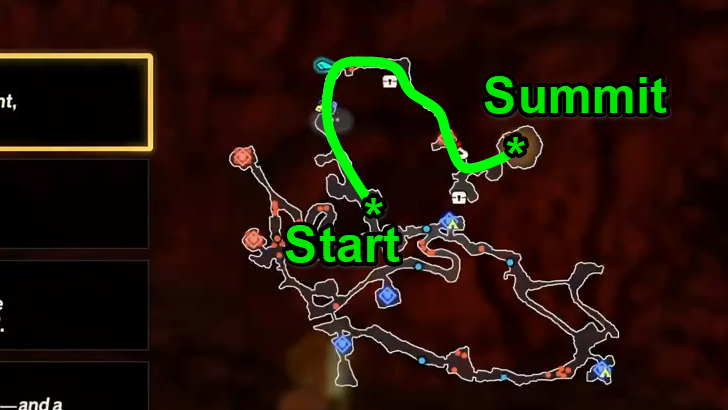 After defeating the Igneo Talus and reaching the next marked area, you'll find out that the shortest route to the summit is blocked by lava flow. This will prompt the group to loop around the map using the northern path to reach the summit on the east side. |
| 5 | 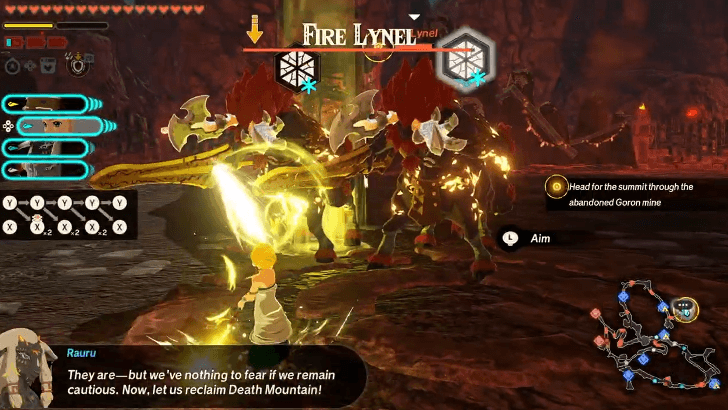 Defeat the two Fire Lynels inside the outpost. A good way to start the fight is to run to either side of the Fire Lynels and place a Frost Emitter that will hit both of them at once. Since they're weak to ice attacks, this staggers them and gives you the chance to shred their weak-points for a moment. |
Crisis on Death Mountain Walkthrough
Under the Cover of Mist
| 1 | 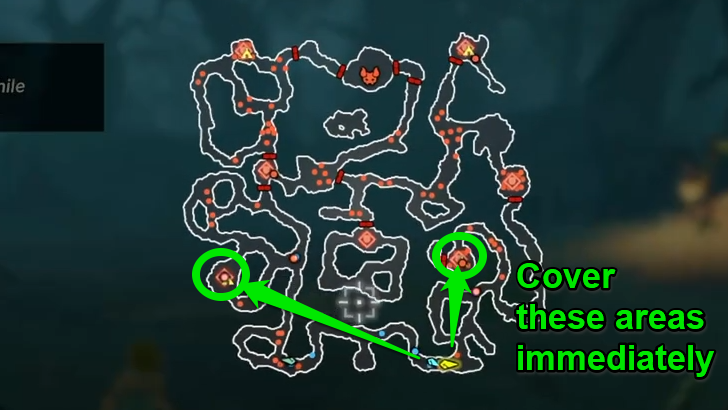 Start by dividing the group into two. Order the other group to move to the west outpost while the group you're actively controlling takes the east outpost. Capture both outposts to proceed. |
|---|---|
| 2 |  Head to either of the new objective markers to discover hidden passages through the mist. These will allow your units to reach and capture the outpost at the center. |
| 3 | 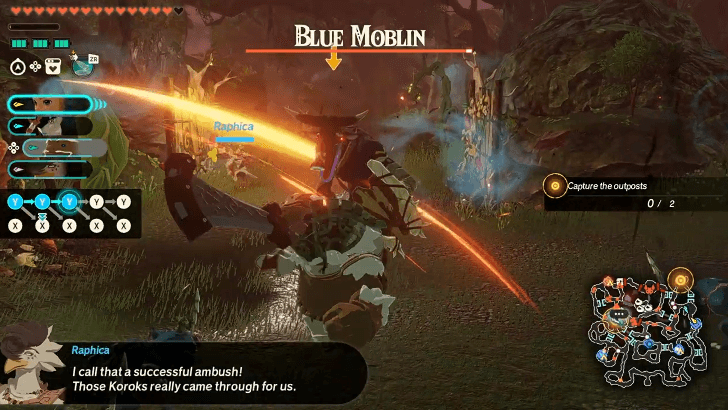 The gate to the north will open after capturing the outpost, giving you access to the upper half of the map and therefore, paths to reach the next two targeted outposts to the northwest and northeast corner. |
| 4 |  An Electric Aerocuda and a Fire Aerocuda will appear on the map that will advance to two of your captured outposts. Meet them on their way and defeat them to open the path to this Battle's main boss. |
| 5 | 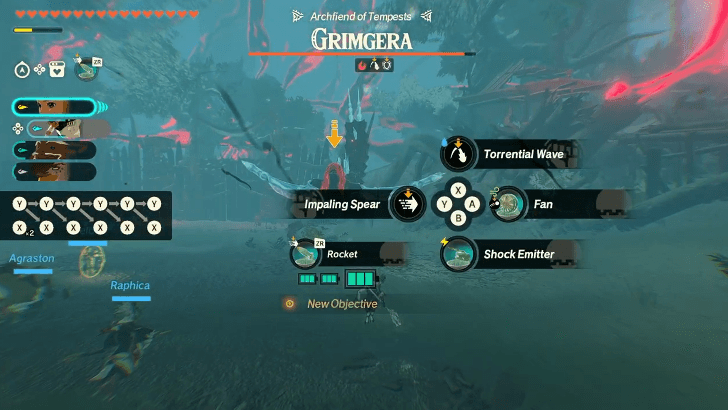 Reach the marked area through the hidden passages and defeat Grimgera. Grimgera innately has three weaknesses that you can always exploit to shred its weak-point gauge: fire, anti-air, and shield breaker attacks. Once its HP drops below 70%, Grimgera will become grounded and will lose its weakness to anti-air attacks. Grimgera's weakness to shield breakers and fire attacks will remain, so you can still use these to deplete its weak-point gauge quickly. |
Under the Cover of Mist Walkthrough
Chapter 4 Walkthrough
| Jump to a Walkthrough! | |||
|---|---|---|---|
| 15 | Terror of the Sands | 16 | Crimson Omen |
| 17 | A Time for Action | 18 | The Counterstrike |
| 19 | Ambush in the Depths | 20 | Purging the Shadows |
| 21 | Fire and Sand | ||
Terror of the Sands
| 1 | 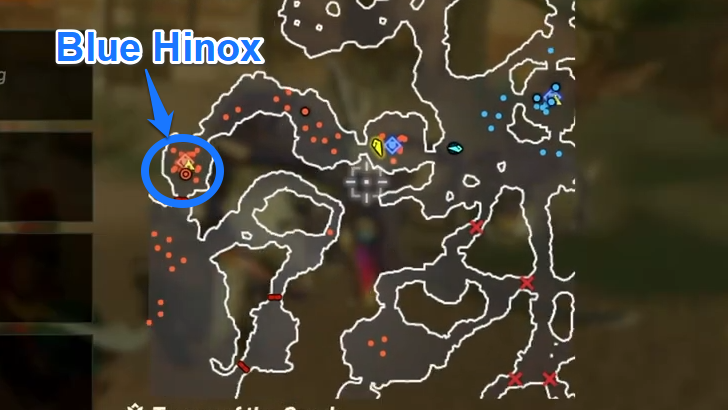 You will start the Battle as the newly unlocked character, Ardi, and outside the first enemy outpost. Test out Ardi's electrifying moveset first on the enemies inside and capture it. As for your first objective, move west until you reach the Blue Hinox at the end of the path. Defeating it opens the gate to the open area southwest of the map. |
|---|---|
| * |  It is important that you complete the objectives quickly or at the very least protect your main outpost in the northeast corner as this Battle's losing condition is to let it get taken by the enemy. |
| 2 | 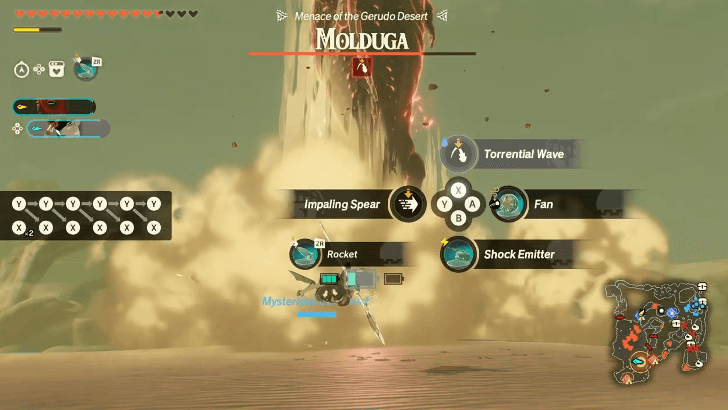 Go to the Mysterious Construct's location and help it and Calamo defeat the Molduga. |
| 3 | 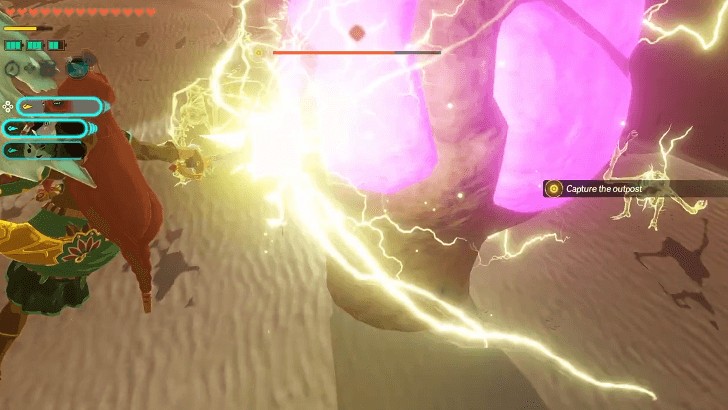 The Mysterious Construct and Calamo will be part of your team starting from the next objective! Move northeast towards the marked area where you'll face a horde of Gibdos and hives that produce them. Ardi will shine here the most, as she can destroy the hives in one hit. Physical attacks have no effect on the Gibdos, so her lightning-imbued attacks can also thin out the horde and ultimately capture the outpost. |
| 4 | 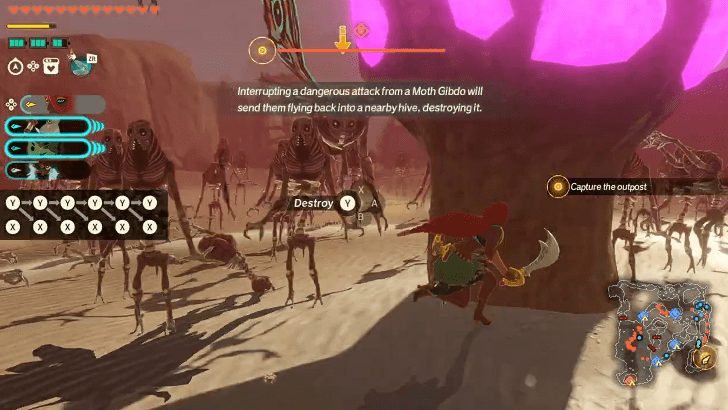 Lastly, move everyone to the outpost in the southeast corner of the map overrun by Gibdos and capture it. Moth Gibdos will start appearing here, whose attacks can be interrupted to send them flying to the hive and destroy it instantly—an alternative to Ardi's "destroy" action. |
| 5 | 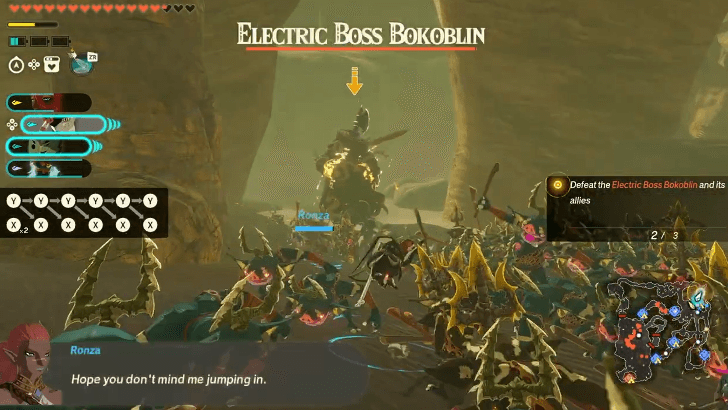 Quickly travel to the your main outpost (northeast outpost) and defend it from the two Electric Moblins and the Electric Boss Bokoblin to complete the Battle. |
Terror of the Sands Walkthrough
Crimson Omen
| 1 | 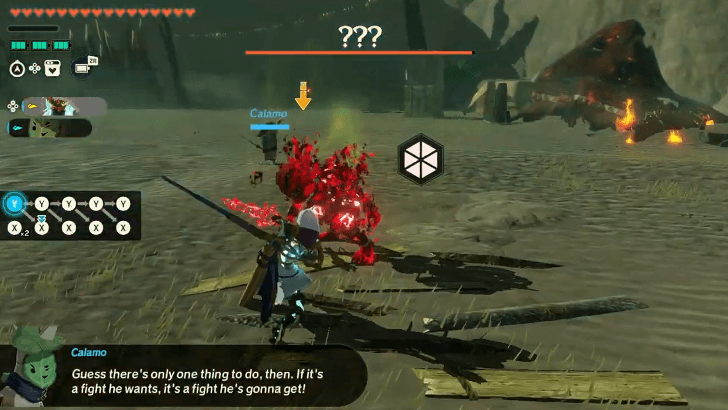 This Battle is a boss fight where you use the Mysterious Construct and Calamo against the corrupted construct. Defeating it clears the Battle. |
|---|---|
| * | 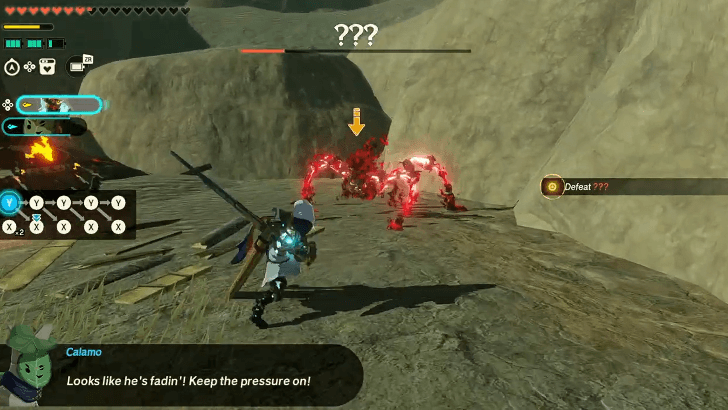 One of its dangerous attack where it assumes a spider-like form can be countered by an anti-charge skill like the Mysterious Construct's Counter Kick. |
| * | 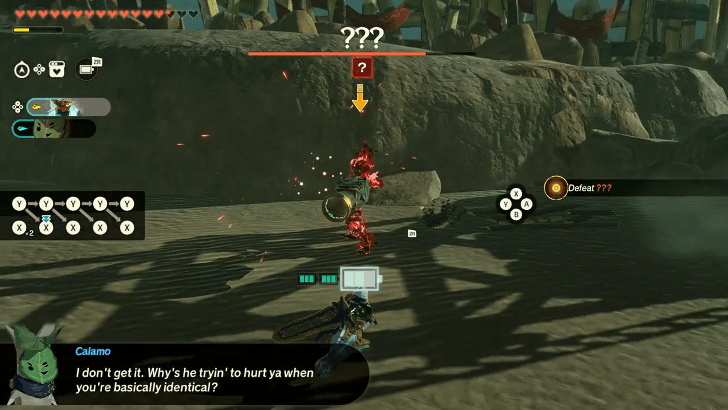 The other dangerous attack this corrupted construct can do is where it uses a Cannon Zonai device. This can be countered by Whirling Tornado. |
| * |  A regular attack that it will use more often is a leg smash. This is a delayed attack that can catch you off guard if you dodge too early or are spamming the dodge button. |
| * |  Another delayed attack that you should watch out for is its Frost Emitter attack. Press the dodge button approximately one second after the construct freezes the ground to trigger a perfect dodge and a chance to Flurry Rush. |
A Time for Action
| 1 | 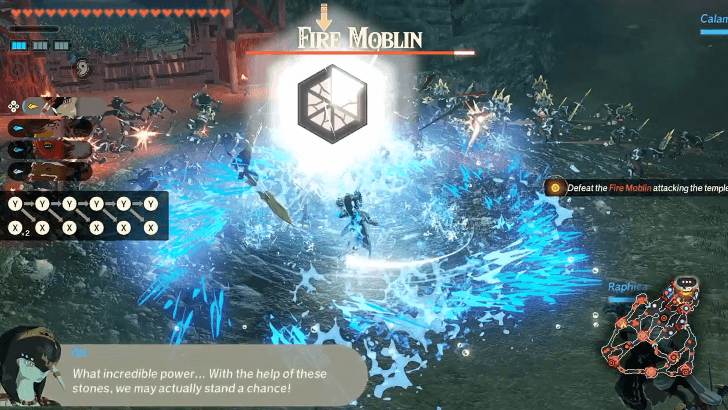 The Battle starts with a unique elemental skill for each sage unlocked. These are powerful attacks that also imbue their user's attack with elemental effects for a period of time. Try out Qia's Cyclone Sweep as you complete the first objectives where you need to defeat a Fire Moblin and a Fire Boss Bokoblin. As for the Ice Moblin, you can exploit its weakness with Agraston's new Flame Burst skill. |
|---|---|
| 2 | 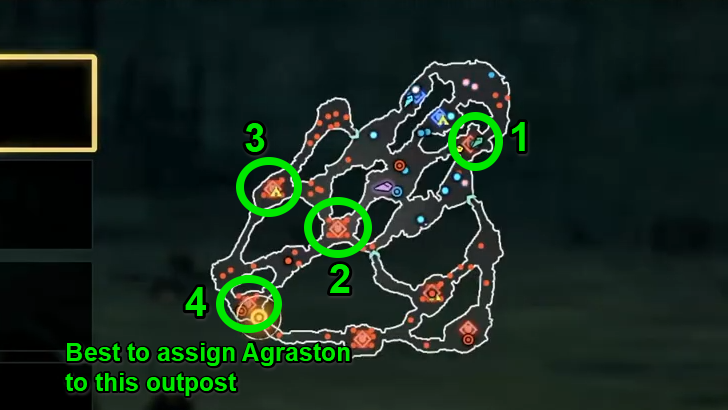 At this point, you can either head straight for the outpost marked as the next objective or capture the other three enemy outposts along the way first. We recommend splitting the group into four so you'll have a unit on each outpost and capture all the outposts for bonus rewards. The fourth outpost is guarded by an Ice Lynel, making Agraston the best unit to assign here. |
| 3 | 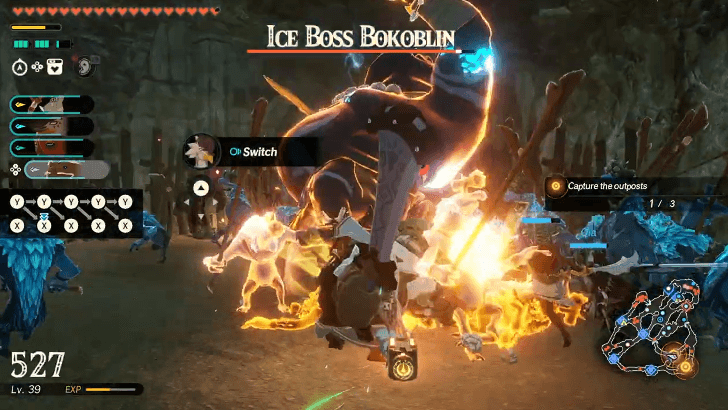 Capture the three outposts inside the cave. |
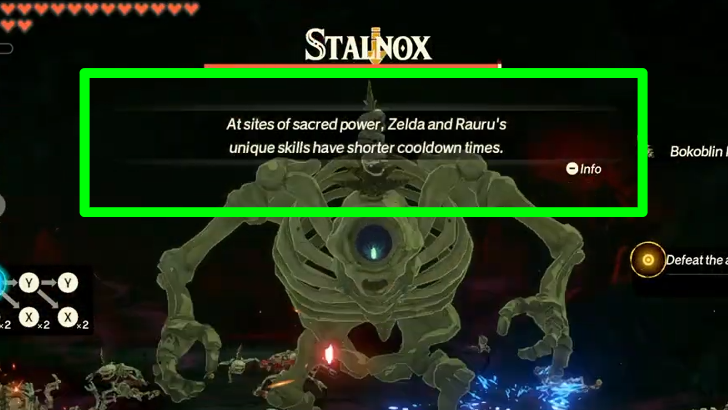
| 4 | 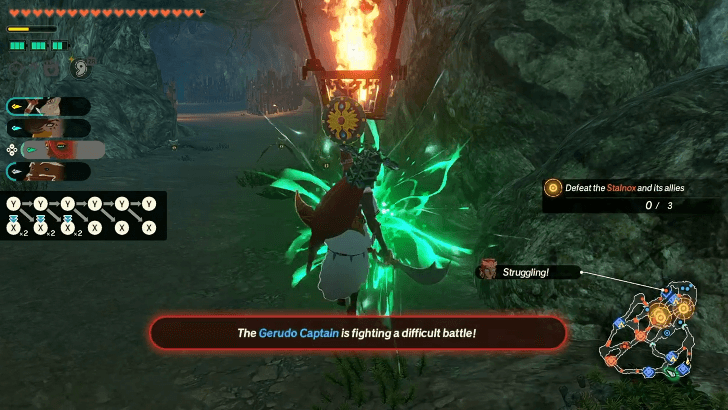 Pick at least one of your units and have them use a Balloon Zonai device so they can fast travel to the main outpost and fend off the Stalnox and two Stalmoblins closing in. Have the rest of your team follow just in case you need backup. |
| 5 |  A Black Boss Bokoblin and a White-Maned Lynel will join the siege after defeating one of the first three elite targets. Defeat all five powerful enemies to complete the Battle. |
The Counterstrike
| 1 | 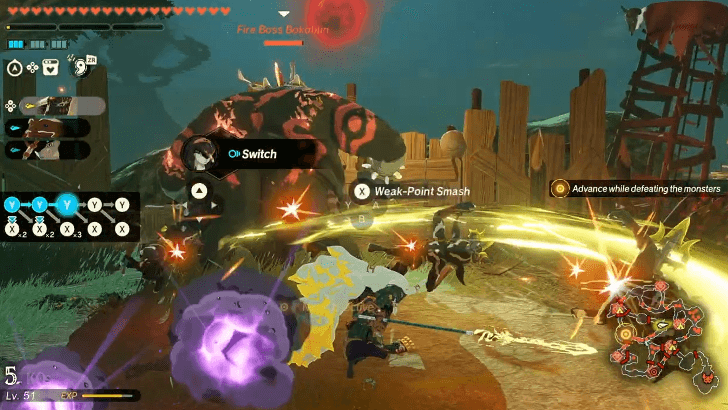 Stealth strike the unaware Fire Boss Bokoblin in front of you to instantly destroy its weak-point gauge and perform a weak-point smash. Finish it off before proceeding with the main objective for bonus rewards. |
|---|---|
| 2 | 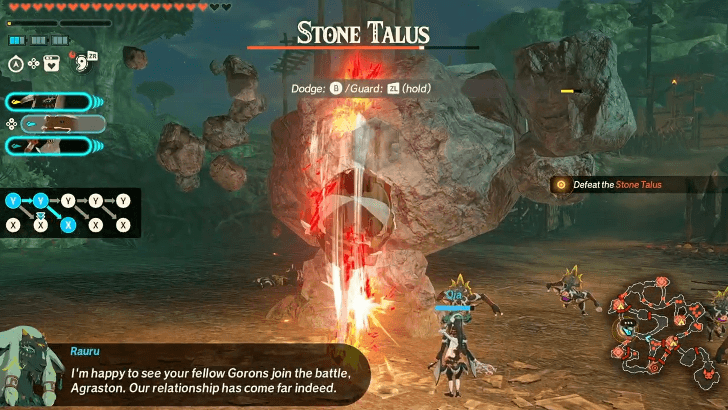 Head west and defeat the Stone Talus inside the outpost. |
| 3 | 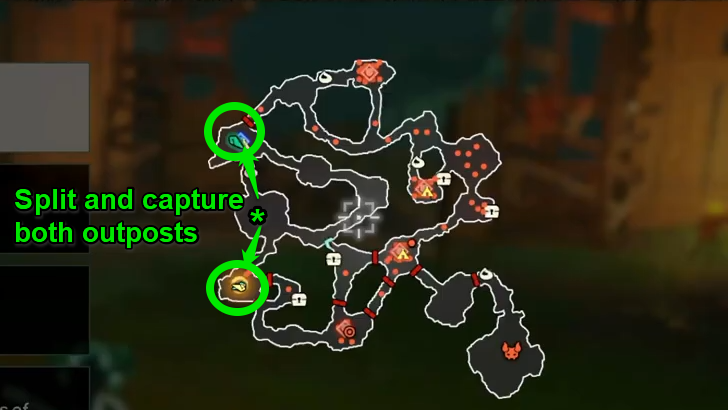 After capturing the outpost, you can split up the group and order a unit to take the north outpost while you take the main objective on the south outpost. |
| 4 |  Move to the next outpost and defeat the Black Hinox inside to capture it. Be sure to quickly run past the rocks Grimgohma launched at your path before they explode. |
| 5 | 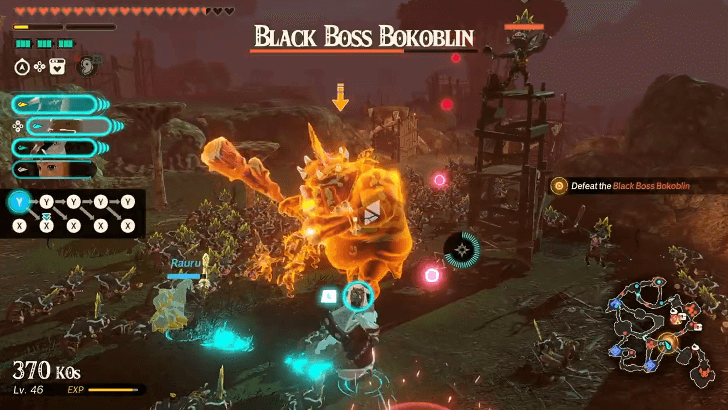 Zelda will join your party starting from the next objective. Have her take the outposts to her east and southeast as you take the objective outpost guarded by a Black Boss Bokoblin before regrouping. |
| 4 | 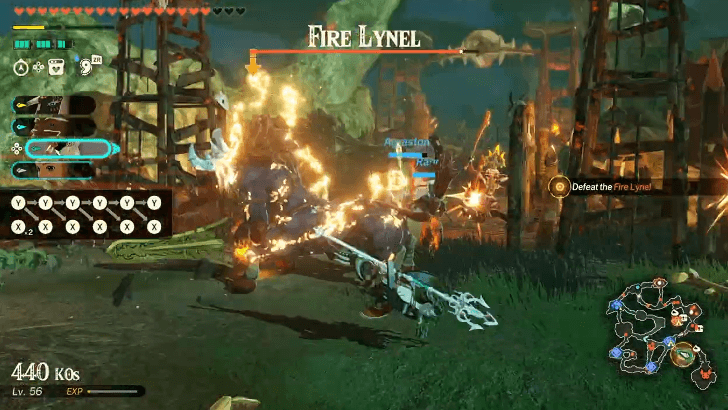 Defeat the Fire Lynel southeast of the previous objective outpost to finally clear the path to the Archfiend. |
| 5 | 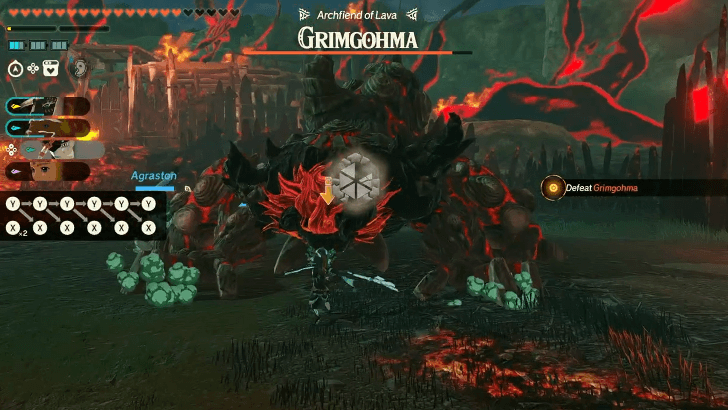 Grimgohma will be awaiting in the outpost at the southeast corner of the map. Defeat it to complete the battle. |
| * |  For the first phase of the fight, we recommend using lots of Bombs and Batteries until Grimgohma's outer shell breaks and allows for a weak-point smash. |
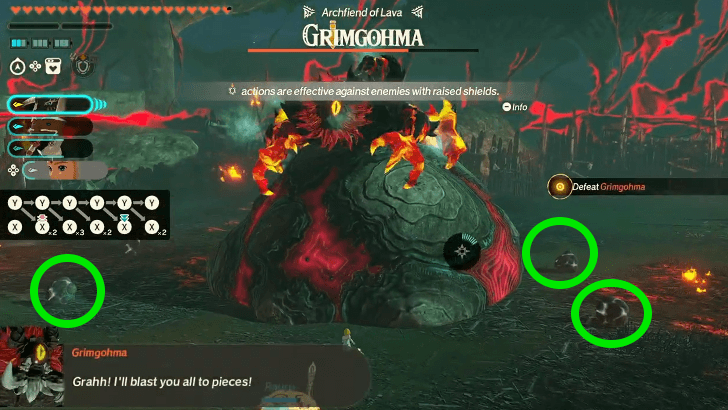
| * |  After the first weak-point smash, Grimgohma will erupt a giant rock at the center of the arena and start hurling explosive rocks around. You can hit these rocks back to Grimgohma to damage its giant rock. Do not hit the rocks if they are already glowing as they will explode on contact at that point. Keep rolling explosive rocks back at Grimgohma until you deplete its weak-point gauge once again. |
Ambush in the Depths
| 1 | 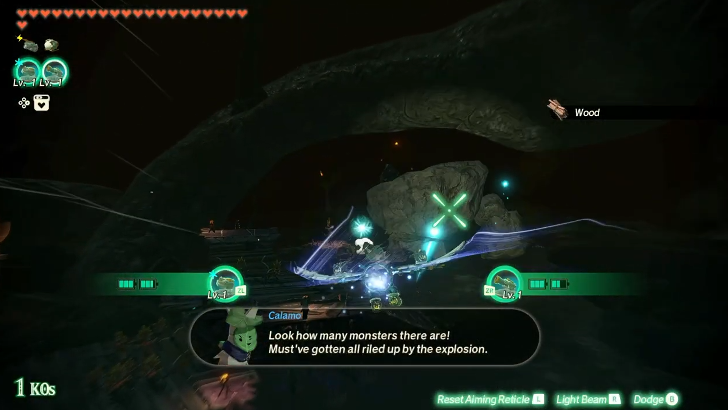 You'll be equipped with the Frost Emitter and Cannon Zonai devices for your secondary weapons in this flight battle, as well as the Shock Emitter to enhance your dodges. A Rocket can also be picked up near the beginning of the fight and used instead of either of the starting devices. The Cannon should be mainly used for blasting the Stone Taluses underground, while the Frost Emitter or Rocket are for taking out the smaller mobs. |
|---|---|
| * |  Watch out for Rock Octoroks along the cave walls as they can catch you off guard with their rock projectiles. Prepare to dodge their attacks every time you see a red flash in the background. |
| 2 | 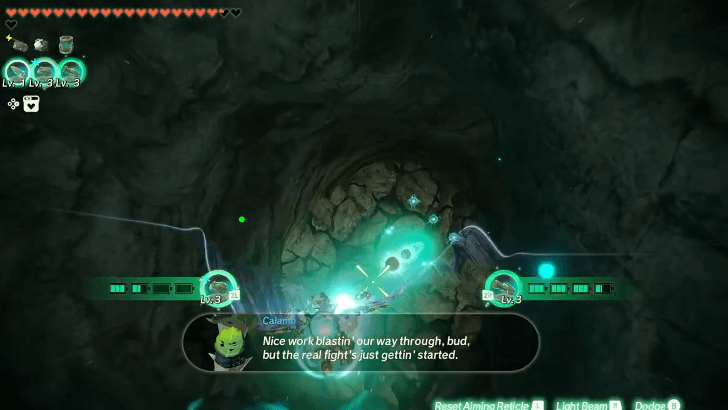 Make sure to always have the Cannon equipped as you will eventually run into a breakable wall that can be easily cleared by a Cannon shot. |
| 3 | 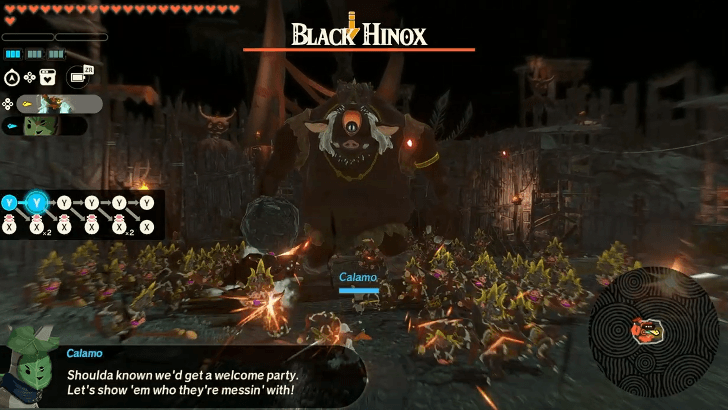 At the end of the flight, you'll be thrown into a fight with a horde led by a Black Hinox. Defeat it to capture the outpost and complete the Battle. |
Ambush in the Depths Walkthrough
Purging the Shadows
| 1 | 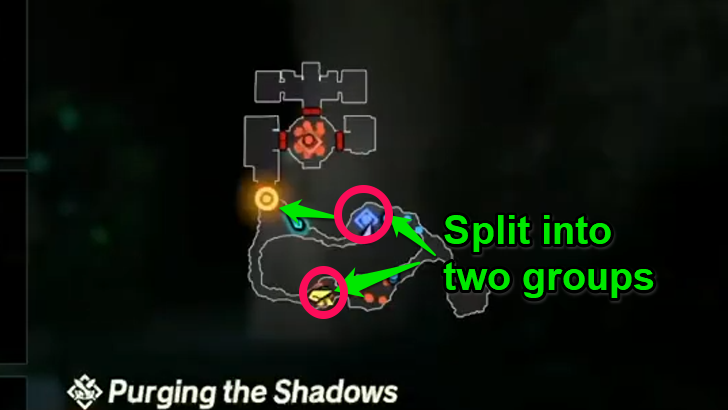 Immediately split the group into two and have a unit or two capture the south outpost where you can set up a camp. The other group takes the north outpost and the first objective where they must defeat a Flux Construct II. |
|---|---|
| 2 | 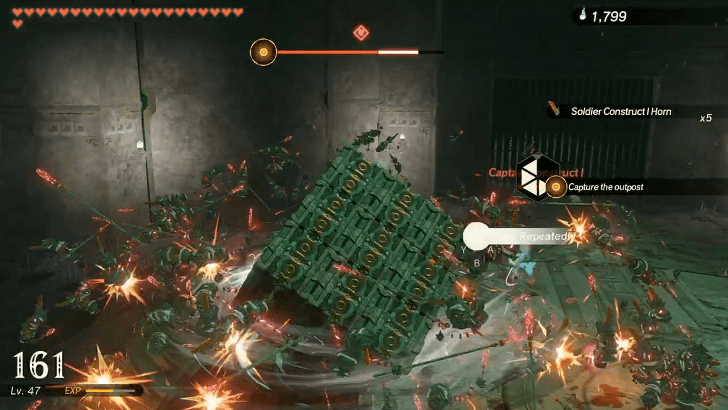 Once the way forward is clear, have Mineru move to the entrance of the marked area and watch her control the Flux Construct on the other side. Capture the outpost from within to open the gates. |
| 3 | 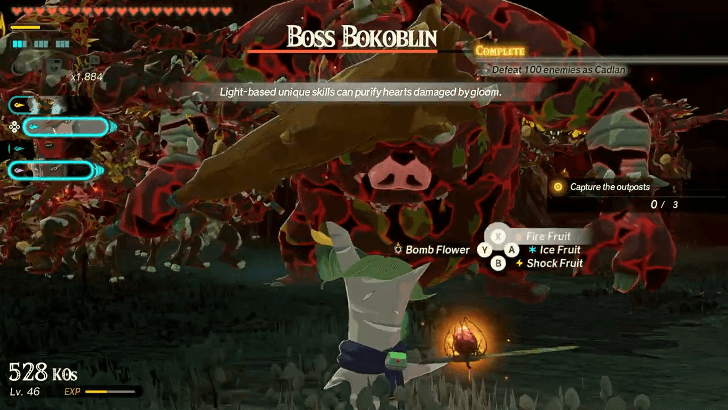 Capture the three outposts on the outskirts of the ruins. It's best to split the party into three to efficiently complete this objective. |
| * | Avoid stepping on gloom puddles as they can temporarily reduce your maximum hearts the longer you stay on them. You'll get the same debuff when taking gloom damage from enemies. The gloomed hearts can be purified by light-based attacks. |
| 4 | 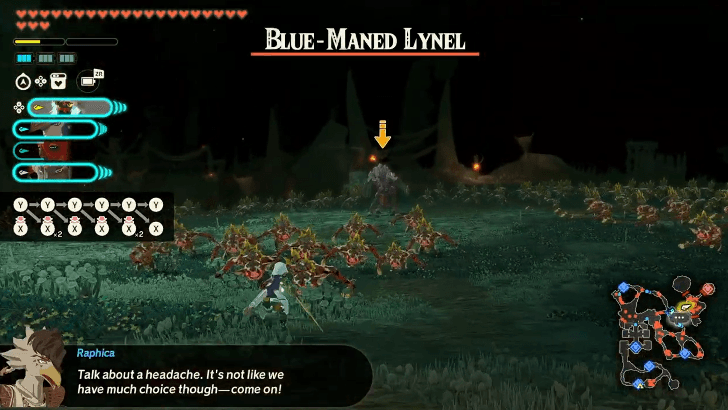 Advance to the northeast area and defeat the gloomed Blue-Maned Lynel. |
| 5 | 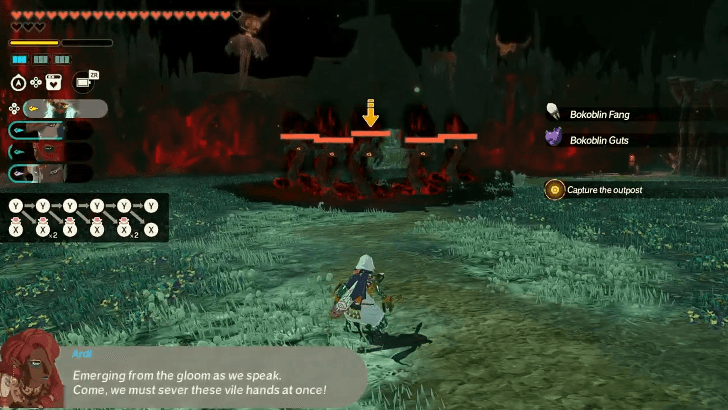 Capture the final outpost further to the northeast by defeating the Gloom Spawns inside. You'll be fighting five of them at once, so try to save your Unique Skills as they can each use dangerous rush attacks. |
| 6 | 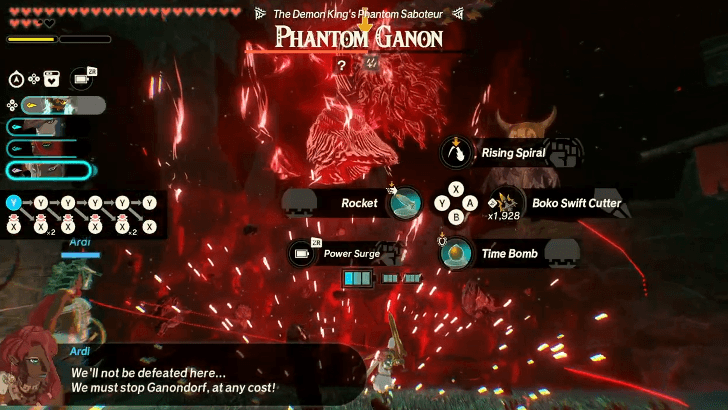 Defeat Phantom Ganon to complete the Battle. Like any gloomed enemy, Phantom Ganon is also weak to light-based attacks. He will also use jump attacks a lot, so always have an anti-air skill ready. |
Purging the Shadows Walkthrough
Fire and Sand
| 1 | 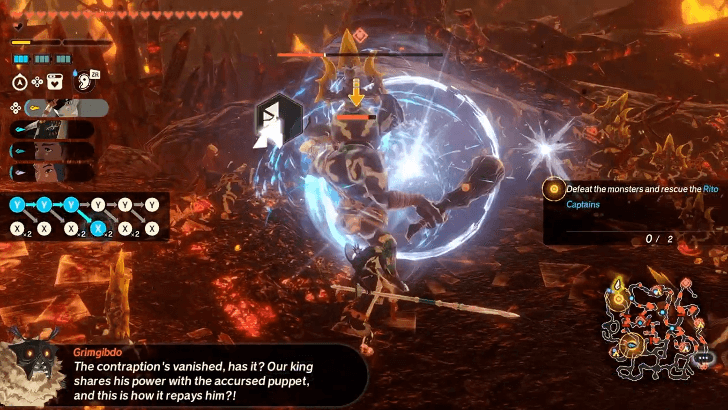 The Battle starts with the party already in two separate ways, so it's only a matter of switching to the other group after capturing the outpost along the active character's path. |
|---|---|
| 2 | 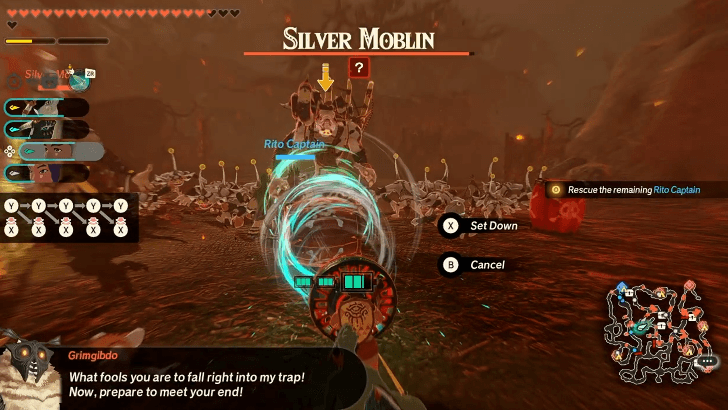 The gates toward the next objective will open soon after capturing the second outpost. Head to the next one where the remaining Rito Captain is and defeat the two Silver Moblins guarding it. Have the Fan Zonai device on one of your quickslots, or a skill that can deflect projectiles, when facing the Silver Moblins as it can be used to hurl their explosives back. |
| 3 | 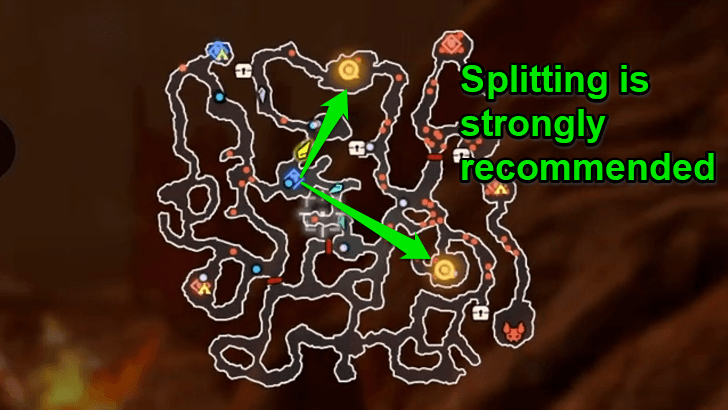 Two more objectives will pop up while you're fighting the Silver Moblins. Immediately send units to both outposts while you're dealing with the Silver Moblins as the outposts are a bit far from the one you're currently in. |
| 4 | 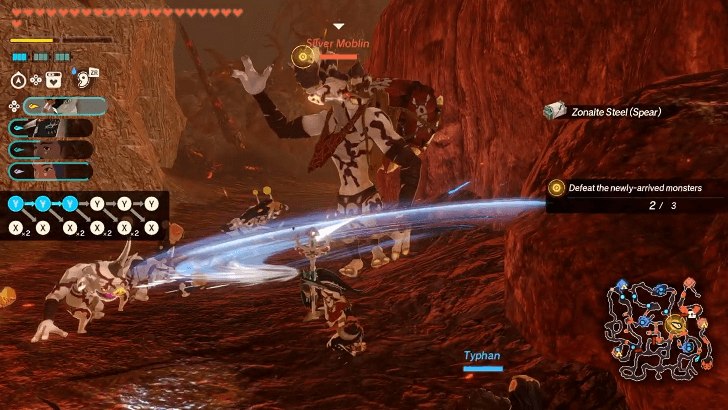 After taking the first outpost with the two Silver Moblins, another objective marker will appear on the map. Clear the two outposts from the previous objective and the new outpost in the middle to proceed. |
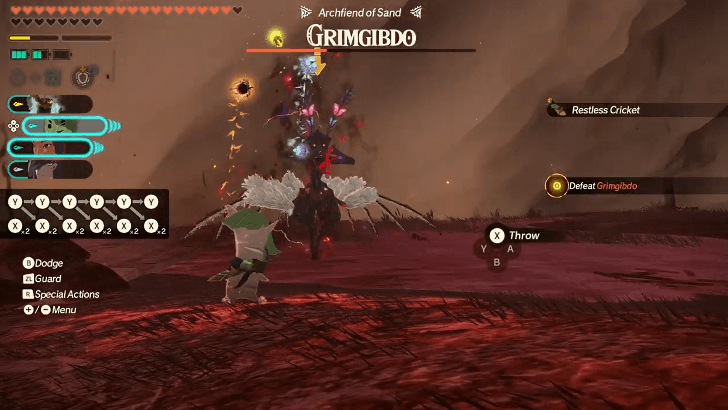
| 5 |  The path to the Archfiend is now clear! Head to the area on southeast corner of the map and defeat Grimgibdo. Grimgibdo is weak to wind-based attacks, so Raphica's combos naturally work well against this boss. Shield-breaker actions also help whittle its weak-point gauge quickly. |
| * |  Grimgibdo's whirlwinds can be blown back to it using the Fan Zonai device. Successfully countering this attack staggers Grimgibdo for a while. |
| * | 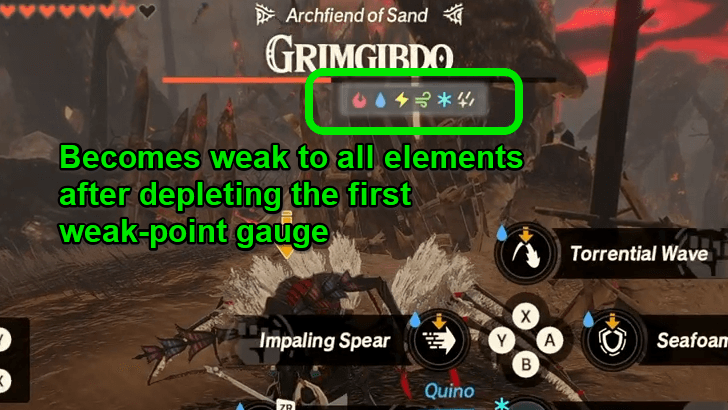 After depleting its first weak-point gauge, Grimgibdo will lose its protection and become weak to all elements. This is the perfect time to use your elemental Special Attacks to shred Grimgibdo's fresh weak-point gauge. |
Chapter 5 Walkthrough
| Jump to a Walkthrough! | |||
|---|---|---|---|
| 22 | Into the Fray | 23 | The Archfiend's Return |
| 24 | The Battle of Hyrule Castle | 25 | The Demon King, Ensnared |
| 26 | The Battle of Hyrule Field | 27 | The Final Confrontation |
Into the Fray
| 1 | 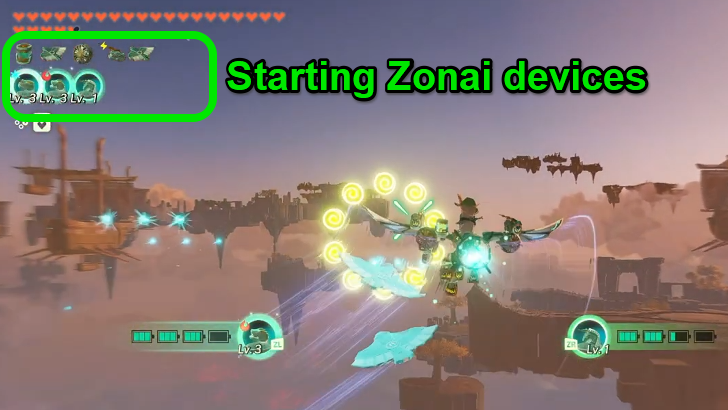 At the beginning of the Battle, the Knight Construct will receive a handful of Zonai devices to help with the run. ・Frost Emitter - deals ice damage ・Flame Emitter - deals fire damage ・Beam Emitter - shoots powerful, piercing light beams ・Battery - increases battery capacity of other devices ・Wing - provides support fire ・Fan - deflects projectiles when dodging ・Shock Emitter - enhances dodges with electric damage |
|---|---|
| 2 | 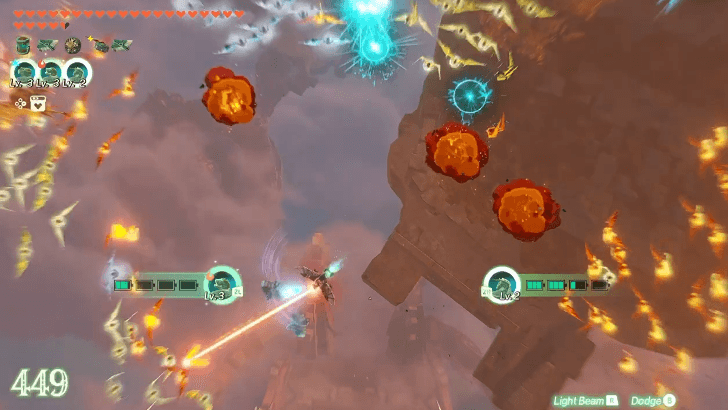 The game will change to a top-down perspective about halfway through the stage (soon after the first set of Korok rings) where enemies will come in from all directions. The Beam Emitter works well in this section as its beams can pierce through multiple targets. Simply lock onto enemies and wait for them to fly a bit closer so the beams hit further through the backline. |
| 3 | 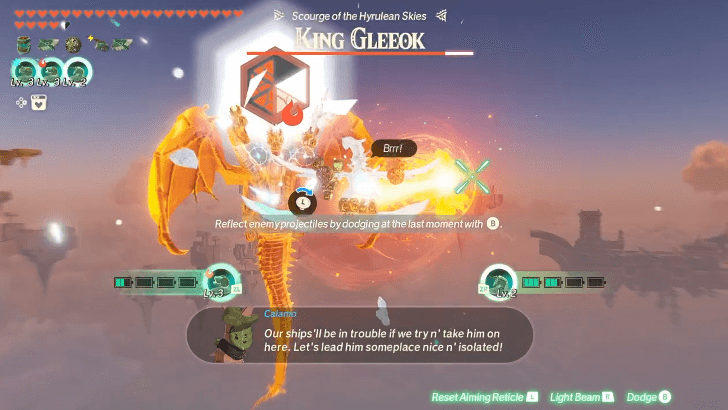 A King Gleeok will eventually appear as this Battle's boss. Although it appears more intimidating than the Fire Gleeok, with each of its heads having a different element, there's actually a cheese strategy for this fight. While dodging its attacks, focus your Fire Emitter / Frost Emitter at the King Gleeok until you inflict Burn or Freeze. This weakens its weak-point gauge, which you can then shred with your regular beams and execute a weak-point smash. Alternatively, the Beam Emitter alone can quickly shred its weak-point gauge even without placing a status effect. Repeat this strategy until the scourge of the skies is defeated. |
The Archfiend's Return
| 1 | 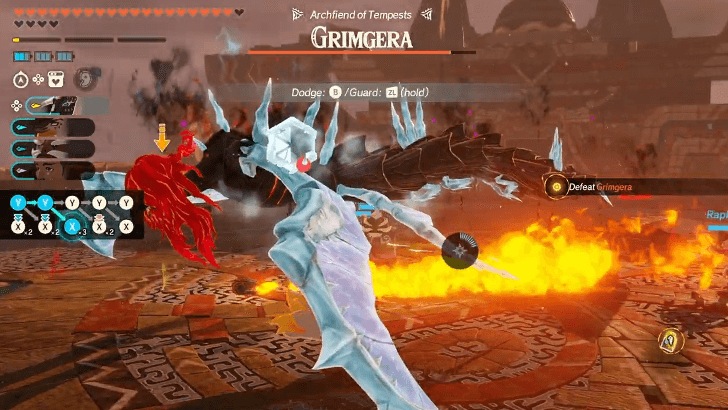 This will be your third fight against Grimgera, but its weaknesses to fire, anti-air, and shield breaker attacks still remain, at least for the first phase. Always keep Grimgera close to the floor by using anti-air attacks when it's flying too high up. This will cause Grimgera to fly lower and allow your units to attack it easily. Use this chance to place a Flame Emitter directly against Grimgera as well to quickly deplete its weak-point gauge. |
|---|---|
| * |  Grimgera's dangerous attack where it shoots homing icicles can be countered by deflecting skills like Zelda's Temporal Counter or by using the Fan Zonai device. |
| 2 | 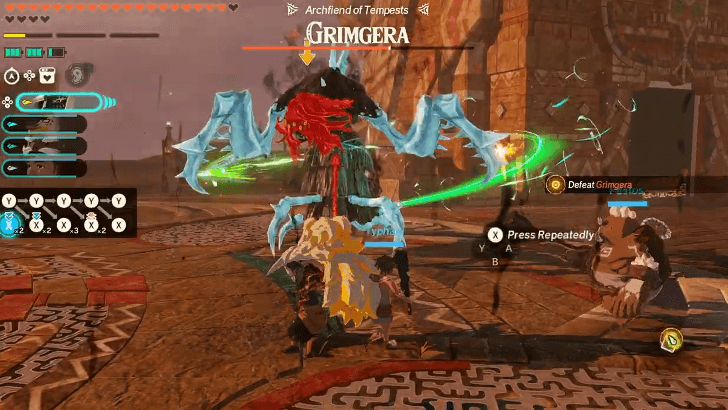 Like in the previous battle, Grimgera will become grounded after breaking its first weak-point gauge and lose its weakness to anti-air attacks. It will still be weak to fire and anti-air attacks, though, and can still be staggered by countering its charging attack. Finish off Grimgera here to defeat it once and for all and complete the Battle. |
The Archfiend's Return Walkthrough
The Battle of Hyrule Castle
| 1 | 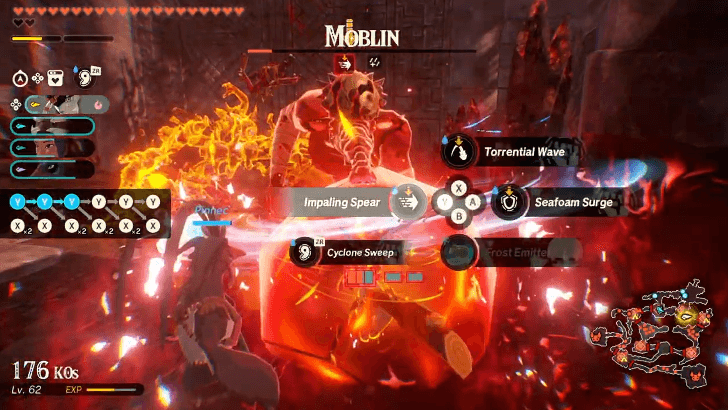 Secure the two outposts south of the starting point by defeating the Boss Bokoblin and Moblin guarding them. The enemies here are covered in gloom, which makes them weak to light-based attacks. As always, it is recommended to split the group for efficiency, especially for later where the objectives line up along the separate paths. |
|---|---|
| 2 | 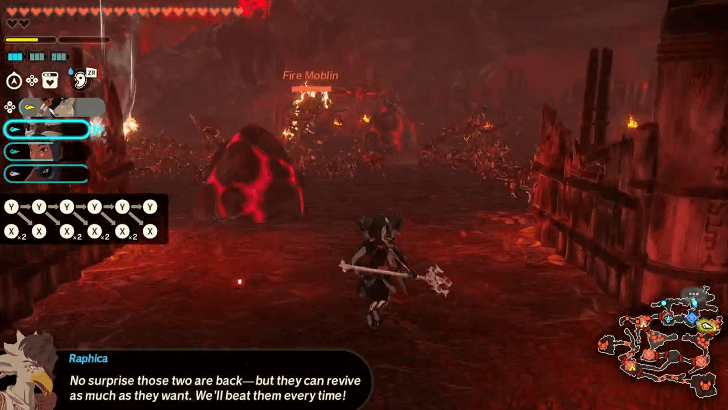 Capture the outpost to the west, but be careful of the explosive rocks that Grimgohma is launching into the outpost as they are proximity-triggered. |
| 3 | 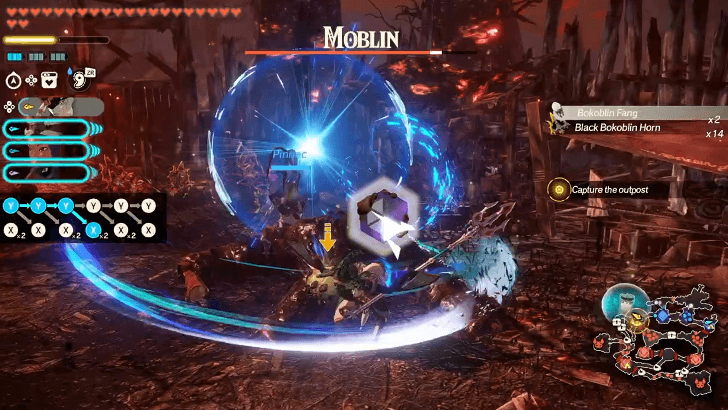 Head west to the other side of the map and capture the newly marked outpost. We recommend using Qia here as the powerful enemies in this outpost is clad in sludge. |
| 4 |  Move both groups south and capture the two outposts near the center. The west outpost is be guarded by a Sludge Like, while the east outpost is guarded by an Igneo Talus. |
| 5 | 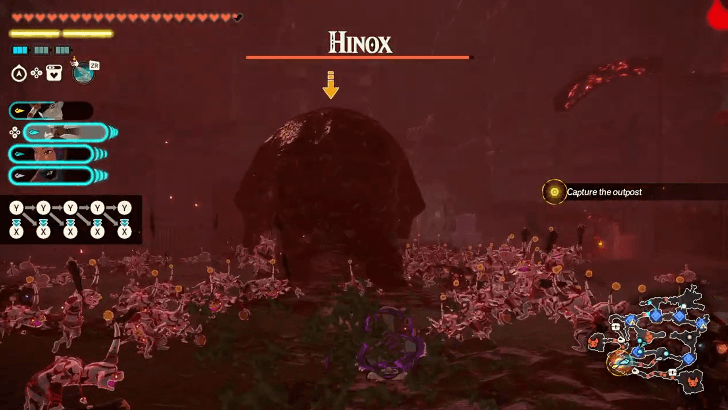 Rendezvous at the central area and have everyone move to the southwest outpost to defeat the sludge-covered Hinox. |
| 6 |  Defeat Grimtorok and Grimgohma to complete the Battle! You can either take your entire party to defeat them one after the other (a Camp can be set up on the outpost in the middle for additional preparations) or split them again so you can just switch to the other group after defeating an Archfiend. Like in the recent fight against Grimgera, both these Archfiends will use the same attack patterns and phases. |
The Battle of Hyrule Castle Walkthrough
The Demon King, Ensnared
| 1 | 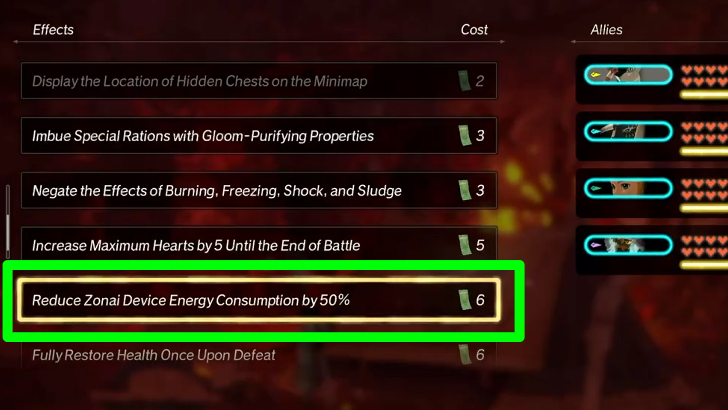 Capture the first outpost to the north so you can set up a Camp. We recommend getting the Reduce Zonai Device Energy Consumption effect from the Bonus Exchange shop especially if you brought the Mysterious Construct and/or Mineru as it also affects the Zonai devices they use with their strong attacks. |
|---|---|
| 2 | 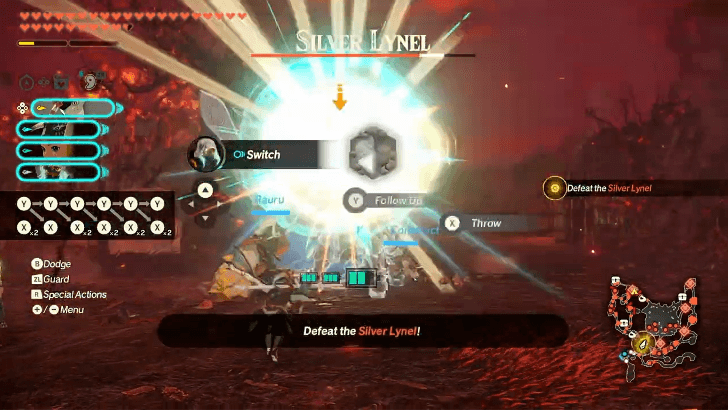 Move further to the north until you reach the enclosed area. You'll have to beat the armored Silver Lynel here to open the gate leading to the west path. |
| 3 | 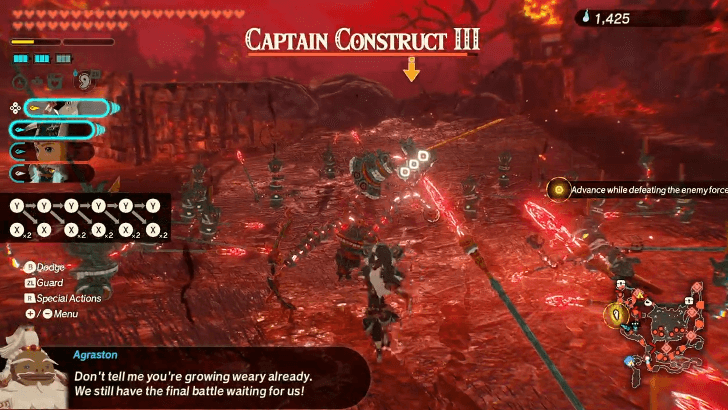 Defeat the marked Captain Construct III on the northwest corner of the map. A Silver Boss Bokoblin will appear on the lower path soon after arriving at the first objective marker. |
| 4 | 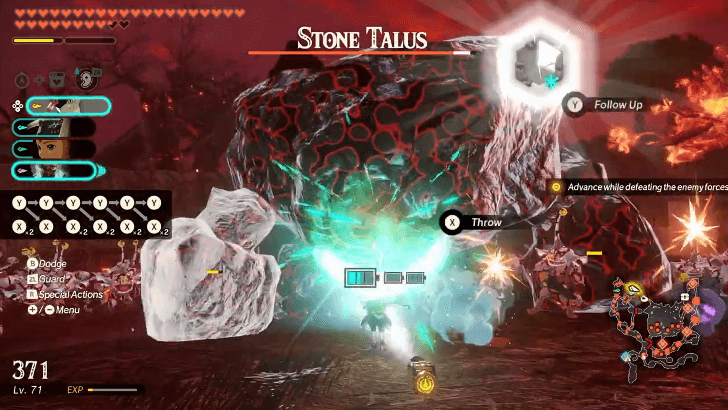 Have both groups meet to the north and follow the path east to reach the gloomed Stone Talus. |
| 5 | 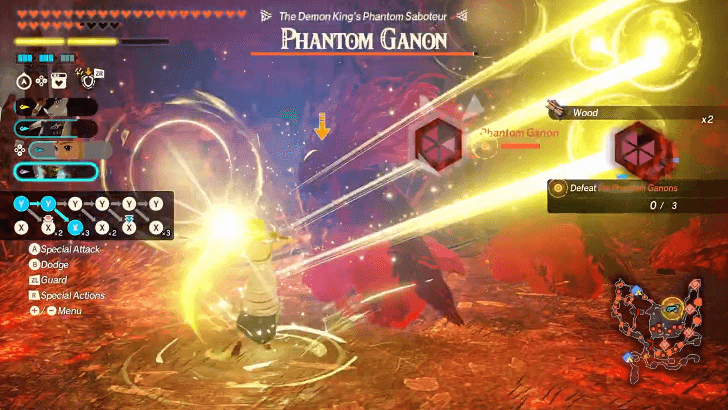 Continue following the path east until you reach the open area in the middle where you'll fight three Phantom Ganons. Both Zelda and Rauru are recommended to use against the Phantom Ganons as they are the only ones who can exploit the Phantoms' weakness to light-based attacks. All three of them will be standing close to each other, so it's the perfect opportunity to use your Sync Strikes and Special Attacks as these can hit them all at once. |
The Demon King, Ensnared Walkthrough
The Battle of Hyrule Field
| 1 |  The main goal in this Battle is to defeat as many enemies as you can until the red bar on the right side of the screen is fully depleted. We recommend focusing on the powerful enemies in the field as defeating each of them takes a good chunk off The Demon King's Army's HP bar. These enemies will be marked on your minimap with objective markers. |
|---|---|
| 2 | 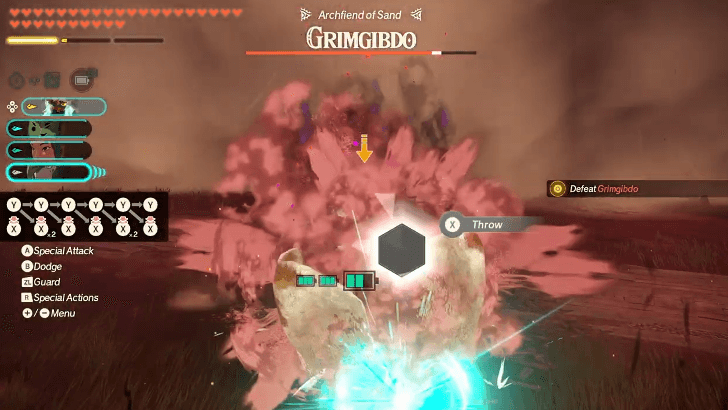 After the army's HP bar drops to around 10%, the last Archfiend, Grimgibdo, will appear. Like in the previous fight, it's better to make it vulnerable first by depleting its first weak-point gauge before going all out. Spamming Bombs or staggering it normally with counters work well in depleting its weak-point gauge. |
| * |  Grimgibdo becomes weak to all elements once its sand coating is destroyed and becomes skeletal. However, it will also become much more agile when grounded and can even use dangerous attacks back-to-back. |
The Battle of Hyrule Field Walkthrough
The Final Confrontation
| 1 | 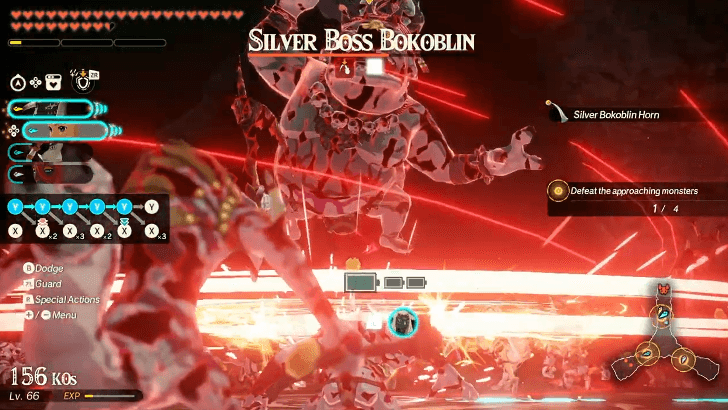 Defeat the Silver Moblin, Silver Boss Bokoblin, Shade, and Stalnox approaching from the three directions. |
|---|---|
| * |  Zelda and Rauru's unique skills have almost no cooldown in this area, which allows them to use a unique skill right after using one. Keep spamming light-based skills, especially against gloom enemies, to complete the first objective quickly. |
| 2 |  After defeating the first four powerful enemies, a Silver Lynel will appear and become your next target. |
| 3 | 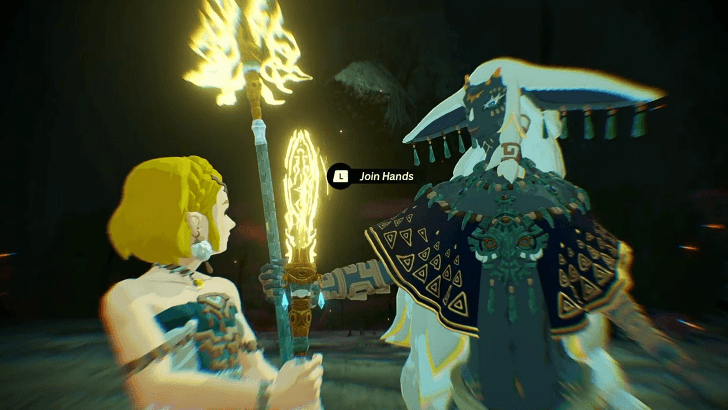 Ganondorf will then summon a wave of Phantom Ganons. After the short cutscene, press L when prompted to blast most of them away, leaving only three Phantom Ganons. |
| 4 | 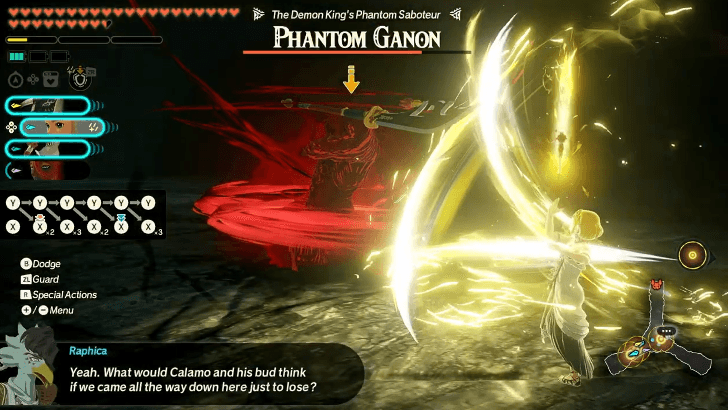 Finish off the remaining Phantom Ganons, which are already at half health. |
| 5 | 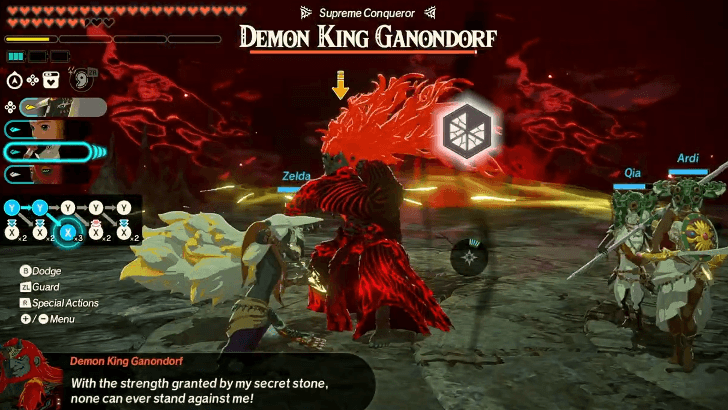 Defeat Demon King Ganondorf to complete the Battle. Like all the gloom enemies you've fought before, even Ganondorf himself is weak to light-based attacks. |
| * | 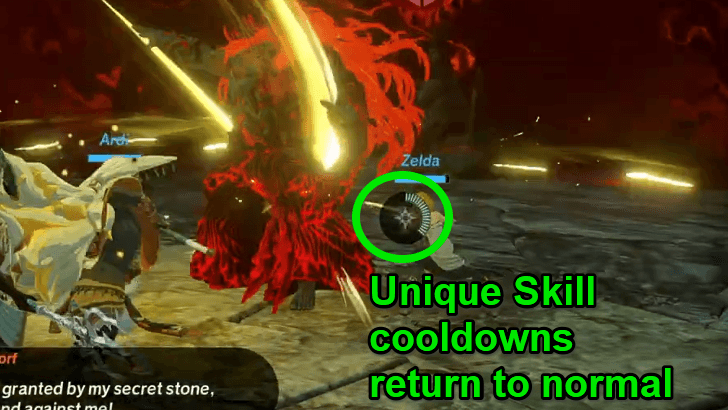 Zelda and Rauru loses the "site of sacred power" buff in this fight, so you won't be able to spam their unique skills anymore. But since you have a 4-member party, it should be fine to use Zelda and Rauru's unique skills back-to-back, as your other allies can use theirs to counter Ganondorf's dangerous attacks. |
| * | Ganondorf can dodge your attacks like how playable characters perform a perfect dodge before a Flurry Rush. Whenever he dodge your attacks, prepare to dodge his follow-up as well after the time dilation. |
The Final Confrontation Walkthrough
Chapter 6 Walkthrough
| Jump to a Walkthrough! | |||
|---|---|---|---|
| 28 | A Clash of Constructs | - | |
A Clash of Constructs
| 1 |  Defeat the Forbidden Construct. The first phase is more or less the same as when you fought it during the Crimson Omen, as it will use the same attack patterns. One significant difference is that the boss area now has water on both sides that you can exploit using ice and electric attacks. |
|---|---|
| 2 | 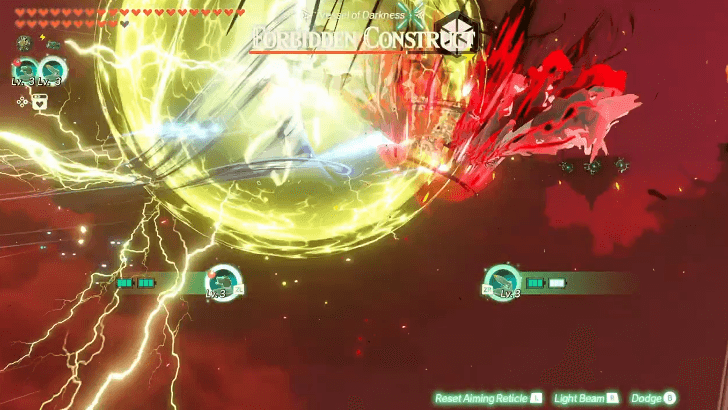 After its HP drops below 70%, a cutscene will start that will change the battle format into an aerial combat. Calamo will immediately equip you with a Lv.3 Rocket and a Lv.3 Flame Emitter for your primary weapons, as well as a Fan and a Shock Emitter to enhance your dodges. |
| * |  Watch your screen at all times, even while focusing fire on the Forbidden Construct, as it can use dive attacks and its own Fan devices to attack across the screen. |
| 3 | 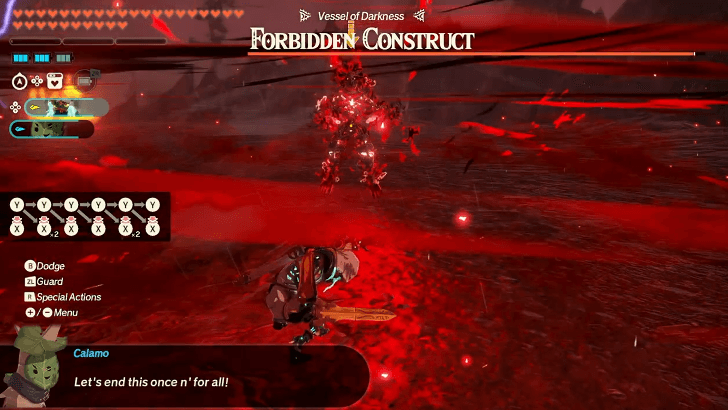 The third and final phase starts after shooting the Forbidden Construct out of the skies, forcing it to fight the Knight Construct again in a ground combat. Your enemy will unleash its corrupted power this time around and use gloom attacks more often. The Forbidden Construct will also a gain an extended HP bar, but you'll only need to deplete it to around 25% of the HP bar (just after the word "Forbidden") to end the fight and start the final cutscenes. |
A Clash of Constructs Walkthrough
How Many Chapters are There?
6 Chapters Total
The main story of Hyrule Warriors: Age of Imprisonment spans 6 chapters, divided into a total of 28 Battles. Playing the game by only focusing on the main Battles will take around 20 hours.
Hyrule Warriors: Age of Imprisonment Related Guides

Guides by Category
 Walkthrough Walkthrough |
 How-Tos How-Tos
|
 Characters Characters |
 Quests Quests |
 Challenges Challenges |
 Aside Quests Aside Quests |
 Enemies Enemies |
 Materials Materials |
 Weapons Weapons |
 Unique Skills Unique Skills |
 News and Updates News and Updates |
- |
Recommended Guides
Comment
Author

Hyrule Warriors: Age of Imprisonment Walkthrough & Guides Wiki
Complete Walkthrough and Chapters List
Please participate in our site
improvement survey
04/2026
improvement survey
04/2026
Would you assist in
improving Game8's site?
improving Game8's site?

×
We are listening to our users' valuable opinions and discussing how to act on them.
The information collected through this survey will be used for the purpose of improving our services. In addition, the information will only be disclosed a part of a statistic in a format that will not allow identification of personal information.
Begin Survey
Not Now
×
Please rate each item regarding Game8.co's Advertisements.
Amount of Ads
Very Dissatisfied
Somewhat Dissatisfied
Fine
Somewhat Satisfied
Highly Satisfied
Placement of Ads
Timing of Ad Display
Ad Loading Speed
Safeness of Ads
Content of Ads
×
Please rate each item regarding Game8.co's Quality of Articles.
Amount of information
Very Dissatisfied
Somewhat Dissatisfied
Fine
Somewhat Satisfied
Highly Satisfied
Frequency of updates
Speed of new information
Accuracy of articles
Understandibility of articles
Readability of sentences
×
Please rate each item regarding Game8.co's Usability of the Site.
Ease of finding information
Very Dissatisfied
Somewhat Dissatisfied
Fine
Somewhat Satisfied
Highly Satisfied
Loading Speed
Use of Color
Font Size
Visibility of Images
Easy to Understand Layout
×
Please rate each item regarding Game8.co's Message Boards, Comments.
Ease of Writing
Very Dissatisfied
Somewhat Dissatisfied
Fine
Somewhat Satisfied
Highly Satisfied
Readability
Ease in Finding Information
Comment Quality
Comment Quantity
Admin Response
×
Please rate each item regarding Game8.co's Site's new design.
Please rate our site's new design
Very Dissatisfied
Somewhat Dissatisfied
Fine
Somewhat Satisfied
Highly Satisfied
Do you think that the website's design change makes the site easier to use?
Has the new design made it easier for you to find information on the site?
Has the new design improved the overall visual appeal of the site?
How would you rate your overall satisfaction with the new design of the site?
×
How likely are you to recommend Game8 to someone you know?
Very Unlikely
0
1
2
3
4
5
6
7
8
9
10
Very Likely
If you have other opinions regarding potential improvement to the website, please share them with us. We would appreciate your honest opinion.
Note: This is a free response section, so you can proceed without entering anything.
Note: Please be sure not to enter any kind of personal information into your response.
Note: Please be sure not to enter any kind of personal information into your response.
×
Thank You
×
Thank you for participating in our survey! Your answers will help us to improve the quality of our website and services.
We hope you continue to make use of Game8.
We hope you continue to make use of Game8.
Close
Rankings
- We could not find the message board you were looking for.
Gaming News


![Forza Horizon 6 Review [Preview] | Beautiful Roads With a Whole Lot of Oversteer](https://img.game8.co/4460981/a7254c24945c43fbdf6ad9bea52b5ce9.png/thumb)
![Borderlands Mobile Review [Playtest] | The Same Borderlands Made Easy](https://img.game8.co/4465500/aac0c880a39ec5cd46073e49d18f3ed5.png/thumb)
Popular Games

Genshin Impact Walkthrough & Guides Wiki
Crimson Desert Walkthrough & Guides Wiki
Umamusume: Pretty Derby Walkthrough & Guides Wiki
Honkai: Star Rail Walkthrough & Guides Wiki
Monster Hunter Stories 3: Twisted Reflection Walkthrough & Guides Wiki
Wuthering Waves Walkthrough & Guides Wiki
The Seven Deadly Sins: Origin Walkthrough & Guides Wiki
Pokemon TCG Pocket (PTCGP) Strategies & Guides Wiki
Pokemon Pokopia Walkthrough & Guides Wiki
Zenless Zone Zero Walkthrough & Guides Wiki


Recommended Games
Fire Emblem Heroes (FEH) Walkthrough & Guides Wiki
Pokemon Brilliant Diamond and Shining Pearl (BDSP) Walkthrough & Guides Wiki
Super Smash Bros. Ultimate Walkthrough & Guides Wiki
Diablo 4: Vessel of Hatred Walkthrough & Guides Wiki
Cyberpunk 2077: Ultimate Edition Walkthrough & Guides Wiki
Yu-Gi-Oh! Master Duel Walkthrough & Guides Wiki
Elden Ring Shadow of the Erdtree Walkthrough & Guides Wiki
Monster Hunter World Walkthrough & Guides Wiki
The Legend of Zelda: Tears of the Kingdom Walkthrough & Guides Wiki
Persona 3 Reload Walkthrough & Guides Wiki


All rights reserved
© Nintendo © KOEI TECMO GAMES All rights reserved.
The copyrights of videos of games used in our content and other intellectual property rights belong to the provider of the game.
The contents we provide on this site were created personally by members of the Game8 editorial department.
We refuse the right to reuse or repost content taken without our permission such as data or images to other sites.