Fire and Sand Korok Seeds, Chests, and Walkthrough
Fire and Sand is a Chapter 4 Battle in Hyrule Warriors: Age of Imprisonment. Here's a walkthrough for Fire and Sand, including Korok Seed and Chest Locations, and tips on how to complete the Battle!
| ◀ Previous Mission | Next Mission ▶ |
|---|---|
| Purging the Shadows | Into the Fray |
Fire and Sand Korok Seed and Chest Locations
Fire and Sand Full Map
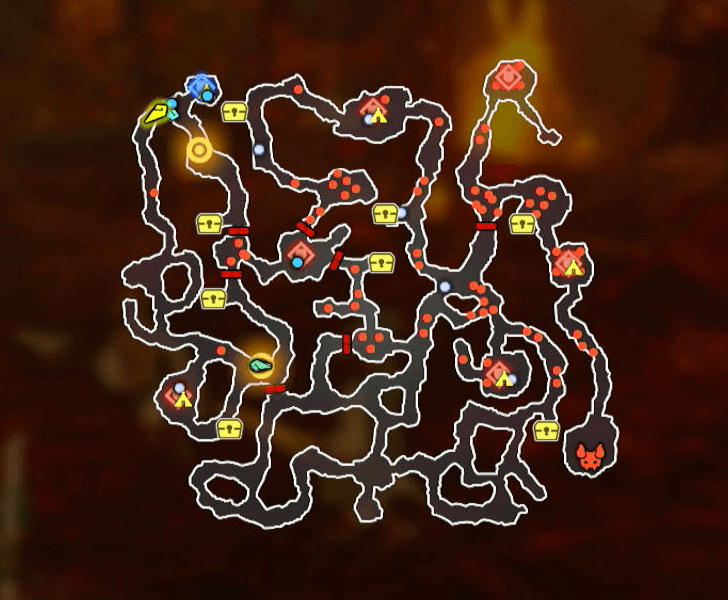
Fire and Sand Korok Seeds
| No Korok Seeds can be found in this mission. |
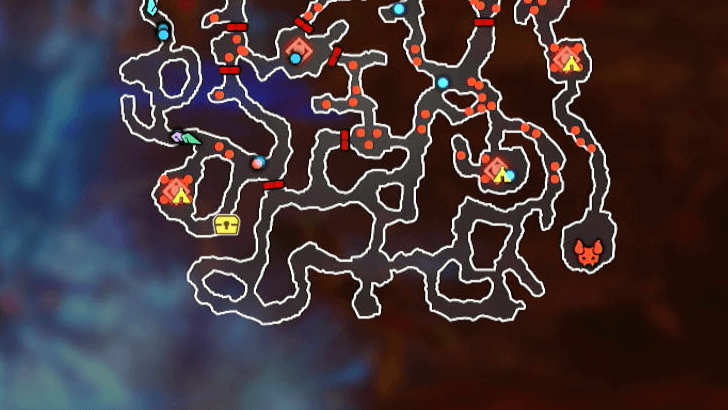
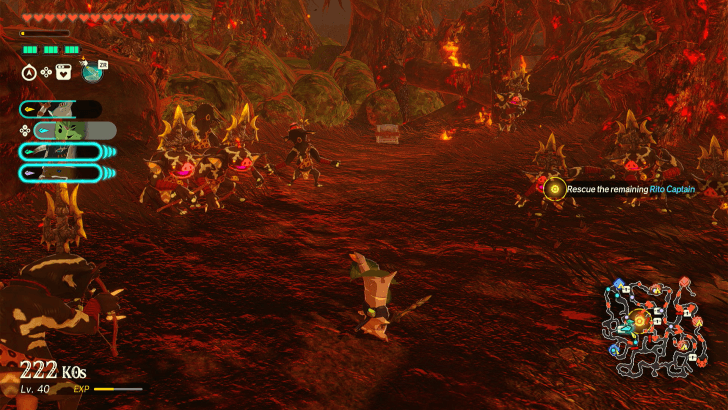
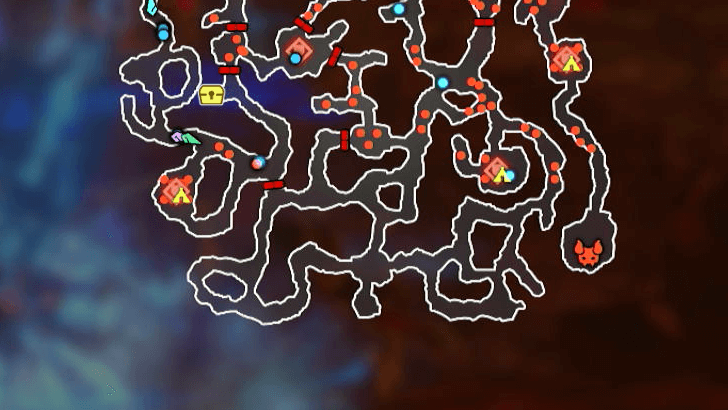
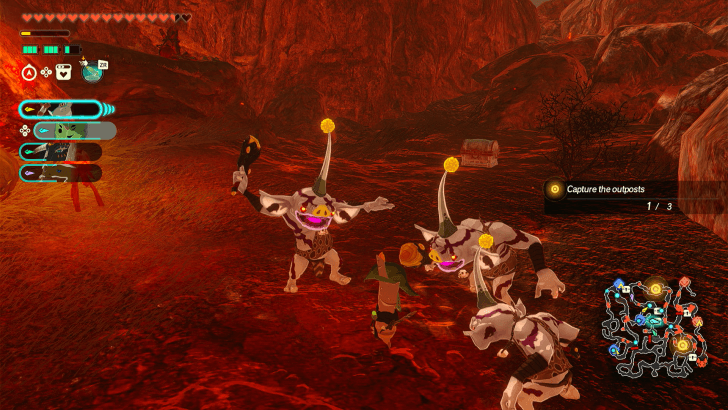
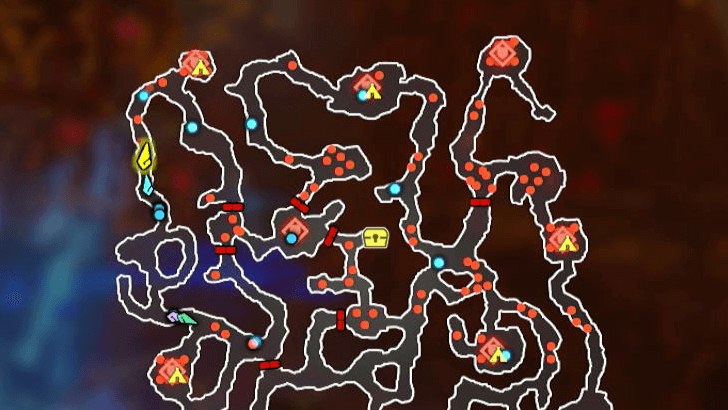
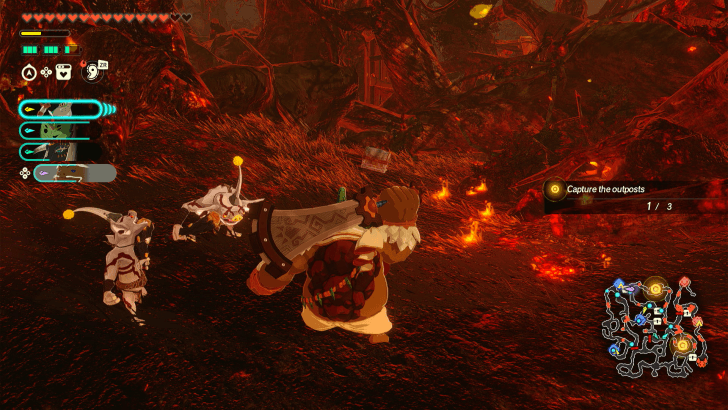
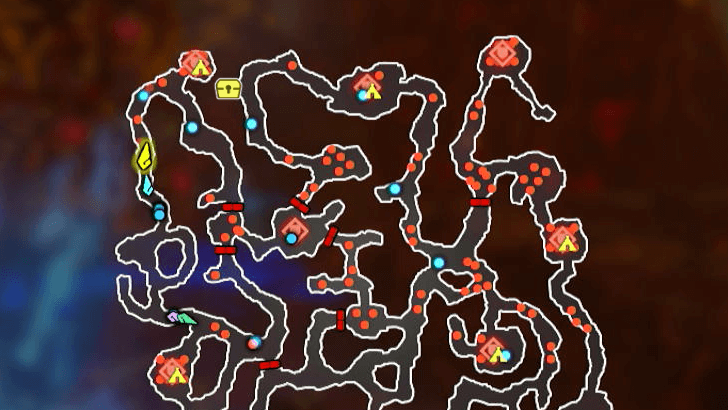
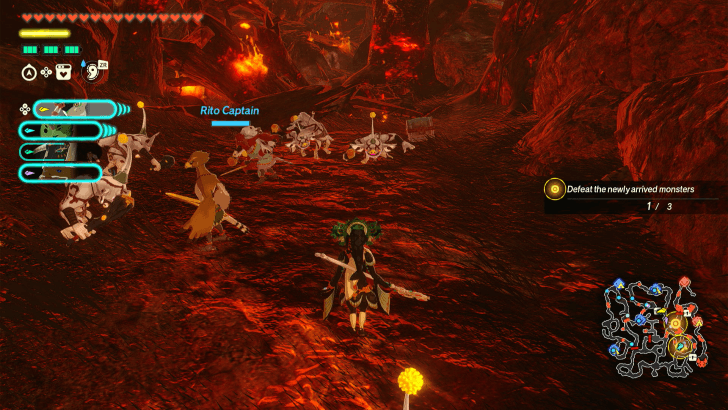
Fire and Sand Treasure Chests
| Overworld View | Map Location | |
|---|---|---|
 |
 |
|
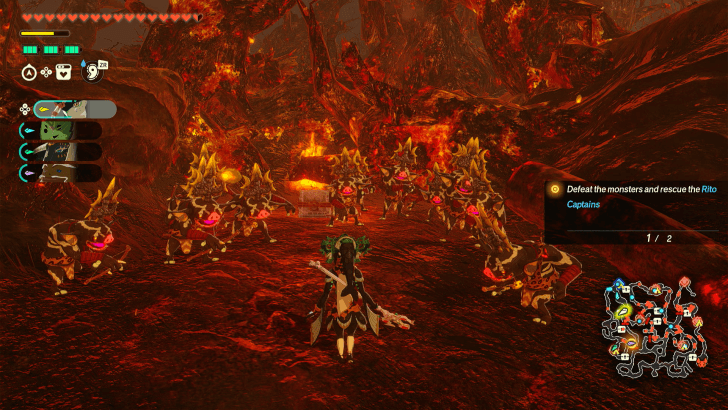
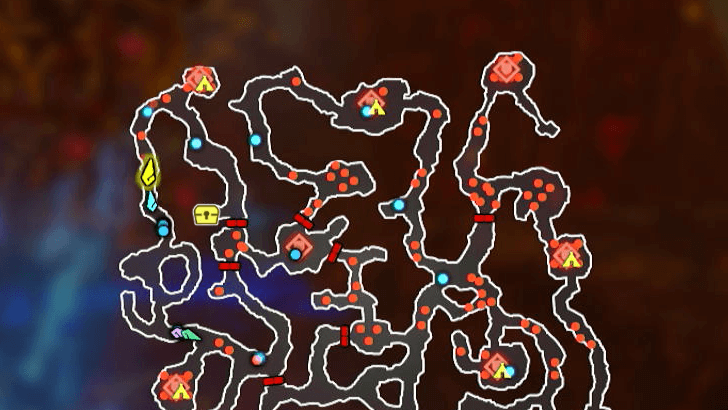
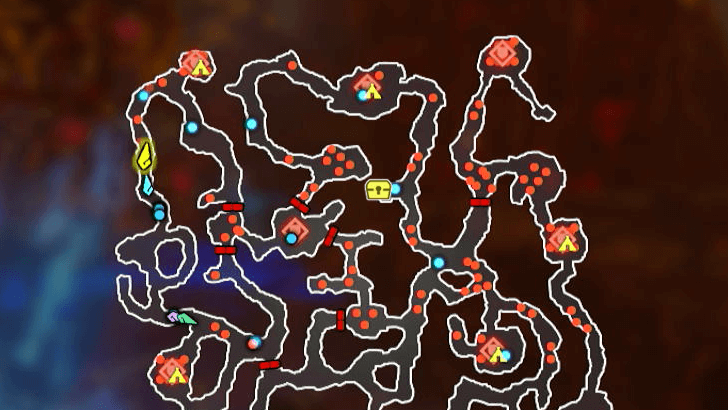
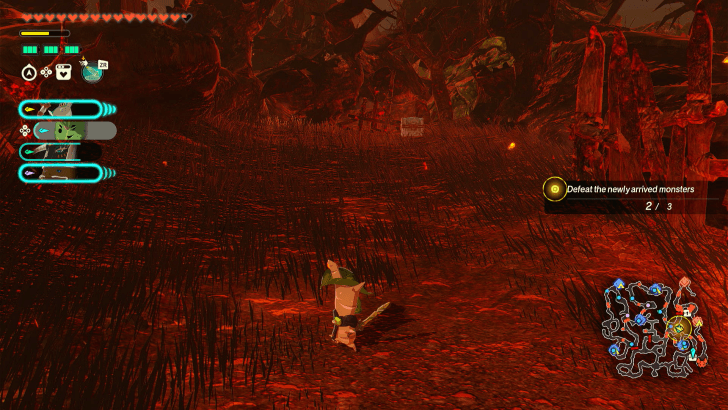
| Guarded by a group of Black Bokoblins south of the northwestern campsite. | ||
 |
 |
|
 |
 |
|
 |
 |
|
 |
 |
|
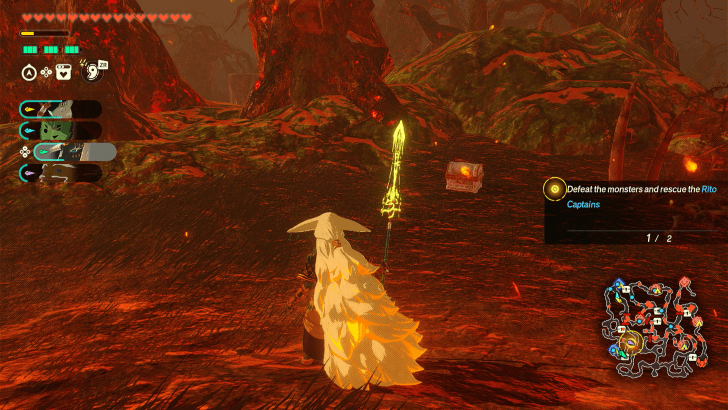
| Found in a sloped nook on the northern part of the map. | ||
 |
 |
|
 |
 |
|
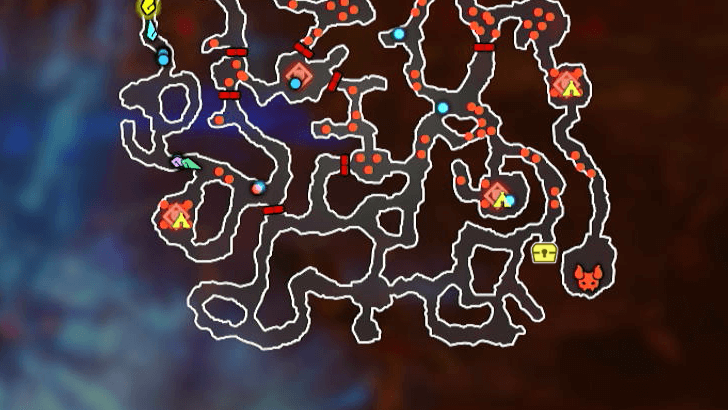
| Found near a gate on the southern part of the map. | ||
 |
 |
|
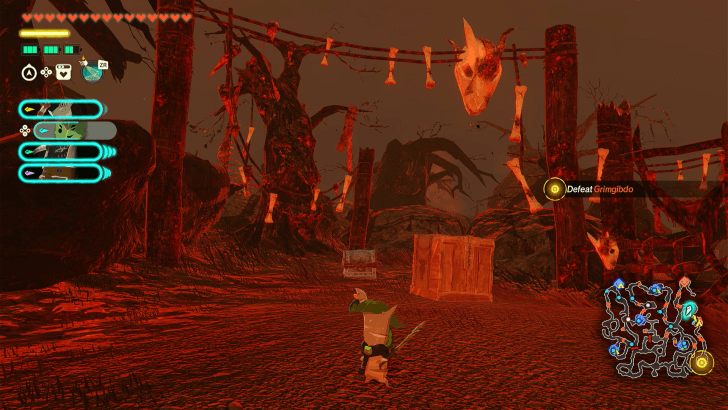
| Found beneath an archway decorated with animal bones north of the eastern campsite. | ||
Fire and Sand Walkthrough
| Recommended Level | 43 |
|---|---|
| Fixed Characters |
・None |
| Other Usable Characters | |
| First Clear Rewards | Battlefield Materials |
Step-by-Step Guide
| 1 | 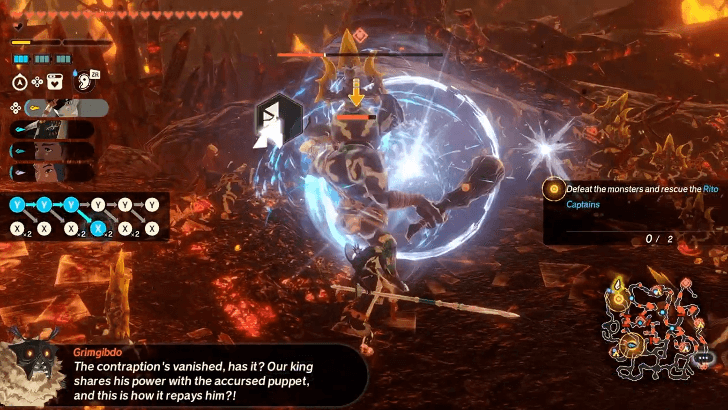 The Battle starts with the party already in two separate ways, so it's only a matter of switching to the other group after capturing the outpost along the active character's path. |
|---|---|
| 2 | 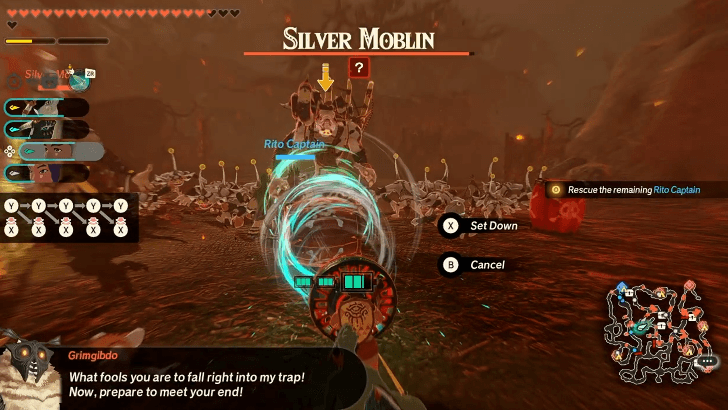 The gates toward the next objective will open soon after capturing the second outpost. Head to the next one where the remaining Rito Captain is and defeat the two Silver Moblins guarding it. Have the Fan Zonai device on one of your quickslots, or a skill that can deflect projectiles, when facing the Silver Moblins as it can be used to hurl their explosives back. |
| 3 | 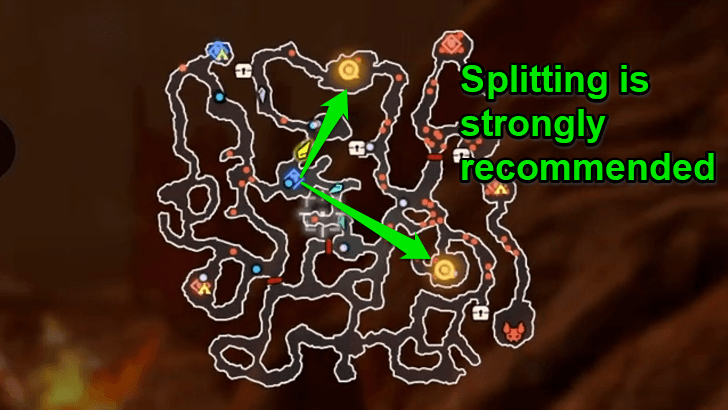 Two more objectives will pop up while you're fighting the Silver Moblins. Immediately send units to both outposts while you're dealing with the Silver Moblins as the outposts are a bit far from the one you're currently in. |
| 4 | 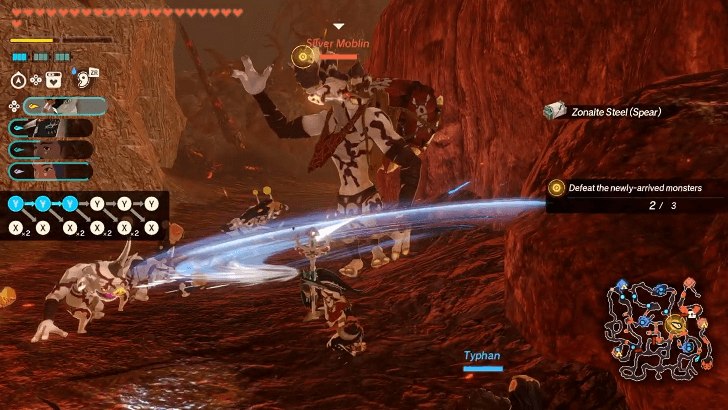 After taking the first outpost with the two Silver Moblins, another objective marker will appear on the map. Clear the two outposts from the previous objective and the new outpost in the middle to proceed. |
| 5 |  The path to the Archfiend is now clear! Head to the area on southeast corner of the map and defeat Grimgibdo. Grimgibdo is weak to wind-based attacks, so Raphica's combos naturally work well against this boss. Shield-breaker actions also help whittle its weak-point gauge quickly. |
| * | 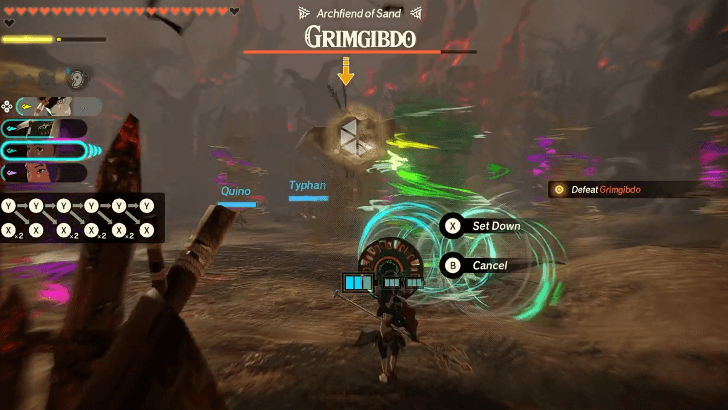 Grimgibdo's whirlwinds can be blown back to it using the Fan Zonai device. Successfully countering this attack staggers Grimgibdo for a while. |
| * | 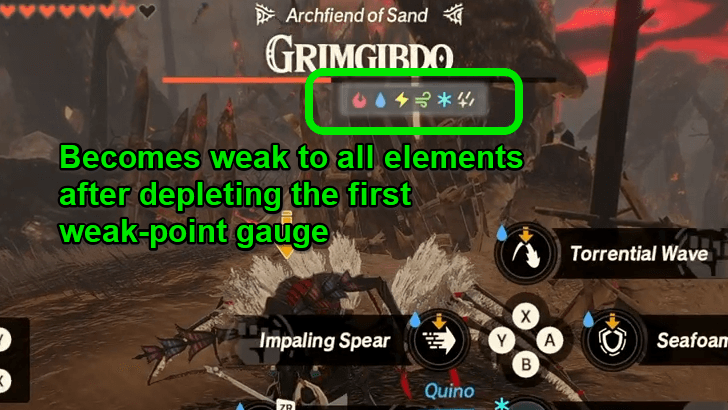 After depleting its first weak-point gauge, Grimgibdo will lose its protection and become weak to all elements. This is the perfect time to use your elemental Special Attacks to shred Grimgibdo's fresh weak-point gauge. |
Previous and Next Battles
| ◀ Previous Mission | Next Mission ▶ |
|---|---|
| Purging the Shadows | Into the Fray |
Hyrule Warriors: Age of Imprisonment Related Guides

Complete Walkthrough and Chapters List
All Battles
| No. | Battle | No. | Battle |
|---|---|---|---|
| 1 | To the Great Plateau | 2 | The Art of the Blade |
| 3 | Where Ancient Wisdom Sleeps | 4 | Raging Sands |
| 5 | The Hands of Evil | 6 | Growing Suspicion |
| 7 | Striking North | 8 | Beneath the Blood Moon |
| 9 | The Howling Tempests | 10 | Shadows in the Snow |
| 11 | Lanayru Defiled | 12 | The Behemoth in the Crater |
| 13 | Crisis on Death Mountain | 14 | Under Cover of Mist |
| 15 | Terror of the Sands | 16 | Crimson Omen |
| 17 | A Time for Action | 18 | The Counterstrike |
| 19 | Ambush in the Depths | 20 | Purging the Shadows |
| 21 | Fire and Sand | 22 | Into the Fray |
| 23 | The Archfiend's Return | 24 | The Battle of Hyrule Castle |
| 25 | The Demon King, Ensnared | 26 | The Battle of Hyrule Field |
| 27 | The Final Confrontation | 28 | A Clash of Constructs |
Comment
Author
Hyrule Warriors: Age of Imprisonment Walkthrough & Guides Wiki
Fire and Sand Korok Seeds, Chests, and Walkthrough
improvement survey
04/2026
improving Game8's site?

Your answers will help us to improve our website.
Note: Please be sure not to enter any kind of personal information into your response.

We hope you continue to make use of Game8.
Rankings
- We could not find the message board you were looking for.
Gaming News
Popular Games

Genshin Impact Walkthrough & Guides Wiki

Crimson Desert Walkthrough & Guides Wiki

Umamusume: Pretty Derby Walkthrough & Guides Wiki

Honkai: Star Rail Walkthrough & Guides Wiki

Monster Hunter Stories 3: Twisted Reflection Walkthrough & Guides Wiki

Wuthering Waves Walkthrough & Guides Wiki

The Seven Deadly Sins: Origin Walkthrough & Guides Wiki

Pokemon TCG Pocket (PTCGP) Strategies & Guides Wiki

Pokemon Pokopia Walkthrough & Guides Wiki

Zenless Zone Zero Walkthrough & Guides Wiki
Recommended Games

Monster Hunter World Walkthrough & Guides Wiki

Fire Emblem Heroes (FEH) Walkthrough & Guides Wiki

Pokemon Brilliant Diamond and Shining Pearl (BDSP) Walkthrough & Guides Wiki

Super Smash Bros. Ultimate Walkthrough & Guides Wiki

Diablo 4: Vessel of Hatred Walkthrough & Guides Wiki

Cyberpunk 2077: Ultimate Edition Walkthrough & Guides Wiki

Yu-Gi-Oh! Master Duel Walkthrough & Guides Wiki

Elden Ring Shadow of the Erdtree Walkthrough & Guides Wiki

The Legend of Zelda: Tears of the Kingdom Walkthrough & Guides Wiki

Persona 3 Reload Walkthrough & Guides Wiki
All rights reserved
© Nintendo © KOEI TECMO GAMES All rights reserved.
The copyrights of videos of games used in our content and other intellectual property rights belong to the provider of the game.
The contents we provide on this site were created personally by members of the Game8 editorial department.
We refuse the right to reuse or repost content taken without our permission such as data or images to other sites.




![Forza Horizon 6 Review [Preview] | Beautiful Roads With a Whole Lot of Oversteer](https://img.game8.co/4460981/a7254c24945c43fbdf6ad9bea52b5ce9.png/thumb)
![Borderlands Mobile Review [Playtest] | The Same Borderlands Made Easy](https://img.game8.co/4465500/aac0c880a39ec5cd46073e49d18f3ed5.png/thumb)


