Where Ancient Wisdom Sleeps Korok Seeds, Chests, and Walkthrough
Where Ancient Wisdom Sleeps is a Chapter 1 Battle in Hyrule Warriors: Age of Imprisonment. Here's a walkthrough for Where Ancient Wisdom Sleeps, including Korok Seed and Chest Locations, and tips on how to complete the Battle!
| ◀ Previous Mission | Next Mission ▶ |
|---|---|
| The Art of the Blade | Raging Sands |
Where Ancient Wisdom Sleeps Korok Seed and Chest Locations
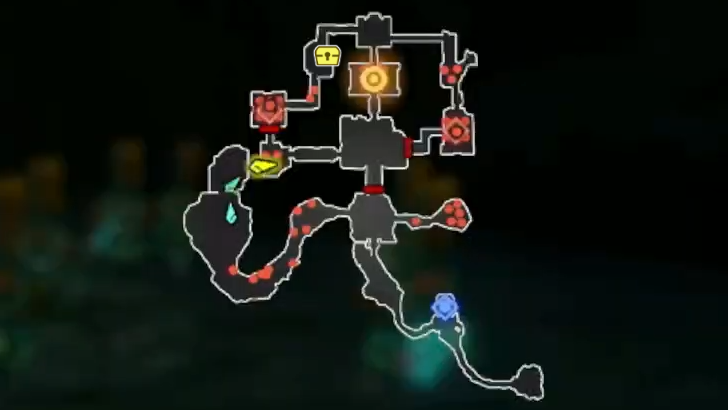
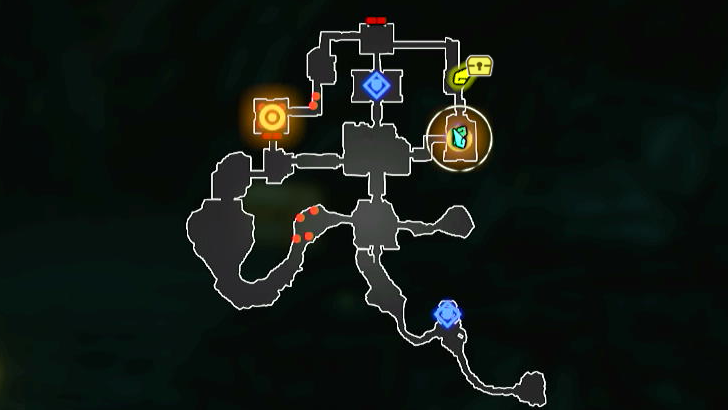
Where Ancient Wisdom Sleeps Full Map
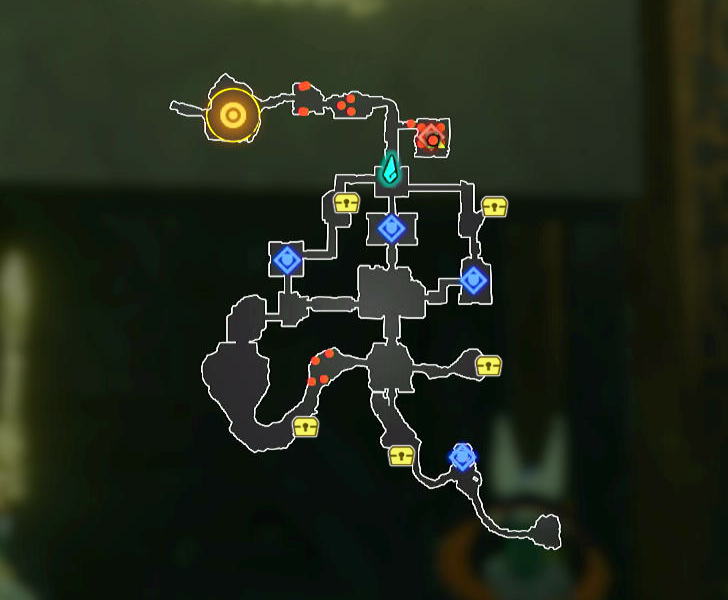
Where Ancient Wisdom Sleeps Korok Seeds
| No Korok Seeds can be found in this mission. |
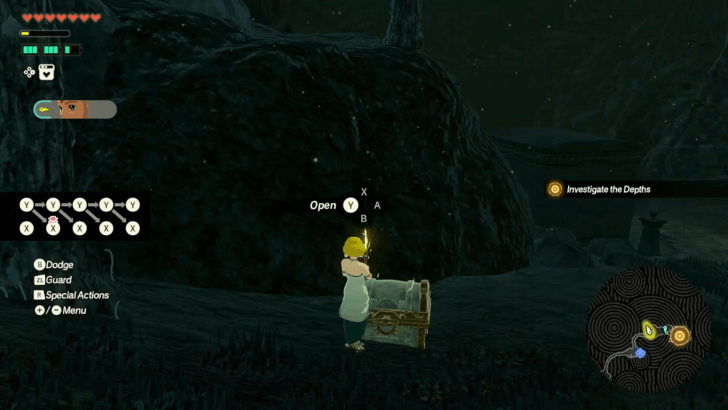
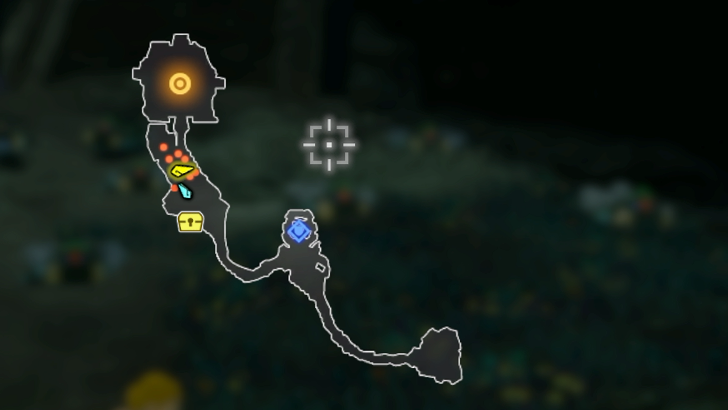
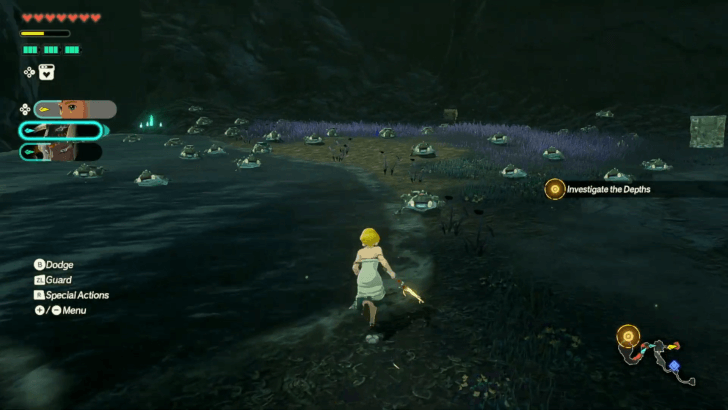
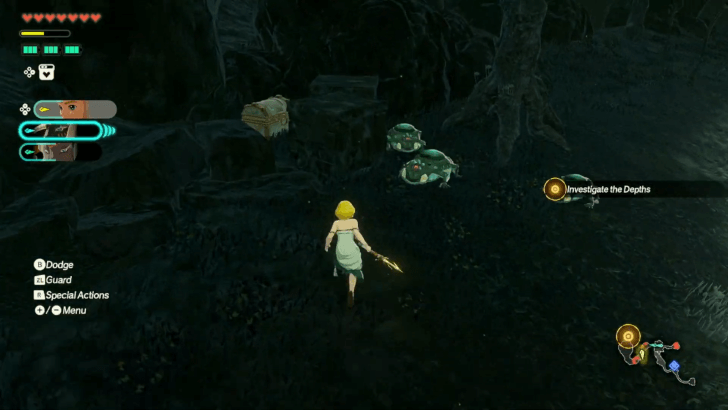
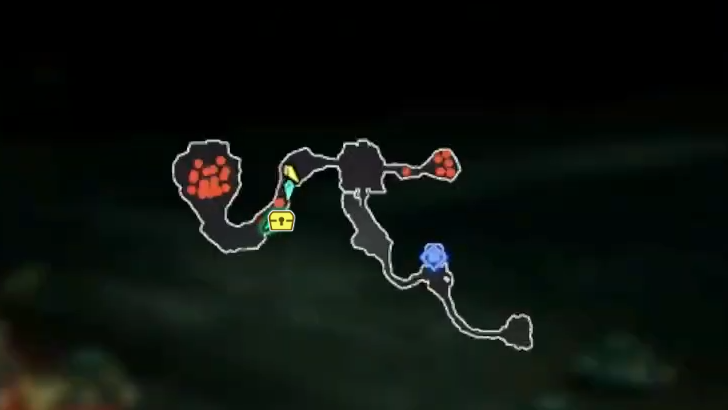
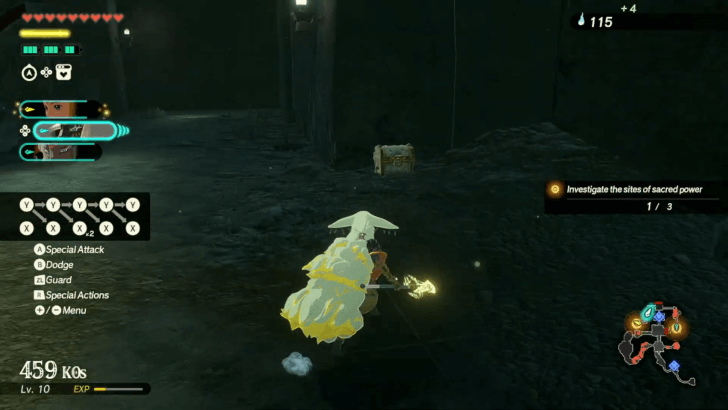
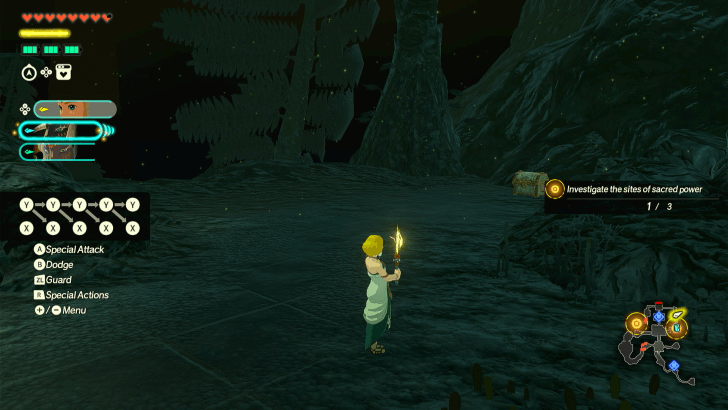
Where Ancient Wisdom Sleeps Treasure Chests
| Overworld View | Map Location | |
|---|---|---|
 |
 |
|
| Found beside a tree west of the allied outpost where you first obtained Zonai devices. | ||
 |
 |
|
 |
 |
|
| Hidden behind some crates. Break the crates to open the treasure chest. | ||
 |
 |
|
 |
 |
|
| Found north of the eastern outpost. | ||
Where Ancient Wisdom Sleeps Walkthrough
| Recommended Level | 2 |
|---|---|
| Fixed Characters | |
| Other Usable Characters |
・None |
| First Clear Rewards | Battlefield Materials |
|
・
・
|
Step-by-Step Guide
| 1 | 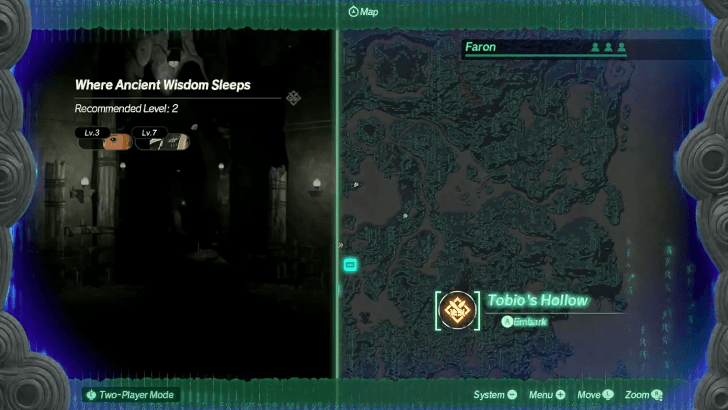 Start the battle through Tobio's Hollow in the Faron Region. |
|---|---|
| 2 | 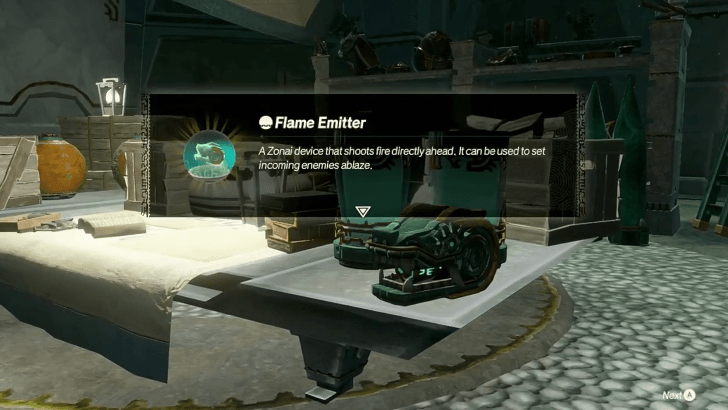 Follow Mineru and Rauru through the hollow until you reach the workshop, where a construct will give you the Flame Emitter Zonai device. |
| 3 | 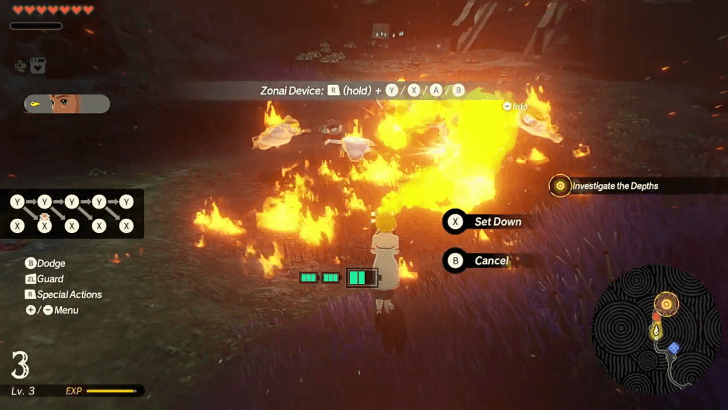 As you continue investigating the ruins, you will run into a group of Little Froxes. This is the perfect opportunity for a Flame Emitter field test! |
| * | Similar to Items and Unique Skills, you can assign Zonai devices by opening the Special Actions menu and assigning them to a face button. You can then use them by holding the R button and pressing the button you assigned them to. |
| 4 | 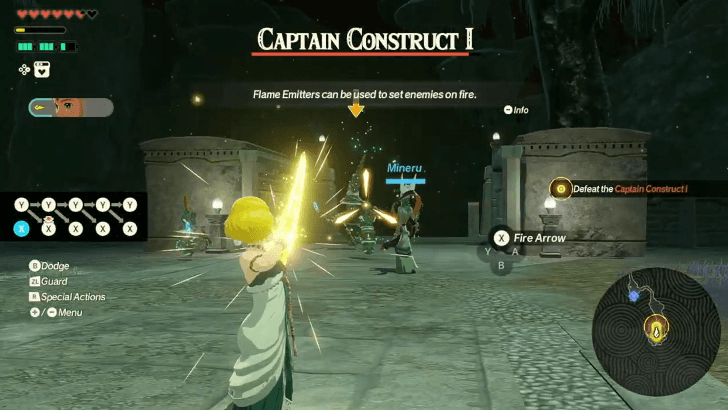 Go up the platform and defeat the Captain Construct I. This enemy uses Charge attacks, so have your Piercing Light ready. |
| 5 | 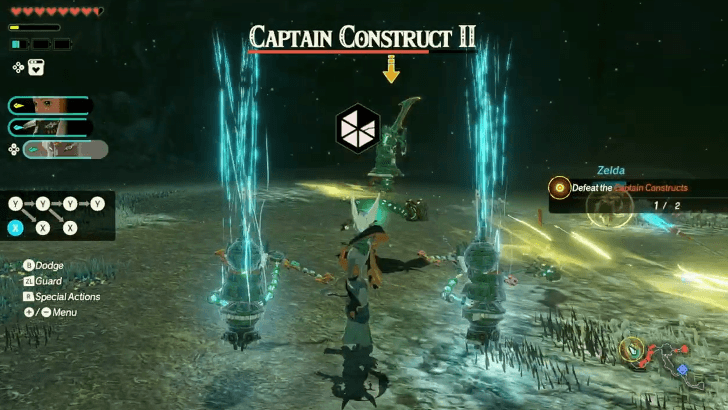 Mineru is now playable! You can explore her moveset in the next fight against the two Captain Construct II further into the hollow. However, her attacks are better suited for one-on-one battles against powerful enemies, so you might want to clear the horde of Little Froxes first with Rauru. |
| 6 | 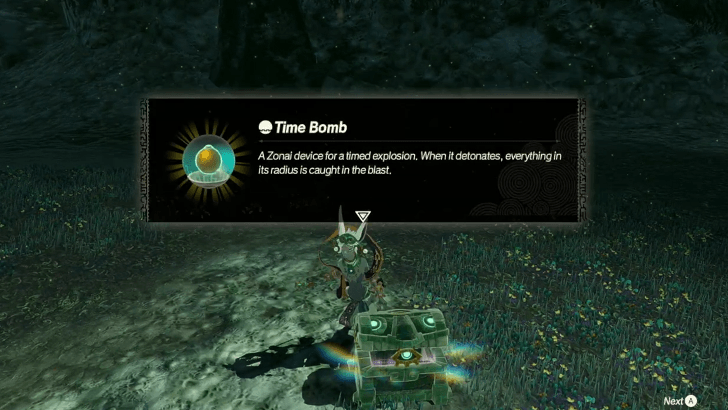 Open the chest that the last Captain Construct drops to obtain the Time Bomb Zonai device. This is a surprise device that will help you later. When you're ready, approach the large stone door ahead. |
| 7 |  Defeat the Frox. One unique way to stagger this boss is to throw a Time Bomb at its mouth when it starts inhaling to deal decent damage and expose its weak-point. Successfully countering its dangerous attacks also allows you to hop on its back and attack the ore deposits to deal more damage. |
| 8 |  Go to the northwest corner of the map for the next objective to find more ruins and reveal the other half of this stage's full map. Once you reach the center, you'll face a Stone Talus. |
| 9 | 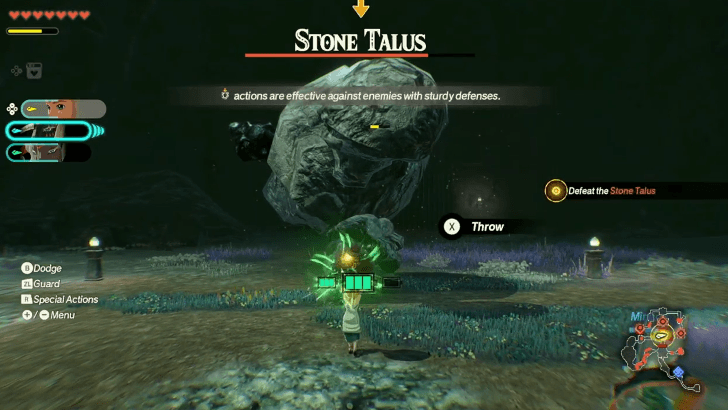 The Stone Talus has a fortified weak-point gauge that is more difficult to deplete than regular ones. Use more of those Time Bombs on all three characters to quickly break through its defenses and execute a Weak-Point Smash. |
| 10 | 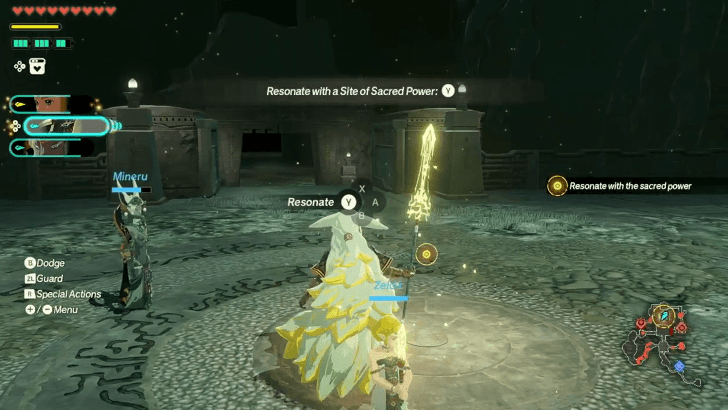 Move to the next room and defeat the Captain Construct III. After the battle, approach the center of the platform and resonate with it to open the path ahead. |
| 11 | 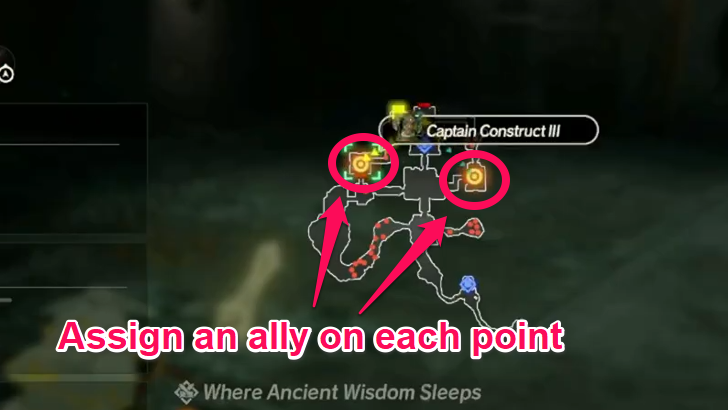 You'll need to resonate with two more emblems to proceed, but they are located on the opposite sides of the ruins. To save time, you can order your allies to move to a specific point of the map, then switch to them once they arrive to complete the objectives yourself. |
| * | In the Allies menu, you can select an ally and order them to move to a specific point in the map. They will start moving to that area immediately after closing the menu. These allies will ignore enemies along the way and will not stop moving until they reach their destination. Not to worry, as they also won't be attacked until you switch to them. |
| 12 | 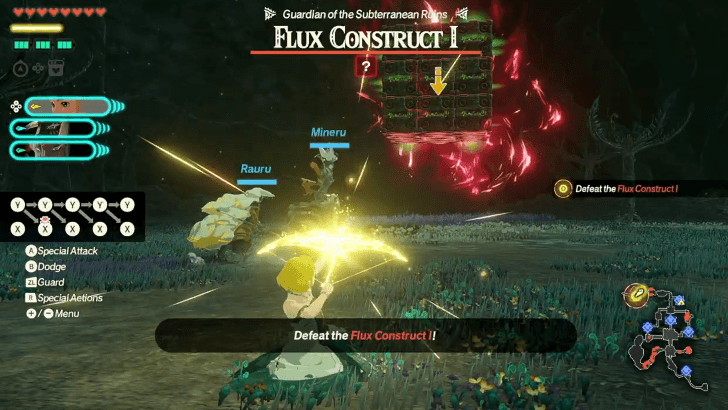 The group will rendezvous back at the newly unlocked door after resonating with the other two emblems. Press onward and reach the next objective marker at the end of this path to enter a fight against a Flux Construct I. Defeat the boss to complete the mission. |
| * | This boss fight has two phases where it uses mostly the same attacks but with different counters to its dangerous attacks. When it uses its dangerous attack during the first phase, counter it with an air attack while the Flux Construct I is in midair to interrupt it. But in the second phase, wait for it to land then use a charge attack as it rolls forward. |
Previous and Next Battles
| ◀ Previous Mission | Next Mission ▶ |
|---|---|
| The Art of the Blade | Raging Sands |
Hyrule Warriors: Age of Imprisonment Related Guides

Complete Walkthrough and Chapters List
All Battles
| No. | Battle | No. | Battle |
|---|---|---|---|
| 1 | To the Great Plateau | 2 | The Art of the Blade |
| 3 | Where Ancient Wisdom Sleeps | 4 | Raging Sands |
| 5 | The Hands of Evil | 6 | Growing Suspicion |
| 7 | Striking North | 8 | Beneath the Blood Moon |
| 9 | The Howling Tempests | 10 | Shadows in the Snow |
| 11 | Lanayru Defiled | 12 | The Behemoth in the Crater |
| 13 | Crisis on Death Mountain | 14 | Under Cover of Mist |
| 15 | Terror of the Sands | 16 | Crimson Omen |
| 17 | A Time for Action | 18 | The Counterstrike |
| 19 | Ambush in the Depths | 20 | Purging the Shadows |
| 21 | Fire and Sand | 22 | Into the Fray |
| 23 | The Archfiend's Return | 24 | The Battle of Hyrule Castle |
| 25 | The Demon King, Ensnared | 26 | The Battle of Hyrule Field |
| 27 | The Final Confrontation | 28 | A Clash of Constructs |
Comment
Author
Hyrule Warriors: Age of Imprisonment Walkthrough & Guides Wiki
Where Ancient Wisdom Sleeps Korok Seeds, Chests, and Walkthrough
improvement survey
04/2026
improving Game8's site?

Your answers will help us to improve our website.
Note: Please be sure not to enter any kind of personal information into your response.

We hope you continue to make use of Game8.
Rankings
- We could not find the message board you were looking for.
Gaming News
Popular Games

Genshin Impact Walkthrough & Guides Wiki

Crimson Desert Walkthrough & Guides Wiki

Umamusume: Pretty Derby Walkthrough & Guides Wiki

Honkai: Star Rail Walkthrough & Guides Wiki

Monster Hunter Stories 3: Twisted Reflection Walkthrough & Guides Wiki

Wuthering Waves Walkthrough & Guides Wiki

The Seven Deadly Sins: Origin Walkthrough & Guides Wiki

Pokemon TCG Pocket (PTCGP) Strategies & Guides Wiki

Pokemon Pokopia Walkthrough & Guides Wiki

Zenless Zone Zero Walkthrough & Guides Wiki
Recommended Games

Monster Hunter World Walkthrough & Guides Wiki

Fire Emblem Heroes (FEH) Walkthrough & Guides Wiki

Pokemon Brilliant Diamond and Shining Pearl (BDSP) Walkthrough & Guides Wiki

Super Smash Bros. Ultimate Walkthrough & Guides Wiki

Diablo 4: Vessel of Hatred Walkthrough & Guides Wiki

Cyberpunk 2077: Ultimate Edition Walkthrough & Guides Wiki

Yu-Gi-Oh! Master Duel Walkthrough & Guides Wiki

Elden Ring Shadow of the Erdtree Walkthrough & Guides Wiki

The Legend of Zelda: Tears of the Kingdom Walkthrough & Guides Wiki

Persona 3 Reload Walkthrough & Guides Wiki
All rights reserved
© Nintendo © KOEI TECMO GAMES All rights reserved.
The copyrights of videos of games used in our content and other intellectual property rights belong to the provider of the game.
The contents we provide on this site were created personally by members of the Game8 editorial department.
We refuse the right to reuse or repost content taken without our permission such as data or images to other sites.




![Forza Horizon 6 Review [Preview] | Beautiful Roads With a Whole Lot of Oversteer](https://img.game8.co/4460981/a7254c24945c43fbdf6ad9bea52b5ce9.png/thumb)
![Borderlands Mobile Review [Playtest] | The Same Borderlands Made Easy](https://img.game8.co/4465500/aac0c880a39ec5cd46073e49d18f3ed5.png/thumb)


