This survey will take about 1 minute.
Your answers will help us to improve our website.
Hyrule Warriors: Age of Imprisonment
Crisis on Death Mountain Korok Seeds, Chests, and Walkthrough
Crisis on Death Mountain is a Chapter 3 Battle in Hyrule Warriors: Age of Imprisonment. Here's a walkthrough for Crisis on Death Mountain, including Korok Seed and Chest Locations, and tips on how to complete the Battle!
| ◀ Previous Mission | Next Mission ▶ |
|---|---|
| The Behemoth in the Crater | Under Cover of Mist |
Crisis on Death Mountain Korok Seed and Chest Locations
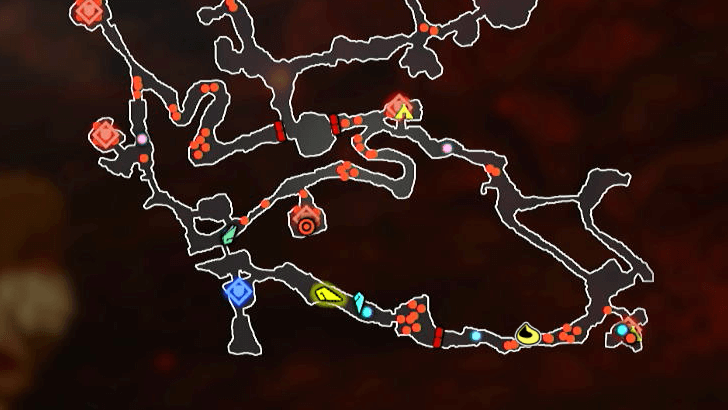
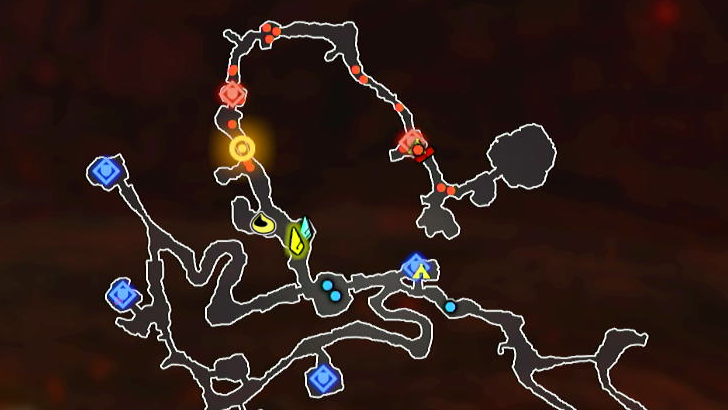
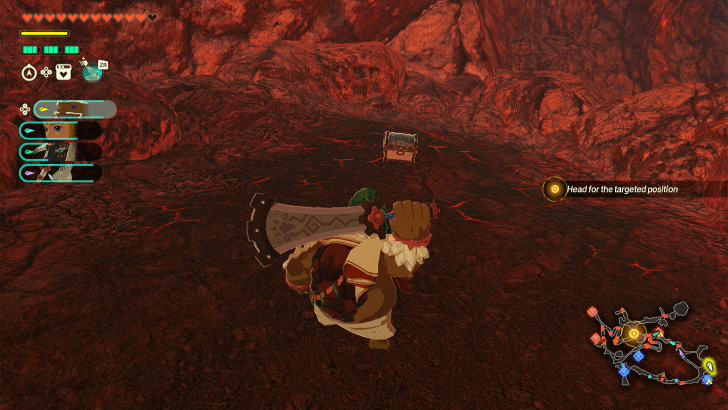
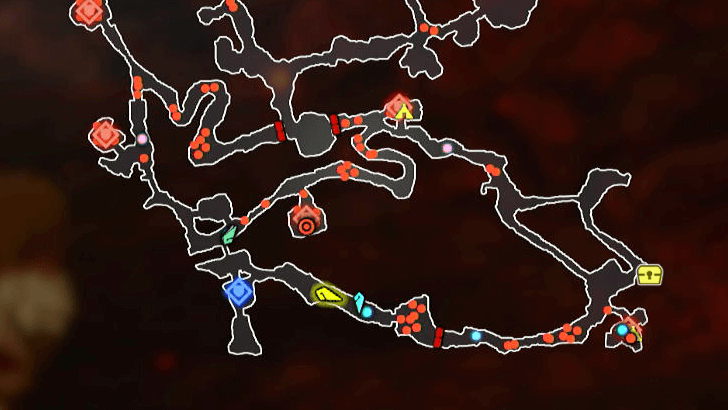
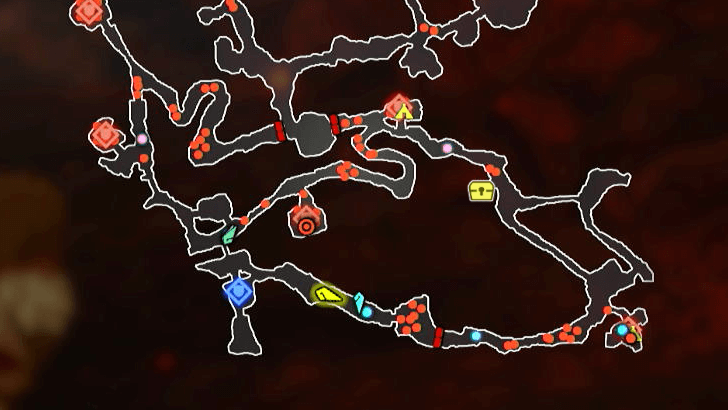
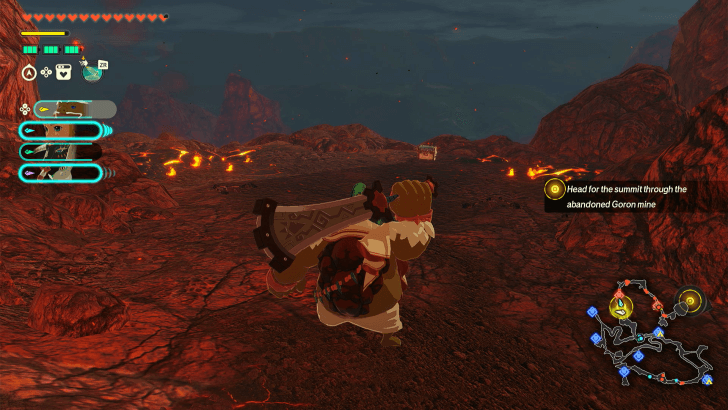
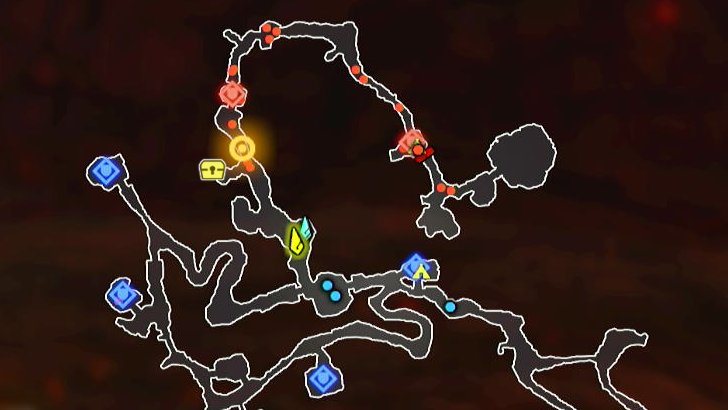
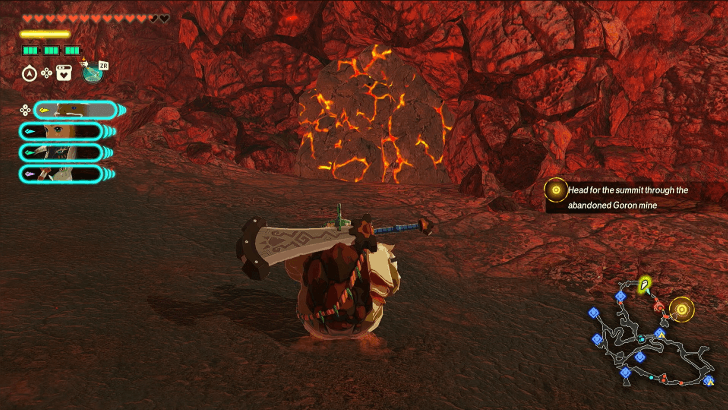
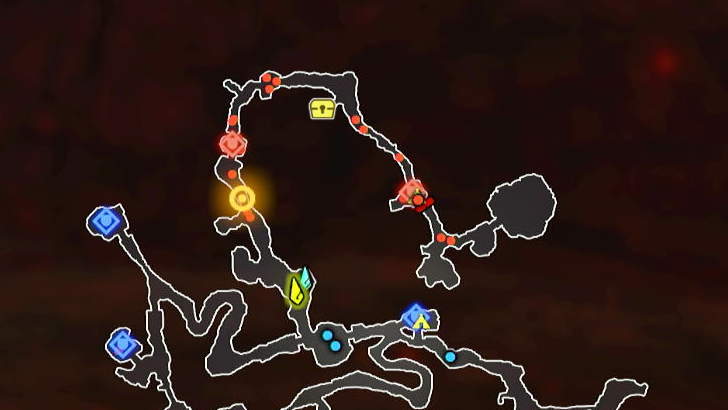
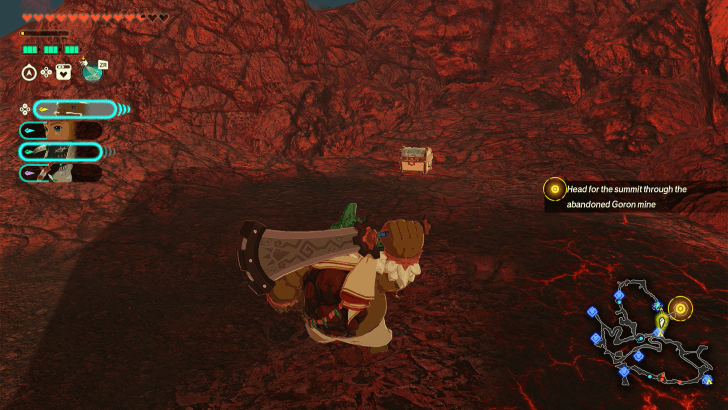
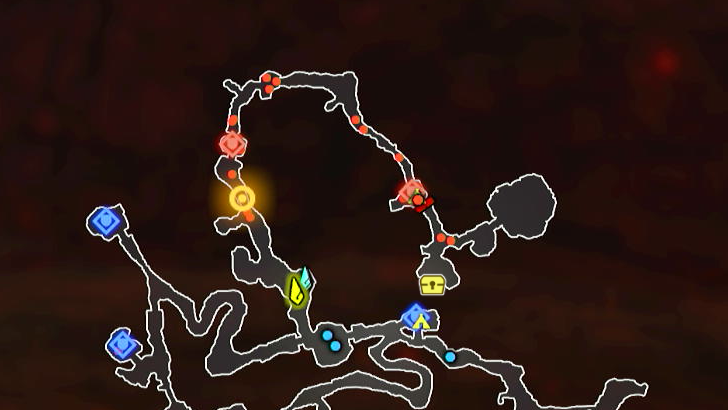
Crisis on Death Mountain Full Map

Crisis on Death Mountain Korok Seeds
| Overworld View | Map Location | |
|---|---|---|
 |
 |
|
 |
 |
|
 |
 |
|
 |
 |
|
 |
 |
|
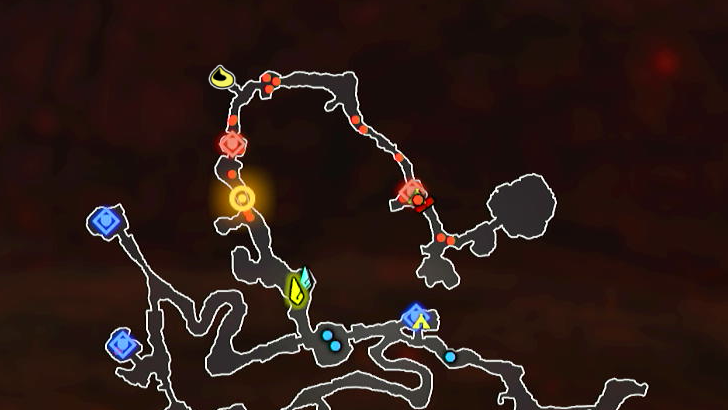
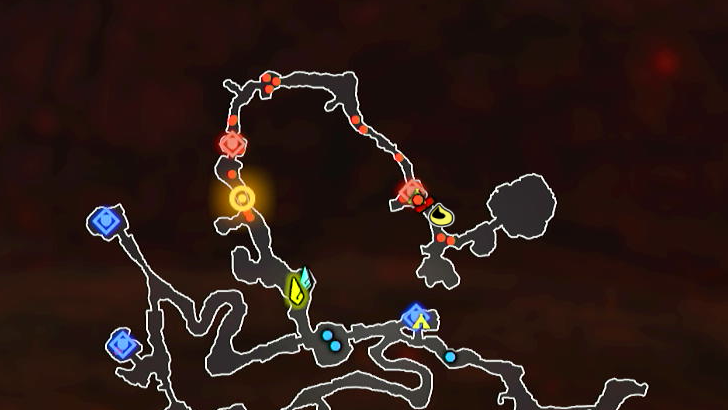
Crisis on Death Mountain Treasure Chests
| Overworld View | Map Location | |
|---|---|---|
 |
 |
|
| Sitting by itself near a gate on the eastern side of the map. | ||
 |
 |
|
| Hidden behind a rock formation. A small pathway leading to it is heralded by two stalagmite formations that look like pincers rising from the ground. | ||
 |
 |
|
| As you go downhill from the hot springs, make a left into a clearing before going through a gate to find a treasure chest. | ||
 |
 |
|
| Break the lava rocks blocking a hole on the side of the mountain. The treasure chest can be found in the inside nook. | ||
 |
 |
|
| Found in an open space next to the end of the lava-blocked road. | ||
Crisis on Death Mountain Walkthrough
| Recommended Level | 24 |
|---|---|
| Fixed Characters |
・None |
| Other Usable Characters | |
| First Clear Rewards | Battlefield Materials |
|
・
|
Step-by-Step Guide
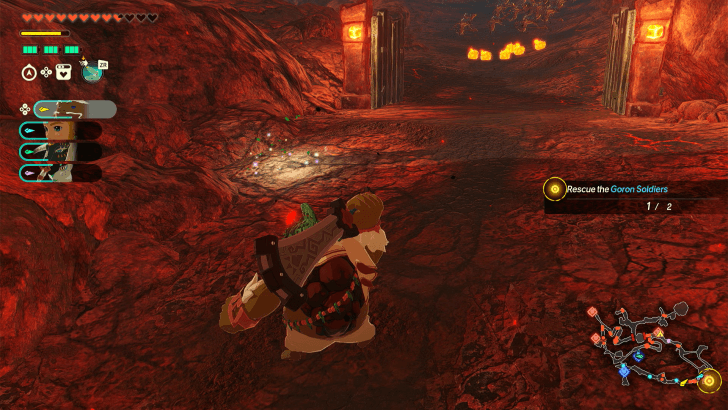
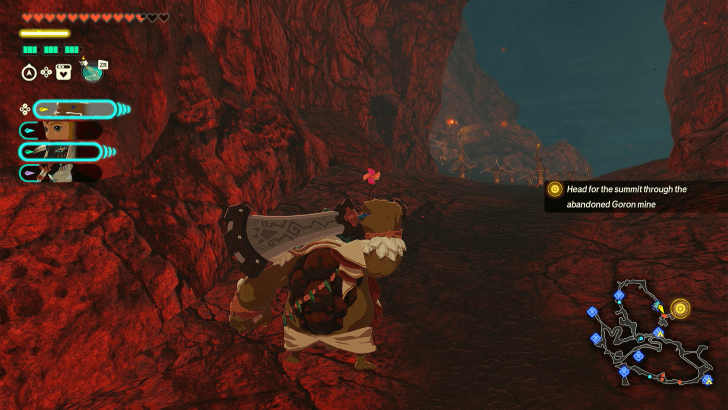
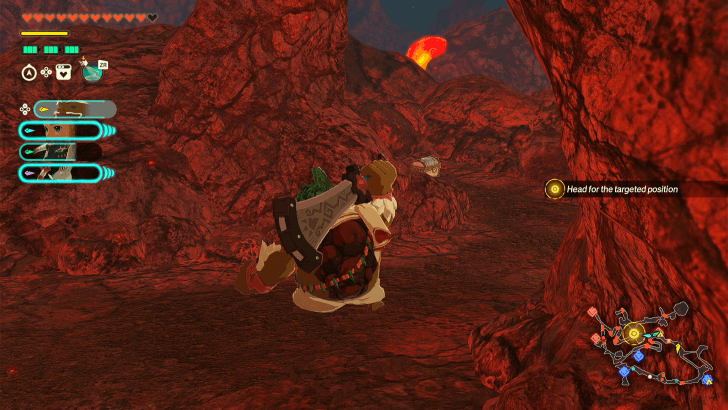
| 1 | 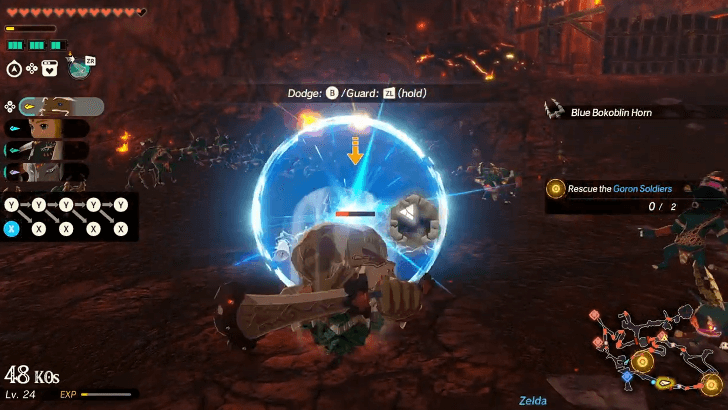 You'll unlock Agraston, whose attacks have an innate shield-breaker effect and can deal fire damage with strong attacks and abilities, right at the start of the battle. For your first objective, head to the southeast corner of the map to rescue the first group of Goron Soldiers. The path to the outpost is blocked by a wall of rocks, which Agraston can easily break. |
|---|---|
| * |  The Fire Moblin (and any enemy shrouded in flame) is weak to water and ice attacks. The ice weakness can be further exploited by using ice attacks until it's frozen and striking it by a strong attack to deal heavy damage. |
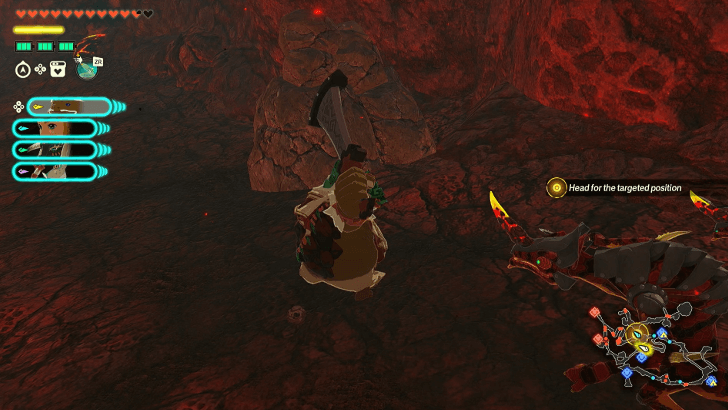
| 2 | 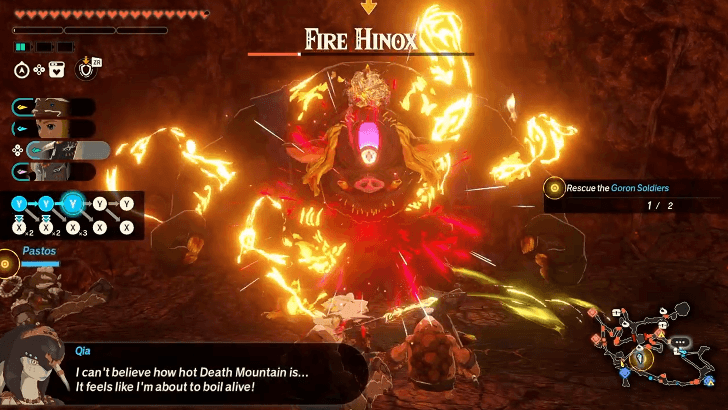 Move to the next marked outpost on the west side of the map and defeat the Fire Hinox guarding it. |
| 3 | 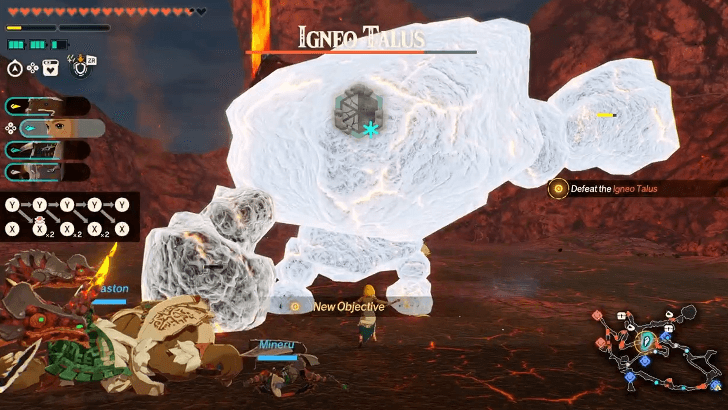 Head to the next objective just north of the last outpost and defeat the Igneo Talus. Use ice and shield-breaker attacks to quickly deplete its weak-point gauge. |
| 4 | 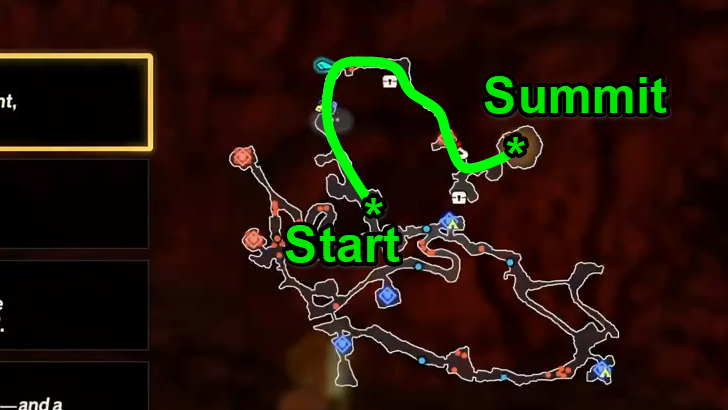 After defeating the Igneo Talus and reaching the next marked area, you'll find out that the shortest route to the summit is blocked by lava flow. This will prompt the group to loop around the map using the northern path to reach the summit on the east side. |
| 5 | 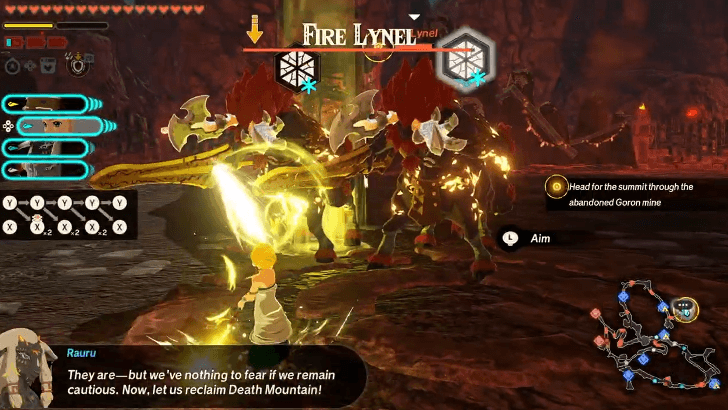 Defeat the two Fire Lynels inside the outpost. A good way to start the fight is to run to either side of the Fire Lynels and place a Frost Emitter that will hit both of them at once. Since they're weak to ice attacks, this staggers them and gives you the chance to shred their weak-points for a moment. |
Previous and Next Battles
| ◀ Previous Mission | Next Mission ▶ |
|---|---|
| The Behemoth in the Crater | Under Cover of Mist |
Hyrule Warriors: Age of Imprisonment Related Guides

Complete Walkthrough and Chapters List
All Battles
| No. | Battle | No. | Battle |
|---|---|---|---|
| 1 | To the Great Plateau | 2 | The Art of the Blade |
| 3 | Where Ancient Wisdom Sleeps | 4 | Raging Sands |
| 5 | The Hands of Evil | 6 | Growing Suspicion |
| 7 | Striking North | 8 | Beneath the Blood Moon |
| 9 | The Howling Tempests | 10 | Shadows in the Snow |
| 11 | Lanayru Defiled | 12 | The Behemoth in the Crater |
| 13 | Crisis on Death Mountain | 14 | Under Cover of Mist |
| 15 | Terror of the Sands | 16 | Crimson Omen |
| 17 | A Time for Action | 18 | The Counterstrike |
| 19 | Ambush in the Depths | 20 | Purging the Shadows |
| 21 | Fire and Sand | 22 | Into the Fray |
| 23 | The Archfiend's Return | 24 | The Battle of Hyrule Castle |
| 25 | The Demon King, Ensnared | 26 | The Battle of Hyrule Field |
| 27 | The Final Confrontation | 28 | A Clash of Constructs |
Comment
Author
Hyrule Warriors: Age of Imprisonment Walkthrough & Guides Wiki
Crisis on Death Mountain Korok Seeds, Chests, and Walkthrough
Please participate in our site
improvement survey
04/2026
improvement survey
04/2026
Would you assist in
improving Game8's site?
improving Game8's site?

×
We are listening to our users' valuable opinions and discussing how to act on them.
The information collected through this survey will be used for the purpose of improving our services. In addition, the information will only be disclosed a part of a statistic in a format that will not allow identification of personal information.
Begin Survey
Not Now
×
Please rate each item regarding Game8.co's Advertisements.
Amount of Ads
Very Dissatisfied
Somewhat Dissatisfied
Fine
Somewhat Satisfied
Highly Satisfied
Placement of Ads
Timing of Ad Display
Ad Loading Speed
Safeness of Ads
Content of Ads
×
Please rate each item regarding Game8.co's Quality of Articles.
Amount of information
Very Dissatisfied
Somewhat Dissatisfied
Fine
Somewhat Satisfied
Highly Satisfied
Frequency of updates
Speed of new information
Accuracy of articles
Understandibility of articles
Readability of sentences
×
Please rate each item regarding Game8.co's Usability of the Site.
Ease of finding information
Very Dissatisfied
Somewhat Dissatisfied
Fine
Somewhat Satisfied
Highly Satisfied
Loading Speed
Use of Color
Font Size
Visibility of Images
Easy to Understand Layout
×
Please rate each item regarding Game8.co's Message Boards, Comments.
Ease of Writing
Very Dissatisfied
Somewhat Dissatisfied
Fine
Somewhat Satisfied
Highly Satisfied
Readability
Ease in Finding Information
Comment Quality
Comment Quantity
Admin Response
×
Please rate each item regarding Game8.co's Site's new design.
Please rate our site's new design
Very Dissatisfied
Somewhat Dissatisfied
Fine
Somewhat Satisfied
Highly Satisfied
Do you think that the website's design change makes the site easier to use?
Has the new design made it easier for you to find information on the site?
Has the new design improved the overall visual appeal of the site?
How would you rate your overall satisfaction with the new design of the site?
×
How likely are you to recommend Game8 to someone you know?
Very Unlikely
0
1
2
3
4
5
6
7
8
9
10
Very Likely
If you have other opinions regarding potential improvement to the website, please share them with us. We would appreciate your honest opinion.
Note: This is a free response section, so you can proceed without entering anything.
Note: Please be sure not to enter any kind of personal information into your response.
Note: Please be sure not to enter any kind of personal information into your response.
×
Thank You
×
Thank you for participating in our survey! Your answers will help us to improve the quality of our website and services.
We hope you continue to make use of Game8.
We hope you continue to make use of Game8.
Close
Rankings
- We could not find the message board you were looking for.
Gaming News

![Forza Horizon 6 Review [Preview] | Beautiful Roads With a Whole Lot of Oversteer](https://img.game8.co/4460981/a7254c24945c43fbdf6ad9bea52b5ce9.png/show)

![Forza Horizon 6 Review [Preview] | Beautiful Roads With a Whole Lot of Oversteer](https://img.game8.co/4460981/a7254c24945c43fbdf6ad9bea52b5ce9.png/thumb)
![Borderlands Mobile Review [Playtest] | The Same Borderlands Made Easy](https://img.game8.co/4465500/aac0c880a39ec5cd46073e49d18f3ed5.png/thumb)
Popular Games

Genshin Impact Walkthrough & Guides Wiki
Crimson Desert Walkthrough & Guides Wiki
Umamusume: Pretty Derby Walkthrough & Guides Wiki
Honkai: Star Rail Walkthrough & Guides Wiki
Monster Hunter Stories 3: Twisted Reflection Walkthrough & Guides Wiki
Wuthering Waves Walkthrough & Guides Wiki
The Seven Deadly Sins: Origin Walkthrough & Guides Wiki
Pokemon TCG Pocket (PTCGP) Strategies & Guides Wiki
Pokemon Pokopia Walkthrough & Guides Wiki
Zenless Zone Zero Walkthrough & Guides Wiki


Recommended Games
Monster Hunter World Walkthrough & Guides Wiki
Fire Emblem Heroes (FEH) Walkthrough & Guides Wiki
Pokemon Brilliant Diamond and Shining Pearl (BDSP) Walkthrough & Guides Wiki
Super Smash Bros. Ultimate Walkthrough & Guides Wiki
Diablo 4: Vessel of Hatred Walkthrough & Guides Wiki
Cyberpunk 2077: Ultimate Edition Walkthrough & Guides Wiki
Yu-Gi-Oh! Master Duel Walkthrough & Guides Wiki
Elden Ring Shadow of the Erdtree Walkthrough & Guides Wiki
The Legend of Zelda: Tears of the Kingdom Walkthrough & Guides Wiki
Persona 3 Reload Walkthrough & Guides Wiki


All rights reserved
© Nintendo © KOEI TECMO GAMES All rights reserved.
The copyrights of videos of games used in our content and other intellectual property rights belong to the provider of the game.
The contents we provide on this site were created personally by members of the Game8 editorial department.
We refuse the right to reuse or repost content taken without our permission such as data or images to other sites.