The Demon King, Ensnared Korok Seeds, Chests, and Walkthrough
The Demon King, Ensnared is a Chapter 5 Battle in Hyrule Warriors: Age of Imprisonment. Here's a walkthrough for The Demon King, Ensnared, including Korok Seed and Chest Locations, and tips on how to complete the Battle!
| ◀ Previous Mission | Next Mission ▶ |
|---|---|
| The Battle of Hyrule Castle | The Battle of Hyrule Field |
The Demon King, Ensnared Korok Seed and Chest Locations
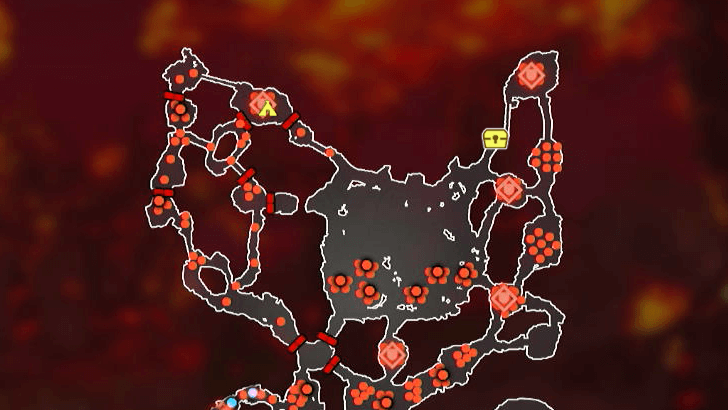
The Demon King, Ensnared Full Map
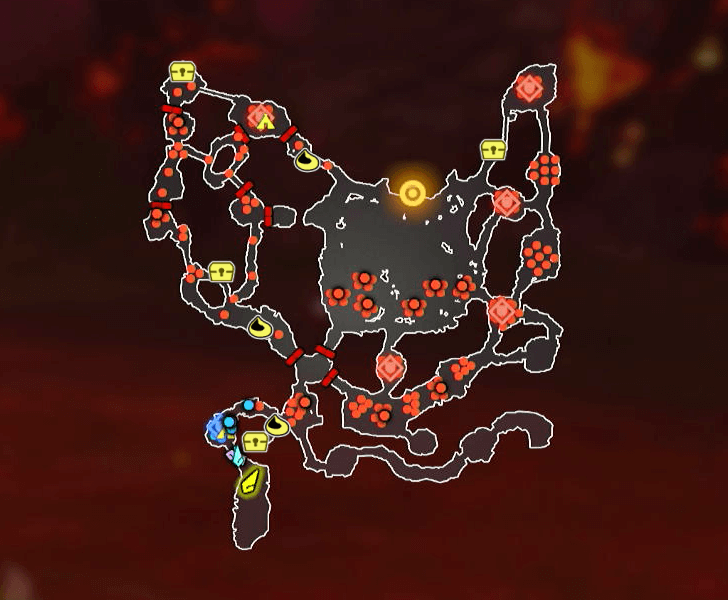
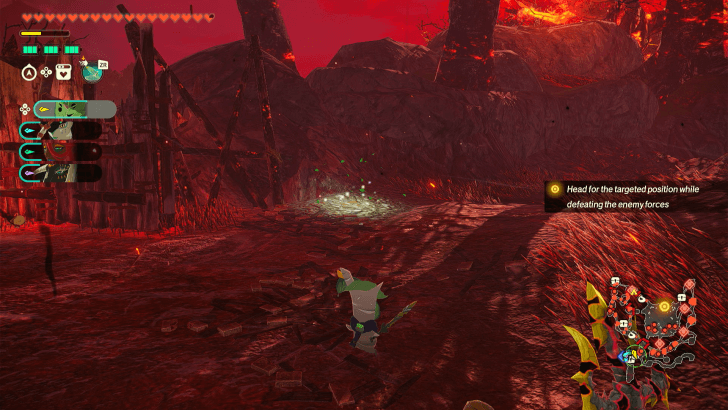
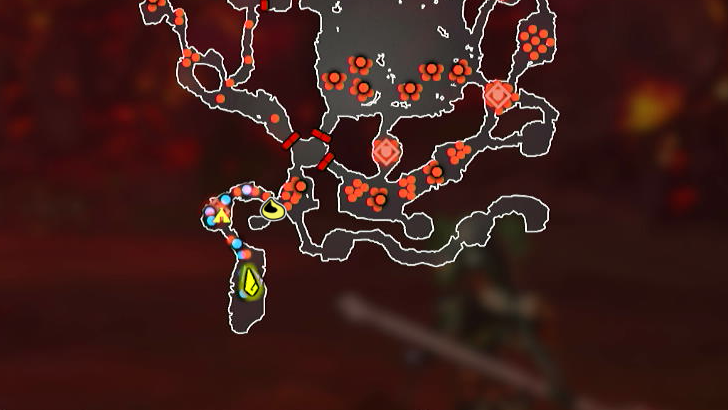
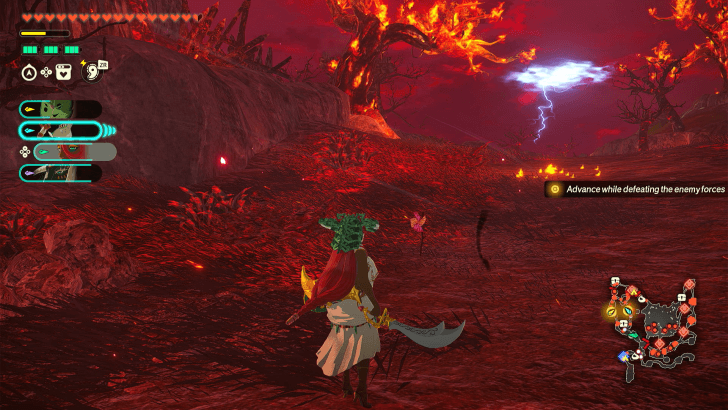
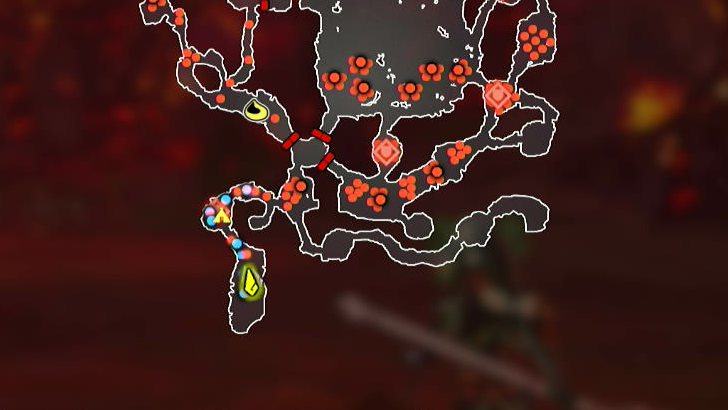
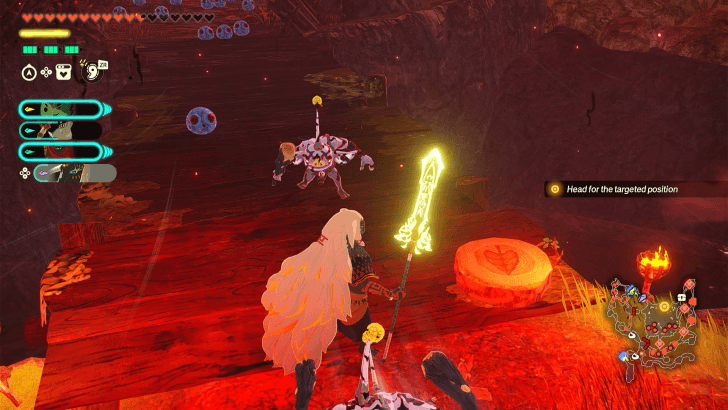
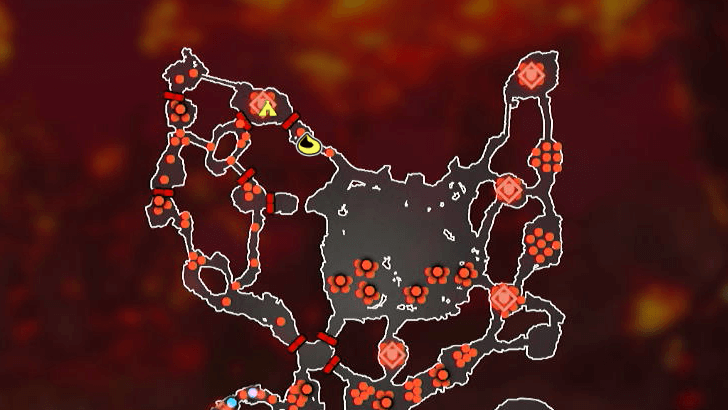
The Demon King, Ensnared Korok Seeds
| Overworld View | Map Location | |
|---|---|---|
 |
 |
|
 |
 |
|
 |
 |
|
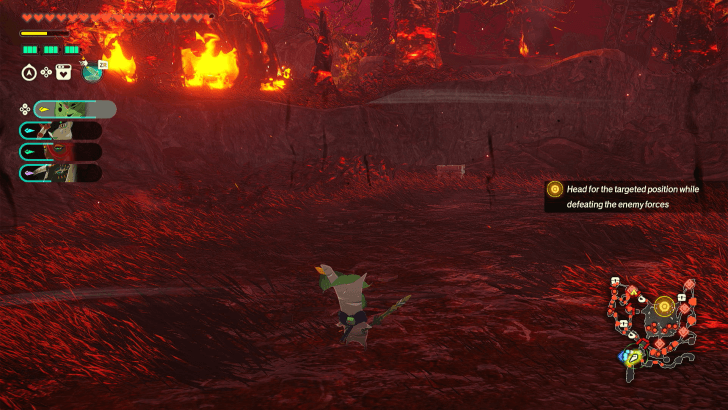
The Demon King, Ensnared Treasure Chests
| Overworld View | Map Location | |
|---|---|---|
 |
 |
|
 |
 |
|
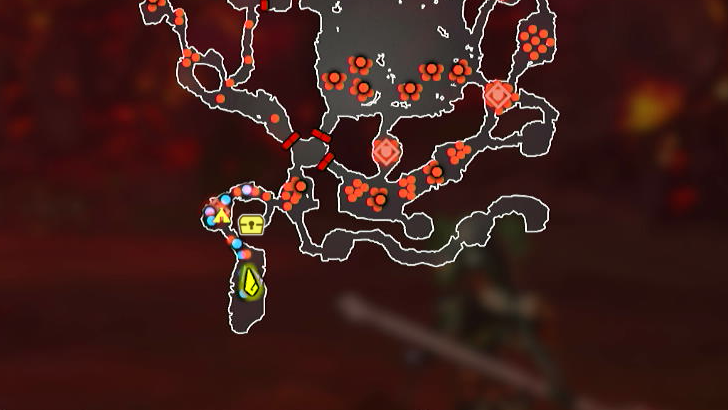
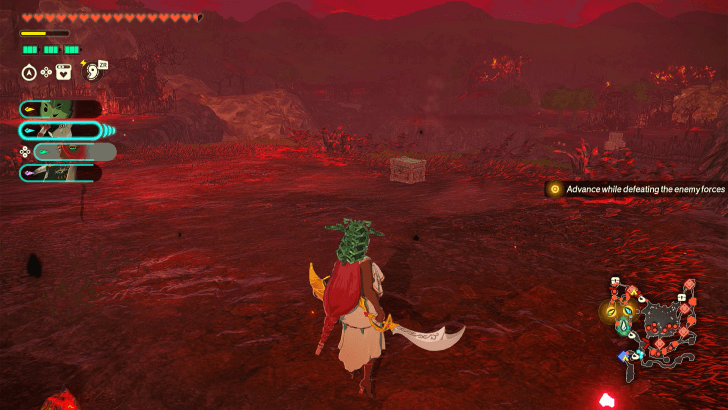
| When the Black Bokoblin-filled path after defeating the first Silver Lynel forks into three roads, take the middle road to find the treasure chest. | ||
 |
 |
|
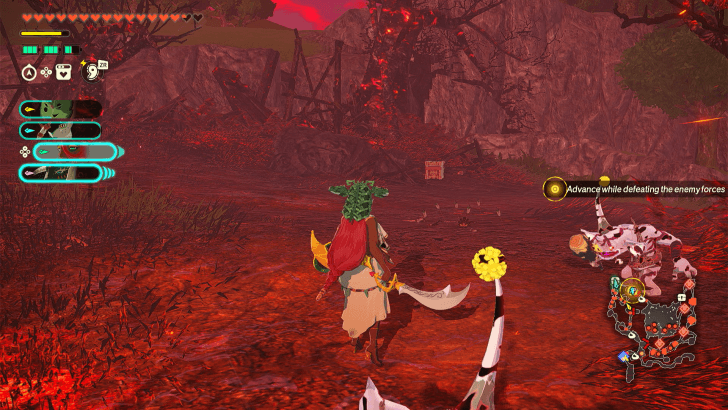
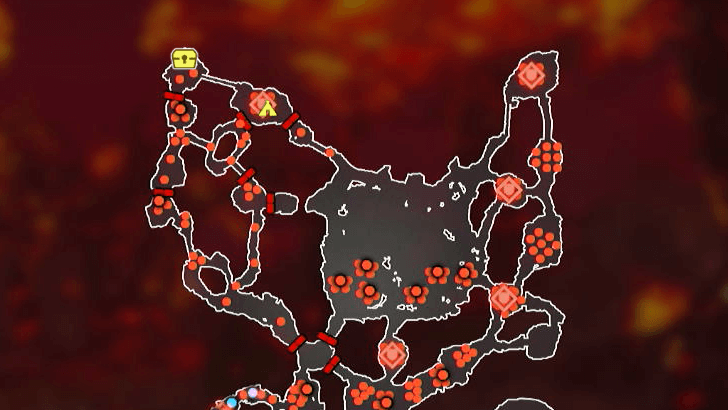
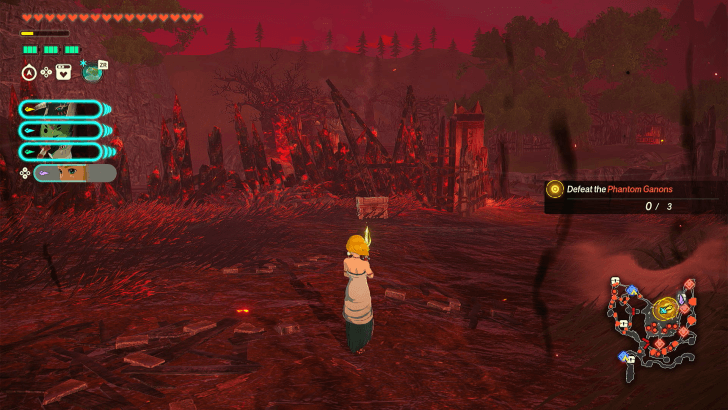
| Near the base of a large, burnt tree on the upper right corner of the map. Silver Bokoblins can be found in this area. | ||
 |
 |
|
| After the Phantom Ganons appear, continue to the eastern side of the map. This chest can be found along the northeastern path. | ||
The Demon King, Ensnared Walkthrough
| Recommended Level | 54 |
|---|---|
| Fixed Characters |
・None |
| Other Usable Characters | |
| First Clear Rewards | Battlefield Materials |
Step-by-Step Guide
| 1 | 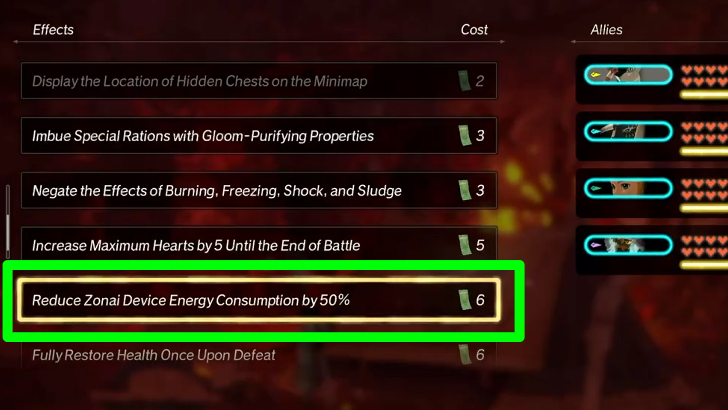 Capture the first outpost to the north so you can set up a Camp. We recommend getting the Reduce Zonai Device Energy Consumption effect from the Bonus Exchange shop especially if you brought the Mysterious Construct and/or Mineru as it also affects the Zonai devices they use with their strong attacks. |
|---|---|
| 2 | 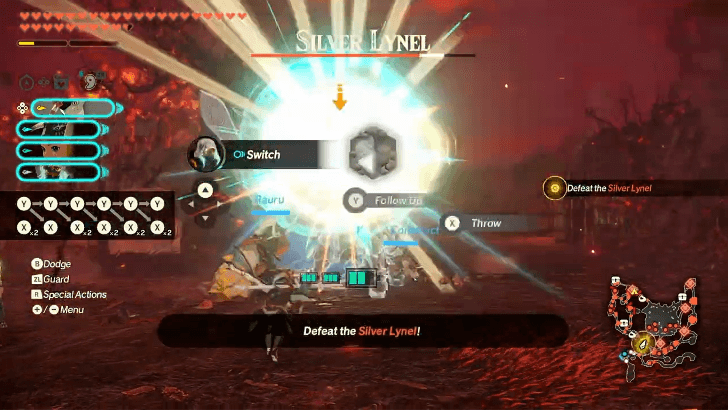 Move further to the north until you reach the enclosed area. You'll have to beat the armored Silver Lynel here to open the gate leading to the west path. |
| 3 | 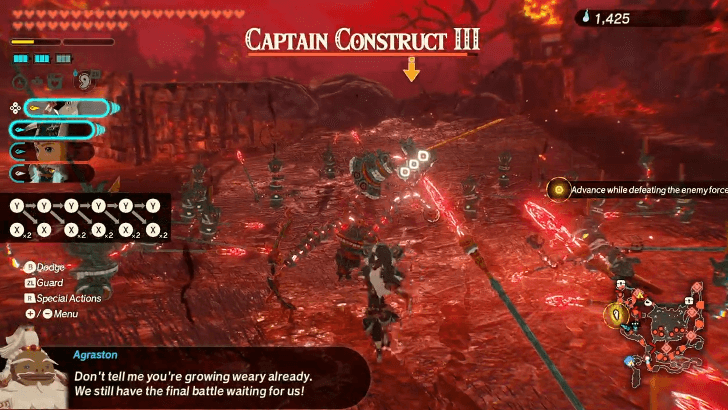 Defeat the marked Captain Construct III on the northwest corner of the map. A Silver Boss Bokoblin will appear on the lower path soon after arriving at the first objective marker. |
| 4 | 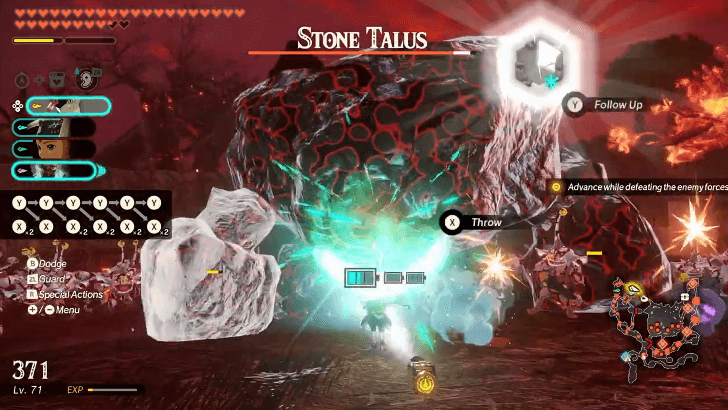 Have both groups meet to the north and follow the path east to reach the gloomed Stone Talus. |
| 5 | 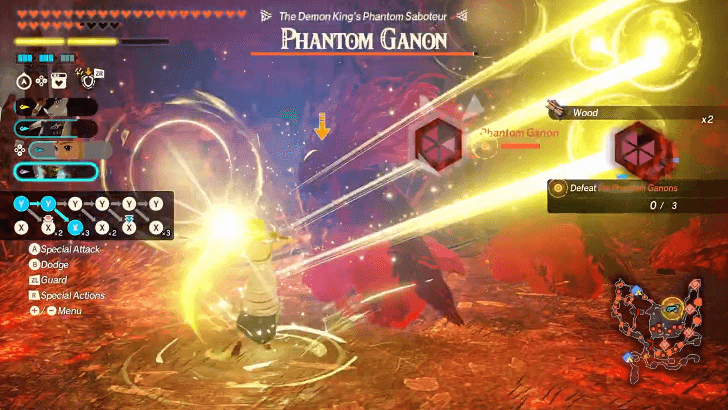 Continue following the path east until you reach the open area in the middle where you'll fight three Phantom Ganons. Both Zelda and Rauru are recommended to use against the Phantom Ganons as they are the only ones who can exploit the Phantoms' weakness to light-based attacks. All three of them will be standing close to each other, so it's the perfect opportunity to use your Sync Strikes and Special Attacks as these can hit them all at once. |
Previous and Next Battles
| ◀ Previous Mission | Next Mission ▶ |
|---|---|
| The Battle of Hyrule Castle | The Battle of Hyrule Field |
Hyrule Warriors: Age of Imprisonment Related Guides

Complete Walkthrough and Chapters List
All Battles
| No. | Battle | No. | Battle |
|---|---|---|---|
| 1 | To the Great Plateau | 2 | The Art of the Blade |
| 3 | Where Ancient Wisdom Sleeps | 4 | Raging Sands |
| 5 | The Hands of Evil | 6 | Growing Suspicion |
| 7 | Striking North | 8 | Beneath the Blood Moon |
| 9 | The Howling Tempests | 10 | Shadows in the Snow |
| 11 | Lanayru Defiled | 12 | The Behemoth in the Crater |
| 13 | Crisis on Death Mountain | 14 | Under Cover of Mist |
| 15 | Terror of the Sands | 16 | Crimson Omen |
| 17 | A Time for Action | 18 | The Counterstrike |
| 19 | Ambush in the Depths | 20 | Purging the Shadows |
| 21 | Fire and Sand | 22 | Into the Fray |
| 23 | The Archfiend's Return | 24 | The Battle of Hyrule Castle |
| 25 | The Demon King, Ensnared | 26 | The Battle of Hyrule Field |
| 27 | The Final Confrontation | 28 | A Clash of Constructs |
Comment
Author
Hyrule Warriors: Age of Imprisonment Walkthrough & Guides Wiki
The Demon King, Ensnared Korok Seeds, Chests, and Walkthrough
improvement survey
04/2026
improving Game8's site?

Your answers will help us to improve our website.
Note: Please be sure not to enter any kind of personal information into your response.

We hope you continue to make use of Game8.
Rankings
- We could not find the message board you were looking for.
Gaming News
Popular Games

Genshin Impact Walkthrough & Guides Wiki

Crimson Desert Walkthrough & Guides Wiki

Umamusume: Pretty Derby Walkthrough & Guides Wiki

Honkai: Star Rail Walkthrough & Guides Wiki

Monster Hunter Stories 3: Twisted Reflection Walkthrough & Guides Wiki

Wuthering Waves Walkthrough & Guides Wiki

The Seven Deadly Sins: Origin Walkthrough & Guides Wiki

Pokemon TCG Pocket (PTCGP) Strategies & Guides Wiki

Pokemon Pokopia Walkthrough & Guides Wiki

Zenless Zone Zero Walkthrough & Guides Wiki
Recommended Games

Monster Hunter World Walkthrough & Guides Wiki

Fire Emblem Heroes (FEH) Walkthrough & Guides Wiki

Pokemon Brilliant Diamond and Shining Pearl (BDSP) Walkthrough & Guides Wiki

Super Smash Bros. Ultimate Walkthrough & Guides Wiki

Diablo 4: Vessel of Hatred Walkthrough & Guides Wiki

Cyberpunk 2077: Ultimate Edition Walkthrough & Guides Wiki

Yu-Gi-Oh! Master Duel Walkthrough & Guides Wiki

Elden Ring Shadow of the Erdtree Walkthrough & Guides Wiki

The Legend of Zelda: Tears of the Kingdom Walkthrough & Guides Wiki

Persona 3 Reload Walkthrough & Guides Wiki
All rights reserved
© Nintendo © KOEI TECMO GAMES All rights reserved.
The copyrights of videos of games used in our content and other intellectual property rights belong to the provider of the game.
The contents we provide on this site were created personally by members of the Game8 editorial department.
We refuse the right to reuse or repost content taken without our permission such as data or images to other sites.




![Forza Horizon 6 Review [Preview] | Beautiful Roads With a Whole Lot of Oversteer](https://img.game8.co/4460981/a7254c24945c43fbdf6ad9bea52b5ce9.png/thumb)
![Borderlands Mobile Review [Playtest] | The Same Borderlands Made Easy](https://img.game8.co/4465500/aac0c880a39ec5cd46073e49d18f3ed5.png/thumb)


