Cannon Best Builds and Equipment
★ Version 1.0.5 is out now!
★ Check our Kemono Weakness Chart before hunting!
★ Our Best Weapons Tier List is updated as of March 2023!
★ We're working on the Best Builds for every weapon!
┗Best Karakuri Staff Builds | Best Claw Blade Builds
★ Check our Items List to learn how to get whatever you need!
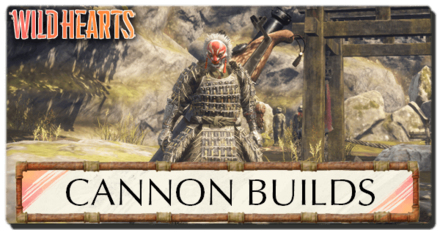
This is a guide to the best builds and equipment for the Cannon in Wild Hearts. Learn about the best Cannons and the best skills and armor to use with the Cannon from the early game until the end game!
| All Cannon Guides | |
|---|---|
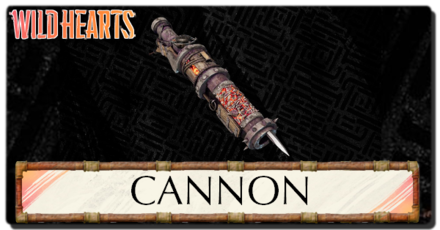 Cannon Weapon Tree Cannon Weapon Tree |
 Cannon Builds Cannon Builds |
List of Contents
Best End Game Cannon Builds
Tempest Cannon All-Rounder
| Weapon | ATK | ATK. Type | Crit. Rate |
|---|---|---|---|
| Tempest Cannon: Ano Zenjо̄ | 930 | Pummel | 0% |
| Element | Element Power | ||
| - | - | ||
| Inherent Skills | |||
|
・Inversion Attack 5% (Base Inherited Skill) ・Speed Heat 15% ・High Spirits 30% |
|||
| Req. Materials | |||
|
・
Lump of Ore
x6 ・ Golden Tempest Auric Claw x4 ・ Golden Tempest Celestial Robe x2 ・ Golden Tempest Auric Ruff x1 |
|||
| Recommended Build Path (Inherited Skills) | |
|---|---|
| Weapon | Skill |
| Nobusuma Cannon | Hawk Eye 5% (Pure Kemono-Path) |
| Frost Cannon: Blizzard's Battery | Thread Thrift 11% |
| Ichimoku-ren | Volley 10% |
| Hoard Cannon: Fūten | Thread Thrift 11% |
| Final Weapon Output | |
| Tempest Cannon: Ano Zenjо̄ |
・Speed Heat 15% ・High Spirits 30% ・Inversion Attack 5% ・Thread Thrift 22% ・Volley 10% ・Hawk Eye 5% |
| Armor | Skills | |
|---|---|---|
| Garuda Hat |
・
Fatigue Recovery (Stam Regen)
10% ・
Deaf Ears
・
Solar Protection
5%
|
|
| Draconic Back Guard |
・
Ancient Tree Champion
15% ・
Hawk Eye
5% ・
Rude Health
12%
|
|
| Garuda Gauntlets |
・
Strong Arm: Spirit
5% ・
Desperation
7% ・
Critical Draw
5%
|
|
| Draconic Body Armor |
・
Fusion Master
・
Battle Spirit
10% ・
Rude Health
12%
|
|
| Wayward Brigand Boots |
・
Grab Master
6% ・
Resurrection
・
Tangle Recovery
33%
|
|
| Skills | |||
|---|---|---|---|
Speed Heat 15% | High Spirits 30% Inversion Attack 5% | Thread Thrift 22% Volley 10% | Hawk Eye 10% Fatigue Recovery 10% | Deaf Ears Solar Protection 5% | Rude Health 24% Strong Arm: Spirit 5% | Critical Draw 5% Desperation 7% | Battle Spirit 10% Tangle Recovery 33% | Grab Master 6% Resurrection |
|||
| Recommended Talisman Skills | ・Volley ・Desperation ・Hawk Eye |
||
| Build Merits | This build provides players with a balance of speed, raw damage, and utility for the Cannon, making it an excellent gear set for taking on Chapter 5's Volatile and Deeply Volatile Kemono.
The Tempest Cannon: Ano Zenjо̄ offers heavy raw damage and a solid base of Inversion Attack, Speed Heat, and High Spirits, which improve the Cannon's damage output and let it reach the heat threshold faster for empowered Ki Bases. In addition, our recommended upgrade path enhances the weapon's quality of life and damage output even further with Thread Thrift, Volley, and Hawk Eye. Mixing the Garuda, Draconic, and Wayward Brigand sets, and using their Kemono-Path modifications, provides the build with potent utility skills, like Deaf Ears, Resurrection, and Rude Health, while contributing to the Cannon's damage output with Hawk Eye, Desperation, and Battle Spirit. To round the build out, we recommend using Talismans with damage-boosting skills like Volley, Desperation, and Hawk Eye to increase your damage output with the Cannon even more. |
|---|
Best Mid Game Cannon Builds
Columnar Rock Sable Mara Set
| Weapon | ATK | ATK. Type | Crit. Rate |
|---|---|---|---|
| Flaming Barrel: Columnar Rock | 817 | Pummel | 10% |
| Element | Element Power | ||
| - | - | ||
| Inherent Skills | |||
|
・Rally: Ironclad 10% ・Desperation 15% (Base Inherited Skill) ・Volley 30% |
|||
| Req. Materials | |||
|
・
Lump of Ore
x8 ・ Onyxshard Rock Incisor x2 ・ Onyxshard Spine x2 ・ Spinous Onyxshard Hide x1 |
|||
| Recommended Build Path (Inherited Skills) | |
|---|---|
| Weapon | Skill |
| Herbal Cannon | Surprise Attack 40% Karakuri Coordination: Fury 4% |
| Spinous Cannon | Fleet Foot 4% |
| Agate Cannon | Volley 10% |
| Final Weapon Output | |
| Flaming Barrel: Columnar Rock |
・Volley 40% ・Rally: Ironclad 10% ・Desperation 15% ・Surprise Attack 40% ・Karakuri Coordination: Fury 4% ・Fleet Foot 4% |
| Armor | Skills | |
|---|---|---|
| Sable Mara Mengu |
・
Lunar Protection
5% ・
Deaf Ears
|
|
| Sable Mara Body Armor |
・
Poison Recovery
33% ・
Provocation
33% ・
Blackout Recovery
33%
|
|
| Sable Mara Tekko |
・
Poison Recovery
33% ・
Rally: Ironclad
5% ・
Blackout Recovery
33%
|
|
| Sable Mara Kusazuri |
・
Provocation
33% ・
Fusion Art: Fury
12%
|
|
| Sable Mara Sune-ate |
・
Provocation
33% ・
Sprint Master
・
Blackout Recovery
33%
|
|
| Skills | |||
|---|---|---|---|
Volley 40% | Rally: Ironclad 15% Desperation 15% | Surprise Attack 40% Karakuri Coordination: Fury 4% | Fleet Foot 4% Deaf Ears | Lunar Protection 5% Poison Recovery 66% | Blackout Recovery 99% Provocation 99% | Fusion Art: Fury 12% Sprint Master |
|||
| Recommended Talisman Skills | ・Volley ・Battle Spirit ・One Strike: Fury |
||
| Build Merits | This build provides a balanced gear set for tackling the Emberplume and Golden Tempest. It also acts as a solid set for taking on the Celestial Dragon.
The Flaming Barrel: Columnar Rock offers heavy raw damage, a 10% crit rate, and potent Inherent and Inherited offensive skills like Volley and Desperation. In addition, our recommended upgrade path enhances the weapon's damage output even further with Surprise Attack, Fleet Foot, and Karakuri Coordination: Fury. The Sable Mara set from the Mighty Fumebeak provides high Fire and Wind resistance alongside potent utility skills, like Deaf Ears, Lunar Protection, Fusion Art: Fury, and Blackout Recovery, improving your survivability against the hard-hitting Emberplume, Golden Tempest, and Celestial Dragon. To round the build out, we recommend using Talismans with damage-boosting skills like Volley, Battle Spirit, and One Strike: Fury to increase your damage output with the Cannon even more. |
|---|
Anti-Amaterasu Sasanqua Set
| Weapon | ATK | ATK. Type | Crit. Rate |
|---|---|---|---|
| Sasanqua Cannon | 381 | Pummel | 0% |
| Element | Element Power | ||
| Wind | 224 | ||
| Inherent Skills | |||
|
・Strong Arm: Remedy +100 ・Strong Arm: Spirit 20% ・One Stroke: Critical 30% (Base Inherited Skill) |
|||
| Req. Materials | |||
|
・
Giant Kemono Petal
x5 ・ Ripclaw Corona Spray x4 ・ Sharp Ripclaw Talon x4 ・ Large Piece of Ore x2 |
|||
| Recommended Build Path (Inherited Skills) | |
|---|---|
| Weapon | Skill |
| Intoxicating Birch Cannon 2 | Wind Wilt 3% |
| Twilight Cannon | Fog Fall 4% |
| Balmy Breeze Cannon | Critical Boost: Fury 4% |
| Summer Camellia Cannon | Karakuri Coordination: Remedy +3 |
| Final Weapon Output | |
| Sasanqua Cannon |
・Strong Arm: Remedy +100 ・Strong Arm: Spirit 20% ・One Stroke: Critical 30% ・Wind Wilt 3% ・Fog Fall 4% ・Critical Boost: Fury 4% ・Karakuri Coordination: Remedy +3 |
| Armor | Skills | |
|---|---|---|
| Great Juniper Headgear |
・
Nostrum Water
・
Strong Arm: Water
+3
|
|
| Great Juniper Body Armor |
・
Health Boost
+5 ・
Health Boost
+5 ・
Tangle Recovery
33%
|
|
| Great Juniper Gauntlets |
・
Health Boost
+5 ・
Strong Arm: Remedy
+33
|
|
| Great Juniper Field Hakama |
・
Strong Arm: Remedy
+33 ・
Fusion Master
|
|
| Great Juniper Sune-ate |
・
Health Boost
+5 ・
Savage
+3
|
|
| Skills | |||
|---|---|---|---|
Strong Arm: Remedy +100 | Strong Arm: Spirit 20% One Stroke: Critical 30% | Wind Wilt 3% Fog Fall 4% | Critical Boost: Fury 4% Savage +3 | Strong Arm: Water +3 Nostrum Water | Health Boost +15 Tangle Recovery 33% | Strong Arm: Thread +6 Fusion Master | Strong Arm: Remedy +66 Karakuri Coordination: Remedy +3 |
|||
| Recommended Talisman Skills | ・Wind Boost ・Wind Wilt ・Wood Resilience |
||
| Build Merits | This build provides an excellent set of gear for the first fight against Amaterasu while remaining solid against Mighty Wood Kemono in Harugasumi Way.
The Sasanqua Nodachi is the one of the strongest Wind-based Cannons at this point in the game, making it one of the best options for taking down the Amaterasu. In addition, it also features potent damage and utility skills from its upgrade paths, like Wind Wilt, Fog Fall, One Stroke: Critical, and Strong Arm: Spirit. The Great Juniper set from the Mighty Kingtusk provides high Wood and Entangle resistance alongside potent Human-Path utility skills, like Nostrum Water, Strong Arm: Remedy, and Fusion Master, greatly improving your survivability against the Amaterasu and other Mighty Wood Kemono. To round the build out, we recommend using Talismans with Wind Boost, Wind Wilt, and Wood Resilience to improve your survivability and damage output against the Amaterasu and other Wood Kemono. |
|---|
Ember Cannon Bandit Set
| Weapon | ATK | ATK. Type | Crit. Rate |
|---|---|---|---|
| Ember Cannon | 238 | Pummel | 0% |
| Element | Element Power | ||
| Fire | 168 | ||
| Inherent Skills | |||
|
・Leeway 4% ・Ki Base Deployment +1 (Base Inherited Skill) |
|||
| Req. Materials | |||
|
・
Ore
x10 ・ Cobalt Lavaback Fang x2 ・ Cobalt Lavaback Hide x2 |
|||
| Recommended Build Path (Inherited Skills) | |
|---|---|
| Weapon | Skill |
| Ripple Cannon | Speed Charge 13% |
| Ripple Cannon 3 | Fire Wilt 3% |
| Wrack Cannon: Rhododendron 2 | Tiger's Den 5% (Pure Kemono-Path) |
| Final Weapon Output | |
| Ember Cannon |
・Leeway 4% ・Ki Base Deployment +1 ・Speed Charge 13% ・Fire Wilt 3% ・Tiger's Den 5% |
| Armor | Skills | |
|---|---|---|
| Bandit Mengu |
・
Grab Master
4% ・
Bridge Burning
10%
|
|
| Bandit Uwagi |
・
Resurrection
・
Freezing Recovery
22%
|
|
| Bandit Tekko |
・
One Stroke: Fury
11%
|
|
| Bandit Loincloth |
・
Core Boost
10% ・
Freezing Recovery
22%
|
|
| Bandit Boots |
・
Grab Master
4%
|
|
| Skills | |||
|---|---|---|---|
Leeway 4% | Ki Base Deployment +1 Speed Charge 13% | Fire Wilt 3% Tiger's Den 5% | Grab Master 8% Bridge Burning 10% | Freezing Recovery 44% Resurrection | One Stroke: Fury 11% Core Boost 10% |
|||
| Recommended Talisman Skills | ・Flame Wielder ・Battle Spirit ・Water Resilience |
||
| Build Merits | This build is primarily designed for taking down the Deathstalker near the end of Chapter 2 while remaining a solid starter set when taking on the Mighty Kemono of Chapter 3.
The Ember Cannon is the strongest Fire-based Cannon at this point in the game, making it an excellent pick for fighting against the Deathstalker. In addition, it also features solid Inherent and Inherited skills from its upgrade paths, like Speed Charge, Fire Wilt, and Tiger's Den. The Bandit set provides high Water resistance and Freezing Recovery, letting you have an easier time dealing with the Deathstalker's icy attacks. In addition, modifying the set toward the Kemono-Path gives you access to potent offensive and defensive skills, like Resurrection, One Stroke: Fury, and Bridge Burning. To round out the build, we recommend using Talismans with Flame Wielder, Battle Spirit, and Water Resilience to improve your survivability and damage output against the Deathstalker and other Water Kemono. |
|---|
Crystal Cannon Akikure Veteran
| Weapon | ATK | ATK. Type | Crit. Rate |
|---|---|---|---|
| Crystal Cannon | 332 | Slash | 10% |
| Element | Element Power | ||
| - | - | ||
| Inherent Skills | |||
|
・Critical Chain 8% (Base Inherited Skill) ・One Stroke: Fury 15% (Kemono-Path) |
|||
| Req. Materials | |||
|
・
Corestone
x6 ・ Goldshard Tail x3 ・ Goldshard Claw x2 ・ Goldshard Spine x3 |
|||
| Recommended Build Path (Inherited Skills) | |
|---|---|
| Weapon | Skill |
| Herbal Cannon | Surprise Attack 40% Karakuri Coordination: Fury 4% |
| Final Weapon Output | |
| Crystal Cannon |
・One Stroke: Fury 15% ・Critical Chain 8% ・Surprise Attack 40% ・Karakuri Coordination: Fury 4% |
| Armor | Skills | |
|---|---|---|
| Veteran Helmet |
・
Bare Thread
6%
|
|
| Veteran Armor |
・
Bare Thread
6% ・
Fatigue Resilience
13%
|
|
| Veteran Tekko |
・
Dodge Master (Armor)
17%
|
|
| Veteran Kusazuri |
・
Fatigue Resilience
13% ・
Poison Recovery
22%
|
|
| Veteran Sune-ate |
・
Dodge Master (Armor)
17%
|
|
| Skills | |||
|---|---|---|---|
One Stroke: Fury 15% | Critical Chain 8% Surprise Attack 40% | Karakuri Coordination: Fury 4% Bare Thread 12% | Fatigue Resilience 26% Dodge Master 34% | Poison Recovery 22% |
|||
| Recommended Talisman Skills | ・Battle Spirit ・Poison Recovery ・Wind Resilience |
||
| Build Merits | This build provides players with a solid set of gear for dealing with the Fumebeak while remaining effective against the rest of the Akikure Canyon kemono.
The Crystal Cannon provides high raw Slash damage, a 10% critical rate, and solid offensive skills when following its build path, including Karakuri Coordination: Fury, Critical Chain, and Surprise Attack. The Veteran set provides excellent resistances against the Sporetail, Goldshard, and Fumebeak while featuring solid utility skills like Bare Thread and Dodge Master. In addition, we also recommend modifying this armor set toward the Kemono-Path to activate the Crystal Cannon's One Stroke: Fury. To round the build out, we recommend equipping Talismans with Battle Spirit, Poison Recovery, and Wind Resilience to further enhance your damage output and survivability against the Fumebeak. |
|---|
Best Early Game Cannon Builds
Starter Natsukodachi Ripple Set
| Weapon | ATK | ATK. Type | Crit. Rate |
|---|---|---|---|
| Ripple Cannon 2 | 252 | Pummel | -10% |
| Element | Element Power | ||
| - | - | ||
| Inherent Skills | |||
|
・Slight of Hand: Fury 4% (Base Inherited Skill) ・Water Wilt 3% (Base Inherited Skill) ・Leeway 4% |
|||
| Req. Materials | |||
|
・
Corestone
x10 ・ Small Kemono Carapace x3 ・ Gritdog Iron Nugget x2 ・ Gritdog Claw x3 |
|||
| Armor | Skills | |
|---|---|---|
| Ninja Mengu |
・
Fleet Foot
2% ・
Blaze Recovery
22%
|
|
| Ninja Uwagi |
・
Verve
2%
|
|
| Grithide Tekko |
・
Stowed Weapon Boost: Ironclad
3%
|
|
| Grithide Loincloth |
・
Core Boost
10%
|
|
| Ninja Sune-ate |
・
Fleet Foot
2%
|
|
| Skills | |||
|---|---|---|---|
Slight of Hand: Fury 4% | Water Wilt 3% Leeway 4% | Blaze Recovery 22% Fleet Foot 4% | Verve 2% (Human-Path) Core Boost 10% | Stowed Weapon Boost: Ironclad 3% |
|||
| Recommended Talisman Skills | ・Battle Spirit ・Blade Debar ・Ironclad |
||
| Build Merits | This build prioritizes giving players a solid starter set with the Cannon after unlocking it from the Earthbreaker fight. It also acts as a suitable gear set for taking on the first few Kemono in Akikure Canyon.
The Ripple Cannon 2 is a solid raw Cannon, featuring 252 base attack and a decent balance of utility skills with Slight of Hand: Fury and Leeway. The mix of Ninja and Grithide sets provides players with a sufficient amount of base defense and potent offensive and defensive skills in Verve, Fleet Foot, and Stowed Weapon Boost: Ironclad. To round this starter build out, we recommend equipping Talismans with Battle Spirit, Blade Debar, and Ironclad for a balance of damage, utility, and surivivability while getting used to the weapon. |
|---|
Best Skills for Cannon
| Best Skills | Explanation |
|---|---|
| Volley ★★★ |
This skill improves the Cannon's fire rate while its charge gauge is above zero, improving the weapon's damage output and letting it reach the heat threshold faster. |
| Speed Charge ★★★ |
This skill increases the amount of charge gauge you regenerate while standing on a Ki Base, letting you refill your ammo faster and extending your Fortified Shot's laser uptime! |
| Thread Thrift ★★★ |
This skill reduces the amount of thread your Fortified Shot and regular attacks consume, improving your damage uptime with the Cannon. |
| Speed Heat ★★ |
Increasing the amount of heat your attacks generate allows you to shoot out empowered Ki Bases faster, making Speed Heat a solid skill to aim for. |
| High Spirits ★★ |
This skill lowers the heat threshold before you can fire an empowered Ki Base, enhancing your damage output and letting you access Fortified Shot much faster. |
| Surprise Attack ★★ |
This skill boosts the amount of damage you deal before a Kemono roars and begins attacking. Combine this skill with a Chain Trap and Fortified Shot at the start of the hunt for massive damage! |
| Desperation ★★ |
This skill provides a potent damage increase at the cost of your defense, making it a high-risk, high-reward damage skill for any weapon. |
| Karakuri Coordination: Fury ★ |
The Cannon often uses Torch and Celestial Anchor Karakuri attacks, so having a skill that boosts the damage of these moves is always great to have. |
| Fleet Foot ★ |
The Cannon uses sliding dodges often to reposition and move away from Kemono attacks, so having a skill that enhances your damage output while sliding is beneficial. |
Wild Hearts Related Guides

Best Builds and Armor for Each Weapon
| All Weapon Builds | |
|---|---|
 Karakuri Katana Karakuri Katana |
 Nodachi Nodachi |
 Karakuri Staff Karakuri Staff |
 Claw Blade Claw Blade |
 Bow Bow |
 Hand Cannon Hand Cannon |
 Maul Maul
|  Bladed Wagasa Bladed Wagasa |
Author
Cannon Best Builds and Equipment
improvement survey
03/2026
improving Game8's site?

Your answers will help us to improve our website.
Note: Please be sure not to enter any kind of personal information into your response.

We hope you continue to make use of Game8.
Rankings
- We could not find the message board you were looking for.
Gaming News
Popular Games

Genshin Impact Walkthrough & Guides Wiki

Honkai: Star Rail Walkthrough & Guides Wiki

Umamusume: Pretty Derby Walkthrough & Guides Wiki

Pokemon Pokopia Walkthrough & Guides Wiki

Resident Evil Requiem (RE9) Walkthrough & Guides Wiki

Monster Hunter Wilds Walkthrough & Guides Wiki

Wuthering Waves Walkthrough & Guides Wiki

Arknights: Endfield Walkthrough & Guides Wiki

Pokemon FireRed and LeafGreen (FRLG) Walkthrough & Guides Wiki

Pokemon TCG Pocket (PTCGP) Strategies & Guides Wiki
Recommended Games

Diablo 4: Vessel of Hatred Walkthrough & Guides Wiki

Cyberpunk 2077: Ultimate Edition Walkthrough & Guides Wiki

Fire Emblem Heroes (FEH) Walkthrough & Guides Wiki

Yu-Gi-Oh! Master Duel Walkthrough & Guides Wiki

Super Smash Bros. Ultimate Walkthrough & Guides Wiki

Pokemon Brilliant Diamond and Shining Pearl (BDSP) Walkthrough & Guides Wiki

Elden Ring Shadow of the Erdtree Walkthrough & Guides Wiki

Monster Hunter World Walkthrough & Guides Wiki

The Legend of Zelda: Tears of the Kingdom Walkthrough & Guides Wiki

Persona 3 Reload Walkthrough & Guides Wiki
All rights reserved
© 2023 Electronic Arts Inc.
The copyrights of videos of games used in our content and other intellectual property rights belong to the provider of the game.
The contents we provide on this site were created personally by members of the Game8 editorial department.
We refuse the right to reuse or repost content taken without our permission such as data or images to other sites.


![Monster Hunter Stories 3 Review [First Impressions] | Simply Rejuvenating](https://img.game8.co/4438641/2a31b7702bd70e78ec8efd24661dacda.jpeg/thumb)


