This survey will take about 1 minute.
Your answers will help us to improve our website.
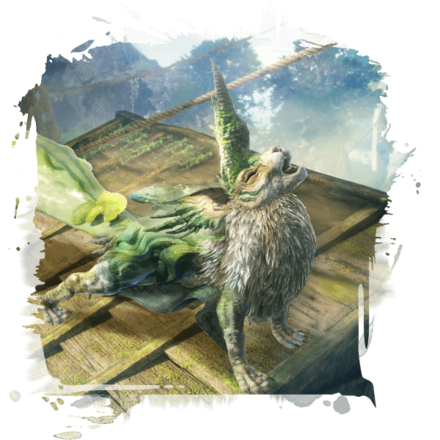
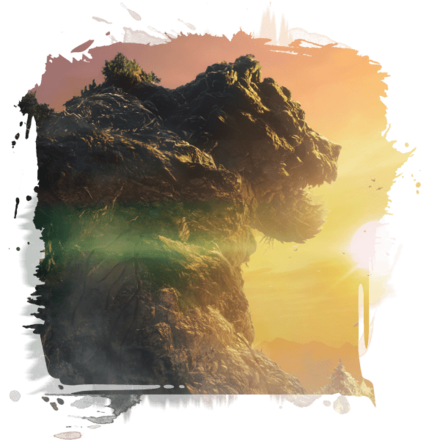
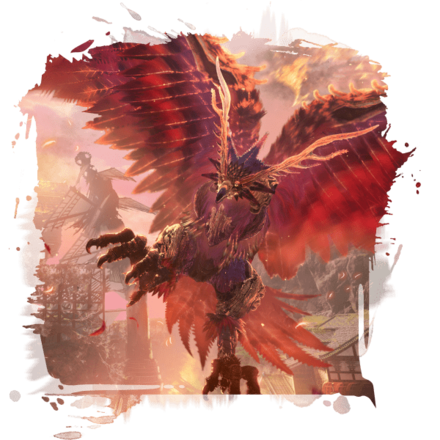
Wild Hearts
Deathstalker: Weaknesses and Drops
★ Version 1.0.5 is out now!
★ Check our Kemono Weakness Chart before hunting!
★ Our Best Weapons Tier List is updated as of March 2023!
★ We're working on the Best Builds for every weapon!
┗Best Karakuri Staff Builds | Best Claw Blade Builds
★ Check our Items List to learn how to get whatever you need!

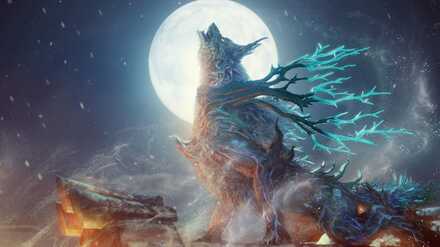
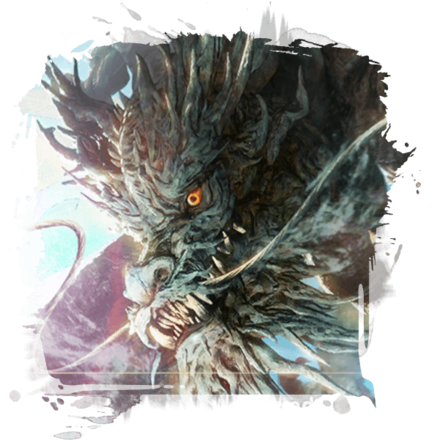
The Deathstalker is a Giant Kemono (Monster) in Wild Hearts. Check out our guide for the Deathstalker, including its weaknesses, habitats, drops, attack patterns, and the best tips and strategies for how to beat it!
List of Contents
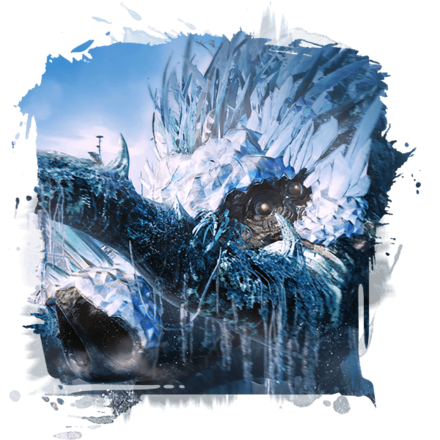
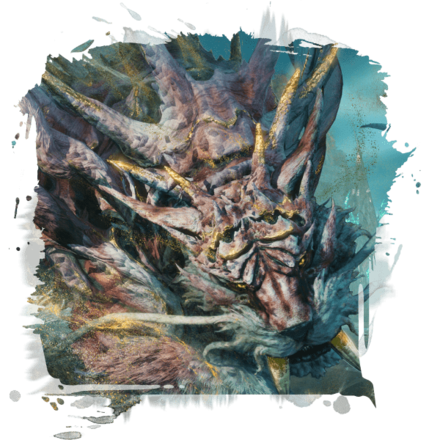
Deathstalker Overview
| Deathstalker | |||
|---|---|---|---|
 |
|||
| Attribute | |||
| Physical Weakness | Elemental Weakness | ||
| Strategy | |||
| Don't let the Deathstalker make sport of you with its lightning fast moves. You must always keep the beast in your sights. When angered, it becomes even quicker, and its attack range increases. In addition, it controls powerful arctic currents of air to clad itself in an icy armor, but that armor is in fact easier to destroy than other parts of the Kemono. Target it proactively to leave the beast reeling, and you should gain the upper hand. | |||
Deathstalker Weakness and Resistance
Deathstalker Part Softness
| Part | Effectiveness |
|---|---|
| Head | ★★★★★ |
| Shoulders | ★★★ |
| Front Legs | ★★★ |
| Body | ★★★★ |
| Hind Legs | ★★★ |
| Tail | ★★★★★ |
Deathstalker Physical Effectiveness
| ★★★ | ★★★ | ★★★★ |
Deathstalker Attribute Effectiveness
| ★ | ★★★ | ★ | ★★ | ★★ |
Deathstalker Ailment Effectiveness
| ★★★★★ | ★ | ★ | X | ★ |
Deathstalker Materials and Drops
| Item | How to Get |
|---|---|
| Argent Kemono Blood | Rare drops from hunting a Deathstalker. |
| Argent Teardrops | Rare drops from hunting a Deathstalker. |
| Brumal Wind Crystal | Obtained from kemono that inhabit Fuyufusagi Fort such as Deathstalker. |
| Deathstalker Claw | Obtained after breaking the Deathstalker's claws. |
| Deathstalker Fang | Obtained after breaking the Deathstalker's fangs. |
| Deathstalker Hide | Obtained after breaking the Deathstalker's back. |
| Deathstalker Ice Bead | Rare drops from hunting a Deathstalker. |
| Deathstalker Ice Tail | Obtained after breaking the Deathstalker's tail. |
| Deathstalker Icicle | Obtained after breaking both the Deathstalker's shoulders. |
| Deathstalker Pelt | Obtained after breaking the Deathstalker's head. |
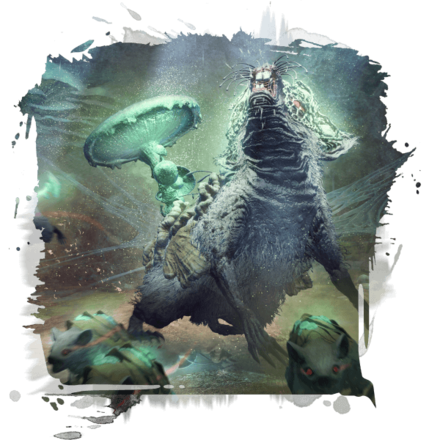
Deathstalker Location
Deathstalker Known Habitats
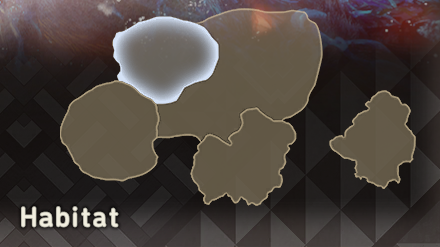
The Deathstalker is found in Fuyufusagi Fort, either resting in the main castle or roaming the castle grounds nearby.
How to Beat Deathstalker
| Deathstalker Tips and Strategies |
|---|
|
|
Prepare Gear for the Hunt
The Deathstalker is the toughest Kemono yet out of all encountered in Chapter 2. It's best to prepare essential equipment and weapons for this hunt.
Best Gear for Deathstalker
The best gear against Deathstalker is the Bandit armor set from Icetusk and Cobalt Lavaback giving you more than 30 resistance to water attribute. While the Ember Blade is the best for this hunt, having fire attribute which is a weakness of the Deathstalker.
Upgrade Tsukumo
Upgrading your Tsukumo will greatly help for this hunt, as it assists you better with its utilities and increases the number of karakuri threads you can carry. From our experience, this hunt requires mastery of karakuri, so having more set ups will greatly help.
Utilize Fusion Karakuri
The Deathstalker has a number of fast charging attacks which you can exploit by setting the bulwark karakuri to halt the attack and stagger the Deathstalker. This kemono also has attack patterns that have intervals, you can use this time for setting the pounder karakuri to deal extra damage against the Deathstalker.
The star bomb karakuri is also an effective counter for the Deathstalker's freeze ailment attacks, as the star bomb does not damage you but builds the ablaze attribute which negates the freeze ailment.
The repeater crossbow is also a great karakuri to use in this fight to exploit the Deathstalker's weakness to lunge attacks.
Target Its Head and Tail
The softest part of a Deathstalker is its head, followed by its Tail. Targeting these areas frequently would break them and would ultimately weaken the Deathstalker.
Anticipate Claw Attacks at All Times
The Deathstalker's claw attacks will always have a follow-up attack of ice spikes that have a variety of dodge timings.
An example of this attack is the Deathclaw's Claw Slam with Spike Follow-up which starts with a slam and is then followed by a wide attack of ice spikes after some time. Anticipating attacks like these and being able to dodge them perfectly makes the hunt easier.
Deathstalker Attacks and Moves
| Name | Description |
|---|---|
| Freezing Fog | The Deathstalker's chilling breath, an attack used to make the fight harder for hunters unprepared for the cold. |
| Paralyzing Howl | A defense mechanic by the Deathstalker to interrupt a barrage of attacks from hunters. |
| Charging Attack | An attack only used by the Deathstalker against hunters who prefer to fight from distances. |
| Lunging Grab | A fast and deadly attack which can prove fatal for any hunter unable to react on time. |
| Claw Swipe | An offensive defense by the Deathstalker to steer clear of hunters who prefer close-quarters combat. |
| Ice Claw Attacks | A set of attacks that showcases the Deathstalker's mastery of conjuring and controlling the cold. |
| Enraged State Attack | A defense mechanic of a wounded Deathstalker, blocking all attacks from its sides. |
Freezing Fog
| Freezing Fog Attack Information |
|---|
| Freezing Fog: Deathstalker will emit a fog that builds up the frozen ailment. Counter this attack by setting a star bomb karakuri near the Deathstalker and attacking it, the ablaze ailment build up from the star bomb will cancel the frozen ailment. |
Paralyzing Howl
| Paralyzing Howl Attack Information |
|---|
| Paralyzing Howl: The Deathstalker will howl mid-fight, paralyzing interrupting any hunter. Set up a repeater crossbow in advance to damage the Deathstalker while interrupted. |
Charging Attack
| Charging Attack Information |
|---|
| Charging Attack: The Deathstalker will sprint towards a targeted hunter, damaging all things in its path. Dodge forward to avoid follow up damages from the sprint. Note that building a bulwark karakuri mid-sprint of the Deathstalker is nearly impossible to do. |
Lunging Grab
| Lunging Grab Attack Information |
|---|
| Lunging Grab: Deathstalker will conjure a wall of ice and lunge from it, mauling any hunter it manages to grab. Counter this by setting a bulwark karakuri as the ice wall is conjured. |
Claw Swipe
| Claw Swipe Attack Information |
|---|
| Claw Swipe: Deathstalker will quickly swipe any hunter in front to interrupt the hunter's attacks. Avoid this attack by dodging forward. |
Ice Claw Attacks
| Ice Claw Attack Variations |
|---|
| Extended Claw Slam: Deathstalker will slam its paws on the ground three times, and will conjure spikes of ice on the third slam. Dodge forward to avoid follow up damages. |
| Claw Slam with Spike Follow-up: Deathstalker will briefly stand on its hind legs lifting its right front leg then slam it on the ground damaging the landing area, then followed by an attack that conjures ice spikes in a larger radius. Time your dodges right to avoid both attacks. |
| Double Claw Slam: Deathstalker will jump high on the air and conjure spikes of ice in a very large radius. Dodge towards the Deathstalker to avoid this attack, and set a damage type fusion karakuri to exploit the attack interval. |
| Traveling Ice Spikes : Deathstalker will stand on its hind legs lifting both front legs, then slam it on the ground conjuring ice spikes that travel towards a targeted hunter. Slide towards the Deathstalker to avoid this attack. |
Enraged State Attack
| Enraged State Attack |
|---|
| Ice Wall: As it enters its enraged state, the Deathstalker will conjure two walls of ice to protect itself. The wall only covers the Deathclaw's sides, set up a repeater crossbow from its front or rear to exploit the non-protected areas. |
Wild Hearts Related Guides

All Kemono in Wild Hearts
| Wild Hearts Kemono | ||
|---|---|---|
 Ragetail Ragetail |
 Sapscourge Sapscourge |
 Kingtusk Kingtusk |
 Spineglider Spineglider |
 Dreadclaw Dreadclaw |
 Gritdog Gritdog |
 Lavaback Lavaback |
 Earthbreaker Earthbreaker |
 Sporetail Sporetail |
 Goldshard Goldshard |
 Fumebeak Fumebeak |
 Icetusk Icetusk |
 Cobalt Lavaback Cobalt Lavaback |
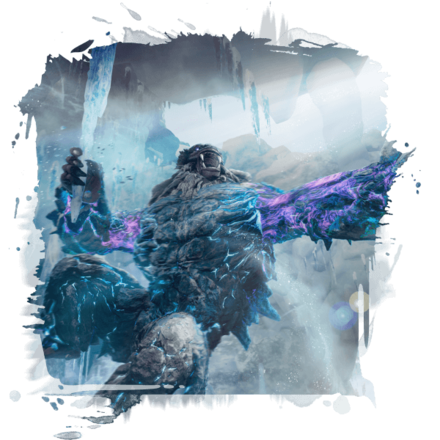
 Deathstalker Deathstalker |
 Ripclaw Ripclaw |
 Pearlbeak Pearlbeak |
 Amaterasu Amaterasu |
 Onyxshard Onyxshard |
 Venomglider Venomglider |
 Emberplume Emberplume |
 Golden Tempest Golden Tempest |
 Celestial Dragon Celestial Dragon |
||
Author

Deathstalker: Weaknesses and Drops
Please participate in our site
improvement survey
03/2026
improvement survey
03/2026
Would you assist in
improving Game8's site?
improving Game8's site?

×
We are listening to our users' valuable opinions and discussing how to act on them.
The information collected through this survey will be used for the purpose of improving our services. In addition, the information will only be disclosed a part of a statistic in a format that will not allow identification of personal information.
Begin Survey
Not Now
×
Please rate each item regarding Game8.co's Advertisements.
Amount of Ads
Very Dissatisfied
Somewhat Dissatisfied
Fine
Somewhat Satisfied
Highly Satisfied
Placement of Ads
Timing of Ad Display
Ad Loading Speed
Safeness of Ads
Content of Ads
×
Please rate each item regarding Game8.co's Quality of Articles.
Amount of information
Very Dissatisfied
Somewhat Dissatisfied
Fine
Somewhat Satisfied
Highly Satisfied
Frequency of updates
Speed of new information
Accuracy of articles
Understandibility of articles
Readability of sentences
×
Please rate each item regarding Game8.co's Usability of the Site.
Ease of finding information
Very Dissatisfied
Somewhat Dissatisfied
Fine
Somewhat Satisfied
Highly Satisfied
Loading Speed
Use of Color
Font Size
Visibility of Images
Easy to Understand Layout
×
Please rate each item regarding Game8.co's Message Boards, Comments.
Ease of Writing
Very Dissatisfied
Somewhat Dissatisfied
Fine
Somewhat Satisfied
Highly Satisfied
Readability
Ease in Finding Information
Comment Quality
Comment Quantity
Admin Response
×
Please rate each item regarding Game8.co's Site's new design.
Please rate our site's new design
Very Dissatisfied
Somewhat Dissatisfied
Fine
Somewhat Satisfied
Highly Satisfied
Do you think that the website's design change makes the site easier to use?
Has the new design made it easier for you to find information on the site?
Has the new design improved the overall visual appeal of the site?
How would you rate your overall satisfaction with the new design of the site?
×
How likely are you to recommend Game8 to someone you know?
Very Unlikely
0
1
2
3
4
5
6
7
8
9
10
Very Likely
If you have other opinions regarding potential improvement to the website, please share them with us. We would appreciate your honest opinion.
Note: This is a free response section, so you can proceed without entering anything.
Note: Please be sure not to enter any kind of personal information into your response.
Note: Please be sure not to enter any kind of personal information into your response.
×
Thank You
×
Thank you for participating in our survey! Your answers will help us to improve the quality of our website and services.
We hope you continue to make use of Game8.
We hope you continue to make use of Game8.
Close
Rankings
- We could not find the message board you were looking for.
Gaming News


![Monster Hunter Stories 3 Review [First Impressions] | Simply Rejuvenating](https://img.game8.co/4438641/2a31b7702bd70e78ec8efd24661dacda.jpeg/thumb)
Popular Games

Genshin Impact Walkthrough & Guides Wiki
Honkai: Star Rail Walkthrough & Guides Wiki
Umamusume: Pretty Derby Walkthrough & Guides Wiki
Pokemon Pokopia Walkthrough & Guides Wiki
Resident Evil Requiem (RE9) Walkthrough & Guides Wiki
Monster Hunter Wilds Walkthrough & Guides Wiki
Wuthering Waves Walkthrough & Guides Wiki
Arknights: Endfield Walkthrough & Guides Wiki
Pokemon FireRed and LeafGreen (FRLG) Walkthrough & Guides Wiki
Pokemon TCG Pocket (PTCGP) Strategies & Guides Wiki


Recommended Games
Diablo 4: Vessel of Hatred Walkthrough & Guides Wiki
Cyberpunk 2077: Ultimate Edition Walkthrough & Guides Wiki
Fire Emblem Heroes (FEH) Walkthrough & Guides Wiki
Yu-Gi-Oh! Master Duel Walkthrough & Guides Wiki
Super Smash Bros. Ultimate Walkthrough & Guides Wiki
Pokemon Brilliant Diamond and Shining Pearl (BDSP) Walkthrough & Guides Wiki
Elden Ring Shadow of the Erdtree Walkthrough & Guides Wiki
Monster Hunter World Walkthrough & Guides Wiki
The Legend of Zelda: Tears of the Kingdom Walkthrough & Guides Wiki
Persona 3 Reload Walkthrough & Guides Wiki


All rights reserved
© 2023 Electronic Arts Inc.
The copyrights of videos of games used in our content and other intellectual property rights belong to the provider of the game.
The contents we provide on this site were created personally by members of the Game8 editorial department.
We refuse the right to reuse or repost content taken without our permission such as data or images to other sites.