Bow Best Builds and Equipment
★ Version 1.0.5 is out now!
★ Check our Kemono Weakness Chart before hunting!
★ Our Best Weapons Tier List is updated as of March 2023!
★ We're working on the Best Builds for every weapon!
┗Best Karakuri Staff Builds | Best Claw Blade Builds
★ Check our Items List to learn how to get whatever you need!
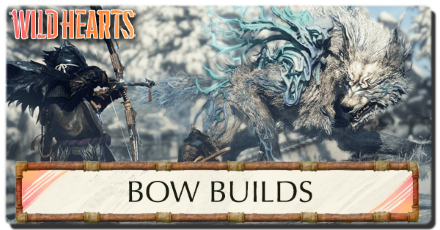
This is a guide to the best builds and equipment for the Bow in Wild Hearts. Learn about the best Bows and the best skills and armor to use with the Bow from the early game until the end game!
| All Bow Guides | |
|---|---|
 Bow Weapon Tree Bow Weapon Tree |
 Bow Builds Bow Builds |
List of Contents
Best End Game Bow Build
Prefectly Balanced Tempest Bow: Skanda
| Weapon | ATK | ATK. Type | Crit. Rate |
|---|---|---|---|
| Tempest Bow: Skanda | 455 | Lunge | 5% |
| Element | Element Power | ||
| - | - | ||
| Inherent Skills | |||
|
・Extreme Archery 20% |
|||
| Req. Materials | |||
|
・
Lump of Ore
x6 ・ Golden Tempest Auric Claw x4 ・ Golden Tempest Celestial Robe x2 ・ Golden Tempest Auric Ruff x1 |
|||
| Recommended Build Path (Inherited Skills) | |
|---|---|
| Weapon | Skill |
| Gleaming Corvid Bow | Critical Chain 12% |
| Great Yata Bow | Broken Beast Screaming Arrow 5% |
| Depluming Bow | Extreme Archery 10% |
| Sasanqua Bow | Nocking Marvel 40% |
| Final Weapon Output | |
| Tempest Bow: Skanda | Extreme Archery 30% Fusion Reaper Broken Beast Screaming Arrow 10% Nocking Marvel 40% Critical Chain 12% |
| Armor | Skills | |
|---|---|---|
| Garuda Hat |
・
Fatigue Recovery (Stam Regen)
10% ・
Deaf Ears
・
Solar Protection
5%
|
|
| Draconic Back Guard |
・
Ancient Tree Champion
15% ・
Hawk Eye
5% ・
Rude Health
12%
|
|
| Garuda Gauntlets |
・
Strong Arm: Spirit
5% ・
Desperation
7% ・
Critical Draw
5%
|
|
| Wayward Brigand Loincloth |
・
Core Boost
16% ・
Freezing Recovery
33% ・
Pummel Bolster
3%
|
|
| White Fang Brocaded Boots |
・
Savage
+3 ・
Verve
3% ・
Follow-Through
+3
|
|
| Skills | |||
|---|---|---|---|
Extreme Archery 30% | Fusion Reaper Broken Beast Screaming Arrow 10% | Nocking Marvel 40% Critical Chain 12% | Fatigue Recovery 10% Deaf Ears | Solar Protection 5% Rude Health 12% | Hawk Eye 5% Desperation 7% | Strong Arm: Spirit 5% Critical Draw 5% | Pummel Bolster 3% Savage +3 | Follow Through +3 |
|||
| Recommended Talisman Skills | Resurrection (Pious Cross: Rosary) Desperation (Attack Talisman: Cicada) Rude Health (Memento of Minato: Remorse) |
||
| Build Merits | This build provides players with a perfect gear set against Volatile and Deeply Volatile Kemono. Our build for the Tempest Bow: Skanda will focus on damage boost as well as stamina and utility boosts that prolong the volley shots from the Haya stance, making it possible to stick more arrows on a Kemono to set for an Otoya shot that ultimately leads to more damage. Note that players can also choose another build path, but we recommend this build as it is not too taxing on resources. Our recommended armor set also provides damage boosts from Desperation, Savage, Solar Protection, and Hawk Eye on top of high defense points and elemental resistances; it also provides stamina boosts that can help prolong the volley shots from Haya stance. To finalize the build we recommend three specific talismans that boost survivability and damage. Pious Cross: Rosary gives the Resurrection skill for a cost of 40 talisman points which leaves us with 10 points to work with. The Attack Talisman: Cicada and Memento of Minato: Remorse give Desperation and Rude Health respectively for 5 talisman points each; totaling 50 talisman points. |
|---|
Best Mid Game Bow Build
Anti-Amaterasu Parhelion Bow
| Weapon | ATK | ATK. Type | Crit. Rate |
|---|---|---|---|
| Parhelion Bow | 283 | Lunge | 5% |
| Element | Element Power | ||
| - | - | ||
| Inherent Skills | |||
|
・Poison Wielder 10% ・Extreme Archery 20% |
|||
| Req. Materials | |||
|
・
Corestone
x15 ・ Long Pearlbeak Tail Feather x2 ・ Sharp Pearlbeak Bill x3 ・ Sharp Pearlbeak Talon x1 |
|||
| Recommended Build Path / Inherited Skills | |
|---|---|
| Weapon | Skill |
| Ice Bow: Celestial Shot | Critical Boost: Fury 2% |
| Bow of Nature's Splendor | Critical Master 5% |
| Balmy Breeze Bow | Critical Boost: Fury 4% |
| Gleaming Corvid Bow | Critical Chain 12% |
| Final Weapon Output | |
| Parhelion Bow | Extreme Archery 20% Poison Wielder 10% Critical Boost: Fury 6% Critical Master 5% Critical Chain 12% Water Wilt 3% |
| Armor | Skills | |
|---|---|---|
| Great Juniper Headgear |
・
Nostrum Water
・
Strong Arm: Water
+3
|
|
| Great Juniper Body Armor |
・
Health Boost
+5 ・
Health Boost
+5 ・
Tangle Recovery
33%
|
|
| Great Juniper Gauntlets |
・
Health Boost
+5 ・
Strong Arm: Remedy
+33
|
|
| Red Plum Haidate |
・
Health Boost
+5 ・
Dodge Boost
+4
|
|
| Red Plum Cannular Sune-ate |
・
Provocation
33% ・
Dodge Boost
+4
|
|
| Skills | |||
|---|---|---|---|
Extreme Archery 20% | Poison Wielder 10% Critical Boost: Fury 6% | Critical Master 5% Critical Chain 12% |Water Wilt 3% Strong Arm: Water +3 |Health Boost +15 Tangle Recovery 33% | Strong Arm: Thread +6 Strong Arm: Remedy +33 | Dodge Boost +8 Provocation 33% | Nostrum Water |
|||
| Recommended Talisman Skills | ・Savage ・Fatigue Alleviation ・Leeway ・Core Boost ・Poison Wielder |
||
| Build Merits | This build provides players with a strong gear set that can bring down Amaterasu. The weapon focuses on raw damage per second with a high chance for critical hits and poison ailment build up that can synergize with the Bow's rapid fire and would work well against Amaterasu as the poison ailment is one of its weaknesses. The Armor for this build will focus on health boosts, elemental and ailment resistances against Amaterasu's attacks, as well as dodge boosts which can merit from the Bow's playstyle as player's can keep on aiming while dodging. To Finalize the build, we recommend equipping talisman skills that can boost the Parhelion Bow's damage output like Savage, and skills that boost stamina and stamina recovery like Leeway, Fatigue Alleviation, and Core Boost to extend the use time of bolstered Haya (Horizontal) shots. |
|---|
Best Early Game Bow Build
Anti-Deathstalker Ember Bow
| Weapon | ATK | ATK. Type | Crit. Rate |
|---|---|---|---|
| Ember Bow | 119 | Lunge | -10% |
| Element | Element Power | ||
| Fire | 84 | ||
| Inherent Skills | |||
|
・Leeway 4% |
|||
| Req. Materials | |||
|
・
Ore
x10 ・ Cobalt Lavaback Fang x2 ・ Cobalt Lavaback Hide x2 |
|||
| Recommended Build Path / Inherited Skills | |
|---|---|
| Weapon | Skill |
| Ripple Bow | Fast Draw 30% |
| Ripple Bow 3 | Fire Wilt 2% |
| Wrack Bow: Rhododendron 2 | Tiger's Den 5% |
| Final Weapon Output | |
| Ember Bow | Leeway 4% Speed Shooter Fast Draw 30% Fire Wilt 2% Tiger's Den 5% |
| Armor | Skills | |
|---|---|---|
| Bandit Mengu |
・
Grab Master
4% ・
Bridge Burning
10%
|
|
| Bandit Uwagi |
・
Resurrection
・
Freezing Recovery
22%
|
|
| Bandit Tekko |
・
One Stroke: Fury
11%
|
|
| Bandit Loincloth |
・
Core Boost
10% ・
Freezing Recovery
22%
|
|
| Bandit Boots |
・
Grab Master
4%
|
|
| Skills | |||
|---|---|---|---|
Leeway 4% | Fast Draw 30% Fire Wilt 2% | Tiger's Den 5% Grab Master 8% | Bridge Burning 10% Freezing Recovery 44% | One Stroke: Fury 11% Core Boost 10% | Speed Shooter Resurrection |
|||
| Recommended Talisman Skills | ・Tiger's Den ・Core Boost ・Savage |
||
| Build Merits | This build provides players with a perfect gear set when hunting Deathstalker. The Ember Bow build will focus on physical and elemental damage boosts and an adequate stamina boost from Leeway. The Bandit Armor set that leans towards a pure kemono-path is heavily focused on resistances against Deathstalker's physical, ice, and freezing attacks but also provides adequate damage boosts like Bridge Burning and One Stroke: Fury with an added stamina bonus from Core Boost. To round up the build we recommend talismans that boost already present skills in the build like Tiger's Den and Core Boost, and skills that boost raw damage like Savage. Note that stacking Tiger's Den is advisable for this build, as Freezing Recovery will alleviate its side effects. |
|---|
Twilight Bow Mid-Game Climber
| Weapon | ATK | ATK. Type | Crit. Rate |
|---|---|---|---|
| Twilight Bow | 134 | Lunge | 10% |
| Element | Element Power | ||
| - | - | ||
| Inherent Skills | |||
|
・Poison Wielder 5% |
|||
| Req. Materials | |||
|
・
Corestone
x8 ・ Fumebeak Bill x2 ・ Fumebeak Toxic Lung x2 |
|||
| Recommended Build Path / Inherited Skills | |
|---|---|
| Weapon | Skill |
| Intoxicating Birch Bow 2 | Karakuri Coordination: Remedy +2 |
| Final Weapon Output | |
| Twilight Bow | Poison Wielder 5% Fog Fall 4% Karakuri Coordination: Remedy +2 |
| Armor | Skills | |
|---|---|---|
| Basara Helm |
・
Nostrum Water
|
|
| Basara Body Armor |
・
Strong Arm: Thread
+4
|
|
| Basara Gauntlets |
・
Strong Arm: Remedy
+22
|
|
| Basara Field Hakama |
・
Strong Arm: Remedy
+22
|
|
| Basara Sune-ate |
・
Savage
+1
|
|
| Skills | |||
|---|---|---|---|
Poison Wielder 5% | Fog Fall 4% Karakuri Coordination: Remedy +2 | Strong Arm: Thread +4 Strong Arm: Remedy +44 | Savage +1 Nostrum Water |
|||
| Recommended Talisman Skills | ・Core Boost ・Poison Wielder ・Leeway ・Savage |
||
| Build Merits | This build provides a perfect gear set against all Kemono from Harugasumi way until Akikure Canyon although the Twilight Bow can still be viable until Fuyufusagi Fort. The Twilight Bow has the highest damage output out of all weapons that are obtainable from Chapter 1 and it comes with a Poison Wielder skill that is a weakness of most Kemono except for Fumebeak. The reason we chose the Basara armor set for this build is that it is the most decent armor set obtainable from Harugasumi way and because of its boosts on survivability and versatility against ailments provided by Nostrum Water. To further boost this build recommend talisman skills that boost stamina like Core Boost and Leeway, as well as boosts on raw and elemental damage like Savage and Poison Wielder. |
|---|
Best Skills for Bow
| Best Skills | Explanation |
|---|---|
| Extreme Archery ★★★ |
Inhibits stamina use with arrow-based attacks, ultimately helps in extending bolstered arrow flurry and volley from Haya stance (Horizontal). |
| Core Boost ★★★ |
Increases maximum stamina, synergizes well with Extreme Archery skill and extends the bolstered arrow flurry and volley from Haya stance. |
| Ailment Wielder ★★ |
Adds an additional damage that benefits from the Bow's rapid fire rate from a bolstered Haya stance. |
Wild Hearts Related Guides

Best Builds and Armor for Each Weapon
| All Weapon Builds | |
|---|---|
 Karakuri Katana Karakuri Katana |
 Nodachi Nodachi |
 Karakuri Staff Karakuri Staff |
 Claw Blade Claw Blade |
 Bow Bow |
 Hand Cannon Hand Cannon |
 Maul Maul
|  Bladed Wagasa Bladed Wagasa |
Author
Bow Best Builds and Equipment
improvement survey
03/2026
improving Game8's site?

Your answers will help us to improve our website.
Note: Please be sure not to enter any kind of personal information into your response.

We hope you continue to make use of Game8.
Rankings
- We could not find the message board you were looking for.
Gaming News
Popular Games

Genshin Impact Walkthrough & Guides Wiki

Honkai: Star Rail Walkthrough & Guides Wiki

Umamusume: Pretty Derby Walkthrough & Guides Wiki

Pokemon Pokopia Walkthrough & Guides Wiki

Resident Evil Requiem (RE9) Walkthrough & Guides Wiki

Monster Hunter Wilds Walkthrough & Guides Wiki

Wuthering Waves Walkthrough & Guides Wiki

Arknights: Endfield Walkthrough & Guides Wiki

Pokemon FireRed and LeafGreen (FRLG) Walkthrough & Guides Wiki

Pokemon TCG Pocket (PTCGP) Strategies & Guides Wiki
Recommended Games

Diablo 4: Vessel of Hatred Walkthrough & Guides Wiki

Cyberpunk 2077: Ultimate Edition Walkthrough & Guides Wiki

Fire Emblem Heroes (FEH) Walkthrough & Guides Wiki

Yu-Gi-Oh! Master Duel Walkthrough & Guides Wiki

Super Smash Bros. Ultimate Walkthrough & Guides Wiki

Pokemon Brilliant Diamond and Shining Pearl (BDSP) Walkthrough & Guides Wiki

Elden Ring Shadow of the Erdtree Walkthrough & Guides Wiki

Monster Hunter World Walkthrough & Guides Wiki

The Legend of Zelda: Tears of the Kingdom Walkthrough & Guides Wiki

Persona 3 Reload Walkthrough & Guides Wiki
All rights reserved
© 2023 Electronic Arts Inc.
The copyrights of videos of games used in our content and other intellectual property rights belong to the provider of the game.
The contents we provide on this site were created personally by members of the Game8 editorial department.
We refuse the right to reuse or repost content taken without our permission such as data or images to other sites.


![Monster Hunter Stories 3 Review [First Impressions] | Simply Rejuvenating](https://img.game8.co/4438641/2a31b7702bd70e78ec8efd24661dacda.jpeg/thumb)


