Bladed Wagasa Best Builds and Equipment
★ Version 1.0.5 is out now!
★ Check our Kemono Weakness Chart before hunting!
★ Our Best Weapons Tier List is updated as of March 2023!
★ We're working on the Best Builds for every weapon!
┗Best Karakuri Staff Builds | Best Claw Blade Builds
★ Check our Items List to learn how to get whatever you need!

This is a guide to the best builds and equipment for the Bladed Wagasa in Wild Hearts. Learn about the best Bladed Wagasas and the best skills and armor to use with the Bladed Wagasa from the early game until the end game!
| All Bladed Wagasa Guides | |
|---|---|
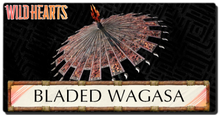 Bladed Wagasa Weapon Tree Bladed Wagasa Weapon Tree |
 Bladed Wagasa Builds Bladed Wagasa Builds |
List of Contents
Best End Game Bladed Wagasa Build
Perfect Parry Blaze Bladed Wagasa: Karura
| Weapon | ATK | ATK. Type | Crit. Rate |
|---|---|---|---|
| Blaze Bladed Wagasa: Karura | 585 | Lunge | 0% |
| Element | Element Power | ||
| - | - | ||
| Inherent Skills | |||
|
・Sublime Dance 50% ・Parry Boost: Fury 15% |
|||
| Req. Materials | |||
|
・
Lump of Ore
x6 ・ Emberplume Fire Crown x4 ・ Emberplume Fire Claw x5 ・ Emberplume Fire Beak x1 |
|||
| Recommended Build Path (Inherited Skills) | |
|---|---|
| Weapon | Skill |
| Freshet Bladed Wagasa | Dodge Master (Wagasa) 20% |
| Dog Star Bladed Wagasa: Bridal Cowl | Parry Boost: Fury |
| Silica Bladed Wagasa | Sublime Dance 30% |
| Almighty Vajra | Dodge Master (Wagasa) 30% |
| Final Weapon Output | |
| Blaze Bladed Wagasa: Karura | Sublime Dance 80% Parry Boost: Fury 24% Dodge Master (Wagasa) 50% Slight of Hand: Fury 6% |
| Armor | Skills | |
|---|---|---|
| Garuda Hat |
・
Fatigue Recovery (Stam Regen)
10% ・
Deaf Ears
・
Solar Protection
5%
|
|
| Sable Mara Body Armor |
・
Poison Recovery
33% ・
Provocation
33% ・
Blackout Recovery
33%
|
|
| Wayward Brigand Tekko |
・
One Stroke: Fury
17% ・
Tangle Recovery
33%
|
|
| Sable Mara Kusazuri |
・
Provocation
33% ・
Fusion Art: Fury
12%
|
|
| Wayward Brigand Boots |
・
Grab Master
6% ・
Resurrection
・
Tangle Recovery
33%
|
|
| Skills | |||
|---|---|---|---|
Sublime Dance 80% | Parry Boost: Fury 24% Dodge Master (Wagasa) 50% | Slight of Hand: Fury 6% Fatigue Recovery 10% | Solar Protection 5% Poison Recovery 33% | Blackout Recovery 33% Provocation 66% | Tangle Recovery 66% One Stroke: Fury 17% | Fusion Art: Fury 12% Grab Master 6% | Deaf Ears Resurrection |
|||
| Recommended Talisman Skills | ・Destruction Art ・One Stroke: Fury ・Provocation ・Defense Boost |
||
| Build Merits | This build provides players with the perfect gear set for hunting Volatile and Deeply Volatile Kemono. The build focuses on parry mastery and building the Bladed Wagasa's weapon gauge faster through parries to obtain stronger combos and higher damage outputs. The weapon build path focuses on stacking skills like Sublime Dance to extend the Bladed Wagasa's weapon gauge timer, Parry Boost: Fury to increase attack damage after a successful parry, and the Bladed Wagasa-specific skill Dodge Master to extend the parry timing for more successful parries. The armor chosen for this build primarily serves as a complement to the weapon build. An important skill to get is Provocation from the Sable Mara armor, this makes Kemono target players more often giving players more parry opportunities to build their gauge faster. To finalize the build, we recommend equipping talisman skills like Destruction Art and One Stroke: Fury to boost attack damage after breaking Kemono parts, as well as Provocation to boost the chances of Kemono targeting players. Defense Boost is also recommended as the armor chosen for this build has low defense points. |
|---|
Best Mid Game Bladed Wagasa Build
Anti-Amaterasu Gleaming Corvid Wagasa
| Weapon | ATK | ATK. Type | Crit. Rate |
|---|---|---|---|
| Gleaming Corvid Wagasa | 243 | Lunge | 10% |
| Element | Element Power | ||
| Wind | 144 | ||
| Inherent Skills | |||
| Req. Materials | |||
|
・
Corestone
x15 ・ Pearlbeak Light Orb x3 ・ Pearlbeak Razor Wing x3 |
|||
| Recommended Build Path (Inherited Skills) | |
|---|---|
| Weapon | Skill |
| Bladed Wagasa of Nature's Splendor 4 | Critical Master 5% |
| Withering Bough Bladed Wagasa | Critical Boost: Fury 4% |
| Critical Boost: Fury 4% | |
| Bladed Wagasa of Nature's Splendor | Critical Master 5% |
| Final Weapon Output | |
| Gleaming Corvid Wagasa | Grab Master 13% Critical Chain 12% Critical Master 10% Critical Boost: Fury 8% |
| Armor | Skills | |
|---|---|---|
| Great Juniper Headgear |
・
Nostrum Water
・
Strong Arm: Water
+3
|
|
| Great Juniper Body Armor |
・
Health Boost
+5 ・
Health Boost
+5 ・
Tangle Recovery
33%
|
|
| Great Juniper Gauntlets |
・
Health Boost
+5 ・
Strong Arm: Remedy
+33
|
|
| Great Juniper Field Hakama |
・
Strong Arm: Remedy
+33 ・
Fusion Master
|
|
| Great Juniper Sune-ate |
・
Health Boost
+5 ・
Savage
+3
|
|
| Skills | |||
|---|---|---|---|
Grab Master 13% | Critical Chain 12% Critical Master 10% | Critical Boost: Fury 8% Stromg Arm: Water +3 | Health Boost +15 Tangle Recovery 33% | Strong Arm: Thread +6 Savage +3 | Strong Arm: Remedy +66 Nostrum Water | Fusion Master |
|||
| Recommended Talisman Skills | ・Grab Master ・Tangle Resilience ・Tangle Recovery ・Critical Master |
||
| Build Merits | This build provides the perfect gear set for players against Amaterasu and mighty Kemono in Harugasumi Way. The weapon build focuses on critical hits that profit from the Gleaming Corvid Wagasa's default 10% critical chance and the Bladed Wagasa's fast-attacking pattern. Additionally, the Gleaming Corvid Wagasa has a Wind affinity which is a weakness of Amaterasu, leading to higher damage outputs. Our recommended armor is the Great Juniper set as it focuses on Wood Resistance and comes with Strong Arm skill bonuses that can help with survivability. The armor set also comes with the Fusion Master skill which is important for the Harpoon Karakuri, this extends the pin time of the Amaterasu; leaving it open for more attacks. To finalize the build, we recommend equipping talisman skills that further boost the skills already in this build like Grab Master to further improve the chances of getting Strong Arm buffs, and skills like Critical Master to increase the chances of dealing critical hits. |
|---|
Best Early Game Bladed Wagasa Build
Deathstalking Ember Bladed Wagasa
| Weapon | ATK | ATK. Type | Crit. Rate |
|---|---|---|---|
| Ember Bladed Wagasa | 153 | Lunge | 0% |
| Element | Element Power | ||
| Fire | 108 | ||
| Inherent Skills | |||
|
・Leeway 4% |
|||
| Req. Materials | |||
|
・
Ore
x10 ・ Cobalt Lavaback Fang x2 ・ Cobalt Lavaback Hide x2 |
|||
| Recommended Build Path (Inherited Skills) | |
|---|---|
| Weapon | Skill |
| Edgestone Bladed Wagasa 2 | None |
| Ripple Bladed Wagasa | Heavenly Dance 8% |
| Ripple Bladed Wagasa 3 | Fire Wilt 2% |
| Wrack Bladed Wagasa: Rhododendron | Tiger's Den 5% |
| Final Weapon Output | |
| Ember Bladed Wagasa | Leeway 4% Parry Boost: Fury 6% Tiger's Den 5% Heavenly Dance 8% Fire Wilt 2% |
| Armor | Skills | |
|---|---|---|
| Bandit Mengu |
・
Grab Master
4% ・
Bridge Burning
10%
|
|
| Bandit Uwagi |
・
Resurrection
・
Freezing Recovery
22%
|
|
| Bandit Tekko |
・
One Stroke: Fury
11%
|
|
| Bandit Loincloth |
・
Core Boost
10% ・
Freezing Recovery
22%
|
|
| Bandit Boots |
・
Grab Master
4%
|
|
| Skills | |||
|---|---|---|---|
Leeway 4% | Parry Boost: Fury 6% Tiger's Den 5% | Heavenly Dance 8% Fire Wilt 2% | Bridge Burning 10% Grab Master 8% | Freezing Recovery 44% One Stroke: Fury 11% | Core Boost 10% Resurrection |
|||
| Recommended Talisman Skills | ・Destruction Art ・Savage ・Tiger's Den |
||
| Build Merits | This build provides players with the perfect gear path and armor set when hunting Deathstalker. The weapon build focuses on dealing fire elemental damage which is a weakness of Deathstalker. This build also adds the Heavenly Dance skill to improve the charge rate of the Bladed Wagasa's weapon gauge which grants more powerful attacks and combos that can help with the fight. Adding the Tiger's Den should not be a problem for players as the Freezing Recovery skill from the Bandit armor set should mitigate its side effects. Our recommended armor set is the Bandit set as it provides high resistance to both fire and water elements and comes with both damage and defense skills which are important for hunting Deathstalker. Leaning to a Pure-Kemono path build of this armor grants players valuable skills for damage and survivability like One Stroke: Fury as well as Resurrection. To round up the build, we recommend talismans that boost damage and synergize with the skills present in this gear set. Skills such as Destruction Art work well with One Stroke: Fury as it makes parts easier to break, allowing players to gain the damage boost from the latter skill. Damage boosts such as Savage and Tiger's Den should be safe to add in this build as the armor set already provides enough survivability skills for a normal Kemono. |
|---|
Night Hunter Yashima Wagasa
| Weapon | ATK | ATK. Type | Crit. Rate |
|---|---|---|---|
| Yashima Bladed Wagasa | 225 | Lunge | -20% |
| Element | Element Power | ||
| - | - | ||
| Inherent Skills | |||
|
・Parry Perfection +4 |
|||
| Req. Materials | |||
|
・
Corestone
x8 ・ Ore x8 ・ Giant Kemono Gem x1 ・ Mirror Stone x7 |
|||
| Recommended Build Path (Inherited Skills) | |
|---|---|
| Weapon | Skill |
| Edgestone Bladed Wagasa 2 | None |
| Ripple Bladed Wagasa | Heavenly Dance 8% Reutilization 10% |
| Ripple Bladed Wagasa 3 | None |
| Final Weapon Output | |
| Yashima Bladed Wagasa | Parry Perfection +4 Destruction Art 15% Heavenly Dance 8% Reutilization 10% |
| Armor | Skills | |
|---|---|---|
| All-Black Mengu |
・
Lunar Protection
3%
|
|
| All-Black Body Armor |
・
Poison Recovery
22% ・
Provocation
22%
|
|
| All-Black Tekko |
・
Poison Recovery
22%
|
|
| All-Black Kusazuri |
・
Provocation
22% ・
Fusion Art: Fury
8%
|
|
| All-Black Sune-ate |
・
Provocation
22% ・
Sprint Master
|
|
| Skills | |||
|---|---|---|---|
Parry Perfection +4 | Destruction Art 15% Heavenly Dance 8% | Reutilization 10% Lunar Protection 5% | Poison Recovery 44% Provocation 66% | Fusion Art: Fury 8% Sprint Master |
|||
| Recommended Talisman Skills | ・One Stroke: Fury ・Savage ・Defense Boost |
||
| Build Merits | This build provides players with a strong gear set against Cobalt Lavaback for farming gear when hunting Deathstalker. The weapon build focuses on building the Bladed Wagasa weapon gauge to gain access to powerful combos and damage output. Parry Perfection synergizes well with Heavenly Dance as it further boosts the gauge fill upon a successful parry. Additionally, the Yashima Bladed Wagasa has the highest raw damage output at this point of the game, which makes this weapon stand out among others. Our recommended armor is the All-Black armor set that is obtainable after defeating Fumebeak. This armor set has a combined total of 20 resistance to fire-based attacks and grants access to unique skills like Lunar Protection and Sprint Master when using its Kemono-path variants. Furthermore, Provocation is an important skill to obtain from this set as it allows Kemono to attack players more frequently for them to parry and build their weapon gauge. In addition to the build, we recommend equipping talismans that boost defense and attack and can synergize with some skills in this gear set. One Stroke: Fury pairs well with Destruction Art as it boosts damage output after breaking a Kemono part. Savage and Defense Boost are also great skills to add to further boost damage and defense. |
|---|
All-Rounder Twilight Wagasa
| Weapon | ATK | ATK. Type | Crit. Rate |
|---|---|---|---|
| Twilight Bladed Wagasa | 171 | Lunge | 10% |
| Element | Element Power | ||
| - | - | ||
| Inherent Skills | |||
|
・Poison Wielder 5% |
|||
| Req. Materials | |||
|
・
Corestone
x8 ・ Fumebeak Bill x2 ・ Fumebeak Toxic Lung x2 |
|||
| Recommended Build Path (Inherited Skills) | |
|---|---|
| Weapon | Skill |
| First Bloom Bladed Wagasa | Savage +2 |
| Intoxicating Birch Bladed Wagasa 2 | Karakuri Coordination: Remedy +2 |
| Final Weapon Output | |
| Twilight Bladed Wagasa | Poison Wielder 5% Fog Fall 4% Savage +2 Karakuri Coordination: Remedy +2 |
| Armor | Skills | |
|---|---|---|
| Basara Helm |
・
Nostrum Water
|
|
| Basara Body Armor |
・
Strong Arm: Thread
+4
|
|
| Basara Gauntlets |
・
Strong Arm: Remedy
+22
|
|
| Basara Field Hakama |
・
Strong Arm: Remedy
+22
|
|
| Basara Sune-ate |
・
Savage
+1
|
|
| Skills | |||
|---|---|---|---|
Poison Wielder 5% | Fog Fall 4% Savage +3 | Karakuri Coordination: Remedy +2 Strong Arm: Thread +4 | Strong Arm: Remedy +44 Nostrum Water |
|||
| Recommended Talisman Skills | ・Grab Master ・Poison Wielder ・Savage ・Defense Boost ・Blaze Resilience |
||
| Build Merits | The Twilight Bladed Wagasa has the highest raw damage out of all weapons obtainable in the early game. Building upon this weapon is extremely helpful for hunting Lavaback and farming other Kemono in Harugasumi Way and Natsukodachi Isle. The weapon build focuses on boosting damage and survivability by inheriting two skills and applying the Poison Ailment against Kemono. Our recommended armor is the Basara set that leans to a Pure Human-Path modification, this grants players access to Nostrum Water which removes all ailments from the player on top of Strong Arm skills that boost healing capabilities. Players can change their armor set to the Grithide set for a boost in blaze resistance which is important for hunting Lavaback. To finalize the build, we recommend equipping talisman skills like Grab Master to synergize with the Strong Arm skills from the armor set. Poison Wielder is also a recommended skill to add to further boost the default skill in the weapon, making it faster to apply the Poison Ailment on a Kemono. Other skills such as Savage and Defense Boost are also recommended to boost damage and defense. |
|---|
Best Skills for Bladed Wagasa
| Best Skills | Explanation |
|---|---|
| Heavenly Dance ★★★ |
Increases the charge rate of the Bladed Wagasa's weapon gauge which is important for dealing higher damage outputs. |
| Parry Perfection ★★★ |
Boosts the Bladed Wagasa gauge fill upon a successful parry; works well with the Heavenly Dance skill. |
Wild Hearts Related Guides

Best Builds and Armor for Each Weapon
| All Weapon Builds | |
|---|---|
 Karakuri Katana Karakuri Katana |
 Nodachi Nodachi |
 Karakuri Staff Karakuri Staff |
 Claw Blade Claw Blade |
 Bow Bow |
 Hand Cannon Hand Cannon |
 Maul Maul
|  Bladed Wagasa Bladed Wagasa |
Author
Bladed Wagasa Best Builds and Equipment
improvement survey
03/2026
improving Game8's site?

Your answers will help us to improve our website.
Note: Please be sure not to enter any kind of personal information into your response.

We hope you continue to make use of Game8.
Rankings
- We could not find the message board you were looking for.
Gaming News
Popular Games

Genshin Impact Walkthrough & Guides Wiki

Honkai: Star Rail Walkthrough & Guides Wiki

Umamusume: Pretty Derby Walkthrough & Guides Wiki

Pokemon Pokopia Walkthrough & Guides Wiki

Resident Evil Requiem (RE9) Walkthrough & Guides Wiki

Monster Hunter Wilds Walkthrough & Guides Wiki

Wuthering Waves Walkthrough & Guides Wiki

Arknights: Endfield Walkthrough & Guides Wiki

Pokemon FireRed and LeafGreen (FRLG) Walkthrough & Guides Wiki

Pokemon TCG Pocket (PTCGP) Strategies & Guides Wiki
Recommended Games

Diablo 4: Vessel of Hatred Walkthrough & Guides Wiki

Cyberpunk 2077: Ultimate Edition Walkthrough & Guides Wiki

Fire Emblem Heroes (FEH) Walkthrough & Guides Wiki

Yu-Gi-Oh! Master Duel Walkthrough & Guides Wiki

Super Smash Bros. Ultimate Walkthrough & Guides Wiki

Pokemon Brilliant Diamond and Shining Pearl (BDSP) Walkthrough & Guides Wiki

Elden Ring Shadow of the Erdtree Walkthrough & Guides Wiki

Monster Hunter World Walkthrough & Guides Wiki

The Legend of Zelda: Tears of the Kingdom Walkthrough & Guides Wiki

Persona 3 Reload Walkthrough & Guides Wiki
All rights reserved
© 2023 Electronic Arts Inc.
The copyrights of videos of games used in our content and other intellectual property rights belong to the provider of the game.
The contents we provide on this site were created personally by members of the Game8 editorial department.
We refuse the right to reuse or repost content taken without our permission such as data or images to other sites.


![Monster Hunter Stories 3 Review [First Impressions] | Simply Rejuvenating](https://img.game8.co/4438641/2a31b7702bd70e78ec8efd24661dacda.jpeg/thumb)


