Nodachi Best Builds and Equipment
★ Version 1.0.5 is out now!
★ Check our Kemono Weakness Chart before hunting!
★ Our Best Weapons Tier List is updated as of March 2023!
★ We're working on the Best Builds for every weapon!
┗Best Karakuri Staff Builds | Best Claw Blade Builds
★ Check our Items List to learn how to get whatever you need!
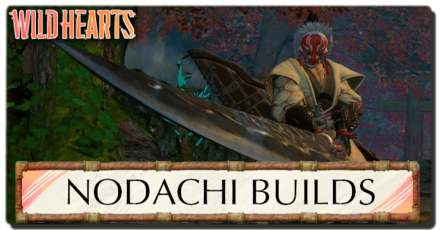
This is a guide to the best builds and equipment for the Nodachi in Wild Hearts. Learn about the best Nodachis and the best skills and armor to use with the Nodachi from the early game until the end game!
| All Nodachi Guides | |
|---|---|
 Nodachi Weapon Tree Nodachi Weapon Tree |
 Nodachi Builds Nodachi Builds |
List of Contents
Best End Game Nodachi Builds
Fushitsu-mitama All-Rounder
| Weapon | ATK | ATK. Type | Crit. Rate |
|---|---|---|---|
| Fushitsu-mitama | 1,105 | Slash | 0% |
| Element | Element Power | ||
| - | - | ||
| Inherent Skills | |||
|
・Iai Art 8% (Base Inherited Skill) ・Hawk Eye 10% ・Battle Swordsmanship: Attack 20% |
|||
| Req. Materials | |||
|
・
Lump of Ore
x10 ・ Celestial Dragon Limb x4 ・ Celestial Dragon Tail x4 ・ Celestial Dragon Essence x1 |
|||
| Recommended Build Path (Inherited Skills) | |
|---|---|
| Weapon | Skill |
| Amber Nodachi | Hawk Eye 5% |
| Ice Crystal Torrent | Charge Boost: Fury 6% |
| Scarlet Doom Nodachi 2 | One Stroke: Fury 18% |
| Blaze Nodachi: Blessed Bird | Charge Boost: Fury 6% |
| Final Weapon Output | |
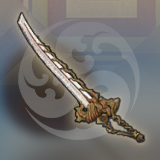 Fushitsu-mitama Fushitsu-mitama
|
・Iai Art 8% ・Hawk Eye 15% ・Battle Swordsmanship: Attack 20% ・Charge Boost: Fury 12% ・One Stroke: Fury 18% |
| Armor | Skills | |
|---|---|---|
| Garuda Hat |
・
Fatigue Recovery (Stam Regen)
10% ・
Deaf Ears
・
Solar Protection
5%
|
|
| Draconic Back Guard |
・
Ancient Tree Champion
15% ・
Hawk Eye
5% ・
Rude Health
12%
|
|
| Wayward Brigand Tekko |
・
One Stroke: Fury
17% ・
Tangle Recovery
33%
|
|
| Draconic Body Armor |
・
Fusion Master
・
Battle Spirit
10% ・
Rude Health
12%
|
|
| Wayward Brigand Boots |
・
Grab Master
6% ・
Resurrection
・
Tangle Recovery
33%
|
|
| Skills | |||
|---|---|---|---|
Iai Art 8% | Hawk Eye 20% Charge Boost: Fury 12% | One Stroke: Fury 35% Resurrection | Fatigue Recovery 10% Deaf Ears | Solar Protection 5% Rude Health 24% | Tangle Recovery 66% Battle Spirit 10% | Grab Master 6% Battle Swordsmanship: Attack 20% |
|||
| Recommended Talisman Skills | ・Hawk Eye ・Desperation ・Double Strike |
||
| Build Merits | This build prioritizes maximizing the Nodachi's raw damage output and providing players with a well-rounded set for dealing with Chapter 5's Volatile and Deeply Volatile Kemono.
The Fushitsu-mitama is one of the best raw Nodachis in the game, featuring 1,105 base damage and solid skills like Hawk Eye, Battle Swordsmanship: Attack, and Iai Art. Following our recommended build path further increases the Nodachi's damage output with skills like Charge Boost: Fury and One Stroke: Fury. Mixing the Garuda, Wayward Brigand, and Draconic sets, and using their Kemono-Path modifications, provides the build with potent utility skills, like Deaf Ears, Resurrection, and Rude Health, while contributing to the Nodachi's damage output with Hawk Eye, One Stroke: Fury, and Battle Spirit. To round the build out, we recommend using Talismans with damage-boosting skills like Hawk Eye, Desperation, and Double Strike to increase your damage output with the Nodachi. |
|---|
Best Mid Game Nodachi Builds
Balanced Sable Mara Agate Set
| Weapon | ATK | ATK. Type | Crit. Rate |
|---|---|---|---|
| Agate Nodachi 2 | 983 | Slash | 0% |
| Element | Element Power | ||
| - | - | ||
| Inherent Skills | |||
|
・Strong Arm: Spirit 20% ・Rally: Ironclad 10% ・Desperation 15% (Base Inherited Skill) |
|||
| Req. Materials | |||
|
・
Lump of Ore
x8 ・ Onyxshard Rock Incisor x2 ・ Onyxshard Spine x2 ・ Spinous Onyxshard Hide x1 |
|||
| Recommended Build Path (Inherited Skills) | |
|---|---|
| Weapon | Skill |
| Wrack Nodachi: Balsam | Charge Boost: Fury 4% |
| Nodachi of Nature's Splendor 4 | Critical Master 5% |
| Destruction Art 10% | |
| Agate Nodachi | Iai Art 8% |
| Final Weapon Output | |
| Agate Nodachi 2 |
・Strong Arm: Spirit 20% ・Rally: Ironclad 10% ・Desperation 15% ・Charge Boost: Fury 4% ・Critical Master 5% ・Destruction Art 10% ・Iai Art 8% |
| Armor | Skills | |
|---|---|---|
| Sable Mara Mengu |
・
Lunar Protection
5% ・
Deaf Ears
|
|
| Sable Mara Body Armor |
・
Poison Recovery
33% ・
Provocation
33% ・
Blackout Recovery
33%
|
|
| Sable Mara Tekko |
・
Poison Recovery
33% ・
Rally: Ironclad
5% ・
Blackout Recovery
33%
|
|
| Sable Mara Kusazuri |
・
Provocation
33% ・
Fusion Art: Fury
12%
|
|
| Sable Mara Sune-ate |
・
Provocation
33% ・
Sprint Master
・
Blackout Recovery
33%
|
|
| Skills | |||
|---|---|---|---|
Strong Arm: Spirit 20% | Rally: Ironclad 15% Desperation 15% | Charge Boost: Fury 4% Critical Master 5% | Destruction Art 10% Iai Art 8% | Deaf Ears Lunar Protection 5% | Poison Recovery 66% Blackout Recovery 99% | Provocation 99% Fusion Art: Fury 12% | Sprint Master |
|||
| Recommended Talisman Skills | ・Slight of Hand: Fury ・Battle Spirit ・One Strike: Fury |
||
| Build Merits | This build provides a balanced gear set for tackling the Emberplume and Golden Tempest. It also acts as a viable set for taking on the Celestial Dragon.
The Agate Nodachi 2 offers heavy raw damage and potent Inherent and Inherited offensive skills like Strong Arm: Spirit and Desperation. In addition, its upgrade paths provide it with a balanced spread of utility and damage skills, like Charge Boost: Fury, Iai Art, and Destruction Art. The Sable Mara set from the Mighty Fumebeak provides high Fire and Wind resistance alongside potent utility skills, like Deaf Ears, Lunar Protection, Fusion Art: Fury, and Blackout Recovery, improving your survivability against the hard-hitting Emberplume and Golden Tempest. To round the build out, we recommend using Talismans with damage-boosting skills like Slight of Hand: Fury, Battle Spirit, and One Strike: Fury to increase your damage output with the Nodachi further. |
|---|
Anti-Amaterasu Sasanqua Set
| Weapon | ATK | ATK. Type | Crit. Rate |
|---|---|---|---|
| Sasanqua Nodachi | 463 | Slash | 0% |
| Element | Element Power | ||
| Wind | 272 | ||
| Inherent Skills | |||
|
・Final Blow 25% ・Recovery Boost 10% (Base Inherited Skill) |
|||
| Req. Materials | |||
|
・
Ripclaw Corona Spray
x3 ・ Ripclaw Sickle Feather x4 ・ Ripclaw Bloom Beak x2 ・ Large Piece of Ore x2 |
|||
| Recommended Build Path (Inherited Skills) | |
|---|---|
| Weapon | Skill |
| Intoxicating Birch Nodachi 2 | Wind Wilt 5% |
| Twilight Nodachi | Fog Fall 4% |
| Summer Camellia Nodachi | Karakuri Coordination: Remedy +3 |
| Summer Camellia Nodachi 2 | Critical Master 5% |
| Final Weapon Output | |
| Sasanqua Nodachi |
・Final Blow 25% ・Recovery Boost 10% ・Wind Wilt 5% ・Fog Fall 4% ・Karakuri Coordination: Remedy +3 ・Critical Master 5% |
| Armor | Skills | |
|---|---|---|
| Great Juniper Headgear |
・
Nostrum Water
・
Strong Arm: Water
+3
|
|
| Great Juniper Body Armor |
・
Health Boost
+5 ・
Health Boost
+5 ・
Tangle Recovery
33%
|
|
| Great Juniper Gauntlets |
・
Health Boost
+5 ・
Strong Arm: Remedy
+33
|
|
| Great Juniper Field Hakama |
・
Strong Arm: Remedy
+33 ・
Fusion Master
|
|
| Great Juniper Sune-ate |
・
Health Boost
+5 ・
Savage
+3
|
|
| Skills | |||
|---|---|---|---|
Final Blow 25% | Recovery Boost 10% Wind Wilt 5% | Fog Fall 4% Karakuri Coordination: Remedy +3 | Critical Master 5% Strong Arm: Water +3 | Nostrum Water Health Boost +15 | Tangle Recovery 33% Strong Arm: Remedy +66 | Strong Arm: Thread +6 Fusion Master | Savage +3 |
|||
| Recommended Talisman Skills | ・Wind Boost ・Wind Wilt ・Wood Resilience |
||
| Build Merits | This build provides an excellent set of gear for the first fight against Amaterasu while remaining solid against Mighty Wood Kemono in Harugasumi Way.
The Sasanqua Nodachi is the strongest Wind-based Nodachi at this point in the game, making it one of the best options for taking down the Amaterasu. In addition, it also features potent damage-enhancing Inherent and Inherited skills from its upgrade paths, like Final Blow, Wind Wilt, and Fog Fall. The Great Juniper set from the Mighty Kingtusk provides high Wood and Entangle resistance alongside potent Human-Path utility skills, like Nostrum Water, Strong Arm: Remedy, and Fusion Master, greatly improving your survivability against the Amaterasu and other Mighty Wood Kemono. To round the build out, we recommend using Talismans with Wind Boost, Wind Wilt, and Wood Resilience to improve your survivability and damage output against the Amaterasu and other Wood Kemono. |
|---|
Ember Nodachi Bandit
| Weapon | ATK | ATK. Type | Crit. Rate |
|---|---|---|---|
| Ember Nodachi | 289 | Slash | 0% |
| Element | Element Power | ||
| Fire | 204 | ||
| Inherent Skills | |||
|
・Leeway 4% ・Iai Art 5% (Base Inherited Skill) |
|||
| Req. Materials | |||
|
・
Ore
x10 ・ Cobalt Lavaback Fang x2 ・ Cobalt Lavaback Hide x2 |
|||
| Recommended Build Path (Inherited Skills) | |
|---|---|
| Weapon | Skill |
| Ripple Nodachi | Double Strike 4% |
| Ripple Nodachi 3 | Fire Wilt 5% |
| Wrack Nodachi: Rhododendron 2 | Tiger's Den 5% |
| Final Weapon Output | |
| Ember Nodachi |
・Leeway 4% ・Iai Art 5% ・Double Strike 4% ・Fire Wilt 5% ・Tiger's Den 5% |
| Armor | Skills | |
|---|---|---|
| Bandit Mengu |
・
Grab Master
4% ・
Bridge Burning
10%
|
|
| Bandit Uwagi |
・
Resurrection
・
Freezing Recovery
22%
|
|
| Bandit Tekko |
・
One Stroke: Fury
11%
|
|
| Bandit Loincloth |
・
Core Boost
10% ・
Freezing Recovery
22%
|
|
| Bandit Boots |
・
Grab Master
4%
|
|
| Skills | |||
|---|---|---|---|
Leeway +4% | Iai Art +5% Double Strike 4% | Fire Wilt 5% Tiger's Den 5% | Grab Master 8% Bridge Burning 10% | Freezing Recovery 44% Resurrection | One Stroke: Fury 11% Core Boost 10 % |
|||
| Recommended Talisman Skills | ・Flame Wielder ・Battle Spirit ・Water Resilience |
||
| Build Merits | This build is primarily designed for taking down the Deathstalker near the end of Chapter 2 while remaining a solid starter set when taking on the Mighty Kemono of Chapter 3.
The Ember Nodachi is the strongest Fire-based Nodachi at this point in the game, making it an excellent pick for fighting against the Deathstalker. In addition, it also features solid Inherent and Inherited skills from its upgrade paths, like Iai Art, Fire Wilt, and Double Strike. The Bandit set provides high Water resistance and Freezing Recovery, letting you have an easier time dealing with the Deathstalker's icy attacks. In addition, modifying the set toward the Kemono-Path gives you access to potent offensive and defensive skills, like Resurrection and Bridge Burning. To round out the build, we recommend using Talismans with Flame Wielder, Battle Spirit, and Water Resilience to improve your survivability and damage output against the Deathstalker and other Water Kemono. |
|---|
Crystal Cleaver Akikure Veteran
| Weapon | ATK | ATK. Type | Crit. Rate |
|---|---|---|---|
| Crystal Cleaver | 405 | Lunge | 10% |
| Element | Element Power | ||
| - | - | ||
| Inherent Skills | |||
|
・Critical Chain 8% (Base Inherited Skill) ・One Stroke: Fury 15% (Kemono-Path) |
|||
| Req. Materials | |||
|
・
Corestone
x6 ・ Goldshard Tail x3 ・ Goldshard Claw x2 ・ Goldshard Spine x3 |
|||
| Recommended Build Path (Inherited Skills) | |
|---|---|
| Weapon | Skill |
| Clove Nodachi | Fillip 6% |
| Demon Grass Nodachi | Battle Paragon 10% |
| Final Weapon Output | |
| Crystal Cleaver |
・Critical Chain 8% ・One Stroke: Fury 15% ・Fillip 6% ・Battle Paragon 10% |
| Armor | Skills | |
|---|---|---|
| Veteran Helmet |
・
Bare Thread
6%
|
|
| Veteran Armor |
・
Bare Thread
6% ・
Fatigue Resilience
13%
|
|
| Veteran Tekko |
・
Dodge Master (Armor)
17%
|
|
| Veteran Kusazuri |
・
Fatigue Resilience
13% ・
Poison Recovery
22%
|
|
| Veteran Sune-ate |
・
Dodge Master (Armor)
17%
|
|
| Skills | |||
|---|---|---|---|
Fillip 6% | Battle Paragon 10% Critical Chain 8% | One Stroke: Fury 15% Bare Thread 12% | Fatigue Resilience 26% Dodge Master 34% | Poison Recovery 22% |
|||
| Recommended Talisman Skills | ・Health Boost ・Poison Recovery ・Wind Resilience |
||
| Build Merits | This build provides players with a solid set of gear for dealing with the Fumebeak while remaining effective against the rest of the Akikure Canyon kemono.
The Crystal Cleaver provides high raw Piercing damage, a 10% critical rate, and solid offensive skills like Critical Chain. The Veteran set provides excellent resistances against the Sporetail, Goldshard, and Fumebeak, while also featuring solid utility skills like Bare Thread and Dodge Master. In addition, we also recommend modifying this armor set toward the Kemono-Path to activate the Crystal Cleaver's One Stroke: Fury. To round the build out, we recommend equipping Talismans with Health Boost, Poison Recovery, and Wind Resilience to further enhance your survivability against the Fumebeak. |
|---|
Best Early Game Nodachi Builds
Ripple Natsukodachi Hunter
| Weapon | ATK | ATK. Type | Crit. Rate |
|---|---|---|---|
| Ripple Nodachi | 270 | Slash | -10% |
| Element | Element Power | ||
| - | - | ||
| Inherent Skills | |||
|
・Nimble-Fingered 25% ・Reutilization 10% (Base Inherited Skill) ・Double Strike 4% (Base Inherited Skill) |
|||
| Req. Materials | |||
|
・
Corestone
x4 ・ Bluestone x3 ・ Gritdog Iron Nugget x1 ・ Gritdog Enteric Sack x1 |
|||
| Armor | Skills | |
|---|---|---|
| Roaming Bard Mengu |
・
Recovery Boost
15%
|
|
| Roaming Bard Uwagi |
・
Presence of Mind
4%
|
|
| Roaming Bard Tekko |
・
Savage
+1
|
|
| Grithide Loincloth |
・
Core Boost
10%
|
|
| Grithide Tabi |
・
Strong Swimmer
・
Resurrection
|
|
| Skills | |||
|---|---|---|---|
Recovery Boost 15% | Presence of Mind 4% (Kemono Path) Nimble-Fingered 25% | Double Strike 4% Savage +1 | Core Boost 10% Resurrection (Pure Kemono-Path) Strong Swimmer (Pure Human-Path) |
|||
| Recommended Talisman Skills | ・Health Boost ・Ironclad ・Fire Resilience |
||
| Build Merits | This build provides players with a solid set of gear for dealing with the Lavaback while remaining effective against the rest of the Natsukodachi Isle kemono.
Despite its 10% negative crit rate, the Ripple Nodachi is one of the strongest raw Nodachi at this point in the game with its 270 base attack. It also offers strong offensive and defensive skills with Nimble-Fingered, Double Strike, and Reutilization. The mix of Roaming Bard and Grithide sets provides high Fire resistance while keeping its Water, Wind, and Earth resistances above zero, making it a great set for tackling the entirety of Natsukodachi Isle. In addition, modifying your armor set toward the Pure Kemono-Path gives you access to the Resurrection skill, which is incredibly handy for giving you a second chance in a pinch. To round the build out, we recommend equipping Talismans with Health Boost, Ironclad, and Fire Resilience to further enhance your survivability against the Lavaback. |
|---|
Creeping Vine All-Rounder
| Weapon | ATK | ATK. Type | Crit. Rate |
|---|---|---|---|
| Creeping Vine Nodachi | 165 | Slash | 0% |
| Element | Element Power | ||
| Wood | 36 | ||
| Inherent Skills | |||
|
・Final Blow 13% ・Strong Arm: Spirit 4% (Base Inherited Skill) |
|||
| Req. Materials | |||
|
・
Kingtusk Hide
x1 ・ Kingtusk Ivory x1 ・ Corestone x4 |
|||
| Recommended Build Path (Inherited Skills) | |
|---|---|
| Weapon | Skill |
| First Bloom Nodachi | Savage +3 |
| Final Weapon Output | |
| Creeping Vine Nodachi |
・Final Blow 13% ・Strong Arm: Spirit 4% ・Savage +3 |
| Armor | Skills | |
|---|---|---|
| Basara Helm |
・
Nostrum Water
|
|
| Basara Body Armor |
・
Strong Arm: Thread
+4
|
|
| Basara Gauntlets |
・
Strong Arm: Remedy
+22
|
|
| Basara Field Hakama |
・
Strong Arm: Remedy
+22
|
|
| Basara Sune-ate |
・
Savage
+1
|
|
| Skills | |||
|---|---|---|---|
Strong Arm: Remedy +44
| Final Blow 13% Strong Arm: Spirit 4% | Strong Arm: Thread +4 Savage +4 | Nostrum Water (Pure Human-Path) |
|||
| Recommended Talisman Skills | ・Health Boost ・Wood Boost ・Ukemi Art |
||
| Build Merits | This build focuses on giving players a strong set of gear for dealing with the Wood-based kemono in Harugasumi Way while still remaining effective against the Spineglider, Gritdog, and Dreadclaw in Natsukodachi Isle. The Creeping Vine Nodachi offers adequate raw and Wood elemental damage while also providing extra damage potential with its Final Blow and Strong Arm: Spirit skills. The Basara Armor Set, obtained from the Kingtusk, provides a solid spread of elemental resistances for dealing with Chapter 1's first few kemono and also offers plenty of survivability skills like Strong Arm: Remedy and Strong Arm: Thread. To round the build out, we recommend equipping Talismans with Health Boost, Wood Boost, and Ukemi Art to further enhance your early survivability and damage output. |
|---|
Best Skills for Nodachi
| Best Skills | Explanation |
|---|---|
| Charge Boost: Fury ★★★ |
This skill boosts the power of the Nodachi's charged-up attacks, which make up most of its damage output, making it a must-have for Nodachi builds. |
| Iai Art ★★★ |
This skill lowers the amount of stamina loss while charging up your Iai Stance, making it a great addition for any Nodachi build. |
| Double Strike ★★★ |
This skill increases your damage output for a short period after landing a charge attack, allowing the Nodachi to land mightier blows. |
| Battle Swordsmanship: Attack ★★ |
This skill provides a straight damage boost to your Attack 1 and Attack 2 moves, so it's an excellent skill for any weapon, including the Nodachi. |
| One Stroke: Fury ★★ |
With the Nodachi capable of breaking parts quickly with its high-damage hits, boosting attack after destroying kemono parts is nice to have. |
| Final Blow ★★ |
The Nodachi unleashes high-damage combos during knockdowns, so a skill that boosts damage against toppled kemono is excellent to have. |
| Karakuri Coordination: Fury ★ |
Iai attacks from the Spring and Crate are essential in Nodachi combos, so a boost in their power is always great to have. |
| Slight of Hand: Fury ★ |
Similar to Karakuri Coordination: Fury, gaining bonus attack after summoning karakuri boosts the power of the Nodachi's karakuri attacks. |
Wild Hearts Related Guides

Best Builds and Armor for Each Weapon
| All Weapon Builds | |
|---|---|
 Karakuri Katana Karakuri Katana |
 Nodachi Nodachi |
 Karakuri Staff Karakuri Staff |
 Claw Blade Claw Blade |
 Bow Bow |
 Hand Cannon Hand Cannon |
 Maul Maul
|  Bladed Wagasa Bladed Wagasa |
Author
Nodachi Best Builds and Equipment
improvement survey
03/2026
improving Game8's site?

Your answers will help us to improve our website.
Note: Please be sure not to enter any kind of personal information into your response.

We hope you continue to make use of Game8.
Rankings
- We could not find the message board you were looking for.
Gaming News
Popular Games

Genshin Impact Walkthrough & Guides Wiki

Honkai: Star Rail Walkthrough & Guides Wiki

Umamusume: Pretty Derby Walkthrough & Guides Wiki

Pokemon Pokopia Walkthrough & Guides Wiki

Resident Evil Requiem (RE9) Walkthrough & Guides Wiki

Monster Hunter Wilds Walkthrough & Guides Wiki

Wuthering Waves Walkthrough & Guides Wiki

Arknights: Endfield Walkthrough & Guides Wiki

Pokemon FireRed and LeafGreen (FRLG) Walkthrough & Guides Wiki

Pokemon TCG Pocket (PTCGP) Strategies & Guides Wiki
Recommended Games

Diablo 4: Vessel of Hatred Walkthrough & Guides Wiki

Cyberpunk 2077: Ultimate Edition Walkthrough & Guides Wiki

Fire Emblem Heroes (FEH) Walkthrough & Guides Wiki

Yu-Gi-Oh! Master Duel Walkthrough & Guides Wiki

Super Smash Bros. Ultimate Walkthrough & Guides Wiki

Pokemon Brilliant Diamond and Shining Pearl (BDSP) Walkthrough & Guides Wiki

Elden Ring Shadow of the Erdtree Walkthrough & Guides Wiki

Monster Hunter World Walkthrough & Guides Wiki

The Legend of Zelda: Tears of the Kingdom Walkthrough & Guides Wiki

Persona 3 Reload Walkthrough & Guides Wiki
All rights reserved
© 2023 Electronic Arts Inc.
The copyrights of videos of games used in our content and other intellectual property rights belong to the provider of the game.
The contents we provide on this site were created personally by members of the Game8 editorial department.
We refuse the right to reuse or repost content taken without our permission such as data or images to other sites.


![Monster Hunter Stories 3 Review [First Impressions] | Simply Rejuvenating](https://img.game8.co/4438641/2a31b7702bd70e78ec8efd24661dacda.jpeg/thumb)


