This survey will take about 1 minute.
Your answers will help us to improve our website.
Sea of Thieves
The Lair of LeChuck Tall Tale Guide
★SoT PS5 Version and Season 12 are Now Live!
★New Pre-Order and Edition Bonuses for the PS5!
★Check out our Beginner's Guide for new players.
★Tall Tales | World Events | Trading Companies

A walkthrough guide for The Lair of LeChuck Tall Tale in Sea of Thieves. See a complete Tall Tale walkthrough and guide for The Lair of LeChuck, including all Memoir Spots and Journal Locations, as well as how to get all its Commendations and a list of its completion rewards.
| ◄ Previous Tall Tale | Next Tall Tale ▶ |
|---|---|
| The Quest for Guybrush | - |
List of Contents
The Lair of LeChuck Overview and Location
| The Lair of LeChuck | |
|---|---|
| Story Arc | The Legend of Monkey Island |
| Quest Location | At the Capsize Charters at all Outposts. |
| Reward |
8000 Gold (High Seas) 2400 Gold (Safer Seas) Burning Blade Cutlass The Legend of Monkey Island Cutlass |
| ◄ Previous Tall Tale | Next Tall Tale ▶ |
| The Quest for Guybrush | - |
Find the Starting Location Beside Kate Capsize
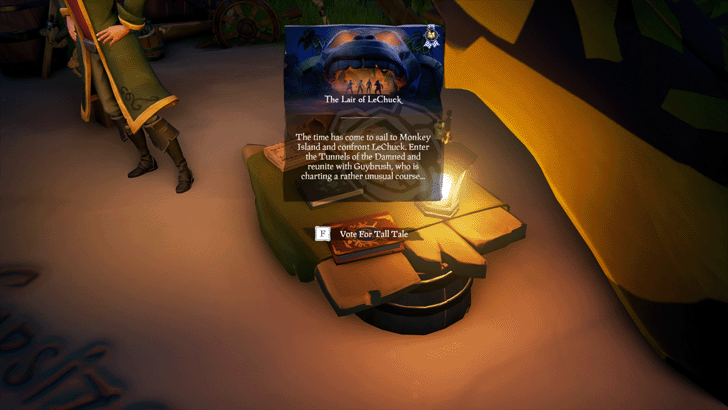
You can start the The Lair of LeChuck beside Kate Capsize, who is stationed at the Capsize Charters tent along the shore of any Outpost. Press the Vote for Tall Tale button to start the quest.
Alternatively, you can also select the The Legend of Monkey Island in the Main Menu to begin the tall tale.
Note: This Tall Tale can also be started from your quest table. However, you will still need to go to the Capsize Charters tent to formally begin the tall tale.
The Lair of LeChuck Walkthrough
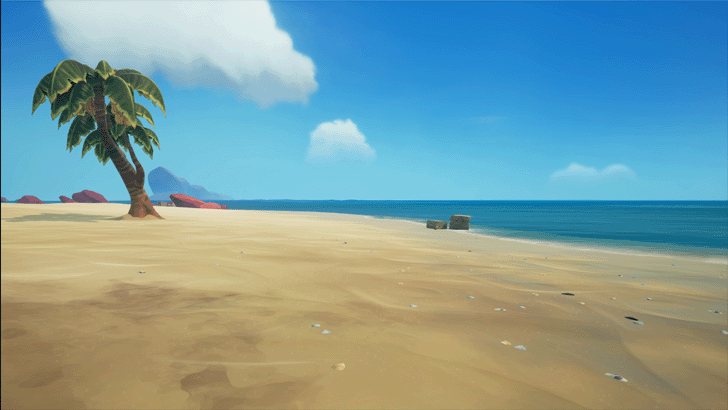
Dock Near the Black Pearl
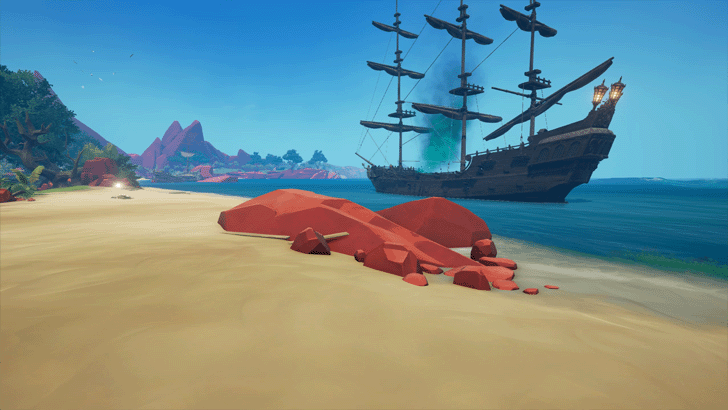
Upon arrival on Monkey Island, dock your ship near Guybrush's vessel, the Black Pearl, located at the eastern side of the island.
You can also climb aboard the Black Pearl and speak to the three crewmen on the deck for the Part of the Crew Commendation.
Obtain Map of the Three Monkey Idols
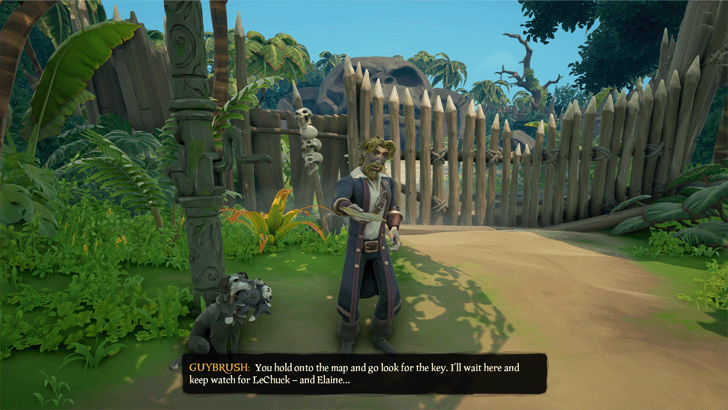
From the Black Pearl, walk North to North East until you reach a path leading to a Private Property Sign. Continue on ahead and speak to Guybrush.
He will give you a map of the island with locations of the three Monkey Idols that you must collect to gain access to LeChuck's Lair. You can view the map on the last page of your Quest Book.
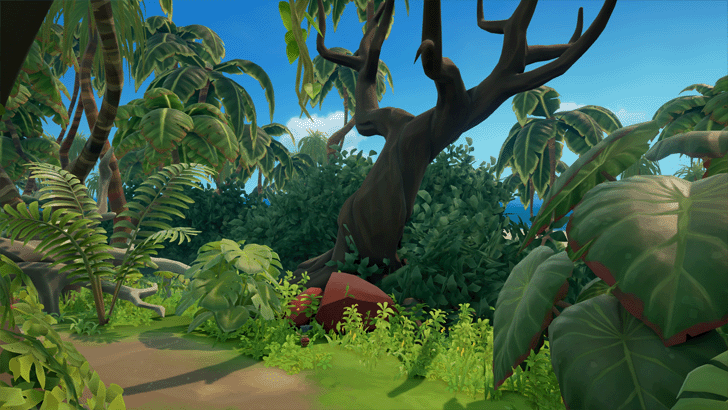
Go to Herman's Camp
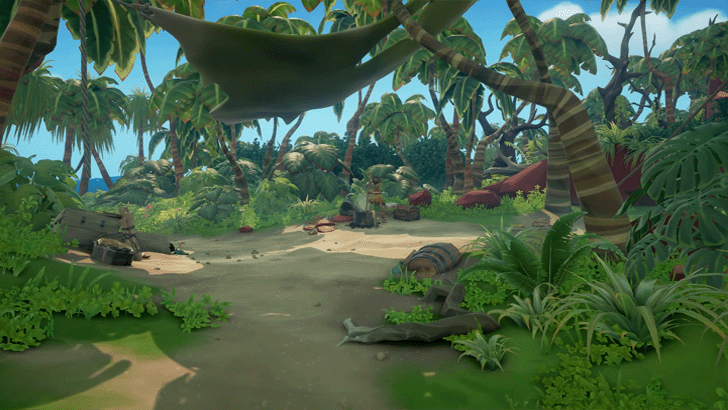
To get to Herman's Camp, go South from Guybrush's location and into the jungle. Keep going South until you see black smoke - this is where the camp is located.
Search the Animal Carvings for Supply Cache Key
There will be four Animal Carvings north of the camp, and one of these carvings contain the Supply Cache Key.
| Animal Carving | Directions |
|---|---|
| Pig |  Cross the bridge north of Herman's camp. Turn left and you will find the Pig Animal Carving. |
| Parrot | 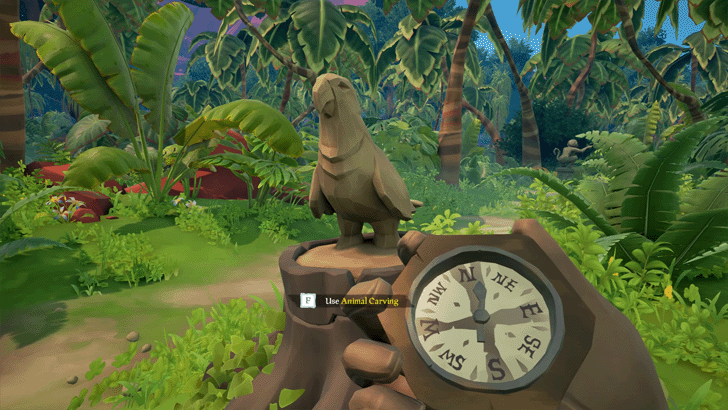 From Pig Animal Carving, take the first path to the right to find the Parrot Animal Carving beside a monkey statue. |
| Monkey | 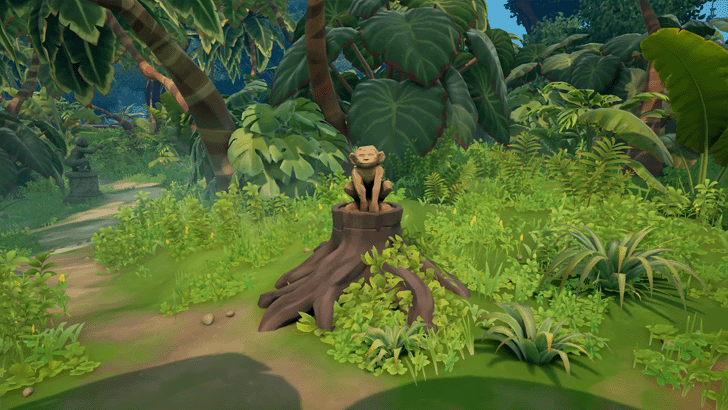 From Parrot Animal Carving, follow the direction of where the monkey statues are pointing to find the Monkey Animal Carving. |
| Chicken |  From Monkey Animal Carving, go Southeast until you reach an intersection. Turn right to find the Chicken Animal Carving. |
Unlock the Supply Cache and Obtain Chilled Banana Soup

Go back to Herman's Camp. From here, go Northeast and climb down the Makeshift Ladder beside a lantern. At the bottom of the ravine, head West until you come to an iron cell door. Open it using the Supply Cache Key.
In the Supply Cache, open the chest and grab the Chilled Banana Soup inside.
Pour Chilled Banana Soup on the Monkey Trap

Return to Herman's Camp and pour the Chilled Banana Soup on the plate of the Monkey Trap. Sit back and watch as a monkey will come out and drink from it.
Capture Herman and Steal the Chest Key

Herman will walk over to the trap and inspect it. Quickly use the nearby rope to spring the trap and capture Herman. Afterward, shake the rope three times and Herman's Chest Key will fall out of his pockets.
Ensnaring Herman unlocks the Highly Strung Commendation.
Open Herman's Chest for the Map
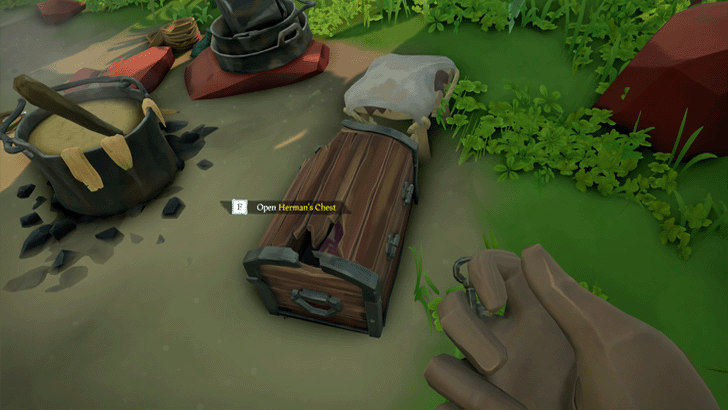
Use Herman's Chest Key to unlock the chest at his camp and grab the Herman's Directions scroll inside. This is a map that will lead you to an Old Boot.
Find the Old Boot for Another Map

Cross the bridge north of Herman's camp, take a left towards the Pig Animal Carving, and keep going Northwest. You will eventually reach a monkey statue and two wooden barrels. Take a left again going Northwest until you find an Old Pocket Watch sitting on a crate.
Continue down the path of the pocket watch and once you spot a black flag with a skull on it, turn left towards the pond to find the Old Boot. Reach inside the boot to find the map leading to the Rowboat Oars.
Dig the Spots for the Rowboat Oars
From the Old Boot, head Northwest towards the riverbed. Open your Quest Book and flip to the last page. You will see a drawing of one of the following: Hanging Clothes, Wooden Fence, Crate of Bottles, and an Old Dagger.
These are the possible locations of where the Rowboat Oars are located. Depending on the drawing on your quest book, go to one of these spots and start digging for the oars.
| Hanging Clothes | 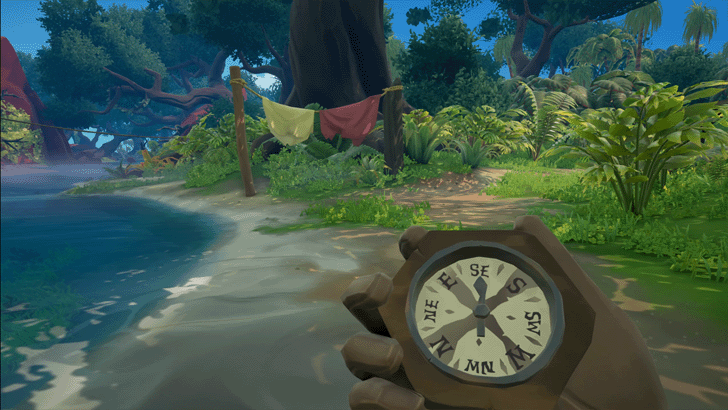 Found south of the riverbed. |
|---|---|
| Wooden Fence |  Found north of the riverbed, beside the footholds. |
| Crate of Bottles |  Found under the Palm Trees near a zipline. Go northwest of the Hanging Clothes to get here. |
| Old Dagger | 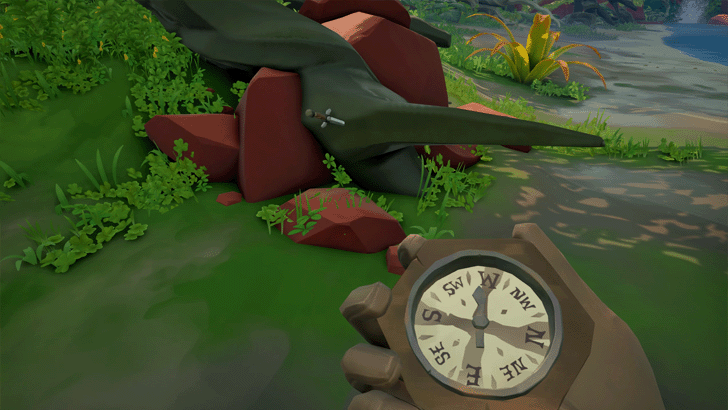 On a small isle along the riverbed. |
Take the Buried Idol Map From the Skeleton
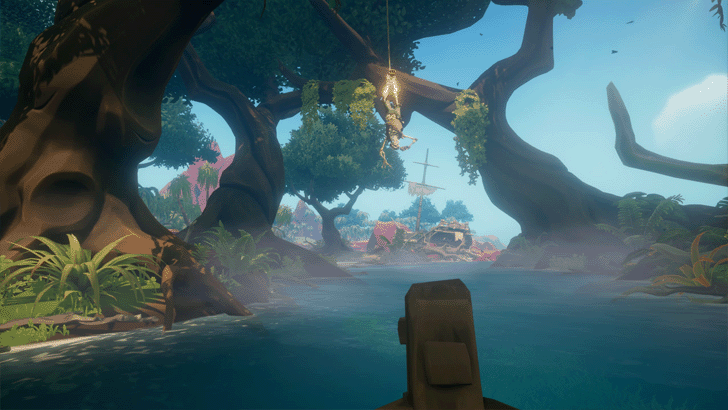
Attach the oars on the rowboat by the riverbed and row towards East down the swamp area. You will come along a hanging skeleton on a rope. Stop just below it and grab the Buried Idol Map attached on the skeleton.
Dig Up the First Monkey Idol
The Buried Idol Map you obtained earlier will be added to your Quest Book. Viewing it reveals one of the following drawings: Banana Tree, Rowboat, or Clenched Fist. Depending on the drawing on your book, go to one of these locations and start digging for the Monkey Idol.
| Banana Tree |  Found along the beach, south of Herman's Camp |
|---|---|
| Rowboat |  East of the swamp area, near the destroyed Sea Monkey ship. |
| Clenched Fist | 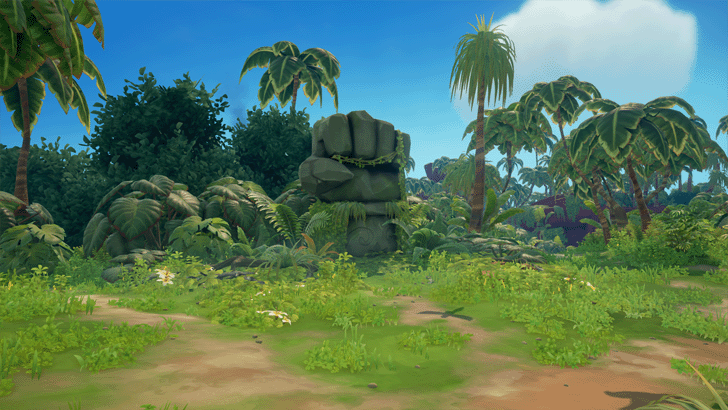 North of Herman's camp, across the wooden bridge. Near the Chicken Carving. |
Place the Monkey Idol on the Stone Monkey Hand

The Stone Monkey Hand is located in the jungle. Look for the monkey statues again and follow the directions that they are pointing at to get here.
Place the first Monkey Idol on the stand. One down, two more idols to go!
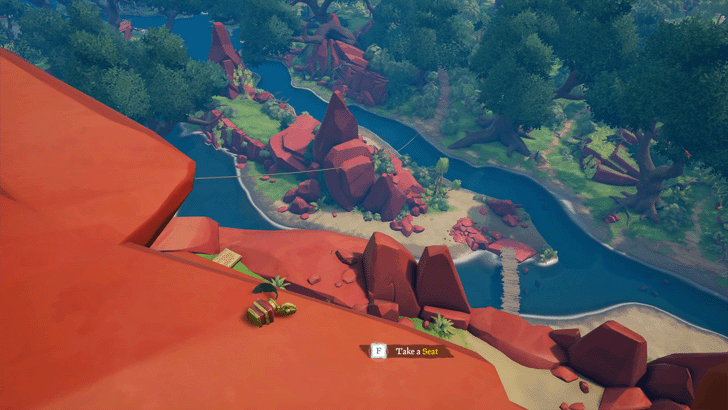
Go to the Stockade at the Crater
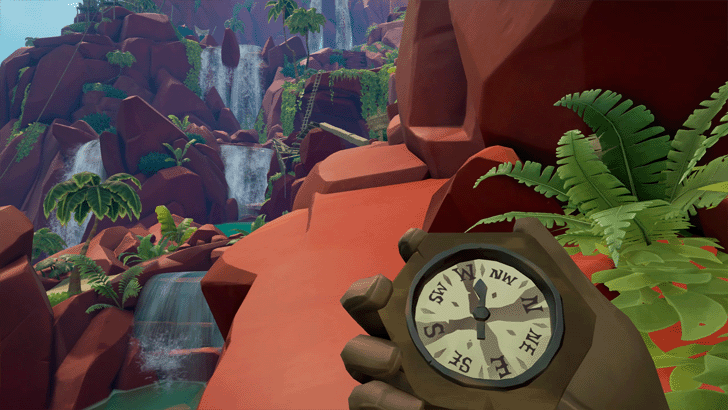
To get to the Stockade, go to the Crater on the western part of the island. Climb up the wooden bridges and up the foothold at the top of the hill. Jump down the pond and swim to the other side to reach the Stockade.
Find the Stockade Key
| Furniture | 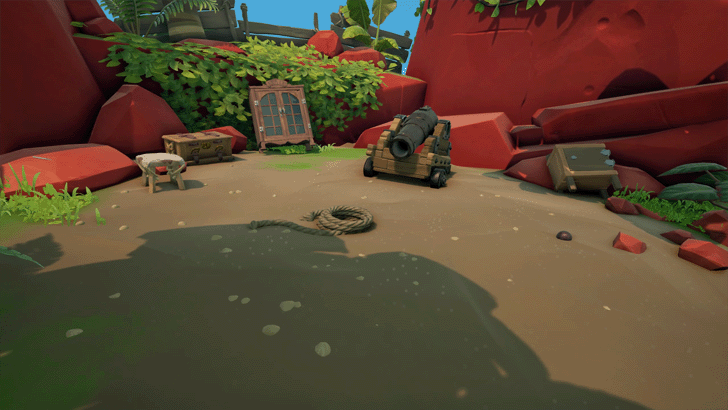 Search the furniture at the top of the crater. |
|---|---|
| Rock Underwater |  Jump down the pond and search each Suspicious Boulders underwater. |
The Stockade is locked, so you will have to find the Stockade Key at one of the two possible locations: The furniture on top of the crater or one of the rocks found in the pond. Once you have the key, use it to unlock the Stockade.
Raise the Window Shutters
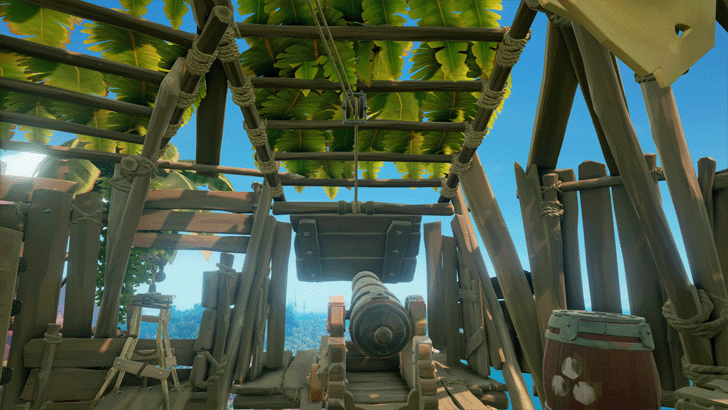
Use the pulley found at the middle of the Stockade to raise the window shutter in front of the cannon.
Create and Obtain Banana Grease
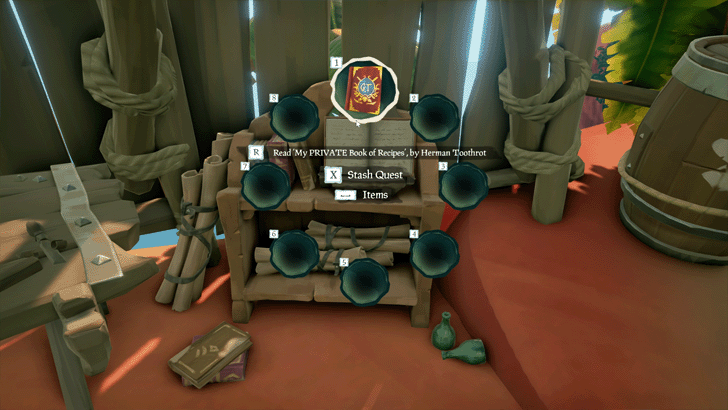
Grab Herman's Private Book of Recipes on the shelf and read it for the ingredients needed to create Banana Grease. You will need this grease to remove the rust on the cannon.
Add Three Blackened Bananas
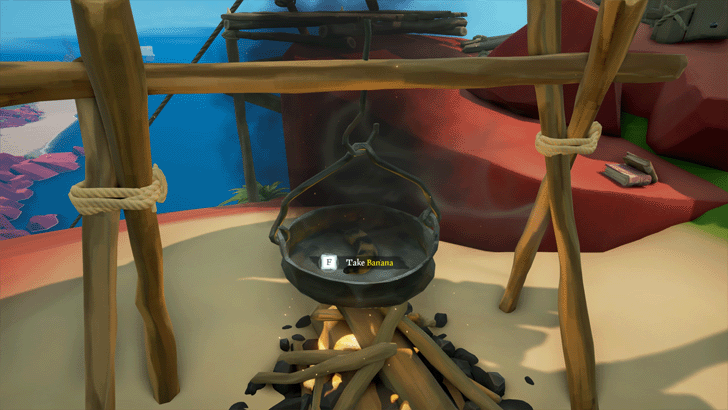
The first ingredients are three Blackened Bananas. Grab some wooden planks at the wood barrel in the Stockade and place it at the campfire outside. Raise your lantern to ignite it.
Collect 3 bananas found in the furniture of the Stockade and cook each one until its burnt. Afterward, add all three burnt bananas to the pot inside the Stockade.
Add Two Coconut Shells

Go to the top of the crater and search the furniture for one of the Coconut Shells. The other shell should be inside the Stockade. Place both Coconut Shells in the pot.
Add Suntan Oil
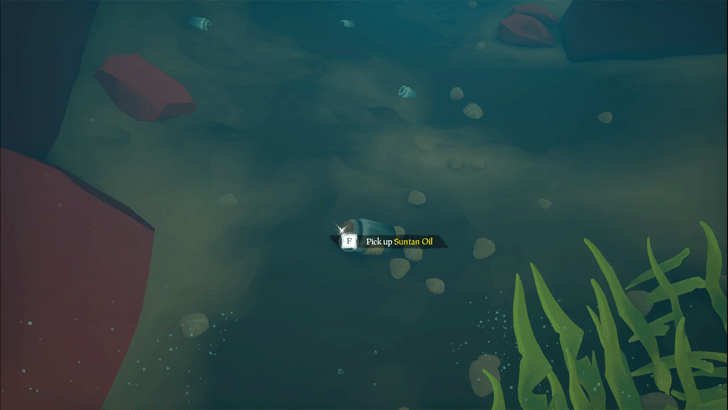
Climb down the foothold of the crater until you see a Suntan Spot sign. Jump down the hole near it and into the water. You will find the Suntan Oil underwater immediately after diving in. Return to the Stockade and add the oil in the pot.
Collect the Grease Using an Empty Jar

Open the small cabinet to the left of the pot and grab the Empty Jar. Use it on the pot to collect Fresh Banana Grease.
Destroy the Ship's Mast
The Ship Mast that you can see from the Stockade contains the cage with the second Monkey Idol inside. Use the Banana Grease on the cannon and push it forward. Grab some cannonballs nearby and fire at the mast.
You may have to do a bit of trial and error to find the correct angle of the cannon for your cannonballs to hit the mast. After destroying it, use the zipline outside. Do not forget to bring the leftover Banana Grease!
Place Gunpowder Gummy on the Cage
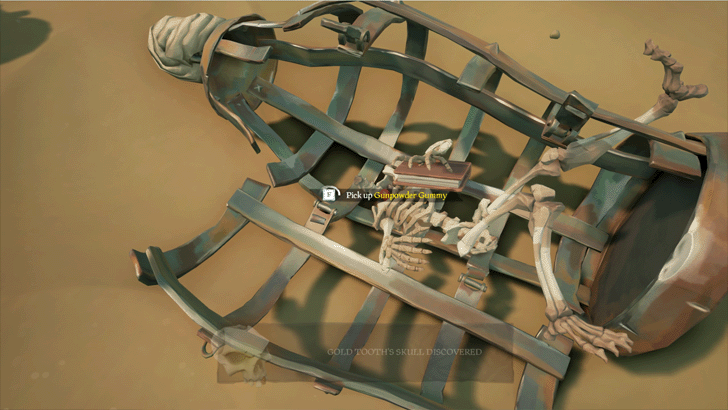
The cage containing the Monkey Idol is locked, so you will have to detonate it with explosives. Open the other cage beside it, grab the Gunpowder Gummy inside, and place it on the cage of the Monkey Idol.
Remove the Weathered Skull on the Stake
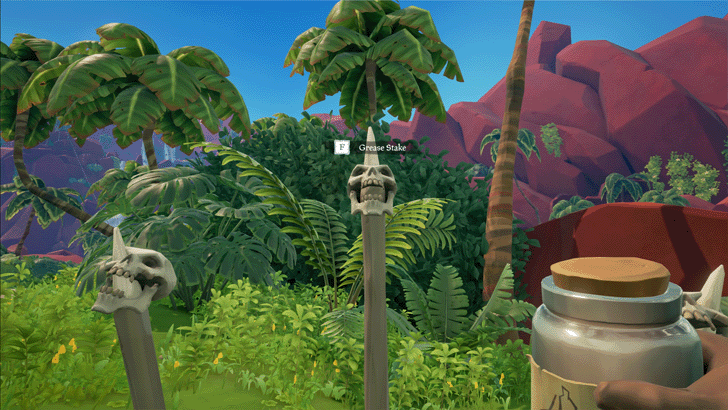
Go Southwest of the cages to find threes stakes with skulls on each one. Try to remove the Weathered Skull in the middle, eventually you will fail because it's stuck. Pour Banana Grease on it and then remove the skull.
No need to pick up the skull or anything here, just leave it be for now.
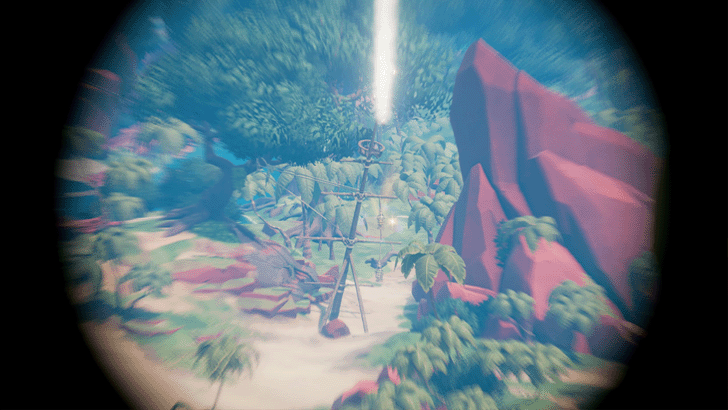
Repair the Spyglass Stand

Go East of the island near where the Black Pearl is anchored and raise the Spyglass Stand on the beach. Follow the monkey footprints nearby to find the missing Spyglass. Pick up the Cracked Spyglass and place it on the stand.
Follow the beam of light and it should lead you to three stakes with another Weathered Skull in the middle. Remove the skull and now it's time to find a suitable replacement for it.
Find the Toy Admiral's Monocle in Cereal Boxes

Before looking for the Toy Admiral's Monocle, climb aboard the Black Pearl and talk to Captain Coco, the coconut at the helm.
Proceed to the shipwreck of the Sea Monkey. Search the cabinets and pull out and search each cereal box until you find the Toy Admiral's Monocle.
Place Admiral Coco on the Stake
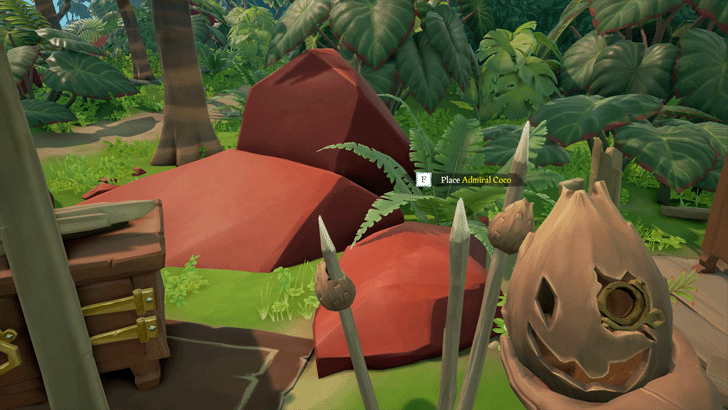
Bring the Toy Admiral's Monocle to Captain Coco and attach it to his eye (this changes his name to Admiral Coco). Bring him to the stake afterward and replace the weathered skull with Admiral Coco.
The light from the Spyglass you repaired earlier will now bounce off here. Follow the beam of light to the next area!
Raise the Knocked-Over Spyglass

The light from Captain Coco's Monocle will lead you to a knocked-over Spyglass beside a rock and some crates. Raise it so that the light can reflect here.
Follow the light again to come across another Spyglass that's already raised and fixed.
Place Three Coconut Shells on the Stakes
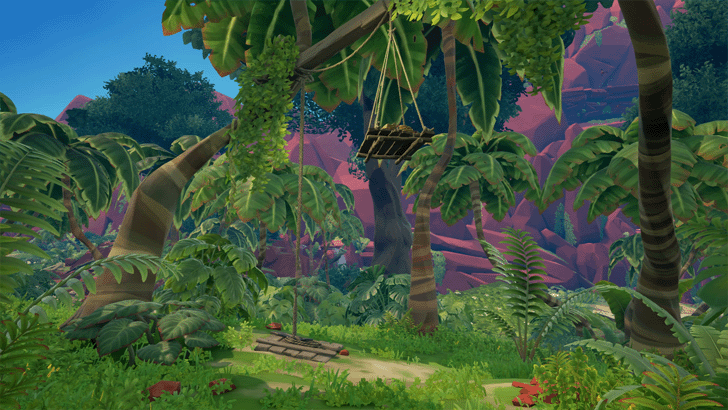
The light eventually ends at the three stakes near the cage of Monkey Idol. Go East into the jungle to find a raised crate with 3 Coconut Shells inside.
Use your sword and slash the frayed rope to bring down the crate. Take the crate to the stakes and place all three coconut shells on the middle stake.
Place Gold Tooth's Skull at the Stake

Grab Gold Tooth's Skull from the opened cage and place it on the middle stake. The light should now reflect on the Monkey Idol Cage, igniting the Gunpowder Gummy.
The cage will then explode. Take the second Monkey Idol to the Stone Monkey Hand. Two idols down, one more to go!
Rotate the Primitive Art
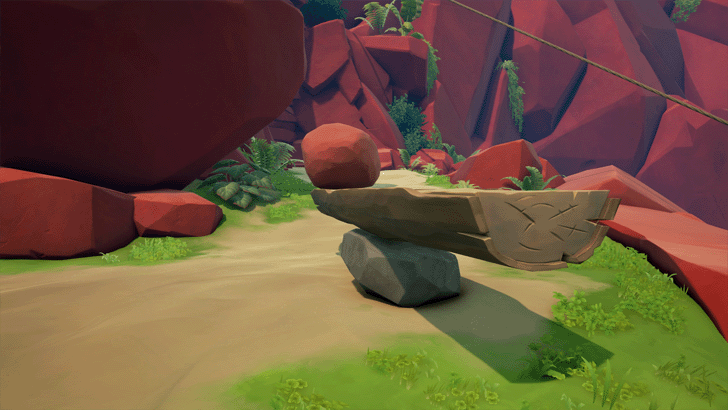
Return to the riverbed at the jungle where you found the Rowboat Oars and climb up the footholds to the North. At the top is a Primitive Art with a boulder on it.
Rotate it once to the left, so that the boulder is facing the statue with the third Monkey Idol on it. To be sure, the Primitive Art must be facing South.
Destroy the Statue Using Primitive Art

Climb up the foothold nearby and pick up a boulder next to the Don't Touch sign. Place the boulder on the X spot and push the boulder down. The boulder will then land on the Primitive Art, launching the rock on it towards the statue and destroying it.
Obtain the Cotton Swab Key

Use the zipline near the X spot to glide towards the statue. Pick up the third and final Monkey Idol and place it on the Stone Monkey Hand. The monkey hand will raise up and reveal the Cotton Swab Key!
Placing all three monkey idols on the stone hand unlocks the A Helping Hand Commendation.
Open the Giant Stone Monkey Head

Return to Guybrush with the Cotton Swab Key and he will unlock the gate for you. Approach the giant Stone Monkey Head and insert the Cotton Swab Key in its left ear to unlock the door leading to LeChuck's Lair.
You will have to interact with the inserted swab key three times for it to open. Doing so, unlocks the Second Biggest Monkey Head Commendation.
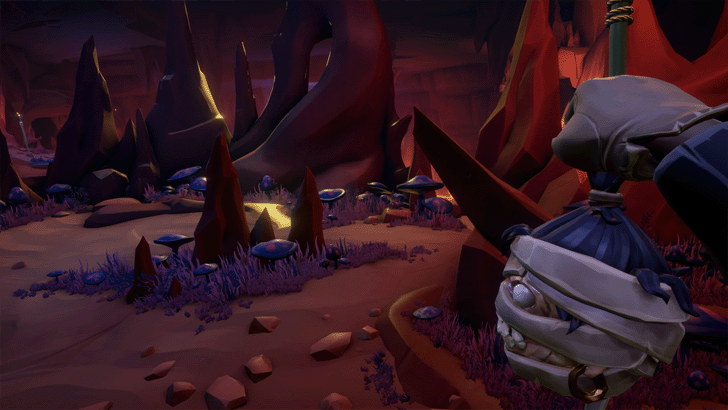
Navigate the Catacombs with Head of the Navigator

Take the Head of the Navigator from Guybrush and enter the catacombs. The head acts as a compass and will face towards the direction of where you will have to go, so follow accordingly.
At times, the head will loop you around in circles, but just keep going towards the direction it keeps pointing you at in order to not get lost.
Chase After LeChuck's Ship

The head will take you to LeChuck's docked ship. A cutscene will then play out, where LeChuck spots you and Guybrush and sails off towards the lava-filled cavern.
Kate and Elaine will arrive shortly with a ship. You will have to commandeer the ship and go after LeChuck.
Destroy LeChuck's Ship

The chase will end in a chamber filled with lava. Fire Root Beer Cannonballs at LeChuck's ship and destroy it three times. Each time you destroy his ship, it will reappear somewhere else in the chamber.
Once defeated, step through the portal that Corina will conjure. This will lead you back to Melee Island!
Defeat LeChuck Using Retorts

Go to the church and confront LeChuck. You will have to duel him with your sword. After this, he will teleport outside for another duel.
This time you will have to beat him with Retorts. After wearing him down, he will Insult you. Say the correct Retort in return to daze him, allowing you to freely slash him with your sword. He will keep teleporting after each fight until you reach the final duel outside the Scumm Bar.
LeChuck Insults and Retorts
| Insults | Retorts |
|---|---|
| It's foolish to stand and fight me! | You're right, I should have brought a stool. |
| You Sea of Thieves pirates are a joke! | Allow me to deliver the PUNCH-line. |
| Soon I shall rule the waters! | How appropriate. You fight like a Splashtail. |
| Athena's Fortune will rally behind me! | At least they won't have to look at your face. |
| I shall be the Dread Pirate Lord! | You're nothing but a dead pirate fraud. |
| The Sea of Thieves you know will soon be nothing but a memory! | Too bad no-one will remember YOU at all. |
| Elaine shall be my blushing bride! | Being seen with you would make anyone blush. |
| You'll pay for this insolence! | Do you take Bilge Rat Doubloons? |
| I'll teach ye to mess up my plans! | Great! You've got plenty of experience with that. |
| I command you to kneel before me! | Aw, you need help tying your shoes? |
| I shall rule with an iron fist! | On the Sea of Thieves, we call that a 'hook'. |
| I shall claim Ramsey's seat of power! | Good idea. You look like you could use a rest. |
| Pirates will clap their hands when they see me! | Sure. Over their eyes. |
| Captain Flameheart shall server ME! | Will you be boiled or roasted? |
Spray LeChuck with Root Beer

After knocking him out on the last Insults and Retorts battle, the Pirate Lord will appear and summon a crate of Root Beer Bottles. Grab one and spray it at LeChuck to finally destroy him.
Speak to Guybrush, Kate, Elaine, and the Pirate Lord
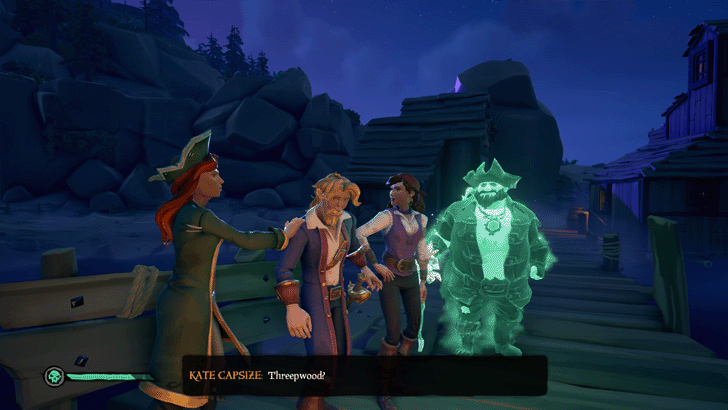
Once LeChuck is defeated, speak to Guybrush, Kate, Elaine, and the Pirate Lord at the docks. The portal out of the island will then appear. Sail through it to end the Lair of LeChuck tall tale.
You will receive the The Lair of LeChuck Commendation afterward.
The Lair of LeChuck Memoir Spots
| All The Lair of LeChuck Memoir Spots | ||||
|---|---|---|---|---|
| # 1 | # 2 | # 3 | # 4 | # 5 |
| # 6 | # 7 | # 8 | # 9 | # 10 |
Finding all 10 Memoir Spots in the Lair of LeChuck tall tale will unlock the Memoirs of a Legend, Vol. III Commendation.
Memoir Spot 1
The first Memoir Spot is a crate along the beach on the western part of the island.
Memoir Spot 2

The second Memoir Spot is on top of the root of a giant tree directly west of the Sea Monkey shipwreck.
Memoir Spot 3

The third Memoir Spot is a rock in front of Guybrush. You can find this spot Northeast of the Black Pearl ship.
Memoir Spot 4
The fourth Memoir Spot is a rock near a bunch of dead trees just West of Herman's camp. You can get here by heading north of the camp, then take the first path left, and then another left towards the dead trees.
Memoir Spot 5

The fifth Memoir Spot is a rock on a small isle at the riverbed. This is also the area where the Rowboat Oars are located.
Memoir Spot 6

The sixth Memoir Spot is on the cliff beside the Primitive Art. You can get here by climbing the foothold North of the riverbed.
Memoir Spot 7
The seventh Memoir Spot is on a cliff again, but this time on the ledge above the Primitive Art.
Memoir Spot 8

The eighth Memoir Spot is a crate near the monkey statues at the entrance of LeChuck's Lair.
Memoir Spot 9
The ninth Memoir Spot is a mushroom that you'll immediately find to your right as soon as you descend down to LeChuck's Lair.
Memoir Spot 10

The tenth Memoir Spot is on the rocks overlooking LeChuck's ship in his lair.
The Lair of LeChuck Journal Locations
| No. | All The Lair of LeChuck Journal Locations |
|---|---|
| 1 | Chasing |
| 2 | Plotting |
| 3 | Spying |
| 4 | Restoring |
| 5 | Imprisoning |
Finding all 5 Journals in the Lair of LeChuck tall tale will unlock the Ghost Writing Commendation.
Chasing Journal Location
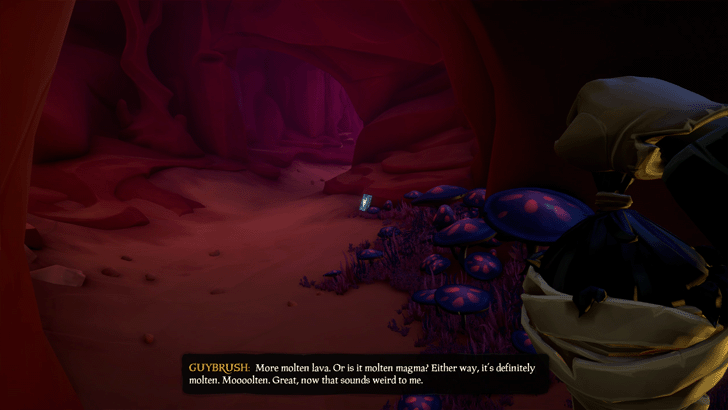
The Chasing Journal is found in the second lava-filled room of LeChuck's lair. As soon as you enter this room, take the path to your left and you will stumble upon the journal on the ground.
Plotting Journal Location

You can find the Plotting Journal in a chamber after escaping the lava-filled room. Upon descending down the first flight of stairs, take the first hallway to your left and you should see the journal on the ground.
Spying Journal Location

The Spying Journal is located at the bottom of the stairs of the chamber room. From the Plotting Journal, continue going down the flight of stairs and look to your left.
Restoring Journal Location
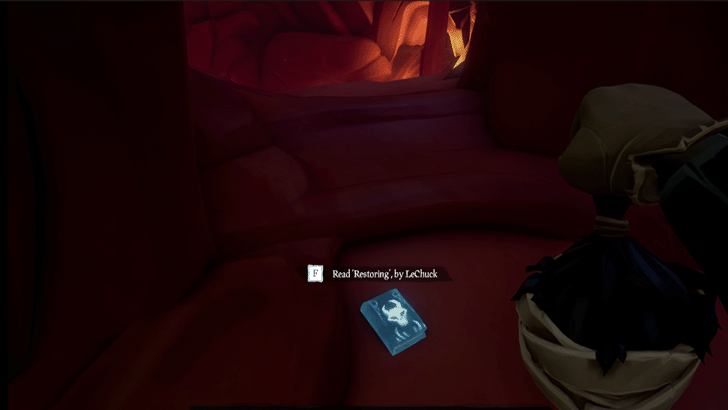
Once Guybrush picks up a skeleton on the ground, walk up the stairs to your left and you should see the Restoring Journal on the ground.
Imprisoning Journal Location

The Restoring Journal can be found on the ground before entering the room with a lava waterfall in it. The Head navigator will eventually lead you towards this path so you can't really miss it!
The Lair of LeChuck Commendations and Rewards
| Commendation | Reward | How to Unlock |
|---|---|---|
| A Helping Hand | None | Place all three Monkey Idols on the Monkey Hand. |
| Do the Monkey! | None | Legendary Commendation: Complete all Commendations for 'The Lair of LeChuck' Tall Tale. |
| Ghost Writing | None | Read all 5 of LeChuck's logbooks. |
| Glad to Be Dead | None | Defeat LeChuck's ghost ship. |
| Highly Strung | None | Snare Herman in his own trap. |
| Legend of Monkey Island | None | Legendary Commendation: Complete all Commendations for The Legend of Monkey Island Tall Tales. |
| Memoirs of a Legend, Vol. III | None | Take in the view at all 10 memoir spots. |
| Monkey Island Shanty | “Mighty Pirate” Title | Complete all Commendations in The Legend of Monkey Island Tall Tales. |
| No Fruit-Picker Required | Burning Blade Cutlass | Make a banana fall from its tree. |
| Part of the Crew | None | Speak with the three people aboard the Black Pearl. |
| Second Biggest Monkey Head | None | Use the Cotton Swab Key. |
| The Castaway's Musings | None | Read all 10 of Herman's notes. |
| The Lair of LeChuck |
LeChuck Portrait The Legend of Monkey Island Cutlass | Complete The Lair of LeChuck. |
| Under Monkey Island | None | Navigate through the catacombs. |
| Whoops... | None | Hit your own ship using the primitive art. |
Sea of Thieves Related Guides
All Tall Tales
| Maiden Voyage | |
|---|---|
| 1 | Maiden Voyage |
| Shores of Gold | |
| 1 | The Shroudbreaker |
| 2 | The Cursed Rogue |
| 3 | The Legendary Storyteller |
| 4 | Stars of a Thief |
| 5 | Wild Rose |
| 6 | The Art of the Trickster |
| 7 | The Fate of the Morningstar |
| 8 | Revenge of the Morningstar |
| 9 | Shores of Gold |
| Ashen Age | |
| 1 | The Seabound Soul |
| 2 | Heart of Fire |
| A Pirate's Life | |
| 1 | A Pirate's Life |
| 2 | The Sunken Pearl |
| 3 | Captains of the Damned |
| 4 | Dark Brethren |
| 5 | Lords of the Sea |
| The Legend of Monkey Island | |
| 1 | The Journey to Melee Island |
| 2 | The Quest for Guybrush |
| 3 | The Lair of LeChuck |
Comment
Author
The Lair of LeChuck Tall Tale Guide
Please participate in our site
improvement survey
03/2026
improvement survey
03/2026
Would you assist in
improving Game8's site?
improving Game8's site?

×
We are listening to our users' valuable opinions and discussing how to act on them.
The information collected through this survey will be used for the purpose of improving our services. In addition, the information will only be disclosed a part of a statistic in a format that will not allow identification of personal information.
Begin Survey
Not Now
×
Please rate each item regarding Game8.co's Advertisements.
Amount of Ads
Very Dissatisfied
Somewhat Dissatisfied
Fine
Somewhat Satisfied
Highly Satisfied
Placement of Ads
Timing of Ad Display
Ad Loading Speed
Safeness of Ads
Content of Ads
×
Please rate each item regarding Game8.co's Quality of Articles.
Amount of information
Very Dissatisfied
Somewhat Dissatisfied
Fine
Somewhat Satisfied
Highly Satisfied
Frequency of updates
Speed of new information
Accuracy of articles
Understandibility of articles
Readability of sentences
×
Please rate each item regarding Game8.co's Usability of the Site.
Ease of finding information
Very Dissatisfied
Somewhat Dissatisfied
Fine
Somewhat Satisfied
Highly Satisfied
Loading Speed
Use of Color
Font Size
Visibility of Images
Easy to Understand Layout
×
Please rate each item regarding Game8.co's Message Boards, Comments.
Ease of Writing
Very Dissatisfied
Somewhat Dissatisfied
Fine
Somewhat Satisfied
Highly Satisfied
Readability
Ease in Finding Information
Comment Quality
Comment Quantity
Admin Response
×
Please rate each item regarding Game8.co's Site's new design.
Please rate our site's new design
Very Dissatisfied
Somewhat Dissatisfied
Fine
Somewhat Satisfied
Highly Satisfied
Do you think that the website's design change makes the site easier to use?
Has the new design made it easier for you to find information on the site?
Has the new design improved the overall visual appeal of the site?
How would you rate your overall satisfaction with the new design of the site?
×
How likely are you to recommend Game8 to someone you know?
Very Unlikely
0
1
2
3
4
5
6
7
8
9
10
Very Likely
If you have other opinions regarding potential improvement to the website, please share them with us. We would appreciate your honest opinion.
Note: This is a free response section, so you can proceed without entering anything.
Note: Please be sure not to enter any kind of personal information into your response.
Note: Please be sure not to enter any kind of personal information into your response.
×
Thank You
×
Thank you for participating in our survey! Your answers will help us to improve the quality of our website and services.
We hope you continue to make use of Game8.
We hope you continue to make use of Game8.
Close
Rankings
- We could not find the message board you were looking for.
Gaming News


![Everwind Review [Early Access] | The Shaky First Step to A Very Long Journey](https://img.game8.co/4440226/ab079b1153298a042633dd1ef51e878e.png/thumb)

![Monster Hunter Stories 3 Review [First Impressions] | Simply Rejuvenating](https://img.game8.co/4438641/2a31b7702bd70e78ec8efd24661dacda.jpeg/thumb)
Popular Games

Genshin Impact Walkthrough & Guides Wiki
Honkai: Star Rail Walkthrough & Guides Wiki
Umamusume: Pretty Derby Walkthrough & Guides Wiki
Pokemon Pokopia Walkthrough & Guides Wiki
Resident Evil Requiem (RE9) Walkthrough & Guides Wiki
Monster Hunter Wilds Walkthrough & Guides Wiki
Wuthering Waves Walkthrough & Guides Wiki
Arknights: Endfield Walkthrough & Guides Wiki
Pokemon FireRed and LeafGreen (FRLG) Walkthrough & Guides Wiki
Pokemon TCG Pocket (PTCGP) Strategies & Guides Wiki


Recommended Games
Diablo 4: Vessel of Hatred Walkthrough & Guides Wiki
Fire Emblem Heroes (FEH) Walkthrough & Guides Wiki
Yu-Gi-Oh! Master Duel Walkthrough & Guides Wiki
Super Smash Bros. Ultimate Walkthrough & Guides Wiki
Pokemon Brilliant Diamond and Shining Pearl (BDSP) Walkthrough & Guides Wiki
Elden Ring Shadow of the Erdtree Walkthrough & Guides Wiki
Monster Hunter World Walkthrough & Guides Wiki
The Legend of Zelda: Tears of the Kingdom Walkthrough & Guides Wiki
Persona 3 Reload Walkthrough & Guides Wiki
Cyberpunk 2077: Ultimate Edition Walkthrough & Guides Wiki


All rights reserved
©Microsoft 2024. Microsoft, Rare, the Rare logo, Sea of Thieves are trademarks of the Microsoft group of companies.
©Disney. All trademarks and copyrights are property of their respective owners.
MONKEY ISLAND © & ™ 2024 Lucasfilm Ltd. All rights reserved.
The copyrights of videos of games used in our content and other intellectual property rights belong to the provider of the game.
The contents we provide on this site were created personally by members of the Game8 editorial department.
We refuse the right to reuse or repost content taken without our permission such as data or images to other sites.