Captains of the Damned Tall Tale Guide
★SoT PS5 Version and Season 12 are Now Live!
★New Pre-Order and Edition Bonuses for the PS5!
★Check out our Beginner's Guide for new players.
★Tall Tales | World Events | Trading Companies
A walkthrough guide for Captains of the Damned Tall Tale in Sea of Thieves. Read on to see a complete Tall Tale walkthrough and guide for Captains of the Damned, including info on how to get all its Commendations and journals, and a list of its completion rewards.
| ◄ Previous Tall Tale | Next Tall Tale ▶ |
|---|---|
| The Sunken Pearl | Dark Brethren |
List of Contents
Captains of the Damned Overview and Location
| Captains of the Damned | |
|---|---|
| Story Arc | A Pirate's Life |
| Quest Location | At the Castaway's Camp at all Outposts. |
| Reward |
8000 Gold (High Seas) 2400 Gold (Safer Seas) Tankard of the Damned Concertina of the Damned Hurdy-Gurdy of the Damned Banjo of the Damned Drum of the Damned |
| ◄ Previous Tall Tale | Next Tall Tale ▶ |
| The Sunken Pearl | Dark Brethren |
Find the Starting Location Beside the Mysterious Castaway
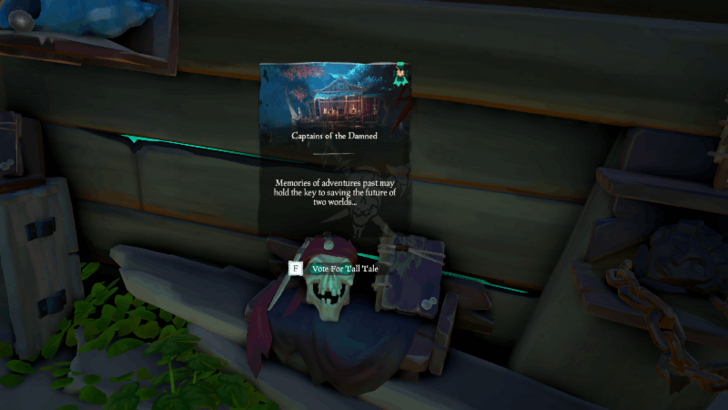
To start A Pirate's Life, head to the Castaway's Camp at any Outpost found in the game. The Tall Tale book should be on one of the shelves beside a skull.
Note: This Tall Tale can also be started from your quest table. However, you will still need to go to the Castaway's Camp in order to unlock the Tall Tale book with clues.
Captains of the Damned Walkthrough
Take Jack's Compass from Gibbs

Wait for the dialogue between the Mysterious Castaway and Gibbs to end and take Jack's Compass from Gibbs once he hands it over to you.
Sail through the Mythical Portal

Find the green portal that has formed near the Outpost and sail through it. Make sure to sell any treasures you have obtained beforehand as you cannot bring them with you when going through the portal.
Upon entering the portal, you'll arrive at the Tunnel of the Damned. Wait for your ship to sail on its own until you reach the second portal. You'll know the Tall Tale is working correctly once you start ghostly figures on rowboats appear beside your ship.
What to Do if You Get Teleported Out of the Tunnel of the Damned
There are cases where players are disconnected midway or outright teleported out of the Tunnel of the Damned and placed back at an outpost. These are usually server-side issues and the only way to fix it is to cancel and restart the Tall Tale until the Tunnel of the Damned sequence plays through its entirety.
Sail through the Swamp

Once you gain control of your ship, continue to sail south to The Whispering Bayou until you reach the impassable green fog wall. At this point, lower your anchor and swim to the right side of the shore that has the torches with green flames.
Tip: You can use Jack's Compass to guide you to the location that leads to the Flame of Souls.
Take the Flame of Souls
| Shipwreck Location | 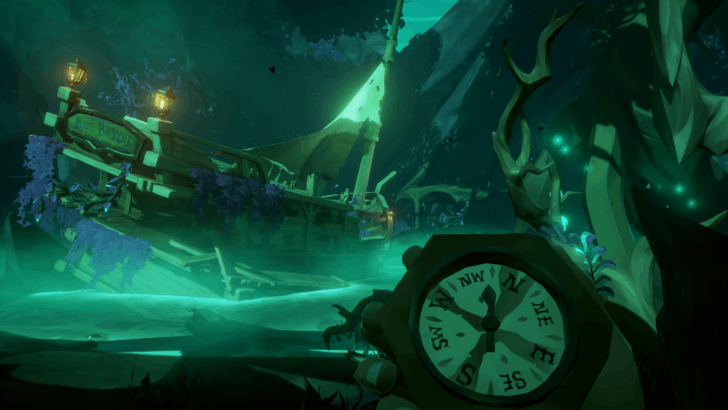 |
|---|---|
| Flame of Souls Location |  |
Follow the path where the green flames light up on the torches until you reach a shipwreck. Enter the shipwreck to find two skeletons sitting on the chairs. Use the Lantern to take the Flame of Souls from the candle.
Head to the Hut West of the Green Fog Wall

Make your way back to where you anchored your ship and head to the hut west of the green fog wall.
Light the Two Lanterns on the Hut

In front of the hut are two lanterns hanging above the windows. Use your Lantern with the Flame of Souls to light them.
Light the Three Unlit Candles
| Unlit Candle Locations | ||
|---|---|---|
 |
 |
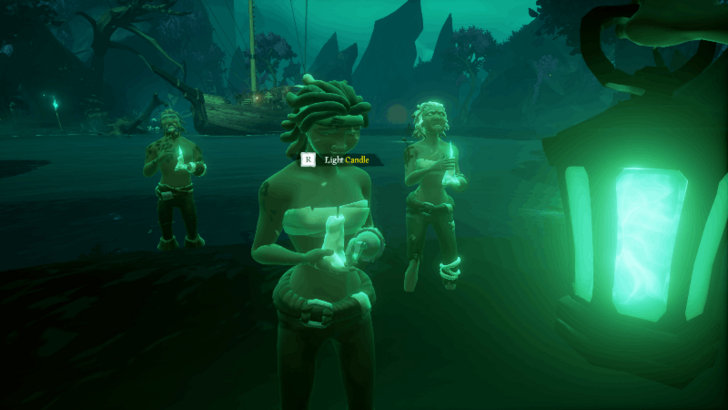 |
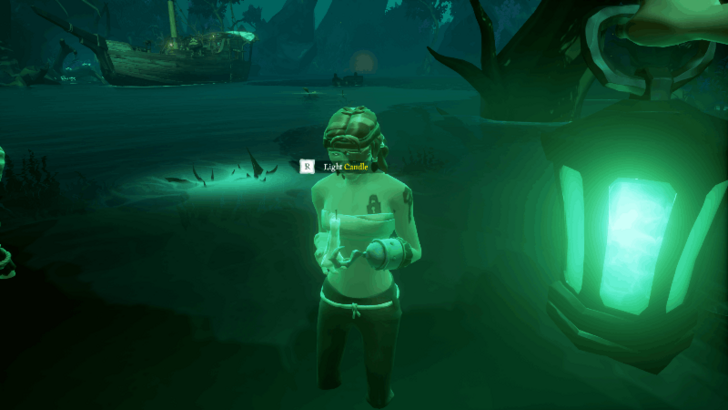
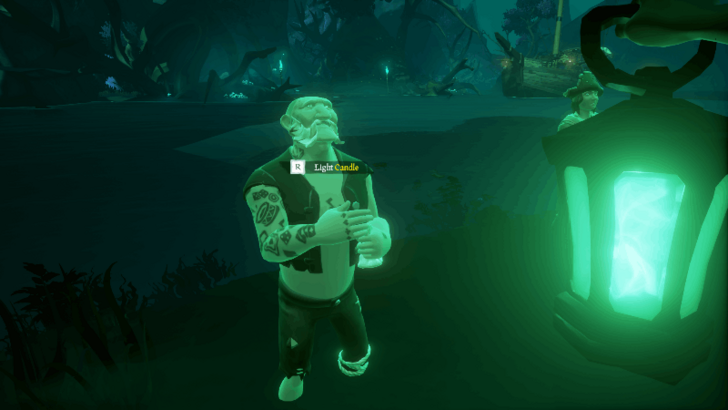
After lighting the two lanterns, a group of ghosts with candles will appear behind the hut. Drop down the ladder and light the unlit candles held by each of the three ghosts.
Doing so causes the green fog wall to disappear allowing you to pass through to the next area. You will also receive the Ghosts of the Bayou commendation and reach the first checkpoint of the Tall Tale.
Reach the Fort of Lost Souls
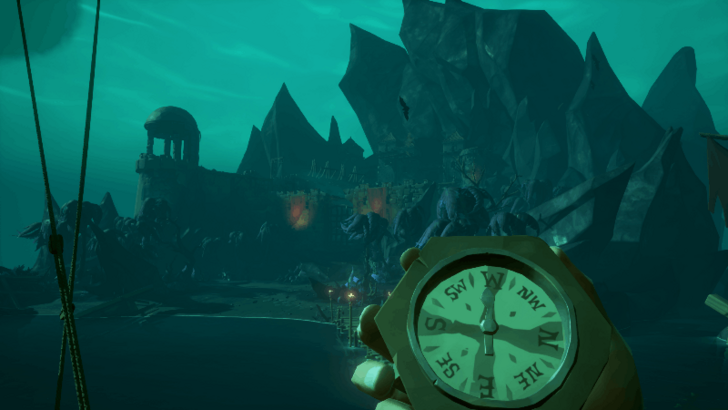
Sail to the next area until you can find the silhouette of a bell tower on the east side of your boat. This is the Fort of Lost Souls.
Light the Lantern on the Skeleton
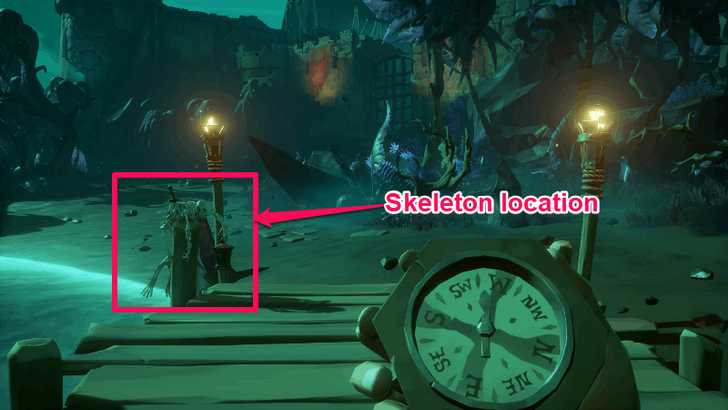
Upon landing at the dock of the Fort of Lost Souls, look for a skeleton holding an unlit lantern. Use your own lantern to light it. Doing so opens the gate the leads to the fort.
Light the Braziers Inside the Fort
| Four Lanterns Location |  |
|---|---|
| Lantern on Column Location | 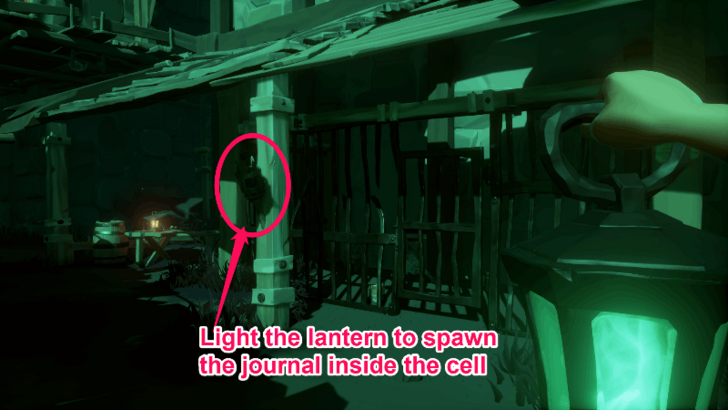 |
Inside the fort, you'll find a large drain surrounded by four braziers. Before you light these braziers, look for the sole lantern to the east of the four braziers. Light it up to access a cell with a Journal later on in the level.
Once the east lantern is lit, return to the four braziers and light them up. This opens up the large drain, allowing you to jump down and proceed to the next area.
Pick Up the Lock Pick Inside the Drain
Jump down the drain and swim underwater. Find the skeleton at the bottom and pick up the Lock Pick.
Swim through the Opening of the Drain
After picking up the Lock Pick, look above the walls of the drain to find a small opening. Swim through it to emerge back inside of the Fort of Lost Souls. Use the Lock Pick on the padlock of the cell to head back to the fort.
Reach the Second Floor of the Fort
| No. | Reach the Second Floor of the Fort |
|---|---|
| 1 | After using the Lock Pick, head straight inside the house north of you. Use the Lock Pick on the door to open it. |
| 2 | Climb the ladder and use your sword to cut the rope to bring the platform with boxes down. |
| 3 | Jump on the platform and towards the roof. |
| 4 | Once you reach the second floor, use the pulley to raise the cage on the left side and bring the cage on the right side down. Open the cage, enter it, and wait for the cage to go up. |
Make Your Way to the Lighthouse
Use the platforms to jump and make your way to the lighthouse. At the end of the path, use the pulley to raise the platform to reach the lighthouse.
Solve the Lighthouse Puzzle
| Brazier Locations | |
|---|---|
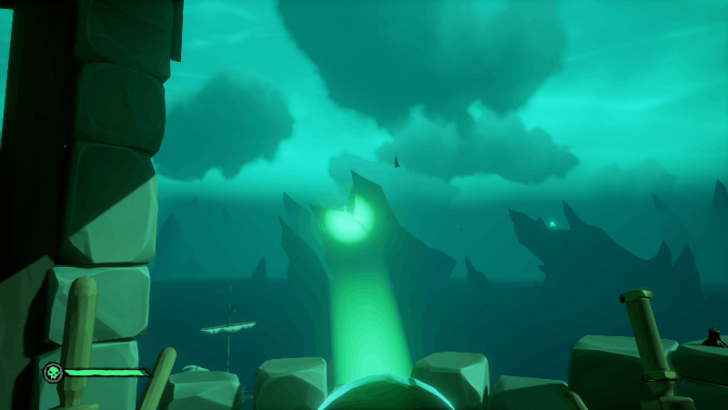 |
 |
 |
 |
 |
|
Use the Lantern to ignite the lighthouse. Use the wheels to move the light beam around to shine the light on the braziers. Doing so rewards you with the Fort of the Forgotten Commendation.
Defeat Black Dog Briar
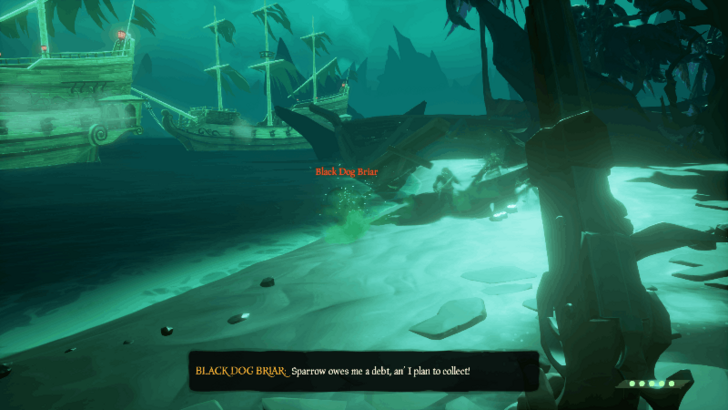
Head back to the dock and fight the phantoms. Use the barrels you find in the area to replenish your food supply and restore health.
Eventually, Black Dog Briar will join the fight as a boss. Defeat him to get the Captain of Memories Commendation.
Use Jack's Compass to Head to the Next Area

Use Jack's Compass to head southeast towards the torches with green flames. A black ship will appear as you sail through the sea, follow it as it leads you to a cave.
As you emerge from the cave, you will find a fort on the east side and a ghost ship on the west side. Lower your anchor near the dock and head inside the fort.
Fire a Cannonball at the Ghost Ship
Climb up the stairs on the west side of the fort and get cannonballs from the barrel. Use the cannon to fire a cannonball at the ghost ship to get the Strike Yer Colours! Commendation.
Get the Mercado Key
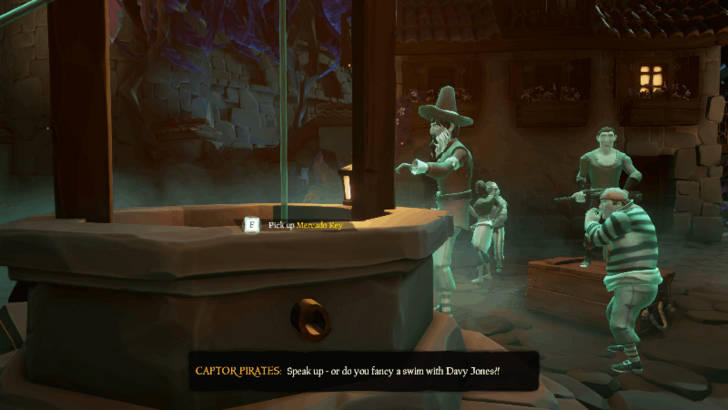
Head inside the fort and find the group of ghosts at the well. Pick up the Mercado Key on the well.
Enter La Costurera Building
Enter the building that has the mannequins outside. Lift up the hatch and go to the building's back door to emerge to the next area.
Follow the linear path until you reach a new area where you can see a building with Mercado written on it.
Enter the Mercado Building
Enter the back door of the Mercado building on its right side. Use the Mercado Key that you picked up from the well to open the locked door.
Light Up the Lantern

Interact with the crate inside the room and read the note on the wall. The note tells you to light the lantern on the rightmost window.
Get the Treasure for Eternity Commendation
Find the Rowboat Near the Mercado Building
Facing the Mercado building, head left passing through the ghosts lining up and descend down the ladder to find a rowboat with two skeletons on it.
Follow the Ghost Rowboat to the Sewer Area

Use the rowboat and follow the ghost rowboat as it leads you to the sewer area of the fort.
Head inside the sewer and use the pulley the raise the gates to allow the rowboat to pass through. Keep rowing until you emerge from the sewer.
Dig on the Spot on the Left Side

Once the ghost rowboat reemerges, you will find them digging on a particular spot on the shallow ground on the left side. Disembark on your rowboat and dig on the same spot to uncover the Villagers' Valuables.
Hand In the Villagers' Valuables

Hand in the Villagers' Valuables to the rowboat pirate to obtain the Treasure for Eternity Commendation.
Head Inside the Fort's Prison
| No. | Head Inside the Fort's Prison |
|---|---|
| 1 | Start from the Mercado building and head down the stairs on the right. Head left from the pirates playing musical instruments and find the pulley in the middle of the next area. |
| 2 | Use the first pulley to lift yourself up to the second floor. Use the second pulley to pull the platform towards your direction. Jump from the crate to reach the third pulley. |
| 3 | Use the second pulley again to move it towards the fort's wall. Jump on the crate to reach the fort's wall. |
| 4 | Face left to find the third pulley and use it to raise the platforms. Jump on the platforms to reach the inside of the fort. Head to where Jack Sparrow's ghost appears to reach the next area. |
Free the Pirate Captives Using the Jail Key
Head to the area where Jack Sparrow's ghost went to and follow the path. Open the door and find the group of prisoners locked inside the cell and a dog.
Follow the ghost dog's paw prints towards the wooden walkway ramp. Turn right from the small hole towards the wooden walkway that leads to a larger hole and pick up the Jail Key on the bowl.
Return to the jail cell with the key on hand and unlock it to obtain the Key to Freedom Commendation.
Solve the Pulley Puzzle
| No. | Solve the Pulley Puzzle |
|---|---|
| 1 | Go back to the room with the wooden walkway ramp and head towards the hole in the wall to find the locked door. Use the Jail Key to open it and follow the path until it leads you to a room with several pulleys. |
| 2 | 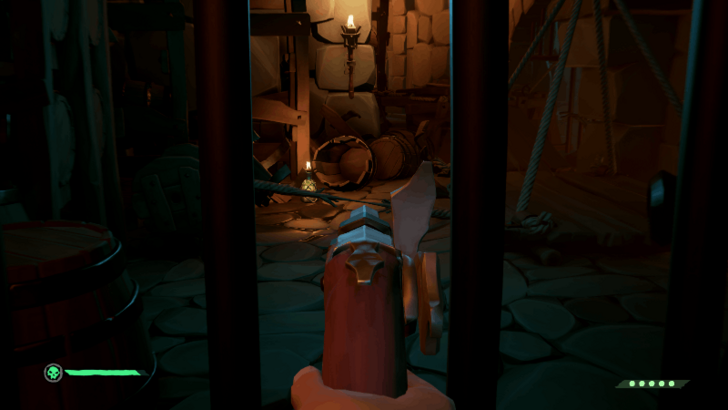 Use your gun to shoot the small string on the leftmost pulley. You can use the Armoury to change to a Sailor Eye of Reach for more precise aiming. |
| 3 |  Use the pulley to bring the second platform in place to create three platforms that you can jump to the next area. |
Get the Treasury Key from the Well
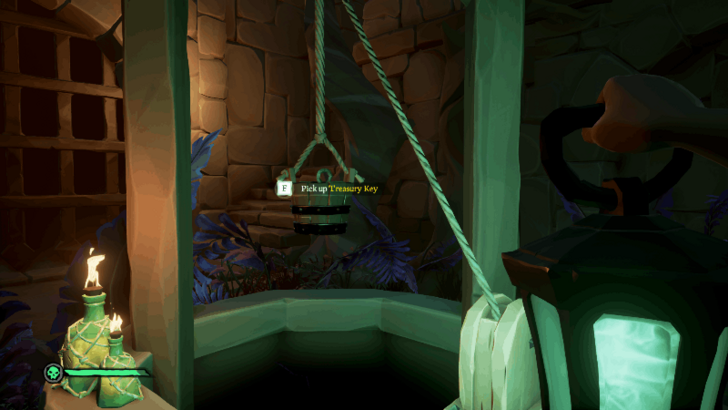
Proceed through the linear path until you reach the open area with the well in the middle and Jack Sparrow's ghost going through the door.
Use the pulley on the well to raise the well's bucket to get the Treasury Key. Use the Treasury Key on the door where Jack Sparrow's ghost passed through to open it.
Once Jack's dialogue ends head to the stairs on the right side and through the door towards the open area. You will receive the Treasured Hoard Commendation once Jack disappears.
Defeat the Phantoms
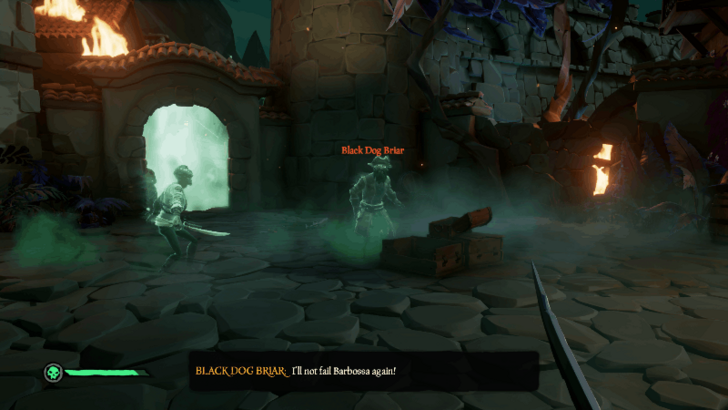
Defeat the Phantoms that appear on the area. Use the ammo crate on the left side to replenish your ammo. Drop down towards the burning town and defeat more phantoms that appear.
Eventually, you will find yourself in the first area and with Black Dog Briar as the boss. Defeat him to get the The Raid of Isla Tesoro Commendation and reach the next checkpoint.
Head Back to Your Ship and Follow the Flames
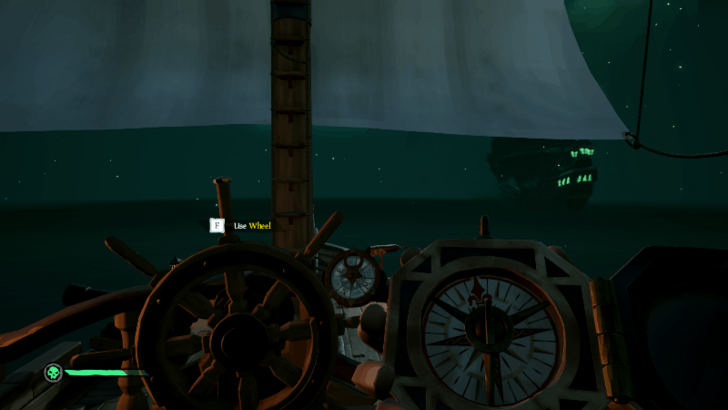
Make your way back to your ship and sail towards the torches with green flames. You can also use Jack's compass as it will point to the correct direction.
Give Jack's Compass Back

Sail towards the Tavern of the Damned and talk to Jack Sparrow. Hand over the compass to him to get the Charting a New Destiny Commendation. Finally, head back to your ship to sail through the portal to complete the Tall Tale.
All Captains of the Damned Journal Locations
| No. | All Lost Journals |
|---|---|
| 1 | Damned Journal #1 |
| 2 | Damned Journal #2 |
| 3 | Damned Journal #3 |
| 4 | Damned Journal #4 |
| 5 | Damned Journal #5 |
| No. | All Townsfolk's Journals |
| 1 | Townsfolk's Journal #1 |
| 2 | Townsfolk's Journal #2 |
| 3 | Townsfolk's Journal #3 |
| 4 | Townsfolk's Journal #4 |
| 5 | Townsfolk's Journal #5 |
Damned Journal #1 Location
| Landmark Location | 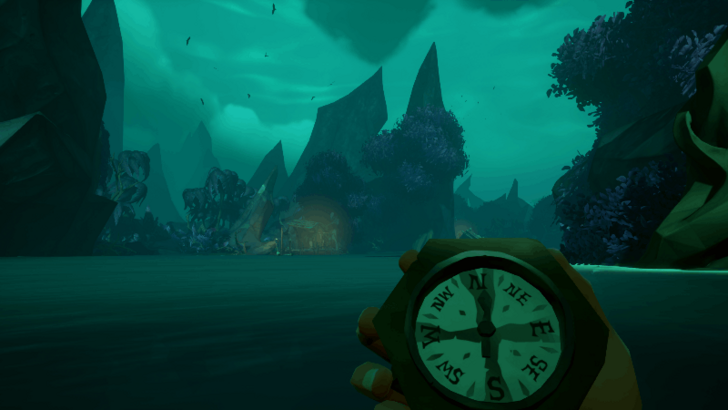 |
|---|---|
| Journal Location |  |
Find the lit up campsite on the north side of the bayou. Find the torch on the left of the rocking chair and light it with the Flame of Souls. This activates the rocking chair and spawns the Damned Journal #1 on the table beside the banjo.
Damned Journal #2 Location
| Landmark Location | 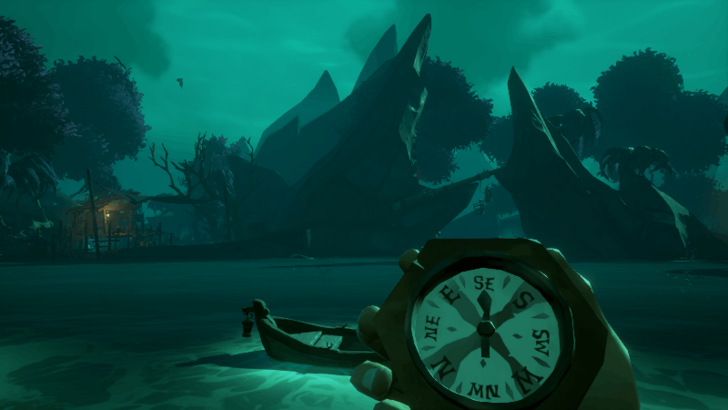 |
|---|---|
| Journal Location |  |
Starting from the Damned Journal #1 location, head east until you can find a large rock structure that has two hanging cages on it. Swim towards the rock to find a torch that you can light with the Flame of Souls.
Use your gun to shoot down the rope of the cage with the skeleton inside. Swim down and open the cage door to read the Damned Journal #2 next to the skeleton.
Damned Journal #3 Location
| Landmark Location | 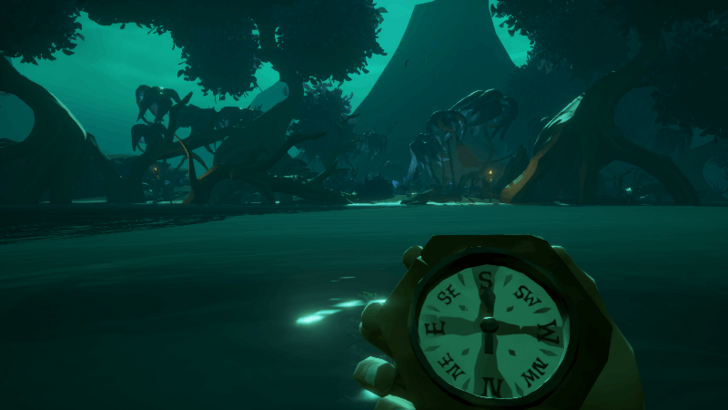 |
|---|---|
| Torch Location | 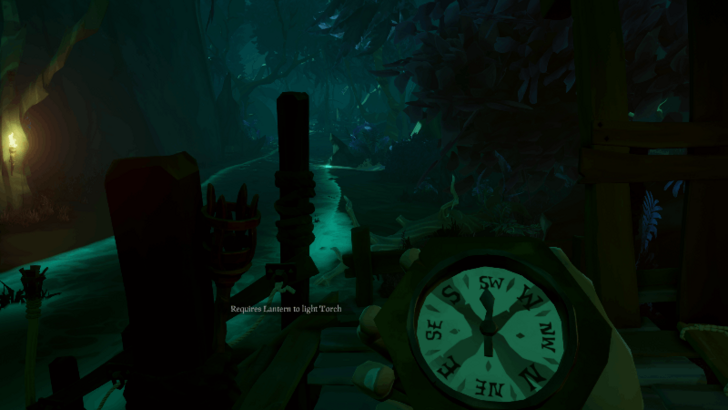 |
| Journal Location | 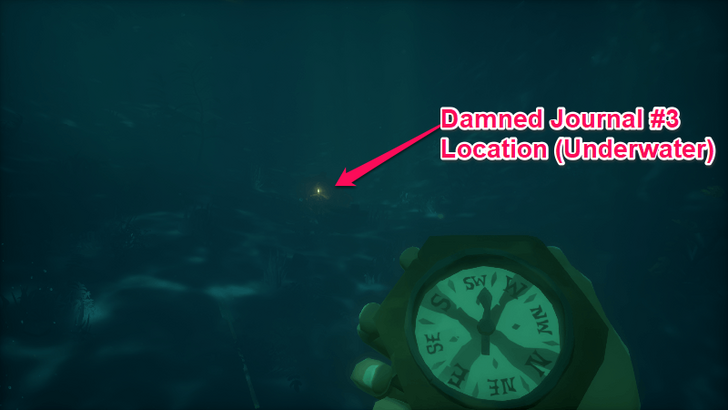 |
Head south from the Damned Journal #2 location and find the small hut in the area. Light the torch inside the hut with the Flame of Souls. Doing so activates a chain reaction causing other torches to light up with the same green flame.
Follow the torches until they lead to the end of the river. Swim underwater and follow the yellow light to find a destroyed boat that has the Damned Journal #3 on it.
Damned Journal #4 Location
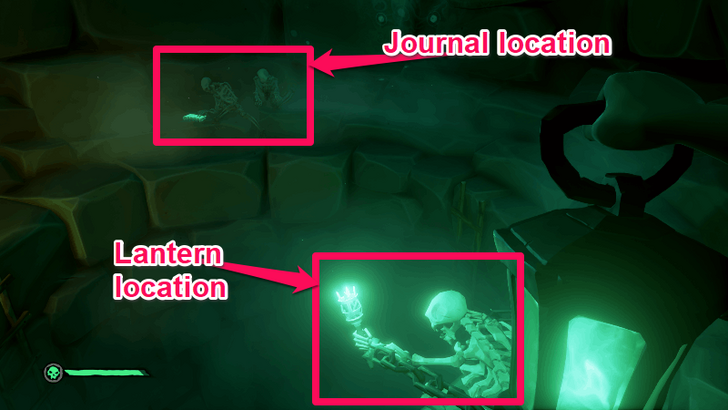
This journal is located at the Fort of Lost Souls. After lighting the four braziers inside the fort, drop down on the drain. Find the skeleton holding the lantern and light it.
This causes the journal to appear on the opposite side beside the two skeletons.
Damned Journal #5 Location
| Lantern Location |  |
|---|---|
| Journal Location |
This journal is located at the Fort of Lost Souls. Light the four braziers to open the gate leading to the drain. Light the lantern on the column east of the four braziers to activate the journal inside the cell.
Swim underwater in the drain to pick up the Lock Pick from the skeleton. Swim through the opening on the wall to emerge back at the fort.
Use the lockpick on the door north of where you emerged and climb the ladder. Use your sword to cut the rope to down the platform down. Jump on the platform and on the roof towards the next area.
Once you are on the second floor, head east towards the roof with the opening and drop down to find the Damed Journal #5 next to the skeleton. If the journal is not there, open the cell door and light the lantern at the column.
Townsfolk's Journal #1 Location
After picking up the Mercado Key at the second fort, head to the house with mannequins outside and open the locked door. Head left to find the book on top of a small chair.
Townsfolk's Journal #2 Location
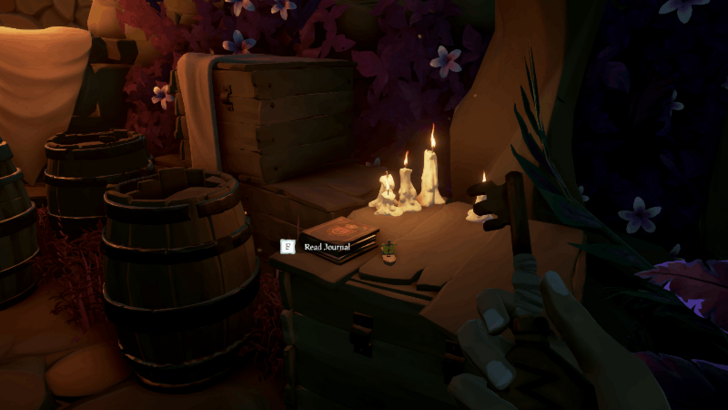
After emerging from the back door of the La Costurera Building, follow the linear path and find the journal on the right side of the path next to some barrels.
Townsfolk's Journal #3 Location
Start from the Mercado building and head down the stairs on the right side. Head left from the group of pirates playing musical instruments and climb up the stairs north leading to the top of the fort.
Find the journal on the journal near the ghosts that are using the cannons.
Townsfolk's Journal #4 Location
You can find this journal at the pulley puzzle inside the fort at Isla Tesoro. Once you reach the pulley puzzle, open the door and drop down near the ghost pirate on the cannon and find the journal sitting on one of the barrels.
Townsfolk's Journal #5 Location
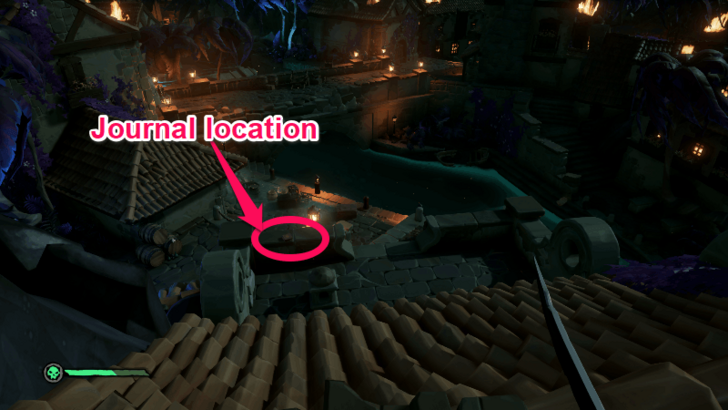
You can find this journal on the edge of the roof after you defeat the phantoms during the sequence where you find Jack Sparrow and the treasure hoard.
Captains of the Damned Commendations and Rewards
| Commendation | Reward | How to Unlock |
|---|---|---|
| Captain of Haunted Waters | None | Legendary Commendation: Complete all commendations for 'Captains of the Damned'. |
| Captain of Memories | None | Survive a pirate duel. |
| Captain Of The Damned |
Tankard of the Damned Concertina of the Damned Hurdy-Gurdy of the Damned Banjo of the Damned Drum of the Damned | Complete 'Captains of the Damned'. |
| Charting a New Destiny | None | Return what was borrowed. |
| Forgotten Memories | None | Discover the 5 Townsfolk's Journals. |
| Fort of the Forgotten | None | Find a way inside a long-abandoned fort. |
| Ghosts of the Bayou | None | Reveal a path through the bayou. |
| Key to Freedom | None | Show mercy to the imprisoned. |
| Lost Memories | None | Discover the 5 Lost Journals throughout the Sea of the Damned. |
| Strike Yer Colours! | None | Return fire! |
| The Raid of Isla Tesoro | None | Escape when the past catches up with you. |
| Treasure for Eternity | None | Discover a hidden stash of valuables and give it to the cursed pirates. |
| Treasured Hoard | None | Investigate the town treasury. |
Sea of Thieves Related Guides

All Tall Tales
| Maiden Voyage | |
|---|---|
| 1 | Maiden Voyage |
| Shores of Gold | |
| 1 | The Shroudbreaker |
| 2 | The Cursed Rogue |
| 3 | The Legendary Storyteller |
| 4 | Stars of a Thief |
| 5 | Wild Rose |
| 6 | The Art of the Trickster |
| 7 | The Fate of the Morningstar |
| 8 | Revenge of the Morningstar |
| 9 | Shores of Gold |
| Ashen Age | |
| 1 | The Seabound Soul |
| 2 | Heart of Fire |
| A Pirate's Life | |
| 1 | A Pirate's Life |
| 2 | The Sunken Pearl |
| 3 | Captains of the Damned |
| 4 | Dark Brethren |
| 5 | Lords of the Sea |
| The Legend of Monkey Island | |
| 1 | The Journey to Melee Island |
| 2 | The Quest for Guybrush |
| 3 | The Lair of LeChuck |
Comment
Author
Captains of the Damned Tall Tale Guide
improvement survey
03/2026
improving Game8's site?

Your answers will help us to improve our website.
Note: Please be sure not to enter any kind of personal information into your response.

We hope you continue to make use of Game8.
Rankings
- We could not find the message board you were looking for.
Gaming News
Popular Games

Genshin Impact Walkthrough & Guides Wiki

Honkai: Star Rail Walkthrough & Guides Wiki

Umamusume: Pretty Derby Walkthrough & Guides Wiki

Pokemon Pokopia Walkthrough & Guides Wiki

Resident Evil Requiem (RE9) Walkthrough & Guides Wiki

Monster Hunter Wilds Walkthrough & Guides Wiki

Wuthering Waves Walkthrough & Guides Wiki

Arknights: Endfield Walkthrough & Guides Wiki

Pokemon FireRed and LeafGreen (FRLG) Walkthrough & Guides Wiki

Pokemon TCG Pocket (PTCGP) Strategies & Guides Wiki
Recommended Games

Diablo 4: Vessel of Hatred Walkthrough & Guides Wiki

Cyberpunk 2077: Ultimate Edition Walkthrough & Guides Wiki

Fire Emblem Heroes (FEH) Walkthrough & Guides Wiki

Yu-Gi-Oh! Master Duel Walkthrough & Guides Wiki

Super Smash Bros. Ultimate Walkthrough & Guides Wiki

Pokemon Brilliant Diamond and Shining Pearl (BDSP) Walkthrough & Guides Wiki

Elden Ring Shadow of the Erdtree Walkthrough & Guides Wiki

Monster Hunter World Walkthrough & Guides Wiki

The Legend of Zelda: Tears of the Kingdom Walkthrough & Guides Wiki

Persona 3 Reload Walkthrough & Guides Wiki
All rights reserved
©Microsoft 2024. Microsoft, Rare, the Rare logo, Sea of Thieves are trademarks of the Microsoft group of companies.
©Disney. All trademarks and copyrights are property of their respective owners.
MONKEY ISLAND © & ™ 2024 Lucasfilm Ltd. All rights reserved.
The copyrights of videos of games used in our content and other intellectual property rights belong to the provider of the game.
The contents we provide on this site were created personally by members of the Game8 editorial department.
We refuse the right to reuse or repost content taken without our permission such as data or images to other sites.





![Monster Hunter Stories 3 Review [First Impressions] | Simply Rejuvenating](https://img.game8.co/4438641/2a31b7702bd70e78ec8efd24661dacda.jpeg/thumb)


