This survey will take about 1 minute.
Your answers will help us to improve our website.
Sea of Thieves
Revenge of the Morningstar Tall Tale Guide
★SoT PS5 Version and Season 12 are Now Live!
★New Pre-Order and Edition Bonuses for the PS5!
★Check out our Beginner's Guide for new players.
★Tall Tales | World Events | Trading Companies

A walkthrough guide for Revenge of the Morningstar Tall Tale in Sea of Thieves. Read on to see a complete Tall Tale walkthrough and guide for Revenge of the Morningstar, including info on how to get all its Commendations, how to defeat Lord Graymarrow, all journal locations, and a list of its completion rewards.
| ◄ Previous Tall Tale | Next Tall Tale ▶ |
|---|---|
| The Fate of the Morningstar | Shores of Gold |
List of Contents
Revenge of the Morningstar Overview and Location
| Revenge of the Morningstar | |
|---|---|
| Story Arc | Shores of Gold |
| Quest Location | Next to Sandra at the Shipwright Shop on Dagger Tooth Outpost. |
| Reward |
8000 Gold (High Seas) 2400 Gold (Safer Seas) Morningstar Figurehead Morningstar Hull |
| ◄ Previous Tall Tale | Next Tall Tale ▶ |
| The Fate of the Morningstar | Shores of Gold |
Tall Tale Can be Found in Dagger Tooth Outpost (M-8)
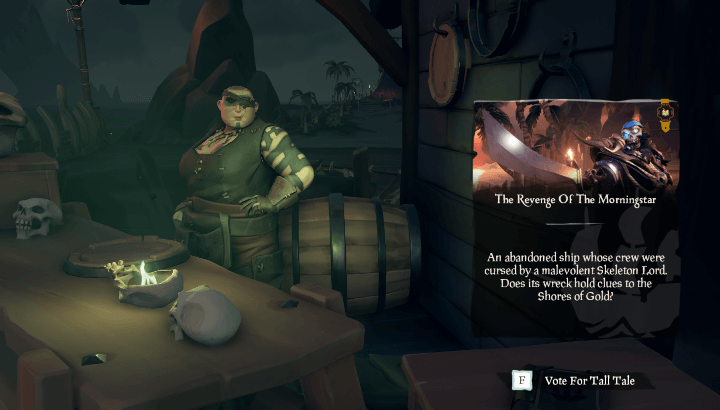
Head to the Dagger Tooth Outpost (M-8) and make your way to the docks to find Sandra's stall. Interact with the book next to her table to start the Tall Tale.
You can also start the Tall Tale by voting for it in the Quest Table, but you still have to talk to Sandra to get your first task.
Revenge of the Morningstar Walkthrough
Find the Shipwreck in Boulder Cay (M-5)

To start, head to Boulder Cay (M-5) and dock your ship in the southeast. From there, dive down until you spot a shipwreck.
Pick Up the Morningstar Ship Logs

After spotting the shipwreck, swim towards the middle to locate the two ship logs. Simply approach the white sparkles to pick them up. The final Ship Log will be inside the shipwreck, on the middle floor of the broken frontal hull.
Find the Morningstar Chest
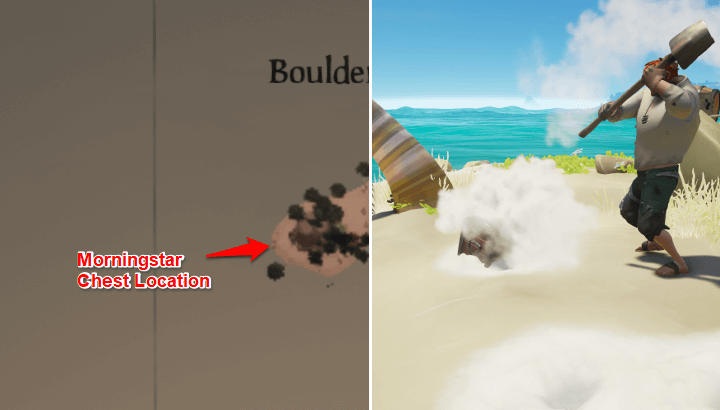
After collecting the ship logs, return to the island and head southwest. Dig around the palm tree and rock to uncover the Morningstar Chest.
Wear the Morningstar Outfit
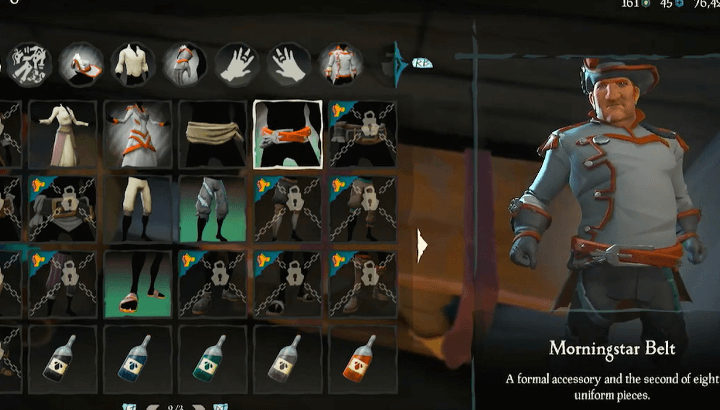
Open the chest to reveal a Morningstar outfit. Wear all of these pieces, as you'll need to disguise yourself for the next part.
Talk to Tracy and Tyler

Head to Sanctuary Outpost (F-7) and visit the bar to find Tracy. Speak to her and finish all the new dialogue options. After that, speak to Tyler in the Equipment Shop of the outpost and see all the new dialogue as well to learn the next locations.
Once you receive information from both Tracy and Tyler, head to either Cannon Cove (G-10) or Sunken Grove (P-7). Cannon Cove will be much closer to your location, so you can go there first.
Note: If you're unable to trigger the special interactions with both NPCs, make sure that you have all the pieces of the Morningstar outfit on. Additionally, this step is optional and you can go directly to Cannon Cove and Sunken Grove after.
Defeat Captain Gripper

Head to Cannon Cove (G-10) and search for Captain Gripper and his crew. Captain Gripper can spawn in different locations on the main island, so make sure to check every spot until you hear him and his crew talk.
Defeat him to obtain Graymarrow’s Orders, which will provide a clue to the location of the Skull of Captain Douglas.
Read the Clues to the Skull of Captain Douglas
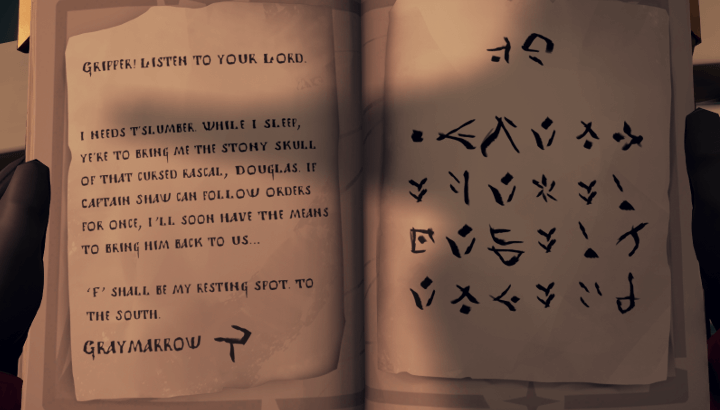
After picking up Graymarrow’s Orders, the journal will be further updated with new pages. Decode the page using the cipher provided in the pages prior. Each code represents a certain word, and you'll have to match it with the text to decipher the message. This will be the clue to the location of the Skull of Captain Douglas.
How to Read the Graymarrow's Orders
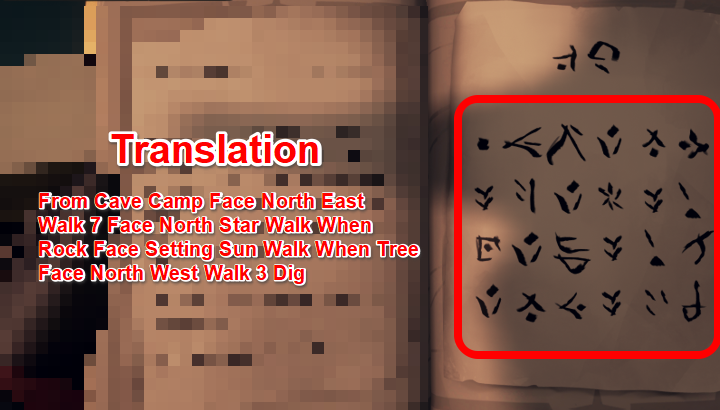
Once you have the decoded instructions, simply follow the given directions on your page. To understand some of the clues, you may need a better understanding of the geography of the map. For instance, you need to start at a certain point and study the directions of other natural elements such as where the sun sets, rises, or where the north star is.
Using the example above, the page requires you to find the Cave Camp and face northeast once you reach the area. Walk 7 steps forward, then change direction to face north (following the north star clue) until you reach a rock. Face west (following the setting sun clue), then walk towards a tree to the north. Take 3 steps west before digging.
Find the Skull of Captain Douglas

After decoding the clue, follow the indicated directions to the spot. Dig once you've reached the area and pick up the Skull of Captain Douglas. Bring this along, as you'll need it later on for the next steps.
All Possible Skull of Captain Douglas Locations
| Clues (First 3-5 Codes) | Location |
|---|---|
| From Cave Walk Rising Sun | 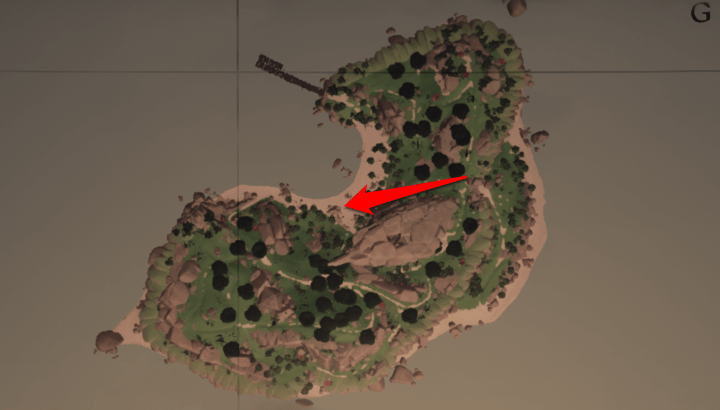 |
| From Skeleton Tree |  |
| From Kraken Rock | 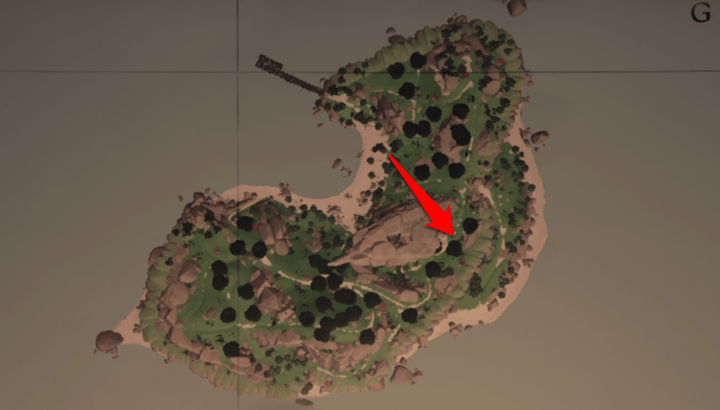 |
| From Cave Camp |  |
| From Beach Camp | 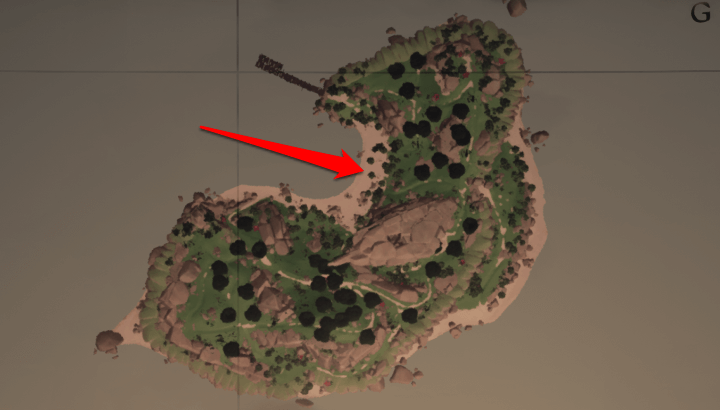 |
| From North West Beach |  |
Defeat Captain Shaw

Next, head to Sunken Grove (P-7) and search for Captain Shaw. Like Captain Gripper, Captain Shaw can spawn at a random spot on the map, so make sure to look around to find him and his crew. Defeat him to get the second Graymarrow’s Orders.
Find the Chalice of Resurrection

After receiving Graymarrow's Orders, review the set of clues again to pinpoint the location of the Chalice of Resurrection. This is another set of codes you need to decipher, so simply check and follow the instructions once you've decoded the passage.
All Possible Chalice of Resurrection Locations
| Clues (First 3-5 Codes) | Location |
|---|---|
| From Kraken Rock |  |
| From Cage Camp South |  |
| From South Beach Ship |  |
| From North East Chest |  |
| From Beach Camp South | 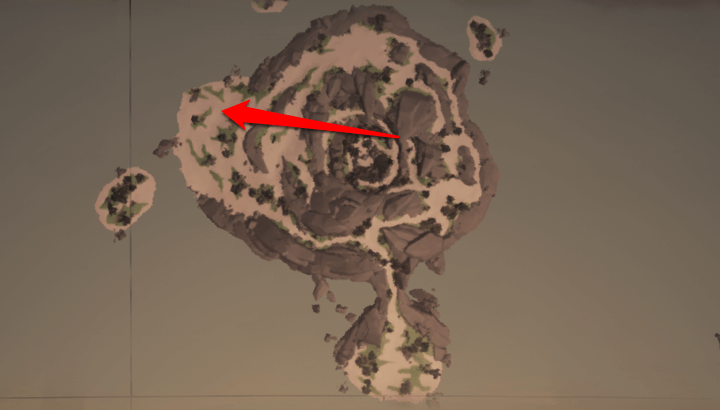 |
| From East Rising Sun | 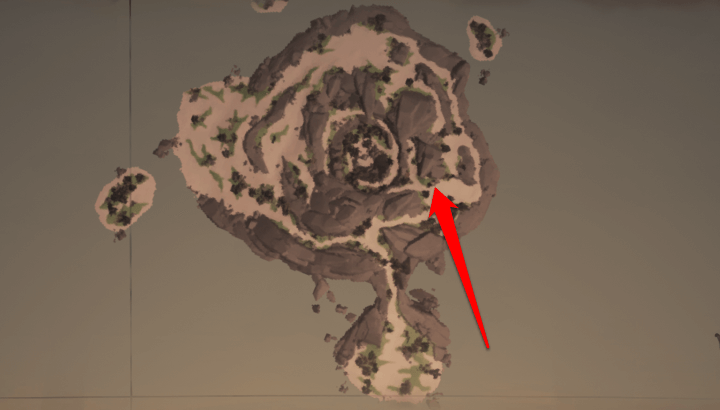 |
Head to the Given Coordinates in the Journal

After receiving both the Skull of Captain Douglas and the Chalice of Resurrection, make your way towards the given coordinates in your journal. Each set of Graymarrow's Orders provides one part of the coordinates, so simply connect them to find the designated island in your session. For example, the image above gave F and 12, which are the coordinates for Wanderer's Refuge (F-12).
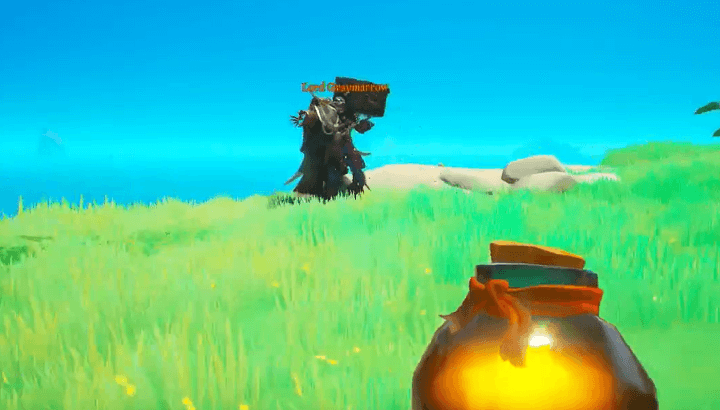
Offer the Skull and the Chalice
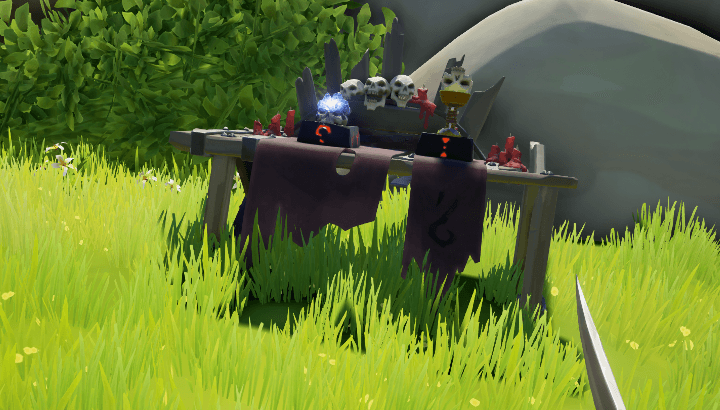
Once you're on the designated island, find the altar and offer both the Skull of Captain Douglas and the Chalice of Resurrection. This will summon Lord Graymarrow, so be sure to prepare for a fight before placing the offerings.
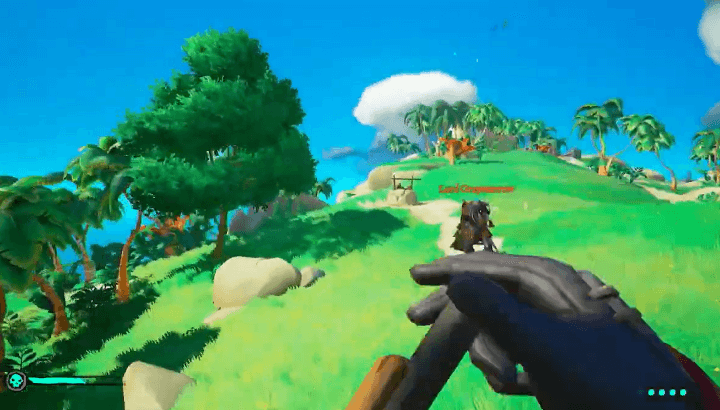
Defeat Lord Graymarrow to Get the Shroudbreaker Stone
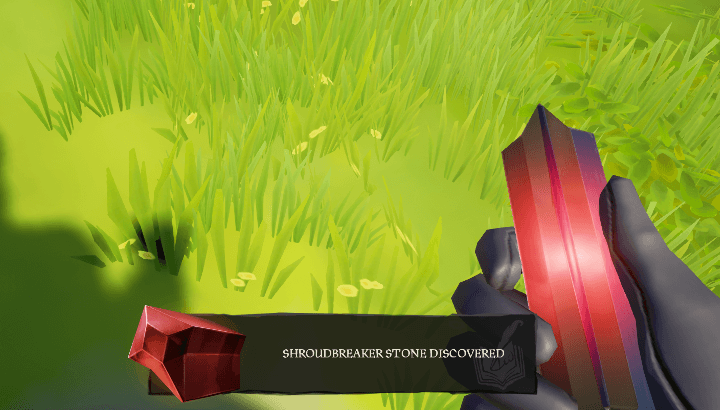
Lord Graymarrow is the last boss fight you need to defeat in this Tall Tale. Like all previous bosses, he can deal massive damage and will send out hordes of skeletons to overwhelm you. Be sure to prepare for this battle before engaging!
Once you defeat Lord Graymarrow, he will drop the Shroudbreak Stone. Take it and sail back to Dagger Tooth Outpost (M-8) to finish the Tall Tale.
Return the Shroudbreaker Stone to Sandra
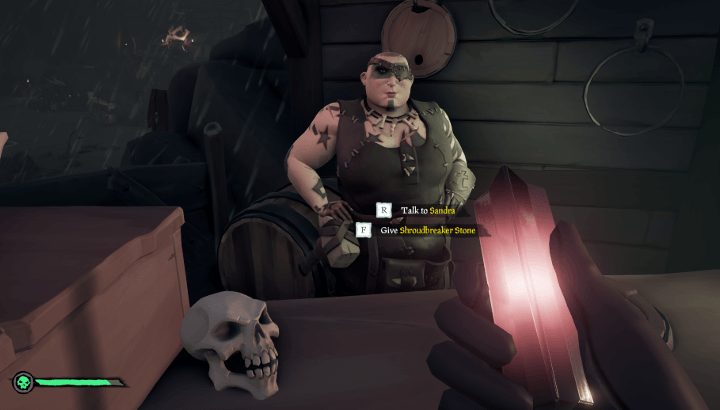
Once you reach the Dagger Tooth Outpost (M-8), speak to Sandra again and give her the Shroudbreaker Stone to complete the last part of this Tall Tale.
How to Defeat Lord Graymarrow
|
|
Eat Cooked Meat Before Combat
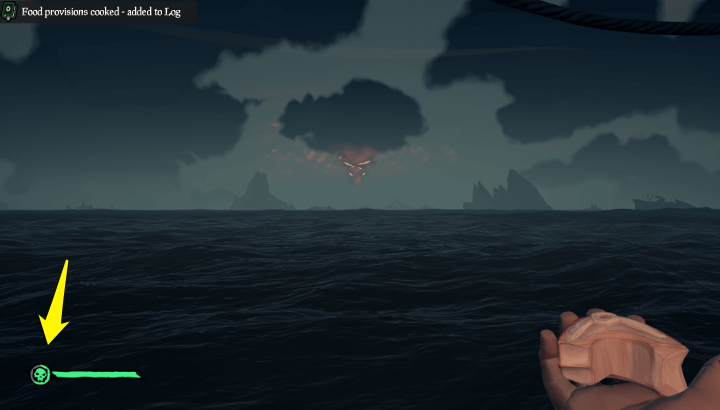
Like with every other boss, it is recommended to eat cooked meat to passively replenish your HP during combat. Eating cooked meat will fill out the skull meter to your left, and the more you eat, the longer HP recovery you'll receive when facing Lord Graymarrow.
Back Away When He Starts Carrying a Chest
When you see Lord Graymarrow carrying a chest, it's a sign that he's charging up a powerful AoE explosion that will blow you away upon impact. Back away when you see this to prevent taking damage.
Use Skeletons to Block Gunshots
Lord Graymarrow also uses powerful gunshots frequently. One way to avoid them is to use his skeleton crew as a shield. This not only causes him to miss his shots at you but also eliminates a member of his mob.
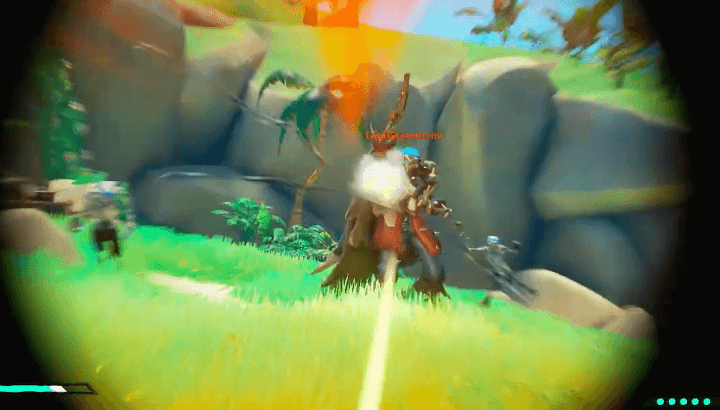
Use Range Weapons on Close Combat
Lord Graymarrow wields two weapons during combat and switches between them depending on the range between him and the player. If the player is close to him, he will use a sword. If the player is far away, he will use his pistol.
A good strategy to use here is to force him to switch to his sword. Then, move away to create distance and shoot him with your ranged weapon while he's wielding the sword. Repeat this as much as possible until he goes down.
All Revenge of the Morningstar Journal Locations
| No. | All Revenge of the Morningstar Journal Locations |
|---|---|
| 1 | Assessing the Enemy |
| 2 | Accepting the Impossible |
| 3 | On the Nature of Curses |
| 4 | An Endless Pursuit |
| 5 | Too Little, Too Late... |
Assessing the Enemy
Behind the tree where you dig up the Morningstar Chest in Boulder Cay (M-5) , you'll find barrels. On top of the barrels is the Assessing the Enemy journal.
Accepting the Impossible
Next, head to the Sanctuary Outpost (F-7) and enter the bar. Just near the entrance, you'll find the Accepting the Impossible journal on the left, next to the first table inside the empty crates.
On the Nature of Curses
The third journal for this Tall Tale will be on Cannon Cove (G-10) . Head to the highest point at the back of the island, where you'll find barrels. Behind these barrels is the On the Nature of Curses journal. There's also a chance that you'll find Captain Gripper camping here.
An Endless Pursuit
Head to the northwest islet of the Sunken Grove (P-7), where you'll find the An Endless Pursuit journal next to a barrel beside a lantern.
Too Little, Too Late...
The last journal, Too Little, Too Late..., will not be on any of the islands you need to visit in this Tall Tale. Instead, you need to head to Marauder's Arch (Q-3) and look for the tallest peak. Under it will be barrels, and you'll find the journal there.
Revenge of the Morningstar Commendations and Rewards
| Commendation | Reward | How to Unlock |
|---|---|---|
| An Avenged Crew | None | Defeat Graymarrow. |
| One of Slate's Crew | None | Discover the Morningstar Crew Outfit. |
| Revenge of the Morningstar | Morningstar Hull | Complete 'Revenge of the Morningstar' |
| Skull of an Old Foe | None | Discover the Skull of Captain Douglas. |
| Souls at Rest | None | Legendary Commendation: Complete the Tale 5 times. |
| The Forsaken Chalice | None | Discover the Chalice of Resurrection. |
| The Morningstar Rises | Morningstar Figurehead | Legendary Commendation: Complete all commendations for 'Revenge of the Morningstar'. |
| Whispers from the Morningstar | None | Discover all 5 of Eli Slate's Journals. |
Sea of Thieves Related Guides
All Tall Tales
| Maiden Voyage | |
|---|---|
| 1 | Maiden Voyage |
| Shores of Gold | |
| 1 | The Shroudbreaker |
| 2 | The Cursed Rogue |
| 3 | The Legendary Storyteller |
| 4 | Stars of a Thief |
| 5 | Wild Rose |
| 6 | The Art of the Trickster |
| 7 | The Fate of the Morningstar |
| 8 | Revenge of the Morningstar |
| 9 | Shores of Gold |
| Ashen Age | |
| 1 | The Seabound Soul |
| 2 | Heart of Fire |
| A Pirate's Life | |
| 1 | A Pirate's Life |
| 2 | The Sunken Pearl |
| 3 | Captains of the Damned |
| 4 | Dark Brethren |
| 5 | Lords of the Sea |
| The Legend of Monkey Island | |
| 1 | The Journey to Melee Island |
| 2 | The Quest for Guybrush |
| 3 | The Lair of LeChuck |
Comment
Author
Revenge of the Morningstar Tall Tale Guide
Please participate in our site
improvement survey
03/2026
improvement survey
03/2026
Would you assist in
improving Game8's site?
improving Game8's site?

×
We are listening to our users' valuable opinions and discussing how to act on them.
The information collected through this survey will be used for the purpose of improving our services. In addition, the information will only be disclosed a part of a statistic in a format that will not allow identification of personal information.
Begin Survey
Not Now
×
Please rate each item regarding Game8.co's Advertisements.
Amount of Ads
Very Dissatisfied
Somewhat Dissatisfied
Fine
Somewhat Satisfied
Highly Satisfied
Placement of Ads
Timing of Ad Display
Ad Loading Speed
Safeness of Ads
Content of Ads
×
Please rate each item regarding Game8.co's Quality of Articles.
Amount of information
Very Dissatisfied
Somewhat Dissatisfied
Fine
Somewhat Satisfied
Highly Satisfied
Frequency of updates
Speed of new information
Accuracy of articles
Understandibility of articles
Readability of sentences
×
Please rate each item regarding Game8.co's Usability of the Site.
Ease of finding information
Very Dissatisfied
Somewhat Dissatisfied
Fine
Somewhat Satisfied
Highly Satisfied
Loading Speed
Use of Color
Font Size
Visibility of Images
Easy to Understand Layout
×
Please rate each item regarding Game8.co's Message Boards, Comments.
Ease of Writing
Very Dissatisfied
Somewhat Dissatisfied
Fine
Somewhat Satisfied
Highly Satisfied
Readability
Ease in Finding Information
Comment Quality
Comment Quantity
Admin Response
×
Please rate each item regarding Game8.co's Site's new design.
Please rate our site's new design
Very Dissatisfied
Somewhat Dissatisfied
Fine
Somewhat Satisfied
Highly Satisfied
Do you think that the website's design change makes the site easier to use?
Has the new design made it easier for you to find information on the site?
Has the new design improved the overall visual appeal of the site?
How would you rate your overall satisfaction with the new design of the site?
×
How likely are you to recommend Game8 to someone you know?
Very Unlikely
0
1
2
3
4
5
6
7
8
9
10
Very Likely
If you have other opinions regarding potential improvement to the website, please share them with us. We would appreciate your honest opinion.
Note: This is a free response section, so you can proceed without entering anything.
Note: Please be sure not to enter any kind of personal information into your response.
Note: Please be sure not to enter any kind of personal information into your response.
×
Thank You
×
Thank you for participating in our survey! Your answers will help us to improve the quality of our website and services.
We hope you continue to make use of Game8.
We hope you continue to make use of Game8.
Close
Rankings
- We could not find the message board you were looking for.
Gaming News


![Monster Hunter Stories 3 Review [First Impressions] | Simply Rejuvenating](https://img.game8.co/4438641/2a31b7702bd70e78ec8efd24661dacda.jpeg/thumb)
Popular Games

Genshin Impact Walkthrough & Guides Wiki
Honkai: Star Rail Walkthrough & Guides Wiki
Umamusume: Pretty Derby Walkthrough & Guides Wiki
Pokemon Pokopia Walkthrough & Guides Wiki
Resident Evil Requiem (RE9) Walkthrough & Guides Wiki
Monster Hunter Wilds Walkthrough & Guides Wiki
Wuthering Waves Walkthrough & Guides Wiki
Arknights: Endfield Walkthrough & Guides Wiki
Pokemon FireRed and LeafGreen (FRLG) Walkthrough & Guides Wiki
Pokemon TCG Pocket (PTCGP) Strategies & Guides Wiki


Recommended Games
Diablo 4: Vessel of Hatred Walkthrough & Guides Wiki
Cyberpunk 2077: Ultimate Edition Walkthrough & Guides Wiki
Fire Emblem Heroes (FEH) Walkthrough & Guides Wiki
Yu-Gi-Oh! Master Duel Walkthrough & Guides Wiki
Super Smash Bros. Ultimate Walkthrough & Guides Wiki
Pokemon Brilliant Diamond and Shining Pearl (BDSP) Walkthrough & Guides Wiki
Elden Ring Shadow of the Erdtree Walkthrough & Guides Wiki
Monster Hunter World Walkthrough & Guides Wiki
The Legend of Zelda: Tears of the Kingdom Walkthrough & Guides Wiki
Persona 3 Reload Walkthrough & Guides Wiki


All rights reserved
©Microsoft 2024. Microsoft, Rare, the Rare logo, Sea of Thieves are trademarks of the Microsoft group of companies.
©Disney. All trademarks and copyrights are property of their respective owners.
MONKEY ISLAND © & ™ 2024 Lucasfilm Ltd. All rights reserved.
The copyrights of videos of games used in our content and other intellectual property rights belong to the provider of the game.
The contents we provide on this site were created personally by members of the Game8 editorial department.
We refuse the right to reuse or repost content taken without our permission such as data or images to other sites.