This survey will take about 1 minute.
Your answers will help us to improve our website.
Sea of Thieves
The Art of the Trickster Tall Tale Guide
★SoT PS5 Version and Season 12 are Now Live!
★New Pre-Order and Edition Bonuses for the PS5!
★Check out our Beginner's Guide for new players.
★Tall Tales | World Events | Trading Companies
A walkthrough guide for The Art of the Trickster Tall Tale in Sea of Thieves. Read on to see a complete Tall Tale walkthrough and guide for The Art of the Trickster, including info on how to get all its Commendations and a list of its completion rewards.
| ◄ Previous Tall Tale | Next Tall Tale ▶ |
|---|---|
| Wild Rose | The Fate of the Morningstar |
List of Contents
The Art of the Trickster Overview and Location
| The Art of the Trickster | |
|---|---|
| Story Arc | Shores of Gold |
| Quest Location | Next to Salty at the shipwreck on the east side of Plunder Valley. |
| Reward |
8000 Gold (High Seas) 2400 Gold (Safer Seas) Rum Bottle Spyglass |
| ◄ Previous Tall Tale | Next Tall Tale ▶ |
| Wild Rose | The Fate of the Morningstar |
Find Salty at the East Side of Plunder Valley (G-16)
| World Location |  |
|---|---|
| Map Location | 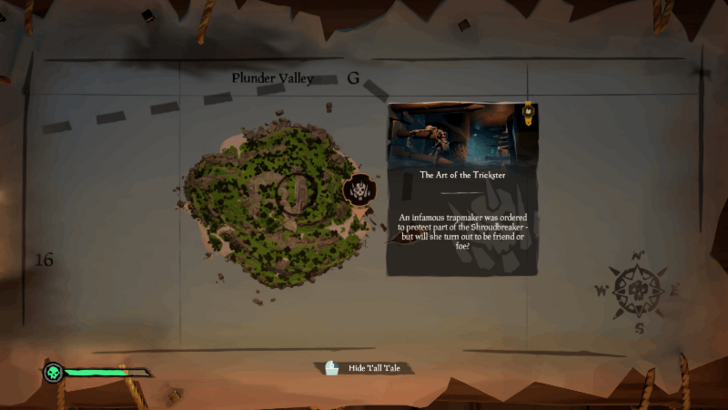 |
Head to the east side of Plunder Valley (G-16) and find the campfire and a large rock with paintings on it. Next to the campfire is Salty, the skeleton parrot that will give you the Tall Tale book.
Note: This Tall Tale can also be started from your quest table. However, you will still need to go to Plunder Valley and speak to Salty in order to unlock the Tall Tale book with clues.
The Art of the Trickster Walkthrough
Head Inside the Cave West of Salty
| Map Location |  |
|---|---|
| World Location |
Starting from Salty, use your compass and head west. Find the cave entrance that has a painting of three red triangles and two black lines on the large leftmost rock and a torch on the right side.
Head inside the cave and turn left until you can see a glowing blue-green mushroom. From the mushroom, turn right to enter the cave that has a lot of skeletons in it.
Solve the Skeleton Puzzle
| All Skeleton Puzzles | |
|---|---|
| The forsaken Captain points to fire and ash | Hand in hand, two lovers face their destiny |
| The Rum Runner laid her drink to rest | The thief hides behind her mask of gold |
This puzzle requires you to rearrange the skeletons in the room to match the description of the "stories told in lifeless bone (skeletons)" on page 4 of the Tale Book.
The forsaken Captain points to fire and ash… Puzzle Solution

Find the skeleton with the glowing red necklace and move its arm so it is pointing at the campfire.
Hand in hand, two lovers face their destiny… Puzzle Solution
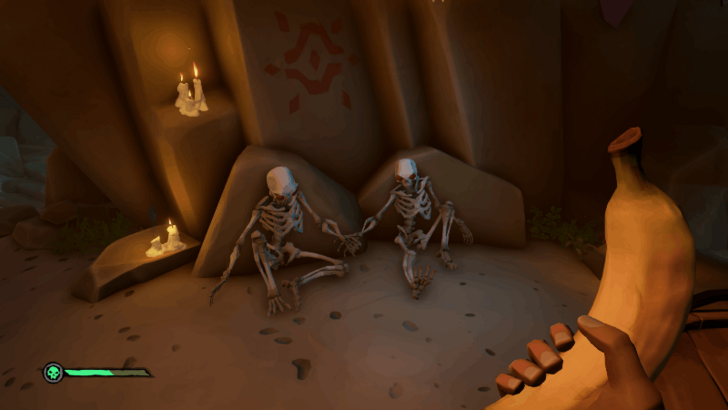
Find the two skeletons with red jewels on their eye sockets. Move their skeleton arms until their hands are touching.
The Rum Runner laid her drink to rest… Puzzle Solution

Find the skeleton with a tankard next to the campfire and interact with it until its arm that holds the tankard is on the ground.
The thief hides behind her mask of gold… Puzzle Solution
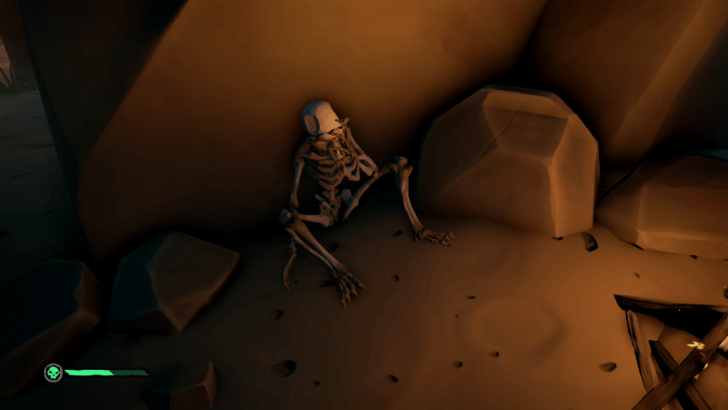
Find the skeleton sitting next to the campfire and interact with it until its arm is holding the mask on its face.
Pick Up the Trapmaker's Spyglass and Note
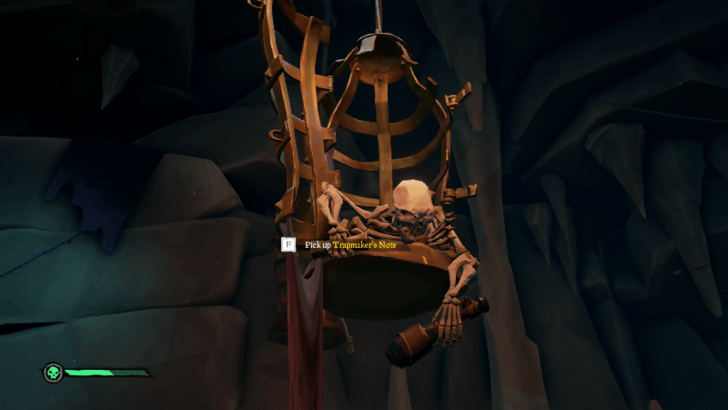
After solving the skeleton puzzle, a cage containing a skeleton will descend down in the middle of the area. Retreive the Trapmaker's Spyglass and Trapmaker's Note to proceed to the next objective.
Solve the Riddle of the Trapmaker's Note
After picking up the Trapmaker's Note, check the new page of the Tale Book. The new page varies per playthrough as it may direct you to a riddle found at Discovery Ridge or Plunder Valley.
| No. | How to Solve the Trapmaker's Note Riddle |
|---|---|
| 1 | 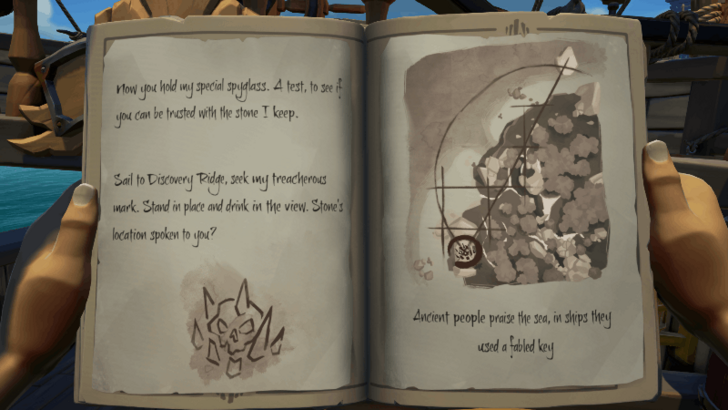 Head to the location marked with a black circle on the Tale Book. Use the Map table to match the ridges of the bird's eye view illustration on the Tale Book. |
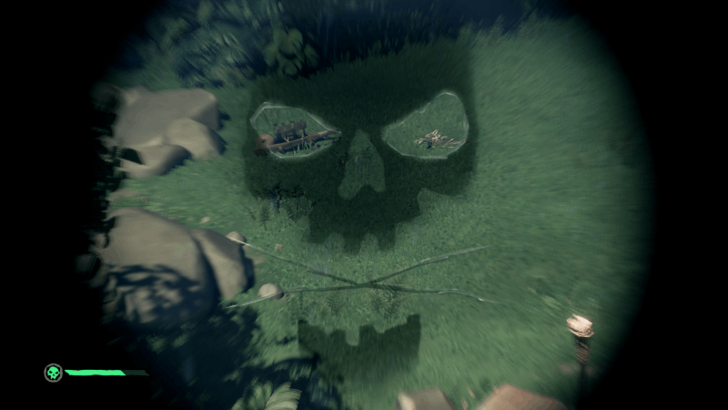
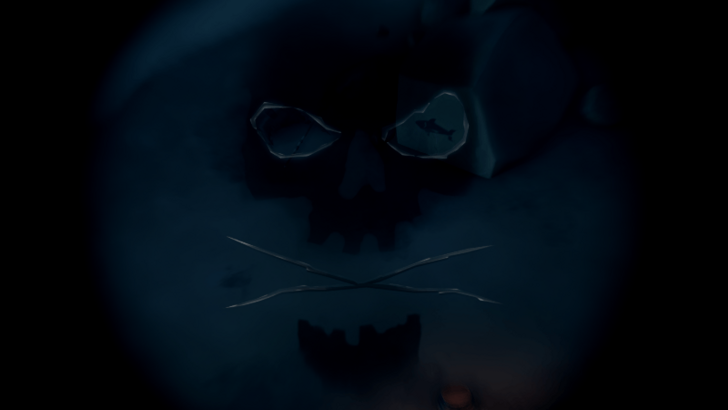
| 2 | 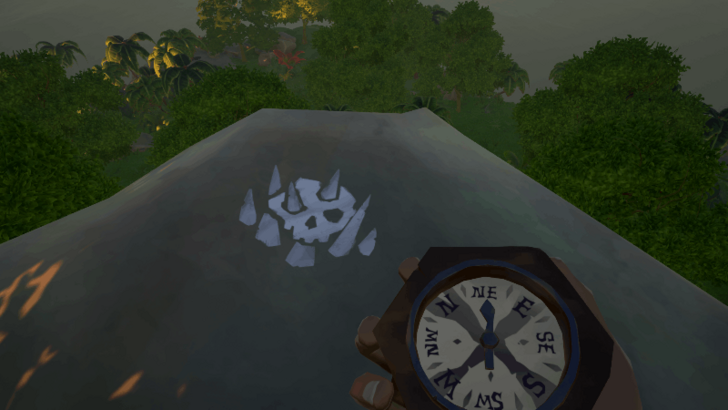 Find the white skull on the floor and stand on top of it. |
| 3 |  Use the Trapmaker's Spyglass to line up the two objects on the skull's eyesockets. The two objects mentioned in the Tale Book vary per playthrough. |
| 4 | 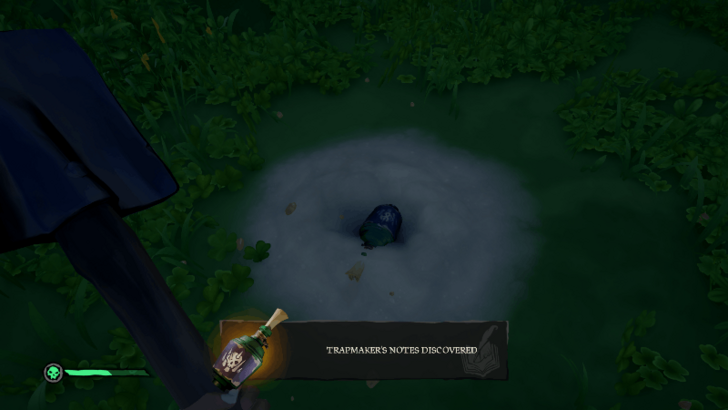 Dig on the spot where the X mark is on the Trapmaker's Spyglass to obtain another Trapmaker's Note. Do this four times until you dig out the Trapmaker’s Gunpowder Key. |
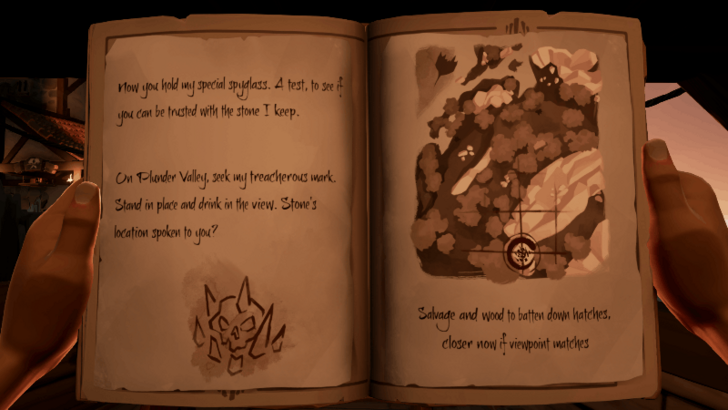
Salvage and wood to batten down hatches, closer now if viewpoint matches Puzzle Solution
| Trapmaker's Symbol Location | |
|---|---|
|
|
| Clue Page | Spyglass View |
 |
|
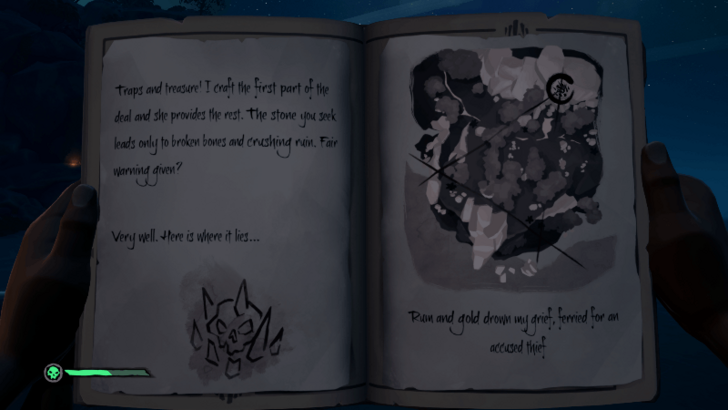
Rum and gold drown my grief, ferried for an accused thief Puzzle Solution
| Trapmaker's Symbol Location | |
|---|---|
 |
|
| Clue Page | Spyglass View |
 |
 |
Once soaring through the sky with pride, now crawling in the earth to hide Puzzle Solution
| Trapmaker's Symbol Location | |
|---|---|
 |
|
| Clue Page | Spyglass View |
 |
 |
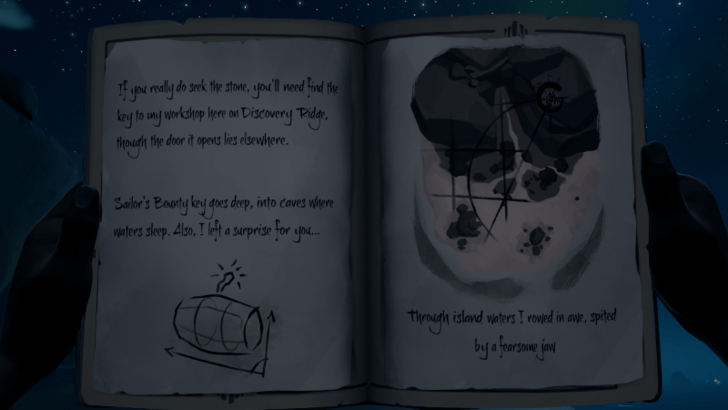
Through island waters I rowed in awe, spited by a fearsome jaw Puzzle Solution
| Trapmaker's Symbol Location | |
|---|---|
 |
|
| Clue Page | Spyglass View |
 |
 |
Travel to Sailor's Bounty (C-4)
| Sailor's Bounty Location |  |
|---|---|
| Ditch Entrance Location |  |
Head to Sailor's Bounty (C-4) with the Trapmaker's Gunpowder Key on board. Once you arrive at the island, head to the very center of the island until you can find the ditch.
Enter the Narrow Hallway in the Ditch
Drop down on the ditch and enter on either of the narrow hallways on the sides. These all lead to the same area. Follow the Trapmaker's icon in the area as they lead you to the correct path.
Avoid Stepping on the Wooden Planks
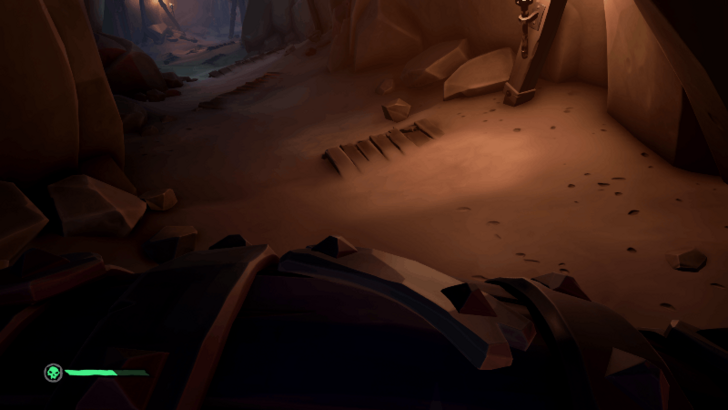
Once you enter either of the narrow hallways, avoid stepping on the wooden planks on the floor. These are pressure traps that activate when you step on them.
Place the Trapmaker's Gunpowder Key on the Pedestal

Once you arrive at an open area, place the Trapmaker's Gunpowder Key on the pedestal. Make sure to prepare first as this activates waves of skeletons that you need to defeat to move on to the next objective.
Defeat the Waves of Skeletons and the Captain
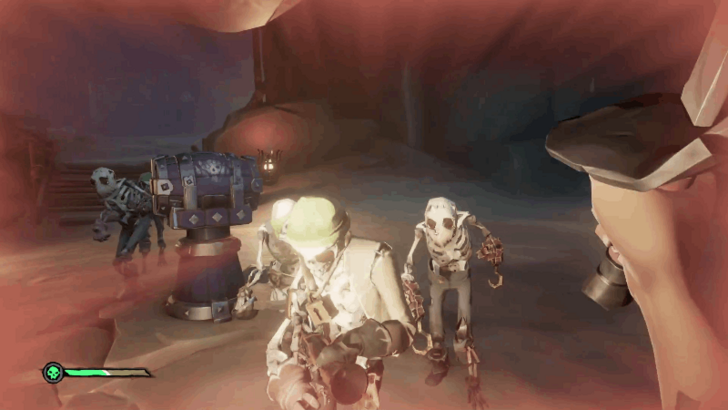
Defeat all the skeletons and the captain as they spawn from the ground. A Totem Key and additional Trapmaker's Notes will appear once you have successfully defeated all the enemies.
Use the Levers on the Sides of the Arena

There are levers on the area that you can use to activate traps to kill multiple skeletons at once. Note that these traps can harm you as well, so be careful when activating them.
If the skeletons kill you on this part of the Tall Tale while playing solo, you will restart from the checkpoint where you placed the Trapmaker's Gunpowder Key on the pedestal.
Grab the Totem Key and Find the Vault
| Totem Key | Location |
|---|---|
| Moon Totem | 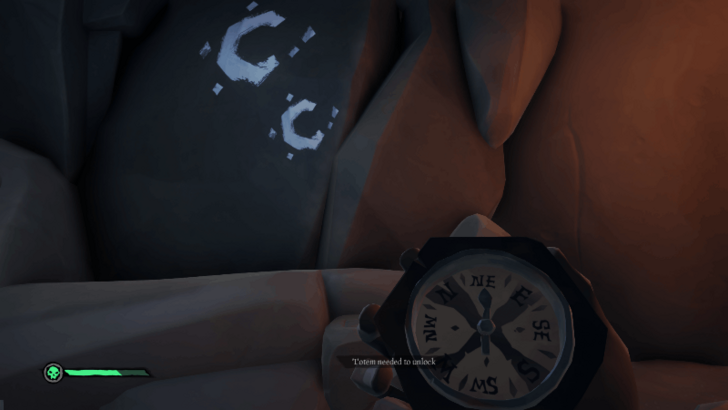 |
Pick up the Totem Key and head back to your ship. Read the new pages of the Tale Book to see the next destination.
If you are playing solo and got struck by the spike traps on your way back, you will spawn on your ship and you will have to go back to the area where you dropped the Totem Key.
Light the Four Braziers on the Vault

Once you reach the location of the totem's corresponding vault, light the four braziers to activate it.
This opens a door that leads to the Shroudbreaker Stone but also closes the door leading to the exit.
There will be three waves of enemies and a captain that will appear after. Defeat them and place the three medallions that the captains drop to unlock the exit.
Return the Shroudbreaker Stone to Salty
Head back to Plunder Valley (G-16) and talk to Salty to complete the Tall Tale.
All The Art of the Trickster Journal Locations
| No. | All The Art of the Trickster Journal Locations |
|---|---|
| 1 | The Perfect Trap |
| 2 | Bait and Switch |
| 3 | Making My Point |
| 4 | We Want Plates |
| 5 | A Worthy Opponent |
The Perfect Trap Journal Location

You can find The Perfect Trap journal in the cave with the skeleton puzzle in Plunder Valley (G-16).
Bait and Switch Journal Location
This journal is located at the top of Discovery Ridge near one of the Trapmaker's symbols.
Making My Point Journal Location
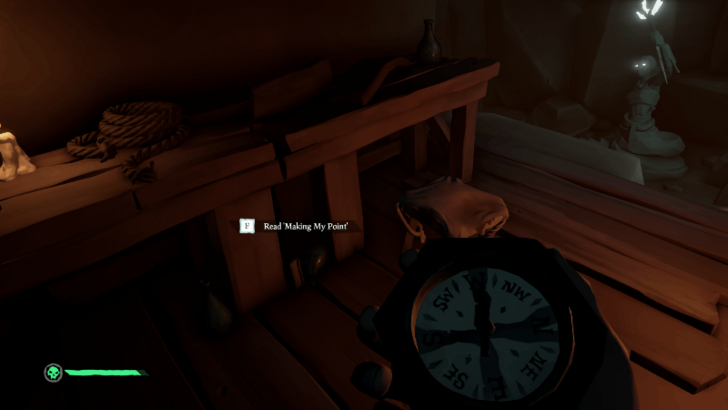
You can find this journal under the table inside the Trapmaker's Lair at Sailor's Bounty (C-4).
We Want Plates Journal Location
Find the journal near the anvil inside the Trapmaker's Lair at Sailor's Bounty (C-4).
A Worthy Opponent Journal Location
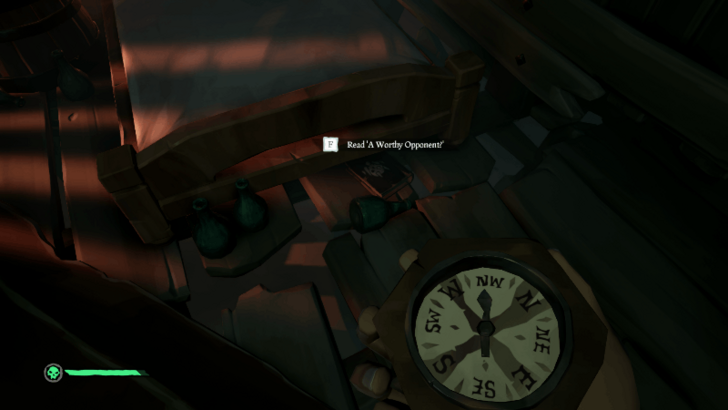
You can find this journal beside the foot of the bed inside the Trapmaker's Lair at Sailor's Bounty (C-4).
The Art of the Trickster Commendations and Rewards
| Commendation | Reward | How to Unlock |
|---|---|---|
| Art of the Trickster | Rum Bottle Spyglass | Complete 'Art of the Trickster'. |
| Drinking in the View | None | Discover the Rum Bottle Spyglass. |
| The Trickster's Folly | Trapmaker's Capstan | Legendary Commendation: Complete all commendations for 'The Art of the Trickster'. |
| The Trickster's Key | None | Discover the Trapmaker's Key. |
| The Trickster's Stone | None | Claim the Trapmaner's Shroudbreaker Stone. |
| The Trickster's Tale | None | Legendary Commendation: Complete the Tale 5 times. |
| Traps and Treasure | None | Discover all 5 of the Trapmaker's Journals. |
Sea of Thieves Related Guides
All Tall Tales
| Maiden Voyage | |
|---|---|
| 1 | Maiden Voyage |
| Shores of Gold | |
| 1 | The Shroudbreaker |
| 2 | The Cursed Rogue |
| 3 | The Legendary Storyteller |
| 4 | Stars of a Thief |
| 5 | Wild Rose |
| 6 | The Art of the Trickster |
| 7 | The Fate of the Morningstar |
| 8 | Revenge of the Morningstar |
| 9 | Shores of Gold |
| Ashen Age | |
| 1 | The Seabound Soul |
| 2 | Heart of Fire |
| A Pirate's Life | |
| 1 | A Pirate's Life |
| 2 | The Sunken Pearl |
| 3 | Captains of the Damned |
| 4 | Dark Brethren |
| 5 | Lords of the Sea |
| The Legend of Monkey Island | |
| 1 | The Journey to Melee Island |
| 2 | The Quest for Guybrush |
| 3 | The Lair of LeChuck |
Comment
Author

The Art of the Trickster Tall Tale Guide
Please participate in our site
improvement survey
03/2026
improvement survey
03/2026
Would you assist in
improving Game8's site?
improving Game8's site?

×
We are listening to our users' valuable opinions and discussing how to act on them.
The information collected through this survey will be used for the purpose of improving our services. In addition, the information will only be disclosed a part of a statistic in a format that will not allow identification of personal information.
Begin Survey
Not Now
×
Please rate each item regarding Game8.co's Advertisements.
Amount of Ads
Very Dissatisfied
Somewhat Dissatisfied
Fine
Somewhat Satisfied
Highly Satisfied
Placement of Ads
Timing of Ad Display
Ad Loading Speed
Safeness of Ads
Content of Ads
×
Please rate each item regarding Game8.co's Quality of Articles.
Amount of information
Very Dissatisfied
Somewhat Dissatisfied
Fine
Somewhat Satisfied
Highly Satisfied
Frequency of updates
Speed of new information
Accuracy of articles
Understandibility of articles
Readability of sentences
×
Please rate each item regarding Game8.co's Usability of the Site.
Ease of finding information
Very Dissatisfied
Somewhat Dissatisfied
Fine
Somewhat Satisfied
Highly Satisfied
Loading Speed
Use of Color
Font Size
Visibility of Images
Easy to Understand Layout
×
Please rate each item regarding Game8.co's Message Boards, Comments.
Ease of Writing
Very Dissatisfied
Somewhat Dissatisfied
Fine
Somewhat Satisfied
Highly Satisfied
Readability
Ease in Finding Information
Comment Quality
Comment Quantity
Admin Response
×
Please rate each item regarding Game8.co's Site's new design.
Please rate our site's new design
Very Dissatisfied
Somewhat Dissatisfied
Fine
Somewhat Satisfied
Highly Satisfied
Do you think that the website's design change makes the site easier to use?
Has the new design made it easier for you to find information on the site?
Has the new design improved the overall visual appeal of the site?
How would you rate your overall satisfaction with the new design of the site?
×
How likely are you to recommend Game8 to someone you know?
Very Unlikely
0
1
2
3
4
5
6
7
8
9
10
Very Likely
If you have other opinions regarding potential improvement to the website, please share them with us. We would appreciate your honest opinion.
Note: This is a free response section, so you can proceed without entering anything.
Note: Please be sure not to enter any kind of personal information into your response.
Note: Please be sure not to enter any kind of personal information into your response.
×
Thank You
×
Thank you for participating in our survey! Your answers will help us to improve the quality of our website and services.
We hope you continue to make use of Game8.
We hope you continue to make use of Game8.
Close
Rankings
- We could not find the message board you were looking for.
Gaming News


![Everwind Review [Early Access] | The Shaky First Step to A Very Long Journey](https://img.game8.co/4440226/ab079b1153298a042633dd1ef51e878e.png/thumb)

![Monster Hunter Stories 3 Review [First Impressions] | Simply Rejuvenating](https://img.game8.co/4438641/2a31b7702bd70e78ec8efd24661dacda.jpeg/thumb)
Popular Games

Genshin Impact Walkthrough & Guides Wiki
Honkai: Star Rail Walkthrough & Guides Wiki
Umamusume: Pretty Derby Walkthrough & Guides Wiki
Pokemon Pokopia Walkthrough & Guides Wiki
Resident Evil Requiem (RE9) Walkthrough & Guides Wiki
Monster Hunter Wilds Walkthrough & Guides Wiki
Wuthering Waves Walkthrough & Guides Wiki
Arknights: Endfield Walkthrough & Guides Wiki
Pokemon FireRed and LeafGreen (FRLG) Walkthrough & Guides Wiki
Pokemon TCG Pocket (PTCGP) Strategies & Guides Wiki


Recommended Games
Diablo 4: Vessel of Hatred Walkthrough & Guides Wiki
Fire Emblem Heroes (FEH) Walkthrough & Guides Wiki
Yu-Gi-Oh! Master Duel Walkthrough & Guides Wiki
Super Smash Bros. Ultimate Walkthrough & Guides Wiki
Pokemon Brilliant Diamond and Shining Pearl (BDSP) Walkthrough & Guides Wiki
Elden Ring Shadow of the Erdtree Walkthrough & Guides Wiki
Monster Hunter World Walkthrough & Guides Wiki
The Legend of Zelda: Tears of the Kingdom Walkthrough & Guides Wiki
Persona 3 Reload Walkthrough & Guides Wiki
Cyberpunk 2077: Ultimate Edition Walkthrough & Guides Wiki


All rights reserved
©Microsoft 2024. Microsoft, Rare, the Rare logo, Sea of Thieves are trademarks of the Microsoft group of companies.
©Disney. All trademarks and copyrights are property of their respective owners.
MONKEY ISLAND © & ™ 2024 Lucasfilm Ltd. All rights reserved.
The copyrights of videos of games used in our content and other intellectual property rights belong to the provider of the game.
The contents we provide on this site were created personally by members of the Game8 editorial department.
We refuse the right to reuse or repost content taken without our permission such as data or images to other sites.