This survey will take about 1 minute.
Your answers will help us to improve our website.
Sea of Thieves
The Sunken Pearl Tall Tale Guide
★SoT PS5 Version and Season 12 are Now Live!
★New Pre-Order and Edition Bonuses for the PS5!
★Check out our Beginner's Guide for new players.
★Tall Tales | World Events | Trading Companies
A walkthrough guide for The Sunken Pearl Tall Tale in Sea of Thieves. Read on to see a complete Tall Tale walkthrough and guide for The Sunken Pearl, including info on how to get all its Commendations and a list of its completion rewards.
| ◄ Previous Tall Tale | Next Tall Tale ▶ |
|---|---|
| A Pirate's Life | Captains of the Damned |
List of Contents
The Sunken Pearl Overview and Location
| The Sunken Pearl | |
|---|---|
| Story Arc | A Pirate's Life |
| Quest Location | At the Castaway's Camp at all Outposts. |
| Reward |
8000 Gold (High Seas) 2400 Gold (Safer Seas) Revenge of the Silver Blade Capstan Revenge of the Silver Blade Cutlass |
| ◄ Previous Tall Tale | Next Tall Tale ▶ |
| A Pirate's Life | Captains of the Damned |
Find the Starting Location Beside the Mysterious Castaway
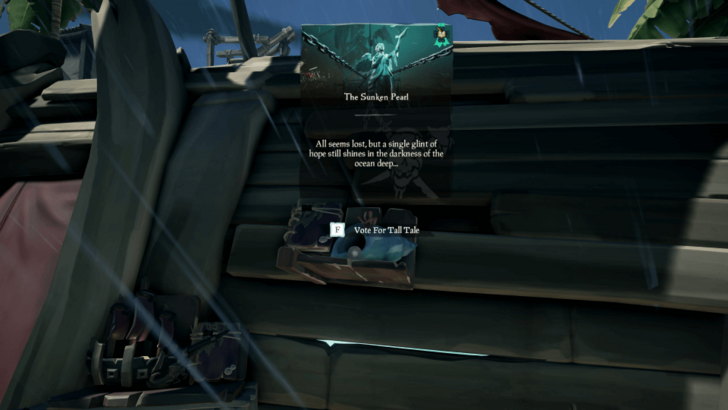
To start The Sunken Pearl, head to the Castaway's Camp at any Outpost found in the game. The Tall Tale book should be on one of the shelves beside a skull.
Note: This Tall Tale can also be started from your quest table. However, you will still need to go to the Castaway's Camp in order to unlock the Tall Tale book with clues.
The Sunken Pearl Walkthrough
Talk to the Castaway

The tall tale starts with the Castaway telling you about Captain Jack Sparrow and a sunken pearl. After she finishes talking, she will hand you a book with details and a map to a location.
Head to the Location Found in the Book
 |
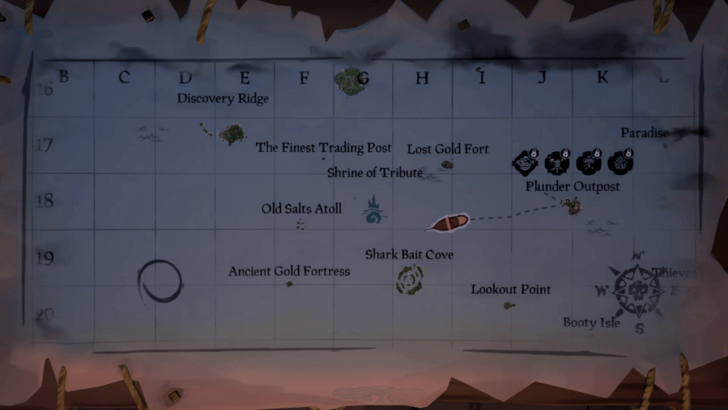 |
You will find a marked location in the book to the west of Plunder Outpost. The marked location can be found between C-19 and D-19.
Follow the Beam of Light

Aside from the book, you will see a beam of light in the distance when you look west of Plunder Outpost. Head towards the light and it will lead you to the marked location.
Look for Floating Debris in the Water

When you arrive at the location, look for floating debris in the water. Get close to the debris and anchor you ship there.
Go Underwater and Swim Down Following the Wreckage
Dive under the floating debris and you'll find pieces of a ship floating around. Keep following the broken pieces and it will lead you to the bottom of the sea.
Stick Close to the Debris for Air
While following the wreckage underwater, keep close to the debris for air. Some of the debris have bubbles and will top you off on oxygen letting you stay underwater without losing HP.
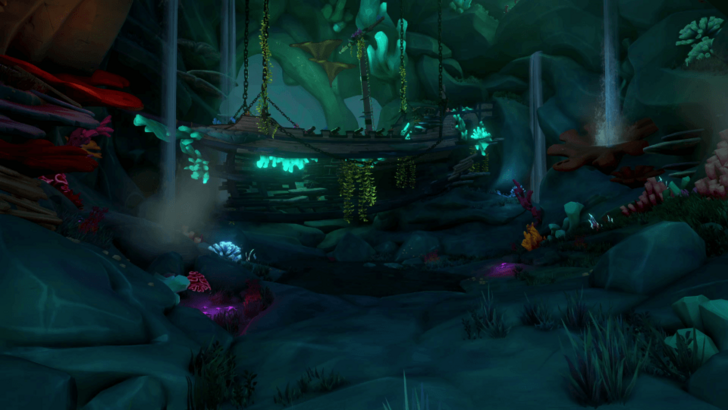
Find the Sunken Black Pearl
When you reach the bottom, keep following the wreckage. You'll soon find the Black Pearl underwater and chained to the seafloor. Get close to investigate.
Investigate the Black Pearl
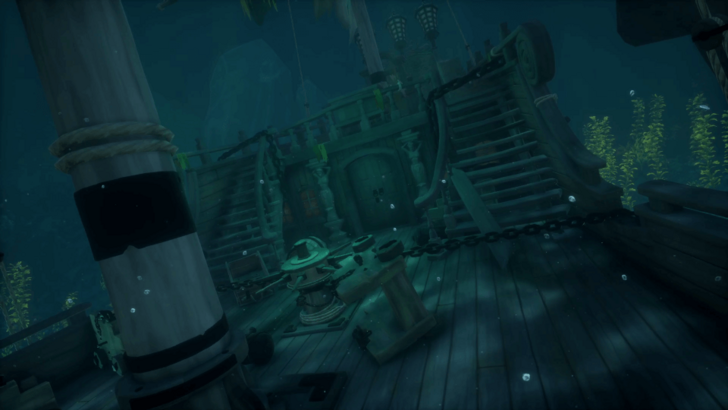
Get close to the Black Pearl and check around the ship. You'll find that the door to the Captain's Quarters is locked and requires a key.
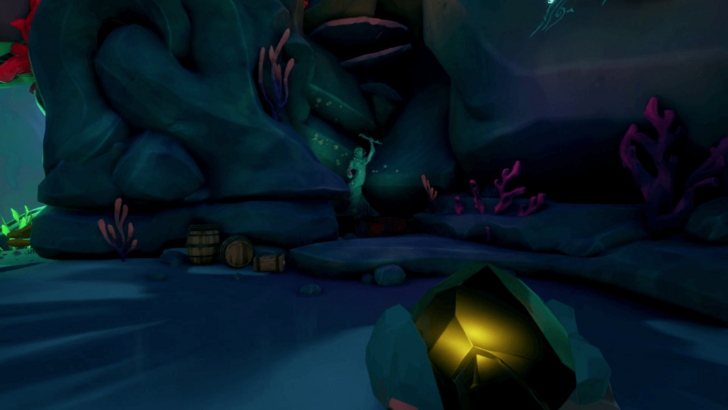
Go Below Deck and Find the Key to the Captain's Quarters
The key can be found below deck by heading down the stairs. You will be able to move debris around and get to the key being held by some coral monster.
Take the Key from the Coral Monster

After getting through the debris below deck, you'll be able to find a coral monster thing. The key can be found on the monster. Take it and head back to the Captain's Quarters.
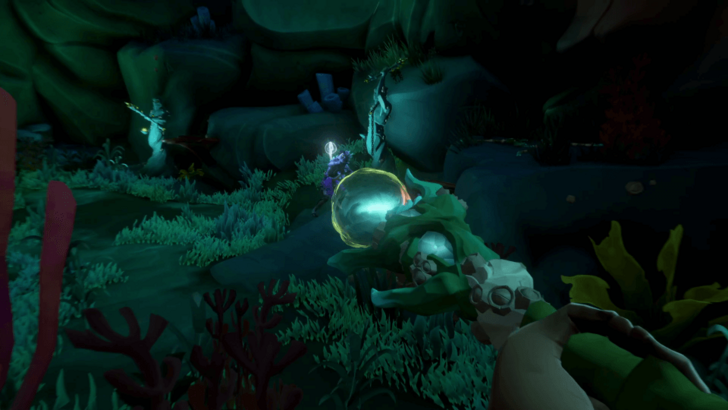
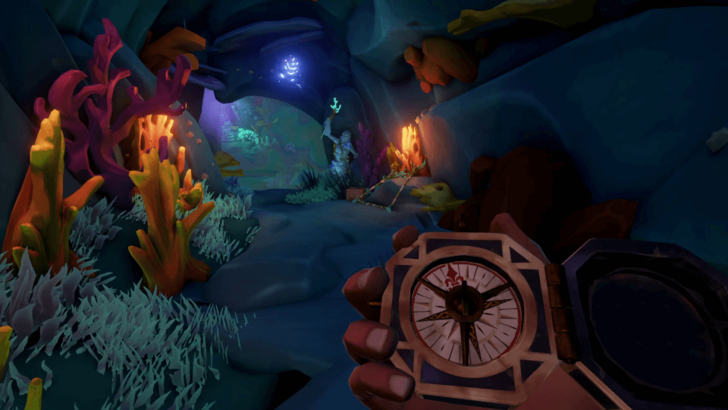
Take Jack's Compass from the Table in the Captain's Quarters

Use the key to open the Captain's Quarters and grab Jack's Compass on the table. The compass is extremely useful and will guide you throughout the tall tale to where you need to be. When you don't know where to go, bring out the compass.
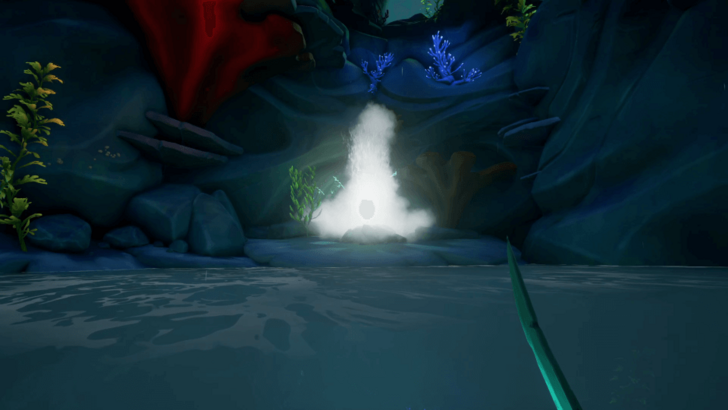
Follow the Compass Into the Cave
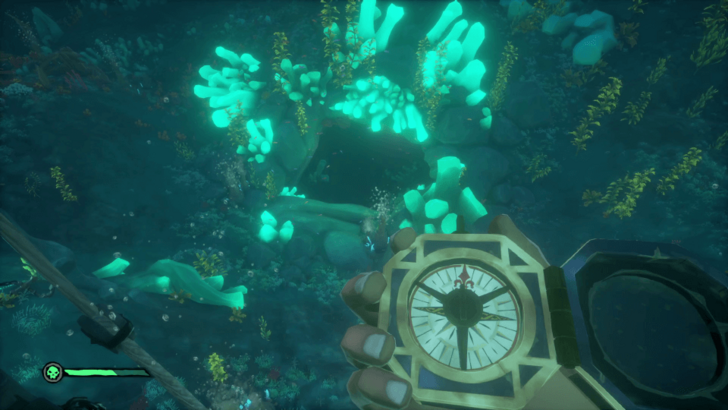
Bring out the compass and it will point you in the direction of a cave. Head towards the cave and swim along the bubbling coral spires for air. When you are running out of air, head to one of these bubbling corals to breathe underwater.
Hit the Blue Blinking Object to Open the Way
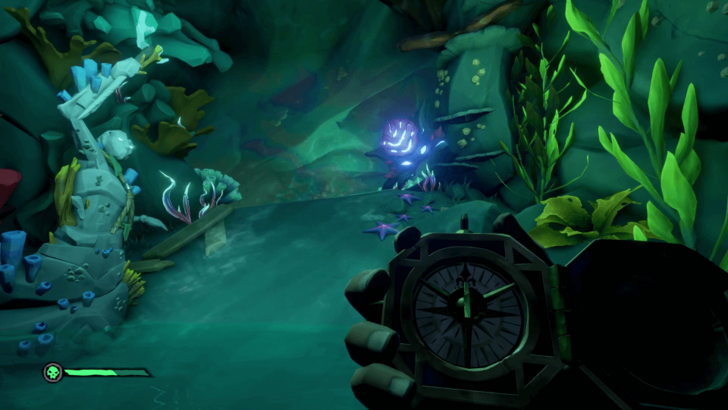
When you arrive inside the cave, you'll find a small pocket of land with an impassable bubble door. Hit the blue blinking object next to it to open the door.
Proceed to the Chamber with the Statue
Follow the passage through the bubble door and it will lead you to a room with a giant Siren Statue. Ocean Crawlers will spawn once the Mysterious Voice finishes talking.
Defeat the Ocean Crawlers and Pick Up the Siren Heart

Defeat the Ocean Crawlers using your cutlass and guns. You'll be able to find ammo boxes and barrels stashed with a lot of food in the area. There's plenty of food so you don't have to hold back on healing.
The enemies will stop coming after beating the big Ocean Crawler. Pick up the Siren Heart that drops from the big Ocean Crawler.
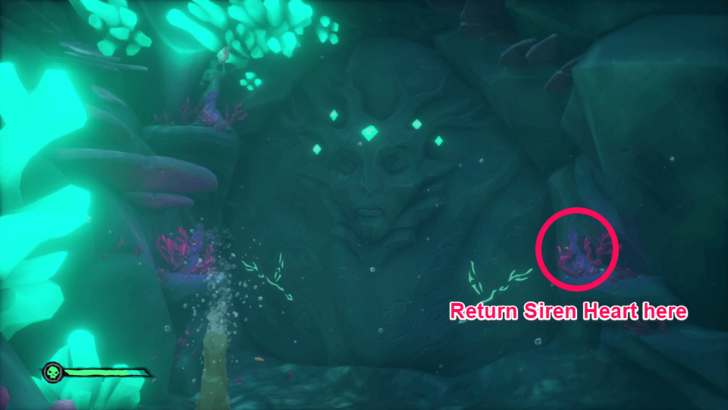
Return the Siren Heart to the Statue inside the Room Where You First Entered
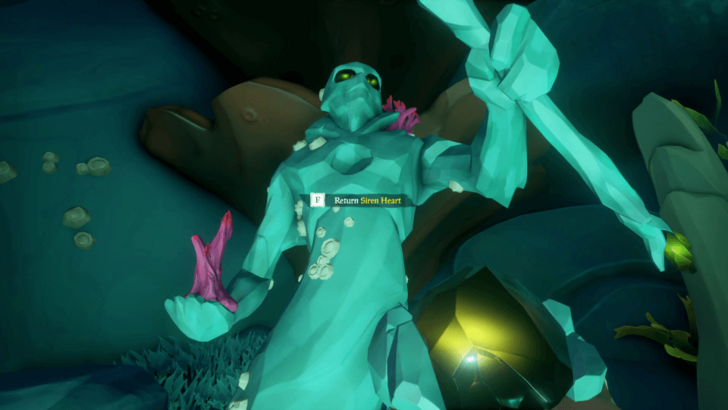
Once you have the Siren Heart, return to the room where you first started. There will be three other smaller Siren Statues in the room. Look for the one missing a piece on their chest. Return the Siren Heart to the statue on the right side of the room to complete all the statues.
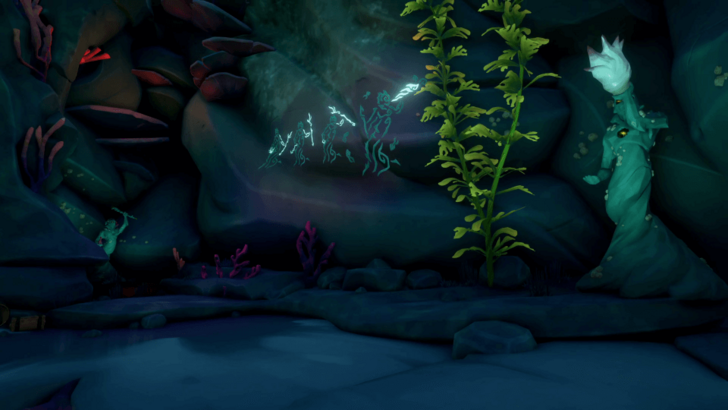
Follow the Mural and Hit the Statues to Match The Arm Positions
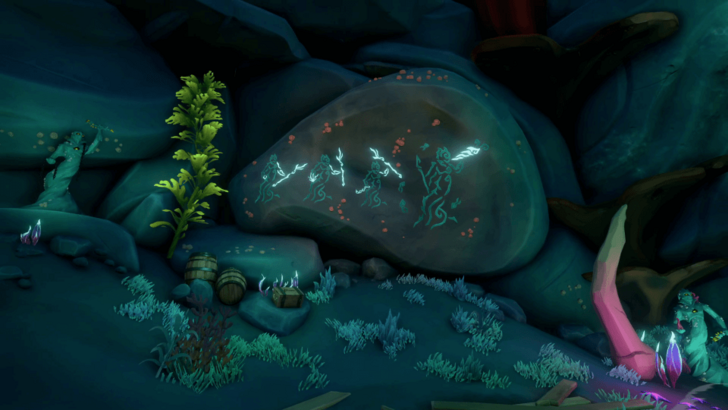
There is a mural in the room depicting four sirens with three of them having glowing arms holding a staff and the other arm holding something else. The fourth siren will be holding a horn. This is a puzzle where you need to match Siren Statues with what you see on the mural.
| Statue | Arm Position |
|---|---|
| Gem Statue | Low |
| Coral Statue | Mid |
| Chain Statue | High |
Go to each of the three Siren Statues in the room and check what they are holding. Match their arm positions to the ones you can see on the mural by hitting them.
Hit the Horn Statue in the Middle of the Room

Once they are matched, hit the big statue of a siren holding a horn in the middle of the room. The room will be filled with water and you'll be able to reach the higher platform.
Follow the Mural Again and Match the Statue Positions

You'll find another mural on this next platform. The statues involved will be the ones from before. Go back and swim underwater to solve the puzzle following the same procedure as before.
| Statue | Arm Position |
|---|---|
| Gem Statue | High |
| Coral Statue | High |
| Chain Statue | High |
All the statues have their staff arm raised high up. Hit the statues until all of them have their arms raised then hit the Horn Statue once again.
Get on the Geyser to Jump Up the Room
Solving the Siren Statue puzzle will bring out a geyser in front of the mural. Get on the mural to launch yourself up onto the next platform.
Defeat the Ocean Crawlers and Pick Up the Siren Heart

Ocean Crawlers will spawn after landing on this platform. Defeat them and the big Ocean Crawler will drop a Siren Heart again.
Return the Siren Heart to the Statue on the Left Side of the Mural
Once again, you'll be able to find Siren Statues around the room and a mural depicting them. Bring the Siren Heart that dropped and return it to the statue on the left side of the mural.
Follow the Mural and Hit the Statues to Match The Arm Positions
Following the same procedure as before, solve the Siren Statue puzzle by matching the arm positions with the ones depicted in the mural. Hit the Horn Statue once they are matched.
| Statue | Arm Position |
|---|---|
| Gem Statue | High |
| Coral Statue | Low |
| Chain Statue | Mid |
The room will fill with water once you solve the puzzle and you'll go even higher up the room.
The Third Statue Can Be Found on Higher Ground to the Left of the Mural
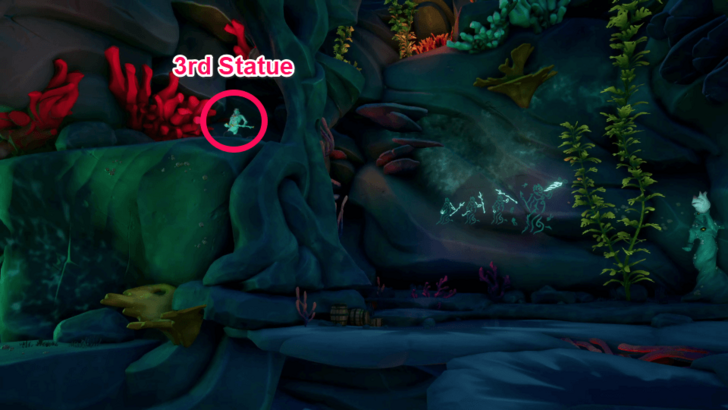
The third Siren Statue can be found above a ledge to the left of the mural. You can see this by standing on the ledge far from the mural and next to an ammo box.
Head Up the Ramps to Reach the Next Room

After solving the statue puzzle, the room will be filled with water once again and take you to the next platform. Head up the bone ramp to reach a bubble door into the next room. Open the door by hitting the blue blinking object.
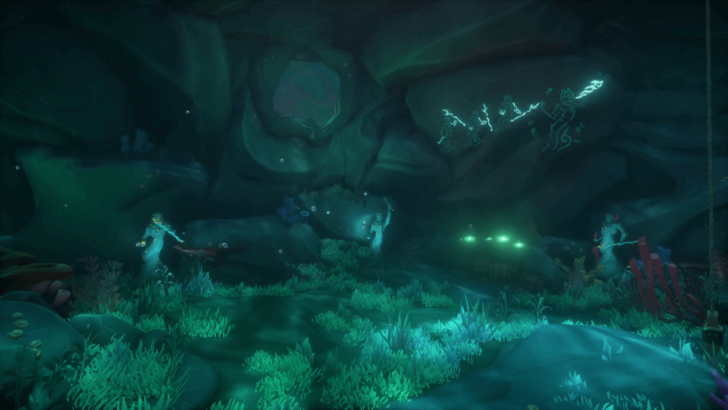
Leave the Room and Defeat the Sirens
In this room, the Mysterious Voice will reveal itself to be the Siren Queen and show you the Kraken. After she has finished talking, you will have to leave the room through the bubble windows and fight some sirens.
Use the Trident of Dark Tides Found Below on the Seafloor

Look down to the seafloor and you will see four green glowing objects, these are Tridents of the Dark Tides. Swim down to it and use the trident to easily defeat the sirens. They will drop a Siren Heart after.
Bring the Siren Heart and Head to the Cave In Front of the Black Pearl
Bring the Siren Heart and head to the cave in front of where the Black Pearl is facing. Swim along the bubbling coral spires to replenish your oxygen. You will find a huge door with the face of the Siren Queen along with some statues.
Return the Siren Heart to the Statue on the Right Side of the Big Door
Return the Siren Heart to the statue on the right side of the door. There will only be two Siren Statues in this area.
Match the Siren Statues with the Markings on the Door
To open the door, you will once again have to match the arm positions of the statues with the markings on the door. In this case, the door wants both of the statues in the low position. Once they are matched, hit the Siren Statue holding a horn at the top-right corner.
Enter the Siren Citadel and Head to the Passage on the Far Corner
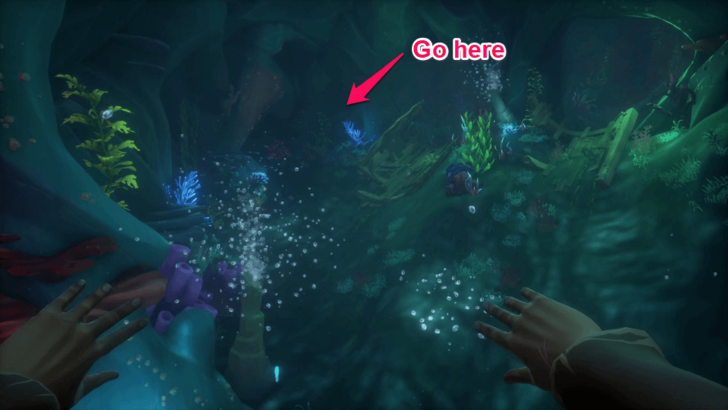
The door will open to the Siren Citadel. Once you're in, head to the passage on the far corner of the room next to some blue corals. Swim up the passage to reach a bubble door that leads to the next room.
Match the Siren Statues with the Mural
As before, match the three surrounding Siren Statues with their positions on the mural by hitting them.
The Horn Statue Can Be Seen by Swimming Up the Room
The fourth Siren Statue can be seen by looking through the opening above the water in the room. Just swim up and shoot the statue once all the other statues are matched.
Defeat the Ocean Crawlers That Spawn
After solving the previous Siren Statue, the room will be drained of water. Ocean Crawlers will then spawn to attack you. Use the Trident of the Dark Tides conveniently placed in the room to defeat them easily.
Use the Pulley to Open the Door
Once you defeat the enemies, you'll see a giant door covered with coral in the room. Use the pulley to open the door and continue inside.
Use the Pulley to Bring Down the Platform
Enter the room and you'll see that it looks somewhat like a jumping puzzle. Use the pulley that you can see near the entrance to bring down the platform which will let you continue up the right side of the room.
Get on the Platform and Jump on the Ledge to the Right
Get on the lowered platform and it will start to rise up after a while. Jump on the ledge to the right once you are high enough.
Go Through the Shipwreck to Reach the Other Side
Jump on the shipwreck you can see along the path and go through the captain's quarters to the back of the ship. From here, you'll see a path to reach the other side of the room. Follow the path on the right side of the room towards a small cave.
Match the Siren Statues with the Mural in the Small Cave

Another mural can be seen inside the small cave depicting the statues. The statues can be seen through an opening on the left side of the mural.
| Statue | Arm Position |
|---|---|
| Gem Statue | Mid |
| Coral Statue | High |
| Chain Statue | Low |
Shoot the Statues Through the Opening
Match the Siren Statues with the mural by shooting them through the opening. There's an ammo box nearby to replenish your bullets.
Go Back and Get on Top of the Shipwreck to See the Horn Statue
The fourth statue with a horn can be seen by going back where you came from and getting on top of the shipwreck. From there, you'll be able to see the Horn Statue across the room. Shoot the statue with your gun once the other statues are matched.
Swim to the Ladder and Use the Pulley to Bring Up the Platform
The room will fill with water after solving the statue puzzle. Swim to the platform with a latter in the middle of the water and use the pulley on top to bring up a bridge platform. Cross the bridge platform and continue on the path until you reach a bubble door.
Enter the Room and Get On the Ship
Go through the bubble door and get on the chained up ship by going up the corals on the left side of the room. Once you get on the ship, enemies will start spawning across the room and shoot you with cannons.
Grab Cannonballs from the Barrel and Shoot Back Using the Cannons
Defeat the enemies by shooting back with the cannons. You'll be able to find cannonballs in the barrel next to the cannons.
Raise the Anchor to Bring Up the Ship
Once the first wave of enemies are defeated, find the anchor capstan to raise the anchor and slowly bring up the ship. The capstan can be turned several times to raise the ship higher.
Defeat the Enemies Across the Room as You Go Higher
Another wave of enemies will spawn across the room shooting you with cannons. You can stop raising the anchor and focus on defeating them first using the cannons. Continue raising the anchor after defeating them.
Defeat the Ocean Crawlers that Spawn on the Ship
Once you go high enough, the Kraken will attack with her tentacles and Ocean Crawlers will spawn on the ship. Defeat the Ocean Crawlers and the Kraken will also retreat. Continue to raise the anchor after defeating them.
Defeat the Kraken
The Kraken will pull the ship up and attack you with his mouth. Shoot the Kraken in the face using the cannons to defeat her. After the Kraken retreats, the Siren Queen will tell you to face her yourself in her chamber. Continue raising the anchor until you reach the very top.
Climb Up the Mast to the Crow's Nest
Climb up the ladder on the mast of the ship to reach even higher. Look around and you'll see a water tunnel and a mural of the Siren Queen.
Swim Through the Water Tunnel to Reach the Next Room
Get in the water tunnel and swim through to reach the room before the Queen's Chamber.
Follow the Path Until You Reach a Bubble Door
After getting through the water tunnel, follow the path and you'll be able to find a bubble door that leads to the Queen's Chamber.
Stock Up on Food Before Entering Through the Door
Before entering the Queen's Chamber, stock up on food by looking into the barrels in this room. Pineapples are the best food to heal yourself with so bring five of them if you can.
Defeat the Siren Queen
Enter the Queen's Chamber through the bubble door to face the Siren Queen. After entering the door, the room will fill with water and the Siren Queen will appear. The room will also have ammo boxes, barrels of food, and Tridents of the Dark Tide for you to use.
Use the Trident of the Dark Tides
Make use of the Trident of the Dark Tides located just outside the entrance and inside the Queen's chamber to defeat the Sirens. Charge it up fully before firing to deal huge damage to the Queen and her Sirens.
Keep Strafing to Dodge the Queen's Attacks
The Siren Queen also uses a trident but you'll be able to dodge her attacks by strafing to the left or right. Always be on the move to avoid getting hit.
Siren Guards Will Spawn After Dealing Enough Damage to the Queen
When you deal enough damage to the Siren Queen, she will retreat and have her loyal Sirens fight you. They are probably more dangerous than the queen since there's more of them so be careful.
Eat Food and Keep Yourself Healthy
There are plenty of food you can find and use in this encounter. Don't be afraid to keep yourself at max health by eating food frequently.
Swim Up the Room to Breathe for Air
To prevent yourself from running out of oxygen while fighting underwater, there is a pocket of air up the room where you can breathe.
Swim Through the Bubble Door on the Floor in the Middle of the Room
After defeating the Siren Queen, there will be a bubble door on the floor in the middle of the room that you can go through. Go through the door and swim through the tunnel.
Break the Statues on the Left Through the Opening
After getting through the tunnel, you'll be able to see statues on the left through the opening. Shoot the statues with your gun to break them and free Captain Jack Sparrow's crew.
Give Jack's Compass to Gibbs
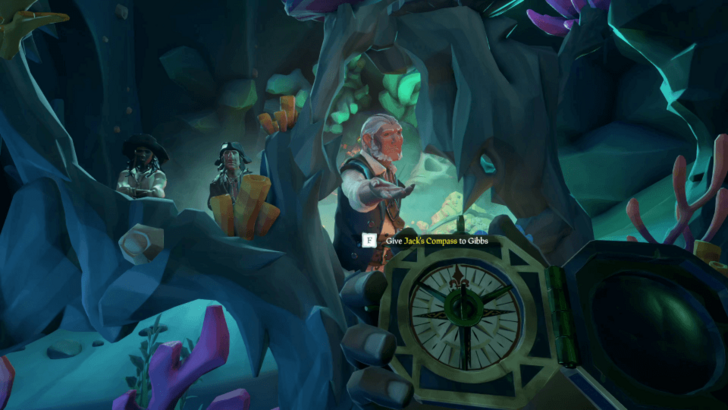
At the end of the dialogue, Gibbs will ask for Jack's Compass. Give it to him to finish the tale.
The Sunken Pearl Journal Locations
| No. | All The Sunken Pearl Journals |
|---|---|
| 1 | A Run of Good Luck |
| 2 | An Ancient Mystery |
| 3 | Unwanted Company |
| 4 | From Bad to Worse |
| 5 | Don't Look for Us |
A Run of Good Luck
Found inside the room where the first Siren Statue puzzle is. The journal is next to the large coral-covered door in the room next to some debris.
An Ancient Mystery
Found underwater after clearing the first three Siren Statue puzzles. The journal can be found in the water on the opposite side of where the large spinal bone is.
Unwanted Company
Found in some ruins of a ship right after entering the Siren Citadel. After opening the door to the Siren Citadel, swim straight for the shipwreck and you'll find the journal.
From Bad to Worse
Found in the first room with a Siren Statue puzzle inside the Siren Citadel. The room will be filled with water before solving the puzzle, swim down through a hole. The journal will be on some ship wreckage just like the journal before this.
Don't Look for Us
Found in the room behind the coral-covered door opened by a pulley in the Siren Citadel. The room will have large pieces of shipwrecks and the journal can be found inside the ruins of a captain's quarters.
The Sunken Pearl Commendations and Rewards
| Commendation | Reward | How to Unlock |
|---|---|---|
| Chest of Sorrow | None | Find the Chest of Everlasting Sorrow. |
| Crew of Freedom | None | Release those who dream of freedom. |
| Deadly Chorus | None | Confront a dangerous enemy beneath the waves. |
| For the Crew | None | Triumph when adversity strikes without warning. |
| Heart's Desire | None | Recover the special object you were sent to find. |
| Pearl in the Dark | Revenge of the Silver Blade Capstan | Legendary Commendation: Complete all Commendations for 'The Sunken Pearl'. |
| Pieces of Silver | None | Discover the Journals of the Silver Blade's Captain. |
| Revenge of the Silver Blade | None | Avenge a fallen pirate crew. |
| Tale of Eternal Sorrow | None | Learn the truth of a sorrowful encounter. |
| The Sunken Pearl | Revenge of the Silver Blade Cutlass | Complete 'The Sunken Pearl'. |
Sea of Thieves Related Guides
All Tall Tales
| Maiden Voyage | |
|---|---|
| 1 | Maiden Voyage |
| Shores of Gold | |
| 1 | The Shroudbreaker |
| 2 | The Cursed Rogue |
| 3 | The Legendary Storyteller |
| 4 | Stars of a Thief |
| 5 | Wild Rose |
| 6 | The Art of the Trickster |
| 7 | The Fate of the Morningstar |
| 8 | Revenge of the Morningstar |
| 9 | Shores of Gold |
| Ashen Age | |
| 1 | The Seabound Soul |
| 2 | Heart of Fire |
| A Pirate's Life | |
| 1 | A Pirate's Life |
| 2 | The Sunken Pearl |
| 3 | Captains of the Damned |
| 4 | Dark Brethren |
| 5 | Lords of the Sea |
| The Legend of Monkey Island | |
| 1 | The Journey to Melee Island |
| 2 | The Quest for Guybrush |
| 3 | The Lair of LeChuck |
Author
The Sunken Pearl Tall Tale Guide
Please participate in our site
improvement survey
03/2026
improvement survey
03/2026
Would you assist in
improving Game8's site?
improving Game8's site?

×
We are listening to our users' valuable opinions and discussing how to act on them.
The information collected through this survey will be used for the purpose of improving our services. In addition, the information will only be disclosed a part of a statistic in a format that will not allow identification of personal information.
Begin Survey
Not Now
×
Please rate each item regarding Game8.co's Advertisements.
Amount of Ads
Very Dissatisfied
Somewhat Dissatisfied
Fine
Somewhat Satisfied
Highly Satisfied
Placement of Ads
Timing of Ad Display
Ad Loading Speed
Safeness of Ads
Content of Ads
×
Please rate each item regarding Game8.co's Quality of Articles.
Amount of information
Very Dissatisfied
Somewhat Dissatisfied
Fine
Somewhat Satisfied
Highly Satisfied
Frequency of updates
Speed of new information
Accuracy of articles
Understandibility of articles
Readability of sentences
×
Please rate each item regarding Game8.co's Usability of the Site.
Ease of finding information
Very Dissatisfied
Somewhat Dissatisfied
Fine
Somewhat Satisfied
Highly Satisfied
Loading Speed
Use of Color
Font Size
Visibility of Images
Easy to Understand Layout
×
Please rate each item regarding Game8.co's Message Boards, Comments.
Ease of Writing
Very Dissatisfied
Somewhat Dissatisfied
Fine
Somewhat Satisfied
Highly Satisfied
Readability
Ease in Finding Information
Comment Quality
Comment Quantity
Admin Response
×
Please rate each item regarding Game8.co's Site's new design.
Please rate our site's new design
Very Dissatisfied
Somewhat Dissatisfied
Fine
Somewhat Satisfied
Highly Satisfied
Do you think that the website's design change makes the site easier to use?
Has the new design made it easier for you to find information on the site?
Has the new design improved the overall visual appeal of the site?
How would you rate your overall satisfaction with the new design of the site?
×
How likely are you to recommend Game8 to someone you know?
Very Unlikely
0
1
2
3
4
5
6
7
8
9
10
Very Likely
If you have other opinions regarding potential improvement to the website, please share them with us. We would appreciate your honest opinion.
Note: This is a free response section, so you can proceed without entering anything.
Note: Please be sure not to enter any kind of personal information into your response.
Note: Please be sure not to enter any kind of personal information into your response.
×
Thank You
×
Thank you for participating in our survey! Your answers will help us to improve the quality of our website and services.
We hope you continue to make use of Game8.
We hope you continue to make use of Game8.
Close
Rankings
- We could not find the message board you were looking for.
Gaming News


![Everwind Review [Early Access] | The Shaky First Step to A Very Long Journey](https://img.game8.co/4440226/ab079b1153298a042633dd1ef51e878e.png/thumb)

![Monster Hunter Stories 3 Review [First Impressions] | Simply Rejuvenating](https://img.game8.co/4438641/2a31b7702bd70e78ec8efd24661dacda.jpeg/thumb)
Popular Games

Genshin Impact Walkthrough & Guides Wiki
Honkai: Star Rail Walkthrough & Guides Wiki
Umamusume: Pretty Derby Walkthrough & Guides Wiki
Pokemon Pokopia Walkthrough & Guides Wiki
Resident Evil Requiem (RE9) Walkthrough & Guides Wiki
Monster Hunter Wilds Walkthrough & Guides Wiki
Wuthering Waves Walkthrough & Guides Wiki
Arknights: Endfield Walkthrough & Guides Wiki
Pokemon FireRed and LeafGreen (FRLG) Walkthrough & Guides Wiki
Pokemon TCG Pocket (PTCGP) Strategies & Guides Wiki


Recommended Games
Diablo 4: Vessel of Hatred Walkthrough & Guides Wiki
Fire Emblem Heroes (FEH) Walkthrough & Guides Wiki
Yu-Gi-Oh! Master Duel Walkthrough & Guides Wiki
Super Smash Bros. Ultimate Walkthrough & Guides Wiki
Pokemon Brilliant Diamond and Shining Pearl (BDSP) Walkthrough & Guides Wiki
Elden Ring Shadow of the Erdtree Walkthrough & Guides Wiki
Monster Hunter World Walkthrough & Guides Wiki
The Legend of Zelda: Tears of the Kingdom Walkthrough & Guides Wiki
Persona 3 Reload Walkthrough & Guides Wiki
Cyberpunk 2077: Ultimate Edition Walkthrough & Guides Wiki


All rights reserved
©Microsoft 2024. Microsoft, Rare, the Rare logo, Sea of Thieves are trademarks of the Microsoft group of companies.
©Disney. All trademarks and copyrights are property of their respective owners.
MONKEY ISLAND © & ™ 2024 Lucasfilm Ltd. All rights reserved.
The copyrights of videos of games used in our content and other intellectual property rights belong to the provider of the game.
The contents we provide on this site were created personally by members of the Game8 editorial department.
We refuse the right to reuse or repost content taken without our permission such as data or images to other sites.
This guide is ass, doesn't even tell you to get all commendations, just a guide for completion and some of the commendations.