
This survey will take about 1 minute.
Your answers will help us to improve our website.
Zelda: Breath of the Wild (BotW)
Goma Asaagh Shrine Walkthrough: Location and Puzzle Solution
★ Sequel: Tears of the Kingdom Guide here!
★ Get a head start with our Beginner's Guide
┗ The Best Recipes to Cook | Rupee Farming
★ Shrines Locations | Korok Seeds Locations
★ Explore after the story with our Post Game Guide
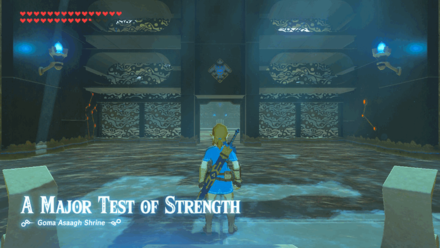
This is a walkthrough for Goma Asaagh Shrine in The Legend of Zelda: Breath of the Wild (BotW). This shrine's location, as well as how to get the hidden treasure chest can all be found here.
List of Contents
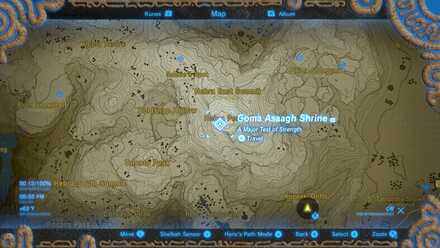
Goma Asaagh Shrine Location
Foot of Hebra Peak
| Goma Asaagh Shrine Location | |
|---|---|
 Enlarge Enlarge |
 Enlarge Enlarge |
You can find the shrine at the foot of Hebra Peak northeast of Rito Village in the mountainous area of the Hebra Region.
Goma Asaagh Shrine Rewards
Shrine Rewards
| Goma Asaagh Shrine Rewards | ||
|---|---|---|
|
|
Spirit Orb | |
Goma Asaagh Guardian Weapons
| Goma Asaagh Guardian Drops | ||
|---|---|---|
|
|
|
|
Goma Asaagh Shrine Walkthrough
| Shrine Solution | |
|---|---|
| 1 | 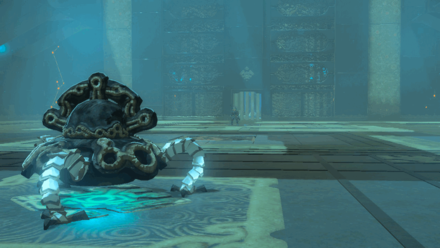 Enlarge EnlargeProceed to the arena where you will be pitted against a Guardian Scout IV |
| 2 | 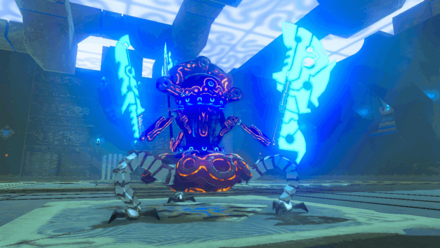 Enlarge EnlargeDefeating this guardian will reward you with its weapons along with Ancient Materials and open the gate to the altar room. |
| 3 | Examine the altar to receive a Spirit Orb. |
Goma Asaagh Shrine Tips and Tricks
Perfect Parry Its Spinning Attack

As the arena lacks stone pillars, you'll have to parry the Guardian's spinning attack to stun it. It takes some practice though and blocking its attack can quickly lower the durability of your shield. It's best to use a Guardian-type Shield against it as it has higher resistance to attacks from Guardians.
Glide During the Spinning Laser Attack
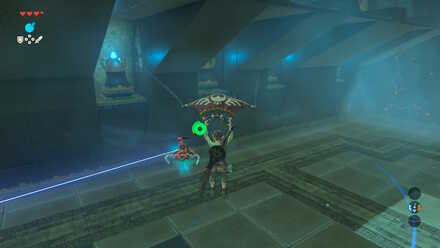
After the guardian's health drops to about 50%, it will start spinning around while firing a laser. This will create a strong upward wind that you can glide on before approaching the guardian and landing an attack on it.
Watch Out for Its Last Resort
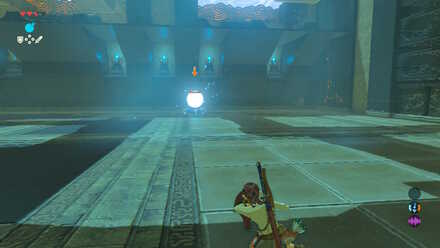
Once you have whittled the guardian's health down to critical level, it will start charging for several consecutive beams. Dodge these beams while trying to get close to the guardian then quickly attack it while it's recharging. Get back when it's close to firing more beams. Repeat this process until it is defeated.
You can also try perfect parrying one of the beams to end its suffering though you should also be careful as it can kill you instead if you failed to parry it.
Goma Asaagh Treasure Chests Location
Treasure Chest #1
| Goma Asaagh Shrine Treasure Chests Location | |
|---|---|
| 1 |  Enlarge EnlargeThis chest is right in front of the altar. Defeat the guardian in this shrine to access the altar room along with its chest containing a Royal Claymore. |
Zelda: BotW Related Guides
All Great Plateau Shrines
| Great Plateau Shrines | |
|---|---|
| Oman Au Shrine | Ja Baij Shrine |
| Owa Daim Shrine | Keh Namut Shrine |
All Akkala Shrines
| Akkala Shrines | |
|---|---|
| Dah Hesho Shrine | Katosa Aug Shrine |
| Ke'nai Shakah Shrine | Ritaag Zumo Shrine |
| Tu Ka'loh Shrine | Tutsuwa Nima Shrine |
| Ze Kasho Shrine | Zuna Kai Shrine |
All Central Shrines
| Central Shrines | |
|---|---|
| Dah Kaso Shrine | Kaam Ya'tak Shrine |
| Katah Chuki Shrine | Namika Ozz Shrine |
| Noya Neha Shrine | Rota Ooh Shrine |
| Saas Ko'sah Shrine | Wahgo Katta Shrine |
All Dueling Peaks Shrines
| Dueling Peaks Shrines | |
|---|---|
| Bosh Kala Shrine | Ree Dahee Shrine |
| Ha Dahamar Shrine | Ta'loh Naeg Shrine |
| Toto Sah Shrine | Shee Vaneer Shrine |
| Shee Venath Shrine | Hila Rao Shrine |
| Lakna Rokee Shrine | |
All Eldin Shrines
| Eldin Shrines | |
|---|---|
| Daqa Koh Shrine | Gorae Torr Shrine |
| Kayra Mah Shrine | Mo'a Keet Shrine |
| Qua Raym Shrine | Sah Dahaj Shrine |
| Shae Mo'sah Shrine | Shora Hah Shrine |
| Tah Muhl Shrine | |
All Faron Shrines
| Faron Shrines | |
|---|---|
| Kah Yah Shrine | Korgu Chideh Shrine |
| Muwo Jeem Shrine | Qukah Nata Shrine |
| Shai Utoh Shrine | Shoda Sah Shrine |
| Tawa Jinn Shrine | Yah Rin Shrine |
All Gerudo Shrines
| Gerudo Shrines | |
|---|---|
| Joloo Nah Shrine | Keeha Yoog Shrine |
| Kema Kosassa Shrine | Kuh Takkar Shrine |
| Sasa Kai Shrine | Sho Dantu Shrine |
All Hateno Shrines
| Hateno Shrines | |
|---|---|
| Kam Urog Shrine | Dow Na'eh Shrine |
| Myahm Agana Shrine | Chaas Qeta Shrine |
| Mezza Lo Shrine | Tahno O'ah Shrine |
| Jitan Sa'mi Shrine | |
All Hebra Shrines
All Lake Shrines
| Lake Shrines | |
|---|---|
| Ishto Soh Shrine | Ka'o Makagh Shrine |
| Pumaag Nitae Shrine | Shae Katha Shrine |
| Shoqa Tatone Shrine | Ya Naga Shrine |
All Lanayru Shrines
| Lanayru Shrines | |
|---|---|
| Daka Tuss Shrine | Kaya Wan Shrine |
| Soh Kofi Shrine | Ne'ez Yohma Shrine |
| Kah Mael Shrine | Rucco Maag Shrine |
| Shai Yota Shrine | Dagah Keek Shrine |
| Sheh Rata Shrine | |
All Ridgeland Shrines
| Ridgeland Shrines | |
|---|---|
| Maag No'rah Shrine | Mijah Rokee Shrine |
| Mogg Latan Shrine | Shae Loya Shrine |
| Sheem Dagoze Shrine | Toh Yahsa Shrine |
| Zalta Wa Shrine | |
All Tabantha Shrines
| Tabantha Shrines | |
|---|---|
| Akh Va'quot Shrine | Bareeda Naag Shrine |
| Kah Okeo Shrine | Sha Warvo Shrine |
| Tena Ko'sah Shrine | Voo Lota Shrine |
All Wasteland Shrines
All Woodland Shrines
| Woodland Shrines | |
|---|---|
| Daag Chokah Shrine | Keo Ruug Shrine |
| Ketoh Wawai Shrine | Kuhn Sidajj Shrine |
| Maag Halan Shrine | Mirro Shaz Shrine |
| Monya Toma Shrine | Rona Kachta Shrine |
All DLC Shrines
Comment
Author

The Legend of Zelda: Breath of the Wild Walkthrough & Guides Wiki
Goma Asaagh Shrine Walkthrough: Location and Puzzle Solution
Please participate in our site
improvement survey
04/2026
improvement survey
04/2026
Would you assist in
improving Game8's site?
improving Game8's site?

×
We are listening to our users' valuable opinions and discussing how to act on them.
The information collected through this survey will be used for the purpose of improving our services. In addition, the information will only be disclosed a part of a statistic in a format that will not allow identification of personal information.
Begin Survey
Not Now
×
Please rate each item regarding Game8.co's Advertisements.
Amount of Ads
Very Dissatisfied
Somewhat Dissatisfied
Fine
Somewhat Satisfied
Highly Satisfied
Placement of Ads
Timing of Ad Display
Ad Loading Speed
Safeness of Ads
Content of Ads
×
Please rate each item regarding Game8.co's Quality of Articles.
Amount of information
Very Dissatisfied
Somewhat Dissatisfied
Fine
Somewhat Satisfied
Highly Satisfied
Frequency of updates
Speed of new information
Accuracy of articles
Understandibility of articles
Readability of sentences
×
Please rate each item regarding Game8.co's Usability of the Site.
Ease of finding information
Very Dissatisfied
Somewhat Dissatisfied
Fine
Somewhat Satisfied
Highly Satisfied
Loading Speed
Use of Color
Font Size
Visibility of Images
Easy to Understand Layout
×
Please rate each item regarding Game8.co's Message Boards, Comments.
Ease of Writing
Very Dissatisfied
Somewhat Dissatisfied
Fine
Somewhat Satisfied
Highly Satisfied
Readability
Ease in Finding Information
Comment Quality
Comment Quantity
Admin Response
×
Please rate each item regarding Game8.co's Site's new design.
Please rate our site's new design
Very Dissatisfied
Somewhat Dissatisfied
Fine
Somewhat Satisfied
Highly Satisfied
Do you think that the website's design change makes the site easier to use?
Has the new design made it easier for you to find information on the site?
Has the new design improved the overall visual appeal of the site?
How would you rate your overall satisfaction with the new design of the site?
×
How likely are you to recommend Game8 to someone you know?
Very Unlikely
0
1
2
3
4
5
6
7
8
9
10
Very Likely
If you have other opinions regarding potential improvement to the website, please share them with us. We would appreciate your honest opinion.
Note: This is a free response section, so you can proceed without entering anything.
Note: Please be sure not to enter any kind of personal information into your response.
Note: Please be sure not to enter any kind of personal information into your response.
×
Thank You
×
Thank you for participating in our survey! Your answers will help us to improve the quality of our website and services.
We hope you continue to make use of Game8.
We hope you continue to make use of Game8.
Close
Rankings
- We could not find the message board you were looking for.
Gaming News


![Forza Horizon 6 Review [Preview] | Beautiful Roads With a Whole Lot of Oversteer](https://img.game8.co/4460981/a7254c24945c43fbdf6ad9bea52b5ce9.png/thumb)
![Borderlands Mobile Review [Playtest] | The Same Borderlands Made Easy](https://img.game8.co/4465500/aac0c880a39ec5cd46073e49d18f3ed5.png/thumb)
Popular Games

Genshin Impact Walkthrough & Guides Wiki
Crimson Desert Walkthrough & Guides Wiki
Umamusume: Pretty Derby Walkthrough & Guides Wiki
Honkai: Star Rail Walkthrough & Guides Wiki
Monster Hunter Stories 3: Twisted Reflection Walkthrough & Guides Wiki
Wuthering Waves Walkthrough & Guides Wiki
The Seven Deadly Sins: Origin Walkthrough & Guides Wiki
Pokemon TCG Pocket (PTCGP) Strategies & Guides Wiki
Pokemon Pokopia Walkthrough & Guides Wiki
Zenless Zone Zero Walkthrough & Guides Wiki


Recommended Games
Monster Hunter World Walkthrough & Guides Wiki
Fire Emblem Heroes (FEH) Walkthrough & Guides Wiki
Pokemon Brilliant Diamond and Shining Pearl (BDSP) Walkthrough & Guides Wiki
Super Smash Bros. Ultimate Walkthrough & Guides Wiki
Diablo 4: Vessel of Hatred Walkthrough & Guides Wiki
Cyberpunk 2077: Ultimate Edition Walkthrough & Guides Wiki
Yu-Gi-Oh! Master Duel Walkthrough & Guides Wiki
Elden Ring Shadow of the Erdtree Walkthrough & Guides Wiki
The Legend of Zelda: Tears of the Kingdom Walkthrough & Guides Wiki
Persona 3 Reload Walkthrough & Guides Wiki


All rights reserved
© 2020 Nintendo. The Legend of Zelda, Wii U, and Nintendo Switch are trademarks of Nintendo.
The copyrights of videos of games used in our content and other intellectual property rights belong to the provider of the game.
The contents we provide on this site were created personally by members of the Game8 editorial department.
We refuse the right to reuse or repost content taken without our permission such as data or images to other sites.