This survey will take about 1 minute.
Your answers will help us to improve our website.
Hyrule Warriors: Age of Calamity
Best Character Tier List (DLC Included)
A tier list for the best characters in Hyrule Warriors: Age of Calamity for the Nintendo Switch. The Tier List has been updated to include changes introduced in the Pulse of the Ancients DLC! Read on to see all 21 playable characters ranked, along with their alternate weapon types, as well as their advantages and disadvantages over others!
List of Contents
Character Tier List Overview
Age of Calamity: Pulse of the Ancients DLC Character Tier List
The Pulse of the Ancients DLC introduced the Battle-Tested Guardian together with new alternate weapon types for Link and Zelda! Here is our updated Tier List and our thoughts on how each character plays.
Note: Characters are ordered within each tier.
 |

|
|---|---|
 |


|
 |


|
 |
|
Explanation of tiers:
S = Top Tier
A = High Tier
B = Mid Tier
C = Low Tier
Character Tier List
S Tier (Top Tier Characters)
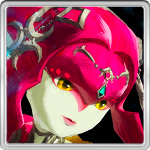
 Impa Impa
|
THE best character in the game. Once she absorbs 3 symbols, she can wipe out groups of enemies or shred enemy weak-point gauges real easy. With her shadow clones, she can also charge her special-attack gauge much faster than others and basically spam special attacks. |
|
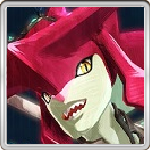
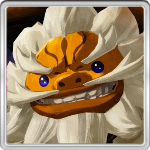
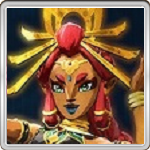
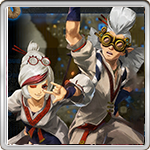
Sooga
|
Has a wide variety of attacks that are equally great against multiple and single target enemies. Regular attack string is also definite thereby making it easy to execute combos. Sooga also has the unique ability to counter incoming damage and boost his own damage. |
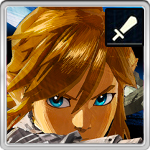
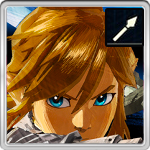
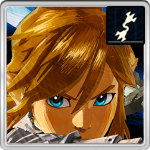
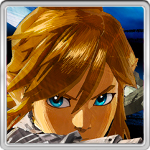 Link Link
(One-Handed Sword) |
Well-balanced character. Link with a sword and shield has great speed, DPS, and range. Using the Master Sword gives him advantage especially when at full health. Having a shield also makes him superior against Guardians as he can deflect the beams back to them for heavy damage. |
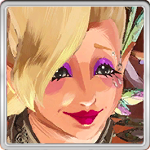
 Mipha Mipha
|
Great at forcing weak-points out of enemies. Give her attack speed boosts and you can stunlock multiple enemies at once as well as quickly charge her special attack to heal herself and others. Her unique ability allows her to instantly blink and deliver midair attacks that hits enemies' weak-points. |
 Teba Teba
|
The best mob clearer in the game. His barrage of strong attacks can wipe out the horde ahead of you. You can also charge his unique ability while moving or attacking then release it later for a sudden burst of damage. Though initially, he cannot go as well against strong enemies, he can still keep up with the others once his combos are upgraded. |
A Tier (High Tier Characters)
|
Link
(Two-Handed Sword) |
Slower but stronger than one-handed Link. His unique ability wrecks mobs and bosses alike and can even be chained in combos. You can worry about the self-damage later as it will be replenished after you use a special attack. |
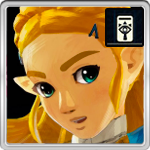
 Zelda Zelda
(Bow of Light) |
A great upgrade for Zelda. Her Luminescence form nukes enemies, especially those with light rings, by draining her special-attack gauge. Her unique ability is quite difficult to use but her basic combos can still work against strong enemies and even bosses. |
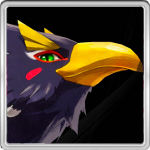
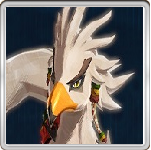
 Revali Revali
|
Excels in aerial combat which also gives him the ability to dodge most melee attacks with ease. Revali is not that good in ground combat so keep him above the enemies where he can safely snipe them. |
|
Link
(Spear) |
Faster and has farther reach than one-handed Link. He can close the gap between his target using his unique ability before unleashing a flurry of stabs. |
 Sidon Sidon
|
If you can time his unique ability in his strong attacks, it can greatly increase his damage output. Sidon already has high attack speed to begin with to decrease the chances of your strong attacks getting interrupted. |
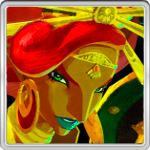
 Urbosa Urbosa
|
Enhances her strong attacks by using the charge of the lightning gauge. The lightning from these enhancements deals continuous damage over a wide area and can shred weak-point gauges if used correctly. |
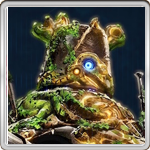
 Calamity Ganon Calamity Ganon
|
Strong but slow. His attacks cover a wide area and deal ridiculous amounts of damage. A combo of Magnesis into his XY Combo can instantly deplete almost any WPG making him a very efficient boss killer. Absorbing Malice for his Calamity form also proves to be difficult but can be worth it once activated since Calamity form's attacks can stunlock strong enemies. |
|
Link
(Flail) |
The Flails offer a good mix between clearing large mobs of enemies while allowing for unique playstyles thanks to it's ability to steal enemy weapons. Each Flail has a different effect for it's Strong Attack. Notably, the Fortified Flail's X attack can be used to counter and expose an enemy's Weak-Point Gauge with proper timing. It may take a bit of practice to master this move but it's very useful for sturdy enemies. |
B Tier (Mid Tier Characters)
 Terrako Terrako
|
Does well against mobs thanks to his vacuum attack. He can use his unique ability from a safe distance and summon orbs to supplement its damage output. |
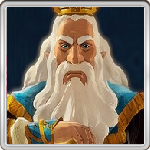
 King Rhoam King Rhoam
|
His versatile moveset allows him to smoothly transition between guises during strong attacks and follow up another strong attack. The damage and range of these attacks make him adept both in fighting multiple strong enemies and capturing posts. |
 Daruk Daruk
|
Same with Calamity Ganon. Daruk has good combo upgrades and unique ability but his attack speed ruins his combos where he could've stunlocked enemies. |
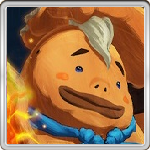
 Yunobo Yunobo
|
A real descendant from the slow Daruk. The random upgrades he obtains from his unique skill are somewhat good but you need to channel for a few seconds first on each use, which is very inconvenient. |
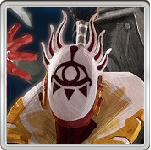
 Monk Maz Koshia Monk Maz Koshia
|
He's a decent character overall with his good DPS and range. What really puts him in B tier is his unique skill. Other than the trouble of absorbing charges, his "gigantic" form doesn't really do much damage and will just make him vulnerable from enemy fire for a few seconds. |
|
Zelda
(Sheikah Slate) |
Attacks are sluggish and unique ability is difficult to use since you can accidentally activate the wrong rune and ruin your combo. She can still perform surprisingly well against groups and strong enemies but it might need practice to use her full potential. |
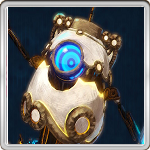
 Battle-Tested Guardian Battle-Tested Guardian
|
Large sweeping attacks are really helpful for clearing out large waves of enemies, and locking-on to single targets allow Battle-Tested Guardian to deal solid damage to larger bosses. However this massive unit can get hard to control and can be frustratingly slow to use on maps that require a lot of traversal. |
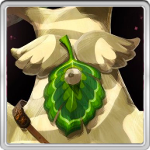
 Great Fairies Great Fairies
|
Good for capturing outposts but only after upgrading their combos. Their unique abilities slightly differ from each Great Fairy but mostly still only good for clearing mobs. Cotera in particular can shred bosses extremely quickly thanks to her special ability to lower the enemies' defense. |
C Tier (Low Tier Characters)
 Riju Riju
|
Can at least do well against groups of enemies but is still hard to control. Her unique ability is only good for moving from one place to another and is basically useless against strong enemies. |
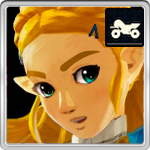
|
Zelda
(Master Cycle) |
Like Riju, using the Master Cycle can be a bit hard to control. Mobility is extremely useful especially for large map traversal, but when engaged in combat, it's a bit hard to predict whether a combo will land or not. The Master Cycle Sentinel does offer great opportunities for WPG depletion with successful Perfect Guards, but you'll have a much easier time using either of Zelda's other weapons. |
 Master Kohga Master Kohga
|
Bad moveset. Though his unique ability deals decent damage and gives long iframes, it will take several (terrible) strong attacks to fill the stress gauge. |
 Hestu Hestu
|
Attacks are slow and short-ranged due to him barely moving while attacking. Combos are underwhelming even when upgraded and Koroks are summoned. Use him if you have a powerful enough weapon so he can at least capture outposts or just for fun. |
|
Purah and Robbie
|
Regular attack string is quite slow with some strong attack combos being slow as well. Although, they are better the more enemies there are as their attacks sweep a wide range. Purah and Robbie's unique action can also damage themselves which is an additional element to consider when positioning. Moreover, these unique attacks are random with varying AOEs so it can miss very mobile enemies. |
Tier List Criteria
Ease of Use
Some characters are strong but are difficult to master. Each character's combos and unique abilities should be synergized with each other easily without having to put much effort and extra steps.
Unique Ability
Each character's unique ability greatly affects their effectiveness in battle. Their unique abilities should work perfectly well with their combos and on different kinds of situations.
Ability to Attack Weak-Points
Weak-points are only present on strong enemies and bosses. A good character should also be able to chip away the weak-point gauges of an enemy or groups of strong enemies with the available moveset and ability.
Crowd Control
Determines how well the character performs against groups of enemies. This is important for objectives and challenges that requires you to capture outposts or defeat a certain number of enemies within the given period of time.
Speed, Power, and Range
These mostly refers to a character's effectiveness using basic combos. The best combination of regular and strong attacks should be able to reach and take out as many enemies as possible.
Related Guides

How to Unlock All Playable Characters
| Main Characters | |||||||||||
|---|---|---|---|---|---|---|---|---|---|---|---|
| Link |
Impa |
Zelda |
|||||||||
| Mipha |
Daruk |
Revali |
Urbosa |
||||||||
| Secret Characters | |||||||||||
| Hestu |
Sidon |
Yunobo |
Riju |
||||||||
| Teba |
Master Kohga |
King Rhoam |
Great Fairies |
||||||||
| Monk Maz Koshia |
Terrako |
Calamity Ganon |
Battle-Tested Guardian
|
||||||||
| Purah and Robbie |
Sooga |
||||||||||
| Best Character Tier List | |||||||||||
| Villains | |||||||||||
| Astor | Sooga | ||||||||||
| English and Japanese Voice Actors and Cast | |||||||||||
Comment
48  Anonymous about 1 year
i honestly agree impa is rlly hard to use but daruk is like insane for boss killing
Author

Best Character Tier List (DLC Included)
Please participate in our site
improvement survey
03/2026
improvement survey
03/2026
Would you assist in
improving Game8's site?
improving Game8's site?

×
We are listening to our users' valuable opinions and discussing how to act on them.
The information collected through this survey will be used for the purpose of improving our services. In addition, the information will only be disclosed a part of a statistic in a format that will not allow identification of personal information.
Begin Survey
Not Now
×
Please rate each item regarding Game8.co's Advertisements.
Amount of Ads
Very Dissatisfied
Somewhat Dissatisfied
Fine
Somewhat Satisfied
Highly Satisfied
Placement of Ads
Timing of Ad Display
Ad Loading Speed
Safeness of Ads
Content of Ads
×
Please rate each item regarding Game8.co's Quality of Articles.
Amount of information
Very Dissatisfied
Somewhat Dissatisfied
Fine
Somewhat Satisfied
Highly Satisfied
Frequency of updates
Speed of new information
Accuracy of articles
Understandibility of articles
Readability of sentences
×
Please rate each item regarding Game8.co's Usability of the Site.
Ease of finding information
Very Dissatisfied
Somewhat Dissatisfied
Fine
Somewhat Satisfied
Highly Satisfied
Loading Speed
Use of Color
Font Size
Visibility of Images
Easy to Understand Layout
×
Please rate each item regarding Game8.co's Message Boards, Comments.
Ease of Writing
Very Dissatisfied
Somewhat Dissatisfied
Fine
Somewhat Satisfied
Highly Satisfied
Readability
Ease in Finding Information
Comment Quality
Comment Quantity
Admin Response
×
Please rate each item regarding Game8.co's Site's new design.
Please rate our site's new design
Very Dissatisfied
Somewhat Dissatisfied
Fine
Somewhat Satisfied
Highly Satisfied
Do you think that the website's design change makes the site easier to use?
Has the new design made it easier for you to find information on the site?
Has the new design improved the overall visual appeal of the site?
How would you rate your overall satisfaction with the new design of the site?
×
How likely are you to recommend Game8 to someone you know?
Very Unlikely
0
1
2
3
4
5
6
7
8
9
10
Very Likely
If you have other opinions regarding potential improvement to the website, please share them with us. We would appreciate your honest opinion.
Note: This is a free response section, so you can proceed without entering anything.
Note: Please be sure not to enter any kind of personal information into your response.
Note: Please be sure not to enter any kind of personal information into your response.
×
Thank You
×
Thank you for participating in our survey! Your answers will help us to improve the quality of our website and services.
We hope you continue to make use of Game8.
We hope you continue to make use of Game8.
Close
Rankings
- We could not find the message board you were looking for.
Gaming News


Popular Games

Genshin Impact Walkthrough & Guides Wiki
Honkai: Star Rail Walkthrough & Guides Wiki
Umamusume: Pretty Derby Walkthrough & Guides Wiki
Pokemon Pokopia Walkthrough & Guides Wiki
Resident Evil Requiem (RE9) Walkthrough & Guides Wiki
Monster Hunter Wilds Walkthrough & Guides Wiki
Wuthering Waves Walkthrough & Guides Wiki
Arknights: Endfield Walkthrough & Guides Wiki
Pokemon FireRed and LeafGreen (FRLG) Walkthrough & Guides Wiki
Pokemon TCG Pocket (PTCGP) Strategies & Guides Wiki


Recommended Games
Diablo 4: Vessel of Hatred Walkthrough & Guides Wiki
Fire Emblem Heroes (FEH) Walkthrough & Guides Wiki
Yu-Gi-Oh! Master Duel Walkthrough & Guides Wiki
Super Smash Bros. Ultimate Walkthrough & Guides Wiki
Pokemon Brilliant Diamond and Shining Pearl (BDSP) Walkthrough & Guides Wiki
Elden Ring Shadow of the Erdtree Walkthrough & Guides Wiki
Monster Hunter World Walkthrough & Guides Wiki
The Legend of Zelda: Tears of the Kingdom Walkthrough & Guides Wiki
Persona 3 Reload Walkthrough & Guides Wiki
Cyberpunk 2077: Ultimate Edition Walkthrough & Guides Wiki


All rights reserved
© Nintendo © KOEI TECMO GAMES All rights reserved. Licensed by Nintendo.
The copyrights of videos of games used in our content and other intellectual property rights belong to the provider of the game.
The contents we provide on this site were created personally by members of the Game8 editorial department.
We refuse the right to reuse or repost content taken without our permission such as data or images to other sites.
fr