Best Builds for All Perks
★ Disclaimer: Our guides were written before the Rearmament update, so some information may be outdated. We appreciate your support!
★ News: Crossplay | Game Pass | Roadmap
★ Best Settings | Teams | Weapons
┗ Best Bonus Abilities | XP Farm | Difficulty
This is a list that showcases all the best builds for the Perks, which act as the class system for Killing Floor 3 (KF3) with their unique skills and abilities. See the best builds for all Perks and how to customize a build to fit your perk's playstyle here!
| Check Out Our Best Pages! | |||||
|---|---|---|---|---|---|
| Best Builds | Best Weapons | Best Tools | |||
| Best Leveling | Best Classes | Best Team | |||
| Best Skills | Best Bonus Abilities | Best Ammo and Weapon Mods | |||
List of All Perk Builds
| Jump to a Perk! | ||
|---|---|---|
 Sharpshooter Sharpshooter |
 Commando Commando |
 Engineer Engineer |
 Ninja Ninja |
 Medic Medic |
 Firebug Firebug |
Best Sharpshooter Builds
| Perk and Specialist | Best Loadout | |
|---|---|---|
| Sharpshooter |
 Samaritan Samaritan
Primary |
 Disciple Disciple
Sidearm |
 Pulse Lure Pulse Lure
Tool |
||
| Best Skills | ||
|
Passive Skills:
Hunter Base Effect:
(Level 2)Weapon spread penalty while walking is reduced by 10%. Walk at full speed while aiming down sights. Big Shot Base Effect:
(Level 8)Weapon damage to enemy weak spots while aiming down sights is increased by 10%. Evasives Maneuvers Base Effect:
(Level 14) Take 10% reduced damage while sprinting and sliding. Flight Response Base Effect:
(Level 20) Taking damage increases movement speed by 15% for 4 seconds. Big Game Hunter Base Effect:
(Level 26) Deal 10% Ballistic and Cold weapon damage to Large enemies and bosses. Participating in a large enemy takedown gives stacks of BIG GAME HUNTER, up to 10 stacks maximum. BIG GAME HUNTER deal 1.5% increased damage to large enemies and bosses for each stack. Throwable Skills: Chilling Effect Base Effect:
(Level 4)Enemies Frozen by Cryo-grenade are Frozen for 20% longer. ・Freeze interrupts enemies, causing them to freeze in place. Capacity Increase Base Effect:
(Level 10) Throwable carrying capacity is increased by 1. Blizzard Base Effect:
(Level 16) Cryo-Grenade explosions create 3 Blizzard ground effects that apply Freeze affliction over time to enemies within their radius. Blizzard ground effects last for 5 seconds. ・Freeze interrupts enemies, causing them to freeze in place. Capacity Increase Base Effect:
(Level 22) Throwable carrying capacity is increased by 1. Frostbite Base Effect:
(Level 28) Enemies hit with Cryo-Grenade explosion have their vulnerability to Ballistic, Force, and Cold damage increased by 10% for 5 seconds. Gadget Skills: Busy Bee Base Effect:
(Level 6)Death's Hand deals 15% increased damage to enemies it has not hit before. Sting Operation Base Effect:
(Level 12) While arrow is in-flight, gain 10% increased weapon damage. Cold-Blooded Base Effect:
(Level 18) When Death's Hand is fired, Freeze all enemies in a cone in front of you. Cone's radius is increased by 0%. ・Freeze interrupts enemies, causing them to freeze in place Target Run Base Effect:
(Level 24) Increase max number of targets for arrow by 4. Frosted Tips Base Effect:
(Level 30) Arrow Freezes enemies on contact. Arrow deals 15% increased damage to Frozen enemies. ・Freeze interrupts enemies, causing them to freeze in place. |
||
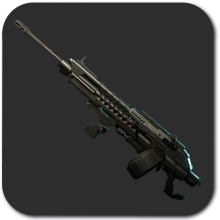
The Sharpshooter is designed to take out medium ZEDs from a distance and burst down Scrakes and Fleshpounds with high headshot damage. This build uses passive skills that improve mobility and accuracy, allowing for effective run-and-gun tactics.
The Samaritan is the main weapon for its versatility against many ZEDs for its cold damage. The throwable, tool, and gadgets provide crowd control when overwhelmed, letting the Sharpshooter focus on eliminating bigger threats while controlling the mob when needed.
Best Sharpshooter (Luna) Builds and Skills
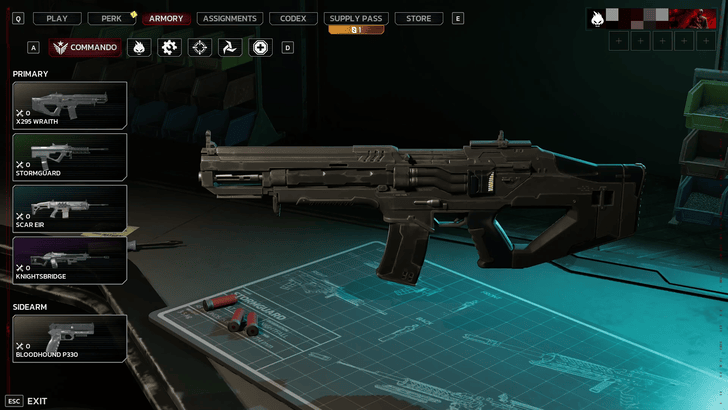
Best Commando Builds
| Perk and Specialist | Best Loadout | |
|---|---|---|
|
Commando |
 Knightsbridge Knightsbridge
Primary |
 Krait Krait
Sidearm |
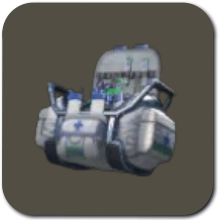
 Ammo Bag Ammo Bag
Tool |
||
| Best Skills | ||
|
Passive Skills:
Fire Sale Base Effect:
(Level 2)Max ammo capacity is increased by 10%. Ammo costs from the trader are reduced by 10%. Preferred Customer Base Effect:
(Level 8)Weapon costs from trader pod are reduced by 15%. Booster Shot Base Effect:
(Level 14) Max Syringe capacity is increased by 2. After using syringe, regenerate 5 additional health per second for 5 seconds. Get Loaded Base Effect:
(Level 20) Weapons automatically reload when holstered for 2.5 seconds. Weapon swap speed is increased by 10%. A Real Rager Base Effect:
(Level 26) Using a syringe increases movement speed by 15%, weapon damage by 15%, and bash damage by 50% for 20 seconds. Using additional Syringes will refresh duration of buff. Throwable Skills: Think Fast! Base Effect:
(Level 4)Grenades explode on impact. Self-damage from grenades reduced by 25%. Capacity Increase Base Effect:
(Level 10) Throwable carrying capacity is increased by 1. Corrosion Explosion Base Effect:
(Level 16) Grenade's damage type is changed to Acidic. Grenade explosion deals 50% less damage but creates a lingering cloud that deals Acidic damage over 3 seconds. Capacity Increase Base Effect:
(Level 22) Throwable carrying capacity is increased by 1. Scavenger Base Effect:
(Level 28) Destroying an enemy's head grants a stack of SCAVENGER. SCAVENGER at 12 stacks, consume all stacks to refill 1 grenade ammo. Gadget Skills: Market Panic Base Effect:
(Level 6)Enemies in Hellion's acid clouds stay in Panic for 30% longer. ・Panic interrupts enemies, causing them to helplessly writhe in place. Widen Out Base Effect:
(Level 12) Radius of Hellion's acid clouds is increased by 25%. Slow Dance Base Effect:
(Level 18) Initial Impact explosions from Hellion's projectiles apply 60 Enfeeble affliction. ・Enfeeble weakens enemies, causing them to move and attack more slowly. Business Expansion Base Effect:
(Level 24) Increases maximum number of clouds fired by Hellion by 3 and its max duration by 5 seconds. Smog Warning Base Effect:
(Level 30) Hellion's acid cloud damage increases by 20% for each second they're active. |
||
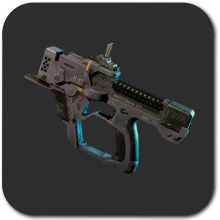
The best build for Foster turns him into an efficient killing machine for smaller ZEDs. Your goal is to buy the Knightsbridge and SCAR EIR assault rifles to unleash a constant stream of bullets on the horde.
The chosen skill setup boosts ammo efficiency, with Get Loaded providing a huge benefit by automatically reloading your weapons. Additional syringe buffs also improve survivability.
Meanwhile, the selected Hellion gadget skills grant powerful crowd control, making Foster even more effective in chaotic situations.
Best Commando (Foster) Builds and Skills
Best Engineer Builds
| Perk and Specialist | Best Loadout | |
|---|---|---|
| Shotgun Engineer | 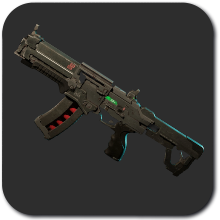 Bonebreaker Bonebreaker Primary | 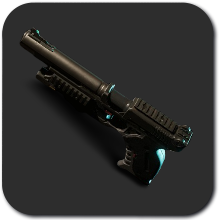 KH-380 KH-380 Sidearm |
| Pulse Lure Tool | ||
| Best Skills | ||
| Passive Skills: Tool Up Base Effect: (Level 2)Killing enemies grants stacks of TOOL UP Different tools gain stacks at different rates. Swapping tools at the trader resets all stacks. TOOL UP: at 100 stacks, consume all stacks to refill 1 tool ammo Major Damage Base Effect: (Level 8)Deal 10% increased weapon damage and 20% increased weapon Stumble to nearby enemies. ・Stumble interrupts enemies, causing them to stagger back in opposite direction Man Of Steel Base Effect: (Level 14) Maximum armor integrity is increased by 20%. While you have armor, small enemies will be stumbled when they attempts to grab you. ・Stumble interrupts enemies, causing them to stagger back in the opposite direction. Scatter Plot Base Effect: (Level 20) Shotguns have +2 pellet count and +25% weapon spread. Rally Beacon Base Effect: (Level 26) Killing enemies grants stacks of RALLY. RALLY at 24 stacks, consume all stacks to place a Rally Beacon. Rally Beacons last for 20 seconds and cause all allies within the radius to deal 25% increased weapon damage. Throwable Skills: Grounded Base Effect: (Level 4)Bouncing Betty fragmentation compinent's explosion applies 120 Knockdown affliction. ・Knockdown interrupts enemies, causing them to fall down Capacity Increase Base Effect: (Level 10) Throwable carrying capacity is increased by 1. Dismember the Day Base Effect: (Level 16) Increase amount of fragment projectiles by 3. Capacity Increase Base Effect: (Level 22) Throwable carrying capacity is increased by 1. Scrap Heap Base Effect: (Level 28) Bouncing Betty leaves behind scrap that lasts for 5 seconds. Interacting with scrap will collect it to restore 1 Bouncing Betty ammo. Gadget Skills: Stabilize Base Effect: (Level 6)While BUNKERED, you move 30% slower but soundwave projectile damage is increased by 15%. Wall of Sound Base Effect: (Level 12) Soundwave projectile size is increased by 35%. Clear the Area Base Effect: (Level 18) Equip explosion radius is increased by 50%. Reforge Base Effect: (Level 24) Using a tool restores gadget activation energy up to a maximum of 32 each round. Different tools restore different amounts of gadget energy when used. Reverb Pedal Base Effect: (Level 30) Fixing Sonic Storm generates a sound explosion that deals 200 damage to enemies that are close. | ||
| Perk and Specialist | Best Loadout | |
|---|---|---|
| Demolitionist Engineer | 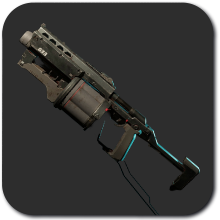 G33 G33 Primary | Krait Sidearm |
 Multi-Tool Multi-ToolTool | ||
| Best Skills | ||
| Passive Skills: Repairman Base Effect: (Level 2)Using a tool repairs armor integrity up to a maximum of 20 each round. Different tools repair different amounts of armor integrity when used. Major Damage Base Effect: (Level 8)Deal 10% increased weapon damage and 20% increased weapon Stumble to nearby enemies. ・Stumble interrupts enemies, causing them to stagger back in opposite direction Man Of Steel Base Effect: (Level 14) Maximum armor integrity is increased by 20%. While you have armor, small enemies will be stumbled when they attempts to grab you. ・Stumble interrupts enemies, causing them to stagger back in the opposite direction. Full Blast Base Effect: (Level 20) Radius for explosive weapons is increased by 30%. Self-damage from explosive weapons is reduced by 80%. Stream size for beam and spray - type weapons is increased by 20% Chain Reaction Base Effect: (Level 26) Killing an enemy with Heat damage or explosions has a 20% chance to cause that enemy to explode, dealing 250 heat damage. Throwable Skills: Grounded Base Effect: (Level 4)Bouncing Betty fragmentation compinent's explosion applies 120 Knockdown affliction. ・Knockdown interrupts enemies, causing them to fall down Capacity Increase Base Effect: (Level 10) Throwable carrying capacity is increased by 1. Dismember the Day Base Effect: (Level 16) Increase amount of fragment projectiles by 3. Capacity Increase Base Effect: (Level 22) Throwable carrying capacity is increased by 1. Scrap Heap Base Effect: (Level 28) Bouncing Betty leaves behind scrap that lasts for 5 seconds. Interacting with scrap will collect it to restore 1 Bouncing Betty ammo. Gadget Skills: Stabilize Base Effect: (Level 6)While BUNKERED, you move 30% slower but soundwave projectile damage is increased by 15%. Wall of Sound Base Effect: (Level 12) Soundwave projectile size is increased by 35%. Clear the Area Base Effect: (Level 18) Equip explosion radius is increased by 50%. Reforge Base Effect: (Level 24) Using a tool restores gadget activation energy up to a maximum of 32 each round. Different tools restore different amounts of gadget energy when used. Reverb Pedal Base Effect: (Level 30) Fixing Sonic Storm generates a sound explosion that deals 200 damage to enemies that are close. | ||
The best build for the Engineer Perk focuses on shotguns, supported by skills that boost damage, survivability, and crowd control. It excels in close-quarters combat, allowing you to devastate nearby ZEDs while staying tanky and making frequent use of your tools.
This setup makes the Engineer highly versatile, capable of clearing large swarms of fodder and dealing solid damage to larger threats. The alternative build is then centered around using Grenade Launchers to assist the team with massive crowd control!
Best Engineer (Imran) Builds and Skills
Best Ninja Builds
| Perk and Specialist | Best Loadout | |
|---|---|---|
| Melee Ninja | 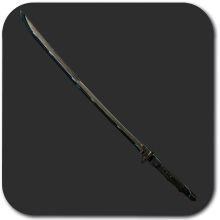 Katanas Katanas Primary |  Shuriken Shuriken Sidearm |
 Shock Trap Shock TrapTool | ||
| Best Skills | ||
| Passive Skills: Kenko Base Effect: (Level 2)Maximum health increased by 20. Performing a perfect parry will restore 10 health over 5 seconds, Additional perfect parries refresh this duration. Roaring Tiger Base Effect: (Level 8)Deal 10% increased weapon damage with heavy melee attacks. Deal 10% increased Cut weapon damage with ranged weapons while aiming down sights. Demon Stance Base Effect: (Level 14) Take no damage from enemy and environmental ground damage effects. Take 10% reduced damage from all explosion and spray damage effects. Chi kai ri Base Effect: (Level 20) Apply 75% increased Stumble affliction with all weapons. ・Stumble interrupt enemies, causing them to stagger back in the opposite direction. Unyielding Base Effect: (Level 26) Killing an enemy with a melee weapon restores 3 health and grants 15% increased melee weapon damage for 5 seconds. Additional kills refresh this duration. Throwable Skills: Swift Current Base Effect: (Level 4)Caltrop explosions no longer deal self damage. Getting hit by caltrop explosions now increase movement speed by 10% for 5 seconds. Capacity Increase Base Effect: (Level 10) Throwable carrying capacity is increased by 1. Hard Rain Base Effect: (Level 16) Increase number of Caltrops by 2 but decrease their explosion radius by 33%. Capacity Increase Base Effect: (Level 22) Throwable carrying capacity is increased by 1. Raijin Base Effect: (Level 28) Caltrops Shock enemies for 40% longer. ・Shock interrupts enemies, paralyzing them with electricity. Gadget Skills: Shogekiha Base Effect: (Level 6)Hebi-Ken's ending shockwave radius is increased by 50% Dead Calm Base Effect: (Level 12) While you have no Hebi-ken charges, deal 10% increased weapon damage. Blood Hunt Base Effect: (Level 18) Killing with enemies with pass through damage heals you for 2 health. Iron Castle Base Effect: (Level 24) Performing a perfect parry grants 3 gadget activation energy. Punishing Chain Base Effect: (Level 30) Taking damage that reduces you to below half health instantly refreshes all charges of the Hebi-ken. This has a 150 second cooldown between triggers. | ||
| Perk and Specialist | Best Loadout | |
|---|---|---|
| Bow Ninja | 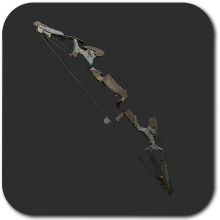 Yumi Yumi Primary | Shuriken Sidearm |
| Pulse Lure Tool | ||
| Best Skills | ||
| Passive Skills: Yoroi Base Effect: (Level 2)Maximum arrow is increased by 20. Stamina lost while blocking attacks is reduced by 50%. Roaring Tiger Base Effect: (Level 8)Deal 10% increased weapon damage with heavy melee attacks. Deal 10% increased Cut weapon damage with ranged weapons while aiming down sights. Skirmisher Base Effect: (Level 14) Maximum ammo capacity with all weapon is increased by 35%. Auto-pickup radius for shuriken, arrow, and kunai is increased by 100%. Chi kai ri Base Effect: (Level 20) Apply 75% increased Stumble affliction with all weapons. ・Stumble interrupt enemies, causing them to stagger back in the opposite direction. Kyuketsuki Base Effect: (Level 26) Weapons deal 100% increased bleed affliction and deal 10% increased damage to Bleeding enemies. Damaging Bleeding enemy with your weapons heals you for 3 health over 3 seconds. Additional hits refreshes this duration. ・Bleed afflicts enemies with Cut damage over time. Throwable Skills: Kekkai Jutsu Base Effect: (Level 4)Caltrop lifetime is increased to 10 seconds. Caltrops detonate early if an enemy gets near. Capacity Increase Base Effect: (Level 10) Throwable carrying capacity is increased by 1. Thunderclap Base Effect: (Level 16) Caltrop explosion radius is increased by 30%. Capacity Increase Base Effect: (Level 22) Throwable carrying capacity is increased by 1. Inazuma Base Effect: (Level 28) After exploding, Caltrops leave behind electrical fields with the same radius as their explosion. Fields last for 5 seconds and apply Shock affliction and 15 Electrical damage every 0.5 seconds to enemies within their radius. ・Shock interrupts enemies, paralyzing them with electricity. Gadget Skills: Eagle Strike Base Effect: (Level 6)First weapon attack after grappling deals 15% increased damage. Dead Calm Base Effect: (Level 12) While you have no Hebi-ken charges, deal 10% increased weapon damage. Red Shadow Base Effect: (Level 18) Take 15% reduced damage for 5 seconds after grappling an enemy. Lightning Incarnate Base Effect: (Level 24) Pass through damage radius is increased by 25%. Pass through damage type is changed to Electrical and damage is increased by 100% Leopard Fist Base Effect: (Level 30) Damaging an enemy with finisher increases their vulnerability to Ballistic, Cut, and Electrical damage by 10% for 10 seconds. | ||
The best Ninja build focuses on melee and Electrical damage, with Katanas and gadgets. It uses passive skills that provide strong, sustained healing, making you incredibly hard to kill in any wave. Your throwable Caltrops and Hebi-Ken gadget also inflict shock damage and buildup, giving you excellent battlefield control.
Alternatively, the second build focuses on ranged and Bleed damage using the Bow and Kunai. This build fully focuses on dealing high single-target damage from a decent enough range while having reclaimable arrows!
Best Ninja (Nakata) Builds and Skills
Best Medic Builds
| Perk and Specialist | Best Loadout | |
|---|---|---|
| Hybrid Medic | 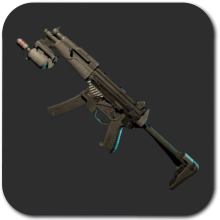 K&W MP6 K&W MP6 Primary | 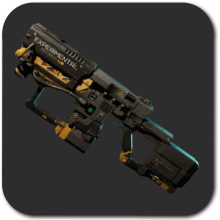 LF-85 LF-85 Sidearm |
| Multi-Tool Tool | ||
| Best Skills | ||
| Passive Skills: Healing Hands Base Effect: (Level 2)Ally revivals are 50% faster. Reviving allies heals them for additional 10 health. Stronger Perscription Base Effect: (Level 8)Weapon healing is increased by 15%. Symbiosis Base Effect: (Level 14) Healing allies with your weapon or hitting enemies with your weapon's healing effects heals you for 20% of your healing amount. Social Distancing Base Effect: (Level 20) Shooting down allies with your weapon's healing effects heals their bleed out health for 140% of your weapon's standard healing. Restoring their bleed-out health to full will revive them. Chemical Reaction Base Effect: (Level 26) Killing enemies with your weapon has a 15% chance to trigger a chemical reaction gas cloud that lingers for 5 seconds. The cloud heals allies over time and applies Panic and Toxic affliction to enemies. ・Panic interrupts enemies, causing them to writhe in place helplessly. ・Toxic afflicts enemies with Biological damage over time. Throwable Skills: Gas Expansion Base Effect: (Level 4)Biotic Grenade gas cloud radius is increased by 15%. Capacity Increase Base Effect: (Level 10) Throwable carrying capacity is increased by 1. Anesthetist Base Effect: (Level 16) Biotic Grenade gas cloud applies 30 Enfeeble affliction every 0.5 seconds. ・Enfeeble weakens enemies, causing them to move and attack more slowly. Capacity Increase Base Effect: (Level 22) Throwable carrying capacity is increased by 1. Lingering Cloud Base Effect: (Level 28) Biotic Grenade gas cloud durations is increased by 6 seconds. Gadget Skills: Health Benefits Base Effect: (Level 6)When Sanctum expires, it heals all allies within its radius for 25 health. Burn Unit Base Effect: (Level 12) Sanctum's energy field deals 100% increased damage over time to small enemies. Steroid Injection Base Effect: (Level 18) Allies within Sanctum's radius receive a buff increasing their weapon damage by 10% for 5 seconds. Storm Shelter Base Effect: (Level 24) Sanctum duration is increased by 5 seconds. Resuscitator Base Effect: (Level 30) Sanctum field expansion blast revives down allies and healls all allies within the blast radius for 20 health. | ||
| Perk and Specialist | Best Loadout | |
|---|---|---|
| Solo DPS Medic | K&W MP6 Primary | Disciple Sidearm |
 Syringe Bag Syringe BagTool | ||
| Best Skills | ||
| Passive Skills: Doctor's Bag Base Effect: (Level 2)Syringe Bags now grant 2 Syringes each. Using Syringes repairs 10 armor integrity. Pill Mill Base Effect: (Level 8)Maximum ammo capacity is increased by 35%. Symbiosis Base Effect: (Level 14) Healing allies with your weapon or hitting enemies with your weapon's healing effects heals you for 20% of your healing amount. Strength in Numbers Base Effect: (Level 20) While atleast one other player or trader pod is nearby, you take 10% reduced damage. Chemical Reaction Base Effect: (Level 26) Killing enemies with your weapon has a 15% chance to trigger a chemical reaction gas cloud that lingers for 5 seconds. The cloud heals allies over time and applies Panic and Toxic affliction to enemies. ・Panic interrupts enemies, causing them to writhe in place helplessly. ・Toxic afflicts enemies with Biological damage over time. Throwable Skills: Cull the Weak Base Effect: (Level 4)Biotic Grenade gas cloud deals 60% increased damage to small enemies. Capacity Increase Base Effect: (Level 10) Throwable carrying capacity is increased by 1. Anesthetist Base Effect: (Level 16) Biotic Grenade gas cloud applies 30 Enfeeble affliction every 0.5 seconds. ・Enfeeble weakens enemies, causing them to move and attack more slowly. Capacity Increase Base Effect: (Level 22) Throwable carrying capacity is increased by 1. Active Infection Base Effect: (Level 28) Enemies hit by Biotic Grenade gas cloud are INFECTED for 4 seconds. INFECTED Enemies deal Biological damage to themselves and other enemies every 0.5 seconds. Gadget Skills: Muscle Stimulant Base Effect: (Level 6)Allies within Sanctum's radius receive a buff increasing their movement speed by 10% for 5 seconds. Burn Unit Base Effect: (Level 12) Sanctum's energy field deals 100% increased damage over time to small enemies. Steroid Injection Base Effect: (Level 18) Allies within Sanctum's radius receive a buff increasing their weapon damage by 10% for 5 seconds. Storm Shelter Base Effect: (Level 24) Sanctum duration is increased by 5 seconds. Terminal Diagnosis Base Effect: (Level 30) When Sanctum expires, it releases final explosion that deals 800 Biological damage | ||
Prioritize getting the K&W MP6 for strong team impact. It boosts your healing output and handles fodder effectively. Follow it up with the LF-85, a weapon that recharges healing so you can maintain consistent support without running out.
Key passives focus on maximizing healing efficiency, improving your healing grenade’s area and effect, and turning the Sanctum gadget into one of the best emergency survival tools in the game.
The alternative build then focuses on full DPS and clear with the changes mainly being centered around skill choices, allowing the Medic to be viable when it comes to solo play.
Best Medic (Obi) Builds and Skills
Best Firebug Builds
| Perk and Specialist | Best Loadout | |
|---|---|---|
| Firebug |
Primary |
 Pyre .357 Pyre .357
Sidearm |
|
Ammo Bag
Tool |
||
| Best Skills | ||
|
Passive Skills:
Too Hot to Handle Base Effect:
(Level 2)Retaliate with a small burst of flame that applies Burn and 150 Heat damage against enemy melee attacks. This skill has a 16 second cooldown between triggers. ・Burn afflicts enemies with heat damage over time. Focus Fire Base Effect:
(Level 8)Deal 10% increased direct weapon damage with Heat weapons. Fuel to Burn Base Effect:
(Level 14) Max ammo capacity is increased by 30%. Hotfoot Base Effect:
(Level 20) Ground fire effects caused by weapons heal you for 2 health per second while standing in them. Extinguisher Base Effect:
(Level 26) Weapon reload speed is increased by 10%. Reloading weapon damages nearby enemies applying Panic and 75 heat damage. Burning enemies take triple damage, but are extinguished. ・Burn afflicts enemies with Heat damage over time. ・Panic interrupts enemies, causing them to helplessly writhe in place Throwable Skills: Boom Out Base Effect:
(Level 4)Increased Molotov explosion radius by 25%. Capacity Increase Base Effect:
(Level 10) Throwable carrying capacity is increased by 1. Out With a Bang Base Effect:
(Level 16) Molotov explosion damage is increased by 100%. Capacity Increase Base Effect:
(Level 22) Throwable carrying capacity is increased by 1. Hot Mess Base Effect:
(Level 28) Molotov secondary projectiles explode and when they land, dealing 150 Heat damage in additional to spawning ground fire. Gadget Skills: Ready for Action Base Effect:
(Level 6)Using Wildfire reloads weapon and increases weapon damage by 10% for 10 seconds. Footlights Base Effect:
(Level 12) Ground fires created by Wildfire have 25% increased radius and deal 15% increased damage. Red Carpet Base Effect:
(Level 18) Ground fire created by Wildfire last for an additional 3 seconds. Standing in ground fire created by Wildfire grants 20% increased heat weapon damage. Hot Streak Base Effect:
(Level 24) Killing nearby enemies grants 3 gadget activation energy. Gadget kills do not count towards this. From the Ashes Base Effect:
(Level 30) Once per match, while downed you may activate Wildfire to get back up, repair 20 Armor intergrity, and become invulnerable for 4 seconds. |
||
The best build for the Firebug focuses on direct-hit weapons rather than flame AoE, as this is currently more efficient and deals higher damage to both small and large ZEDs. The Vulcan TA, paired with passives that boost direct-hit damage, becomes a powerhouse of burst damage capable of shredding hordes and bosses alike.
The rest of the skills enhance Firebug's survivability, allowing you to heal while standing in ground flames and becoming unkillable when using your Wildfire Gadget.
Best Firebug (Devlin) Builds and Skills
How to Create Best Builds for Perks
Find a Perk That Fits Your Playstyle
| Perk | Playstyle Summary |
|---|---|
| Commando | All-rounder with balanced ranged assault |
| Engineer | Close-range crowd control and utility support |
| Firebug | AoE damage and area neutralizer |
| Medic | Team and single-target healing |
| Ninja | Melee Bruiser with evasive maneuvers |
| Sharpshooter | Single-target marksman with hit-and-run abilities |
There are six distinct Perks to choose from in Killing Floor 3, each offering unique skills and abilities that make them vital to any party composition. Whether you're a close-range brawler or a strategic support player, there's a Perk tailored to your playstyle.
Assemble a Loadout
Once you've chosen a Perk that suits your playstyle, it's time to build your loadout. Each Perk comes equipped with its own set of Primary and Sidearm weapons, which can be Modded to enhance their performance. You'll also have access to Tools, which are essential for survival, offering both utility and support.
Your available gear will expand as your Perk levels up. With each level, your Operational Fund increases, giving you access to more powerful weapons and better equipment to match the escalating threats!
Best Ammo and Weapon Mods: All Loadouts
Choose the Best Skills
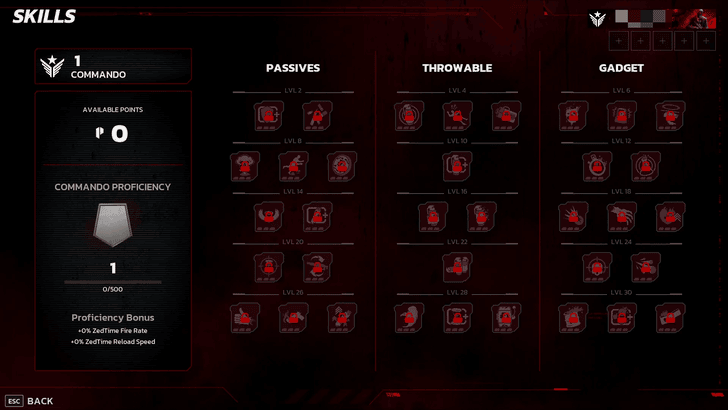
A Perk’s effectiveness largely depends on the Skills you equip. Each Perk has 32 unique Skills divided into three categories, with a new set unlockable every two levels. You can activate only one Skill per tier, shaping how your Perk performs in combat.
For example, the Sharpshooter can be built for precise, high single-target damage or customized for a more mobile, run-and-gun approach. You may tailor your build how you'd like, as the goal is to create an optimized Skill loadout that fits your playstyle while supporting your team’s survival!
Killing Floor 3 Related Guides

Guides by Category
 Characters
 Skills
 Weapons
 Weapon Mods
 Bosses
 Enemies
 Crafting Materials
 Damage Types
 Cosmetics
 Maps
Maps Tools
Tools Assignments
 Supply Pass
 Bugs and Issues
 Tips and Tricks
 Items
Items Affliction
 Bonus Abilities
 Latest News
All Recommended Guides
 Best Specialists Tier List
 Best Weapons
 Best Tools
 Best XP Farm Guide
 Best Team Comp
 Best Skills
 Best Bonus Abilities
 Best Ammo and Weapon Mods
 How Long to Beat
 How to Get Creds Pack
 Multiplayer Guide
 Trophy Guide
 Weekly Mutation
 Difficulty Differences
 Easter Eggs and Secrets
 Weapon Stats Explained
 How to Enable Crossplay
 All Game Modes
 Hell on Earth Guide
 List of All Destructibles
 List of All Voice Actors
 How to Join the Playtest
 Lore and Story Explained
 Roadmap and Schedule
 Season 2 Release Date
 Best Settings
 Patch Notes and Updates
 Server Status
 Maintenance Countdown
 Co-Op Message Board
Comment
Author
Best Builds for All Perks
Rankings
- We could not find the message board you were looking for.
Gaming News

![Death Stranding 2: On The Beach [PC] Review | A Port That Delivers](https://img.game8.co/4447392/15310a0c9aa1b6843bb713b2ea216930.jpeg/show)


Popular Games

Genshin Impact Walkthrough & Guides Wiki
Umamusume: Pretty Derby Walkthrough & Guides Wiki
Crimson Desert Walkthrough & Guides Wiki
Monster Hunter Stories 3: Twisted Reflection Walkthrough & Guides Wiki
Honkai: Star Rail Walkthrough & Guides Wiki
Pokemon Pokopia Walkthrough & Guides Wiki
The Seven Deadly Sins: Origin Walkthrough & Guides Wiki
Wuthering Waves Walkthrough & Guides Wiki
Zenless Zone Zero Walkthrough & Guides Wiki
Arknights: Endfield Walkthrough & Guides Wiki


Recommended Games
Fire Emblem Heroes (FEH) Walkthrough & Guides Wiki
Diablo 4: Vessel of Hatred Walkthrough & Guides Wiki
Cyberpunk 2077: Ultimate Edition Walkthrough & Guides Wiki
Yu-Gi-Oh! Master Duel Walkthrough & Guides Wiki
Super Smash Bros. Ultimate Walkthrough & Guides Wiki
Pokemon Brilliant Diamond and Shining Pearl (BDSP) Walkthrough & Guides Wiki
Elden Ring Shadow of the Erdtree Walkthrough & Guides Wiki
Monster Hunter World Walkthrough & Guides Wiki
The Legend of Zelda: Tears of the Kingdom Walkthrough & Guides Wiki
Persona 3 Reload Walkthrough & Guides Wiki


All rights reserved
Killing Floor© 2009-2025 Tripwire Interactive. Unreal® is a trademark or registered trademark of Epic Games, Inc. in the United States of America and elsewhere. Unreal® Engine, Copyright 1998-2025, Epic Games, Inc. All rights reserved.
The copyrights of videos of games used in our content and other intellectual property rights belong to the provider of the game.
The contents we provide on this site were created personally by members of the Game8 editorial department.
We refuse the right to reuse or repost content taken without our permission such as data or images to other sites.