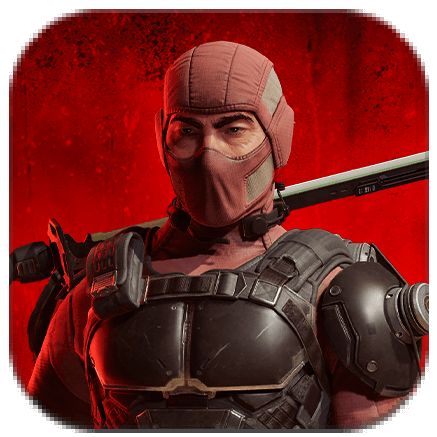
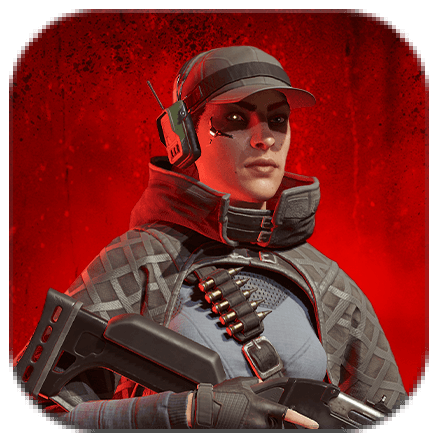
Best Ninja (Nakata) Builds and Skills
★ Disclaimer: Our guides were written before the Rearmament update, so some information may be outdated. We appreciate your support!
★ News: Crossplay | Game Pass | Roadmap
★ Best Settings | Teams | Weapons
┗ Best Bonus Abilities | XP Farm | Difficulty
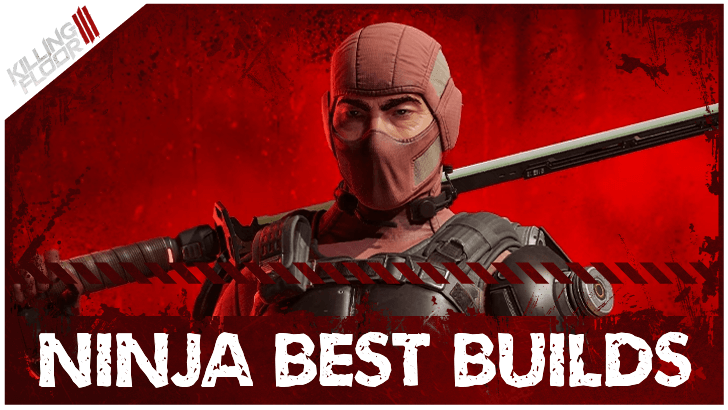
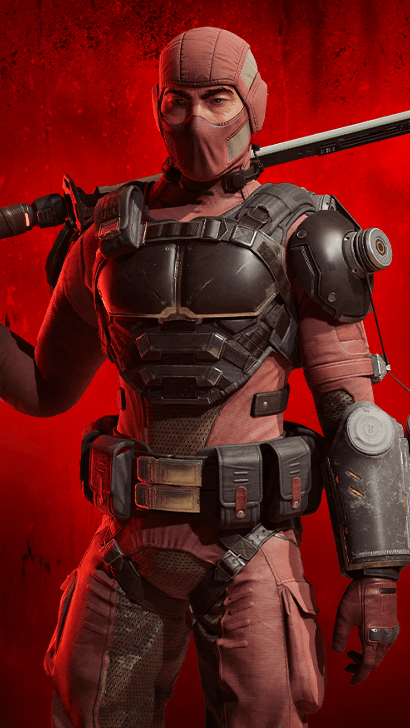
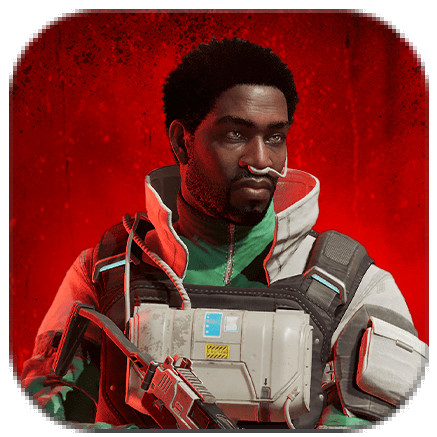
The Ninja Perk, played by Nakata, is the Specialist in Killing Floor 3 (KF3) who excels at diving into the heat of combat with deadly melee precision. See the Ninja's best builds, weapons, bonus ability priority, tools, skills, how to play them, and additional character info here!
List of Contents
Best Ninja (Nakata) Builds
Best Ninja Loadout
 Ninja Ninja
|
Primary | |
|||||||||
|---|---|---|---|---|---|---|---|---|---|---|---|
| Sidearm | |||||||||||
| Tool | |||||||||||
| Passive | Throwable | Gadget | |||||||||
|
Kenko Level Requirement: 2
Base Effect: Maximum health increased by 20. Performing a perfect parry will restore 10 health over 5 seconds, Additional perfect parries refresh this duration. Lvl 2 |
Swift Current Level Requirement: 4
Base Effect: Caltrop explosions no longer deal self damage. Getting hit by caltrop explosions now increase movement speed by 10% for 5 seconds. Lvl 4 |
Shogekiha Level Requirement: 6
Base Effect: Hebi-Ken's ending shockwave radius is increased by 50% Lvl 6 |
|||||||||
|
Roaring Tiger Level Requirement: 8
Base Effect: Deal 10% increased weapon damage with heavy melee attacks. Deal 10% increased Cut weapon damage with ranged weapons while aiming down sights. Lvl 8 |
Capacity Increase Level Requirement: 10
Base Effect: Throwable carrying capacity is increased by 1. Lvl 10 |
Dead Calm Level Requirement: 12
Base Effect: While you have no Hebi-ken charges, deal 10% increased weapon damage. Lvl 12 |
|||||||||
|
Demon Stance Level Requirement: 14
Base Effect: Take no damage from enemy and environmental ground damage effects. Take 10% reduced damage from all explosion and spray damage effects. Lvl 14 |
Hard Rain Level Requirement: 16
Base Effect: Increase number of Caltrops by 2 but decrease their explosion radius by 33%. Lvl 16 |
Blood Hunt Level Requirement: 18
Base Effect: Killing with enemies with pass through damage heals you for 2 health. Lvl 18 |
|||||||||
|
Chi kai ri Level Requirement: 20
Base Effect: Apply 75% increased Stumble affliction with all weapons. ・Stumble interrupt enemies, causing them to stagger back in the opposite direction. Lvl 20 |
Capacity Increase Level Requirement: 22
Base Effect: Throwable carrying capacity is increased by 1. Lvl 22 |
Iron Castle Level Requirement: 24
Base Effect: Performing a perfect parry grants 3 gadget activation energy. Lvl 24 |
|||||||||
|
Unyielding Level Requirement: 26
Base Effect: Killing an enemy with a melee weapon restores 3 health and grants 15% increased melee weapon damage for 5 seconds. Additional kills refresh this duration. Lvl 26 |
Raijin Level Requirement: 28
Base Effect: Caltrops Shock enemies for 40% longer. ・Shock interrupts enemies, paralyzing them with electricity. Lvl 28 |
Punishing Chain Level Requirement: 30
Base Effect: Taking damage that reduces you to below half health instantly refreshes all charges of the Hebi-ken. This has a 150 second cooldown between triggers. Lvl 30 |
|||||||||
| Tier List Evaluations | |||||||||||
| Solo | |||||||||||
| Squad | |||||||||||
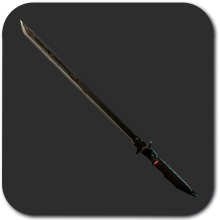
Katanas should be your go-to purchase in the mid to late game. The Katana’s alternate Shock mode can deal massive damage to the larger ZEDs, while its normal mode excels at clearing out waves of smaller enemies.
The Kunai is an excellent backup weapon, particularly against pesky ranged ZEDs like Husks and Bloats, and during Boss Fights. The Shuriken serves a similar role and performs well early on before you unlock the Kunai.
For your tool, Shock Traps are great for crowd control when dealing with groups that include a Scrake or Fleshpound. They immobilize multiple ZEDs at once and deal solid damage, making it easier to focus on the bigger threats. The total build would cost 8,500 Dosh.
Ninja Bow Build and Loadout
| Ninja
|
Primary | |
|||||||||
|---|---|---|---|---|---|---|---|---|---|---|---|
| Sidearm | |||||||||||
| Tool | |||||||||||
| Passive | Throwable | Gadget | |||||||||
|
Yoroi Level Requirement: 2
Base Effect: Maximum arrow is increased by 20. Stamina lost while blocking attacks is reduced by 50%. Lvl 2 |
Kekkai Jutsu Level Requirement: 4
Base Effect: Caltrop lifetime is increased to 10 seconds. Caltrops detonate early if an enemy gets near. Lvl 4 |
Eagle Strike Level Requirement: 6
Base Effect: First weapon attack after grappling deals 15% increased damage. Lvl 6 |
|||||||||
|
Roaring Tiger Level Requirement: 8
Base Effect: Deal 10% increased weapon damage with heavy melee attacks. Deal 10% increased Cut weapon damage with ranged weapons while aiming down sights. Lvl 8 |
Capacity Increase Level Requirement: 10
Base Effect: Throwable carrying capacity is increased by 1. Lvl 10 |
Dead Calm Level Requirement: 12
Base Effect: While you have no Hebi-ken charges, deal 10% increased weapon damage. Lvl 12 |
|||||||||
|
Skirmisher Level Requirement: 14
Base Effect: Maximum ammo capacity with all weapon is increased by 35%. Auto-pickup radius for shuriken, arrow, and kunai is increased by 100%. Lvl 14 |
Thunderclap Level Requirement: 16
Base Effect: Caltrop explosion radius is increased by 30%. Lvl 16 |
Red Shadow Level Requirement: 18
Base Effect: Take 15% reduced damage for 5 seconds after grappling an enemy. Lvl 18 |
|||||||||
|
Chi kai ri Level Requirement: 20
Base Effect: Apply 75% increased Stumble affliction with all weapons. ・Stumble interrupt enemies, causing them to stagger back in the opposite direction. Lvl 20 |
Capacity Increase Level Requirement: 22
Base Effect: Throwable carrying capacity is increased by 1. Lvl 22 |
Lightning Incarnate Level Requirement: 24
Base Effect: Pass through damage radius is increased by 25%. Pass through damage type is changed to Electrical and damage is increased by 100% Lvl 24 |
|||||||||
|
Kyuketsuki Level Requirement: 26
Base Effect: Weapons deal 100% increased bleed affliction and deal 10% increased damage to Bleeding enemies. Damaging Bleeding enemy with your weapons heals you for 3 health over 3 seconds. Additional hits refreshes this duration. ・Bleed afflicts enemies with Cut damage over time. Lvl 26 |
Inazuma Level Requirement: 28
Base Effect: After exploding, Caltrops leave behind electrical fields with the same radius as their explosion. Fields last for 5 seconds and apply Shock affliction and 15 Electrical damage every 0.5 seconds to enemies within their radius. ・Shock interrupts enemies, paralyzing them with electricity. Lvl 28 |
Leopard Fist Level Requirement: 30
Base Effect: Damaging an enemy with finisher increases their vulnerability to Ballistic, Cut, and Electrical damage by 10% for 10 seconds. Lvl 30 |
|||||||||
| Tier List Evaluations | |||||||||||
| Solo | |||||||||||
| Squad | |||||||||||
Alternatively, you can opt for a ranged-focused Ninja build by equipping the Yumi. This bow deals high damage per shot and offers great versatility with different arrow mods, with Exploding Arrows being a top choice. Pair it with Kunai to take full advantage of passive skills that boost ranged damage.
However, compared to the best build, this setup is more challenging to use. Accuracy is crucial with both weapons and every shot with the Yumi counts due to its slow fire rate. Since neither excels at body shot damage, landing precise hits is essential.
The full loadout costs around 7,500+ Dosh, usually affordable by Wave 4.
Best Ammo and Weapon Mods: All Loadouts
Ninja Best Weapons
| Jump to a Weapon Slot! | |
|---|---|
| Primary | Secondary |
Best Ninja Primary Weapons
Primary Weapon Slot 1
| Primary | |
|---|---|
| Recommended Mods |
Stunning Coating ・+25 Stun Affliction
Padded Grip ・+10% Aggro Generation
・+2 Block Power ・+10% Block Stamina ・+10 Knockdown Affliction Lightweight Blade ・+1% Attack Speed
・+3% Damage ・+15% Handling ・+10 Stun Affliction Ornate Guard ・+1% Attack Speed
・+5% Block Stamina ・+1% Damage ・+10% Handling |
Katanas are incredibly versatile, able to mow down hordes of smaller ZEDs in their normal mode and take on larger threats like Scrakes and Fleshpounds using their alternate Shock mode. Be sure to save Shock energy for the big targets.
Apply the Stunning Coating venom for reliable crowd control, as it can even stun Fleshpounds with enough hits. Pair it with mods like Padded Grip, Lightweight Blade, Ornate Guard, or Balanced Pommel to boost attack speed and damage without any drawbacks.
Primary Weapon Slot 2
| Primary | |
|---|---|
| Recommended Mods |
Enfeebling Venom ・+25 Enfeeble Affliction
Smooth Grip ・+5% Damage (Thrown)
・+10% Projectile Speed ・+10 Stumble Affliction ・+10% Accuracy Lightweight Blade ・+1% Attack Speed
・+3% Damage ・+15% Handling ・+10 Stun Affliction Whistler Pommel Ring ・+10% Accuracy
・+5 Penetration Power ・+10% Projectile Speed |
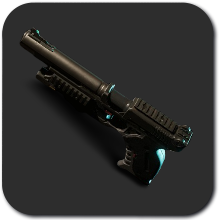
Kunais are an ideal backup against ranged ZEDs like Husks, Bloats, and Sirens, who can punish you before you get in melee range. Aim for weak spots, like the Husk's gas canister, to deal quick burst damage. They're also great in Boss Fights since you can retrieve the ammo, together with Enfeebling Venom that adds a weakening debuff.
Alternative Primary Weapons
| 1 |
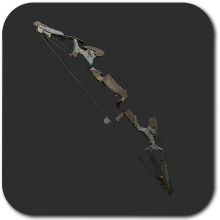 Yumi Yumi
|
Primary DMG: 290 Primary Fire Mode: Ballistic DMG & Cut DMG Base Cost: 3,500 |
|---|---|---|
| 2 |
 Kiba Kiba
|
Primary DMG: 84 Primary Fire Mode: Cut DMG Base Cost: 1,400 |
If you're looking for a strong ranged option as the Ninja, the Yumi bow delivers pretty decent burst damage. Pair it with ranged passive skill buffs and equip Exploding Arrows, which are the most effective arrow mod for this weapon.
The Kiba starting sword can carry you through the first few waves until you have enough Dosh to purchase the Katanas. Equip it with the same recommended mods for Katanas, such as Stunning Coating and Lightweight Blade, to make it even more effective from the start.
Best Ninja Sidearm Weapon
| Sidearm | |
|---|---|
| Recommended Mods |
Enfeebling Venom ・+25 Enfeeble Affliction
Triple Blades ・+10% Accuracy
・+5% Attack Speed ・+5% Damage ・+20 Stun Affliction |
Before you get the Kunai, Shurikens are excellent for picking off Husks, who already start appearing in early waves and can constantly chip away at your armor and health. Taking them out quickly with Shurikens helps you save on armor and syringes before engaging in melee with other ZEDs.
Alternative Sidearm Weapons
| 1 |
 KH-380 KH-380
|
Primary DMG: 60 Primary Fire Mode: Ballistic DMG Secondary Fire Mode: Biological DMG Base Cost: 800 |
|---|
The only solid alternative sidearm for the Ninja is the KH-380 Medic Pistol, which provides additional team healing support. If your squad lacks a dedicated Medic, consider equipping it to help with healing when needed.
Ninja Best Tools
Best Ninja Tools
| Tool | Effect |
|---|---|
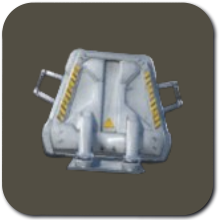 Shock Trap Shock Trap
|
Trap triggers when enemy is nearby. • 4 traps • Shocks and Slows nearby enemies when triggered |
Shock Traps have amazing crowd control and since you are most often in melee range, you can easily place them down right in front of a crowd of ZEDs. These can immobilize and damage multiple ZEDs at once, allowing you to focus on the larger threats like Scrakes and Fleshpounds easier.
Alternative Tool
| Tool | Effect | |
|---|---|---|
| 1 |
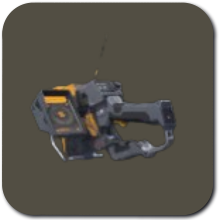 Multi-Tool Multi-Tool
|
Multi-function tool with 3 charges. • Activates and allows remote enabling of Traps. • Enables Ziplines • Unlocks Armor Lockers and certain Doors • Repairs damaged Explosive Locks |
| 2 |
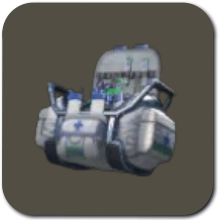 Syringe Bag Syringe Bag
|
First-aid kit that provides the team with additional syringes. • 2 deployable bags • Each bag grants 1 syringe |
The Multi-Tool is a versatile alternative that lets you access Ziplines and Armor Containers, both of which greatly improve your mobility and survivability. You can also use it to open locked doors and create new routes for your team.
For the Boss Fight, carrying extra Syringe Bags are helpful when you're on the front lines and constantly taking damage from the boss and its mobs.
Ninja Bonus Ability Priority
| Ability and Priority | Explanation |
|---|---|
| Deal 2.5% more Melee Damage and 20% more Bash Damage ★★★★★ |
Additional melee damage with no downsides should be a no-brainer pick for the Ninja. This allows the Ninja to lessen the amount of hits needed to deal with the Large ZEDs, thus increasing you and your team's chances of winning. |
| Deal 5% more damage to Bosses. ★★★☆☆ |
The Ninja's goal is to retain the aggro of Bosses while actively parrying and dealing damage. Having some stacks on the additional damage towards bosses should allow the Ninja to cover this role more consistently. |
| Add 20 Stumble Power ★☆☆☆☆ |
Lastly, the additional Stumble power will increase the likelihood of your charged attacks to stagger Large ZEDs, giving you more leeway to line up the next one! |
For the Ninja, it would be best to prioritize the following Bonus Abilities to further increase this class' melee damage capabilities while having more consistency with staggering Large ZEDs for when you are up close and personal.
List of Bonus Abilities for Mods
Best Ninja Skills
| Jump to a Skill Type! | ||
|---|---|---|
| Passive | Throwable | Gadget |
Best Nakata Passive Skills
| Skill | |
|---|---|
| Level 2 |
Base Effect: Maximum health increased by 20. ┗ Performing a perfect parry will restore 10 health over 5 seconds, Additional perfect parries refresh this duration. |
| Level 8 |
Base Effect: Deal 10% increased weapon damage with heavy melee attacks. ┗ Deal 10% increased Cut weapon damage with ranged weapons while aiming down sights. |
| Level 14 |
Base Effect: Take no damage from enemy and environmental ground damage effects. ┗ Take 10% reduced damage from all explosion and spray damage effects. |
| Level 20 |
Base Effect: Apply 75% increased Stumble affliction with all weapons. ┗Stumble interrupt enemies, causing them to stagger back in the opposite direction. |
| Level 26 |
Base Effect: Killing an enemy with a melee weapon restores 3 health and grants 15% increased melee weapon damage for 5 seconds. ┗ Additional kills refresh this duration. |
The Skills above are tailored for a more aggressive, melee brawler playstyle, with abilities that help you regain health or mitigate damage taken. Most notable is Demon Stance, which can negate afflictions and damage, and the late game skill Unyielding that restores health and increases damage with kills.
Do note that latency can affect your ability to perform perfect parries. If that becomes an issue, consider switching Kenko for Yoroi, as it still provides a solid defensive option while staying effective in close-quarters combat.
Passive Skills for Ranged Builds
| Ranged Focused Passives | ||
|---|---|---|
|
Yoroi Level Requirement: 2
Base Effect: Maximum arrow is increased by 20. Stamina lost while blocking attacks is reduced by 50%. Lvl 2 |
Skirmisher Level Requirement: 14
Base Effect: Maximum ammo capacity with all weapon is increased by 35%. Auto-pickup radius for shuriken, arrow, and kunai is increased by 100%. Lvl 14 |
Kyuketsuki Level Requirement: 26
Base Effect: Weapons deal 100% increased bleed affliction and deal 10% increased damage to Bleeding enemies. Damaging Bleeding enemy with your weapons heals you for 3 health over 3 seconds. Additional hits refreshes this duration. ・Bleed afflicts enemies with Cut damage over time. Lvl 26 |
Be sure to replace your passives with those that better enhance ranged weaponry to make the Yumi and Kunai far more effective. These passives increase your ammo capacity, make it easier to recover ammo, and boost your overall bleed damage.
Best Nakata Throwable Skills
| Skill | |
|---|---|
| Level 4 |
Base Effect: Caltrop explosions no longer deal self damage. ┗ Getting hit by caltrop explosions now increase movement speed by 10% for 5 seconds. |
| Level 10 |
Base Effect: Throwable carrying capacity is increased by 1. |
| Level 16 |
Base Effect: Increase number of Caltrops by 2 but decrease their explosion radius by 33%. |
| Level 22 |
Base Effect: Throwable carrying capacity is increased by 1. |
| Level 28 |
Base Effect: Caltrops Shock enemies for 40% longer. ┗Shock interrupts enemies, paralyzing them with electricity. |
This Skill loadout is designed to give Nakata’s Throwable strong crowd control while also boosting its damage output. Swift Current allows you to buff your movement speed, allowing you to reach your enemies faster.
The extra caltrops from Hard Rain are worth the lowered explosion radius, allowing you to use them more. Raijin enhances this further by causing the shock damage to persist longer, having more opportunity for follow-up affinity attacks.
Best Nakata Gadget Skills
| Skill | |
|---|---|
| Level 6 |
Base Effect: Hebi-Ken's ending shockwave radius is increased by 50% |
| Level 12 |
Base Effect: While you have no Hebi-ken charges, deal 10% increased weapon damage. |
| Level 18 |
Base Effect: Killing with enemies with pass through damage heals you for 2 health. |
| Level 24 |
Base Effect: Performing a perfect parry grants 3 gadget activation energy. |
| Level 30 |
Base Effect: Taking damage that reduces you to below half health instantly refreshes all charges of the Hebi-ken. ┗ This has a 150 second cooldown between triggers. |
Shogekiha greatly increases the AoE of your Shock blast, making it more effective at clearing groups of ZEDs. It also encourages frequent use of Hebi-Ken, especially with Dead Calm, to boost your overall damage without stacks.
Blood Hunt adds extra healing, turning your gadget into a secondary healing source. On higher difficulties, Punishing Chain is excellent for getting out of bad spots when you get to half HP, refilling your gadget stacks. This is incredibly effective when combined with Blood Hunt’s healing.
Ninja Skill Priority
Nakata Skill Upgrade Priority
| Skill | Priority | Explanation |
|---|---|---|
 Kenko
Kenko Kenko Base Effect:
Maximum health increased by 20. Performing a perfect parry will restore 10 health over 5 seconds, Additional perfect parries refresh this duration. |
★★★★★ | An excellent Skill that increases your survivability, especially as a melee Specialist. Prioritize upgrading this first to beef up Nakata's health. |
 Dead Calm
 Dead Calm Base Effect:
While you have no Hebi-ken charges, deal 10% increased weapon damage. |
★★★★☆ | The next best skill to upgrade, as it can significantly increase Nakata's damage as long as your Hebi-Ken charges are used up. |
 Unyielding
 Unyielding Base Effect:
Killing an enemy with a melee weapon restores 3 health and grants 15% increased melee weapon damage for 5 seconds. Additional kills refresh this duration. |
★★★☆☆ | Unyielding is what makes the Ninja an absolute powerhouse in damage and survivability, and allows you to single-handedly dive into a horde and slice away with ease. Level this for a near-permanent damage boost. |
 Demon Stance
 Demon Stance Base Effect:
Take no damage from enemy and environmental ground damage effects. Take 10% reduced damage from all explosion and spray damage effects. |
★★☆☆☆ | A good Skill to have leveled up since it increases Nakata's survivability through damage mitigation. |
 Chi kai ri
 Chi kai ri Base Effect:
Apply 75% increased Stumble affliction with all weapons. ・Stumble interrupt enemies, causing them to stagger back in the opposite direction. |
★☆☆☆☆ | While generally helpful, you can prioritize Chi kai ri last since it is still able to deal a good amount of Stumble affliction at its base level. |
We recommend prioritizing Kenko first, as it significantly improves your tankiness, essential for a melee Specialist who’s constantly on the front lines. Demon Stance further enhances survivability by mitigating and even negating damage.
Next, invest in Dead Calm, which boosts damage when your Hebi-Ken shots are depleted. To further boost your damage, the late-game skill Unyielding makes you even more unstoppable against hordes.
Chi kai ri is a good bonus to your overall Stumble attacks, so you can control and interrupt ZEDs more, particularly those that take more than a few swings to kill.
How to Play Ninja
| Nakata Playstyle Tips |
|---|
|
|
Play Aggresively
As the Ninja, you thrive in the close-quarters chaos of the frontline. Take ZED aggro for your team and stay aggressive. At higher levels, you gain excellent survivability and self-healing through kills. Keep on fighting to trigger healing and perfect parry bonuses that keep you in the fight.
Prioritize Upgrading Your Armor
Since you’ll rarely need to spend Dosh on ammo, prioritize upgrading your armor to make yourself even harder to kill. You’ll be taking most of the hits on the frontline, so it's best to invest in better armor early.
Armor Refills When Upgrading It
At the end of each round, upgrade your armor at the Trader Pod rather than refilling it first. The next armor level automatically restores it to full, so refilling before upgrading wastes Dosh.
Use Shuriken and Kunai for Ranged ZEDs
If you spot Bloats, Husks, or Sirens from a distance, try to pick them off with ranged attacks early. Dealing with them first makes it much easier to focus on the melee ZEDs in front. If left unchecked, their ranged attacks will damage you greatly before you can even reach them with melee.
Use Shock Damage for Large ZEDs
Shock damage is highly effective against Scrakes and Fleshpounds. The Katana's alternate Shock mode, combined with your other tools like the Hebi-Ken and Shock Traps can quickly burst down large ZEDs.
Communicate With Your Team for High-Level Enemies
You will be in charge of dealing with high-level threats such as the Scrake and Fleshpound by not allowing them the chance to berserk while dealing with them. A misplaced shot from your teammates will often lead you to closer to death's door or 6 feet underground.
All Ninja Skills
Ninja Passives
| Level 2 |
Yoroi Base Effect: Maximum arrow is increased by 20. Stamina lost while blocking attacks is reduced by 50%. Kenko Base Effect: Maximum health increased by 20. Performing a perfect parry will restore 10 health over 5 seconds, Additional perfect parries refresh this duration. |
|---|---|
| Level 8 |
Kaishakunin Base Effect: Deal 10% increased weapon damage when hitting enemies in the head. Roaring Tiger Base Effect: Deal 10% increased weapon damage with heavy melee attacks. Deal 10% increased Cut weapon damage with ranged weapons while aiming down sights. Kuji-kiri Base Effect: Performing a perfect parry increases weapon damage by 10% for 5 seconds. Additional perfect parries refresh this duration. |
| Level 14 |
Skirmisher Base Effect: Maximum ammo capacity with all weapon is increased by 35%. Auto-pickup radius for shuriken, arrow, and kunai is increased by 100%. Demon Stance Base Effect: Take no damage from enemy and environmental ground damage effects. Take 10% reduced damage from all explosion and spray damage effects. |
| Level 20 |
Chi kai ri Base Effect: Apply 75% increased Stumble affliction with all weapons. ・Stumble interrupt enemies, causing them to stagger back in the opposite direction. Sakki-jutsu Base Effect: Performing a perfect parry Stumbles all enemies in a radius around you. This radius is increased by 0%. ・Stumble interrupt enemies, causing them to stagger back in the opposite direction. |
| Level 26 |
Ebb and Flow Base Effect: Ranged Cut weapon damage is increased by 15%. Next melee attack deals 100% increased damage and heals for 10 health.This effect has a 16 second cooldown Kyuketsuki Base Effect: Weapons deal 100% increased bleed affliction and deal 10% increased damage to Bleeding enemies. Damaging Bleeding enemy with your weapons heals you for 3 health over 3 seconds. Additional hits refreshes this duration. ・Bleed afflicts enemies with Cut damage over time. Unyielding Base Effect: Killing an enemy with a melee weapon restores 3 health and grants 15% increased melee weapon damage for 5 seconds. Additional kills refresh this duration. |
Ninja Throwables
| Level 4 |
Blunt Force Base Effect: Caltrop Canister now only explodes on impact. Hitting an enemy directly with the Caltrop Canister applies Shock affliction and 200 force damage before bursting and releasing caltrops as normal. ・Shock interrupts enemies, paralyzing them with electricity. Swift Current Base Effect: Caltrop explosions no longer deal self damage. Getting hit by caltrop explosions now increase movement speed by 10% for 5 seconds. Kekkai Jutsu Base Effect: Caltrop lifetime is increased to 10 seconds. Caltrops detonate early if an enemy gets near. |
|---|---|
| Level 10 |
Capacity Increase Base Effect: Throwable carrying capacity is increased by 1. |
| Level 16 |
Hard Rain Base Effect: Increase number of Caltrops by 2 but decrease their explosion radius by 33%. Thunderclap Base Effect: Caltrop explosion radius is increased by 30%. |
| Level 22 |
Capacity Increase Base Effect: Throwable carrying capacity is increased by 1. |
| Level 28 |
Devil's Circuit Base Effect: Caltrops deal 55% increased damage to enemies they are stuck to. Raijin Base Effect: Caltrops Shock enemies for 40% longer. ・Shock interrupts enemies, paralyzing them with electricity. Inazuma Base Effect: After exploding, Caltrops leave behind electrical fields with the same radius as their explosion. Fields last for 5 seconds and apply Shock affliction and 15 Electrical damage every 0.5 seconds to enemies within their radius. ・Shock interrupts enemies, paralyzing them with electricity. |
Ninja Gadgets
| Level 6 |
Eagle Strike Base Effect: First weapon attack after grappling deals 15% increased damage. Shogekiha Base Effect: Hebi-Ken's ending shockwave radius is increased by 50% Shinobi Shozoku Base Effect: Grappling an enemy repairs 5 armor integrity. |
|---|---|
| Level 12 |
Dead Calm Base Effect: While you have no Hebi-ken charges, deal 10% increased weapon damage. Warrior of the Wind Base Effect: Grappling an enemy grants 15% increased movement speed for 5 seconds. |
| Level 18 |
Strike Thrice Base Effect: Every third use of Hebi-Ken deals 25% increased pass through and finisher damage. Blood Hunt Base Effect: Killing with enemies with pass through damage heals you for 2 health. Red Shadow Base Effect: Take 15% reduced damage for 5 seconds after grappling an enemy. |
| Level 24 |
Iron Castle Base Effect: Performing a perfect parry grants 3 gadget activation energy. Lightning Incarnate Base Effect: Pass through damage radius is increased by 25%. Pass through damage type is changed to Electrical and damage is increased by 100% |
| Level 30 |
Violent Sorcerer Base Effect: Hebi-Ken's finisher damage is increased by 10%. Killing an enemy with the finisher grants stacks of VIOLENCE up to 20 max. VIOLENCE Finisher damage is increased by 4% per stack. Punishing Chain Base Effect: Taking damage that reduces you to below half health instantly refreshes all charges of the Hebi-ken. This has a 150 second cooldown between triggers. Leopard Fist Base Effect: Damaging an enemy with finisher increases their vulnerability to Ballistic, Cut, and Electrical damage by 10% for 10 seconds. |
Nakata Specialist Stats and Information
Ninja Stats Overview
| Ninja Stats | |
|---|---|
| Damage | 4 |
| Survivability | 5 |
| Support | 3 |
Nakata is a Ninja Specialist with an overall score of 4 Damage, 5 Survivability, and 3 Support. They will also start with 3,243 loaded into their Operation Budget at Level 1, which will gradually increase as their Perk is leveled up.
Starting Gear
| Primary | Sidearm |
|---|---|
|
Kiba
|
 Shuriken Shuriken
|
Character Information
| Nakata Basic Information | |
|---|---|
 |
|
| Perk Archetype | Starting Gadget |
| Ninja | Hebi-Ken |
Voice Actors
| English VA | TBD |
|---|---|
| French VA | TBD |
| German VA | TBD |
| Spanish VA | TBD |
Killing Floor 3 Related Guides
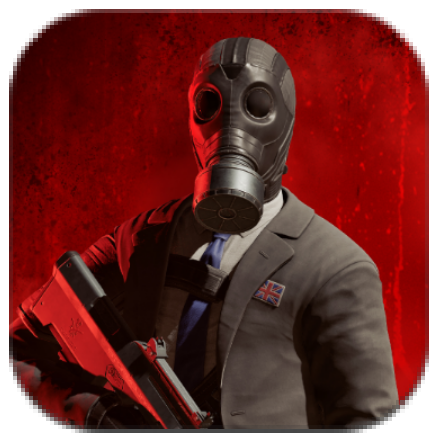
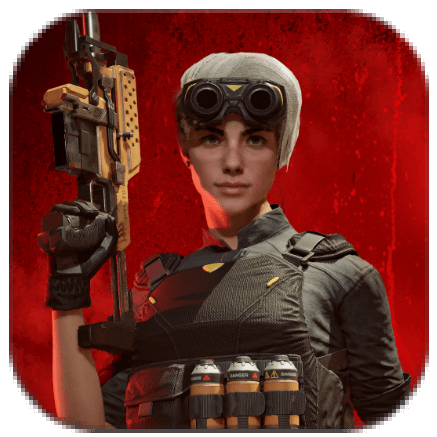
List of All Specialist Characters
All Specialist Characters
| All Nightfall Specialists | ||
|---|---|---|
 Foster FosterCommando |
 Devlin DevlinFirebug |
 Imran ImranEngineer |
 Luna LunaSharpshooter |
 Obi ObiMedic |
Nakata Ninja |
Other Character Guides
| Other Guides |
|---|
| Upcoming Specialists and Perks |
Comment
Author

Best Ninja (Nakata) Builds and Skills
Rankings
- We could not find the message board you were looking for.
Gaming News

![Death Stranding 2: On The Beach [PC] Review | A Port That Delivers](https://img.game8.co/4447392/15310a0c9aa1b6843bb713b2ea216930.jpeg/show)


Popular Games

Genshin Impact Walkthrough & Guides Wiki
Umamusume: Pretty Derby Walkthrough & Guides Wiki
Crimson Desert Walkthrough & Guides Wiki
Monster Hunter Stories 3: Twisted Reflection Walkthrough & Guides Wiki
Honkai: Star Rail Walkthrough & Guides Wiki
Pokemon Pokopia Walkthrough & Guides Wiki
The Seven Deadly Sins: Origin Walkthrough & Guides Wiki
Wuthering Waves Walkthrough & Guides Wiki
Zenless Zone Zero Walkthrough & Guides Wiki
Arknights: Endfield Walkthrough & Guides Wiki


Recommended Games
Fire Emblem Heroes (FEH) Walkthrough & Guides Wiki
Diablo 4: Vessel of Hatred Walkthrough & Guides Wiki
Cyberpunk 2077: Ultimate Edition Walkthrough & Guides Wiki
Yu-Gi-Oh! Master Duel Walkthrough & Guides Wiki
Super Smash Bros. Ultimate Walkthrough & Guides Wiki
Pokemon Brilliant Diamond and Shining Pearl (BDSP) Walkthrough & Guides Wiki
Elden Ring Shadow of the Erdtree Walkthrough & Guides Wiki
Monster Hunter World Walkthrough & Guides Wiki
The Legend of Zelda: Tears of the Kingdom Walkthrough & Guides Wiki
Persona 3 Reload Walkthrough & Guides Wiki


All rights reserved
Killing Floor© 2009-2025 Tripwire Interactive. Unreal® is a trademark or registered trademark of Epic Games, Inc. in the United States of America and elsewhere. Unreal® Engine, Copyright 1998-2025, Epic Games, Inc. All rights reserved.
The copyrights of videos of games used in our content and other intellectual property rights belong to the provider of the game.
The contents we provide on this site were created personally by members of the Game8 editorial department.
We refuse the right to reuse or repost content taken without our permission such as data or images to other sites.