Best Classes Tier List
★ Disclaimer: Our guides were written before the Rearmament update, so some information may be outdated. We appreciate your support!
★ News: Crossplay | Game Pass | Roadmap
★ Best Settings | Teams | Weapons
┗ Best Bonus Abilities | XP Farm | Difficulty
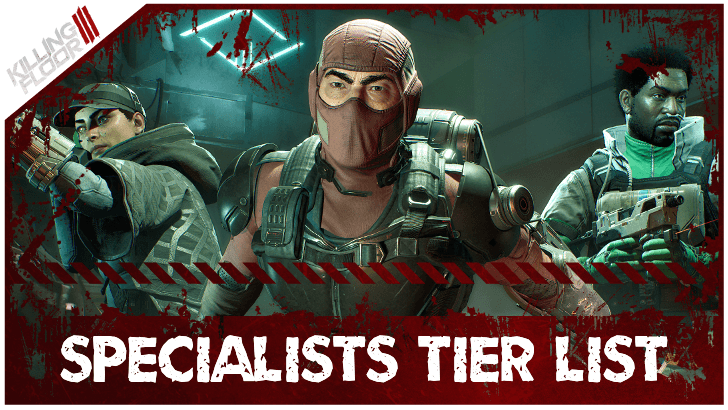
The current best classes are Firebug and Medic for our Killing Floor 3 (KF3) tier list. Check out our squad and solo tier lists, as well as the criteria and explanation for each in this guide!
| Check Out Our Best Pages! | |||||
|---|---|---|---|---|---|
| Best Builds | Best Weapons | Best Tools | |||
| Best Leveling | Best Classes | Best Team | |||
| Best Skills | Best Bonus Abilities | Best Ammo and Weapon Mods | |||
Best Classes in Killing Floor 3
Specialist Tier Lists
 S Tier
 A Tier
 B Tier
 C Tier
✘ Click on a Perk to see an explanation for their tier placement.
The best Solo Class is the Firebug due to the class' ability to have reliable damage and self-sustain individually, while the best Squad Class is the Medic because having one will generally be essential for clearing missions.
Class Tier List Criteria
| Tier | Explanation |
|---|---|
| S-Tier |
Solo: Classes that have full access to self-sustained survivability, horde clear, and damage for Bosses.
Squad: Classes that are integral for teamplay and have indespensable support through their utility. |
| A-Tier | Solo: Classes that have the means to promote survivability and respectable damage, but not as efficient as the S-Tier.
Squad: Classes that can be core pieces for teamplay and fully follow a role in finishing the mission. |
| B-Tier |
Solo: Classes that have limited access to either of the three core aspects mentioned above to fully support, so clearing solo can be hard but possible.
Squad: Classes that serve a specific team composition and have some utility to bring to the table. |
| C-Tier | Solo: Classes that struggle with self-sustain and have limited means for clearing hordes and clearing the boss.
Squad: Classes that offer little teamplay and have niche additions for utility to promote group play. |
What's the Best Class For You?
Best Class Ranking Explanations
Commando (Foster)
 Commando Commando |
Solo | Squad | |||||
|---|---|---|---|---|---|---|---|
| Pros | Cons | ||||||
| ・Great for beginners ・Accumulates ZED fast ・Jack of all trades |
・Lacks overall damage ・Mediocre utility ・Master of none |
||||||
Foster is the class using the Commando Perk, an extremely versatile class that has access to most features a class should have. The Commando adopts the "Jack of all trades, master of none" saying quite literally as most of the classes does everything the Commando can, but exceptionally better.
While lower in the tier list, the Commando has redeeming factors to it such as its ability to accelerate the ZED Time. However, this can be problematic with teamplay as it can mess up the timings for some Specialists!
Best Commando (Foster) Builds and Skills
Firebug (Devlin)
 Firebug Firebug |
Solo | Squad | |||||
|---|---|---|---|---|---|---|---|
| Pros | Cons | ||||||
| ・High Survivability ・Massive horde clear ・Bursts bosses |
・Requires some skill ・Can trigger Large ZEDs ・Low range |
||||||
Devlin, the Firebug, is an assault-type combatant that is undeniably the best when it comes to solo play due to all of her skills fully supporting her and her alone. The Firebug not only doles out massive single-target and AoE damage, she can also heal herself by standing on the flames she generates.
However, the Firebug has a caveat when it comes to her teamplay inside a Squad. Due to the flames she spreads across the field, this can unintentionally trigger the enrage of Scrakes and Fleshpounds, leading to a harder battle. However, if a skilled Firebug plays around this, her sustained damage and clear can become a great asset to any squad!
Best Firebug (Devlin) Builds and Skills
Medic (Obi)
 Medic Medic |
Solo | Squad | |||||
|---|---|---|---|---|---|---|---|
| Pros | Cons | ||||||
| ・Integral for Teamplay ・Massive heals and utility ・Capable for crowd control |
・Reliant on Teamplay ・Limited damage ・Self heal requires resources |
||||||
Obi, the assigned Medic of the team, is absolutely essential when it comes to Squads as this specialist serves as the foundation of the team. The Medic will keep the team alive, comfortable with space, and answer the lesser mobs with high efficiency.
Additionally, they can now heal themselves either by healing allies or using darts/healing grenades on ZEDs through their Symbiosis skill that unlocks by level 14!
However, the Medic has absolutely been gutted when it comes to its potential for Solo play when compared to its previous iterations. Not only is the damage lacking due to their primary weapon choices, but most of their perks are solely concerned about teamplay.
Best Medic (Obi) Builds and Skills
Engineer (Imran)
 Engineer Engineer |
Solo | Squad | |||||
|---|---|---|---|---|---|---|---|
| Pros | Cons | ||||||
| ・Solid defense ・High burst damage w/ Shotguns ・Best Multi-tool Support |
・Reliant on tool ・Needs investment to start rolling |
||||||
Imran, the Engineer, is a specialist who is viable for both solo and squad play due to his damage-dealing capabilities via shotguns and his gadget. Additionally, Engineer has great survivability since some of his skills can improve his armor integrity.
However, the Engineer's downside is that it takes some time and investment for the class to feel complete, as the core upgrades to his tool are locked behind a level system. However, if you do get there, this class can answer any problems the team or he faces!
Best Engineer (Imran) Builds and Skills
Ninja (Nakata)
 Ninja Ninja |
Solo | Squad | |||||
|---|---|---|---|---|---|---|---|
| Pros | Cons | ||||||
| ・High mobility ・Negates damage through parry ・Solid clear |
・Most skill-intensive class ・Highly affected by latency and FPS ・Requires team comms |
||||||
Ninja is a vanguard-type Specialist that excels both in melee and ranged combat, and has both defensive and offensive combat-styles to help you adapt in most situations. Furthermore, the Ninja's mobility is currently the best in the game. With the addition of the Grappling Hook, the Ninja's clear and speed is unparalleled!
The only caveat with using the Ninja is his high skill-ceiling and the off-chance that latency and FPS can highly affect performance. These factors can be pretty daunting to most players, especially for beginners. On the right hands, however, the Ninja is an absolute killing-machine as their parries can single-handedly solo content.
Best Ninja (Nakata) Builds and Skills
Sharpshooter (Luna)
 Sharpshooter Sharpshooter |
Solo | Squad | |||||
|---|---|---|---|---|---|---|---|
| Pros | Cons | ||||||
| ・Most consistent damage ・Answers most Large ZEDs ・Best in terms of range |
・Skill-intensive with aim ・Lacks horde clear ・Relies on proper positioning |
||||||
Luna is the resident Sharpshooter, who shines the best at single-target, burst ranged attacks that can take down large units with ease. Being a Sharpshooter, Luna also has access to a larger repertoire of throwables to help the team escape sticky situations.
However, just like Nakata, Luna's skill ceiling is on the higher side, as her overall gameplay banks on dominating the playing field from the rear, while taking little to no damage to increase her personal damage. Moreover, the Sharpshooter has little to no means to clear or control hordes apart from her Cryo Grenade, which lessens her viability for solo play.
Best Sharpshooter (Luna) Builds and Skills
Killing Floor 3 Related Guides

Guides by Category
 Characters
 Skills
 Weapons
 Weapon Mods
 Bosses
 Enemies
 Crafting Materials
 Damage Types
 Cosmetics
 Maps
Maps Tools
Tools Assignments
 Supply Pass
 Bugs and Issues
 Tips and Tricks
 Items
Items Affliction
 Bonus Abilities
 Latest News
All Recommended Guides
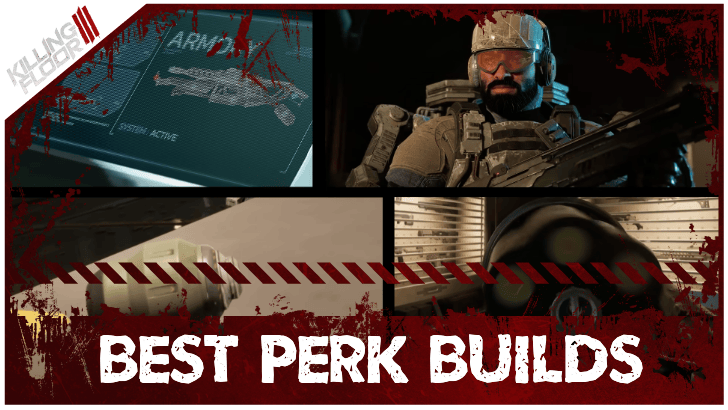 Best Perk Builds
 Best Weapons
 Best Tools
 Best XP Farm Guide
 Best Team Comp
 Best Skills
 Best Bonus Abilities
 Best Ammo and Weapon Mods
 How Long to Beat
 How to Get Creds Pack
 Multiplayer Guide
 Trophy Guide
 Weekly Mutation
 Difficulty Differences
 Easter Eggs and Secrets
 Weapon Stats Explained
 How to Enable Crossplay
 All Game Modes
 Hell on Earth Guide
 List of All Destructibles
 List of All Voice Actors
 How to Join the Playtest
 Lore and Story Explained
 Roadmap and Schedule
 Season 2 Release Date
 Best Settings
 Patch Notes and Updates
 Server Status
 Maintenance Countdown
 Co-Op Message Board
Comment
The medic's self sustain isn't tied to healing teammates. At level 14 you get the same bonus by using healing darts on enemies too. So using the LF-85 And unloading on enemies while simutaneously unloading the darts you are practically immortal besides oneshots. Your health instantly fills when using the darts.
Author
Best Classes Tier List
Rankings
- We could not find the message board you were looking for.
Gaming News

![Death Stranding 2: On The Beach [PC] Review | A Port That Delivers](https://img.game8.co/4447392/15310a0c9aa1b6843bb713b2ea216930.jpeg/show)


Popular Games

Genshin Impact Walkthrough & Guides Wiki
Umamusume: Pretty Derby Walkthrough & Guides Wiki
Crimson Desert Walkthrough & Guides Wiki
Monster Hunter Stories 3: Twisted Reflection Walkthrough & Guides Wiki
Honkai: Star Rail Walkthrough & Guides Wiki
Pokemon Pokopia Walkthrough & Guides Wiki
The Seven Deadly Sins: Origin Walkthrough & Guides Wiki
Wuthering Waves Walkthrough & Guides Wiki
Zenless Zone Zero Walkthrough & Guides Wiki
Arknights: Endfield Walkthrough & Guides Wiki


Recommended Games
Fire Emblem Heroes (FEH) Walkthrough & Guides Wiki
Diablo 4: Vessel of Hatred Walkthrough & Guides Wiki
Cyberpunk 2077: Ultimate Edition Walkthrough & Guides Wiki
Yu-Gi-Oh! Master Duel Walkthrough & Guides Wiki
Super Smash Bros. Ultimate Walkthrough & Guides Wiki
Pokemon Brilliant Diamond and Shining Pearl (BDSP) Walkthrough & Guides Wiki
Elden Ring Shadow of the Erdtree Walkthrough & Guides Wiki
Monster Hunter World Walkthrough & Guides Wiki
The Legend of Zelda: Tears of the Kingdom Walkthrough & Guides Wiki
Persona 3 Reload Walkthrough & Guides Wiki


All rights reserved
Killing Floor© 2009-2025 Tripwire Interactive. Unreal® is a trademark or registered trademark of Epic Games, Inc. in the United States of America and elsewhere. Unreal® Engine, Copyright 1998-2025, Epic Games, Inc. All rights reserved.
The copyrights of videos of games used in our content and other intellectual property rights belong to the provider of the game.
The contents we provide on this site were created personally by members of the Game8 editorial department.
We refuse the right to reuse or repost content taken without our permission such as data or images to other sites.
Hello dear user! Thank you for the clarification on how the Medic's Symbiosis skill and self-healing works. The write-up has been updated to reflect your findings!