Best Medic (Obi) Builds and Skills
★ Disclaimer: Our guides were written before the Rearmament update, so some information may be outdated. We appreciate your support!
★ News: Crossplay | Game Pass | Roadmap
★ Best Settings | Teams | Weapons
┗ Best Bonus Abilities | XP Farm | Difficulty
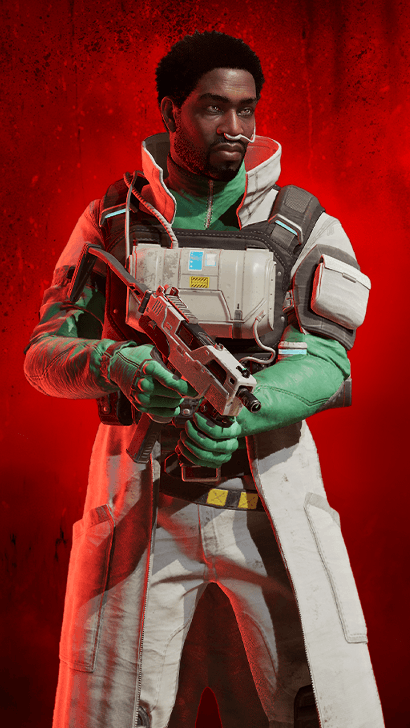
The Medic Perk, played by Obi, is the Specialist in Killing Floor 3 (KF3) responsible for keeping other Specialists intact while impairing ZEDs with Biotic weapons. See the Medic's best builds, weapons, bonus ability priority, tools, skills, how to play them, and additional character info here!
List of Contents
Best Medic (Obi) Builds
Best Medic Loadout (Heal and DPS Hybrid)
 Medic Medic
|
Primary | ||||||||||
|---|---|---|---|---|---|---|---|---|---|---|---|
| Sidearm | |||||||||||
| Tool | |||||||||||
| Passive | Throwable | Gadget | |||||||||
|
Healing Hands Level Requirement: 2
Base Effect: Ally revivals are 50% faster. Reviving allies heals them for additional 10 health. Lvl 2 |
Gas Expansion Level Requirement: 4
Base Effect: Biotic Grenade gas cloud radius is increased by 15%. Lvl 4 |
Health Benefits Level Requirement: 6
Base Effect: When Sanctum expires, it heals all allies within its radius for 25 health. Lvl 6 |
|||||||||
|
Stronger Perscription Level Requirement: 8
Base Effect: Weapon healing is increased by 15%. Lvl 8 |
Capacity Increase Level Requirement: 10
Base Effect: Throwable carrying capacity is increased by 1. Lvl 10 |
Burn Unit Level Requirement: 12
Base Effect: Sanctum's energy field deals 100% increased damage over time to small enemies. Lvl 12 |
|||||||||
|
Symbiosis Level Requirement: 14
Base Effect: Healing allies with your weapon or hitting enemies with your weapon's healing effects heals you for 20% of your healing amount. Lvl 14 |
Anesthetist Level Requirement: 16
Base Effect: Biotic Grenade gas cloud applies 30 Enfeeble affliction every 0.5 seconds. ・Enfeeble weakens enemies, causing them to move and attack more slowly. Lvl 16 |
Steroid Injection Level Requirement: 18
Base Effect: Allies within Sanctum's radius receive a buff increasing their weapon damage by 10% for 5 seconds. Lvl 18 |
|||||||||
|
Social Distancing Level Requirement: 20
Base Effect: Shooting down allies with your weapon's healing effects heals their bleed out health for 140% of your weapon's standard healing. Restoring their bleed-out health to full will revive them. Lvl 20 |
Capacity Increase Level Requirement: 10
Base Effect: Throwable carrying capacity is increased by 1. Lvl 10 |
Storm Shelter Level Requirement: 24
Base Effect: Sanctum duration is increased by 5 seconds. Lvl 24 |
|||||||||
|
Chemical Reaction Level Requirement: 26
Base Effect: Killing enemies with your weapon has a 15% chance to trigger a chemical reaction gas cloud that lingers for 5 seconds. The cloud heals allies over time and applies Panic and Toxic affliction to enemies. ・Panic interrupts enemies, causing them to writhe in place helplessly. ・Toxic afflicts enemies with Biological damage over time. Lvl 26 |
Lingering Cloud Level Requirement: 28
Base Effect: Biotic Grenade gas cloud durations is increased by 6 seconds. Lvl 28 |
Resuscitator Level Requirement: 30
Base Effect: Sanctum field expansion blast revives down allies and healls all allies within the blast radius for 20 health. Lvl 30 |
|||||||||
| Tier List Evaluations | |||||||||||
| Solo | |||||||||||
| Squad | |||||||||||
✘ Click on an equipment category to jump to their selection explanation.
The K&W MP6 will be the primary weapon you should prioritize upgrading, specifically before boss fight rounds. Alongside its fairly accurate and high rate-of-fire shots, the K&W MP6 can also equip the Healing Grenade launcher attachment to help with clearing hordes while healing a group of allies early on.
As per your boss fight weapon, the LF-85 will be the best option due to its strength in prolonged fights; the main reason being that it can regain darts as long as you are dealing damage to enemies.
For your sidearm, the Medic's default secondary KH-380 will serve you well, as having an extra source of healing during emergencies will come a long way. Furthermore, depending on the team composition, you can either go for recharging syringe darts or an upgraded burst-fire mode!
The Multi-Tool tool should be the best option to support your team, as the Medic's early game healing should suffice. However, if your team sustains early casualties, consider transitioning to the Syringe Bag on the second round!
Alternative Medic Loadout (Full DPS)
| Medic
|
Primary | ||||||||||
|---|---|---|---|---|---|---|---|---|---|---|---|
| Sidearm | |||||||||||
| Tool | |||||||||||
| Passive | Throwable | Gadget | |||||||||
|
Doctor's Bag Level Requirement: 2
Base Effect: Syringe Bags now grant 2 Syringes each. Using Syringes repairs 10 armor integrity. Lvl 2 |
Cull the Weak Level Requirement: 4
Base Effect: Biotic Grenade gas cloud deals 60% increased damage to small enemies. Lvl 4 |
Muscle Stimulant Level Requirement: 6
Base Effect: Allies within Sanctum's radius receive a buff increasing their movement speed by 10% for 5 seconds. Lvl 6 |
|||||||||
|
Pill Mill Level Requirement: 8
Base Effect: Maximum ammo capacity is increased by 35%. Lvl 8 |
Capacity Increase Level Requirement: 10
Base Effect: Throwable carrying capacity is increased by 1. Lvl 10 |
Burn Unit Level Requirement: 12
Base Effect: Sanctum's energy field deals 100% increased damage over time to small enemies. Lvl 12 |
|||||||||
|
Symbiosis Level Requirement: 14
Base Effect: Healing allies with your weapon or hitting enemies with your weapon's healing effects heals you for 20% of your healing amount. Lvl 14 |
Anesthetist Level Requirement: 16
Base Effect: Biotic Grenade gas cloud applies 30 Enfeeble affliction every 0.5 seconds. ・Enfeeble weakens enemies, causing them to move and attack more slowly. Lvl 16 |
Steroid Injection Level Requirement: 18
Base Effect: Allies within Sanctum's radius receive a buff increasing their weapon damage by 10% for 5 seconds. Lvl 18 |
|||||||||
|
Strength in Numbers Level Requirement: 20
Base Effect: While atleast one other player or trader pod is nearby, you take 10% reduced damage. Lvl 20 |
Capacity Increase Level Requirement: 10
Base Effect: Throwable carrying capacity is increased by 1. Lvl 10 |
Storm Shelter Level Requirement: 24
Base Effect: Sanctum duration is increased by 5 seconds. Lvl 24 |
|||||||||
|
Chemical Reaction Level Requirement: 26
Base Effect: Killing enemies with your weapon has a 15% chance to trigger a chemical reaction gas cloud that lingers for 5 seconds. The cloud heals allies over time and applies Panic and Toxic affliction to enemies. ・Panic interrupts enemies, causing them to writhe in place helplessly. ・Toxic afflicts enemies with Biological damage over time. Lvl 26 |
Active Infection Level Requirement: 28
Base Effect: Enemies hit by Biotic Grenade gas cloud are INFECTED for 4 seconds. INFECTED Enemies deal Biological damage to themselves and other enemies every 0.5 seconds. Lvl 28 |
Terminal Diagnosis Level Requirement: 30
Base Effect: When Sanctum expires, it releases final explosion that deals 800 Biological damage Lvl 30 |
|||||||||
| Tier List Evaluations | |||||||||||
| Solo | |||||||||||
| Squad | |||||||||||
Alternatively, if you wanted to play the Medic solo, the K&W MP6 is still the best option, albeit it should be kitted purely around damage and self-sustain. The MP6 has decent single-target damage while allowing you to self-heal with Symbiosis, which is especially potent with Healing Grenades as it damages and heals at the same time!
The Disciple sidearm then allows you to hit those pesky Husks and Bloats from a decent range, essentially covering the blaring weakness of a Solo Medic. As for your tool, the Syringe Back
As for the best skills, most have been changed simply by removing all of the extra utility that supports your team and instead focusing on patching up the Medic's lack of damage. Some key skill inclusions are Pill Mill, Strength in Numbers, Active Infection, and Terminal Diagnosis
Medic Best Weapons
| Jump to a Weapon Slot! | |
|---|---|
| Primary | Secondary |
Best Medic Primary Weapons
Primary Weapon Slot 1
| Primary | |
|---|---|
| Recommended Mods |
Hollow Point Rounds ・-5% Accuracy
・+5% Damage ・-1 Penetration Power ・+40 Stun Affliction Suppressed Barrel ・+3% Accuracy
・-4% Recoil ・+10% Zed Time Gain Multiplier Healing Grenade Launcher ・6 Seconds - AOE Duration
・500 AOE Scale ・28 Damage ・2 Healing ・-10% Handling Reflex Sight ・+2% Accuracy
・+35% Handling ・-4% Recoil ・+1% Zoom Critical Damage Lightweight Mag ・-5 Mag Size
・+11% Reload Speed Fast Action Receiver ・+15% Fire Rate
|
The K&W MP6 is the Medic's best and most versatile weapon, having the ability to mow down fodder ZEDs while having access to solid secondary attachment mods depending on the situation.
In terms of mod priority, the Healing Grenade Launcher attachment should be a no-brainer as it offers AoE healing and ZED debilitation. Furthermore, get the Hollow Point Rounds mod as the main role of the Medic is to clear Flesh-type enemies to create space for your Squad whilst healing.
Additionally, the weakness of the K&W MP6 is its high recoil and low damage-per-shot, so the other mods recommended here should serve as a means to improve on these weaknesses while enhancing the fundamental strengths of the gun.
Primary Weapon Slot 2
| Primary | |
|---|---|
| Recommended Mods |
Biomorphic Boosted Battery ・-100% Ammo Efficiency (Secondary)
・+1 Healing ・+2 Heal-Over-Time ・+3 Heal-Over-Time Duration Penetrating Barrel ・-60% Fire Rate (Primary)
・+4 Penetration Power Enhanced Foregrip ・+2% Accuracy
・-5% Recoil Reflex Sight ・+2% Accuracy
・+35% Handling ・-4% Recoil ・+1% Zoom Critical Damage Secondary Battery Booster ・-50 Mag Size (Primary)
・+10 Mag Size (Secondary) ・+11% Reload Speed Overclocked Receiver ・+11% Fire Rate
・+7% Damage |
The LF-85 is the best choice for when you reach the boss round, often swapping out the K&W MP6 for it. Its main strength is that it can siphon the damage it deals to ZEDs to turn it into darts, meaning it will shine in long and drawn-out fights as the amount of healing you can dole out is only limited by your ammo and DPS.
For mod priority, the Biomorphic Boosted Battery will be a solid investment as it will improve your healing by giving it an overtime effect at the cost of ammo efficiency. With this, you have damage uptime while retaining the consistent healing the LF-85 provides.
Additionally, if you will be facing the Chimera or are lacking in the crowd-control department, you can opt to replace the Penetrating Barrel with the Cold Fusion Converter. This will allow you to take the role in clearing the fodder while healing your Squad.
Alternative Primary Weapons
| 1 |
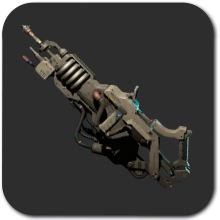 Biomorphic Projector Biomorphic Projector
|
Primary DMG: 70 Primary Fire Mode: Biological DMG Base Cost: 2,300 |
|---|---|---|
| 2 |
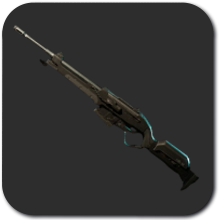 Fieldmaster HR-10 Fieldmaster HR-10
|
Primary DMG: 230 Primary Fire Mode: Ballistic DMG Base Cost: 1,400 |
Alternatively, the Biomorphic Project can be an effective choice if you plan on pocket-healing
An effective off-perk option for mid-game Medics whose squad is lacking in terms of answering long-range ZEDs is the Fieldmaster HR-10. If your team does not have a Sharpshooter, this gun should be a budget yet effective option.
Best Medic Sidearm Weapon
| Sidearm | |
|---|---|
| Recommended Mods |
Instant Heal Darts ・+8 Damage
・+8 Healing Muzzle Brake ・+5% Accuracy
Laser Sight (Pistol) ・+4% Accuracy
Reflex Sight (Pistol) ・+2% Accuracy
・+35% Handling ・-4% Recoil ・+1% Zoom Critical Damage Lightweight Mag ・-5 Mag Size
・+11% Reload Speed Dart Recharger Kit ・+20% Fire Rate (Secondary)
|
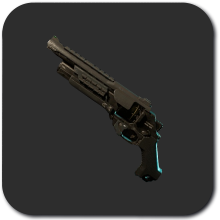
The KH-380, Obi’s default sidearm, is the best choice thanks to the sole fact that it has a separate ammo pool for Darts, making it ideal for emergencies where you need to expend a lot of healing. With the Instant Heal Darts and Dart Recharger Kit modifiers, this pistol can come in clutch!
Alternative Sidearm Weapons
| 1 |
 Disciple Disciple
|
Primary DMG: 160 Primary Fire Mode: Ballistic DMG Secondary DMG: 250 Secondary Fire Mode: Ballistic DMG & Cold DMG Base Cost: 900 |
|---|
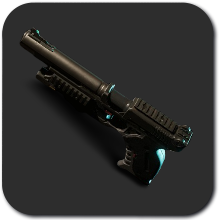
If your squad is lacking a Sharpshooter and you are on a very tight budget, the Disciple would be the better option for its precision and headshot damage. While it is not as fast to handle or shoot as the KH-380, its accuracy among the sidearms is unparalleled.
Medic Best Tools
Best Medic Tools
| Tool | Effect |
|---|---|
 Multi-Tool Multi-Tool
|
Multi-function tool with 3 charges. • Activates and allows remote enabling of Traps. • Enables Ziplines • Unlocks Armor Lockers and certain Doors • Repairs damaged Explosive Locks |
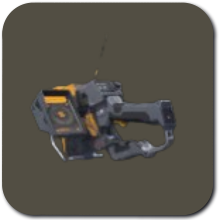
The Multi-Tool is the best option for the Medic as it can open up advantageous situations and mobility with Ziplines for your squad.
Alternative Tool
| Tool | Effect | |
|---|---|---|
| 1 |
 Syringe Bag Syringe Bag
|
First-aid kit that provides the team with additional syringes. • 2 deployable bags • Each bag grants 1 syringe |
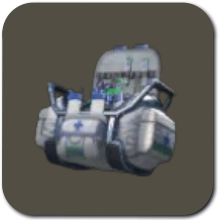
The Syringe Bag is considered an alternative tool as the healing on the earlier parts of the game can be kept to a minimum, especially with the Medic. It would be best to swap into this during Boss fights, or if you plan to take the Doctor's Bag skill when going solo.
Medic Bonus Ability Priority
| Ability and Priority | Explanation |
|---|---|
| Each shot has 1.5% chance to deal 150% Damage. ★★★★★ |
The Medic makes full use of the Spray-n'-Pray playstyle due to their weapons mainly being SMGs with high magazine capacity and fire rate. Stacking up on this ability will surely increase your clear strength and consistency with activating your Chemical Reaction. |
| Teammates within 10m have a 5% chance to gain 5 Armor after killing an enemy. ★★★☆☆ |
As for the second recommendation, having the ability to provide Armor for your team will allow you to save up on your resources during the early game, giving you the chance to buy the higher-tier guns much earlier into the match. |
| Add 10 Panic Power. ★☆☆☆☆ |
Lastly, the additional Panic power will increase the likelihood of your Chemical Reaction to stay in place for your teammates to finish off. While not essential, it is a noticeable change in the higher levels! |
For the Medic, it would be best to prioritize the following Bonus Abilities to make up for its miscomings in terms of damage and strengthening their utility by also adding the chance to provide Armor for your squadmates.
List of Bonus Abilities for Mods
Best Medic Skills
| Jump to a Skill Type! | ||
|---|---|---|
| Passive | Throwable | Gadget |
Best Medic Passive Skills
| Level | Skill |
|---|---|
| Level 2 |
Base Effect: Ally revivals are 50% faster. ┗ Reviving allies heals them for additional 10 health. |
| Level 8 |
Base Effect: Weapon healing is increased by 15%. |
| Level 14 |
Base Effect: Healing allies with your weapon or hitting enemies with your weapon's healing effects heals you for 20% of your healing amount. |
| Level 20 |
Base Effect: Shooting down allies with your weapon's healing effects heals their bleed out health for 140% of your weapon's standard healing. ┗ Restoring their bleed-out health to full will revive them. |
| Level 26 |
Base Effect: Killing enemies with your weapon has a 15% chance to trigger a chemical reaction gas cloud that lingers for 5 seconds. ┗ The cloud heals allies over time and applies Panic and Toxic affliction to enemies. ┗Panic interrupts enemies, causing them to writhe in place helplessly. ・Toxic afflicts enemies with Biological damage over time. |
The recommended Passive Skills for the Medic are designed to enhance the Specialist's healing ability. With this skill set up, the amount you heal will improve with Stronger Perscription and have better resurrects through the Social Distancing and Healing Hands combo.
Furthermore, skills such as Symbiosis and Chemical Reaction improve the sustainability of the Medic. Symbiosis allows you to heal yourself by a percentage of what you heal your teammates with, while Chemical Reaction can control a group of ZEDs if you need to reposition.
Passive Skills for Solo Build
| Solo Medic Passive Skills | ||
|---|---|---|
|
Doctor's Bag Level Requirement: 2
Base Effect: Syringe Bags now grant 2 Syringes each. Using Syringes repairs 10 armor integrity. Lvl 2 |
Pill Mill Level Requirement: 8
Base Effect: Maximum ammo capacity is increased by 35%. Lvl 8 |
Strength in Numbers Level Requirement: 20
Base Effect: While atleast one other player or trader pod is nearby, you take 10% reduced damage. Lvl 20 |
When going for a solo Medic, replace all of the passives that enhance healing for your allies and instead focus on self-sustain, ammo efficiency, and additional damage. Furthermore, with the way the Symbiosis and Healing Grenade work, it essentially doubles the self-heal as it counts as healing.
Best Medic Throwable Skills
| Skill | |
|---|---|
| Level 4 |
Base Effect: Biotic Grenade gas cloud radius is increased by 15%. |
| Level 10 |
Base Effect: Throwable carrying capacity is increased by 1. |
| Level 16 |
Base Effect: Biotic Grenade gas cloud applies 30 Enfeeble affliction every 0.5 seconds. ┗Enfeeble weakens enemies, causing them to move and attack more slowly. |
| Level 22 |
Base Effect: Throwable carrying capacity is increased by 1. |
| Level 28 |
Base Effect: Biotic Grenade gas cloud durations is increased by 6 seconds. |
The recommended Throwable Skills for the Medic is designed to turn the Biotic Grenade into either a means to set up ZEDs or as an emergency precaution for when you need to reposition.
The combo between Gas Expansion, Anesthetist, and Lingering Cloud will reliably enfeeble a massive group of ZEDs, essentially giving you and your Squad more leeway. The build purposely opted to leave out the healing skills as the Passive Skill Tree already provides sufficient healing.
Throwable Skills for Solo Build
| Solo Medic Passive Skills | |
|---|---|
|
Cull the Weak Level Requirement: 4
Base Effect: Biotic Grenade gas cloud deals 60% increased damage to small enemies. Lvl 4 |
Active Infection Level Requirement: 28
Base Effect: Enemies hit by Biotic Grenade gas cloud are INFECTED for 4 seconds. INFECTED Enemies deal Biological damage to themselves and other enemies every 0.5 seconds. Lvl 28 |
The Biotic Grenade is often just used for group healing; however, this skill set turns this humble healing apparatus into a throwable that can clear from the initial explosion while spreading the damage to other nearby ZEDs through its Infection mechanic.
Best Medic Gadget Skills
| Skill | |
|---|---|
| Level 6 |
Base Effect: When Sanctum expires, it heals all allies within its radius for 25 health. |
| Level 12 |
Base Effect: Sanctum's energy field deals 100% increased damage over time to small enemies. |
| Level 18 |
Base Effect: Allies within Sanctum's radius receive a buff increasing their weapon damage by 10% for 5 seconds. |
| Level 24 |
Base Effect: Sanctum duration is increased by 5 seconds. |
| Level 30 |
Base Effect: Sanctum field expansion blast revives down allies and healls all allies within the blast radius for 20 health. |
The recommended Gadget Skills for the Medic make the Sanctum into a haven for your squad but a death zone for ZEDs. Each skill has a different role and purpose depending on the situation:
- Health Benefits - Heals all of the allies inside the Sanctum.
- Burn Unit - Keeps out and kills the fodder ZEDs to secure space.
- Steroid Injection - Incentivizes the whole team to stay in the Sanctum by increasing weapon damage.
- Storm Shelter - Increases the duration of the Sanctum
- Resuscitator - Acts as an instant group revive during dire situations.
Gadget Skills for Solo Build
| Solo Medic Passive Skills | ||
|---|---|---|
|
Muscle Stimulant Level Requirement: 6
Base Effect: Allies within Sanctum's radius receive a buff increasing their movement speed by 10% for 5 seconds. Lvl 6 |
Terminal Diagnosis Level Requirement: 30
Base Effect: When Sanctum expires, it releases final explosion that deals 800 Biological damage Lvl 30 |
|
In terms of changes, replace Health Benefits and Resuscitator with the following to answer the Medic's lack of mobility with Muscle Stimulant while strengthening your clear capabilities with Terminal Diagnosis.
Medic Skill Priority
Medic Skill Upgrade Priority
| Skill | Priority | Explanation |
|---|---|---|
 Social Distancing
 Social Distancing Base Effect:
Shooting down allies with your weapon's healing effects heals their bleed out health for 140% of your weapon's standard healing. Restoring their bleed-out health to full will revive them. |
★★★★★ | Having the ability to revive teammates from afar is a great boon to any Medic role for cooperative shooters, as it allows you to avoid risking your position for a revive. Upgrading this skill makes the resurrect even faster! |
|
Symbiosis Symbiosis Base Effect:
Healing allies with your weapon or hitting enemies with your weapon's healing effects heals you for 20% of your healing amount. |
★★★★☆ | With Symbiosis, it allows you to sustain yourself while avoiding the use of your syringes or throwables. Each upgrade strengthens the heals you receive upon healing an ally. |
|
Stronger Perscription Stronger Perscription Base Effect:
Weapon healing is increased by 15%. |
★★★☆☆ | Healing is the Medic's core skill, so increasing its efficacy with Stronger Perscription should be a no-brainer! |
|
Chemical Reaction Chemical Reaction Base Effect:
Killing enemies with your weapon has a 15% chance to trigger a chemical reaction gas cloud that lingers for 5 seconds. The cloud heals allies over time and applies Panic and Toxic affliction to enemies. ・Panic interrupts enemies, causing them to writhe in place helplessly. ・Toxic afflicts enemies with Biological damage over time. |
★★☆☆☆ | While Chemical Reaction is strong, the additional percentage can be lackluster compared to the top three Medic skills. |
|
Anesthetist Anesthetist Base Effect:
Biotic Grenade gas cloud applies 30 Enfeeble affliction every 0.5 seconds. ・Enfeeble weakens enemies, causing them to move and attack more slowly. |
★☆☆☆☆ | The Anesthetist base effect is already strong, so upgrading the slow to be much faster can be redundant. |
Prioritize spending your points on leveling up Social Distancing first. Being the Medic, Obi is assigned to look after and minimize the squad's mistakes. With Social Distancing, Symbiosis, and Stronger Prescription strengthened, the margin for error is lessened for the squad as the Medic will be a reliable safety net!
Lastly, upgrading the Chemical Reaction and Anasthetist skills allow the Medic to set up situations more consistently through their crowd control, but are not that impactful with each upgrade. With this, prioritizing the three main skills mentioned above will strengthen the foundation of the Medic.
How to Play Medic
| Medic Playstyle Tips |
|---|
|
|
Be Resourceful With Heals
The Medic, while consistent with healing, has a limited pool of resources for recovery, unlike in other cooperative shooters. With that in mind, always be mindful of your Darts, Grenades, and Sanctum charges as this can make or break a mission.
A squadmate's HP should be in the 70-80% range to make the most value out of your heals. With that in mind, classes like the Ninja and the Engineer should be the main priorities in terms of healing, as they are constantly in the faces of ZEDs.
Focus on Clearing Lesser ZEDs
While you are led to believe that the Medic's only role will be healing, that is not the case in Killing Floor 3. The Medic for this iteration specializes in clearing out the Lesser ZEDs as they have easy access to the Biological Damage type, meaning that Clots and Gorefasts are easily dealt with.
Upon doing this, you give yourself and your squadmates more space and ease of mind to take out the high-priority ZEDs like Fleshpounds and Scrakes.
Use Sanctum to Divert Range Attacks
The new Sanctum tool for the Medic has diverse applications depending on the situation. The best way to use them is to heal up the whole group, but you can also use the Sanctum if your squad is having trouble with Husks and Sirens.
Not only does it completely nullify the projectiles of the Husks, but it also heals up the possible burst damage that a Siren's scream would deal.
Gain the High Ground
The best position for a Medic will always be the high ground, as it gives you a better vantage point and assessment of who is low on health, as well as what group of ZEDs would be best to throw your Biotic Grenades at.
All Medic Skills
Medic Passives
| Level 2 |
Doctor's Bag Base Effect: Syringe Bags now grant 2 Syringes each. Using Syringes repairs 10 armor integrity. Healing Hands Base Effect: Ally revivals are 50% faster. Reviving allies heals them for additional 10 health. |
|---|---|
| Level 8 |
Biohazard Base Effect: Deal 10% increased weapon damage to enemy Flesh and Mire hitzones. Pill Mill Base Effect: Maximum ammo capacity is increased by 35%. Stronger Perscription Base Effect: Weapon healing is increased by 15%. |
| Level 14 |
Symbiosis Base Effect: Healing allies with your weapon or hitting enemies with your weapon's healing effects heals you for 20% of your healing amount. Painkiller Base Effect: Healing allies with your weapon grants them 20% damage reduction for 4 seconds. |
| Level 20 |
Strength in Numbers Base Effect: While atleast one other player or trader pod is nearby, you take 10% reduced damage. Social Distancing Base Effect: Shooting down allies with your weapon's healing effects heals their bleed out health for 140% of your weapon's standard healing. Restoring their bleed-out health to full will revive them. |
| Level 26 |
Chemical Reaction Base Effect: Killing enemies with your weapon has a 15% chance to trigger a chemical reaction gas cloud that lingers for 5 seconds. The cloud heals allies over time and applies Panic and Toxic affliction to enemies. ・Panic interrupts enemies, causing them to writhe in place helplessly. ・Toxic afflicts enemies with Biological damage over time. Heal and Deal Base Effect: Healing an ally with your weapon increases weapon damage by 15% for 10 seconds. Damaging an enemy with your weapon grants you a stack of HEAL up to 10 that last for 10 seconds. Heal consume all stacks when you heal an ally with a weapon to increase the heal by 4% for each stack consumed. Damage Plan Base Effect: Allies healed by your weapons deal 20% increased weapon damage for 5 seconds. |
Medic Throwables
| Level 4 |
Cull the Weak Base Effect: Biotic Grenade gas cloud deals 60% increased damage to small enemies. Gas Expansion Base Effect: Biotic Grenade gas cloud radius is increased by 15%. Waste Collector Base Effect: Biotic Grenade leaves behind waste that lasts for 5 seconds. Interacting with the Waste will collect it to restore 1 Syringe. |
|---|---|
| Level 10 |
Capacity Increase Base Effect: Throwable carrying capacity is increased by 1. |
| Level 16 |
Anesthetist Base Effect: Biotic Grenade gas cloud applies 30 Enfeeble affliction every 0.5 seconds. ・Enfeeble weakens enemies, causing them to move and attack more slowly. Pulmonologist Base Effect: Biotic Grenade gas cloud healing is increased by 55%. |
| Level 22 |
Capacity Increase Base Effect: Throwable carrying capacity is increased by 1. |
| Level 28 |
Active Infection Base Effect: Enemies hit by Biotic Grenade gas cloud are INFECTED for 4 seconds. INFECTED Enemies deal Biological damage to themselves and other enemies every 0.5 seconds. Lingering Cloud Base Effect: Biotic Grenade gas cloud durations is increased by 6 seconds. Urgent Care Base Effect: Downed allies inside Biotic Grenade gas cloud have their bleed out paused and are healed for 3 bleed out health each second. Restoring their bleed-out health to full will revive them. |
Medic Gadgets
| Level 6 |
Power Surge Base Effect: Sanctum field expansion blast damage is increased by 20%. Muscle Stimulant Base Effect: Allies within Sanctum's radius receive a buff increasing their movement speed by 10% for 5 seconds. Health Benefits Base Effect: When Sanctum expires, it heals all allies within its radius for 25 health. |
|---|---|
| Level 12 |
Burn Unit Base Effect: Sanctum's energy field deals 100% increased damage over time to small enemies. Outreach Center Base Effect: Sanctum field expansion blast and energy field radius are increased by 15%. |
| Level 18 |
Steroid Injection Base Effect: Allies within Sanctum's radius receive a buff increasing their weapon damage by 10% for 5 seconds. Suppressor Base Effect: Enemies damaged by Sanctum field deal 20% reduced damage for 4 seconds. Field Hospital Base Effect: Sanctum field's healing is increased by 55% |
| Level 24 |
Energy Cycle Base Effect: Gadget energy recharge rate for other allies within sanctum field is increased by 100%. Storm Shelter Base Effect: Sanctum duration is increased by 5 seconds. |
| Level 30 |
Terminal Diagnosis Base Effect: When Sanctum expires, it releases final explosion that deals 800 Biological damage Double Dose Base Effect: After activating Sanctum, it can be activated a second time before the first one expires to place a second Sanctum. Ally effects from Sanctums do not stack.You many no longer pick up Sanctum to refund gadget energy. Sanctum's damage is also reduced by 30%. Resuscitator Base Effect: Sanctum field expansion blast revives down allies and healls all allies within the blast radius for 20 health. |
Medic Specialist Stats and Information
Medic Stats Overview
| Medic Stats | |
|---|---|
| Damage | 3 |
| Survivability | 4 |
| Support | 5 |
Obi is a Medic Specialist with an overall score of 3 Damage, 4 Survivability, and 5 Support. They will also start with 2,750 loaded into their Operation Budget at Level 1, which will gradually increase as their Perk is leveled up.
Starting Gear
| Primary | Sidearm |
|---|---|
 VS-11 VS-11
|
 KH-380 KH-380
|
Character Information
| Obi Basic Information | |
|---|---|
 |
|
| Perk Archetype | Starting Gadget |
| Medic | Sanctum |
Voice Actors
| English VA | TBD |
|---|---|
| French VA | TBD |
| German VA | TBD |
| Spanish VA | TBD |
Killing Floor 3 Related Guides
List of All Specialist Characters
All Specialist Characters
| All Nightfall Specialists | ||
|---|---|---|
 Foster FosterCommando |
 Devlin DevlinFirebug |
 Imran ImranEngineer |
 Luna LunaSharpshooter |
Obi Medic |
 Nakata NakataNinja |
Other Character Guides
| Other Guides |
|---|
| Upcoming Specialists and Perks |
Comment
Hello dear user, thank you for using our build guide as a reference! Based on our findings, it should be possible. However, if that is not the case, the next best thing would be to get the "Teammates within 10 meters gain 3% damage buff for three seconds after killing an enemy" bonus ability. Thank you and have a nice day
Author

Best Medic (Obi) Builds and Skills
Rankings
- We could not find the message board you were looking for.
Gaming News


Popular Games

Genshin Impact Walkthrough & Guides Wiki
Umamusume: Pretty Derby Walkthrough & Guides Wiki
Crimson Desert Walkthrough & Guides Wiki
Monster Hunter Stories 3: Twisted Reflection Walkthrough & Guides Wiki
Honkai: Star Rail Walkthrough & Guides Wiki
Pokemon Pokopia Walkthrough & Guides Wiki
The Seven Deadly Sins: Origin Walkthrough & Guides Wiki
Wuthering Waves Walkthrough & Guides Wiki
Zenless Zone Zero Walkthrough & Guides Wiki
Arknights: Endfield Walkthrough & Guides Wiki


Recommended Games
Fire Emblem Heroes (FEH) Walkthrough & Guides Wiki
Diablo 4: Vessel of Hatred Walkthrough & Guides Wiki
Cyberpunk 2077: Ultimate Edition Walkthrough & Guides Wiki
Yu-Gi-Oh! Master Duel Walkthrough & Guides Wiki
Super Smash Bros. Ultimate Walkthrough & Guides Wiki
Pokemon Brilliant Diamond and Shining Pearl (BDSP) Walkthrough & Guides Wiki
Elden Ring Shadow of the Erdtree Walkthrough & Guides Wiki
Monster Hunter World Walkthrough & Guides Wiki
The Legend of Zelda: Tears of the Kingdom Walkthrough & Guides Wiki
Persona 3 Reload Walkthrough & Guides Wiki


All rights reserved
Killing Floor© 2009-2025 Tripwire Interactive. Unreal® is a trademark or registered trademark of Epic Games, Inc. in the United States of America and elsewhere. Unreal® Engine, Copyright 1998-2025, Epic Games, Inc. All rights reserved.
The copyrights of videos of games used in our content and other intellectual property rights belong to the provider of the game.
The contents we provide on this site were created personally by members of the Game8 editorial department.
We refuse the right to reuse or repost content taken without our permission such as data or images to other sites.
Only possible to get on sight. Each ability is tied to only three mod types. Here is a spreadsheet: https://docs.google.com/spreadsheets/d/1yl5DmNzcy4ym73iQc3eUuiyE3Fiz-ySIz__Z4dBxgBg