This survey will take about 1 minute.
Your answers will help us to improve our website.
FF12
Paramina Rift ~ Stilshrine of Miriam - Walkthrough

This is the story walkthrough page for the locations Paramina Rift ~ Stilshrine of Miriam in the game Final Fantasy XII The Zodiac Age (FF12, FFXII, FFXII). Read on for more information about objectives, items, and bosses within this section.
| Previous Chapter | Next Chapter |
|---|---|
| Ozmone Plain ~ Henne Mines |
Mosphoran Highwaste ~ Sochen Cave |
List of Contents
Paramina Rift Story Walkthrough
| 1 | Enter Paramina Rift. Save your game at the provided savepoint, and move on. |
|---|---|
| 2 | Take the northern path to move to the next area. Before moving on, a cutscene will occur. |
| 3 | Continue moving north all the way to the exit that leads to Mt. Bur-Omisace. |
Mt. Bur-Omisace I Story Walkthrough

| 1 | If you haven't already, you can stock up on potions and other items at the vendors near the entrance. There is also a save crystal available as well as a moogle Cartographer. |
|---|---|
| 2 | Walk to the north towards the temple. Move through the Gate of the Holy Circle, where a cutscene happens. |
| 3 | Larsa will be leaving at the cutscene, so if you wanted to finish any hunts or level up some more, you should do so before walking towards the Gate. |
Stilshrine of Miriam Story Walkthrough

| 1 | After the cutscene, head south for the Stilshrine of Miriam. Keep to a southern route towards the area. |
|---|---|
| 2 | As always, make it a point to save whenever there is a savepoint available. The temple courtyard has one, as well as some treasure chests. |
| 3 | Equip the Dawn Shard to activate the teleportation device at the entrance. If you don't, a trio of Zombies will rise to harrass your party. |
| 4 | You will be transported from the Pedestal into another room. Make your way through the room, past the enemies, to another Pedestal of Dawn. Touch it with the Dawn Shard equipped to activate. |
| 5 | Find your way to the room of the Sword of Judgement. Touch it to open a door inside which is a Waystone. Touch it to go back to the entrance, then head for the Ancient Door on the right. |
| 6 | Past the next door, there are three areas that have a Stone Brave statue. Head for the first one, then turn it counter-clockwise to face the large statue you went past earlier. |
| 7 | Go past the statue into the next room. Follow the path going east until you reach the next statue. Turn it counter-clockwise two times to make it face the large statue. |
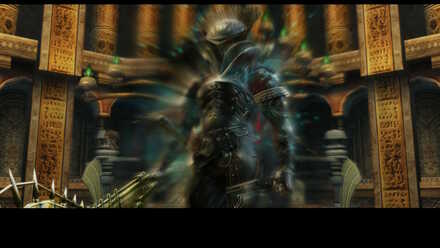
| 8 | Again, go past this statue and be ready for a boss fight against Vinuskar. After beating him, go into the next room, where another statue is. |
| 9 | Turn this one counter-clockwise, and you'll see a message informing you that your path is open. Be sure to open the map urn also located in this room before you go on your way. |
| 10 | The colossal statue will move the Sword of Judgment out of the way, which will open a new pathway. Again, save at the crystal before proceeding, as you will face another boss. |
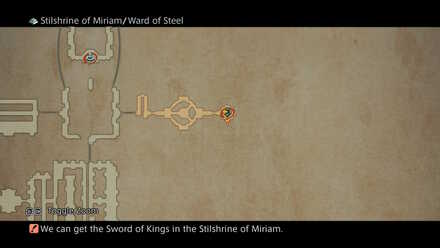
| 11 | When you defeat the ice elemental, Mateus, it will also become another available Esper to summon. Enter the next room for the Sword of Kings. |
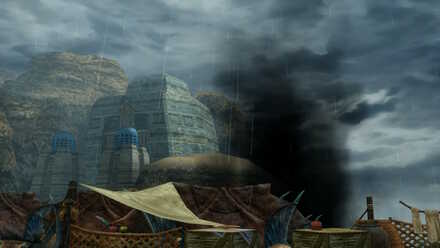
| 12 | Make your way out of the ruins. A cutscene will show smoke rising up from the Bur-Omisace temple. |
The Dawn Shard
Equip the Dawn Shard to continue through the Stilshrine. The Dawn Shard will be needed to unlock one of the Stilshrine's locked doors and the entrance to the wider temple.
Crystal Bugs
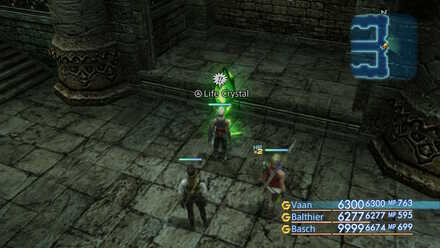
Inside Miriam Shrine, there will be stationary green crystals. Interact with it and it will reveal itself to be a Crystal bug. Crystal Bugs are tougher than normal enemies but defeating them will let a real save crystal take their place, making the battle extremely worth it.
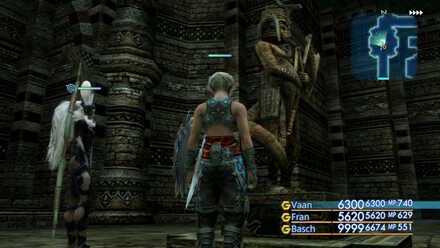
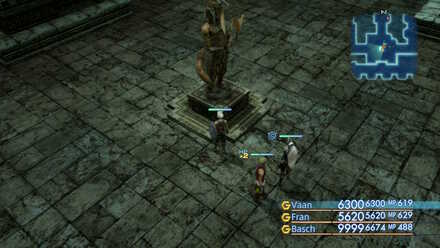
The Three Statues
 |
 |
 |
There are three statues here in the Stilshrine of Miriam that you need to turn in order to proceed through to Mateus and the Sword of Kings. These are easy to spot as they are given a special place in their respective areas.
This is the first statue you encounter after opening the Ancient Door. Turn this statue counterclockwise.
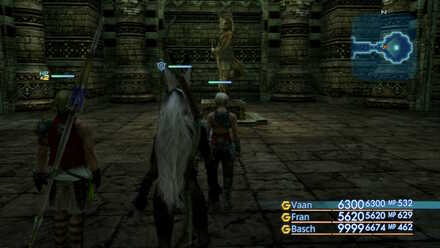
Go past the first statue after turning it counter-clockwise to head to this statue. This time, you have to turn this one counterclockwise two times.
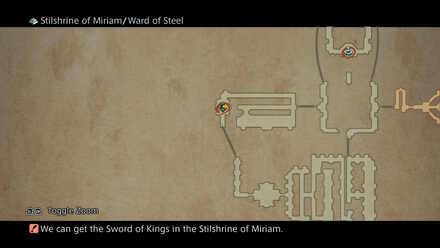
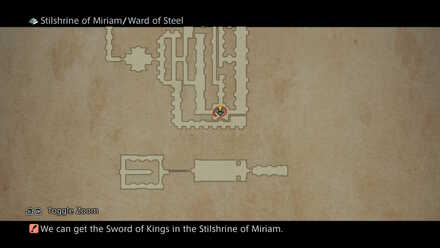
You won't be able to activate this tatue until after you beat Vinuskar. Turn it in a counterclockwise fashion and the Sword of Judgment will be lifted, opening the way to Mateus and the Sword of Kings.
The Two Bosses

Be warned that in the Stilshrine of Miriam, there are two bosses. One of them, Vinuskar, is closer to a mini-boss, while the other, the Esper Mateus, is a hard boss to defeat without the proper training. For a complete list of the two bosses' strategies, visit the links below.
Mt. Bur-Omisace II - Ruin Story Walkthrough
| 1 | Return to Mt. Bur-Omisace. It will be easier to return since there is a billow of smoke marking the area. |
|---|---|
| 2 | Be sure to save at the savepoint crystal near the entrance. This time, you'll be facing another boss, Judge Bergan. |
| 3 | Watch the cutscene that happens before you challenge Bergan, then fight and defeat him. |
| 4 | Once you defeat Bergan, watch the cutscene that follows. You'll be visiting Nalbina once again. |
The Judge Bergan
The Judge Bergan is your final adversary for this part of the story. Bergan will have some Judges with him, but he will go down easy with focused fire. Learn how to deal with Judge Bergan by visiting the link below.
Final Fantasy XII Related Links
| Previous Chapter | Next Chapter |
|---|---|
| Ozmone Plain ~ Henne Mines |
Mosphoran Highwaste ~ Sochen Cave |

Author

Paramina Rift ~ Stilshrine of Miriam - Walkthrough
Please participate in our site
improvement survey
03/2026
improvement survey
03/2026
Would you assist in
improving Game8's site?
improving Game8's site?

×
We are listening to our users' valuable opinions and discussing how to act on them.
The information collected through this survey will be used for the purpose of improving our services. In addition, the information will only be disclosed a part of a statistic in a format that will not allow identification of personal information.
Begin Survey
Not Now
×
Please rate each item regarding Game8.co's Advertisements.
Amount of Ads
Very Dissatisfied
Somewhat Dissatisfied
Fine
Somewhat Satisfied
Highly Satisfied
Placement of Ads
Timing of Ad Display
Ad Loading Speed
Safeness of Ads
Content of Ads
×
Please rate each item regarding Game8.co's Quality of Articles.
Amount of information
Very Dissatisfied
Somewhat Dissatisfied
Fine
Somewhat Satisfied
Highly Satisfied
Frequency of updates
Speed of new information
Accuracy of articles
Understandibility of articles
Readability of sentences
×
Please rate each item regarding Game8.co's Usability of the Site.
Ease of finding information
Very Dissatisfied
Somewhat Dissatisfied
Fine
Somewhat Satisfied
Highly Satisfied
Loading Speed
Use of Color
Font Size
Visibility of Images
Easy to Understand Layout
×
Please rate each item regarding Game8.co's Message Boards, Comments.
Ease of Writing
Very Dissatisfied
Somewhat Dissatisfied
Fine
Somewhat Satisfied
Highly Satisfied
Readability
Ease in Finding Information
Comment Quality
Comment Quantity
Admin Response
×
Please rate each item regarding Game8.co's Site's new design.
Please rate our site's new design
Very Dissatisfied
Somewhat Dissatisfied
Fine
Somewhat Satisfied
Highly Satisfied
Do you think that the website's design change makes the site easier to use?
Has the new design made it easier for you to find information on the site?
Has the new design improved the overall visual appeal of the site?
How would you rate your overall satisfaction with the new design of the site?
×
How likely are you to recommend Game8 to someone you know?
Very Unlikely
0
1
2
3
4
5
6
7
8
9
10
Very Likely
If you have other opinions regarding potential improvement to the website, please share them with us. We would appreciate your honest opinion.
Note: This is a free response section, so you can proceed without entering anything.
Note: Please be sure not to enter any kind of personal information into your response.
Note: Please be sure not to enter any kind of personal information into your response.
×
Thank You
×
Thank you for participating in our survey! Your answers will help us to improve the quality of our website and services.
We hope you continue to make use of Game8.
We hope you continue to make use of Game8.
Close
Rankings
- We could not find the message board you were looking for.
Gaming News


![Marathon Review [First Impressions] | Playing The Long Game](https://img.game8.co/4435736/b9b1ec1e9219416dfc2599f85295d6ef.png/thumb)


Popular Games

Genshin Impact Walkthrough & Guides Wiki
Honkai: Star Rail Walkthrough & Guides Wiki
Umamusume: Pretty Derby Walkthrough & Guides Wiki
Pokemon Pokopia Walkthrough & Guides Wiki
Resident Evil Requiem (RE9) Walkthrough & Guides Wiki
Monster Hunter Wilds Walkthrough & Guides Wiki
Wuthering Waves Walkthrough & Guides Wiki
Arknights: Endfield Walkthrough & Guides Wiki
Pokemon FireRed and LeafGreen (FRLG) Walkthrough & Guides Wiki
Pokemon TCG Pocket (PTCGP) Strategies & Guides Wiki


Recommended Games
Fire Emblem Heroes (FEH) Walkthrough & Guides Wiki
Diablo 4: Vessel of Hatred Walkthrough & Guides Wiki
Yu-Gi-Oh! Master Duel Walkthrough & Guides Wiki
Super Smash Bros. Ultimate Walkthrough & Guides Wiki
Pokemon Brilliant Diamond and Shining Pearl (BDSP) Walkthrough & Guides Wiki
Elden Ring Shadow of the Erdtree Walkthrough & Guides Wiki
Monster Hunter World Walkthrough & Guides Wiki
The Legend of Zelda: Tears of the Kingdom Walkthrough & Guides Wiki
Persona 3 Reload Walkthrough & Guides Wiki
Cyberpunk 2077: Ultimate Edition Walkthrough & Guides Wiki


All rights reserved
2006, 2017 SQUARE ENIX CO., LTD. All Rights Reserved.
The copyrights of videos of games used in our content and other intellectual property rights belong to the provider of the game.
The contents we provide on this site were created personally by members of the Game8 editorial department.
We refuse the right to reuse or repost content taken without our permission such as data or images to other sites.