This survey will take about 1 minute.
Your answers will help us to improve our website.
FF12
Ridorana Cataract ~ Pharos 2nd - Walkthrough

This is the story walkthrough page for the locations Ridorana Cataract ~ Pharos 2nd in the game Final Fantasy XII The Zodiac Age (FF12, FFXII, FFXII Zodiac Age). Read on for more information about objectives, items, and bosses within this section.
| Previous Chapter | Next Chapter |
|---|---|
| Giruvegan | Pharos 3rd ~ Sky Fortress Bahamut |
List of Contents
Ridorana Cataract Story Walkthrough

| Tip | Reddas will be joining your party at Balfonheim. Complete all the side-tasks you wish to do. |
|---|---|
| 1 | Head to the Aerodrome and speak to the receptionist handling the Private Airships. |
| 1 | Use the Strahl and head to The Ridorana Cataract. |
Party with Reddas
At this point of the story, Reddas joins your party as a guest. He is a strong berserker type. With him in your party, it is a good idea to complete any side-quests or hunts that remain unfinished.
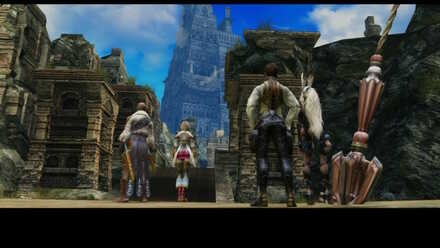
The Pharos at Ridorana Story Walkthrough

| 1 | There will be a savepoint available at the front area. Make sure to save, as you'll come face to face with this area's boss, Hydro. |
|---|---|
| 2 | Defeat Hydro and watch a cutscene. Enter Pharos right after. You'll come face-to-face with an inactive waypoint. Find a way to activate it. |
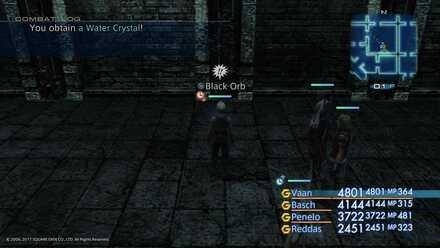
| 3 | There are clues all around the first floor of the ruins, but you basically have to collect a required number of orbs to activate three altars. |
| 4 | Once you've collected enough orbs and the altars are activated, the Seal of Night will be opened. Head through to proceed. |
| 5 | You'll be at the Dunes of Profaning Wind, where the first boss of the ascents, Paendemonium, will challenge you. |
| 6 | Defeat Paendemonium to find your way back to the door of the Threshold of Night. The waypoint will also be activated; touch it to proceed. |
| 7 | Move through the next floor. The key to proceeding through this area is to take out enemies called 'Brainpans' while avoiding similar ones named 'Deidars.' |
| 8 | Find your way to the Ancient Door in 47F. Save at the provided savepoint before you face the boss for Marsh of the Profaning Wind, Slyt. |
| 9 | Defeat Slyt and then proceed to the Reach of Diamond Law. When asked for an offering to open the door to the next area, choose to make an offering of the map function. |
| 10 | With the way open, make your way to the top floor. Move through the southwest corridor to find your way through. |
| 11 | At the Station of Suffering, find your way to the northernmost branch for the door going to the next area. |
| 12 | You'll find yourself at the Station of Ascension. Your exit for this area will be at the northernmost part of the map. |
| 13 | There is a save area here, meaning you're about to face the boss for Reach of the Damned, Fenrir. |
| 14 | Defeat Fenrir to proceed to the door which is connected with your earlier sacrifice. |
| 15 | Touch the available altar to restore your map and to use the lift. Climb up to the next area, which is the 3rd Floor of the Pharos. |
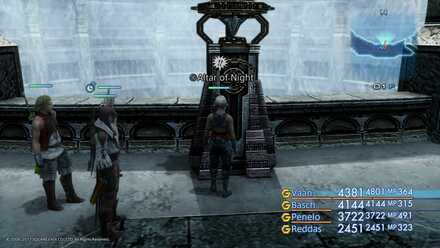
Orbs and Altars
 Enlarge Enlarge |
 Enlarge Enlarge |
There are three altars in the first floor of Pharos that must be activated to proceed. These altars can only be activated by collecting the Black Orbs dropped by enemies in the same area.
As to where these Altars of Night are, they are as follows:
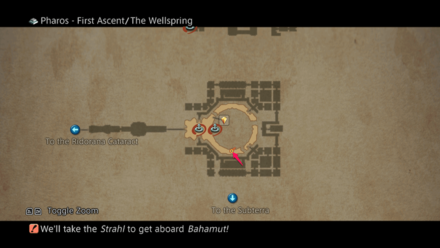
 Enlarge
One of the Altars is found where the arrow is pointed, to the north of this map.
 Enlarge
Another is found to the east in this map.
 Enlarge
The last one is to the south, directly below the northern altar.
The Fool's Facade
 Enlarge
In the Pharos at Ridorana, there are walls that will appear to be there, but really aren't. You can go through these walls and gain access to whatever treasures or other monsters are waiting within these depths. You might even get lucky and these may serve as protected pathways toward your destination.
The Undead Dragon, Hydro
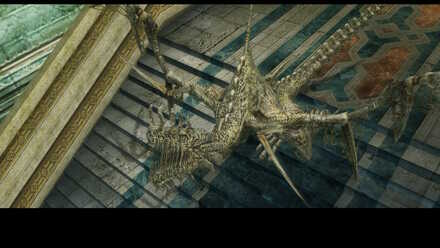
Barring your way to get into the Pharos is the undead dragon, Hydro. Obviously, holy-infused weapons will have a bigger chance at dealing significant damage on him than any other weapons. For a detailed walkthrough on how to deal with him, as well as with the other bosses, follow the link below.
The Three Bosses
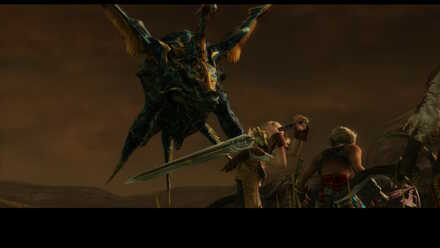
There are three mini-bosses to fight against at the Pharos before facing the ultimate boss of the area, another Esper. If you're not ready, make sure to level-up as you make your way through the different floors.

Pandaemonium is the first of these bosses. He resembles a titantoise that looks like a mountain of trouble. For information on how to deal with him, refer to the link below.
Next up is Slyt. He resembles a giant Yensa that's looking to rain terror on your entire party, if you've neglected preparing for this battle. Take a look at this link for more details on how to beat him.

Last, but definitely not the least, is Fenrir. He resembles an anthromorphic White tiger with a penchant for making your party endangered and not the other way around. Follow the link below to see strategies on beating him.
Final Fantasy XII Related Links
| Previous Chapter | Next Chapter |
|---|---|
| Giruvegan | Pharos 3rd ~ Sky Fortress Bahamut |

Author

Ridorana Cataract ~ Pharos 2nd - Walkthrough
Please participate in our site
improvement survey
03/2026
improvement survey
03/2026
Would you assist in
improving Game8's site?
improving Game8's site?

×
We are listening to our users' valuable opinions and discussing how to act on them.
The information collected through this survey will be used for the purpose of improving our services. In addition, the information will only be disclosed a part of a statistic in a format that will not allow identification of personal information.
Begin Survey
Not Now
×
Please rate each item regarding Game8.co's Advertisements.
Amount of Ads
Very Dissatisfied
Somewhat Dissatisfied
Fine
Somewhat Satisfied
Highly Satisfied
Placement of Ads
Timing of Ad Display
Ad Loading Speed
Safeness of Ads
Content of Ads
×
Please rate each item regarding Game8.co's Quality of Articles.
Amount of information
Very Dissatisfied
Somewhat Dissatisfied
Fine
Somewhat Satisfied
Highly Satisfied
Frequency of updates
Speed of new information
Accuracy of articles
Understandibility of articles
Readability of sentences
×
Please rate each item regarding Game8.co's Usability of the Site.
Ease of finding information
Very Dissatisfied
Somewhat Dissatisfied
Fine
Somewhat Satisfied
Highly Satisfied
Loading Speed
Use of Color
Font Size
Visibility of Images
Easy to Understand Layout
×
Please rate each item regarding Game8.co's Message Boards, Comments.
Ease of Writing
Very Dissatisfied
Somewhat Dissatisfied
Fine
Somewhat Satisfied
Highly Satisfied
Readability
Ease in Finding Information
Comment Quality
Comment Quantity
Admin Response
×
Please rate each item regarding Game8.co's Site's new design.
Please rate our site's new design
Very Dissatisfied
Somewhat Dissatisfied
Fine
Somewhat Satisfied
Highly Satisfied
Do you think that the website's design change makes the site easier to use?
Has the new design made it easier for you to find information on the site?
Has the new design improved the overall visual appeal of the site?
How would you rate your overall satisfaction with the new design of the site?
×
How likely are you to recommend Game8 to someone you know?
Very Unlikely
0
1
2
3
4
5
6
7
8
9
10
Very Likely
If you have other opinions regarding potential improvement to the website, please share them with us. We would appreciate your honest opinion.
Note: This is a free response section, so you can proceed without entering anything.
Note: Please be sure not to enter any kind of personal information into your response.
Note: Please be sure not to enter any kind of personal information into your response.
×
Thank You
×
Thank you for participating in our survey! Your answers will help us to improve the quality of our website and services.
We hope you continue to make use of Game8.
We hope you continue to make use of Game8.
Close
Rankings
- We could not find the message board you were looking for.
Gaming News

![Marathon Review [First Impressions] | Playing The Long Game](https://img.game8.co/4435736/b9b1ec1e9219416dfc2599f85295d6ef.png/thumb)


Popular Games

Genshin Impact Walkthrough & Guides Wiki
Honkai: Star Rail Walkthrough & Guides Wiki
Umamusume: Pretty Derby Walkthrough & Guides Wiki
Pokemon Pokopia Walkthrough & Guides Wiki
Resident Evil Requiem (RE9) Walkthrough & Guides Wiki
Monster Hunter Wilds Walkthrough & Guides Wiki
Wuthering Waves Walkthrough & Guides Wiki
Arknights: Endfield Walkthrough & Guides Wiki
Pokemon FireRed and LeafGreen (FRLG) Walkthrough & Guides Wiki
Pokemon TCG Pocket (PTCGP) Strategies & Guides Wiki


Recommended Games
Fire Emblem Heroes (FEH) Walkthrough & Guides Wiki
Diablo 4: Vessel of Hatred Walkthrough & Guides Wiki
Yu-Gi-Oh! Master Duel Walkthrough & Guides Wiki
Super Smash Bros. Ultimate Walkthrough & Guides Wiki
Pokemon Brilliant Diamond and Shining Pearl (BDSP) Walkthrough & Guides Wiki
Elden Ring Shadow of the Erdtree Walkthrough & Guides Wiki
Monster Hunter World Walkthrough & Guides Wiki
The Legend of Zelda: Tears of the Kingdom Walkthrough & Guides Wiki
Persona 3 Reload Walkthrough & Guides Wiki
Cyberpunk 2077: Ultimate Edition Walkthrough & Guides Wiki


All rights reserved
2006, 2017 SQUARE ENIX CO., LTD. All Rights Reserved.
The copyrights of videos of games used in our content and other intellectual property rights belong to the provider of the game.
The contents we provide on this site were created personally by members of the Game8 editorial department.
We refuse the right to reuse or repost content taken without our permission such as data or images to other sites.