This survey will take about 1 minute.
Your answers will help us to improve our website.
Bravely Default Flying Fairy HD Remaster
Chapter 2 Walkthrough and Chests
This is a walkthrough for Chapter 2 of Bravely Default Flying Fairy HD Remaster. Read on for a complete walkthrough of Chapter 2 and the chests that you can find in this chapter.
List of Contents
Chapter 2 Walkthrough
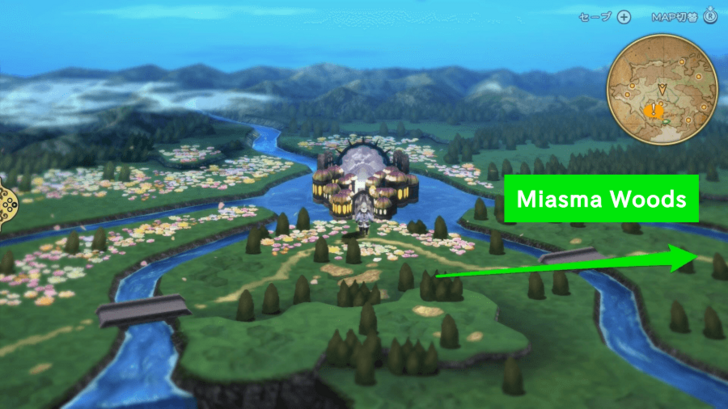
Miasma Woods
| 1 | Prepare for Miasma Woods |
|---|---|
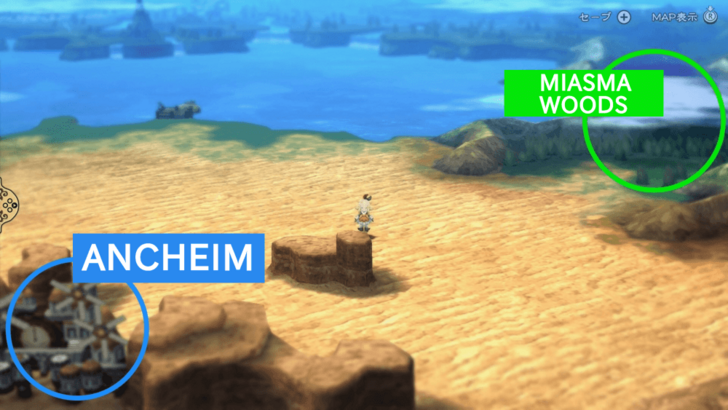 Finish watching the cutscenes at the beginning until it lets you control your character. You will be starting at the entrance of Miasma Woods. Buy anything you need in the Faithful Fox shop by the entrance before continuing inside the forest. Miasma Woods have poisonous water puddles so either thread with caution or level up your Freelancer job up to level 4 to get the Dungeon Master skill that protects you from damage or status ailments from traps. ▶︎ Miasma Woods Map (Recommended Level: 20) |
|
| 2 | Loot Chests as you go |
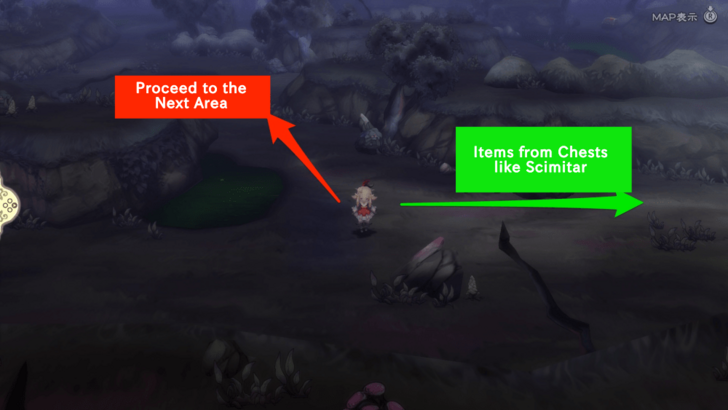 Loot the chests in the area as you try to find the exit through the forest. You can get 2000 pg and a Scimitar in the second area. |
|
| 3 | Exit the Forest |
| In the third area, loot one more chest while avoiding the poison swamp. Exit through the field from the upper left and recover HP and MP from the adventurer as it is still a long way to Mount Fragmentum. |
Florem
| 1 | Get to Florem |
|---|---|
 On the world map, go to the north then to the west where you will see a bridge that you need to cross. Once crossed, move forward again for another bridge that will get you to Florem. Once inside Florem, it's best to purchase new spells like Raise, a resurrection spell, and Esuna, a spell that cures all status effects. |
|
| 2 | Play Minigames (Recommended) |
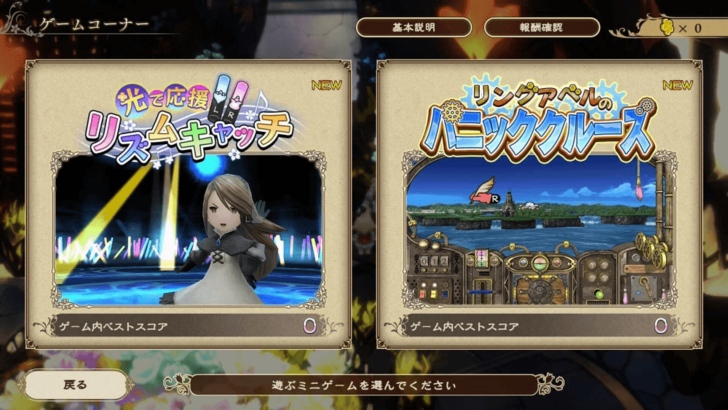 You can play minigames in Florem as well and they will reward you with better weapons like Silver Sword, Silver Axe, and more. You can try them out if you have time as those weapons will surely help on the next battles. ▶︎ List of Minigames |
|
| 3 | Head to the North Plaza |
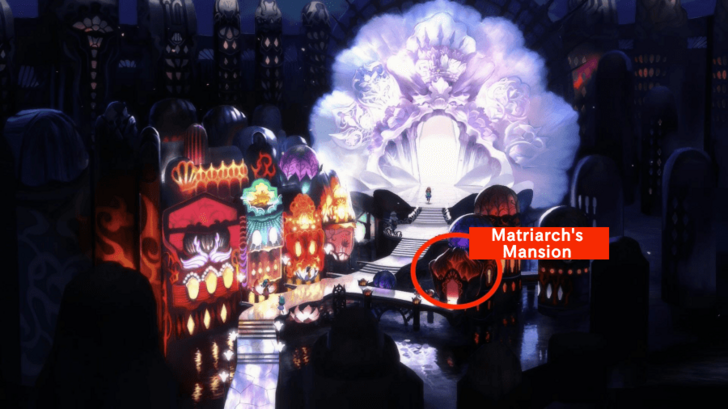 Head to the north plaza and enter the Matriach's mansion to trigger the event and progress the story. You will then need to go to the Temple of Water, south of Florem. |
Temple of Water
| 1 | Go to the Temple of Water |
|---|---|
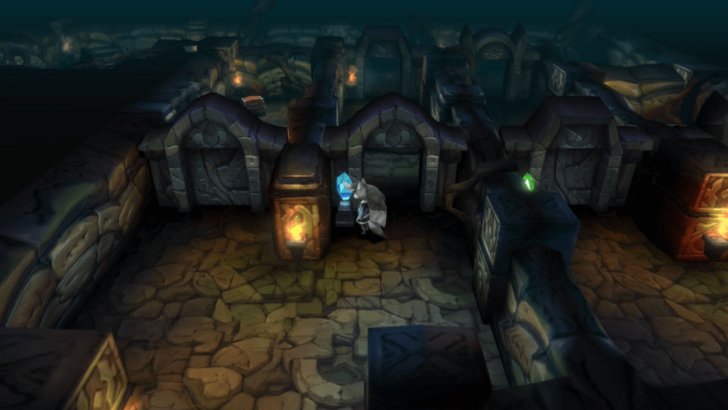
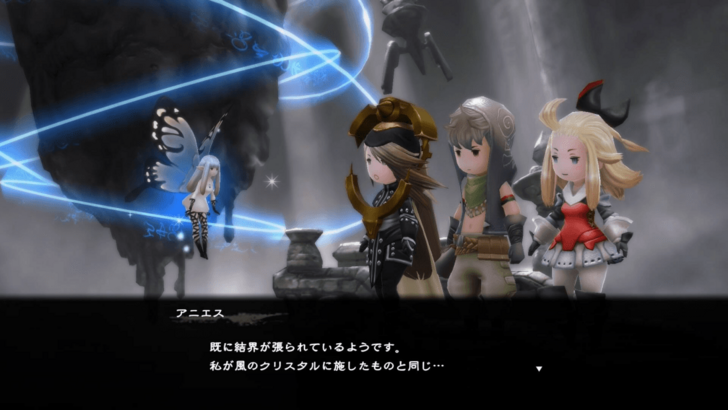 Travel south of Florem and head inside the Temple of Water. Inside the temple, there will be no random encounters so you can freely loot the chests inside without battling. It's recommended to get the Ice Charm on the northeast as you will need it later on. Go forward and turn right then go down on the open space and inspect the altar for a scene. ▶︎ Temple of Water Map |
|
| 2 | Examine the Temple |
| Inspect the other things inside then return to Florem once that's done. |
Florem 2
| 1 | Return to the Matriarch |
|---|---|
| Talk to the Matriarch after investigating the temple. Finish the conversation and then head back to town. | |
| 2 | Talk to the Girl with the Giant Hairpin |
 After your conversation with the Matriarch, talk to the girl with the giant hairpin on the middle. After talking to her, go to the south section of the town an talk to the . |
|
| 3 | Talk to the Girl with Dyed Hair |
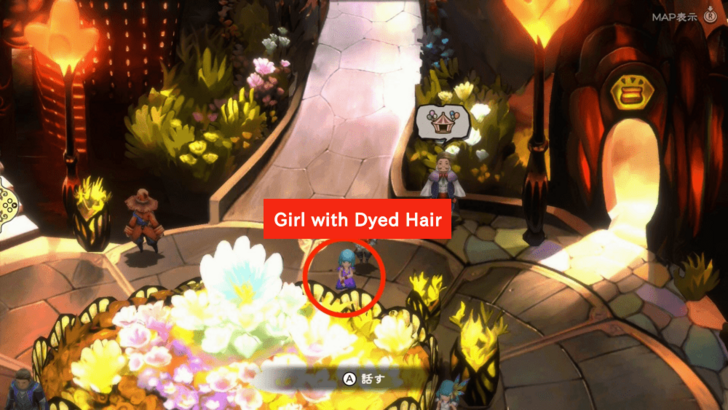 Talk to the girl with dyed hair in front of the tools shop. She won't give that much info aside for asking about the men (Ancheim Citizen), so head down to the opposite side and talk to the guy in Ancheim clothing. |
|
| 4 | Talk to the Ancheim Citizen |
| Talk to the Ancheim Citizen to the south to gather more info. Exhaust the dialogues after that (including the party chats) and talk to the ill-mannered girl. | |
| 5 | Talk to the Ill-Mannered Girl |
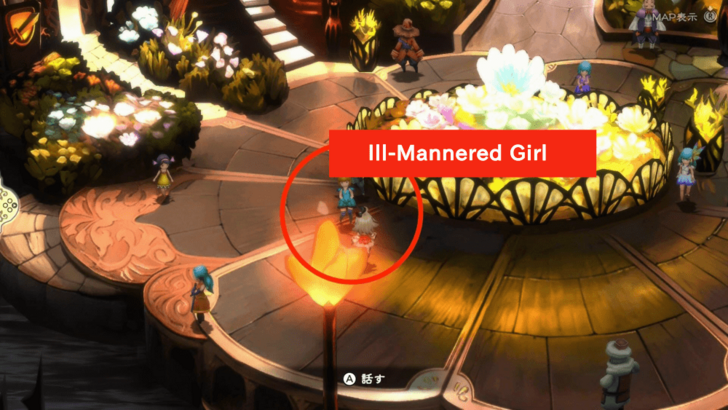 Talk to the ill-mannered girl close to the Ancheim Citizen then you can decide to leave Florem and head to Mount Fragmentum or you can do the Sub-Scenarios for Summoner and Ranger jobs. |
|
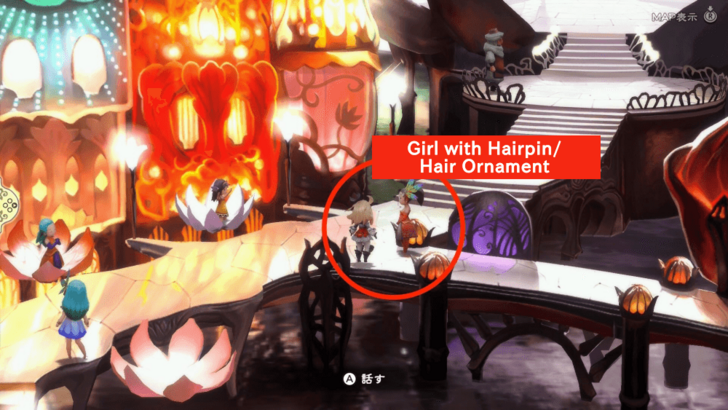
| 6 | Ranger Sub-Scenario |
| You can talk to the girl with a hair ornament outside the Matriarch's Mansion to start the sub-scenario. Complete it to unlock the Ranger Job. | |
| 7 | Summoner Sub-Scenario |
| For the Summoner job, you can go to the Weapon Shop to start its sub-scenario. |
Mount Fragmentum
| 1 | Head to Mount Fragmentum |
|---|---|
| Go to the east of Florem to get to Mount Fragmentum.The path towards the exit is fairly straightforward as you only need to go to the east. Don't forget to pick up chests on the way.
▶︎ Mount Fragmentum Map (Recommended Level: 25) |
|
| 2 | Get the Ripper (Dagger) |
| Head right at the fork once inside and then go left to loot the chest and get the Ripper. | |
| 3 | Explore Mount Fragmentum |
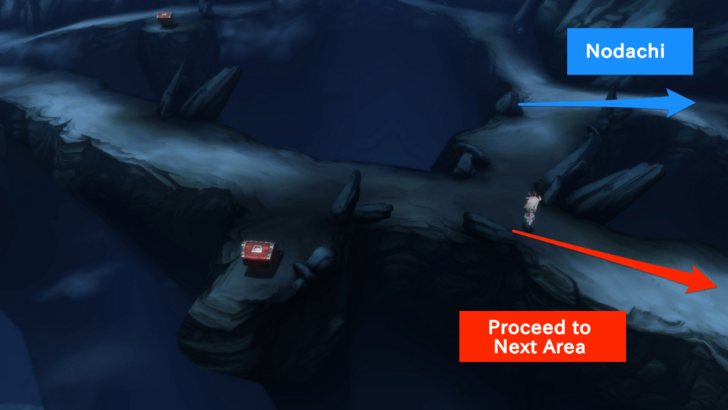 Once you reach the second area, head southeast to proceed. ┣ Head northeast to get the Nodachi. ┣ If you have the Summoner Job, challenge the trial. You must withstand the powerful water attacks to complete the trial. ┗You can equip the Ice Charm to help you reduce the damage. |
|
| 4 | Defeat the Land Turtle |
 Keep heading east and save your game using the save point. Move forward to encounter the boss of the dungeon, the Land Turtle. ┣ Land Turtle can enter the Reflect state and reflect back the magic attacks you throw at it. ┗ Attack with Water element to exploit its weakness and deal more damage once the Reflect wears off. |
|
| 5 | Head to Yulyana's House |
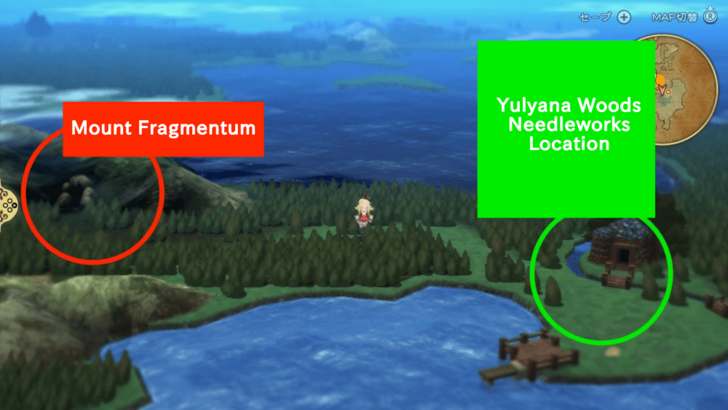 Go outside Mount Fragmentum and head east to get to Yulyana's House. Speak to Yulyana and watch the events unfold. |
|
| 6 | Head Back to Florem |
| Go back to Mount Fragmentum to see more events Exit the Mount Fragmentum and it will automatically move you back to Florem. |
Florem 3
| 1 | Return to Florem |
|---|---|
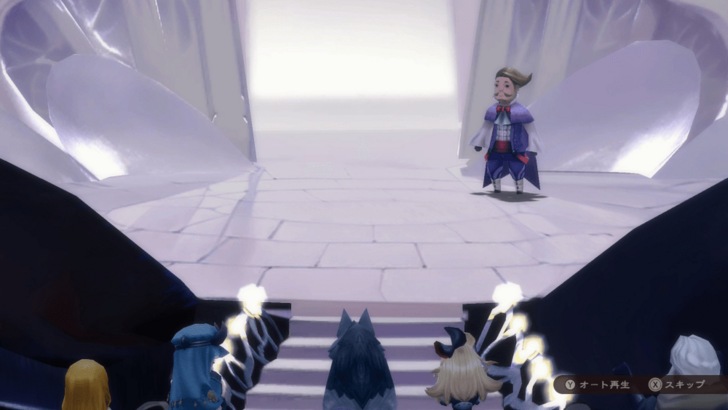 Go to the northern plaza upon return to trigger an event. Once that's done, you can start the Sub-Scenarios for Valkyrie and Red Mage. |
|
| 2 | Valkyrie Sub-Scenario |
 To trigger the Valkyrie Sub-Scenario, head out of Florem then go inside again. Complete it to get the Valkyrie Job. |
|
| 3 | Red Mage Sub-Scenario |
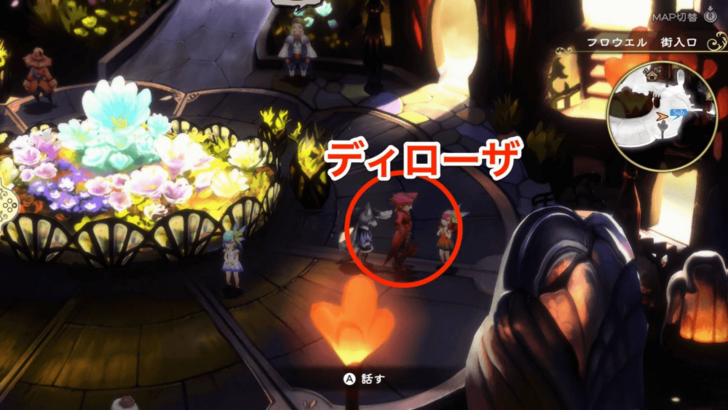 Wait at night in the shop area to find DeRosa. Talk to him to start the Red Mage Sub-Scenario. You can get the Red Mage job after completing the sub-scenario. |
|
| 4 | Head to Twilight Ruins |
| Once done doing your thing in Florem, leave and go straight to Twilight Ruins. You can find it west of Florem. |
Twilight Ruins
| 1 | Go to the Twilight Ruins |
|---|---|
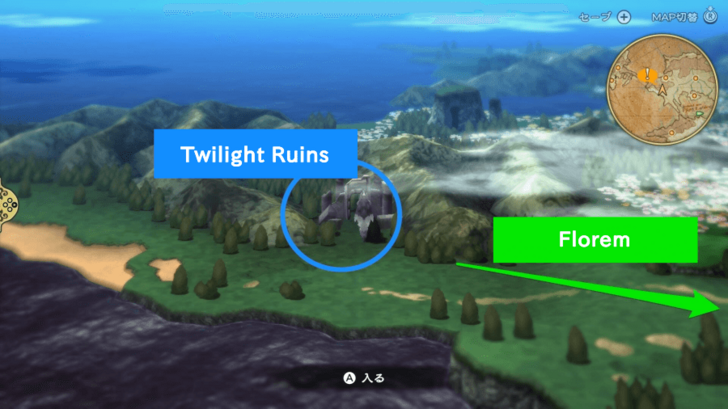 Head west after exiting Florem to reach Twilight Ruins. You will have to open the doors using their dedicated switches to reach the end. ▶︎ Twilight Ruins Map (Recommended Level: 29) |
|
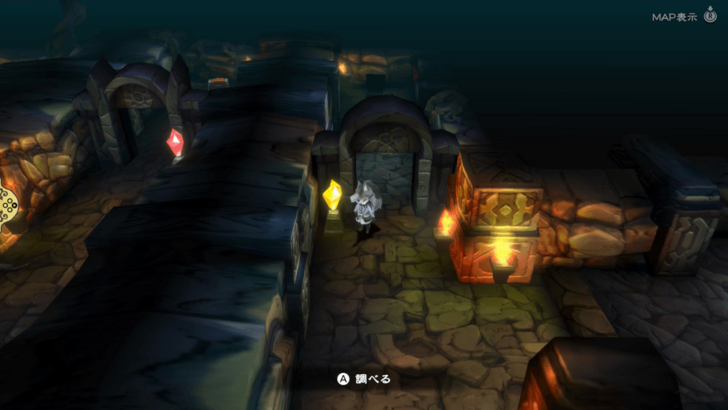
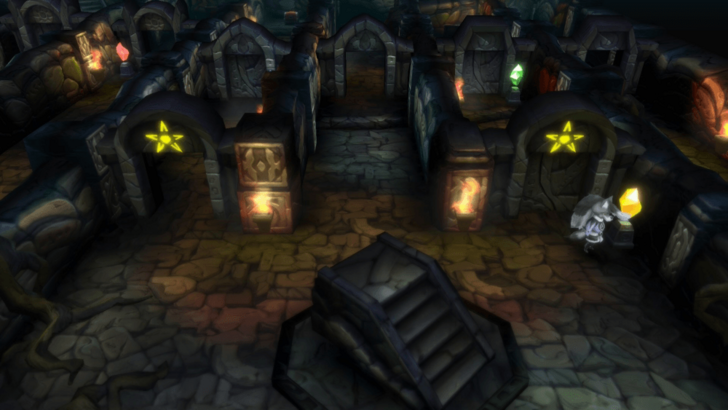
| 2 | Use the Yellow Switch |
 Inside the Twilight Ruins will be colored switches. These switches will open one of the two doors that are connected to them. Use the yellow switch to open the left door to proceed. |
|
| 3 | Use the Green Switch |
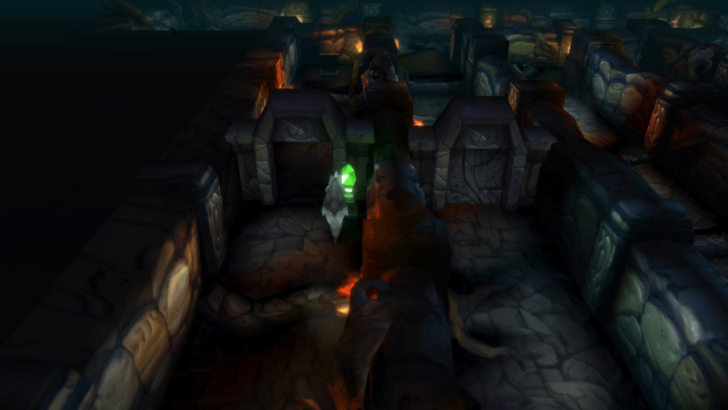 Proceed forward and then go to the left most path to see the green switch. Use this to open the door to the right then go straight to this path and then head left to see stairs that will lead you to the next area. |
|
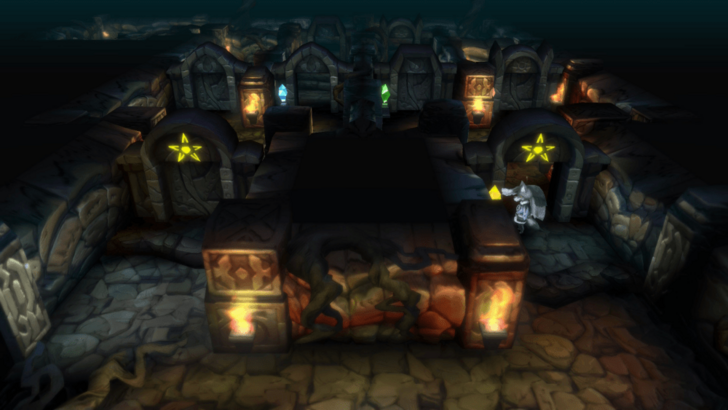
| 4 | Go to the South |
 On the next area, use the yellow stone to open the door to the south. |
|
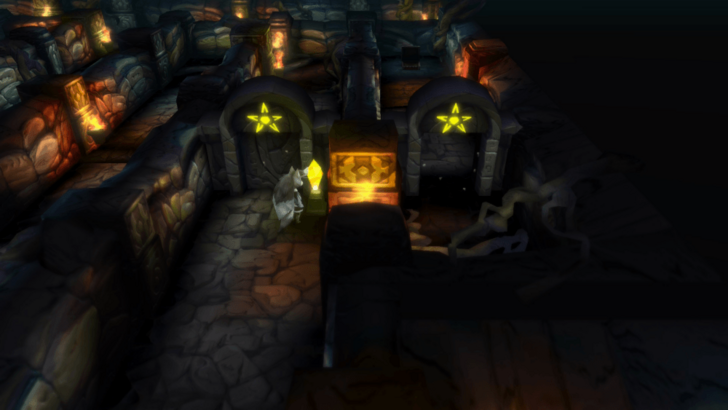
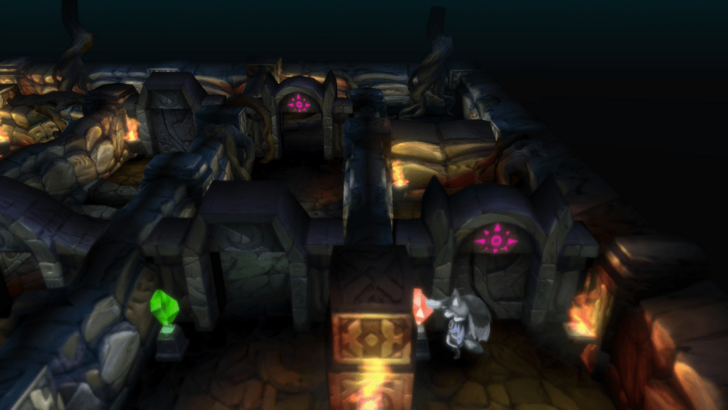
| 5 | Go to the Third Area |
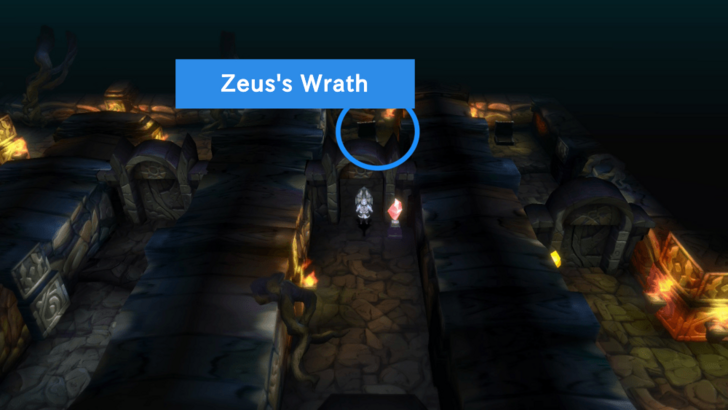 Proceed forward to see a green switch. Don't press the green switch yet and just go to the right door to press the red switch which will open the second door to the left. Finally, use the green switch to open the first left door to proceed. Move north then left then south and then left again to get to the stairs. Before leaving, you can get Zeus's Wrath near the red switch. |
|
| 6 | Go to the Fourth Area |
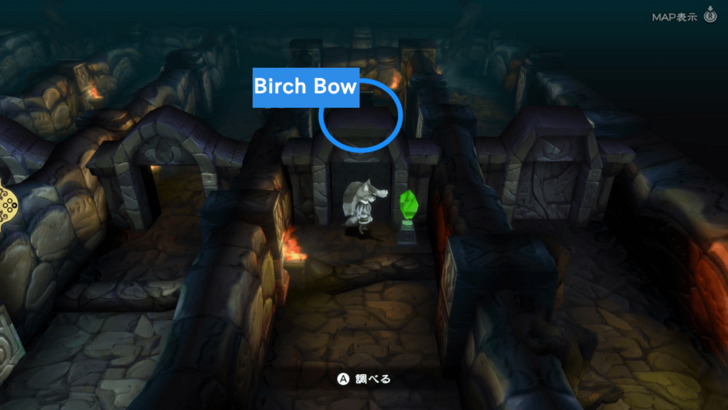 Birch Bow can be obtained from the red chest near the green switch in this area. You can get it before continuing opening the doors to the next area. Interact with the green switch once that's done. |
|
| 7 | Open the Doors |
 Go back to the stairs and interact with the yellow switch first. After that, proceed to the open door and interact with the blue switch. You can also get the Hermes Sandals from there. |
|
| 8 | Follow the Central Path |
| Follow the central path and colllect the Ether from the chest at the end. Interact with the red switch and proceed to the stairs beyond the door. | |
| 9 | Activate the Green Switch |
 Once upstairs, collect the Turbo Ether inside the open door. After that, interact with the red switch in front and go down to the left to get the X-Potion. Interact with the green switch on the way back. |
|
| 10 | Move to the Next Area |
 Go back and interact with the yellow switch then move to the next area. You can also get the Courage Ring in the secret passage in front of the yellow door on the left. |
|
| 11 | Prepare for Boss Fight |
 Press the blue switch to open the door leading to the boss. Enter this door and then save your game at the end before proceeding to the stairs. You will then see an event where you will finally meet Olivia. Tip: Setup Thief Skills and White Mage Skills to end the boss fight easily. |
|
| 12 | Fight Victor and Victoria |
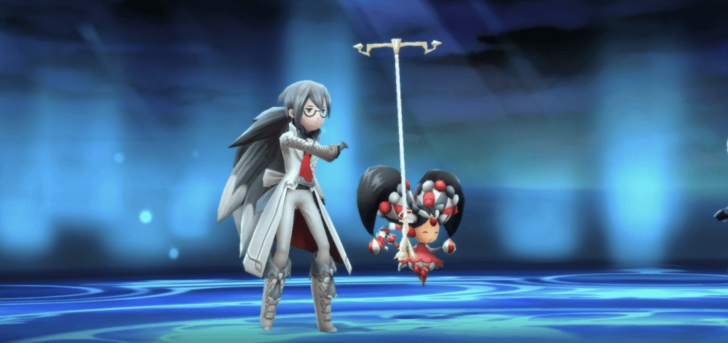 There will be a scripted boss fight against Victor and Victoria after the event. Survive for 5 turns and this battle will automatically end. Finish the cutscenes and exit the Twilight Ruins. |
Temple of Water 2
| 1 | Fight Rusalka |
|---|---|
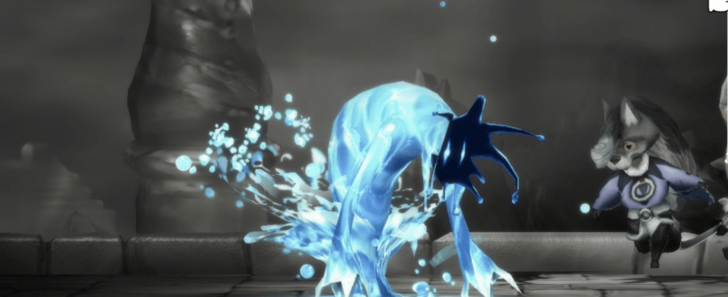 Go back to the Temple of Water and enter the Crystal Room where you will have to fight Rusalka. ┣ Save BP by defaulting when there's only one main body. ┣ When Rusalka splits into two, attack with Brave. ┗ We recommend using Thundara or Crescent Moon (Valkyrie) to clear the clones. |
|
| 2 | Release the Crystal |
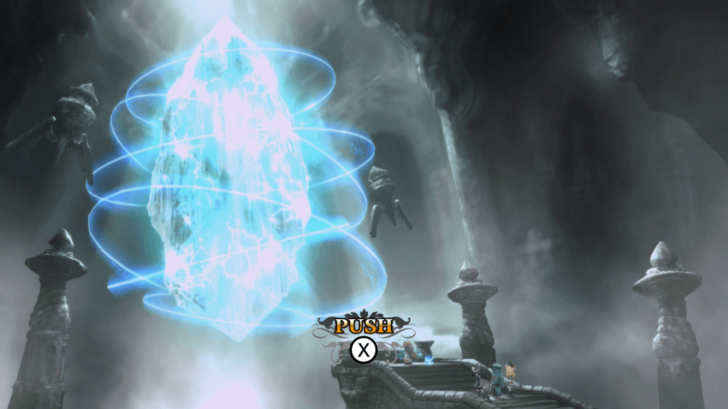 After defeating Rusalka, free the crystal until Airy tells you to stop. Leave the temple and return to Florem once it's done. |
|
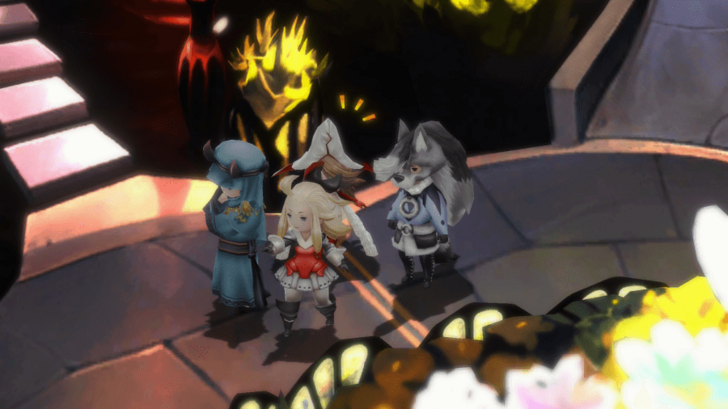
| 3 | Return to the Matriarch |
 Go back to Florem and speak with the Matriarch about what happened. |
|
| 4 | Go back to your Airship |
 Head back to the Miasma Woods and exit to the southern side to get to your airship which will end the chapter. |
|
| * | Do the Temple of Wind Trial (Optional) |
 You can try to complete the trial in Temple of Wind first before moving to the next chapter. You can get the Hresvelgr summon magic once you finish the trial. You can use it to deal a ton of wind elemental damage on an enemy. |
Chapter 2 Sub-Scenarios
Ranger
| 1 | Talk to the Girl with Hair Ornament |
|---|---|
| Talk to the girl with the hair ornament in front of the Matriarch's mansion to start. | |
| 2 | Talk to the Peddler Near the Entrance |
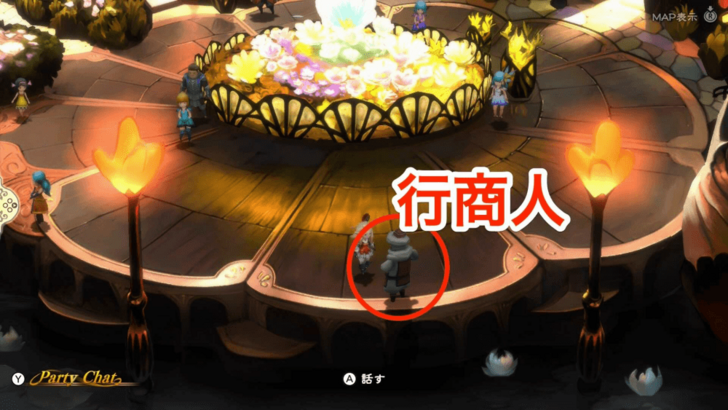 Talk to the peddler near the entrance to the town or simply go south from the girl you talked to. Return to the girl after talking to the man to progress. |
|
| 3 | Go to the Forest Northwest of Florem |
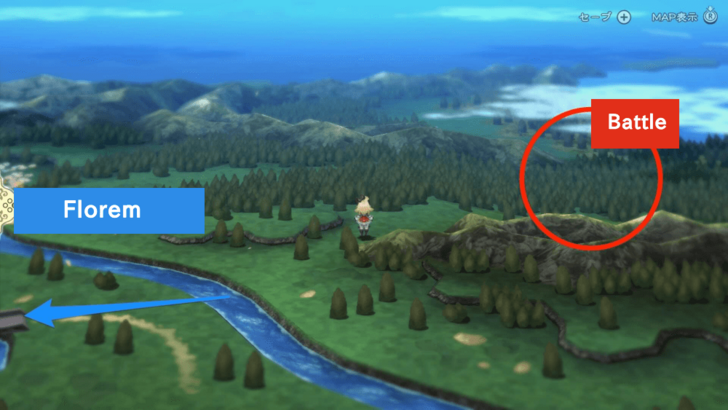 Defeat the enemy located in the forest northeast of Florem. You can beat him in one go if you use Brave to attack. |
|
| 4 | Battle Artemia |
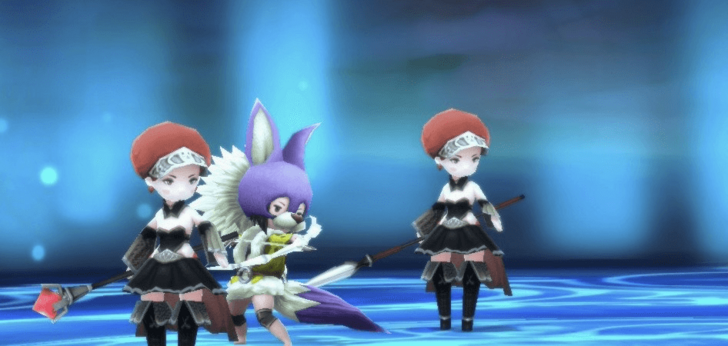 Continue going east until you reach the Twisted Treetop. Enter and fight Artemia there. ┣ Kill the weaker enemies first. ┣ Prepare a resurrection spell or Phoenix Downs. ┗ Artemia is weak against fire. You can head back to Florem and buy a Fira if you don't have it yet. |
|
| 5 | Get the Red Mage Asterisk |
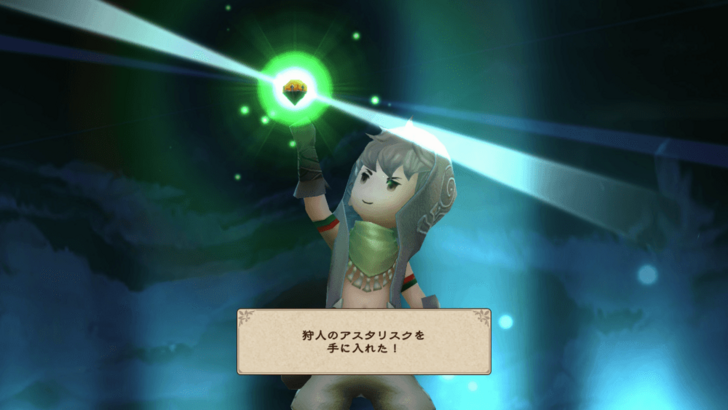 You can get the Ranger Asterisk and unlock the Ranger job for your characters. |
Ranger Best Abilities and Unlock Condition
Summoner
| 1 | Enter the Weapon Shop |
|---|---|
| Enter the Weapon Shop then head out and go to the western flower field to fight Alraune. | |
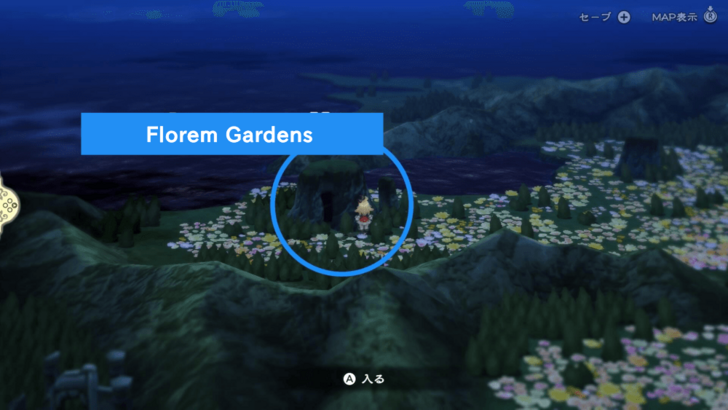
| 2 | Defeat Alraune |
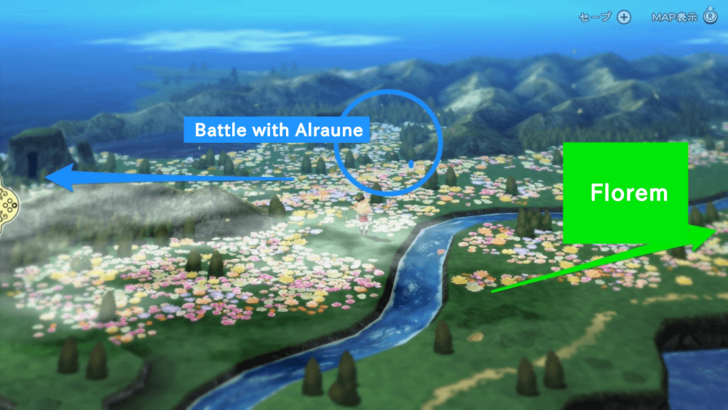 Head to the flower field and beat Alrune. After that, head further west and enter the Florem Gardens. ▶︎ Florem Gardens Map (Recommended Level: 21) |
|
| 3 | Beware of Purple Flowers |
 Once you're inside, be careful not to step on the purple flowers at it can silence your party. |
|
| 4 | Proceed to the Third Area |
| Proceed to the back of the third area. Get the Tomahawk from the chest in the bottom right part of the second area. | |
| 5 | Save Progress |
| Save the game once you reach the adventurer as there will be a boss fight just ahead. | |
| 6 | Defeat Mephilia |
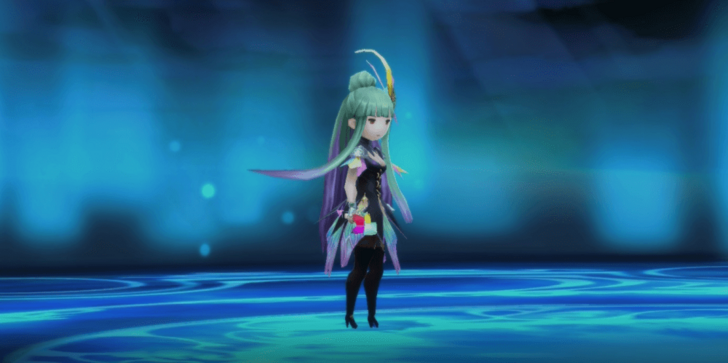 Defeat Mephilia once you get to her. ┣ Mephilia can use a powerful attack every 3 turns, so always Default on those turns to reduce damage. ┣ Can put characters to Sleep every 5 turns. ┗ Mephilia has no weakness. |
|
| 7 | Obtain the Summoner Asterisk |
| Summoner Asterisk will be yours once you defeat Mephilia. You will be able to change your characters' job to a Summoner after that. |
Summoner Best Abilities and Unlock Condition
Valkyrie
| 1 | Re-Enter Florem |
|---|---|
Leave and re-enter Florem to start the sub-scenario. |
|
| 2 | Enter Witherwood |
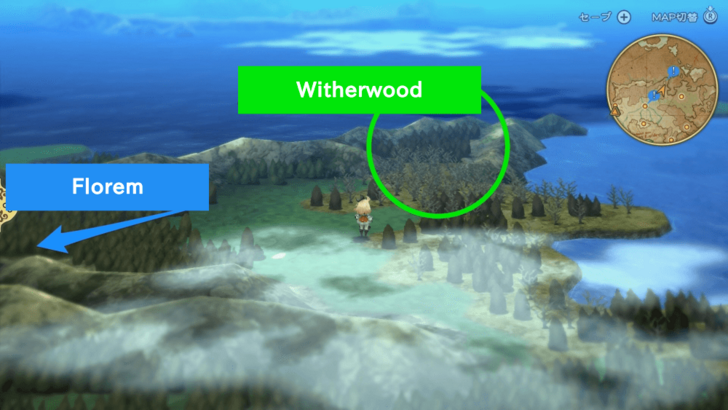 Leave Florem and go northeast to reach Witherwood. ▶︎ Witherwood Map |
|
| 3 | First Area |
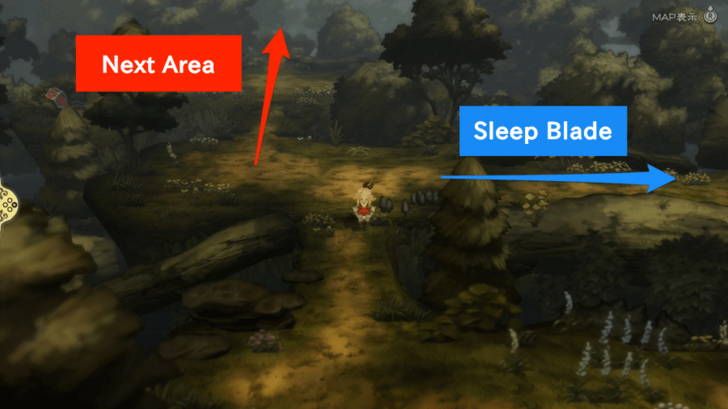 Once you're inside, head northeast to get the Sleep Blade. Return to the first area then proceed to the next one. |
|
| 4 | Second Area |
| You can get to the second area by going northeast. You can get the Aeolian Bow from the southeast part of the area. | |
| 5 | Third Area |
| Proceed to the third area after looting the chest. Move in the counter clockwise direction until you see the adventurer. Save your progress here before proceeding as it is the boss fight next. | |
| 6 | Defeat Einheria |
 Defeat Einheria after passing through the third area. ┣ Beware of the Crescent Moon. It can hit all party members ┣ Default when its about time for Einheria to use Crescent Moon. ┗ If Einheria jumps in the air, use that turn to heal up and prepare your next moves. |
|
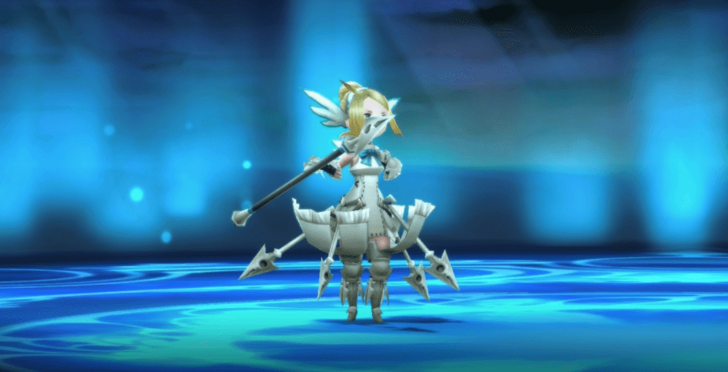
| 7 | Obtain the Valkyrie Asterisk |
 You will get the Valkyrie Asterisk after beating Einheria. It will allow you to change your characters' job to Valkyrie. |
Valkyrie Best Abilities and Unlock Condition
Red Mage
| 1 | Meet DeRosa at Night |
|---|---|
Wait for the night to come and talk to DeRosa in the southern area. |
|
| 2 | Rest at the Inn |
| Rest at the inn and wait for the night again. | |
| 3 | Talk to the Woman in the Northern Plaza |
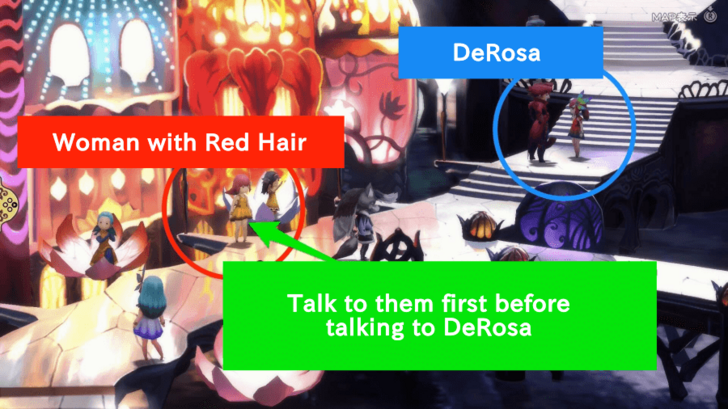 Talk to the woman in the central part of the north plaza to progress. Be sure not to talk to DeRosa if you haven't talk to the woman yet as you won't be able to proceed. |
|
| 4 | Defeat DeRosa |
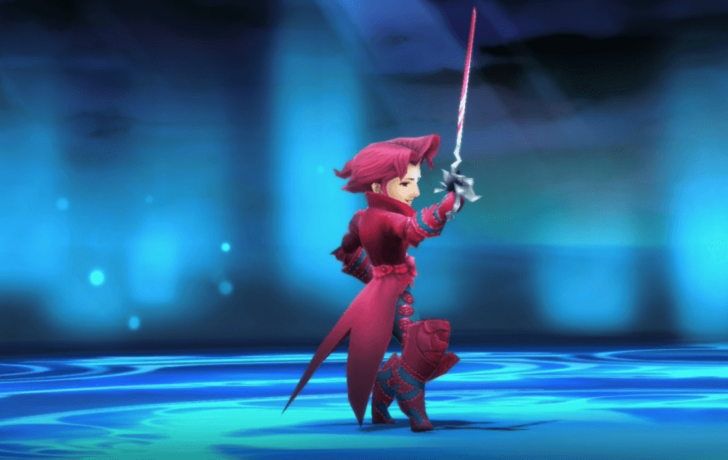 After that, fight DeRosa and defeat him. ┣ Edea will start in a Charmed State, so remove it first before anything else. ┣ DeRosa will always attack a character 3 times each turn. ┗ Make one character focus on healing. |
|
| 5 | Obtain the Red Mage Asterisk |
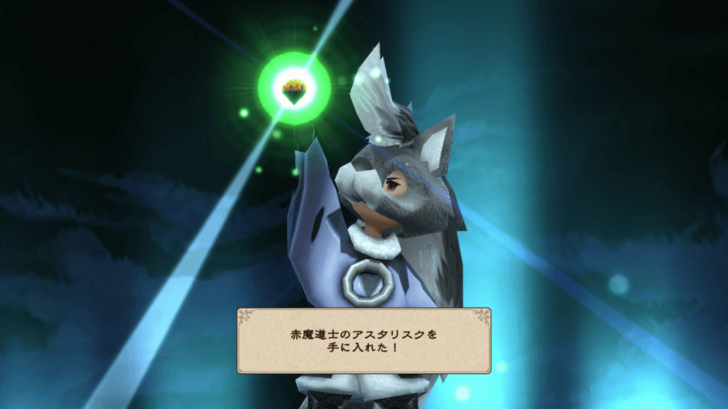 You can get the Red Mage Asterisk after defeating DeRosa. It will allow you to change your characters' job to Red Mage. |
Red Mage Best Abilities and Unlock Condition
Chapter 2 Bosses
Artemia (Recommeded Level: 21)

| Artemia Boss Fight Tips |
|---|
Mephilia (Recommeded Level: 23)
| Mephilia Boss Fight Tips |
|---|
┗ Default to avoid taking too much damage and recovery when needed |
Land Turtle (Recommeded Level: 25)
| Land Turtle Boss Fight Tips |
|---|
Einheria (Recommeded Level: 26)
| Einheria Boss Fight Tips |
|---|
DeRosa (Recommeded Level: 28)
| Land Turtle Boss Fight Tips |
|---|
┣ Accumulate enough BP and attack three times with three characters. ┗ Let one character focus on healing. |
Victor and Victoria (Recommeded Level: 29)
| Victor and Victoria Boss Fight Tips |
|---|
Rusalka (Recommeded Level: 30)
| Rusalka Boss Fight Tips |
|---|
Bravely Default HD Remaster Related Guides

List of All Main Story Chapters
All Bravely Default Flying Fairy Chapters
| 0 | On the Precipice of Despair |
|---|---|
| 1 | Sit and Stay Are Tricks for Dogs |
| 2 | One Day, Beneath a Blue Sky |
| 3 | Beloved Bonds |
| 4 | Black and White |
| 5 | Yesterday's Scenery |
| 6 | A World of Echoes - Equal |
| 7 | A World of Echoes - Dash |
| 8 | A World of Echoes - Circle |
| 9 | Airy Lies (False Final Chapter) |
| 10 | Bravely Default (True Final Chapter) |
Comment
Author

Bravely Default Flying Fairy Remaster Walkthrough & Guides Wiki
Chapter 2 Walkthrough and Chests
Please participate in our site
improvement survey
03/2026
improvement survey
03/2026
Would you assist in
improving Game8's site?
improving Game8's site?

×
We are listening to our users' valuable opinions and discussing how to act on them.
The information collected through this survey will be used for the purpose of improving our services. In addition, the information will only be disclosed a part of a statistic in a format that will not allow identification of personal information.
Begin Survey
Not Now
×
Please rate each item regarding Game8.co's Advertisements.
Amount of Ads
Very Dissatisfied
Somewhat Dissatisfied
Fine
Somewhat Satisfied
Highly Satisfied
Placement of Ads
Timing of Ad Display
Ad Loading Speed
Safeness of Ads
Content of Ads
×
Please rate each item regarding Game8.co's Quality of Articles.
Amount of information
Very Dissatisfied
Somewhat Dissatisfied
Fine
Somewhat Satisfied
Highly Satisfied
Frequency of updates
Speed of new information
Accuracy of articles
Understandibility of articles
Readability of sentences
×
Please rate each item regarding Game8.co's Usability of the Site.
Ease of finding information
Very Dissatisfied
Somewhat Dissatisfied
Fine
Somewhat Satisfied
Highly Satisfied
Loading Speed
Use of Color
Font Size
Visibility of Images
Easy to Understand Layout
×
Please rate each item regarding Game8.co's Message Boards, Comments.
Ease of Writing
Very Dissatisfied
Somewhat Dissatisfied
Fine
Somewhat Satisfied
Highly Satisfied
Readability
Ease in Finding Information
Comment Quality
Comment Quantity
Admin Response
×
Please rate each item regarding Game8.co's Site's new design.
Please rate our site's new design
Very Dissatisfied
Somewhat Dissatisfied
Fine
Somewhat Satisfied
Highly Satisfied
Do you think that the website's design change makes the site easier to use?
Has the new design made it easier for you to find information on the site?
Has the new design improved the overall visual appeal of the site?
How would you rate your overall satisfaction with the new design of the site?
×
How likely are you to recommend Game8 to someone you know?
Very Unlikely
0
1
2
3
4
5
6
7
8
9
10
Very Likely
If you have other opinions regarding potential improvement to the website, please share them with us. We would appreciate your honest opinion.
Note: This is a free response section, so you can proceed without entering anything.
Note: Please be sure not to enter any kind of personal information into your response.
Note: Please be sure not to enter any kind of personal information into your response.
×
Thank You
×
Thank you for participating in our survey! Your answers will help us to improve the quality of our website and services.
We hope you continue to make use of Game8.
We hope you continue to make use of Game8.
Close
Rankings
- We could not find the message board you were looking for.
Gaming News


![Slay the Spire 2 Review [Early Access] | Still the Deckbuilder to Beat](https://img.game8.co/4433115/44e19e1fb0b4755466b9e516ec7ffb1e.png/thumb)

![Resident Evil Village Review [Switch 2] | Almost Flawless Port](https://img.game8.co/4432790/e1859f64830960ce4248d898f8cd38d9.jpeg/thumb)
Popular Games

Genshin Impact Walkthrough & Guides Wiki
Honkai: Star Rail Walkthrough & Guides Wiki
Umamusume: Pretty Derby Walkthrough & Guides Wiki
Pokemon Pokopia Walkthrough & Guides Wiki
Resident Evil Requiem (RE9) Walkthrough & Guides Wiki
Monster Hunter Wilds Walkthrough & Guides Wiki
Wuthering Waves Walkthrough & Guides Wiki
Arknights: Endfield Walkthrough & Guides Wiki
Pokemon FireRed and LeafGreen (FRLG) Walkthrough & Guides Wiki
Pokemon TCG Pocket (PTCGP) Strategies & Guides Wiki


Recommended Games
Fire Emblem Heroes (FEH) Walkthrough & Guides Wiki
Diablo 4: Vessel of Hatred Walkthrough & Guides Wiki
Yu-Gi-Oh! Master Duel Walkthrough & Guides Wiki
Super Smash Bros. Ultimate Walkthrough & Guides Wiki
Pokemon Brilliant Diamond and Shining Pearl (BDSP) Walkthrough & Guides Wiki
Elden Ring Shadow of the Erdtree Walkthrough & Guides Wiki
Monster Hunter World Walkthrough & Guides Wiki
The Legend of Zelda: Tears of the Kingdom Walkthrough & Guides Wiki
Persona 3 Reload Walkthrough & Guides Wiki
Cyberpunk 2077: Ultimate Edition Walkthrough & Guides Wiki


All rights reserved
© SQUARE ENIX
The copyrights of videos of games used in our content and other intellectual property rights belong to the provider of the game.
The contents we provide on this site were created personally by members of the Game8 editorial department.
We refuse the right to reuse or repost content taken without our permission such as data or images to other sites.