This survey will take about 1 minute.
Your answers will help us to improve our website.
Bravely Default Flying Fairy HD Remaster
Chapter 1 Walkthrough
This is a walkthrough for Chapter 1 of Bravely Default Flying Fairy HD Remaster. Read on for a complete walkthrough of Chapter 1.
List of Contents
Chapter 1 Walkthrough
Ancheim
| 1 | Head to Ancheim |
|---|---|
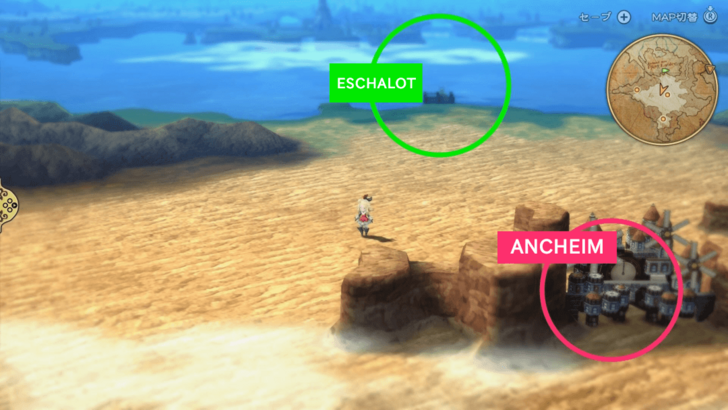
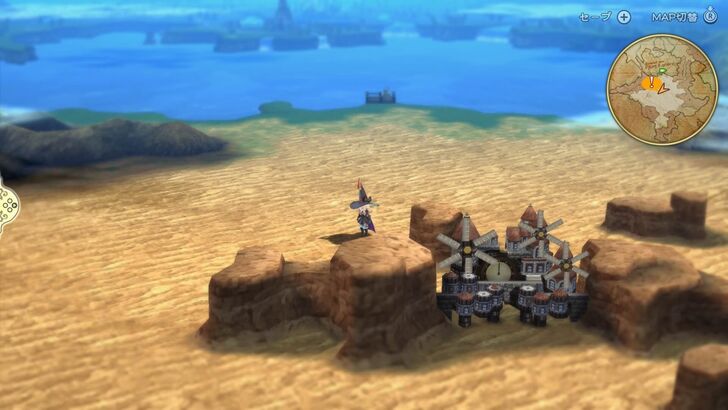 Enter the town of Ancheim, located in the center of the desert. It is just south of the port where you landed your airship. ┣ Upon entering the town, the party chat Ancheim, Land of Sand and Time will become available. ┗ Staying at the Inn will trigger the party chat The Cogs of Ancheim. |
|
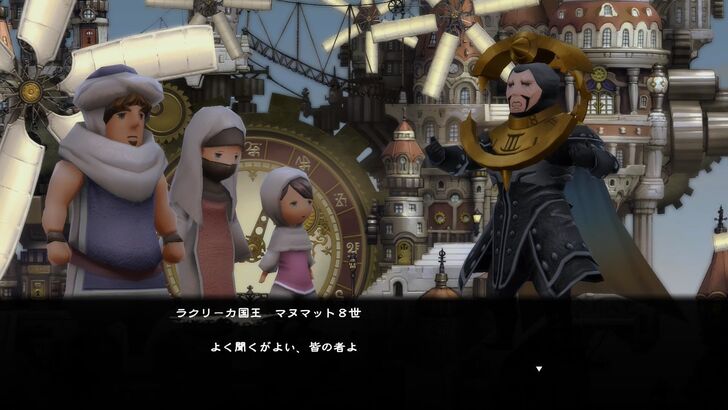
| 2 | Head to the Center of Town |
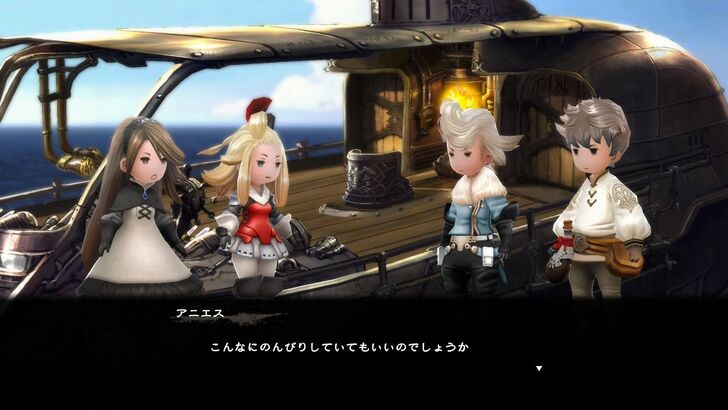
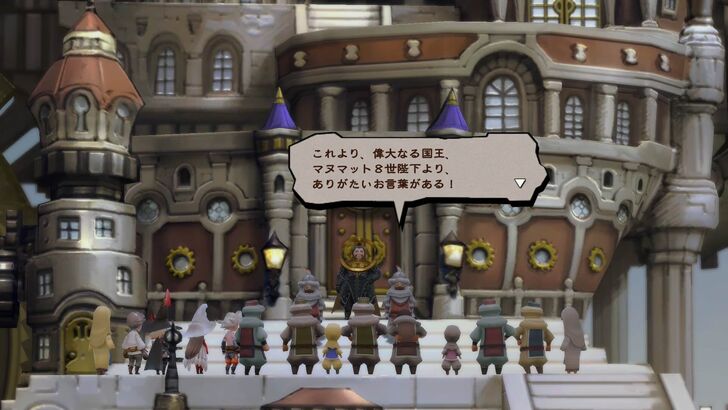 Upon reaching the center of town, a scene of King Khamer VIII's speech will occur. Party Chat: Agnès's Angst |
|
| 2 | Go Inside the Palace |
| Enter the palace or wait for the Ancheim Sentry to get you. Continue your conversation with the King there. Afterwards, when you exit the Royal Palace, the Sub-Scenarios will be unlocked. ▶︎ Thief and Merchant Sub-scenarios unlocked It is recommended to complete the Sub-Scenarios before proceeding with the main story. Party Chat: What's This Temple? |
|
| 3 | Head to the Temple of Wind |
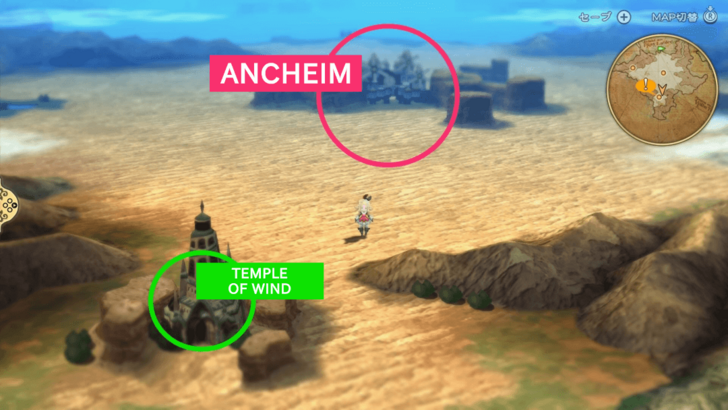 Prepare to leave the city and then travel south to reach the Temple of Wind. |
Temple of Wind
| 1 | (1F) Head to the Basement |
|---|---|
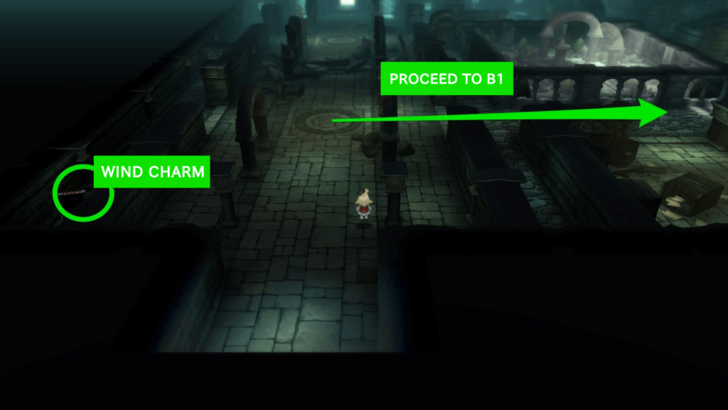 Upon entering the Wind Temple, proceed to B1F via the right passage. ┣ In the small room to the south, examine the overturned bookshelf to trigger a dialogue event. ┗ Open the treasure chest on the left to obtain a Wind Charm. ▶︎ Temple of Wind Map |
|
| 2 | (B1F) Go to the West Side of the 1st Floor |
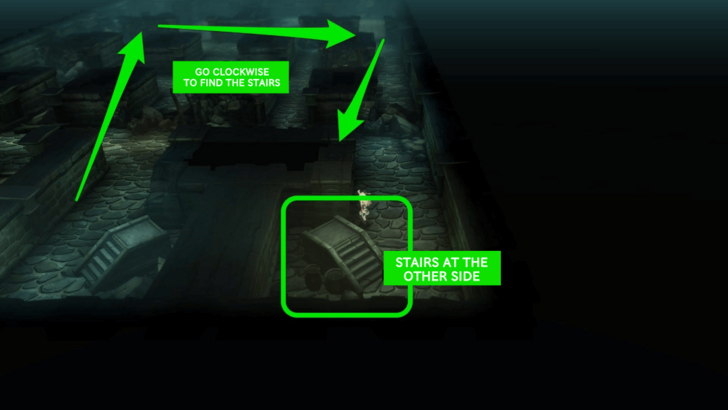 On B1F, go clockwise while collecting treasure chests along the way, then return to 1F from the stairs found at bottom right area of the floor. |
|
| 3 | (1F) Head to the 2nd Floor |
| Follow the path north until you see a staircase. Climb it, and it should take you to the 2nd floor. ┗ On the way, examine the bookshelf in the small room on the east side to trigger a dialogue event. |
|
| 4 | (2F) Head Back to the 1st Floor |
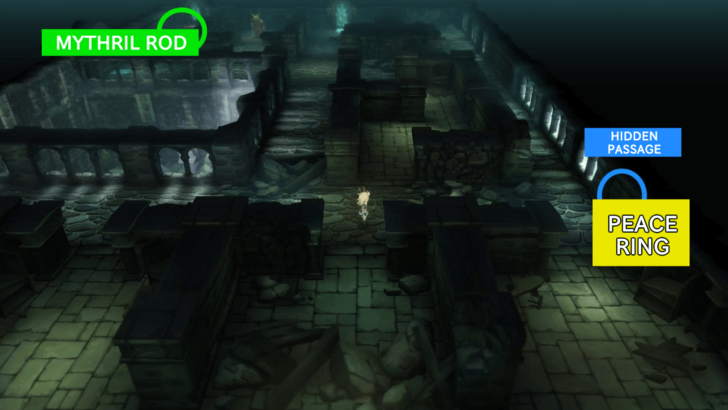 Head back to the 1st floor, but from the north side. You should be able to spot the stairs at the central top part of the current floor, on the right of the Wind Hermit. ┣ Collect the Peace Ring from the treasure chest in the hidden passage just before the southeast corner. ┗ Get the Mythril Rod from the treasure chest in the northwest. Note: The hermit in the room just before the Mythril Rod will not do anything even if you talk to him, so it's okay to ignore him. |
|
| 5 | (1F) Pull the Lever Leading to the Entrance |
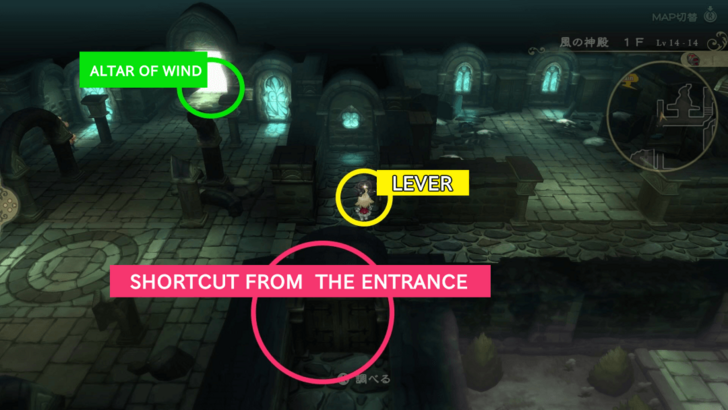 Once you descend to 1F, a dialogue event will occur in front of the small room. ┣ Pull the lever on the left side to access the shortcut. You won't have to go between floors anymore just to get to the north side of the 1st floor. ┗ Obtain the Mythril Dagger from the treasure chest in the west passage |
|
| 6 | (1F) Enter the Altar of Wind |
 Tip: Before leaving the temple, you can save, restock, and purchase superior gear unavailable in town from the Adventurer. |
Yulyana Woods Needleworks
| 1 | Board the Airship |
|---|---|
 ┗ If your HP is low, it's a good idea to stop by Ancheim first and recover. |
|
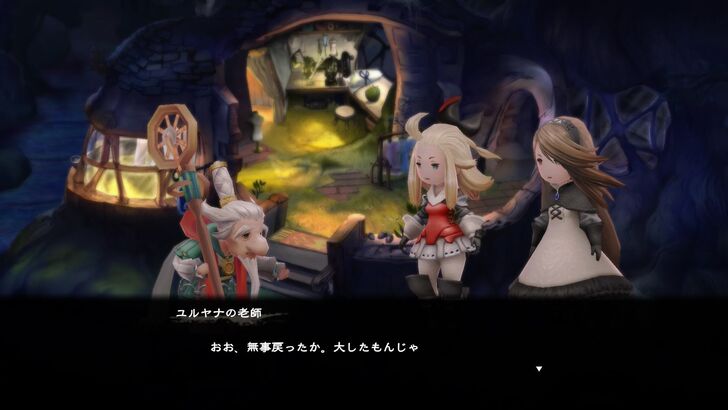
| 2 | Go to Yulyana Woods Needleworks |
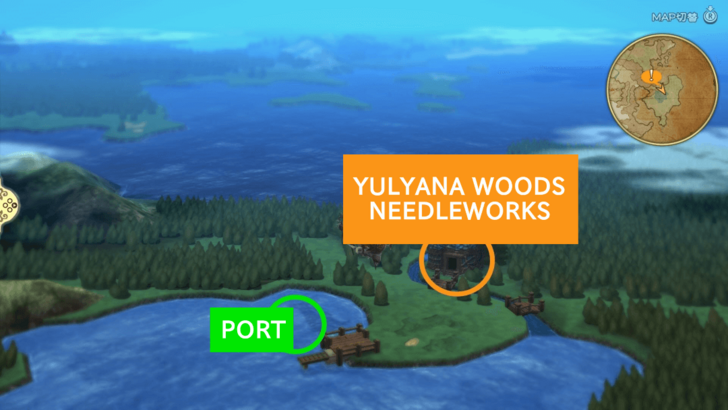 Travel northeast to reach the Yulyana Woods Needleworks. Talk to the Sage once you get there. Party Chat: Such Sweet Sorrow |
|
| 3 | Find the Vestment Cave |
| Exhaust the dialogues, then leave Yulyana Woods Needleworks and find the entrance to the Vestment Cave. |
Vestment Cave
| 1 | Go to the Vestment Cave |
|---|---|
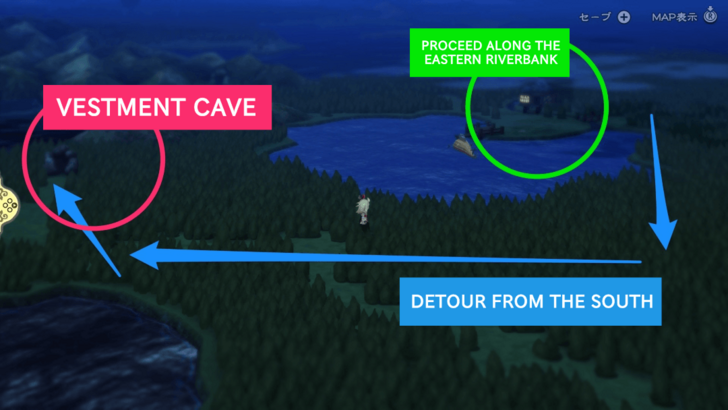 Travel east then south from Yulyana Woods Needleworks to reach the Vestment Cave. ▶︎ Vestment Cave Map |
|
| 2 | (1F) Head to B1F |
| Head to the central part of the cave and then follow the path to find the stairs to B1F. | |
| 3 | (B1F) Find the Stairs to B2F |
| On the center of B1F, there are two staircases. Proceed using the southeast staircase. ┗ If you go down the southwest staircase, you will find a treasure chest containing a Mage Shell. |
|
| 4 | (B2F) Make your way to B3F |
| Upon entering B2F, move to the central area by going through the corridor at the middle. You should then head north once you see the intersection, then go right until you see a way going down. Follow the path to reach the stairs going to B3F. ┗ Collect the items from the treasure chests as you go. |
|
| 5 | (B3F) Shop, Save, and Heal |
| Once on B3F, save with the Adventurer. You can buy items from him to prepare for an upcoming boss fight. | |
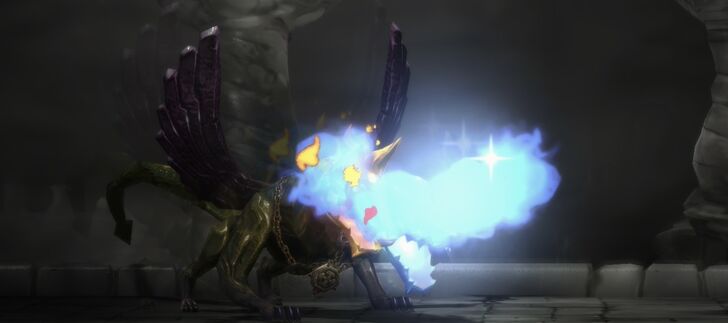
| 6 | (B3F) Defeat the Dragon |
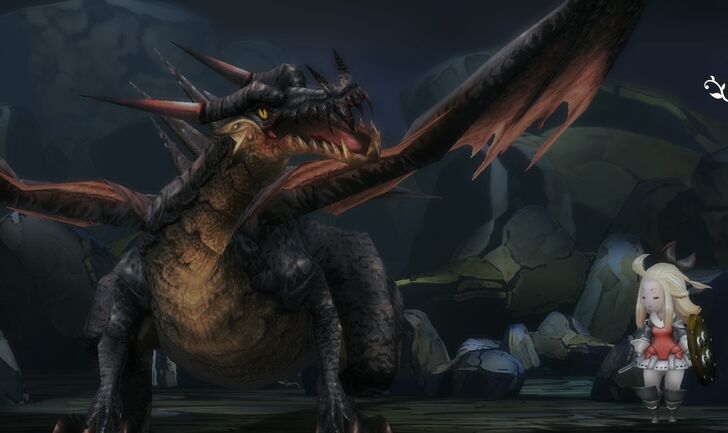 Proceeding further north into B3F triggers a boss fight against the Dragon. ┣ It is weak against Water attacks, so use Blizzard. ┣ Accumulate BP by using the Default. ┣ Once the boss's BP drops into the negative, attack with Braves. ┗ Add Special Moves to your attacks to tear down its HP fast! After beating the Dragon, you will receive a Thunder Charm. After you defeat the Dragon, you can use a Teleport Stone to escape out of the Vestment Cave. |
Yulyana Woods Needleworks
| 1 | Return to the Sage |
|---|---|
 Head back to the Sage to give him the Rainbow Thread and get the Vestal Garb. Leave the area and then return to the Temple of Wind. Party Chat: Ringabel's Reconnaissance (after resting at the Needleworks) |
Temple of Wind
| 1 | Return to the Altar of Wind |
|---|---|
| After the event, board the airship and return to the port north of Ancheim. Head to the Temple of Wind and proceed to the Altar via the shortcut you opened. Save with the Adventurer nearby first, as you will head into a boss fight in the Crystal Room. | |
| 2 | Defeat Orthros |
 Once you enter the altar, Orthros will stand in your way and try to stop you from reaching the crystal. Defeat Orthros to progress. ┗ Each of his head has a different weakness, the fire head is weak against water and the ice head is weak against fire. You will get an Antarctic Wind, Bomb Fragment, Potion, and Ether after beating it. |
|
| 3 | Release the Crystal |
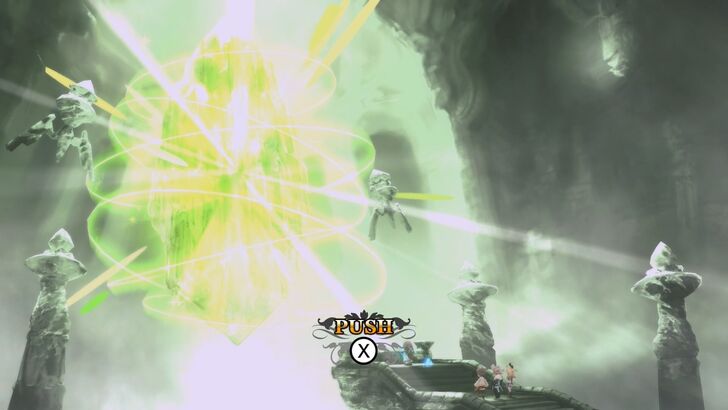 After beating Orthros, head over to the crystal for Agnès to release it. You will have to tap the X button repeatedly until Airy tells you to stop. Party Chat: Proof, Not Promises |
Ancheim
| 1 | Return to Ancheim |
|---|---|
 After the scene, return to Ancheim to trigger another event. ▶︎ Spell Fencer and Time Mage Sub-scenarios unlocked Before proceeding to your next destination, make sure to complete all the Chapter 1 Sub-scenarios first. Party Chat: The Wind Returns, The Minister's Generosity (when you leave Ancheim after completing the Merchant Sub-scenario) |
World: Harena Region
| 1 | Board the Airship |
|---|---|
 Upon entering the airship Eschalot, a scene will play out, and its flight function will become unusable. You will have no choice but to proceed to the next destination on foot. |
|
| 2 | Enter the Miasma Woods |
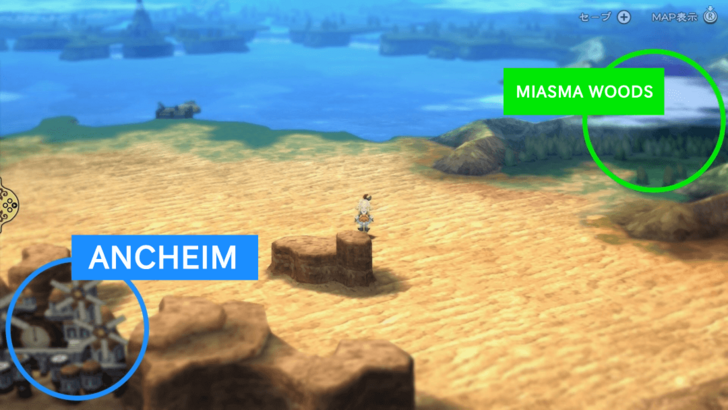 Enter the Miasma Woods, located northeast of Ancheim. |
Bravely Default HD Remaster Related Guides

List of All Main Story Chapters
All Bravely Default Flying Fairy Chapters
| 0 | On the Precipice of Despair |
|---|---|
| 1 | Sit and Stay Are Tricks for Dogs |
| 2 | One Day, Beneath a Blue Sky |
| 3 | Beloved Bonds |
| 4 | Black and White |
| 5 | Yesterday's Scenery |
| 6 | A World of Echoes - Equal |
| 7 | A World of Echoes - Dash |
| 8 | A World of Echoes - Circle |
| 9 | Airy Lies (False Final Chapter) |
| 10 | Bravely Default (True Final Chapter) |
Comment
Author
Bravely Default Flying Fairy Remaster Walkthrough & Guides Wiki
Chapter 1 Walkthrough
Please participate in our site
improvement survey
03/2026
improvement survey
03/2026
Would you assist in
improving Game8's site?
improving Game8's site?

×
We are listening to our users' valuable opinions and discussing how to act on them.
The information collected through this survey will be used for the purpose of improving our services. In addition, the information will only be disclosed a part of a statistic in a format that will not allow identification of personal information.
Begin Survey
Not Now
×
Please rate each item regarding Game8.co's Advertisements.
Amount of Ads
Very Dissatisfied
Somewhat Dissatisfied
Fine
Somewhat Satisfied
Highly Satisfied
Placement of Ads
Timing of Ad Display
Ad Loading Speed
Safeness of Ads
Content of Ads
×
Please rate each item regarding Game8.co's Quality of Articles.
Amount of information
Very Dissatisfied
Somewhat Dissatisfied
Fine
Somewhat Satisfied
Highly Satisfied
Frequency of updates
Speed of new information
Accuracy of articles
Understandibility of articles
Readability of sentences
×
Please rate each item regarding Game8.co's Usability of the Site.
Ease of finding information
Very Dissatisfied
Somewhat Dissatisfied
Fine
Somewhat Satisfied
Highly Satisfied
Loading Speed
Use of Color
Font Size
Visibility of Images
Easy to Understand Layout
×
Please rate each item regarding Game8.co's Message Boards, Comments.
Ease of Writing
Very Dissatisfied
Somewhat Dissatisfied
Fine
Somewhat Satisfied
Highly Satisfied
Readability
Ease in Finding Information
Comment Quality
Comment Quantity
Admin Response
×
Please rate each item regarding Game8.co's Site's new design.
Please rate our site's new design
Very Dissatisfied
Somewhat Dissatisfied
Fine
Somewhat Satisfied
Highly Satisfied
Do you think that the website's design change makes the site easier to use?
Has the new design made it easier for you to find information on the site?
Has the new design improved the overall visual appeal of the site?
How would you rate your overall satisfaction with the new design of the site?
×
How likely are you to recommend Game8 to someone you know?
Very Unlikely
0
1
2
3
4
5
6
7
8
9
10
Very Likely
If you have other opinions regarding potential improvement to the website, please share them with us. We would appreciate your honest opinion.
Note: This is a free response section, so you can proceed without entering anything.
Note: Please be sure not to enter any kind of personal information into your response.
Note: Please be sure not to enter any kind of personal information into your response.
×
Thank You
×
Thank you for participating in our survey! Your answers will help us to improve the quality of our website and services.
We hope you continue to make use of Game8.
We hope you continue to make use of Game8.
Close
Rankings
- We could not find the message board you were looking for.
Gaming News


![Slay the Spire 2 Review [Early Access] | Still the Deckbuilder to Beat](https://img.game8.co/4433115/44e19e1fb0b4755466b9e516ec7ffb1e.png/thumb)

![Resident Evil Village Review [Switch 2] | Almost Flawless Port](https://img.game8.co/4432790/e1859f64830960ce4248d898f8cd38d9.jpeg/thumb)
Popular Games

Genshin Impact Walkthrough & Guides Wiki
Honkai: Star Rail Walkthrough & Guides Wiki
Umamusume: Pretty Derby Walkthrough & Guides Wiki
Pokemon Pokopia Walkthrough & Guides Wiki
Resident Evil Requiem (RE9) Walkthrough & Guides Wiki
Monster Hunter Wilds Walkthrough & Guides Wiki
Wuthering Waves Walkthrough & Guides Wiki
Arknights: Endfield Walkthrough & Guides Wiki
Pokemon FireRed and LeafGreen (FRLG) Walkthrough & Guides Wiki
Pokemon TCG Pocket (PTCGP) Strategies & Guides Wiki


Recommended Games
Fire Emblem Heroes (FEH) Walkthrough & Guides Wiki
Diablo 4: Vessel of Hatred Walkthrough & Guides Wiki
Yu-Gi-Oh! Master Duel Walkthrough & Guides Wiki
Super Smash Bros. Ultimate Walkthrough & Guides Wiki
Pokemon Brilliant Diamond and Shining Pearl (BDSP) Walkthrough & Guides Wiki
Elden Ring Shadow of the Erdtree Walkthrough & Guides Wiki
Monster Hunter World Walkthrough & Guides Wiki
The Legend of Zelda: Tears of the Kingdom Walkthrough & Guides Wiki
Persona 3 Reload Walkthrough & Guides Wiki
Cyberpunk 2077: Ultimate Edition Walkthrough & Guides Wiki


All rights reserved
© SQUARE ENIX
The copyrights of videos of games used in our content and other intellectual property rights belong to the provider of the game.
The contents we provide on this site were created personally by members of the Game8 editorial department.
We refuse the right to reuse or repost content taken without our permission such as data or images to other sites.