This survey will take about 1 minute.
Your answers will help us to improve our website.
Bravely Default Flying Fairy HD Remaster
True Final Ending Walkthrough
This is a walkthrough for the True Final Ending of Bravely Default Flying Fairy HD Remaster. Read on for a complete walkthrough of the True Final Chapter including boss strategies!
List of Contents
True Final Ending Walkthrough
How to Get the True Final Ending
Continue Awakening the Crystals
After getting the Normal Ending, save your game when prompted. You will be able to continue from before you broke the crystal.
To get the True Final Ending of the game, you must not break any crystal but release them as you have done so from previous Chapters 5, 6, 7, and 8.
The Grandship
| 1 | Head out to the Deck |
|---|---|
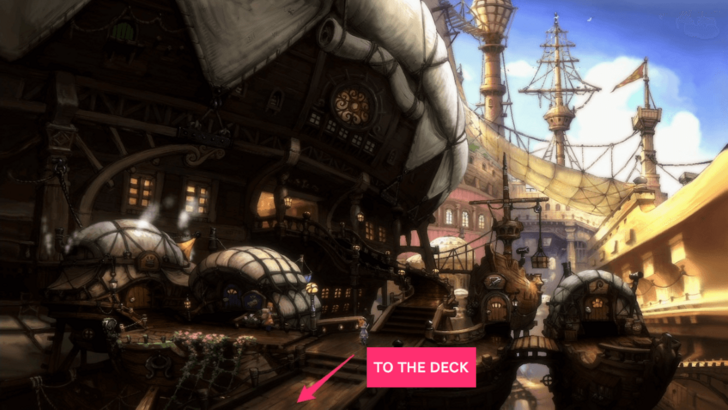 After watching all the scenes, save your game, then head to the deck. Following the events there, you'll face a boss fight against Airy. |
|
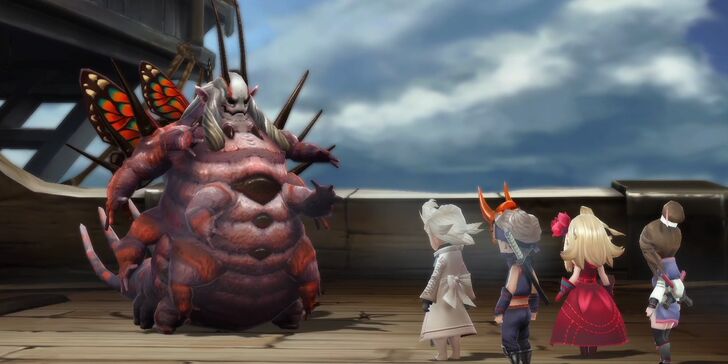
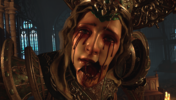
| 2 | Defeat Airy (First Form) |
| Airy has a very high HP. She attacks with Slaughter, dealing over 1000 damage and inflicting Poison on the entire party—often followed by Poison Punisher. Additionally, she also casts Stop. Fortunately, Airy is vulnerable to fire. Make use of Firaga spell, Sword Magic Firaga, Promethean Fire, and anything else fire-based against her. Since she is a bug, Bug Slayer will be effective too. She is also susceptible to Sleep which you can take advantage of. Having a party member with White Magic during this battle is handy for cleansing poison and healing up your party. Or you can equip the accesory Star Pendant for poison immunity. A work-around for the Stop status is to level up the whole party to Time Mage level 7 so they can all get the Support Ability Stop Immunity. ┣ Her debuffs are intense, so bring a Spiritmaster for countermeasures. ┗ Primarily uses magic attacks, so raise your magic defense. (▶︎ Equipment List) |
|
| 3 | Defeat Airy (Second Form) |
| Airy's second form has lower hp than the first one. She will cast Acedia, which inflicts weakness to all elements on the entire party, then follow it up with either Flare, Quaga, or Thundaga. A character hit with Irritation will be inflicted with Berserk. When her HP is drained, she can cast Restore to fully recover. Airy is still weak to fire in this second form so keep on hitting her with fire-based attacks. | |
| 4 | Talk to Edea |
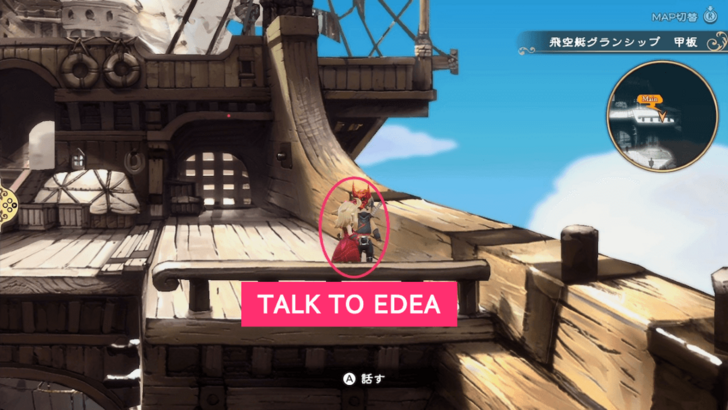 After watching the scene, return to the deck where you previously fought Airy and talk to Edea. |
|
| 5 | Talk to Agnès |
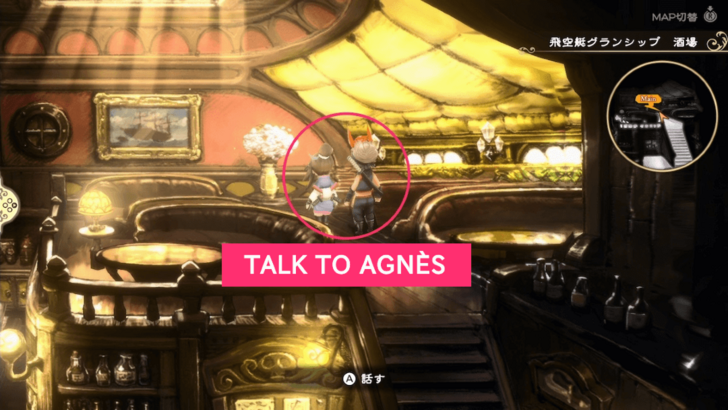 After speaking with Edea, go to the tavern and talk to Agnès. |
|
| 5 | Go to the Gradship's Bridge |
| After speaking with Agnès, go to the bridge and watch the scene. | |
| 5 | Yulyana Woods Needleworks |
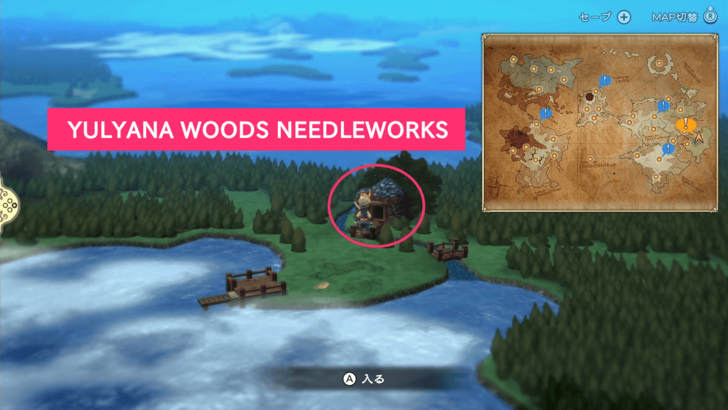 After the scene, head to Yulyana Woods Needleworks. |
Yulyana Woods Needleworks
| 1 | Talk to Sage Yulyana |
|---|---|
| Upon entering, a scene will play out. | |
| 2 | Head to Norende |
| After the scene, go to Norende. |
Norende
| 1 | Head to Norende Ravine |
|---|---|
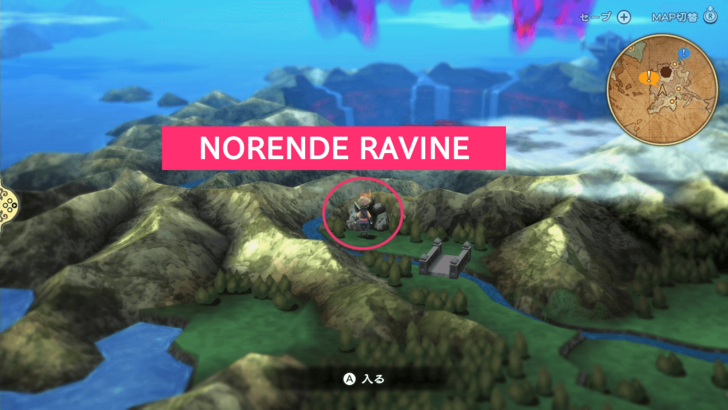 Get off the Grandship, and head straight to Norende Ravine. ▶︎ Norende Ravine Map |
|
| 2 | Head to the Dark Aurora |
| After the scene, enter the portal to get to the Dark Aurora. |
Dark Aurora
| 1 | Find Airy |
|---|---|
| When you regain control, follow the path to the west. Keep heading west until you see a path leading north where the next portal is. Move north and enter the portal to go to the 2F. ▶︎ Dark Aurora Map ┗ See map for chest locations. |
|
| 2 | Go to the 3F |
| From the entrance, you can take either the left or the right path, its a connected road, just keep heading south. When you reach the southermost part of the area, move north and enter the portal to go to the 3F. | |
| 3 | Go to the 6F |
| From the entrance, move south then go east. Follow the path going west then head south. You can take either the left or the right path, just keep heading south until you see the portal. Enter the portal to go to the 6F. | |
| 4 | Go to the 4F |
| On the other side of the 6F, from the entrance, follow the path south then go left to find the portal. Enter the portal to go to the 4F. | |
| 5 | Go to the 6F |
| On the 4F, from the entrance, head south, then east, and then go north. Follow the path north until you reach the northeasternmost part of the area where the portal is. Enter the portal to get to the third area of the 6F. | |
| 6 | Go to the 7F |
| On the third area of the 6F, from the entrance, head north and take the right path at the intersection to go to the 5F to open the remaining chests. Otherwise, keep heading north towards the marker to continue with the story. | |
| 7 | Enter the Portal to the Altar of Darkness |
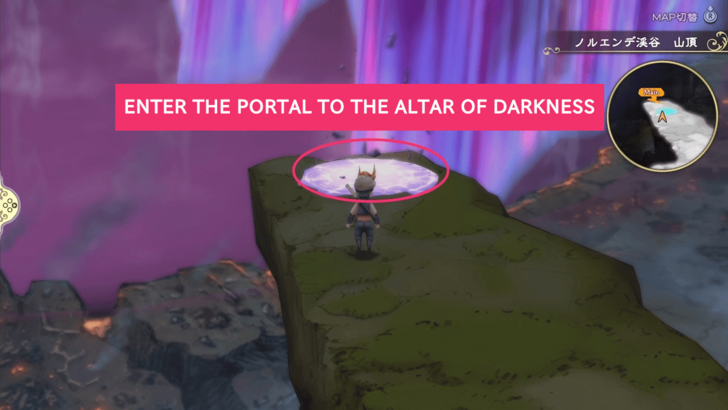 Upon entering the portal, a scene will play out. The 7F is a straightforward area, so when you regain control, simply follow the path. Save your game with the Adventurer to the south before moving forward. Once you are ready, enter the portal to reach the Altar of Darkness. |
Altar of Darkness
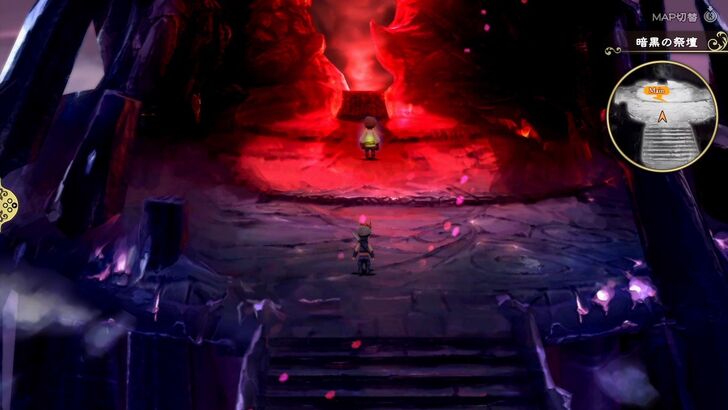
| 1 | Go to Airy |
|---|---|
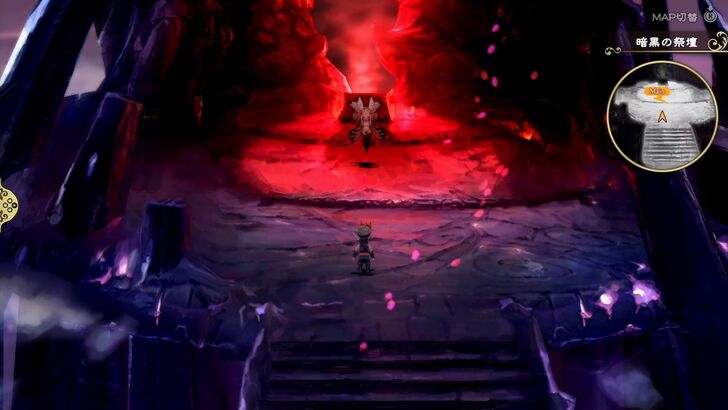 After watching the scene, head north, where Airy awaits. |
|
| 2 | Defeat Airy (Perfect Form) |
| Airy's attacks in this form can deal massive damage, especially when she uses her Acedia and Zeta-Flare combo. Dark Abyss inflicts Dread on the party, while Plague instantly kills all members affected by a status ailment. She also continues to use Recover when her HP is depleted. The best method to defeat Airy is to have a high-level Spiritmaster who can grant resistance to all elements to the entire party and use Stillness. Fortunately, Airy is still weak to Fire and not immune to Sleep. ┣ Weak against Fire. ┣ Have a Spiritmaster/White Mage combo for healing and debuff countermeasures. ┗ Primarily uses magic attacks, so raise your magic defense. (▶︎ Equipment List) |
|
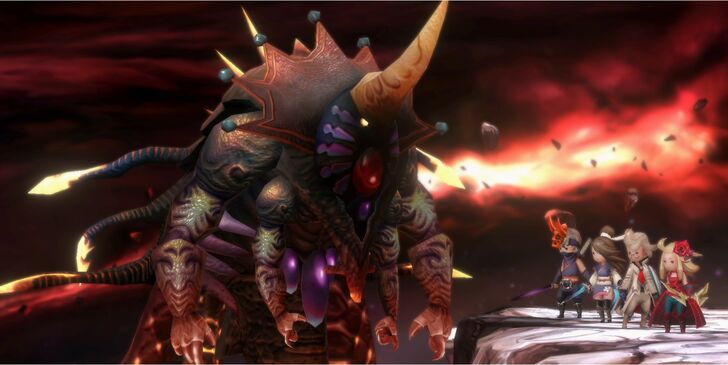
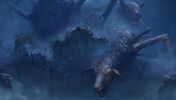
| 3 | Defeat Ouroboros (First Form) |
 After you defeat Airy, Ouroboros, the ultimate boss of the game, will finally show himself. After the scene, you will immediately be thrust into a fight against him. In his first form, Ouroboros will use various job abilities that you have. This is not a very tough fight, just continuously hit him with your heavy damage dealing attacks to deplete his HP. Additionally, he is susceptible to Sleep in this form. ┣ Weak against Water. ┣ Prepare for a non-stop, four-phase battle from its 1st to 4th forms. ┗ Before challenging Ouroboros, heal and save your game with the Adventurer. |
|
| 4 | Defeat Ouroboros (Second Form) |
| After defeating his first form, Ouroboros will change to his second form. This time he will use Zero Dimension, which can instantly kill. It can also slip through Stillness. He also heals himself with Total Regeneration. Ouroboros is weak to Water, so you can take advantage of Blizzaga-based attacks, especially Blizzaga Dragon Slayer since Ouroboros is a dragon. Once you have dealt him 50000 damage, he will change form again. Equip Ribbon and cast Fairy Ward to nullify hi s death attacks. |
|
| 5 | Defeat Ouroboros (Third Form) |
| The third form is basically just the same as the second form, except for Demonic Touch, an attack that decreases your entire party's BP by 1. When you reduce his HP to half, he will change form once again. | |
| 6 | Defeat Ouroboros (Fourth Form) |
| His fourth form is where it gets harder. In addition to Demonic Touch, he will now use Celestial Touch, which increases his physical attack. Ouroboros will also unleash Armageddon, which deals massive damage and recovers his HP completely. Survive Armageddon and lower his HP enough to push him into his fifth and final form. Casting Stillness and having a Giant's Draft, when possible, is useful in this fight. |
|
| 7 | Defeat Ouroboros (Fifth Phase) |
| In his final form, Ouroboros will now use Disaster, which causes over 5000 damage to the entire party, and Divergence, which prevents all actions except Default and Summon Friends. Make use of Blizzaga Dragon Slayer, all Blizzaga-based attacks, piercing Defense attacks, and anything that can deal flat damage. If you can outpace Ouroboros then this fight will be fairly easier. |
|
| 8 | Clear the Game |
| Winning the Ouroboros battle triggers the ending and clears the game. |
Resume from Chapter 8 with True Ending Cleared Save Data
Your character's growth status and held items will carry over when you restart from Chapter 8 with your True Ending clear data. Once your characters are sufficiently leveled, it's recommended to challenge the deepest part of the Dimension's Hasp.
Post-Game Content and New Game Plus
True Final Ending Bosses
Airy
| Airy Boss Fight Tips |
|---|
|
|
Ouroboros (1st to 4th form)
| Ouroboros Boss Fight Tips |
|---|
|
|
Recommended Party
| Job | Job Commands/Support Abilites to Equip |
|---|---|
 Ninja
(x2) Ninja
(x2) |
Job Command: Sword Magic (Spell Fencer) Support Abilities: Frenetic Fighting (Ninja Lv. 14) Precision (Ranger Lv. 13) Hawkeye (Hunter Lv. 12) |
 Red Mage Red Mage
|
Job Command: Singing (Performer) Support Abilities: BP Recovery (Red Mage Lv. 9) Revival (Red Mage Lv. 12) Save Singing MP (Performer Lv. 12) |
 Spiritmaster Spiritmaster
|
Job Command: White Magic (White Mage) Support Abilities: Revenge (Red Mage Lv. 11) Holy One (Spiritmaster Lv.9) Steady MP Recover (Conjurer Lv. 2) |
This is the recommended party for the True Final Chapter boss battle. It is made up of two ninja attackers and two support characters for durability and damage amplification.
Strategy That Our Team Used
This is the strategy that our team actually used to defeat the True Ending bosses. If you're stuck, feel free to use it as a reference.
| Turn | Command |
|---|---|
| 1st Turn | Ninja x2: Accumulate BP with Default. Spiritmaster: Use Stillness for 2 turns for party-wide invincibility. Red Mage: Use My Hero |
| 2nd Turn | Ninja x2: Sword Magic→Imbue Element Spiritmaster: No Action Red Mage: No Action |
| 3rd Turn | Ninja x2: Go all-out with Brave, performing 4 actions. (Ikkikasei→Attack x3) Spiritmaster: BP Convert※ Red Mage: Use My Hero |
| 4th and Next Turns | Endure with Stillness invincibility until BP and buffs are ready. Once buffs are accumulated, go out with an all-out attack when invincibility ends. |
| Key Points | |
| ・Accumulate buffs and BP while invincible using Stillness. ┗ Beware as the enemy will also become invincible. ・Once you've stocked up on BP and buffs, unleash a full assault when the invincibility wears off. ・The Red Mage can support the party by granting BP to everyone. ・ There's a risk of taking damage for just one turn after Stillness invincibility ends. ※During Turn 3, consider additional debuff countermeasures depending on the enemy to significantly increase stability of the Spiritmaster. ┣ For the Airy battle, use Convert BP + Fairy Ward for debuff countermeasures. ┗ For the Ouroboros battle, use Convert BP + Dispel to remove enemy buffs. If a character is incapacitated by an instant-death attack or similar, it's fine to revive them using an item during a Ninja's Default turn. |
|
Bravely Default HD Remaster Related Guides

List of All Main Story Chapters
All Bravely Default Flying Fairy Chapters
| 0 | On the Precipice of Despair |
|---|---|
| 1 | Sit and Stay Are Tricks for Dogs |
| 2 | One Day, Beneath a Blue Sky |
| 3 | Beloved Bonds |
| 4 | Black and White |
| 5 | Yesterday's Scenery |
| 6 | A World of Echoes - Equal |
| 7 | A World of Echoes - Dash |
| 8 | A World of Echoes - Circle |
| 9 | Airy Lies (False Final Chapter) |
| 10 | Bravely Default (True Final Chapter) |
Comment
Author
Bravely Default Flying Fairy Remaster Walkthrough & Guides Wiki
True Final Ending Walkthrough
Please participate in our site
improvement survey
02/2026
improvement survey
02/2026
Would you assist in
improving Game8's site?
improving Game8's site?

×
We are listening to our users' valuable opinions and discussing how to act on them.
The information collected through this survey will be used for the purpose of improving our services. In addition, the information will only be disclosed a part of a statistic in a format that will not allow identification of personal information.
Begin Survey
Not Now
×
Please rate each item regarding Game8.co's Advertisements.
Amount of Ads
Very Dissatisfied
Somewhat Dissatisfied
Fine
Somewhat Satisfied
Highly Satisfied
Placement of Ads
Timing of Ad Display
Ad Loading Speed
Safeness of Ads
Content of Ads
×
Please rate each item regarding Game8.co's Quality of Articles.
Amount of information
Very Dissatisfied
Somewhat Dissatisfied
Fine
Somewhat Satisfied
Highly Satisfied
Frequency of updates
Speed of new information
Accuracy of articles
Understandibility of articles
Readability of sentences
×
Please rate each item regarding Game8.co's Usability of the Site.
Ease of finding information
Very Dissatisfied
Somewhat Dissatisfied
Fine
Somewhat Satisfied
Highly Satisfied
Loading Speed
Use of Color
Font Size
Visibility of Images
Easy to Understand Layout
×
Please rate each item regarding Game8.co's Message Boards, Comments.
Ease of Writing
Very Dissatisfied
Somewhat Dissatisfied
Fine
Somewhat Satisfied
Highly Satisfied
Readability
Ease in Finding Information
Comment Quality
Comment Quantity
Admin Response
×
Please rate each item regarding Game8.co's Site's new design.
Please rate our site's new design
Very Dissatisfied
Somewhat Dissatisfied
Fine
Somewhat Satisfied
Highly Satisfied
Do you think that the website's design change makes the site easier to use?
Has the new design made it easier for you to find information on the site?
Has the new design improved the overall visual appeal of the site?
How would you rate your overall satisfaction with the new design of the site?
×
How likely are you to recommend Game8 to someone you know?
Very Unlikely
0
1
2
3
4
5
6
7
8
9
10
Very Likely
If you have other opinions regarding potential improvement to the website, please share them with us. We would appreciate your honest opinion.
Note: This is a free response section, so you can proceed without entering anything.
Note: Please be sure not to enter any kind of personal information into your response.
Note: Please be sure not to enter any kind of personal information into your response.
×
Thank You
×
Thank you for participating in our survey! Your answers will help us to improve the quality of our website and services.
We hope you continue to make use of Game8.
We hope you continue to make use of Game8.
Close
Rankings
- We could not find the message board you were looking for.
Gaming News


Popular Games

Genshin Impact Walkthrough & Guides Wiki
Arknights: Endfield Walkthrough & Guides Wiki
Honkai: Star Rail Walkthrough & Guides Wiki
Wuthering Waves Walkthrough & Guides Wiki
Umamusume: Pretty Derby Walkthrough & Guides Wiki
Zenless Zone Zero Walkthrough & Guides Wiki
Pokemon TCG Pocket (PTCGP) Strategies & Guides Wiki
Clair Obscur: Expedition 33 Walkthrough & Guides Wiki
Digimon Story: Time Stranger Walkthrough & Guides Wiki
Where Winds Meet Walkthrough & Guides Wiki


Recommended Games
Fire Emblem Heroes (FEH) Walkthrough & Guides Wiki
Diablo 4: Vessel of Hatred Walkthrough & Guides Wiki
Super Smash Bros. Ultimate Walkthrough & Guides Wiki
Yu-Gi-Oh! Master Duel Walkthrough & Guides Wiki
Pokemon Brilliant Diamond and Shining Pearl (BDSP) Walkthrough & Guides Wiki
Elden Ring Shadow of the Erdtree Walkthrough & Guides Wiki
Monster Hunter World Walkthrough & Guides Wiki
The Legend of Zelda: Tears of the Kingdom Walkthrough & Guides Wiki
Persona 3 Reload Walkthrough & Guides Wiki
Cyberpunk 2077: Ultimate Edition Walkthrough & Guides Wiki


All rights reserved
© SQUARE ENIX
The copyrights of videos of games used in our content and other intellectual property rights belong to the provider of the game.
The contents we provide on this site were created personally by members of the Game8 editorial department.
We refuse the right to reuse or repost content taken without our permission such as data or images to other sites.