This survey will take about 1 minute.
Your answers will help us to improve our website.
Sand Land
The Flying Fortress Garam Walkthrough
★ Check out our complete Platinum Trophy Guide!
⧗ Use different Parts and Materials to enhance vehicles!
⧖ Learn the Best Vehicles and Best Skills!
⧗ Find Collectibles: Blueprints | Lost Property | Bottles
This is a walkthrough for the The Flying Fortress Garam Main Quest in Sand Land. See a detailed walkthrough of The Flying Fortress Garam, the boss guides for this chapter, as well as useful tips for completing The Flying Fortress Garam.
| ◄ Previous Quest | Next Quest ▶ |
|---|---|
| The Two Kings | - |
List of Contents
The Flying Fortress Garam Walkthrough
 Attention!
 |
Before starting this quest, we recommend leveling up your Battle Tank, Battle Armor, and Hovercar to Level 25 to make the boss fights in this chapter a lot easier. |
Part 1: Masala Dig Site
| No. | Step-By-Step Walkthrough |
|---|---|
| 1 | Fast travel to Trikke Camp and talk to King Jam and Papa. While you're here, stock up on Repair Kit Max and other supplies for the boss fights ahead. Make sure you have the Best Skills for battle equipped to your radial as well, like Ann's E. Repairs and Quick Reload. |
| 2 | 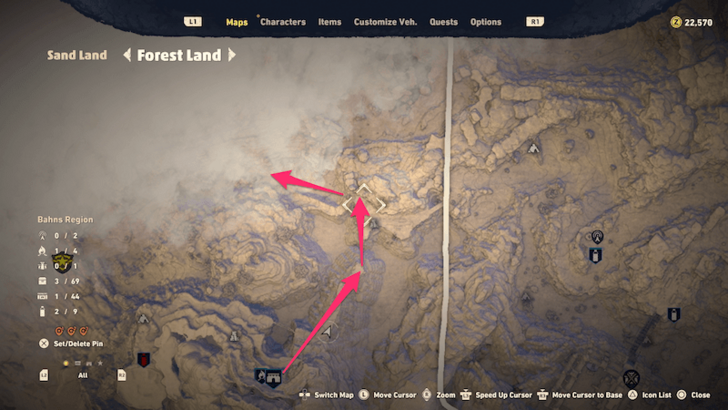 Fast Travel to Aracia Village next and go northeast across the bridge, then descend to the northwest to find the path to Flying Fortress Garam. |
| 3 |  Ride on your Motorbike and avoid all of the Battle Armor and soldiers in the way. When you reach the large circle, ride towards the middle until a cutscene begins, but first, get your gear ready before you fight Epi's Mech 3.0! |
| 4 | 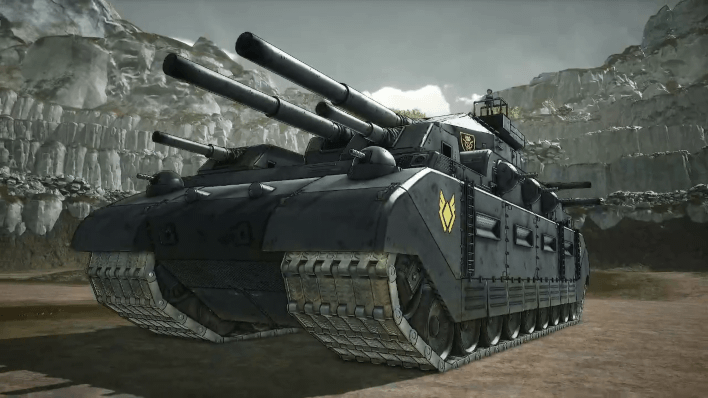 After the battle, you'll have a short break, so heal up as needed. Proceed to the next area to fight Rosetta's Tank. Rosetta's Tank will reward you with the High-Capacity Missile Pod option for the Battle Tank. This is one of its most powerful upgrades, so don't forget to equip it! |
| 5 | Run through the cave as Beelzebub avoiding soldiers. Watch out for their rockets and bullets while running and jumping past them to the end of the section. |
| 6 | After a cutscene, you'll automatically Fast Travel to Trikke Camp. Proceed through the objectives. |
Part 2: Vender Base
| No. | Step-By-Step Walkthrough |
|---|---|
| 1 | You'll be back in Spino Town. Fast Travel to Sagitta Camp in Forest Land and head up the slope. To get into Vender Base, go northeast around it to find a path up. |
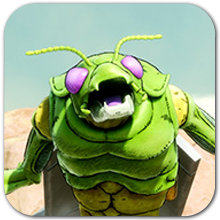
| 2 | 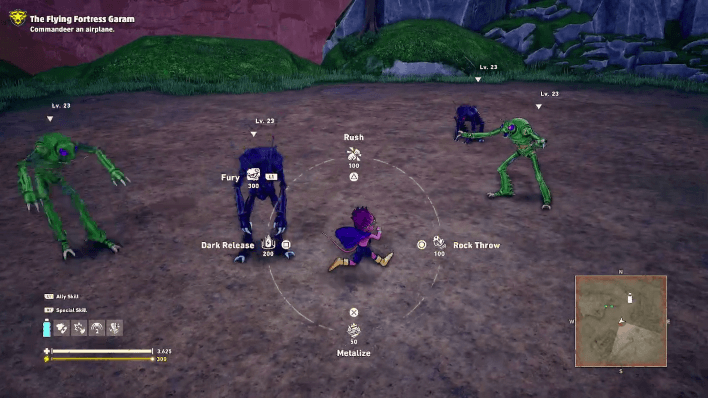 When you enter, you'll have to fight several Insect Men. Take them out one at a time or use Dark Release once you have them grouped up near you. |
| 3 | You'll begin a stealth section upon entering the base. Proceed clockwise around the area to advance, as troops will be gathered in the central and bottom-right areas, and you'll be trying to advance to a building on the right side. Note that you can jump over the grass-covered walls, and troops won't see you when going over them, so use this to your advantage. |
| 4 |  From the entrance, run fast to the left towards the pole. Then, cross the road towards the crates beside the large building. Continue north while hiding behind the crates so you won't be caught by the soldiers. |
| 5 | 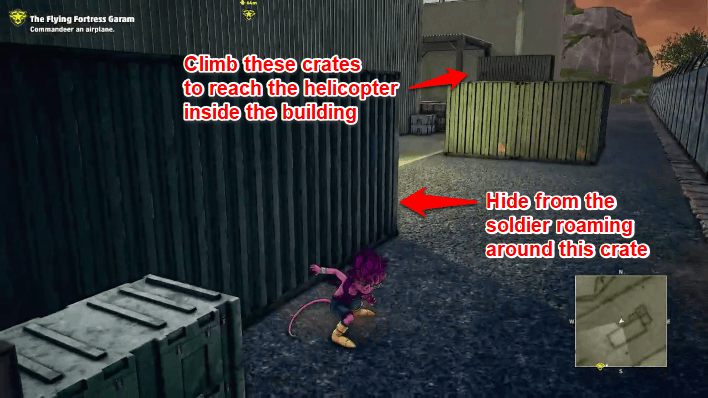 Go left once you've reached the end of the path but be careful of the soldier roaming there. Go past him and climb the crates up ahead to reach the open window in the next building. |
| 6 | Optional: Enter the other building to start another stealth section. Inside it is a Flaming Boost option for the Hoverjet. |
| 7 | 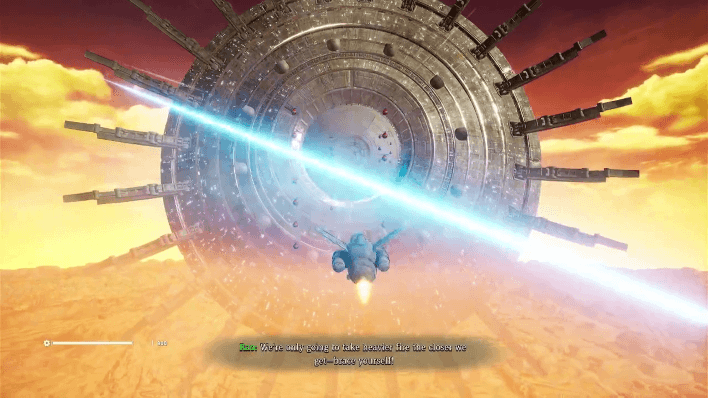 After a cutscene, you'll be flying a helicopter. Dodge the rocks to proceed. Next, dodge the bullets from the bogeys behind you and wait for them to crash into the walls. In the last flying section, you'll need to dodge flying bombs, bullets, and lasers. Generally, you can move further than you might think to avoid obstacles, so stay on the edges. During the final section with the blue lasers, hug the bottom of the screen and they won't be able to hit you despite appearances. |
Part 3: Flying Fortress Garam
| No. | Step-By-Step Walkthrough |
|---|---|
| 1 | 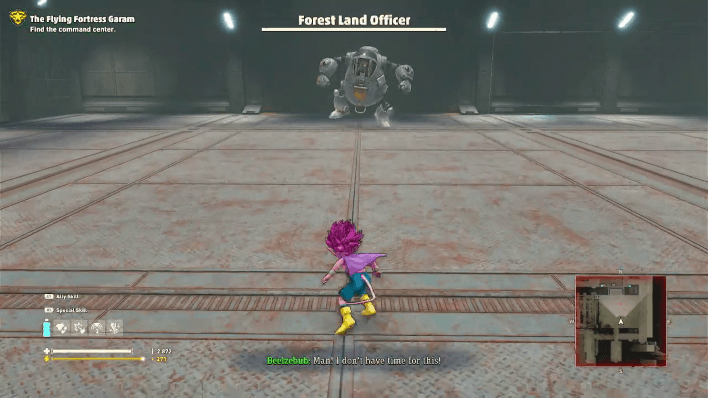 Continue ahead while defeating a large jumper robot, then more robots and soldiers. Continue following the quest markers until you reach the room with a Forest Land Officer in Battle Armor. The Hovercar is a good choice for this fight as the room is too small to avoid hits with the Tank. Defeat the Forest Land Officer to get materials and a Legendary Standard Backpack IV for the Battle Armor. |
| 2 | 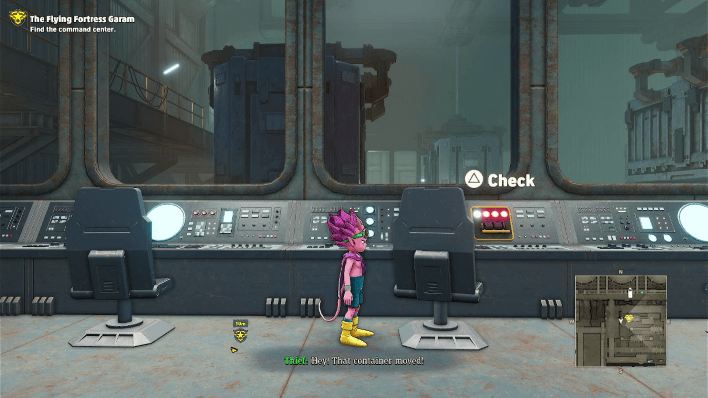 Continue up the stairs while defeating robots until you reach the room with a control panel. Defeat the enemies in it, then interact with the control panel to raise the large crate in the next area. Exit the room afterwards and jump across the large crates to get to the other side. |
| 3 | 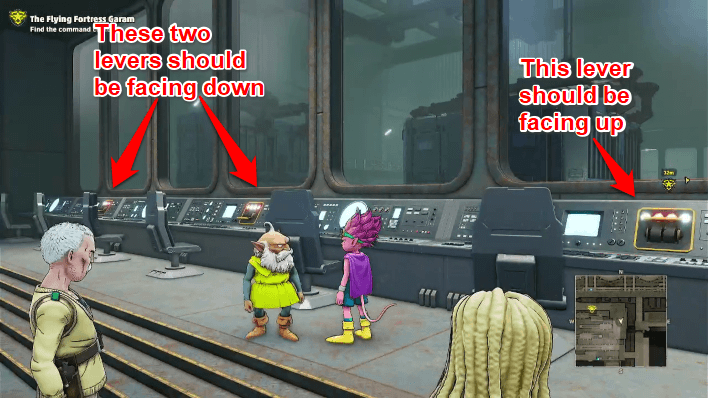 Reach the next room and interact with another control panel. Make sure that the leftmost and middle levers are facing down, and the one on the right is facing up. |
| 4 | Continue ahead following the quest marker. Enemies here are fairly tough and you'll have to use Beelzebub alone, so keep your HP up by drinking water as needed. |
| 5 | 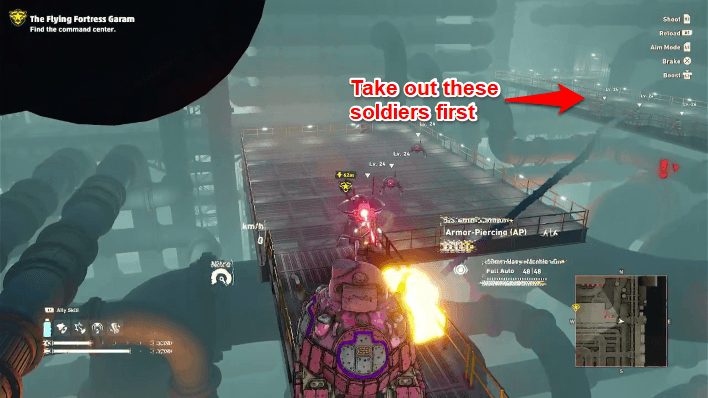 After a sidescrolling section, you'll fight another jumper robot. Switch to the Tank and take out the soldiers from across launching rockets first, then the robots near you. |
| 6 | 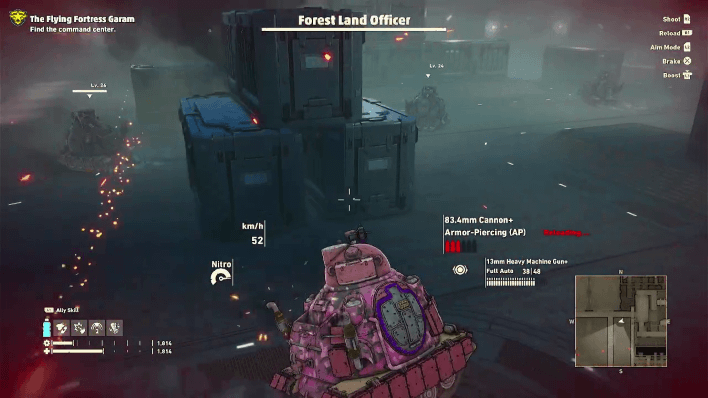 In the next room, you'll fight a Forest Land Officer in a Tank with a few other tanks. You have a wide room to work with here, so use the vehicle of your choice. |
| 7 | 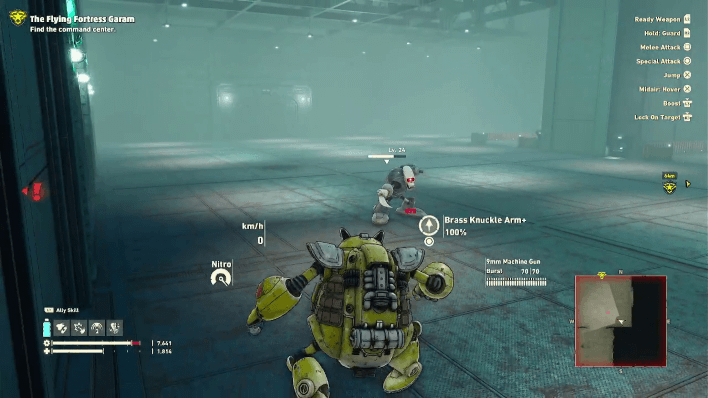 Continue ahead and blow through a few Insect Men. You'll fight two Battleship Defenders in the next room. Use the Battle Armor for its Block and take out the two Battleship Defenders. |
| 8 | Ahead, you'll fight another Forest Land Officer in a Battle Armor. The Hovercar is a good choice here as the room is fairly small. |
| 7 |  Proceed to the next area and defeat the Defense System. |
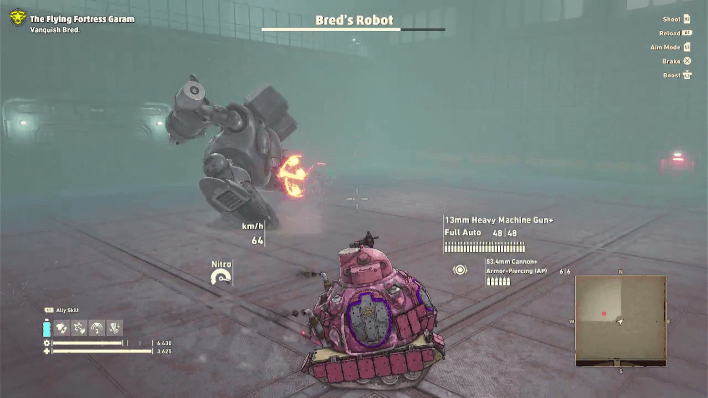
| 8 | 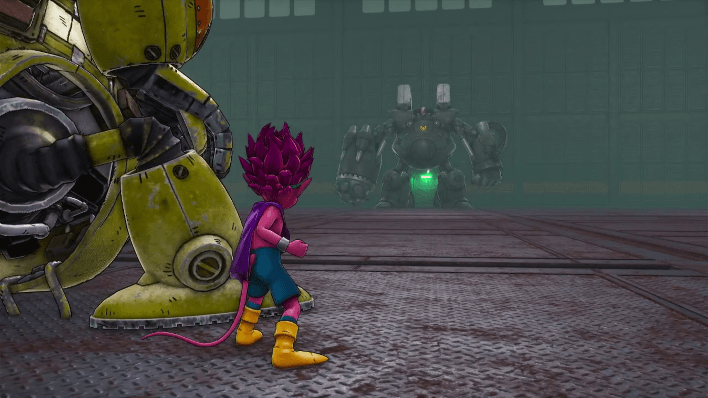 Ride the elevator up. Ahead, you'll fight with Bred's Robot, a giant Battle Armor. Defeat it to get 4,000 Zeni and the One-Hit Headbutt for the Battle Armor. |
| 9 |  Defeat Muniel in the next room after your fight with Bred. |
| 10 | Watch the cutscene after your fight with Muniel and let the credits roll! You'll receive 5,000 Zeni and 1,200 EXP afterwards. Lassi will also have new items and the Spino garage will have new parts available for crafting. |
No Post-Game Content
There's no content exclusive to the post-game in Sand Land, as all the side content can be completed before finishing the game. There are a few unlockables at Lassi's shop and the Spino garage, but no new game modes or New Game Plus. But, if you haven't finished it all yet, there's still plenty of side content to explore in the wide world of Sand Land!
Trophy Guide and List of Achievements
The Flying Fortress Garam Boss Guides
| Jump to a Boss Fight! | |||||
|---|---|---|---|---|---|
| Epi's Mech 3.0 | Rosetta's Tank | ||||
| Defense System | Bred's Robot | Muniel | |||
Epi's Mech 3.0
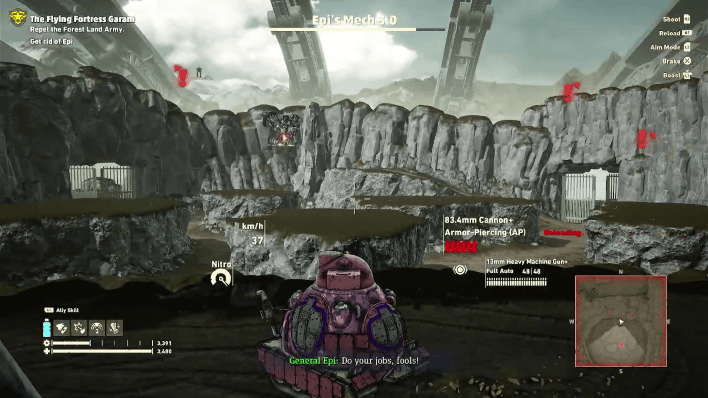
Your fight with Epi's Mech 3.0 will be somewhat similar to your previous battles with him. This time, however, tanks and other robots will back him up.
The strategy for this is to ignore them and focus on Epi. He'll also unleash a fast laser beam directly ahead, and a spinning laser with a wide range, so use the rocks carefully to hide and use vehicles with maneuverability like the Hovercar when you can.
Rosetta's Tank
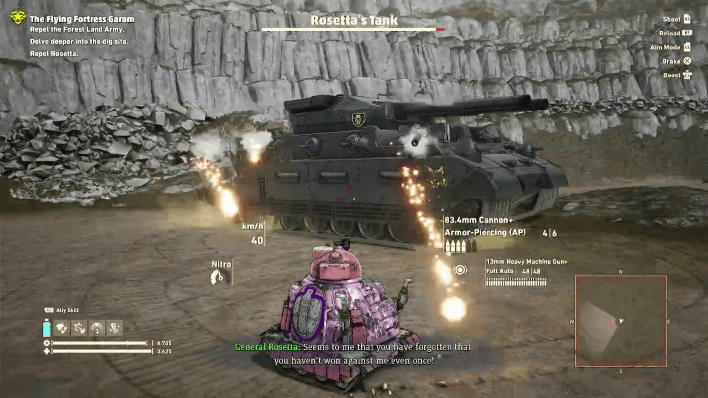
This is a war of attrition as it's tricky to avoid her constant barrage, so just keep pelting her with damage and ensure that she goes down before you.
Equip the Cannon for the Battle Armor, as otherwise it'll be useless in this fight, with its punches causing the Armor to take damage and fly back.
Defense System
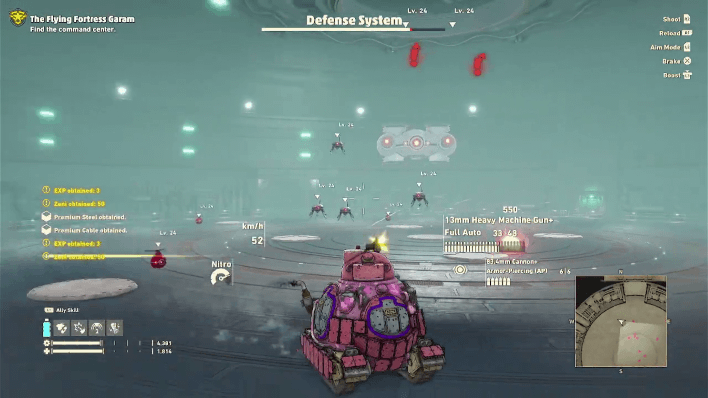
Your fight with this Defense System is similar to last time, but there are now exploding robots to watch out for.
We recommend using the Tank for this one. When there are too many enemies, use the High-Capacity Missile Pod to clear the room. If you have it, the 100mm EMP Gun sold by Lassi is good here despite its low attack, as it can fire near-instantaneously, trivializing the difficulty of aiming your hits.
Bred's Robot

Your fight with Bred's Robot is pretty hard! Instead of using the Battle Armor as the game suggests, switch to the Tank as your Battle Armor is completely outmatched hand-to-hand.
The Hovercar is just a bit too fragile and has trouble avoiding Bred's charging punch without the Jet Thruster option. Switch back to your most powerful primary weapon if you were using the 100mm EMP Gun.
Bred's Robot Phase 1
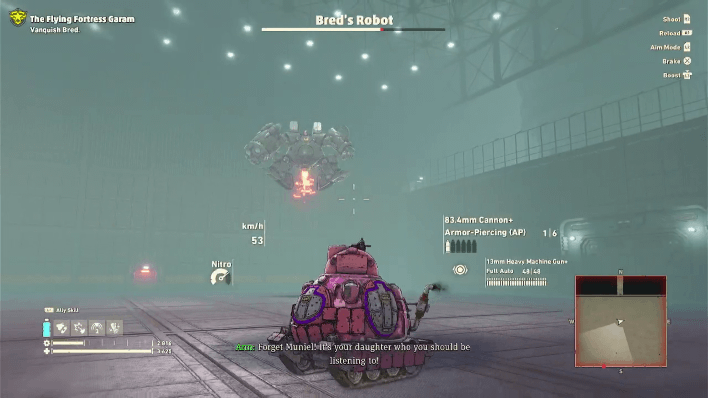
Bred will mostly use punches in this part, but watch out for his charging punch, where he will fly at you at high speed. This attack has a wide range, is hard to avoid, and does tons of damage – it will 1-shot many of your vehicles.
Make sure you always have some Nitro for the Tank and can use it to dodge; even still, make sure you always have plenty of distance from Bred and aren't cornered so you can avoid this attack at any time.
Bred's Robot Phase 2
Bred will fly up into the air and start charging a laser and firing rockets and bullets. This laser is very slow and easy to avoid, and the rockets and bullets are also on the slow side, so blast away at him during this phase
Bred's Robot Phase 3
Bred will start jumping into the air and crashing down near you, and then winding up a charging punch. This is the hardest phase as you'll need to use Nitro to avoid both of these attacks.
Keep out of range while firing and use E. Repairs and Repair Kits when needed to finish him off.
Muniel
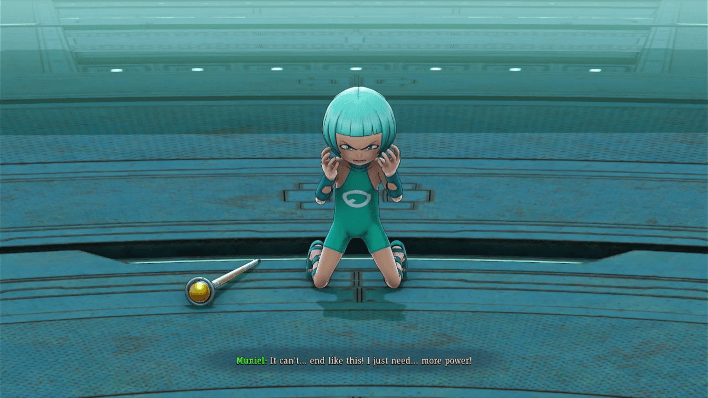
As expected, Muniel is the final boss but unfortunately he's rather disappointing. You'll fight him with hand-to-hand combat in the first part, and vehicles in the second.
Muniel Phase 1
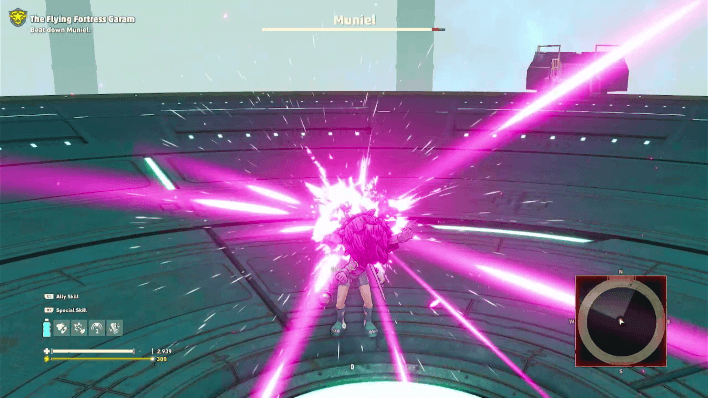
You'll fight Muniel as just Beelzebub during phase 1. Spam your combo of weak x5 -> strong to knock him backwards.
Rush is the best choice for when you build up Power of Darkness, as it will knock him back as well. Dodge his lightning orbs when he throws them, and when he starts to charge up a bubble, get out of the way to avoid being trapped in it. If you get trapped, spam weak attacks to escape.
Muneil Phase 2

You'll fight the giant Muniel with your vehicles during phase 1.
Once again, the Tank is the best choice despite the small battlefield as Muniel's attacks are slow and predictable. There aren't a lot of attacks worth mentioning – just continue to move in a circle and pound him with your primary weapon.
When he jumps into the air and starts glowing, he's about to transform; nothing will really change, but he'll be invinicible while transforming, so save your ammo and special attacks.
Sand Land Related Guides

| No. | Quest |
|---|---|
| 1 | Water Delivery! |
| 2 | Hitting the Road |
| 3 | Head to the Legendary Spring |
| 4 | Get Food and Water in Town |
| 5 | A Tank? Sign Me Up! |
| 6 | Need a Lift, Ann? |
| 7 | Tank Repairs |
| 8 | A Jump-bot?! Gimme! |
| 9 | The East Valley |
| 10 | Speaking the Truth |
| 11 | Headin' South! |
| 12 | The Legendary Spring |
| 13 | Royal Secrets No More |
| 14 | Water to the World! |
| 15 | Delivery for the Picchi |
| 16 | Surveying the Big Dam |
| 17 | Taking Ann Home |
| 18 | Rao's Suspicions |
| 19 | Aquanium Recovery |
| 20 | To Forest Land! |
| 21 | Rescue Mission! |
| 22 | Sunken Battleship |
| 23 | A Man of Chivalry |
| 24 | On the Brink |
| 25 | Taking Back the King |
| 26 | To Trikke, Pronto! |
| 27 | Joining Forces |
| 28 | Counteroffensive! |
| 29 | A Royal Rescue |
| 30 | The Two Kings |
| 31 | The Flying Fortress Garam |
Comment
Author

The Flying Fortress Garam Walkthrough
Please participate in our site
improvement survey
03/2026
improvement survey
03/2026
Would you assist in
improving Game8's site?
improving Game8's site?

×
We are listening to our users' valuable opinions and discussing how to act on them.
The information collected through this survey will be used for the purpose of improving our services. In addition, the information will only be disclosed a part of a statistic in a format that will not allow identification of personal information.
Begin Survey
Not Now
×
Please rate each item regarding Game8.co's Advertisements.
Amount of Ads
Very Dissatisfied
Somewhat Dissatisfied
Fine
Somewhat Satisfied
Highly Satisfied
Placement of Ads
Timing of Ad Display
Ad Loading Speed
Safeness of Ads
Content of Ads
×
Please rate each item regarding Game8.co's Quality of Articles.
Amount of information
Very Dissatisfied
Somewhat Dissatisfied
Fine
Somewhat Satisfied
Highly Satisfied
Frequency of updates
Speed of new information
Accuracy of articles
Understandibility of articles
Readability of sentences
×
Please rate each item regarding Game8.co's Usability of the Site.
Ease of finding information
Very Dissatisfied
Somewhat Dissatisfied
Fine
Somewhat Satisfied
Highly Satisfied
Loading Speed
Use of Color
Font Size
Visibility of Images
Easy to Understand Layout
×
Please rate each item regarding Game8.co's Message Boards, Comments.
Ease of Writing
Very Dissatisfied
Somewhat Dissatisfied
Fine
Somewhat Satisfied
Highly Satisfied
Readability
Ease in Finding Information
Comment Quality
Comment Quantity
Admin Response
×
Please rate each item regarding Game8.co's Site's new design.
Please rate our site's new design
Very Dissatisfied
Somewhat Dissatisfied
Fine
Somewhat Satisfied
Highly Satisfied
Do you think that the website's design change makes the site easier to use?
Has the new design made it easier for you to find information on the site?
Has the new design improved the overall visual appeal of the site?
How would you rate your overall satisfaction with the new design of the site?
×
How likely are you to recommend Game8 to someone you know?
Very Unlikely
0
1
2
3
4
5
6
7
8
9
10
Very Likely
If you have other opinions regarding potential improvement to the website, please share them with us. We would appreciate your honest opinion.
Note: This is a free response section, so you can proceed without entering anything.
Note: Please be sure not to enter any kind of personal information into your response.
Note: Please be sure not to enter any kind of personal information into your response.
×
Thank You
×
Thank you for participating in our survey! Your answers will help us to improve the quality of our website and services.
We hope you continue to make use of Game8.
We hope you continue to make use of Game8.
Close
Rankings
- We could not find the message board you were looking for.
Gaming News


![Monster Hunter Stories 3 Review [First Impressions] | Simply Rejuvenating](https://img.game8.co/4438641/2a31b7702bd70e78ec8efd24661dacda.jpeg/thumb)
Popular Games

Genshin Impact Walkthrough & Guides Wiki
Honkai: Star Rail Walkthrough & Guides Wiki
Umamusume: Pretty Derby Walkthrough & Guides Wiki
Pokemon Pokopia Walkthrough & Guides Wiki
Resident Evil Requiem (RE9) Walkthrough & Guides Wiki
Monster Hunter Wilds Walkthrough & Guides Wiki
Wuthering Waves Walkthrough & Guides Wiki
Arknights: Endfield Walkthrough & Guides Wiki
Pokemon FireRed and LeafGreen (FRLG) Walkthrough & Guides Wiki
Pokemon TCG Pocket (PTCGP) Strategies & Guides Wiki


Recommended Games
Diablo 4: Vessel of Hatred Walkthrough & Guides Wiki
Cyberpunk 2077: Ultimate Edition Walkthrough & Guides Wiki
Fire Emblem Heroes (FEH) Walkthrough & Guides Wiki
Yu-Gi-Oh! Master Duel Walkthrough & Guides Wiki
Super Smash Bros. Ultimate Walkthrough & Guides Wiki
Pokemon Brilliant Diamond and Shining Pearl (BDSP) Walkthrough & Guides Wiki
Elden Ring Shadow of the Erdtree Walkthrough & Guides Wiki
Monster Hunter World Walkthrough & Guides Wiki
The Legend of Zelda: Tears of the Kingdom Walkthrough & Guides Wiki
Persona 3 Reload Walkthrough & Guides Wiki


All rights reserved
© Bandai Namco Entertainment America Inc. All third party content, brands, names, and logos are used under license and remain property of their respective owners. All rights reserved.
The copyrights of videos of games used in our content and other intellectual property rights belong to the provider of the game.
The contents we provide on this site were created personally by members of the Game8 editorial department.
We refuse the right to reuse or repost content taken without our permission such as data or images to other sites.