Rao's Suspicions Walkthrough (Krowa's Hoverjet Boss Guide)
★ Check out our complete Platinum Trophy Guide!
⧗ Use different Parts and Materials to enhance vehicles!
⧖ Learn the Best Vehicles and Best Skills!
⧗ Find Collectibles: Blueprints | Lost Property | Bottles
This is a walkthrough for the Rao's Suspicions Main Quest in Sand Land. See a detailed walkthrough of Rao's Suspicions, the items that can be found in it, how to beat Krowa's Hoverjet, as well as useful tips for completing Rao's Suspicions.
| ◄ Previous Quest | Next Quest ▶ |
|---|---|
| Taking Ann Home | Aquanium Recovery |
List of Contents
Rao's Suspicions Walkthrough
| No. | Step-By-Step Walkthrough |
|---|---|
| 1 | 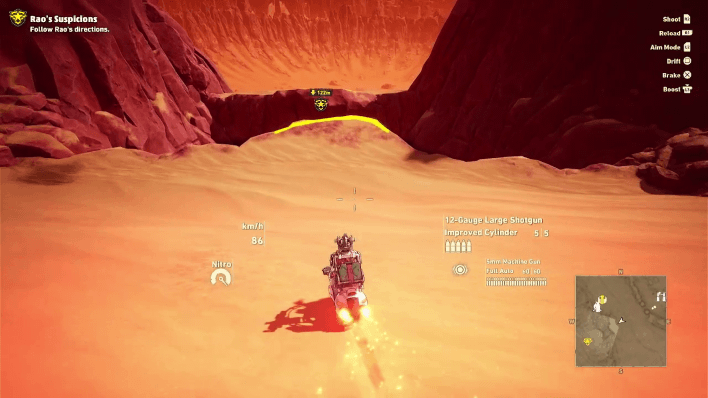 Follow the map marker across the bridge and through the West Grine Checkpoint gate. Ahead, you'll find a ramp that you can jump; use the Motorbike's Boost to get across. Some players encounter a bug with this and other motorbike jumps; if this occurs, try saving and restarting the game to fix the bug. |
| 2 | 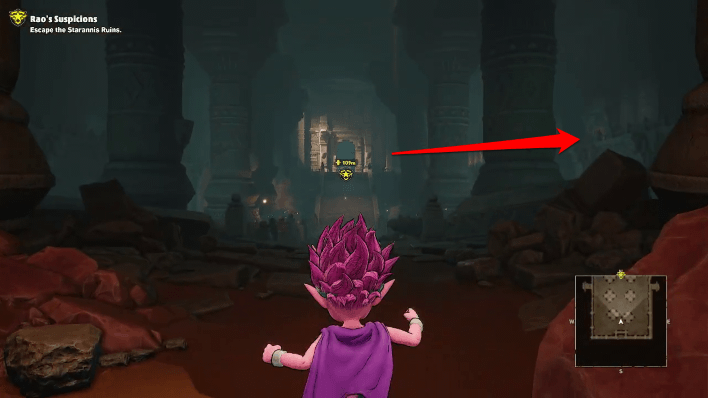 Optional: After the cutscene, continue ahead through the ruins. Go up the stairs, then turn right twice before you reach the quest marker. Check the alcoves to your left until you find a chest with an Ancient Copper Coin. |
| 3 | Afterwards, continue towards the quest marker, careful of the scorpion along the way. |
| 4 | 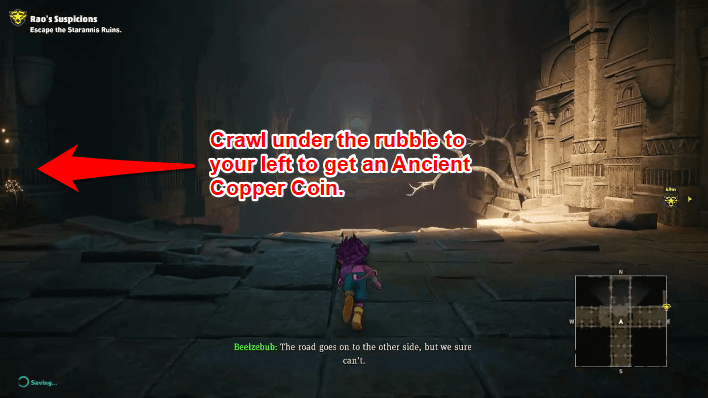 Optional: The path to the left is blocked off by rubble, but you are able to crawl through a small gap to reach a chest with an Ancient Copper Coin. |
| 5 | Go back to the dead end, then head right this time, through the passageways, down some steps to reach the next quest marker in a large room. Down here, yet another is another busted bridge. Before you cross it, grab the Ancient Copper Coin in the chest in the opposite corner of the room. |
| 6 | Head down the pit where the bridge's remains are. Use the Motorbike's Booster on the nearby slope to cross the gap. |
| 7 | 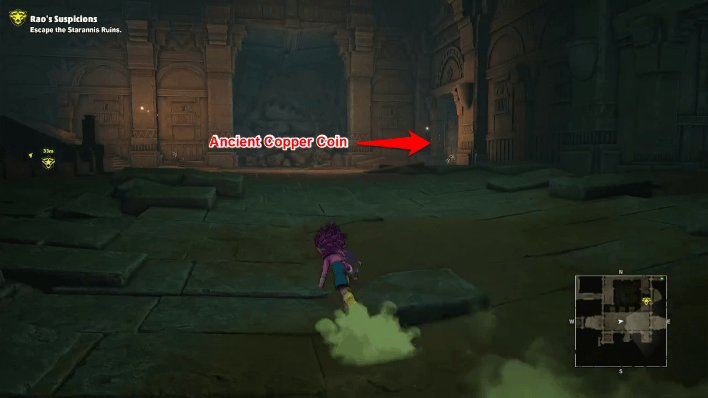 Continue straight ahead, defeating more scorpions along the way, as you reach the next chamber. Before you head up the steps to the quest marker, grab the chest in one of the alcoves to earn another Ancient Copper Coin. |
| 8 | 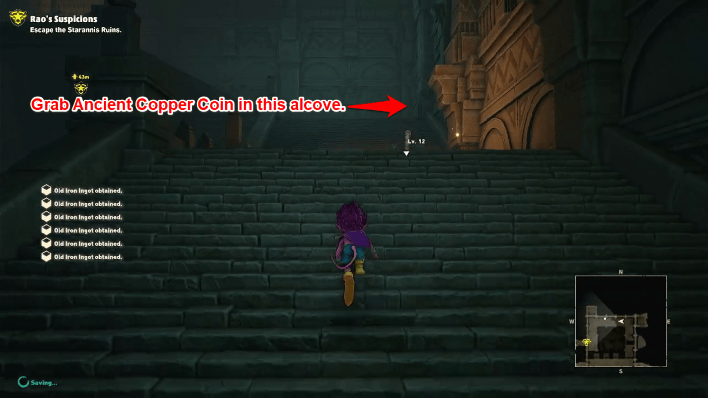 Head up the steps defeating the creatures, and collecting the treasures along the way. There's also a Treasure Chest with yet another Ancient Copper Coin guarded by a Cave Cobra. |
| 9 | 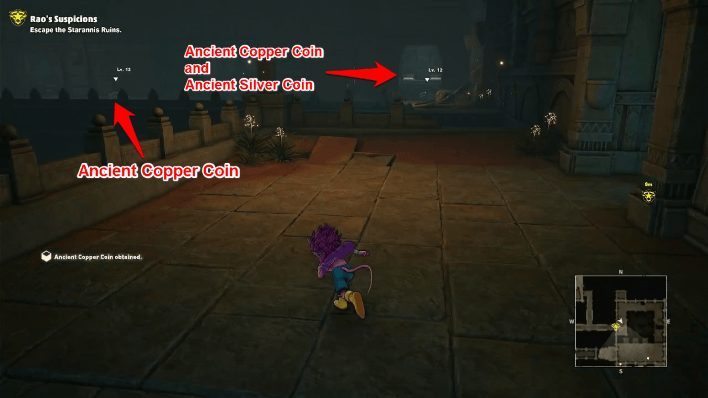 Once you reach the top of the steps, jump across the gap instead of going for the marker. Defeat the Cave Cobras in this area to get two Ancient Copper Coins and an Ancient Silver Coin. |
| 10 | 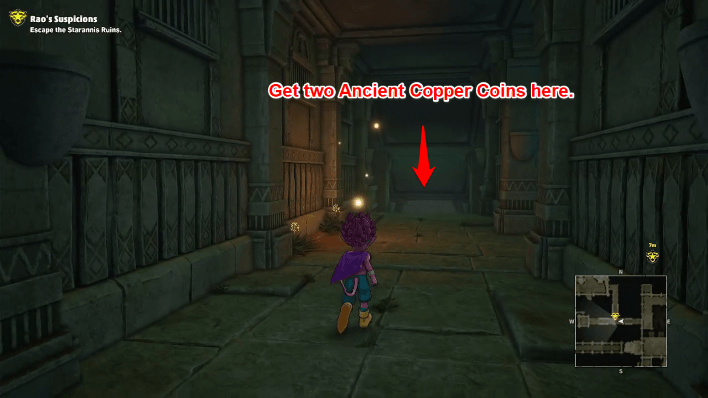 Return to the main path and follow the quest marker into the narrow passageways. At the fork, you can go straight to defeat a few more Cave Cobras and get two more chests that contain an Ancient Copper Coin each. |
| 11 | 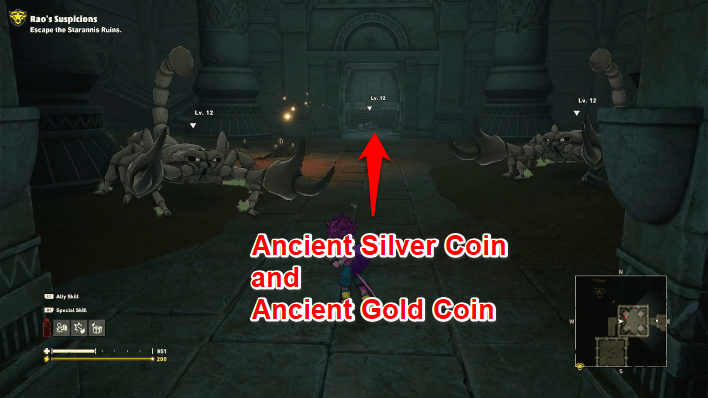 Continue through the narrow passageways until you reach another large room. Go north instead of going towards the quest marker and go inside the narrow passageway nearby. Keep going deeper until you reach a room guarded by two large Assassin Scorpions. Defeat the Scorpions and the Cave Cobra guarding the chests inside the alcove. Then, open the chests to get an Ancient Silver Coin and an Ancient Gold Coin. |
| 12 | 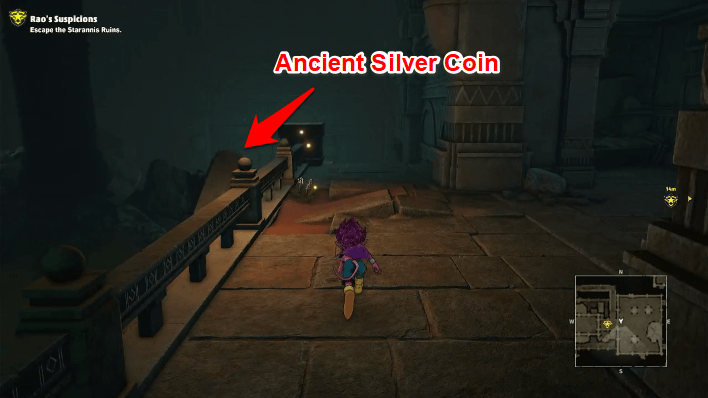 Go back to the large room and go up the stairs towards the quest marker. Grab the Ancient Silver Coin nearby before leaving the room. |
| 13 | After the cutscene, follow the quest markers in the room in an attempt to find an exit. Don't forget to grab the Ancient Gold Coin in the upper floor of the room. |
| 14 | After opening the exit, go through the door and jump across the pitfall. The floor ahead will start to collapse; use the Motorbike to go across faster than the floor can collapse. |
| 15 | 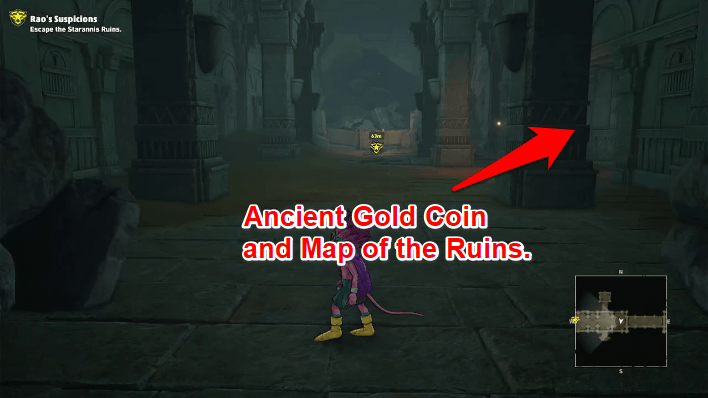 After passing through the collapsing floor, go towards the quest marker but take a short detour to go right to find an Ancient Gold Coin and a map of the ruins. |
| 16 | 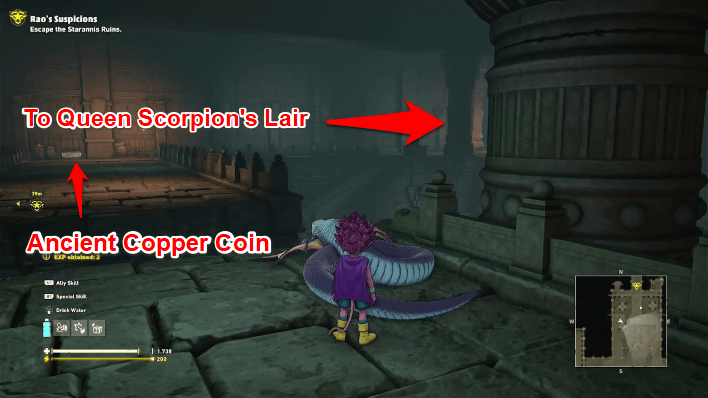 Continue ahead and go up the stairs. On the opposite end, you'll find an Ancient Copper Coin. Head back and jump across the gap to find another Ancient Copper Coin. Optional: Nearby, you can blast through a rock to find a path to a Queen Scorpion. It can be a bit tricky to fight with the Tank since the room has several obstacles and is difficult to maneuver in, and Queen Scorpion will charge you fast. It can be helpful to switch to the Jump-Bot or another more maneuverable vehicle, though your damage output will decrease accordingly. After the battle, go to the surrounding rooms to find 2 Ancient Gold Coins, 2 Ancient Silver Coins, and several Ore Veins |
| 17 | 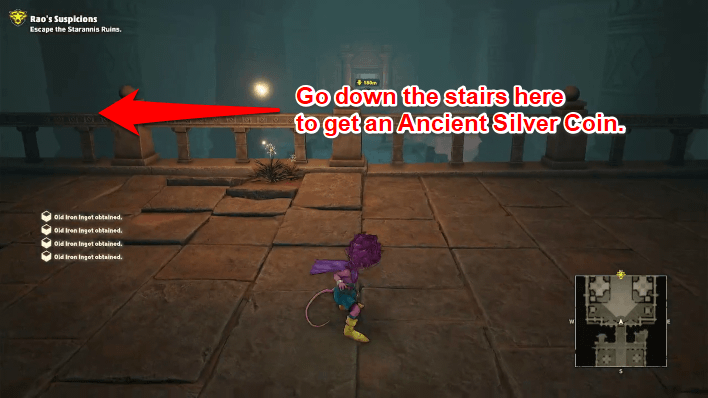 Head for the quest marker again. Once you reach the next large room, go down the stairs to your left to find an Ancient Silver Coin. Then, go across the collapsed bridge using your Motorbike. |
| 18 | 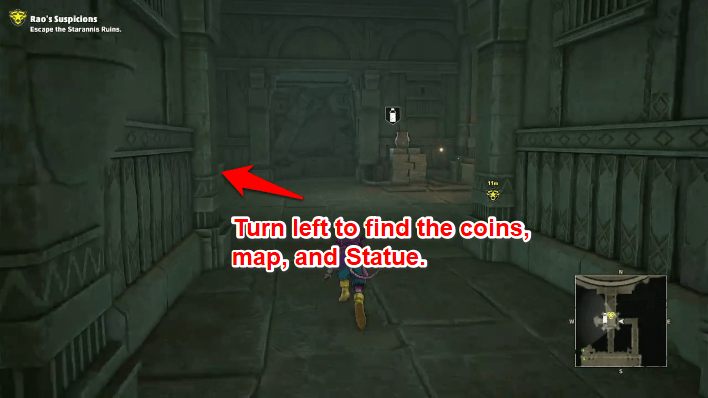 Ride the Motorbike through the hallway with the collapsing ceiling to avoid getting hit. When you reach the Water Supply Station, head left to find a map fo the Ruins, 2 Ancient Copper Coins, and the King Lucifer's Statue Furniture item. |
| 19 | 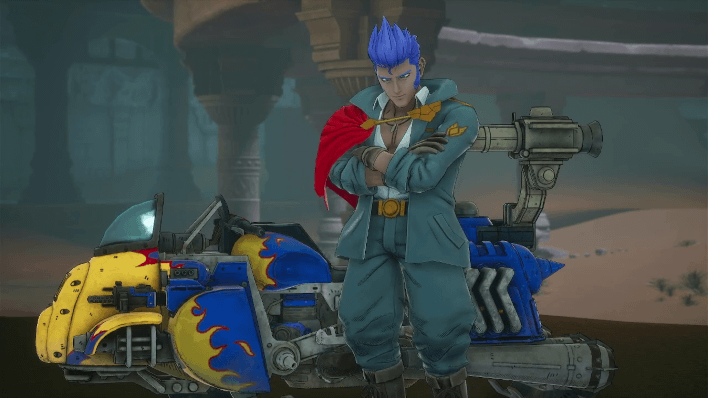 Continue to the map marker and defeat Krowa's Hoverjet. You'll receive 800 EXP and 1,500 Zeni for defeating him. |
| 20 | Leave following the map marker. Grab an Ancient Silver Coin on the way out. |
| 21 | Fast Travel back to Spino and after the cutscene, talk to Mayor Tor to end the quest. |
Rao's Suspicions Boss Guide
Krowa's Hoverjet
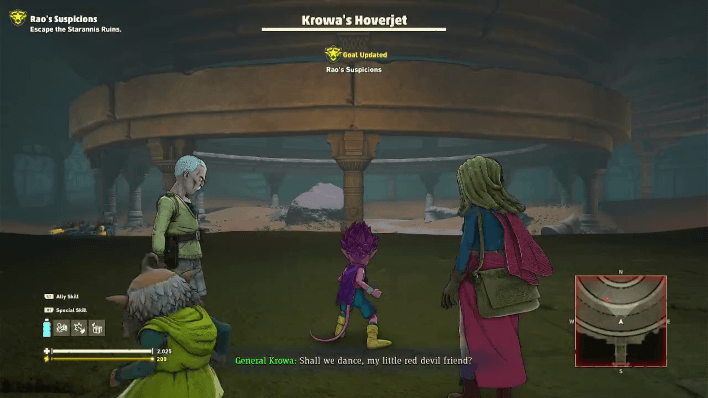
Your fight with Krowa's Hoverjet will be pretty tough, so come equipped with your best gear, as you won't be able to switch once the battle begins. Krowa will move at high speed for the entire battle, so be sure the Primary Weapon for all your vehicles can aim accurately at long range.
We recommend using the Battle Tank for this fight despite its low maneuverability as it can aim accurately at long distances.
Here are some other tips that you can do to take down Krowa's Hoverjet.
Stay at the Center
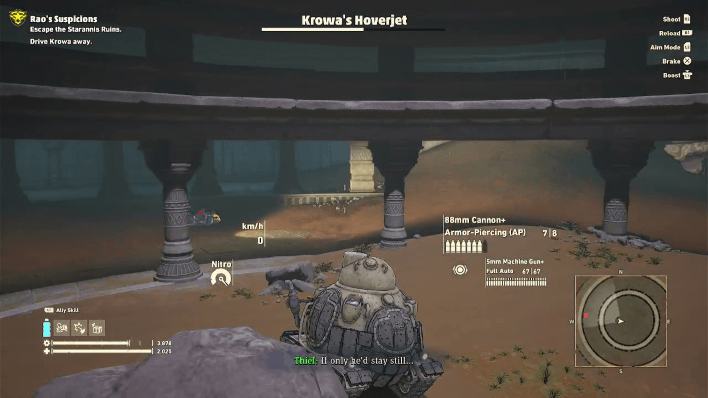
It's no use chasing Krowa's Hoverjet using the Battle Tank due to its low speed. Instead, stay at the center and watch his movements from there.
Take Cover Behind the Rock at the Center
At one point, Krowa will shoot missiles towards you. You can avoid these by taking cover behind the nearby rock at the center. Do your best not to get hit by the missiles to keep your tank healthy.
Lead Your Shots
Finally, you have to lead your shots so you can hit Krowa's Hoverjet. Make sure to aim where he will be and not where he currently is.
Sand Land Related Guides

| No. | Quest |
|---|---|
| 1 | Water Delivery! |
| 2 | Hitting the Road |
| 3 | Head to the Legendary Spring |
| 4 | Get Food and Water in Town |
| 5 | A Tank? Sign Me Up! |
| 6 | Need a Lift, Ann? |
| 7 | Tank Repairs |
| 8 | A Jump-bot?! Gimme! |
| 9 | The East Valley |
| 10 | Speaking the Truth |
| 11 | Headin' South! |
| 12 | The Legendary Spring |
| 13 | Royal Secrets No More |
| 14 | Water to the World! |
| 15 | Delivery for the Picchi |
| 16 | Surveying the Big Dam |
| 17 | Taking Ann Home |
| 18 | Rao's Suspicions |
| 19 | Aquanium Recovery |
| 20 | To Forest Land! |
| 21 | Rescue Mission! |
| 22 | Sunken Battleship |
| 23 | A Man of Chivalry |
| 24 | On the Brink |
| 25 | Taking Back the King |
| 26 | To Trikke, Pronto! |
| 27 | Joining Forces |
| 28 | Counteroffensive! |
| 29 | A Royal Rescue |
| 30 | The Two Kings |
| 31 | The Flying Fortress Garam |
Comment
Author
Rao's Suspicions Walkthrough (Krowa's Hoverjet Boss Guide)
improvement survey
03/2026
improving Game8's site?

Your answers will help us to improve our website.
Note: Please be sure not to enter any kind of personal information into your response.

We hope you continue to make use of Game8.
Rankings
- We could not find the message board you were looking for.
Gaming News
Popular Games

Genshin Impact Walkthrough & Guides Wiki

Honkai: Star Rail Walkthrough & Guides Wiki

Umamusume: Pretty Derby Walkthrough & Guides Wiki

Pokemon Pokopia Walkthrough & Guides Wiki

Resident Evil Requiem (RE9) Walkthrough & Guides Wiki

Monster Hunter Wilds Walkthrough & Guides Wiki

Wuthering Waves Walkthrough & Guides Wiki

Arknights: Endfield Walkthrough & Guides Wiki

Pokemon FireRed and LeafGreen (FRLG) Walkthrough & Guides Wiki

Pokemon TCG Pocket (PTCGP) Strategies & Guides Wiki
Recommended Games

Diablo 4: Vessel of Hatred Walkthrough & Guides Wiki

Cyberpunk 2077: Ultimate Edition Walkthrough & Guides Wiki

Fire Emblem Heroes (FEH) Walkthrough & Guides Wiki

Yu-Gi-Oh! Master Duel Walkthrough & Guides Wiki

Super Smash Bros. Ultimate Walkthrough & Guides Wiki

Pokemon Brilliant Diamond and Shining Pearl (BDSP) Walkthrough & Guides Wiki

Elden Ring Shadow of the Erdtree Walkthrough & Guides Wiki

Monster Hunter World Walkthrough & Guides Wiki

The Legend of Zelda: Tears of the Kingdom Walkthrough & Guides Wiki

Persona 3 Reload Walkthrough & Guides Wiki
All rights reserved
© Bandai Namco Entertainment America Inc. All third party content, brands, names, and logos are used under license and remain property of their respective owners. All rights reserved.
The copyrights of videos of games used in our content and other intellectual property rights belong to the provider of the game.
The contents we provide on this site were created personally by members of the Game8 editorial department.
We refuse the right to reuse or repost content taken without our permission such as data or images to other sites.





![Monster Hunter Stories 3 Review [First Impressions] | Simply Rejuvenating](https://img.game8.co/4438641/2a31b7702bd70e78ec8efd24661dacda.jpeg/thumb)


