A Tank? Sign Me Up! Walkthrough
★ Check out our complete Platinum Trophy Guide!
⧗ Use different Parts and Materials to enhance vehicles!
⧖ Learn the Best Vehicles and Best Skills!
⧗ Find Collectibles: Blueprints | Lost Property | Bottles
This is a walkthrough for the A Tank? Sign Me Up! Main Quest in Sand Land. See a detailed walkthrough of A Tank? Sign Me Up!, how to get through the stealth section in the Military Base, how to beat the Sand Land Army Tank, the items that can be found in Napps Base, as well as useful tips for completing A Tank? Sign Me Up!
| ◄ Previous Quest | Next Quest ▶ |
|---|---|
| Get Food and Water in Town | Need a Lift, Ann? |
List of Contents
A Tank? Sign Me Up! Walkthrough
| No. | Step-By-Step Walkthrough |
|---|---|
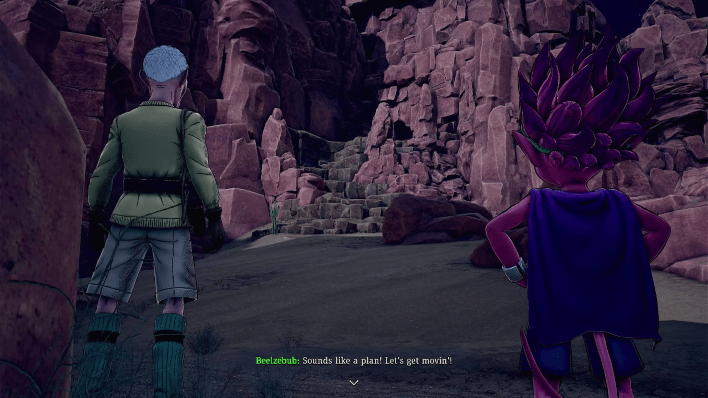
| 1 | Follow the quest marker to Napps Base and watch a short cutscene. |
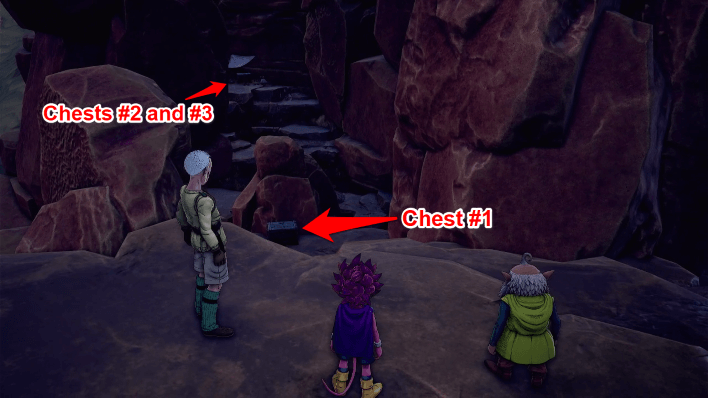
| 2 |  After the cutscene, climb through the rock path to your right and go to the other side to find the base. |
| 3 |  Go down the rocky path and open the chests scattered all over the place. Then, go straight to the base. |
| 4 | After the cutscene, go straight until you reach a tank of some sort to the left. Take down the lone soldier nearby and open the chest hiding behind some crates to get a few materials. Afterwards, go under the bent barbed fence where the lone soldier was stationed to go further inside the base. |
| 5 | Once you're in the second area, go up the ladder to your right and use double jump to reach a chest atop the leftmost building. |
| 6 | Double jump atop the buildings to reach the other side where another chest is waiting. |
| 7 | Cross the wire beside the chest you just opened, then go down the ladder to find a chest. Open the chest to get some materials. |
| 8 | Sneak out of the enclosure towards the white tent, then head right. Carefully approach the roaming guard and strike him while his back is turned on you. |
| 9 | Go back to the area where the tent is and hide behind the crates beside the tent. Sneak behind the roaming guard and strike them while their back is turned. Be careful of another guard roaming nearby. You can take cover behind another tent. |
| 10 | After killing the soldier, head back to where you were before and sneak up on the guard roaming around the crates to your right. After taking him down, open the chest he's guarding to get an Endurance Booster Chip. |
| 11 | From where the Endurance Booster Chip is, head south then west to find another chest. Open it to get a few more materials but be careful of another roaming guard nearby. |
| 12 | Find another guard between two of the tents nearby and take him down. Afterwards, loot the chest in front of him to get more materials. |
| 13 | Head for the westmost tent and crawl into the opening to get inside. |
| 14 | Exit the tent through its door and head into the maze of crates nearby. Turn right to find another chest. |
| 15 | Head south towards one of the white buildings and watch a short cutscene between two guards. Go to the back of the building and climb the stairs up ahead to find a chest. Afterwards, climb the ladder to reach the top of the building. |
| 16 | Next, double jump to the building on your right and open the chest there. |
| 17 | Move towards the marker and use the wire to get down from the building. |
| 18 | Turn around and head west. Then, loot the chest beside one of the white buildings. Be careful of the roaming guard nearby. |
| 19 | Follow the marker once more and crawl under the red tanks. Keep crawling until you reach the other side where a ladder is. |
| 20 | Climb the ladder and cross the wire nearby. Make sure to jump before the blue parts to avoid getting shocked. |
| 21 | Go inside the building through an open window and take down the soldiers guarding the large room. Once cleared, open the lone chest in the midde of the room to get materials. Follow the quest marker again and exit through another open window. |
| 22 | Follow the marker to the building where the tank is. |
| 23 | Ride the tank and destroy the gate. Go straight towards the green tent near the white buildings. Once you're near the tent, exit the tank and open the chest to get more materials. |
| 24 | Go back to the green building and climb the crates to its left to get a Lightweight Body. |
| 25 | Head towards the tower nearby and open the chest under it to get a treasure map for Napps Base. |
| 26 | Destroy the gate of the base and head towards the marker. |
| 27 | Once you reach a clearing, be prepared to take down a Sand Land Army Tank. Once it's down, loot its parts. |
| 28 | Finally, install the gun to your tank to complete the quest. You'd also have leveled up again at this point, so go ahead and get more skills for you and your team! |
Some Chests Can Only Be Obtained After You Get the Tank
This base is crawling with chests and materials but some of them can't be obtained just by sneaking past soldiers. A few of these chests can only be obtained after you've caused a commotion by getting the tank.
If there's a chest you can't get to, you can leave them for now and get them later when you get the tank.
A Tank? Sign Me Up! Boss Guide
Sand Land Army Tank
In this main quest, you'll be pit against another tank. Aim your crosshair at the enemy tank and shoot it with your guns.
Remember that you can reload manually using R1 on PS5 or RT on Xbox. You can also switch to a different gun if you want to by pressing the Circle button on your PS5 or the B button on Xbox.
List of Controls and How to Change
Sand Land Related Guides

| No. | Quest |
|---|---|
| 1 | Water Delivery! |
| 2 | Hitting the Road |
| 3 | Head to the Legendary Spring |
| 4 | Get Food and Water in Town |
| 5 | A Tank? Sign Me Up! |
| 6 | Need a Lift, Ann? |
| 7 | Tank Repairs |
| 8 | A Jump-bot?! Gimme! |
| 9 | The East Valley |
| 10 | Speaking the Truth |
| 11 | Headin' South! |
| 12 | The Legendary Spring |
| 13 | Royal Secrets No More |
| 14 | Water to the World! |
| 15 | Delivery for the Picchi |
| 16 | Surveying the Big Dam |
| 17 | Taking Ann Home |
| 18 | Rao's Suspicions |
| 19 | Aquanium Recovery |
| 20 | To Forest Land! |
| 21 | Rescue Mission! |
| 22 | Sunken Battleship |
| 23 | A Man of Chivalry |
| 24 | On the Brink |
| 25 | Taking Back the King |
| 26 | To Trikke, Pronto! |
| 27 | Joining Forces |
| 28 | Counteroffensive! |
| 29 | A Royal Rescue |
| 30 | The Two Kings |
| 31 | The Flying Fortress Garam |
Comment
Author
A Tank? Sign Me Up! Walkthrough
improvement survey
03/2026
improving Game8's site?

Your answers will help us to improve our website.
Note: Please be sure not to enter any kind of personal information into your response.

We hope you continue to make use of Game8.
Rankings
- We could not find the message board you were looking for.
Gaming News
Popular Games

Genshin Impact Walkthrough & Guides Wiki

Honkai: Star Rail Walkthrough & Guides Wiki

Umamusume: Pretty Derby Walkthrough & Guides Wiki

Pokemon Pokopia Walkthrough & Guides Wiki

Resident Evil Requiem (RE9) Walkthrough & Guides Wiki

Monster Hunter Wilds Walkthrough & Guides Wiki

Wuthering Waves Walkthrough & Guides Wiki

Arknights: Endfield Walkthrough & Guides Wiki

Pokemon FireRed and LeafGreen (FRLG) Walkthrough & Guides Wiki

Pokemon TCG Pocket (PTCGP) Strategies & Guides Wiki
Recommended Games

Diablo 4: Vessel of Hatred Walkthrough & Guides Wiki

Cyberpunk 2077: Ultimate Edition Walkthrough & Guides Wiki

Fire Emblem Heroes (FEH) Walkthrough & Guides Wiki

Yu-Gi-Oh! Master Duel Walkthrough & Guides Wiki

Super Smash Bros. Ultimate Walkthrough & Guides Wiki

Pokemon Brilliant Diamond and Shining Pearl (BDSP) Walkthrough & Guides Wiki

Elden Ring Shadow of the Erdtree Walkthrough & Guides Wiki

Monster Hunter World Walkthrough & Guides Wiki

The Legend of Zelda: Tears of the Kingdom Walkthrough & Guides Wiki

Persona 3 Reload Walkthrough & Guides Wiki
All rights reserved
© Bandai Namco Entertainment America Inc. All third party content, brands, names, and logos are used under license and remain property of their respective owners. All rights reserved.
The copyrights of videos of games used in our content and other intellectual property rights belong to the provider of the game.
The contents we provide on this site were created personally by members of the Game8 editorial department.
We refuse the right to reuse or repost content taken without our permission such as data or images to other sites.


![Monster Hunter Stories 3 Review [First Impressions] | Simply Rejuvenating](https://img.game8.co/4438641/2a31b7702bd70e78ec8efd24661dacda.jpeg/thumb)


