All Wonderful Top Pole Finish Guide
★ Friend Room Codes | Green Checkmark Guide ☆
☆ All Worlds | All Collectibles | Checkmark Guide
┗ W1 | W2 | W3 | W4 | W5 | W6 | Special | Petal Isles
★ All Captain Toad Locations and Rewards
✧ Guides▶︎ Purple 10-Coins | Wonder Seeds | Exits
☆ Power-Ups | Characters | Badges | Secrets
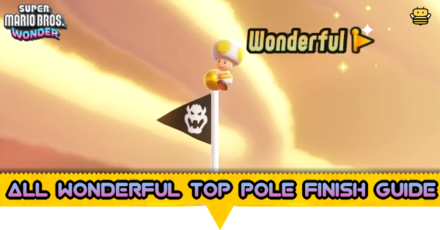
This is a guide on how to reach the top of the goal posts in Super Mario Bros Wonder. Read more to learn how to get a Wonderful result when reaching the flag poles on each world by reading this article!
All World 1 Flag Poles
| All World 1 Flag Poles |
|---|
|
|
Welcome to the Flower Kingdom
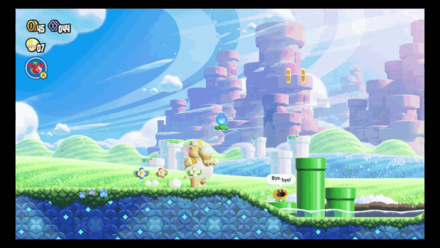
Touch the Blue Flower Bud before the Goal to raise the pipes in front of it. Use the pipes as stairs then jump at the end to reach the top of the goal!
Piranha Plants on Parade
Normal Exit
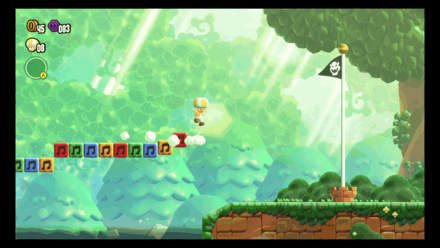
A Musical Note Block is placed right before the goal, so you can use it to jump higher to reach the top of the goal.
The timing can be a bit tricky, but the way to do it is to jump when you reach the red block. This ensures that you can jump enough to reach the top of the goal!
Secret Exit
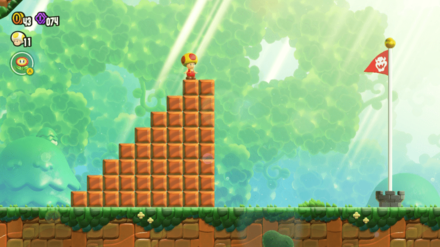
There will be a stacked blocks you can use at the end of the hidden exit. Dash and jump from that platform to reach the top of the goal!
Piranha Plants on Parade Secret Exit! All Three Purple 10 Coin and Wonder Seed Guide
Scram, Skedaddlers
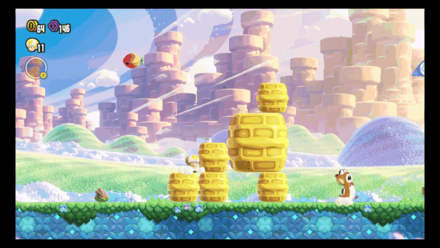
To reach the top of the goal post, dash and jump before the Skedaddler breaks the beeswax using its Acorns. Since the topmost beeswax is quite small, the timing can be tricky. Press the ZR button after jumping to spin in the air, allowing you to reach the top of the Goal easier.
Keep in mind that Elephant Mario's Attacks can break the Beeswax, so be careful when reaching this area with the Elephant Powerup equipped!
Scram, Skedaddlers Guide: All Wonder Seed and 10 Coin Locations
Bulrush Coming Through!
Normal Goal
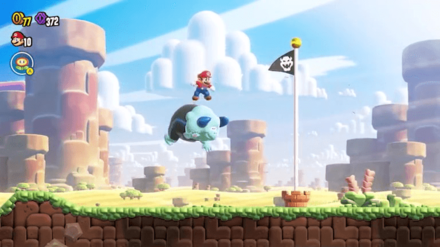
You can end this course normally if you follow the path without taking the Wonder Flower. You can also use the bull near the goal to boost yourself and reach the top!
Cloud Goal
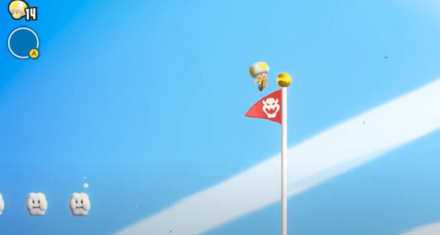
You can get to the cloud goal by using the Wonder Flower and riding the bulls until you pass through the first Wonder Seed. Be careful not to fall or you'll have to climb back again!
Bulrush Coming Through! Guide: All Wonder Seed and 10 Coin Locations
Here Come the Hoppos
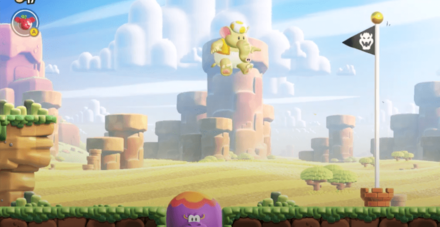
You can reach the top of the goal by sprinting and jumping on the Hoppo on the ground. You can do it on the ground or on the elevated platform nearby, whichever you prefer!
Here Come the Hoppos Guide: All Wonder Seed and 10 Coin Locations
Bulrush Express
Normal Goal
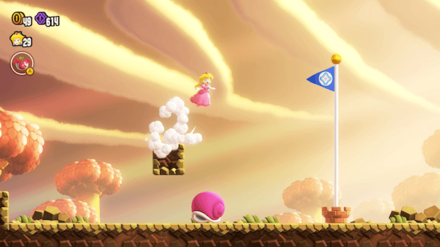
Simply sprint and jump from the small platform near the goal to reach the top. You can use Parachute Cap to fall down slowly and control your drop!
You can also use the Jet Run Badge and do a double jump on the small platform near the goal!
Golden Pipe Goal
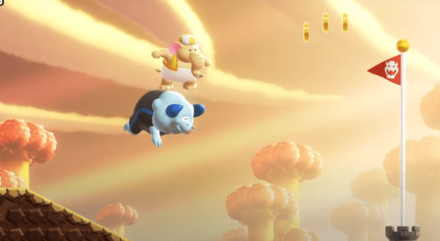
Ride the bull and wait until it gets you near the goal. Jump towards the goal once the bull starts falling down!
Bulrush Express Guide: Secret Exits, Wonder Seeds, and 10 Coin Locations
Cosmic Hoppos
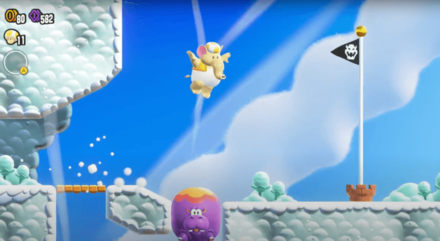
Push the Hoppo to the gap and jump on it to reach the top of the goal. If you have the Parachute Cap equipped, you can use it to control the fall and land on the top!
Cosmic Hoppos Guide: All Wonder Seed and 10 Coin Locations
Sproings in the Twilight Forest
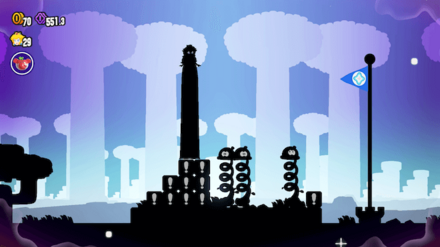
When you reach the end of the course, three Sproings can be found just before the Goal. Jump on top of the Sproing closest to the goal to increase your Jump Height, and successfully reach the top of the goal!
Sproings in the Twilight Forest Guide: Hidden Secrets, Wonder Seeds and 10 Coin Locations
Angry Spikes and Sinkin' Pipes
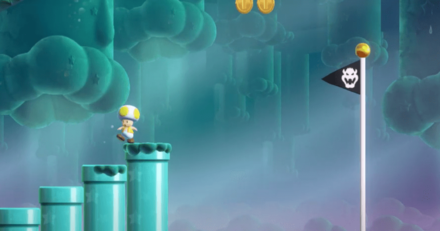
You can easily reach the top of the goal by sprinting and jumping on the pipe at the end. The Parachute Cap Badge can help you control your fall toward the goal, so use it if you have it equipped!
You can also do small jumps without killing your momentum to reach the top when you do the last jump!
Angry Spikes and Sinkin' Pipes Guide: All Wonder Seed and 10 Coin Locations
Rolla Koopa Derby
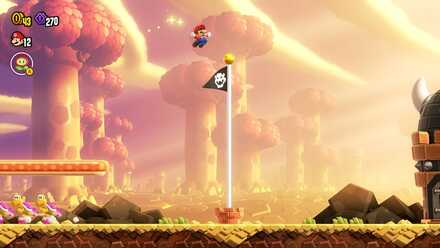
A bouncy platform is situated just before the goal. Use this convenient platform to reach the top of the goal.
Rolla Koopa Derby Guide: All Wonder Seed and 10 Coin Locations
Swamp Pipe Crawl
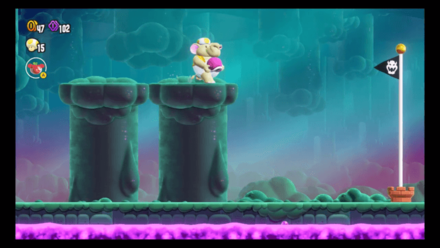
You can reach the top of the goal without any problems by dashing and jumping from the platform near the goal. If you are uncertain, you can use the Parachute Cap to maintain some air time.
Swamp Pipe Crawl Guide: All Wonder Seed and 10 Coin Locations
Parachute Cap 1

Once the final platform reaches its highest point, perform a Dash Jump, and then use the Parachute Cap to slowly glide towards the coin and the goal.
Parachute Cap 1 Badge Challenge Guide and All Purple 10 Coin Locations
Wall-Climb Jump 1
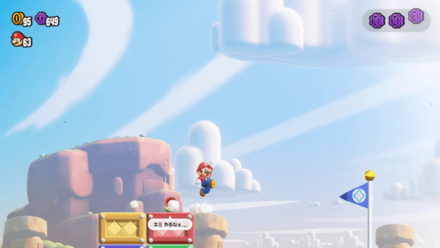
Sprint and jump on the platform near the flagpole in order to reach the top.
Wall-Climb Jump 1 Badge Challenge Guide and All Purple 10 Coin Locations
Jet Run 1
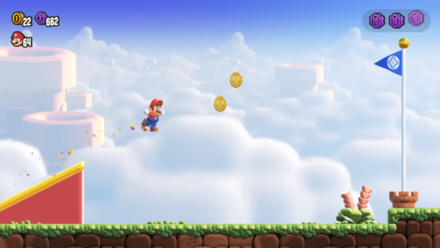
Use Jet Run on the ramp near the goal and then jump again near the coins while in midair to get to the top of the flag pole.
Jet Run 1 Badge Challenge Guide and All Purple 10 Coin Locations
All World 2 Flag Poles
| All World 2 Flag Poles |
|---|
|
|
Outmaway Valley
Normal Goal
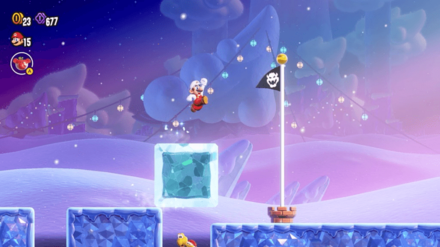
Ride the ice block at the end of the course and jump from there once it's near the goal to reach the top. You only have one chance so make it count!
Wonder Flower Goal
The goal after the Wonder Flower effect have a different platform structure to reach the top. Ride the blocks of ice near it and sprint jump to reach the top!
If you have the Parachute Cap, you can activate it as well to control the drop.
Outmaway Valley Guide: All Wonder Seed and 10 Coin Locations
Condarts Away!
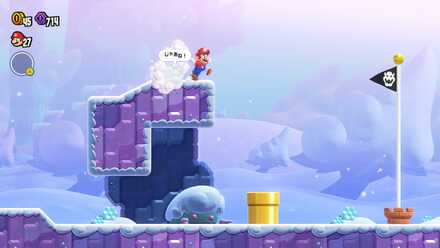
Get on top of the platform right before the flagpole and then dash and jump. You can use the Wall-Climb Jump badge if you have it or bait a Condor into hitting the wall to get to the top.
Condarts Away! Guide: All Wonder Seed and 10 Coin Locations
Wall-Climb Jump 2
Utilize the wall near the flagpole by constantly using wall jump until you are high enough to reach the top of the pole.
Wall-Climb Jump 2 Badge Challenge Guide and All Purple 10 Coin Locations
Pokipede Pass
As soon as you approach the stairs near the goal, a Pokipede will descend from the top of the screen and start destroying the stair blocks. Get on top of the stairs and jump towards the goal before the Pokipede destroys all of them!
The Pokipede will start destroying from the bottom of the stairs, so you have a bit of time before you need to jump.
Pokipede Pass Guide: All Wonder Seed and 10 Coin Locations
Pole Block Passage
Before you reach the goal, you'll find three floating blocks above a huge gap. After you hit the third block to make the third pole appear, get a running start, then jump right as you reach the end of the pole.
Pole Block Passage Guide: All Wonder Seed and 10 Coin Locations
Floating High Jump 1
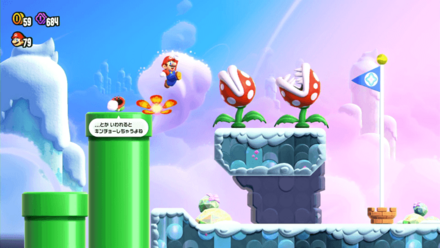
From the pipe before the two big Piranha Plants, do a running start, then do a floating high jump over the plants and to the top of the goal.
Floating High Jump 1 Badge Challenge Guide and All Purple 10 Coin Locations
Up 'n' Down with Puffy Lifts
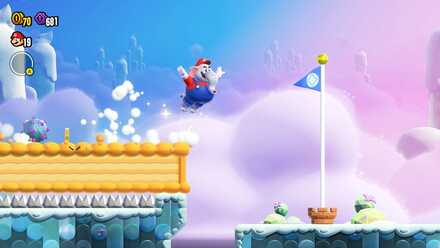
Move forward without lowering the cloud altitude as much as you can, and aim for the top of the goal by jump dashing.
Up 'n' Down with Puffy Lifts Guide: All Wonder Seed and 10 Coin Locations
Jump! Jump! Jump!
There's no twist for this level's goal; it's the simple, classic Mario stairs that we all know. Run on top of the stairs, then jump right towards the goal.
Jump! Jump! Jump! Wonder Seed and Purple Coin Guide
Spring Feet 1

On the cliff to the left of the goal, start your high spring jump from the very edge so you can get as much distance as possible so you can reach the goal!
Spring Feet 1 Badge Challenge Guide and All Purple 10 Coin Locations
Countdown to Drop Down
Before you reach the goal, you'll see a horizontally aligned Piranha Plant spitting seeds. Time your jump as it is spitting seeds, then jump on the many seeds to stay in the air and reach the top of the goal.
Countdown to Drop Down Guide: All Wonder Seed and 10 Coin Locations
Cruising with Linking Lifts
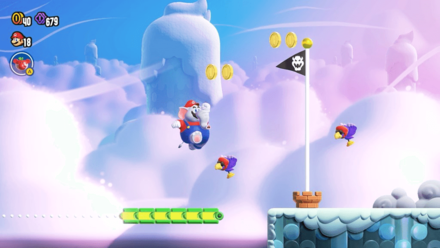
You can reach the top of the goal by jumping on the bird near it. You only have one chance to do it so don't waste it!
Cruising with Linking Lifts Guide: All Wonder Seed and 10 Coin Locations
All World 3 Flag Poles
| All World 3 Flag Poles |
|---|
|
|
The Hoppycat Trial: Hop, Hop, and Awaaay
To reach the top of the goal, Dash Jump from the elevated floor, and try to land on the second Hoppycat as it jumps to copy your jump. Using the Hoppycat as a stepping-stone gives you just enough height to reach the top of the goal!
The Hoppycat Trial: Hop, Hop, and Awaaay Guide: All Wonder Seed and 10 Coin Locations
Crouching High Jump 1
Since the third Purple 10 Coin requires you to jump to just above the Goal post, grabbing the Coin also means you should be able to land on the top of the Goal!
Crouching High Jump 1 Badge Challenge Guide and All Purple 10 Coin Locations
The Midway Trial: Hop to It
Once you start running towards the Goal post, continously perform Dash Jumps to avoid the Hoppycats, and build enough momentum to reach the top of the goal.
The Midway Trial: Hop to It Guide: All Wonder Seed and 10 Coin Locations
The Sugarstar Trial: Across the Night Sky
Just in front of the Goal post, a series of upwards moving platforms can be found. Ride a platform until you get to a high enough height, then just simply Dash Jump towards the goal!
The Sugarstar Trial: Across the Night Sky Guide: All Wonder Seed and 10 Coin Locations
The Final Trial: Zip Track Dash
To reach the top of the Goal, jump from the end of the Zip Track, giving you the most height as your approach the Goal Post.
The Final Trial: Zip Track Dash Guide: All Wonder Seed and 10 Coin Locations
The Sharp Trial: Launch to Victory
Use the Cloud Blocks to build momentum, and then dash jump once you reach the last cloud. If done correctly, you should have enough jump height to collect the coins, and land on top of the Goal post.
The Sharp Trial: Launch to Victory Guide: All Wonder Seed and 10 Coin Locations
The Anglefish Trial: Ready, Aim, Fly!
Once you reach the Goal post area, walk up near the Anglefish, and time your jump when the Anglefish also jumps out of the water. If you step on the Anglefish, it will give you enough jump height to reach the platform above, where you can easily reach the top of the goal by performing a Dash Jump!
The Anglefish Trial: Ready, Aim, Fly! Guide: All Wonder Seed and 10 Coin Locations
All World 4 Flag Poles
| All World 4 Flag Poles |
|---|
|
|
Armads on the Roll
The top of the flagpole can be reached by getting a running start from the slope before the pipe and jumping right at the edge of the pink block. Make sure to avoid any Armads.
Easily cross the gap and reach the flag with Peach by pressing the R Button after jumping to float and gain enough distance.
Armads on the Roll Guide: All Wonder Seed and 10 Coin Locations
Parachute Cap 2
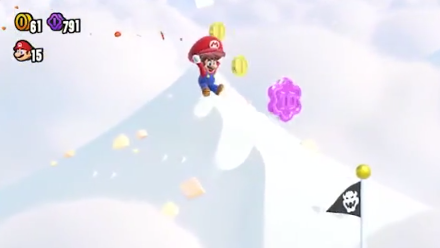
If you are able to glide towards the third Purple 10 Coin from the high ground mentioned in the previous section, you will also be able to reach the top of the Goal (since it is just right under the coin).
Parachute Cap 2 Badge Challenge Guide and All Purple 10 Coin Locations
Rolling Ball Hall
Use the elevated platform right before the flagpole to reach its top. For safety measure, use the R Button while in midair to extend your jump distance!
Rolling Ball Hall Guide: All Wonder Seed and 10 Coin Locations
Bloomps of the Desert Skies
Gain altitude to reach the top of the flagpole by jumping on the three green Bloomps appearing right before it.
These Bloomps will be moving slowly, so there should be enough time to adjust for each jump when needed!
Bloomps of the Desert Skies Guide: All Wonder Seed and 10 Coin Locations
Valley Fulla Snootles
Reach the top of the flagpole by jumping on the floating blocks and using the elevated platform to gain enough height
To ensure that you cover enough distance, make a running start first before jumping! Be wary of any enemies in the way.
Valley Fulla Snootles Guide: All Wonder Seed and 10 Coin Locations
Crouching High Jump 2
Dash and use Crouching High Jump while jumping from platform to platform. You will want to do this quickly as each platform you will be jumping on is a falling platform.
Time your jumps while crouching and dashing to maximize your distance towards the top of the goal!
Crouching High Jump 2 Badge Challenge Guide and All Purple 10 Coin Locations
Color Switch Dungeon
To reach the top of the goal, hit the blue switch to create red platforms that you can use to dash jump to the top of the goal pole!
Color Switch Dungeon Guide: All Wonder Seed and 10 Coin Locations
Secrets of Shova Mansion
Take advantage of the pink tall platforms you come across right before the flagpole by pushing them into a gap. This will allow you to climb them and prepare a jump for reaching the top of the goal.
Extend your jump in midair with the R Button to guarantee reaching the flag!
Secrets of Shova Mansion Secret Exit, All Wonder Seeds and 10 Coin Locations Guide
Flight of the Bloomps
To reach the top of the flagpole, use the launched Bloomp as a jump platform and continue until you reach the goal.
Flight of the Bloomps Guide: All Wonder Seed and 10 Coin Locations
Invisibility 1
To reach the top of the Goal, stand first on the multiple brick blocks right before it, and trigger the bull to ram it.
As the bricks are broken, you will land on the bull. Time your jump to the bull's hop to gain just enough distance to reach the flag.
Invisibility 1 Badge Challenge Guide and All Purple 10 Coin Locations
Ninji Jump Party
Run up the steps of the elevated platform and jump at the edge to reach the top of the flagpole.
For safety measure, you can always use the R Button while in midair to extend your jump distance!
Ninji Jump Party Guide: All Wonder Seed and 10 Coin Locations
The Desert Mystery
Near towards the end of the course, touching a floating flower bud will reveal a handle that, when pulled, will raise hidden platforms which you can use to gain enough height to reach the top of the flagpole.
Make sure to climb these platforms quickly as they will begin to sink back into the ground!
The Desert Mystery Guide: All Wonder Seed and 10 Coin Locations
All World 5 Flag Poles
| All World 5 Flag Poles |
|---|
|
|
Upshroom Downshroom
Use the pumpkins and jump from top of them after you dash to get to the top. You can also spin mid-air to increase your air time!
Upshroom Downshroom Guide: All Wonder Seed and 10 Coin Locations
Taily's Toxic Pond
Between the goal and the yellow platforms, there's a Taily hanging from the ceiling. Use its vine to swing to the top of the goal.
Taily's Toxic Pond Guide: All Wonder Seed and 10 Coin Locations
Light-Switch Mansion
For this level, there are ghost stairs beside the goal. This is just the same stairs as the classic Mario stairs, with the gimmick of it being mostly invisible. Unfortunately, there's no switch to reveal these stairs.
Try to find the top level of the stairs; you'll still be able to get a glimpse of the shape of the stairs as you step on it. From the top level, run and jump from the edge towards the top of the goal.
Light-Switch Mansion Guide: All Wonder Seed and 10 Coin Locations
Beware of the Rifts
In the edge of the upper land to the left of the goal, you'll find a dent at the corner. Jump towards this corner to reveal the hidden block that raise the red pipes nearby, which you can then jump from to reach the top of the goal.
Beware of the Rifts Guide: All Wonder Seed and 10 Coin Locations
An Uncharted Area: Wubba Ruins

To the left of the goal, you'll find a couple of slime clumps floating. Swim to the top of the second one, then jump from there to reach the top of the goal.
An Uncharted Area: Wubba Ruins Guide: All Wonder Seed and 10 Coin Locations
Another Uncharted Area: Swaying Ruins
To the left of the goal, there is a spike enemy and a swaying platform. When you jump on top of the spike enemy, the platform will start swaying and the enemy will start sliding. Time your jump towards the goal just as the spike enemy is at the edge of the platform. You only have one chance for this since the spike enemy will fall to the swamp after.
Another Uncharted Area: Swaying Ruins Guide: All Wonder Seed and 10 Coin Locations
A Final Uncharted Area: Poison Ruins
Make sure to time your jump on the two blocks near the goal. Do a dash jump on the blocks to gain momentum!
Be careful though as stepping on these blocks will cause them to fall so there is no room for mistakes!
A Final Uncharted Area: Poison Ruins Guide: All Wonder Seed and 10 Coin Locations
Grappling Vine 1
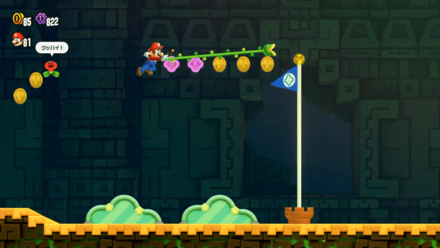
Sprint to gain momentum for a bigger jump, and jump on the ledge, immediately use the Grappling Vine when you're in front of the top of the goal to grapple towards it.
Grappling Vine 1 Badge Challenge Guide and All Purple 10 Coin Locations
All World 6 Flag Poles
| All World 6 Flag Poles |
|---|
|
|
Where the Rrrumbas Rule
Upon reaching the area where the goal is, use the Drill to attach yourself in the ceiling and then drill towards the platform before the goal.
Immediately after dropping to the platform, immediately dash forward and jump to reach the top of the goal.
Where the Rrrumbas Rule Secret Exit and All Wonder Coin, Wonder Seed Locations
Floating High Jump 2
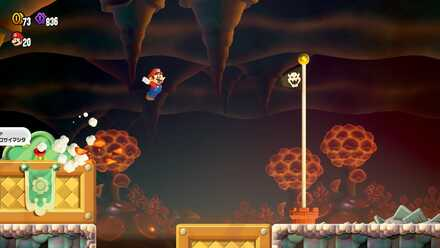
Just dash and jump from the platform before the goal in order to get to the top!
Floating High Jump 2 Badge Challenge Guide and All Purple 10 Coin Locations
Boosting Spin Jump 2
Just dash at the top of the platform right before the goal and then use Boosting Spin Jump to get to the top of the goal.
Boosting Spin Jump 2 Badge Challenge Guide and All Purple 10 Coin Locations
Raarghs in the Ruins
Equip the Boosting Spin Jump and use it on top of the purple pipe to reach the top of the goal.
Raarghs in the Ruins Guide: All Wonder Seed and 10 Coin Locations
Hot-Hot Hot!
To reach the top of the goal, dash across the blocks and then use your Boosting Spin Jump to reach the top of the goal pole.
Hot-Hot Hot! Guide: All Wonder Seed and 10 Coin Locations
Wavy Ride Through the Magma Tube
To reach the top of the Goal Pole, wait for the platform to reach the very top of its course then dash jump towards the goal!
Wavy Ride Through the Magma Tube Guide: All Wonder Seed and 10 Coin Locations
Pull, Turn, Burn
There will be another chain and a circle platform that you can use to get to the top of the goal. Just simply pull the chain until the circle platform comes near you, ride the platform then dash jump at the right time to get to the top of the goal.
Pull, Turn, Burn Guide: All Wonder Seed and 10 Coin Locations
Grappling Vine 2
You can use the platform just right before the flagpole and then immediately start dashing and jumping at the right time to get to the top.
Grappling Vine 2 Badge Challenge Guide and All Purple 10 Coin Locations
Dragon Boneyard
To reach the top of the goal, you'll need to stand on the last rotating skeleton and then quickly dash jump towards the goal pole.
Dragon Boneyard Guide: All Wonder Seed and 10 Coin Locations
Jet Run 2
Just before the goal, simply do a Jet-Run on the slope then jump to reach the top of the goal.
Jet Run 2 Badge Challenge Guide and All Purple 10 Coin Locations
Invisibility 2
Since there are no blocks or platforms in front of the goal, you have no choice but to use the Lakitus cloud used during the retrieval of the third Purple 10 Coin. Once you get the Coin, make sure to use the cloud to navigate towards the Goal as well.
Invisibility 2 Badge Challenge Guide and All Purple 10 Coin Locations
Spring Feet 2
You can reach the top of the goal by simply doing consecutive dash jumps. A tip is to make small adjustments while jumping so that you can position yourself at the edge of the platform before jumping towards the goal.
Spring Feet 2 Badge Challenge Guide and All Purple 10 Coin Locations
All Petal Isles Flag Poles
| All Petal Isles Flag Poles |
|---|
|
|
Leaping Smackerel
You can reach the top of the goal by sprinting and jumping through the tree and platform nearby.
Leaping Smackerel Guide: All Wonder Tokens and Purple 10 Coin Locations
Dolphin Kick 1
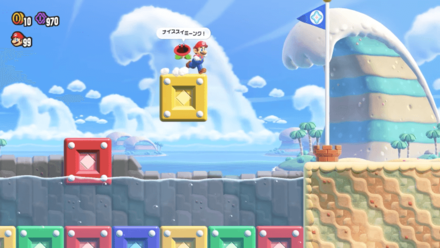
Touch the orange flower under water to raise the platforms and dash and jump on those platforms to reach the top of the goal.
Dolphin Kick 1 Badge Challenge Guide and All Purple 10 Coin Locations
Robbird Cove
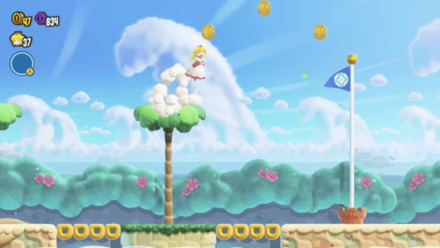
You can get to the top of the goal by wall jumping to get to the top of the tree and then use dash jump to reach the top of the flag.
Robbird Cove Guide: All Wonder Seed and 10 Coin Locations
Blewbird Roost
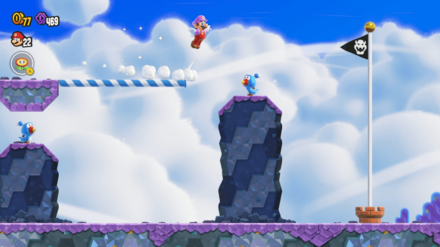
Use the bird's temporary platform to sprint and jump towards the goal and reach the top. Be quick as the platform will disappear after a few seconds!
If you accidentally kill the bird, you can use the platform that it's standing on to reach the top of the goal. It should be doable, even if there's only a little space on that platform!
Blewbird Roost Guide: All Wonder Seed and 10 Coin Locations
Dolphin Kick 2
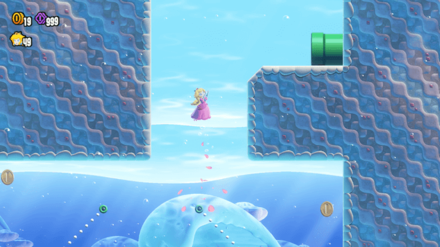
To reach the top of the goal, exit from the Top Pipe instead of the one near the third Purple 10 Coin. Use your Dolphin Kick to jump out of the water, and then Jump Kick between the walls to reach the pipe.
Dolphin Kick 2 Badge Challenge Guide and All Purple 10 Coin Locations
Downpour Uproar
Swim up the waterfall and jump off the cloud to reach the top of the goal.
Downpour Uproar Guide: All Wonder Seed and 10 Coin Locations
Jewel-Block Cave
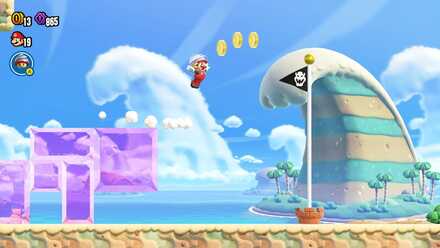
Simply reach the top of the goal by dashing and then jumping from the top of the Jewel block.
Jewel-Block Cave Guide: All Wonder Seed and 10 Coin Locations
Gnawsher Lair
You can get to the top of the goal by dash-jumping from the stair-like blocks before it gets eaten by the Gnawshers. After jumping, press the R button
to float and gain some distance to make it easier on reaching the top.
Gnawsher Lair Guide: All Wonder Seed and 10 Coin Locations
Maw-Maw Mouthful
You can get to the top of the goal here by jumping on the Maw-Maw placed in front of the goal and making a big jump. If you find it difficult to jump on the Maw-Maw continuously, it is recommended to use badges such as Parachute Cap and Crouching High Jump.
Maw-Maw Mouthful Guide: All Wonder Seed and 10 Coin Locations
Boosting Spin Jump 1
The top of the goal can be reached with a Boosting Spin Jump after a dash jump. It is recommended that you jump to hit the green pipe before jumping. This method will give you a longer run-up distance.
Boosting Spin Jump 1 Badge Challenge Guide and All Purple 10 Coin Locations
Muncher Fields
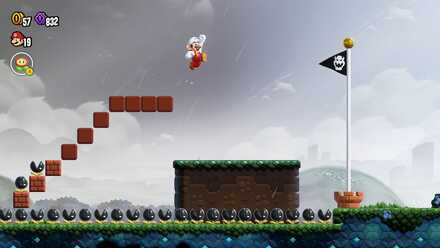
To reach the top of the goal, we recommend clearing the Munchers on the steps of the platform with a POW Block, and then dash jumping to reach the top of the goal.
We recommend equipping the Floating High Jump Badge at the start of the level so you can better reach the top of the goal!
Muncher Fields Guide: All Wonder Seed and 10 Coin Locations
Missile Meg Mayhem
Jump on the platform near the goal. After waiting a while, a pair of Missile Megs will come flying from the left. Hop on the lower Missile Meg first then transition to the top Missile Meg if you are close to the goal. Do a dash jump to seal the deal!
Missile Meg Mayhem Guide: All Wonder Seed and 10 Coin Locations
High-Voltage Gauntlet
Do a simple dash and jump to get to the top of the goal. Keep note that the dash distance is only 2 blocks long, so have a running head-start until the last second. Doing so will increase your likelihood of success.
High-Voltage Gauntlet Guide: All Wonder Seed and 10 Coin Locations
Evade the Seeker Bullet Bills!
This course has a large number of Bullet Bills placed before the goal. If you are slow, the blocks before the goal will be destroyed them.
When the blocks are destroyed, it will be difficult to reach the top of the goal, so it is optimal to dash and jump quickly while heading towards the goal without stopping.
It is recommended to use badges such as Boosting Spin Jump, Floating High Jump, and Timed High Jump to reach the top of the goal much easier!
Evade the Seeker Bullet Bills! Guide: All Wonder Seed and 10 Coin Locations
KnuckleFest Bowser's Blazing Beats
There is a lift just before the goal that moves when you step on it. While the lift is moving, a Knuckleduster will be fired in front of the goal. Jump on the Knuckleduster as it makes a U-turn to reach the top of the goal.
KnuckleFest Bowser's Blazing Beats Guide: All Wonder Seed and 10 Coin Locations
All Special World Flag Poles
| All Special World Flag Poles |
|---|
|
|
Fluff-Puff Peaks Special Climb to the Beat
You can use any badges that can help you reach the goal pole such as the Floating High Jump or the Boost Spinning Jump.
Special World Entrance Fluff-Puff Peaks: Special Climb to the Beat
The Final Test Wonder Gauntlet
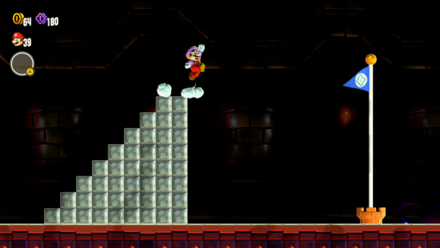
You can easily reach the top of the goal by dash-jumping from the top of the stairs then spinning during the jump.
The Final Test Wonder Gauntlet Guide: All Wonder Seed and 10 Coin Locations
The Semifinal Test Piranha Plant Reprise
You can reach the top of the goal simply by sprinting and jumping using the elevated platform. There won't be any enemies that may stop you, so take your time!
The Semifinal Test Piranha Plant Reprise Guide: All Wonder Seed and 10 Coin Locations
Petal Isles Special Way of the Goomba
Dash to gain momentum and jump on the edge, then do a Boosting Spin Jump to reach the top of the goal pole.
Special World Entrance Petal Isles: Special Way of the Goomba
Deep Magma Bog Special Solar Roller
To the left of the goal is a rotating bumper; jump from it diagonally to reach the top of the goal. It might be hard to do this properly, so use a badge that will make this easier, such as the Boosting Spin Jump badge.
Deep Magma Bog Special Solar Roller Guide: All Wonder Seed and 10 Coin Locations
Fungi Mines Special Dangerous Donut Ride
You can use the elevated platform near the goal as your stepping stone to reach the top. However, an enemy is moving around on that platform so evade it as you take the jump on the right side!
Special World Entrance Fungi Mines: Special Dangerous Donut Ride
Sunbaked Desert Special Pole Block Allure
Use the purple Bloomp as a jump pad towards the other Bloomps. You'll be using the other Bloomps as a jump pad too.
You can use Boosting Spin Jump to reach them more easily!
Special World Entrance Sunbaked Desert: Special Pole Block Allure
Shining Falls Special Triple Threat Deluge
Bounce on the Rotating Platform while dashing to reach the top of the goal. Jump on the green pipes first and jump to get to the rotating platform.
Special World Entrance Shining Falls: Triple Threat Deluge
Pipe-Rock Plateau Special Bounce, Bounce, Bounce
You can reach the top of the goal by bouncing off the Hoppos placed on the pillars. You can use the last pillar if you take out the Hoppo and fail the jump. It shouldn't be hard to do if you have the Floating High Jump Badge!
Special World Entrance Pipe-Rock Plateau: Special Bounce, Bounce, Bounce
The Final-Final Test Badge Marathon
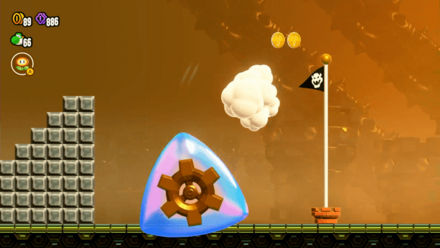
You can reach the top of the goal by doing a big jump with the balloon near the goal. This is achieved by long-pressing the jump button as soon as you land on the balloon.
The Final-Final Test Badge Marathon Guide: All Wonder Seed and 10 Coin Locations
Super Mario Bros Wonder Related Guides

List of All Worlds and Courses
List of All Worlds
| Super Mario Bros Wonder List of All Worlds | |
|---|---|
 Pipe-Rock Plateau (World 1) Pipe-Rock Plateau (World 1) |
 Petal Isles Petal Isles |
 Fluff-Puff Peaks (World 2) Fluff-Puff Peaks (World 2) |
 Shining Falls (World 3) Shining Falls (World 3) |
 Sunbaked Desert (World 4) Sunbaked Desert (World 4) |
 Fungi Mines (World 5) Fungi Mines (World 5) |
 Deep Magma Bog (World 6) Deep Magma Bog (World 6) |
 Special World (Secret) Special World (Secret) |
Bonus Game-Over Level
| Super Mario Bros. Wonder Bonus Game-Over Level |
|---|
 Bonus: Coins Galore! (Secret Level) Bonus: Coins Galore! (Secret Level) |
Course Lists
Comment
Author
All Wonderful Top Pole Finish Guide
improvement survey
03/2026
improving Game8's site?

Your answers will help us to improve our website.
Note: Please be sure not to enter any kind of personal information into your response.

We hope you continue to make use of Game8.
Rankings
- We could not find the message board you were looking for.
Gaming News
Popular Games

Genshin Impact Walkthrough & Guides Wiki

Honkai: Star Rail Walkthrough & Guides Wiki

Umamusume: Pretty Derby Walkthrough & Guides Wiki

Pokemon Pokopia Walkthrough & Guides Wiki

Resident Evil Requiem (RE9) Walkthrough & Guides Wiki

Monster Hunter Wilds Walkthrough & Guides Wiki

Wuthering Waves Walkthrough & Guides Wiki

Arknights: Endfield Walkthrough & Guides Wiki

Pokemon FireRed and LeafGreen (FRLG) Walkthrough & Guides Wiki

Pokemon TCG Pocket (PTCGP) Strategies & Guides Wiki
Recommended Games

Diablo 4: Vessel of Hatred Walkthrough & Guides Wiki

Cyberpunk 2077: Ultimate Edition Walkthrough & Guides Wiki

Fire Emblem Heroes (FEH) Walkthrough & Guides Wiki

Yu-Gi-Oh! Master Duel Walkthrough & Guides Wiki

Super Smash Bros. Ultimate Walkthrough & Guides Wiki

Pokemon Brilliant Diamond and Shining Pearl (BDSP) Walkthrough & Guides Wiki

Elden Ring Shadow of the Erdtree Walkthrough & Guides Wiki

Monster Hunter World Walkthrough & Guides Wiki

The Legend of Zelda: Tears of the Kingdom Walkthrough & Guides Wiki

Persona 3 Reload Walkthrough & Guides Wiki
All rights reserved
© Nintendo.
The copyrights of videos of games used in our content and other intellectual property rights belong to the provider of the game.
The contents we provide on this site were created personally by members of the Game8 editorial department.
We refuse the right to reuse or repost content taken without our permission such as data or images to other sites.


![Everwind Review [Early Access] | The Shaky First Step to A Very Long Journey](https://img.game8.co/4440226/ab079b1153298a042633dd1ef51e878e.png/thumb)

![Monster Hunter Stories 3 Review [First Impressions] | Simply Rejuvenating](https://img.game8.co/4438641/2a31b7702bd70e78ec8efd24661dacda.jpeg/thumb)


