
This survey will take about 1 minute.
Your answers will help us to improve our website.
Visions of Mana
Complete Story Walkthrough
★ Check out our Story Walkthrough
┗ Side Quests | Bosses | Post Game Content
★ See a list of all Characters!
┗ Classes | Best Characters | Best Team Composition
★ New to the game? Check out our Beginner's Guide!
★ How Long to Beat | Trophy Guide
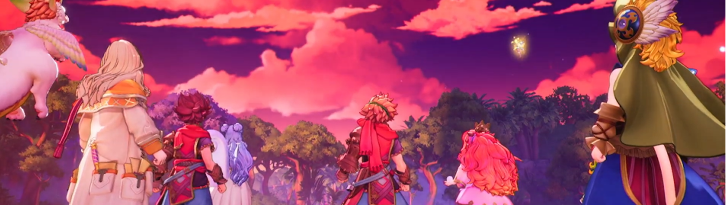
This is a complete story walkthrough of Visions of Mana. Read on for a complete story walkthrough, a detailed guide for each chapter, the bosses for each chapter, and everything else you need to know about the story of Visions of Mana.
List of Contents
 Attention! Attention! |
We're currently rushing out guides as quick as possible. More details will be added in this page soon! |
|---|
List of All Chapters
All Main Story Chapters
- Prologue
- Chapter 1: To the Mana Tree
- Chapter 2: Capital of the Deep
- Chapter 3: Faded Whispers
- Chapter 4: Back with a Vengeance
- Chapter 5: We're Alm in This Together
- Chapter 6: Guardian of the Sanctuary
- Chapter 7: The Shattered Sword
- Chapter 8: Where the Heart Lies
- Chapter 9: Brave New Realm
- Chapter 10
Complete Story Walkthrough
Prologue
| Prologue Walkthrough Overview | |
|---|---|
 We see Eoren fleeing with Lyza as he tries to leave Gudju village and their responsibilities as Alms to the Mana Tree. Citizens of Gudju village try to stop Lyza from leaving since her departure as the village's Alm will bring ruin to their village. Eoren insists on their escape, leading to incurring the wrath of the Earth itself." |
|
| 1 | Flee the village with Lyza. ┣ Learn the basics of combat by defeating the enemies blocking Eoren and Lyza's way. ┗ Toggle the navigation guide if you ever lose your way in your adventures. |
| 2 | Boss Fight: Defeat Gardlegrog. ┗ Attack its weak spot to incapacitate it and deal critical damage. |
Chapter 1: To the Mana Tree
| Chapter 1: To the Mana Tree Walkthrough Overview |
|
|---|---|
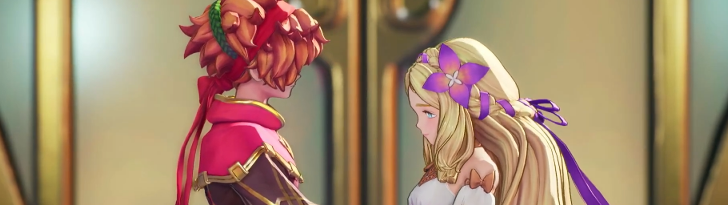
 In the Fire village of Tianeea, Hinna is appointed by Faerie as the Fire Alm. This marks the start of her ritual to journey to the Mana Tree. Val is tasked to fulfill his duty as a Soul Guard, one who protects alms during this pilgrimage. The two meet Careena, the Alm of the Wind, and Morley, the Alm of the Moon. Together, they're on a journey to the Mana tree to offer their souls and ensure prosperity to their world. |
|
| 1 | Meet with Hinna and head to the village square together. ┗ Optional: Grab the Curious Cookie by the cliff south of where you met Hinna for the first time. |
| 2 | Drive the monsters away from the thicket. ┗ Before heading out, make sure to equip the Fireball ability seed. |
| 3 | Prepare for your pilgrimage. ┗ Optional: Buy the Patchwork Vest from the Gear Shopkeep to increase Val's Defense and Magic Defense. |
| 4 | Join up with the Alm of the Wind and journey through the Charred Passage. ┣ Interact with Fortuneflies and defeat enemies within the time limit to get extra lucre! ┣ Optional: Get the Move Damage ability seed at the base of a waterfall in the west under a wooden bridge. ┣ Optional: Get the Ample Incense item and Life Sigil ability seed at the beach located at the southern area of the Charred Passage. ┗ Optional: Defeat enemies along the way to get Corestones. |
| 5 | Go through the Aery Passage, then return the Vessel of Wind to the chief once you reach Longren, the Vale of Wind. |
| 6 | Try to reason with Careena. ┣ Complete the side quest Where Are You, Shiriu? ┗ Find Shiriu at the fields of Aery Passage. |
| 7 | Attempt the wind dyeing. ┗ Careena joins your party! |
| 8 | Search for Ramcoh and head for Mt. Gala. ┣ Receive the Strength Sigil and Stamina Sigil before leaving Longren. ┗ Equip Careena with the Sylphid Boomerang. |
| 9 | Look for the elemental of wind at Mt. Gala. ┗ Boss Fight: Defeat Mantis Ant. |
| 10 | Head to the Lefeya Drifts. |
| 11 | Cross the Lefeya Drifts. |
| 12 | Head to Etaern, the Moonlit Parish. ┗ Morley joins your party! |
| 13 | Search for the Moon Sphere, then return to Morley's camp. ┗ Moon Sphere obtained. |
| 14 | Look around Etaern, and chase after Morley. ┣ Luna Globe obtained. ┣ Aegis class unlocked. ┗ Defeat the enemies surrounding Morley and Val. |
| 15 | Return to Etaern, then leave. ┣ Optional: Grab a few weapons, armor, and items from the merchant sisters before you go! ┗ Optional: Equip Morley with the Luna Globe. |
| 16 | Proceed across Rime Falls until you reach Fallow Steppe. ┣ Use Luna Globe to slow down the ice blocks on the icy river. ┗ Optional: Interact with the Fortuneflies and defeat enemies within the time limit to get extra EXP or Lucre! |
| 17 | Head to Rhata Harbor. ┗ Pikuls ride and Beckon Bell unlocked! |
| 18 | Help Careena. Look for Passar's key and return to him. |
| 19 | Board the boat and the enjoy the Primm. ┣ Optional: Buy a few things from the shopkeeps in Rhata Harbor before boarding the ship. ┗ Warning: It will be a while before you can go back to this continent once you've boarded the ship. Make sure you have done everything you wanted to do in this continent before you board the Primm. |
| 20 | Check on the boat. ┗ Boss Fight: Defeat the Kraken. |
Chapter 1: To the Mana Tree Walkthrough
Chapter 2: Capital of the Deep
| Chapter 2: Capital of the Deep Walkthrough Overview |
|
|---|---|
 After departing from the Trynia continent, Val and three of the Alms arrive in the Manadore Continent. They make their way towards Illystana to meet with the Alm of Water and receive a ritual blessing from the Queen. |
|
| 1 | Head to Illystana, the Capital of the Deep and enjoy the sights there. ┣ Optional: Shop for weapons, armor, and items before leaving for Illystana. ┗ Pass through Pritta Ridge. |
| 2 | Rendezvous with Hinna at the marketplace. |
| 3 | Take in the ocean view with Hinna. |
| 4 | Attend the rites of initiation at the Sanctorium, then go to the palace. |
| 5 | Head to the Luka Ruins. ┣ Palamena joins your party! ┗ Optional: Equip Palamena with the Undine Flask before heading out. |
| 6 | Proceed further into the Luka Ruins. ┣ Use the Undine Flask to summon a bubble you can ride on. ┣ Defeat the wave of enemies in your way. ┗ Boss Fight: Defeat Fullmetal Hugger. |
Chapter 2: Capital of the Deep Walkthrough
Chapter 3: Faded Whispers
| Chapter 3: Faded Whispers Walkthrough Overview |
|
|---|---|
 With four of the Alms gathered, the team remain in Illystana to await the arrival of the Alms of Light and Darkness. Doubt starts to enter Hinna's mind as she considers what she'll be leaving behind. Soon Eoren appears, offering a way out for Hinna. He proposes a plan he's been forming to change the world - making it so Alms won't have to live as sacrifices. With Hinna's wish to stay longer with Val, they join Eoren and help him prepare for his mysterious ritual. |
|
| 1 | Find Hinna in the palace. |
| 2 | Go to the pier to see Eoren and head to Reignus Shrine. |
Chapter 3: Faded Whispers Walkthrough
Chapter 4: Back with a Vengeance
| Chapter 4: Back with a Vengeance Walkthrough Overview |
|
|---|---|
 With the tragic loss of Hinna, Val and the remaining Alms set out on a journey to take back Hinna's corestone from Eoren. |
|
| 1 | Go to the pier. ┣ Receive the Jaque Seed. ┗ Exchange your corestones for Ability Seeds. |
| 2 | Head to the Deade Cliffs. ┣ Stock up on items, and upgrade your weapons and armor before heading out! ┣ Pass through Ahrvet's Pasture. ┣ Pass through Dura Gorge. ┗ Use your elemental vessels to traverse Dura Gorge. ┗ Boss Battle: Defeat Du!Inke |
| 3 | Greet the Overseer of the Beast Watch and plant the Jaque Seed. |
| 4 | Head to Tsaata, the Free City. ┣ Pass through the Entwine Bridgepass. ┗Pass through Khaswia Moors. |
| 5 | Find a boat to get to Gudju, then talk to the convoy in the square. |
| 6 | Accompany Palamena to the cape, then return to the square. ┣ Receive the Salamando Candle! ┗ Optional: Equip the Salamando Candle to Val. |
| 7 | Follow Vuscav, then go to Tatoh Temple. ┗ Stock up on items, and get new weapons and armor before leaving for Tatoh Temple. |
| 8 | Explore Tatoh Temple and learn about the two lovers' story. ┣ Ride the Salamando Candle to get through some parts of the temple. ┣ Defeat the enemies in the way. ┗ Boss Fight: Defeat Vuscavalanche. |
| 9 | Follow Vuscav and cross the ocean. ┗ Ferry Flute obtained! You can now call Vuscav to traverse the ocean. |
| 10 | Head to Gudju, the Village of Earth. ┗ Pass through Zawhak Desert. |
| 11 | Look around Gudju, then head to the eastern plateau. ┗ Gnome Shovel obtained! |
| 12 | Search for Gnome inside the Gamuda Mines. ┣ Control Golems to create paths for your party. ┗ Boss Fight: Defeat Jewel Eater. |
| 13 | Return to the Deade Cliffs and climb the Jaque Tree. ┗ Use the Ferry Flute to call Vuscav, then travel to Deade Cliffs from Zawhak Desert. |
| 14 | Head to Verdeus Borough and inspect the area. ┣ Pass through Mylos Woods. ┗ Defeat enemies along the way to open up paths. |
| 15 | Follow Julei and find out why the flowers aren't blooming. ┣ Grab some items, armor, and weapons from the merchant sisters. You can also exchange your corestone for ability seeds! ┗ Boss Fight: Defeat Grapplavine. |
| 16 | Return to Verdeus and go to the sproutlings. ┣ Julei joins your party! ┣ Receive the Dryad Sprig! ┗ Optional: Equip Julei with the Dryad Sprig. |
| 17 | Head to the Sanctuary entrance and search for Eoren. ┣ Use the Dryad Sprig to traverse Mylos Woods. ┗ Boss Fight: Fight Daelophos. |
Chapter 4: Back with a Vengeance Walkthrough
Chapter 5: We're Alm in This Together
| Chapter 5: We're Alm in This Together Walkthrough Overview |
|
|---|---|
 An ancient hero named Daelophos has awakened and he's out to overthrow the Mana Goddess by resurrecting the Benevedons. It's up to Val, Careena, Morley, Palamena, and Julei to stop Daepholos from bringing ruin to the world. |
|
| 1 | Return to Gudju and hurry to the eastern plateau. |
| 2 | Let Watts know what happened and defeat the Benevodon of Earth. ┣ Boss Fight: Defeat Garethe, Benevodon of Earth. ┣ Lumina Lantern obtained! ┗ Equip the Lumina Lantern to your party to unlock new classes and abilities. |
| 3 | Head to Log'grattzo, the Dark Archives and Find Aesh, the head curator. ┗ Use the Ferry Flute to call Vuscav. |
| 4 | Follow Aesh and find a replacement support. ┗ Optional: You know the drill! Grab some items, ability seeds, as well as new weapons and armor from the merchant sisters to grow stronger. |
| 5 | Replace the support. ┣ Shade Sight obtained! ┗ Equip the Shade Sight to your party to unlock new classes and abilities. |
| 6 | Find the forbidden tome in the tomespire. ┣ Traverse the Passagean Tomespire. ┣ Use the Shade Sight to move to areas you can't normally reach. ┣ Time your jump and use the Gravity Grapple to reach certain areas. ┗ Boss Fight: Defeat Zehnoa. |
| 7 | Gather the three ingredients and find Von Boyage. |
| 8 | Find Aesh, the head curator, and defeat the Benevodon of Darkness. ┣ Use Shade Sight and Gravity Grapple to reach the Benevodon of Darkness. ┗ Boss Fight: Defeat Zable Fahr, Benevodon of Darkness. |
| 9 | Head to the Radiant Playhouse, Terratio and check out what's happening there. ┗ Call on Vuscav so you can cross the ocean and reach Terratio. |
| 10 | Use the Lumina Lantern on the actors, then return to the playhouse. |
| 11 | Search for the troupe leader. |
| 12 | Defeat the Benevodon of Light. ┣ Traverse the Temple of Wendel. ┣ Use the Light Reflectors to redirect the light onto a prism to reveal a new path. ┣ Use moves that shatter the ground when fighting on icy ground to prevent your party from slipping and sliding. ┣ Boss Fight: Defeat Frost Gigas. ┣ After defeating Frost Gigas, continue forward and grab the Sword of Fate for Val on a cliff to your right just before you encounter a couple of Bluster Gas on icy ground. The cliff should be by a flight of stairs. ┗ Boss Fight: Defeat Selaphia, Benevodon of Light. |
| 13 | Report back to the actors at the playhouse. |
Chapter 5: We're Alm in This Together Walkthrough
Chapter 6: Guardian of the Sanctuary
| Chapter 6: Guardian of the Sanctuary Walkthrough Overview |
|
|---|---|
 Before offering their souls to the Mana Tree, the Alms, this time with Val as the Alm of Light, requests an audience with the Mana Goddess to let her know of Daelophos' plan. Unfortunately, the Goddess is in a deep slumber and only the spirit of the Guardian of the Sanctuary remains at the Mana Tree. |
|
| 1 | Go to the Goddess of Mana. ┣ Call Vuscav using the Ferry Flute and head for Deade Cliffs. ┣ Pass through Mylos Woods and the Sanctuary Entrance. ┣ Talk to Trent and enter the Sanctuary of Mana. ┣ Grab the Dragoon Knife for Morley on a broken tree trunk by a couple of King Rabites and a Chess Knight beside a waterfall. ┗ Boss Fight: Defeat Vadise. ┗ Vadise will quiz your party during the fight and you have to answer correctly, else you'll face a larger group of monsters. ┗ Vadise Quiz Answers: ┗ “Extinguish the bane that threatens to incinerate all” - Attack the Fire crystal. ┗ “Expel the knowledge that leads mortals astray” - Attack the Darkness crystal to your right. ┗ “Discern your truth, and yours alone!” - Attack the middle crystal. |
| 2 | Talk to Khoda. |
Chapter 6: Guardian of the Sanctuary Walkthrough
Chapter 7: The Shattered Sword
| Chapter 7: The Shattered Sword Walkthrough Overview |
|
|---|---|
 Without the aid of the Goddess, the Alms took it upon themselves to save the world from the five remaining Benevodons and Daelophos himself. |
|
| 1 | Head to Log'grattzo. ┣ Flammie Drum acquired! ┗ You can now call on Flammie whenever you need to fly. |
| 2 | Defeat the unsealed Benevodons. ┣ Note: From here on out, you can pick which Benevodon you want to take on first. ┗ Defeating the Benevodons unlock the Tonic required for 3rd section of a character's Elemental Plot. We suggest going for the Benevodon that will give you the Tonic of the character you use the most first. ┗ Benevodon of Water - Unlocks Palamena's Tonic. ┗ Benevodon of Wind - Unlocks Careena's Tonic. ┗ Benevodon of the Moon - Unlock Morley's Tonic. ┗ Benevodon of Wood - Unlocks Julei's Tonic. ┗ Benevodon of Fire - Unlocks Val's Tonic. Note that his Tonic can only be unlocked after defeating the other 4 Benevodons. ┗ Optional: The journey ahead is arduous, so make sure your team is all geared up! Stock up on items, upgrade your weapons and armor, grab some abilities from the Elemental Plot, and equip ability seeds. |
| 3 | Head to Longren. ┣ Talk to the chief, then head to the Wind Sanctum. ┣ Convince the villagers, then reconvene with the convoy. ┣ Ride the wind of the Tempest Trails in the Wind Sanctum to reach certain areas. ┣ Optional: Grab the Soulblade from a cliff beside a broken wooden bridge. ┣ Boss Fight: Defeat Ocypete and Aello. ┣ Optional: Don't forget to grab the Goddess Scales inside a chest just before you reach Beseroth. ┗ Boss Fight: Defeat Beseroth, Benevodon of Wind. |
| 4 | Head to Etaern. ┣ Talk to Meelpa. ┣ Rest at the inn, then head to Castle Cresceno. ┣ Use the Luna Globe to replenish the sandglasses and move between the past and present. ┣ Boss Fight: Defeat Vampire. ┣ Optional: Get the Niccolo Stole for Morley in the same area where you fought Vampire. ┗ Boss Fight: Defeat Tor Marne, Benevodon of the Moon. |
| 5 | Head to Illystana. ┣ Check in with Iain at the palace. ┣ Investigate the disturbance outside, then return to the palace. ┣ Head for the undertemple. ┣ Use the bubbles and manipulate the water level to get around the undertemple. ┣ Boss Fight: Defeat Shreegill. ┣ Optional: Grab the Black Pillar inside a chest in the large chamber before you reach Gandoom. ┗ Boss Fight: Defeat Gandoom, Benevodon of Water. |
| 6 | Head to Verdeus Borough. ┣ Search for clues about the Benevodon. ┣ Talk to Trent at the Sanctuary Entrance. ┣ Visist Aesh in Log'grattzo. ┣ Return to the Sanctuary Entrance. ┣ Head to the Floating Isle fo Ulul. ┗ Call Flammie and fly to the Floating Isle of Ulul. ┣ Optional: Obtain the Pinion Robe for Julei. ┗ Boss Fight: Defeat Floaret, Benevodon of Wood. |
| 7 | Talk to Mayor Cuesta, then visit Val's parents. |
| 8 | Make for Dorpher Volcano. ┣ Make your way through the Charred Passage. ┣ Traverse Dorpher Volcano. ┣ Optional: Get the Gold Armor for Val in a chest by a cliff of flowing lava in the southwestern area of the volcano. ┣ Warning: Be careful not to fall into any kind of lava. Use the Undine Flask to cool them down so your party can cross safely. ┣ Use the Salamando Candle to break rocks blocking your party's way and reach certain areas quickly. ┣ Boss Fight: Defeat Axe Beak. ┗ Boss Fight: Defeat Vaulchibel, the Benevodon of Fire. |
| 9 | Visit Hinna's home, then look for Hinna's letter. |
| 10 | Rendezvous with Aesh in Log'grattzo. |
| 11 | Head to Entwine Bridgepass. ┣ Call on Flammie to reach Entwine Bridgepass. ┗ Boss Fight: Defeat Daelophos. |
Chapter 7: The Shattered Sword Walkthrough
Chapter 8: Where the Heart Lies
| Chapter 8: Where the Heart Lies Walkthrough Overview |
|
|---|---|
 Val, Careena, Morley, Palamena, and Julei have successfully vanquished the remaining Benevodons. However, after a scuffle with Daelophos, the Alms are now left with a broken Mana Sword. To make matters worse, Daelophos has escaped and is now on his way to the Mana Goddess. It's now up to the Alms to protect the Goddess and the world from their demise. |
|
| 1 | Go to the Sanctuary Entrance. |
| 2 | Proceed through the distorted sanctuary. ┣ Optional: Obtain the Death Dilettante for Palamena from a chest by the Ghosts, Tremorkin, and Mean Mask in the eastern area of the Distorted Sanctuary. ┣ Optional: In the snowy area of the Distorted Sanctuary, you can grab the Ethereal Pelisse for Morley by a cliff just after a group of Demons, Killafish, and Petit Poseidon. ┣ Boss Fight: Defeat Savage Grapplavine. ┣ Boss Fight: Defeat Savage Mantis Ant. ┣ Boss Fight: Defeat Savage Shreegill. ┣ Optional: Get the Spirit Coat for Palamena inside a chest in the middle area of the water area of the distorted sanctuary. ┣ Boss Fight: Defeat Boreal Gorg and Gaian Gorg. ┗ Boss Fight: Defeat Trent. |
Chapter 8: Where the Heart Lies Walkthrough
Chapter 9: Brave New Realm
| Chapter 9: Brave New Realm Walkthrough Overview |
|
|---|---|
 The Alms have caught up with Daelophos at the Mana Tree. Only the five heroes stand between the bountiful future of the world and its destruction. They must defeat Daelophos once and for all. |
|
| 1 | Boss Fight: Defeat Daelophos. |
Chapter 9: Brave New Realm Walkthrough
Chapter 10
| Chapter 10 Walkthrough Overview |
|
|---|---|
 Aeve Zalaha, an ancient dragon from the earliest days of Fa'Diel, threatens to ruin the world once more. The Alms need to stop the dragon's rebirth and find the one responsible for trying to wake it. |
|
| 1 | Defeat the monsters Iain requested. ┣ Boss Fight: Defeat Du'Inke. ┗ Paracelsus obtained. ┣ Boss Fight: Defeat Frost Gigas. ┗ Gleipnir obtained. ┣ Boss Fight: Defeat Axe Beak. ┗ Blade of Triumph obtained. ┣ Boss Fight: Defeat Ocypete and Aello. ┗ Raitei obtained. |
| 2 | Return to the palace. |
| 3 | Go to Reignus Shrine. |
| 4 | Head deep into the Floating Isle of Ulul. ┣ Solve the light puzzles to reveal hidden paths. ┗ Boss Fight: Defeat Aeve Zalaha. |
| 5 | Boss Fight: Defeat Daelophos. |
How Many Chapters Are There?
10 Chapters
Visions of Mana has a total of 10 Chapters excluding the Prologue. The story takes around 25 hours to complete and around 40 to 50 hours if you don't skip all the cutscenes.
Game Length:
How Long to Beat Visions of Mana?
Story Walkthrough Tips
| Story Walkthrough Tips |
|---|
|
|
Head Towards the Star
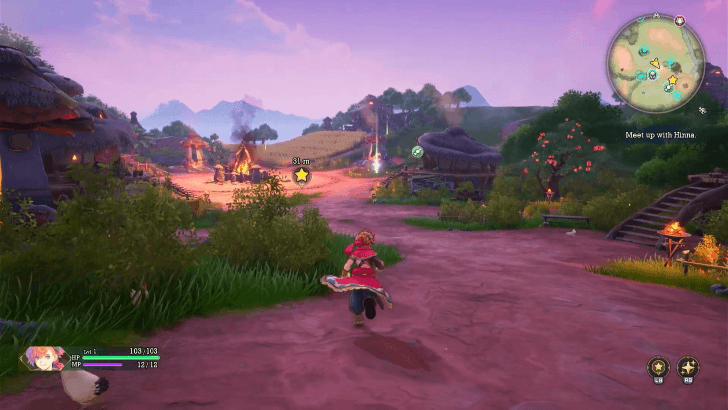
You can continue with the story by heading towards the star on your screen and the map on the upper right corner. If you ever get lost in your adventures, just look for the star and go towards it to continue the story.
Go to the Blue Dots on the Map
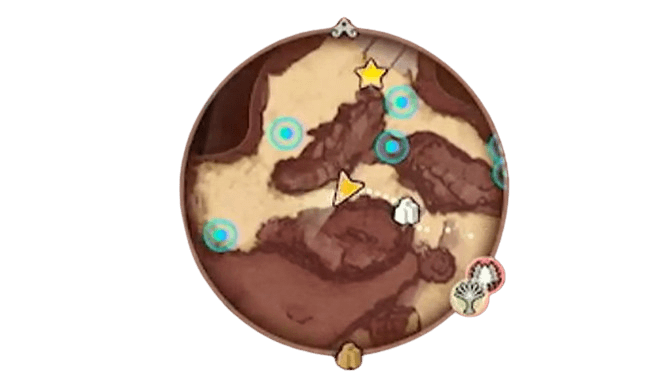
The blue dots on your map are either treasure chests, Elementites, or meridians. Treasure chests and elementites can provide items, money, and elemental points while meridians will let you save the game or fast travel to a different area.
Change Classes Once You Get an Elemental Vessel
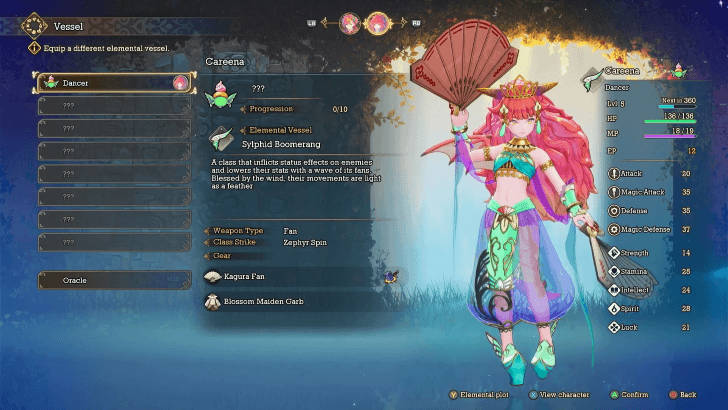
Finally, make sure to change your characters' classes whenever you get an elemental vessel. Changing classes strengthens your characters and allows them to learn abilities on the Elemental Plot. These abilities can still be used even if a character has changed classes!
Visions of Mana Story Plot
A Pilgrimage to the Mana Tree

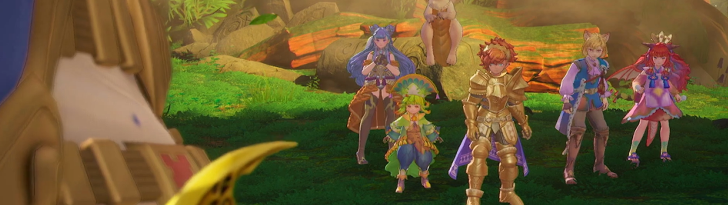
Visions of Mana follows the story of Val and the chosen Alms on their pilgrimage to the Mana Tree, a giant magical tree that blesses the people of its world with its powers.
Chosen Alms should offer their souls to the Mana Tree to ensure a bright future to the world.
Visions of Mana Related Guides
Visions of Mana Guides
 News and Game Info News and Game Info |
 Characters Characters |
 Story Walkthrough Story Walkthrough |
 Side Quests Side Quests |
 Tips and Tricks Tips and Tricks |
 Classes Classes |
 Bosses Bosses |
 Weapons Weapons |
 Armor Armor |
 Items Items |
 Moves and Abilities Moves and Abilities
|
 Elemental Vessels Elemental Vessels |
 Elemental Aeries Elemental Aeries |
Comment
Author

Complete Story Walkthrough
Please participate in our site
improvement survey
03/2026
improvement survey
03/2026
Would you assist in
improving Game8's site?
improving Game8's site?

×
We are listening to our users' valuable opinions and discussing how to act on them.
The information collected through this survey will be used for the purpose of improving our services. In addition, the information will only be disclosed a part of a statistic in a format that will not allow identification of personal information.
Begin Survey
Not Now
×
Please rate each item regarding Game8.co's Advertisements.
Amount of Ads
Very Dissatisfied
Somewhat Dissatisfied
Fine
Somewhat Satisfied
Highly Satisfied
Placement of Ads
Timing of Ad Display
Ad Loading Speed
Safeness of Ads
Content of Ads
×
Please rate each item regarding Game8.co's Quality of Articles.
Amount of information
Very Dissatisfied
Somewhat Dissatisfied
Fine
Somewhat Satisfied
Highly Satisfied
Frequency of updates
Speed of new information
Accuracy of articles
Understandibility of articles
Readability of sentences
×
Please rate each item regarding Game8.co's Usability of the Site.
Ease of finding information
Very Dissatisfied
Somewhat Dissatisfied
Fine
Somewhat Satisfied
Highly Satisfied
Loading Speed
Use of Color
Font Size
Visibility of Images
Easy to Understand Layout
×
Please rate each item regarding Game8.co's Message Boards, Comments.
Ease of Writing
Very Dissatisfied
Somewhat Dissatisfied
Fine
Somewhat Satisfied
Highly Satisfied
Readability
Ease in Finding Information
Comment Quality
Comment Quantity
Admin Response
×
Please rate each item regarding Game8.co's Site's new design.
Please rate our site's new design
Very Dissatisfied
Somewhat Dissatisfied
Fine
Somewhat Satisfied
Highly Satisfied
Do you think that the website's design change makes the site easier to use?
Has the new design made it easier for you to find information on the site?
Has the new design improved the overall visual appeal of the site?
How would you rate your overall satisfaction with the new design of the site?
×
How likely are you to recommend Game8 to someone you know?
Very Unlikely
0
1
2
3
4
5
6
7
8
9
10
Very Likely
If you have other opinions regarding potential improvement to the website, please share them with us. We would appreciate your honest opinion.
Note: This is a free response section, so you can proceed without entering anything.
Note: Please be sure not to enter any kind of personal information into your response.
Note: Please be sure not to enter any kind of personal information into your response.
×
Thank You
×
Thank you for participating in our survey! Your answers will help us to improve the quality of our website and services.
We hope you continue to make use of Game8.
We hope you continue to make use of Game8.
Close
Rankings
- We could not find the message board you were looking for.
Gaming News


![Monster Hunter Stories 3 Review [First Impressions] | Simply Rejuvenating](https://img.game8.co/4438641/2a31b7702bd70e78ec8efd24661dacda.jpeg/thumb)
Popular Games

Genshin Impact Walkthrough & Guides Wiki
Honkai: Star Rail Walkthrough & Guides Wiki
Umamusume: Pretty Derby Walkthrough & Guides Wiki
Pokemon Pokopia Walkthrough & Guides Wiki
Resident Evil Requiem (RE9) Walkthrough & Guides Wiki
Monster Hunter Wilds Walkthrough & Guides Wiki
Wuthering Waves Walkthrough & Guides Wiki
Arknights: Endfield Walkthrough & Guides Wiki
Pokemon FireRed and LeafGreen (FRLG) Walkthrough & Guides Wiki
Pokemon TCG Pocket (PTCGP) Strategies & Guides Wiki


Recommended Games
Diablo 4: Vessel of Hatred Walkthrough & Guides Wiki
Cyberpunk 2077: Ultimate Edition Walkthrough & Guides Wiki
Fire Emblem Heroes (FEH) Walkthrough & Guides Wiki
Yu-Gi-Oh! Master Duel Walkthrough & Guides Wiki
Super Smash Bros. Ultimate Walkthrough & Guides Wiki
Pokemon Brilliant Diamond and Shining Pearl (BDSP) Walkthrough & Guides Wiki
Elden Ring Shadow of the Erdtree Walkthrough & Guides Wiki
Monster Hunter World Walkthrough & Guides Wiki
The Legend of Zelda: Tears of the Kingdom Walkthrough & Guides Wiki
Persona 3 Reload Walkthrough & Guides Wiki


All rights reserved
© SQUARE ENIX
The copyrights of videos of games used in our content and other intellectual property rights belong to the provider of the game.
The contents we provide on this site were created personally by members of the Game8 editorial department.
We refuse the right to reuse or repost content taken without our permission such as data or images to other sites.