Combat System Explained
The Game8 Black Beacon Team has ended coverage as of May 21, 2025. Information on certain pages may not be up-to-date. Thank you for your continued support!

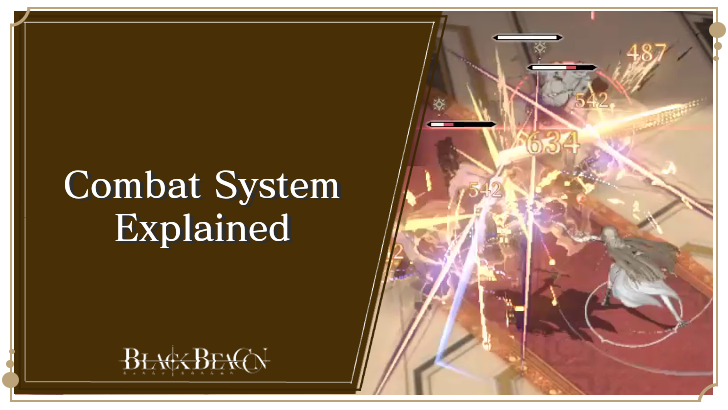
Mastering Black Beacon's combat system is essential in winning battles. Read on to learn the basics of combat, as well as intermediate and advanced combat tricks!
List of Contents
Combat System Explained
| Black Beacon Combat Basics |
|---|
|
|
Combat Happens in Real-Time
Like in other action games, combat in Black Beacon happens in real-time, and you can move your characters within the limits of the stages they find themselves in. This means you can come up with creative ways to not only deal damage (get enemies bunched up and hit them all with one attack), but avoid damage as well (dodge enemy attacks properly, interrupt Killing Moves with Heavy Strikes).
The game encourages players to keep moving throughout the battlefield and actively avoid enemy attacks, while looking for the perfect opportunity to strike with their attacks and skills.
Every Character Has a Basic Attack and a Set of Skills
Every playable character in Black Beacon has a basic set of abilities: A Basic Attack, a First Skill, and Second Skill, an Ultimate Skill, a Passive Skill, and a Combo Skill.
These abilities interact with each other in special ways. They also affect what order you use them in, what characters you will team up with, when you will switch your character in or out during battle, and even whether or not you should prioritize upgrading them over other characters.
Using your character's abilities in the correct order maximizes their damage output and survivability (or maximizes the damage output and survivability of another character), which ultimately affects your success with clearing missions (especially with endgame content that earns you Rune Shards and Ancient Marks).
Certain Character Abilities Charge Each Others' Vigor
Vigor is the energy that a character needs to gather before they can use their skills. But there is a small hierarchy of what character action gathers Vigor for what skill.
Basic Attacks charge the Vigor of a character's First Skill, while the First Skill charges the Vigor of a character's Second Skill. The Second Skill, as well as basic attacks, charges the Vigor of a character's Ultimate Skill. Then, the process is repeated all over again. This is important in maintaining high, consistent damage.
However, certain character upgrades can shorten this process by hastening a character's Vigor charge or even outright eliminating the need to do basic attacks. This is why it's important to prioritize not only what character to upgrade first, but which of their skills should be upgraded first as well.
Combo Burst Lets You Use Skills Without Having to Charge Vigor
All of your character's combat actions (Basic Attack, First and Second Skills, Ultimate Skills) also charge their Combo Burst meter. When the Combo Burst meter is full, you can enter Combo Burst mode, which allows your character to use their First and Second Skills without having to charge their Vigor.
This is useful for characters with high DPS, as they can spam their skills without any delay aside from a short cooldown for their second skill. So, it is recommended to switch to your character with the highest DPS and then activate Burst Mode to maximize damage.
Switching Characters Near Enemies Triggers Entrance Attacks, Charges Vigor Faster
If you have one or two other characters in your team, you can switch to them at any point in the battle. However, switching characters near enemies triggers an Entrance Attack, which the character being switched to will do. That character will also have a slightly increased Vigor charge rate, which means they will be able to use their skills faster.
Depending on what kind of team you have, switching characters often (preferably after they've gone through their skills) helps with dealing damage more consistently, as they would be able to charge the Vigor for all their skills (especially their Ultimate Skill) faster.
If the character you want to switch to has their Ultimate Skill's Vigor charged up, you can also tap the Ultimate Skill icon next to their picture in the upper right-hand corner of the screen. This will make them do their Ultimate Skill as you switch them into battle.
Dodging Enemy Attacks at the Right Time Grants Temporary Invulnerability
Dodging is important in Black Beacon, since battles in-game happen in real-time and players can survive for as long as possible, depending on their skill. Whenever you tap the dodge button, you can dodge in whatever direction you like (so it's also useful in closing the distance between you and enemies if you need to).
Dodging at the right time, however, is called a Perfect Dodge, and this grants a quick burst of invulnerability. This can be useful as you can rush headlong into a mob of enemies and use your skills to damage all of them while they are all bunched up.
Learn What Enemy Attack Indicators Mean
Enemies Flashing Yellow Indicate Killing Moves
During battle, certain enemies will begin to emit a golden glow. This is their cue for doing a Killing Move, which can deal a lot of damage to your character if they get hit. But you can counter this by holding the Attack button.
This makes your character do a Heavy Attack, which interrupts the enemy's Killing Move. Alternatively, you can interrupt the enemy's Killing Move by making your character use any of their skills.
Certain enemies doing Normal Attacks can also be interrupted just by doing basic attacks on them.
Enemies Flashing Red Indicate an Uninterruptible Attack
Meanwhile, if the enemy (such as a boss) is flashing Red, it means they're about to do an attack that cannot be interrupted, either by a heavy attack or a skill. In this case, the best thing to do is to get your character out of the way by dodging or simply moving in the opposite direction.
Attacks Fill an Enemy's Elemental Anomaly Meter
All playable characters belong to certain Elements, and their attacks fill the Elemental Anomaly meters of their enemies. Filling this meter inflicts an Elemental Anomaly on the enemy, which inflicts a skill effect on them that either causes damage or hinders them in some way.
For example, when the Dark Element character Ereshan fills an enemy's Elemental Anomaly meter, the enemy becomes afflicted with Erosion. Once Erosion ends, the enemy takes additional damage equal to the total damage they received while the effect was active, effectively amplifying Ereshan's overall damage output.
List of All Elemental Anomalies
Weapons and Ancient Marks Improve Your Character's Performance
Eventually, players will get their hands on two types of equipable items for their characters: Weapons and Ancient Marks. Weapons give extra Attack and Defense stats to your character, as well as a Sync Skill that enhances one of that character's stats and even a character's main skill if it's a higher-rarity weapon.

Meanwhile, Ancient Marks work similarly to weapons in that they give specific stat boosts as well as grant special effects to the user wearing them. However, the difference is that Ancient Marks don't give just additional Attack or Defense.
Instead, they run the gamut of stats from HP to Critical Hit Rate, Critical Damage, and Pierce - which are stats that increase your character's chance to deal critical hits, do more damage with critical hits, and ignore an enemy's Defense stat, respectively. Also, you can equip your character with multiple Ancient Marks to give them multiple stat boosts and effects.
Getting the right Ancient Marks and Weapons will make a difference in how your character performs in battle and come out as the winner.
Combat Tricks
Intermediate Combat Tricks
| Intermediate Combat Tricks |
|---|
|
|
Know Your Skill Rotations and Character Rotations
Learning your character's skills, what they do, and what order you should use them in is one of the most important things a player should learn about their character. If you want to look at a character's skill effects, you can go to the Character menu, tap Develop, and go to the Skill screen.
For many characters, rotating between their First and Second Skills and basic attacks is enough. The order in which you do your character's skills is called a Skill Rotation.
But characters with certain abilities (like Zero and her ability to buff the damage of other characters in the team) require learning the right time to switch to other characters as well. The order in which you switch between characters is called a Character Rotation.
For example, any team with Zero will want to have her use her first and second skills before immediately switching to her team's main damage dealer (in this case, Florence). This is so Florence benefits from Zero's damage buffs, maximizing the damage she can deal with her skills. Once her skills are used up, it's time again to switch back to Zero so she can use her skills and repeat the process. Sometimes, you can also switch to Logos
Organize Your Strike Order
When it comes to Character Rotations, your party's Strike Order before the start of the battle is important as well. Every time before a mission starts, you are asked which characters you want to send into battle. On the right-hand side of the Team Formation screen, you can decide which character will be on the field first i.e., the "First Strike".
Sticking with our previous example, any team with Zero in it would want her to be the team's First Strike. This is so she can get the character going by charging her skills and using them, which grants buffs to the character she will be switched out with.
Take some time to think about which characters have abilities that benefit other characters somehow, and put them in a team with characters with high DPS. Depending on what specific characters you put in your team, you can have that support character either be the First Strike (like Zero with her buff or Ninsar with her shields), or switch to them later when you specifically need them.
You Can Queue Your Characters' Ultimate Skills
While using your character's ultimate skill, you can "queue" another character's ultimate skill so it can fire off right after without giving the enemy any chance to make a move between ultimate skill activations. This is useful for when you are facing a very tough enemy, and giving them even a moment to do any move could lead to your character's defeat.
While your character is doing an ultimate skill, tap the ultimate skill icon next to your other character's icon on the top-right-hand side of the screen. If your third character has an ultimate skill ready, tap their ultimate skill icon as well, so all three ultimate skills are used in quick succession.
Get Higher Rarity Weapons for Your Characters
As you progress through the game and encounter tougher and tougher enemies, we recommend getting higher rarity Weapons for your characters - or at least your main carry.
For example, Qing's weapon - Bieyunshui - not only has a sync skill that gives her a water damage boost, but also enhances the damage of her skill Wave Slicer by giving it more damage and a higher chance to deal critical hits. Compare this to her default 3-star weapon, Phoenix Flare, which only gives her a water damage boost and lower Attack and Defense.
Standard 5-star characters are relatively easier to get 5-star or 4-star weapons for since they have a permanent banner that takes Lost Time Keys instead of Time-Seeking Keys. But if you're using a limited 5-star character as your main carry, you will have to pull as many copies of their weapon as you can while their banner is still available.
Advanced Combat Tricks
| Intermediate Combat Tricks |
|---|
|
|
Learn How to Use Swap Cancels
Swap Canceling is when you use a certain character's abilities, before switching them out for another character while they're in the middle of making their current move. This will not cancel that move and allow you to quickly use the next character's skills without having to wait for the previous character's skill animation to finish.
For example, if you use Florence's second skill, you can tap Zero's icon quickly while she's in the middle of doing her animation. Florence still deals the damage, but Zero's already on the field using her skills and activating her buffs before you switch back to Florence and deal even more damage.
Keep Topping Up Your Characters' Ultimate Skill Charges
Black Beacon encourages players to switch between characters often, because not only does switching in characters trigger Entrance Attacks, but it also gives the next character a boost in charging the Vigor of their own skills.
If you want to maximize your team's damage, you can quickly switch between all members, doing their skill rotations, to ensure that all their Ultimate Skills are charged up. Once that's done, you can queue their Ultimate Skills to deal maximum damage.
Teleport Switching Can Make Skill Rotations Quicker
Certain characters, such as Ereshan, have skills that either teleport them or get them quickly from one part of the map to another. These skills can be used to hasten another character's skill rotation and ensure they have maximum damage.
For example, the Dark Element character Nanna has a mechanic where, after you use her First Skill, you have to pick up the other half of her weapon to deal more damage. Instead of making Nanna run up to her weapon and pick it up, you can instead use Ereshan's First Skill to teleport her to where the weapon is and immediately switch back to Nanna.
Try to think of your team as one character, with each character being a set of different abilities you can use at any time to turn the battle in your favor.
Get the Right Ancient Marks for Your Character
Don't just equip your characters with random Ancient Marks that enhance stats they don't need.
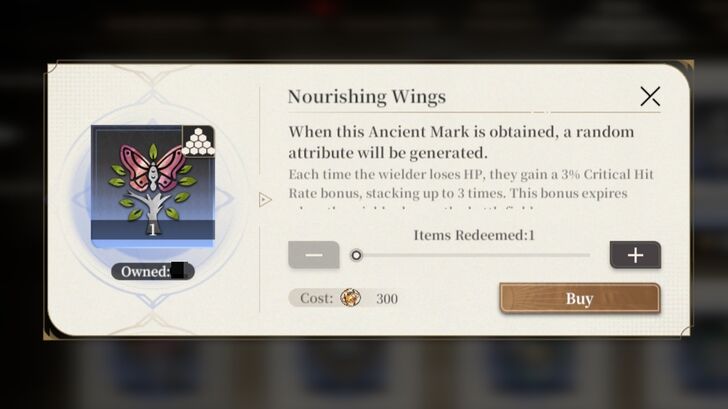
In the early game, this is easier said than done since Ancient Marks are hard to come by. But when you've already unlocked Tome of Fate Mode, you can farm Seals of Fate to buy Ancient Marks at the Fate Store. The thing is that the Ancient Marks sold here have random stat boosts, which means you will have to keep farming and spending Seals of Fate until you get the Ancient Mark with the right stat boost.
However, it will be worth it. For example, giving Li Chi a Nourishing Wings ancient mark that boosts his ATK, Critical Hit Rate, and Critical Damage further amplifies his abilities on top of its effect that gives him a higher chance of dealing critical hits to enemies as his HP goes down due to using his skills.
Find out exactly what kind of stats Li Chi and other characters should be boosting with Ancient Marks to know what to buy from the Fate Store right away and minimize your time grinding Tome of Fate mode.
Black Beacon Related Guides

All Tips and Tricks Guides
Comment
Author
Combat System Explained
Rankings
Gaming News
Popular Games

Genshin Impact Walkthrough & Guides Wiki

Honkai: Star Rail Walkthrough & Guides Wiki

Umamusume: Pretty Derby Walkthrough & Guides Wiki

Pokemon Pokopia Walkthrough & Guides Wiki

Resident Evil Requiem (RE9) Walkthrough & Guides Wiki

Monster Hunter Wilds Walkthrough & Guides Wiki

Wuthering Waves Walkthrough & Guides Wiki

Arknights: Endfield Walkthrough & Guides Wiki

Pokemon FireRed and LeafGreen (FRLG) Walkthrough & Guides Wiki

Pokemon TCG Pocket (PTCGP) Strategies & Guides Wiki
Recommended Games

Diablo 4: Vessel of Hatred Walkthrough & Guides Wiki

Cyberpunk 2077: Ultimate Edition Walkthrough & Guides Wiki

Fire Emblem Heroes (FEH) Walkthrough & Guides Wiki

Yu-Gi-Oh! Master Duel Walkthrough & Guides Wiki

Super Smash Bros. Ultimate Walkthrough & Guides Wiki

Pokemon Brilliant Diamond and Shining Pearl (BDSP) Walkthrough & Guides Wiki

Elden Ring Shadow of the Erdtree Walkthrough & Guides Wiki

Monster Hunter World Walkthrough & Guides Wiki

The Legend of Zelda: Tears of the Kingdom Walkthrough & Guides Wiki

Persona 3 Reload Walkthrough & Guides Wiki
All rights reserved
Game Copyright©Glohow Holdings Pte. Ltd. & MINGZHOU Technology Co., Ltd. All Rights Reserved
The content we provide on this site were created personally by members of the Game8 editorial department.
We refuse the right to reuse or repost content taken without our permission such as data or images to other sites.
©Glohow Holdings Pte. Ltd. & MINGZHOU Technology Co., Ltd (Provider)
 Beginner's Guide: Tips and Tricks for New Players


![Monster Hunter Stories 3 Review [First Impressions] | Simply Rejuvenating](https://img.game8.co/4438641/2a31b7702bd70e78ec8efd24661dacda.jpeg/thumb)


