Chapter 2 (Normal) Walkthrough Guide
The Game8 Black Beacon Team has ended coverage as of May 21, 2025. Information on certain pages may not be up-to-date. Thank you for your continued support!
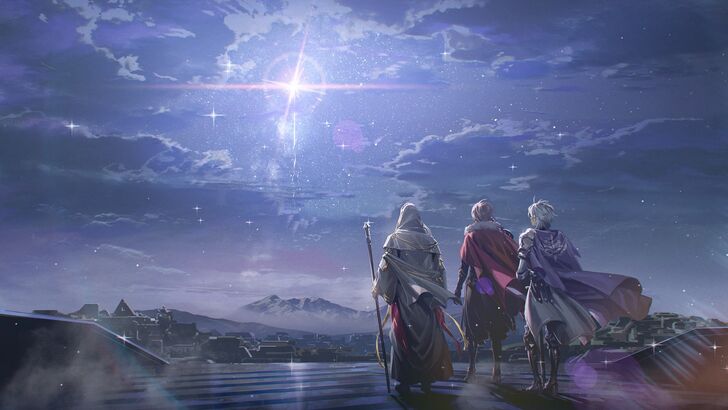
Chapter 2 is a Main Quest chapter in Black Beacon. Follow this guide to learn about the best characters for this chapter, as well as the walkthrough to complete each section and its rewards.
List of Contents
Chapter 2 (Normal) Walkthrough Guide
Chapter 2 Overview
 |
|
| Star | |
|---|---|
| Treasure Chests Available: | 8 |
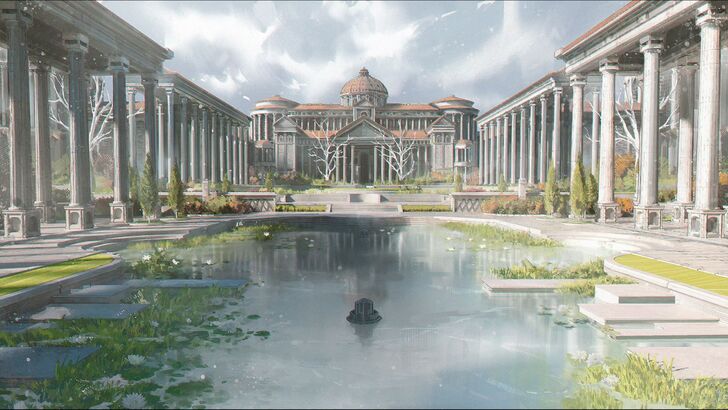
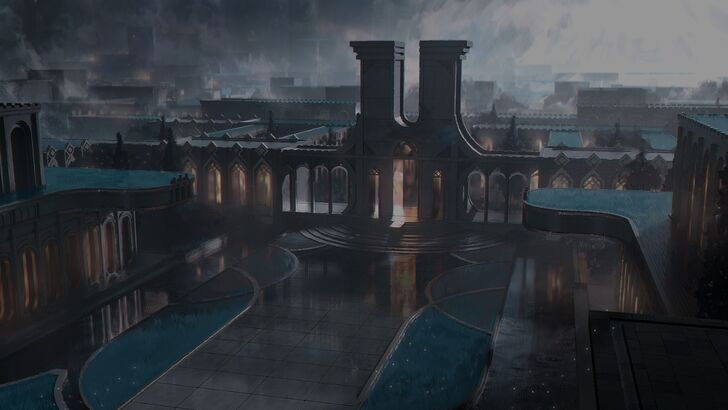
The Seer transported back in time to acquire the code to deactivate the sun god, Aten.
Best Characters for Chapter 2
Most Characters Can Clear Chapter 2
| Best Characters for This Chapter | |||
|---|---|---|---|
 Shamash Shamash
|
 Zero Zero
|
 Ninsar Ninsar
|
 Wushi Wushi
|
 Logos Logos
|
 Ereshan Ereshan
|
 Nanna Nanna
|
|
Chapter 2 follows the group's quest to stop Aten from destroying the Library and introduces human-type enemies. However, these enemies do not pose a serious threat if you level up your characters.
We recommend using Light and Dark element characters, as most enemies in this chapter are weak to them.
Chapter 2 Quest Walkthrough
| Chapter 2 Walkthrough Directory | ||||
|---|---|---|---|---|
| 2-1 | 2-2 | 2-3 | 2-4 | 2-5 |
| 2-6 | 2-7 | 2-8 | 2-9 | 2-10 |
| 2-11 | 2-12 | 2-13 | 2-14 | 2-15 |
| 2-16 | 2-17 | 2-EX | ||
Chapter 2-1 Guide
Overview
 |
|
| The Eternal Sun | |
|---|---|
| I desire the sun only. If they decline my request, destroy them all, and if they are willing to relinquish it, you shall decide their fate. |
Two thousand years before the World Calendar, the scene opens with a conversation between the Japheth Empire's royals: Emperor Thurinus, Prince Rubicon, General Sarvis, and High Priest Merari. The outstanding general, praised for his military prowess, was promoted to Senator and awarded the charming city of Bellefontaine.
Recalling all the feats and accolades he had received as the leader of the Japheth Empire, the emperor set his sights on the Arsacid Empire and ordered the three to seize the mysterious sun god by any means necessary.
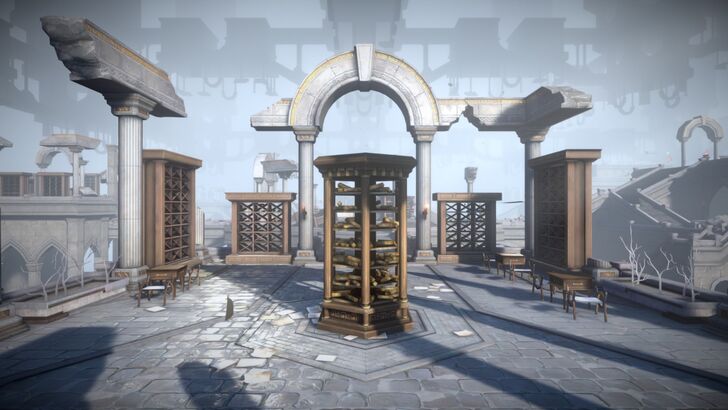
Upon reaching the Arsacid Empire's capital, Obed, the three marveled at the majestic Babel Tower. With the empire brought to its knees, they marched toward the mysterious tower to reclaim The Library and the sun god.
Chapter 2-2 Guide
Overview
 |
|
| Arsacid Empire | |
|---|---|
| Throughout its long history, Obed was sometimes the center of a powerful empire, while at other times it became the vassal of an even more powerful empire, the fifth emperor of the Arscacid Empire, was an instance of the latter. | |
| Treasure Chests Available | 2 |
| First-Time Clear Rewards | Rune Shards x 50 Vision x 400 Proof of Search for Knowledge - Page x 15 Proof of Search for Knowledge - Fragment x 25 |
Walkthrough
| 1 | 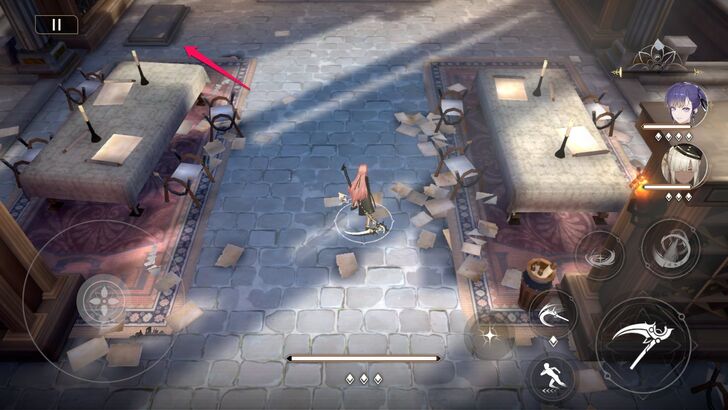 The level starts with Ereshan. Move north and step on the pressure plate to open the blocked path. |
|---|---|
| 2 | 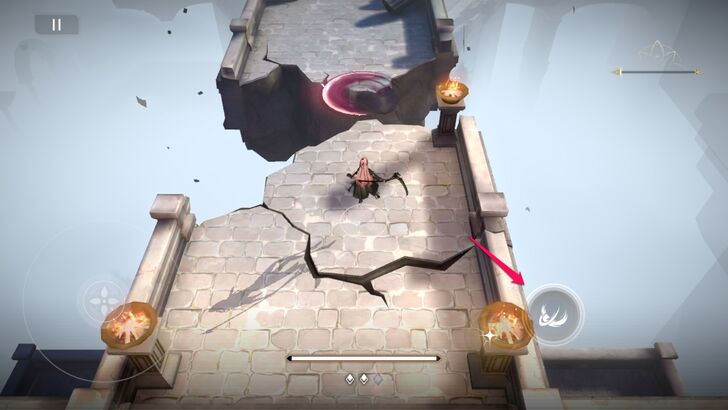 Move forward and you'll come across a broken bridge. Use Ereshan's first skill to throw her sickle, then tap it again to teleport to where it landed. This skill allows her to cross gaps between broken bridges and other structures. |
| 3 | 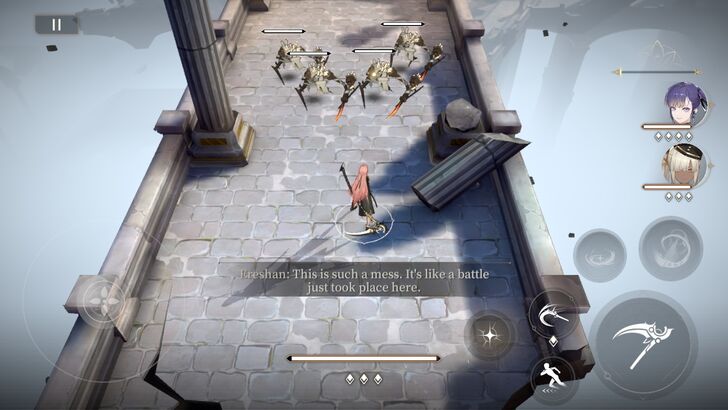 Follow the bridge, and you will encounter an enemy mob. Eliminate them. |
| 4 |  As you move along, interact with the glowing object. This will trigger a cutscene. |
| 5 | 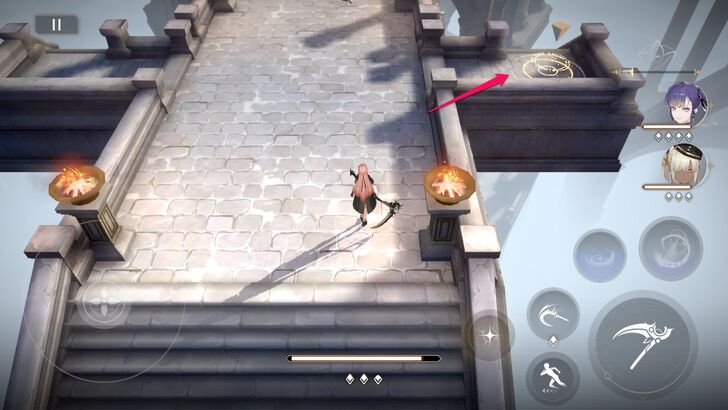 You'll be instructed to check the lower levels of the library by using the stairs on the right side of the bridge. |
| 6 | 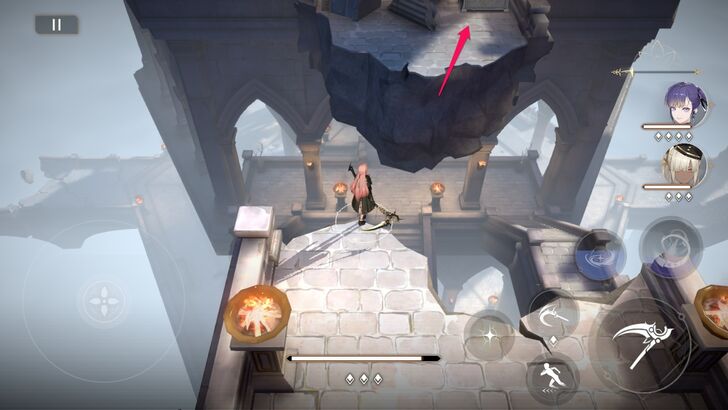 Before doing that, move north and use Ereshan's first skill to cross the broken bridge and reach the level's first treasure chest. |
| 7 |  Go back and head down to the lower level of the library. |
| 8 | 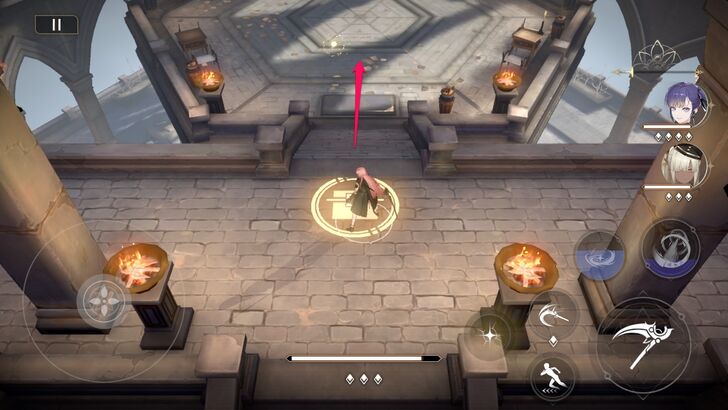 Go down the stairs and head north toward a staircase marked with a treasure chest icon on the floor. |
| 9 | 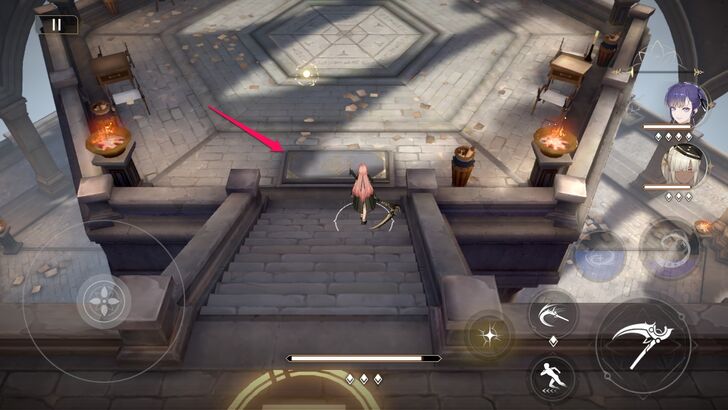 Step on the pressure plate to activate the pedestal. |
| 10 | 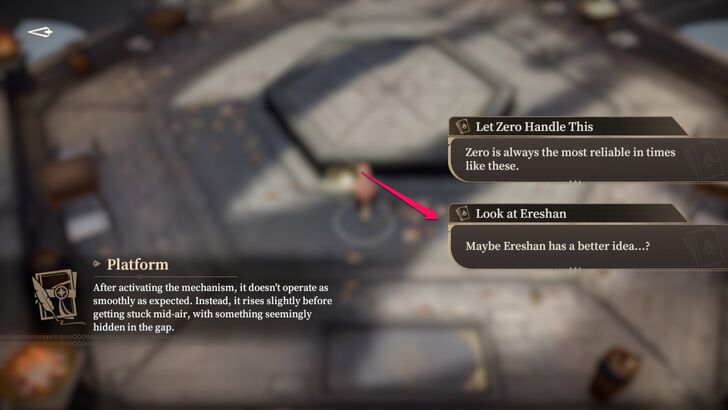 Interact with the glowing object and select Ereshan. This will reward you with the level's second treasure chest. |
| 11 | 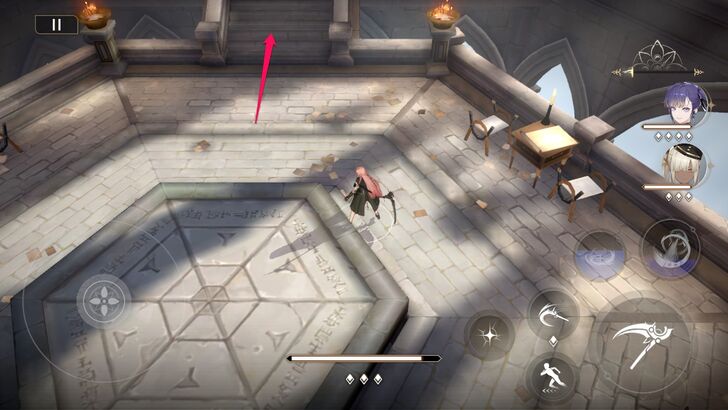 Move northward past the pedestal and go up the stairs. |
| 12 |  Step on the pressure plate to activate the elevator. However, it won't work. |
| 13 | 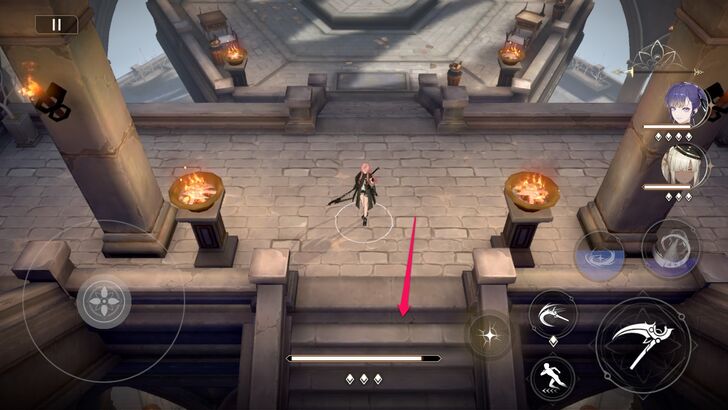 Head back to the area where you found the treasure chest icon and take the other staircase. |
| 14 | 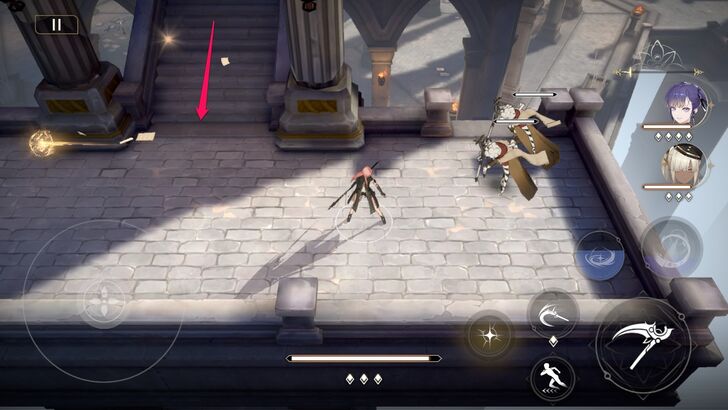 Follow the stairs, and you will encounter enemies at the end. Take them out. |
| 15 | 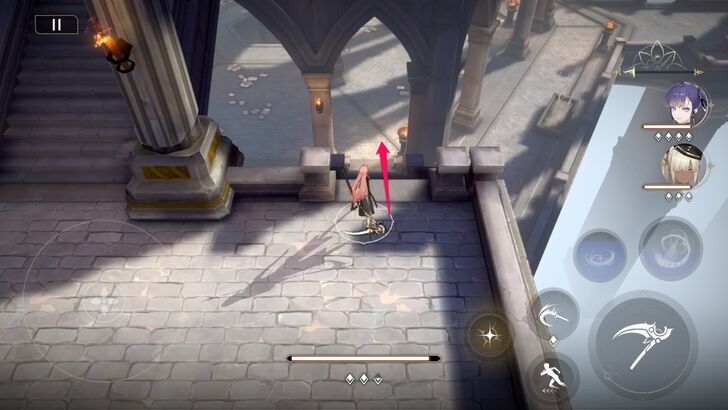 After taking out the enemies, go down the stairs to the left. |
| 16 | 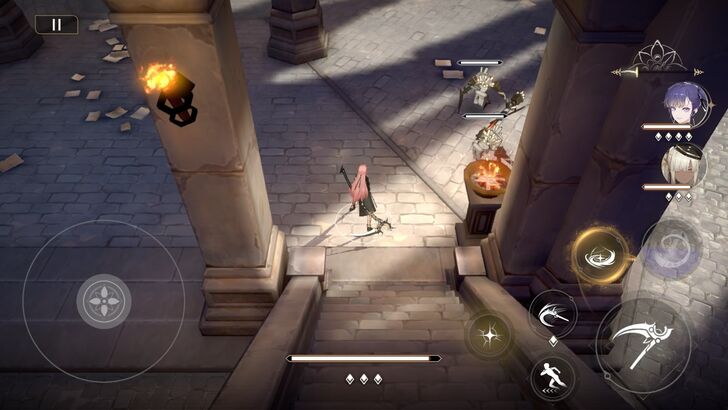 Another set of enemies awaits you at the lower level, but you can easily take care of them. Once eliminated, a cutscene will play. Skip the cutscene or let it play out to end the chapter. |
Chapter 2-3 Guide
Overview
|
|
| The Star of Ephrathah | |
|---|---|
| According to the history records, a solitary star of unparalleled splendor emerged in the night sky above Ephrathah. Unlike other stars, it remained fixed over Ephrathah. | |
| Treasure Chests Available | 2 |
| First-Time Clear Rewards | Rune Shards x 50 Vision x 400 Fire of Hephae - Medium x 15 Fire of Hephae - Small x 25 |
Walkthrough
| 1 | 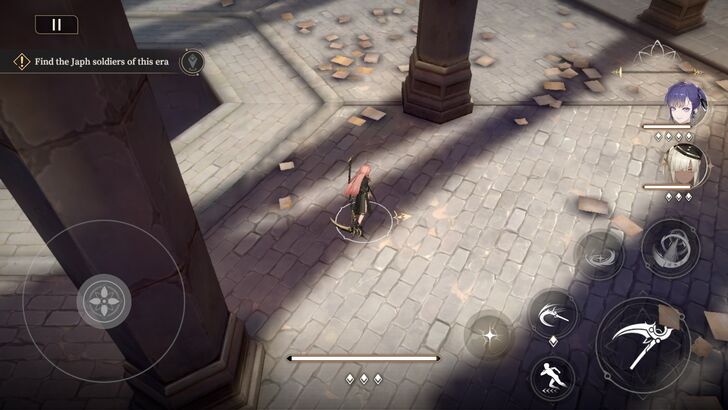 The level opens with a conversation between Ereshan and Zero. |
|---|---|
| 2 | 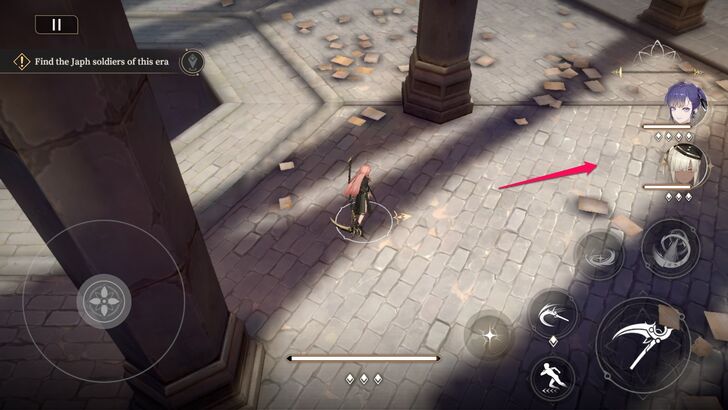 Follow the mission path east. |
| 3 | 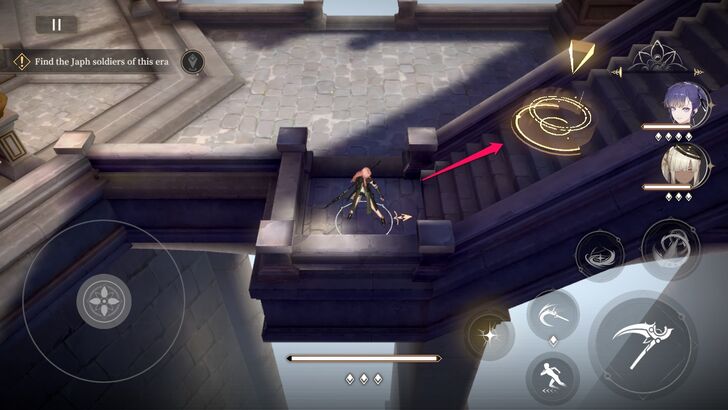 Go up the stairs. |
| 4 | 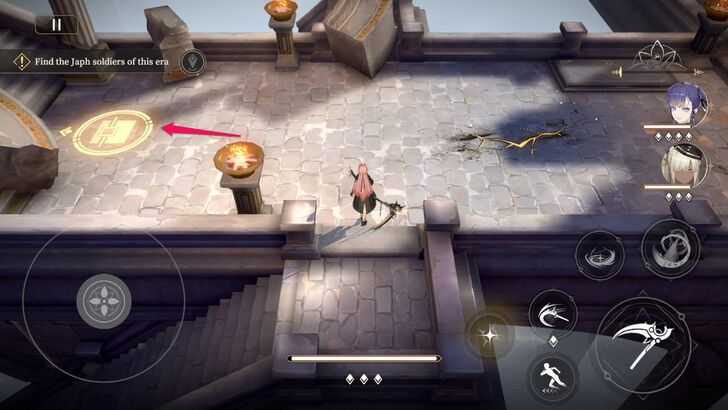 Before following the mission path, head to the location indicated by the treasure chest icon. |
| 5 | 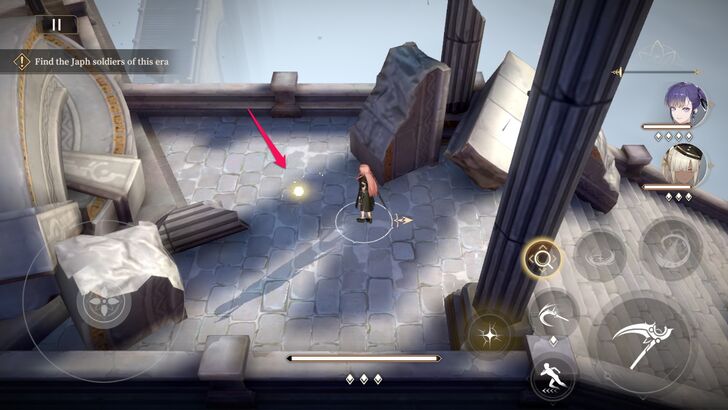 Ascend the stairs and interact with the glowing object at the end of the path. |
| 6 | 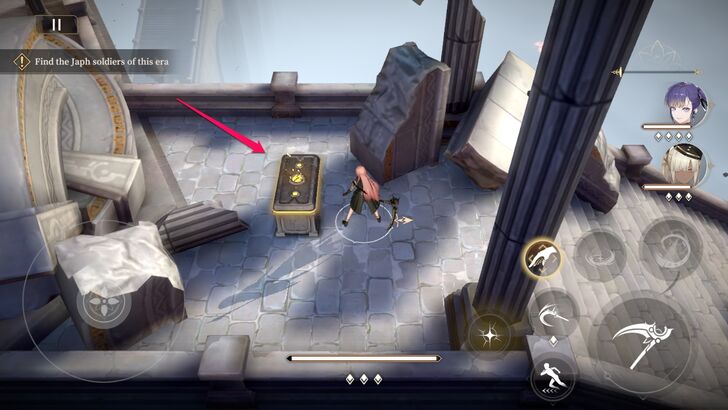 Complete the minigame to unlock the treasure chest. |
| 7 | 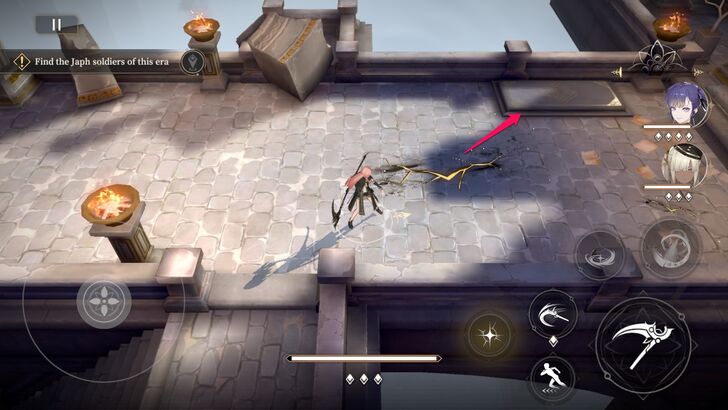 Go back and step on the pressure plate to remove the stone gate blocking the path. |
| 8 | 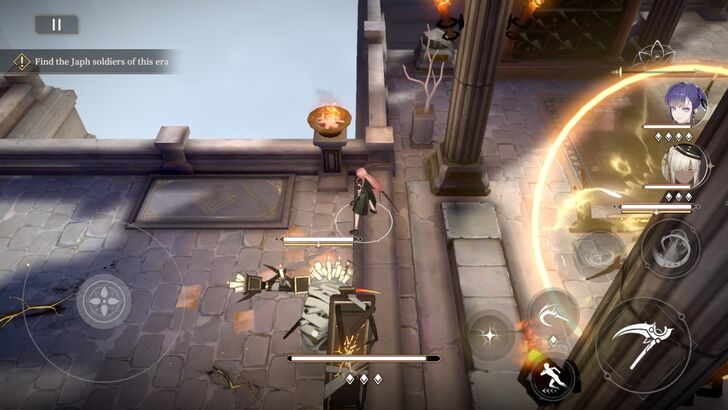 As the stone gate lowers, enemies will spawn. Take them out, and you'll receive the third pendant upgrade. |
| 9 | 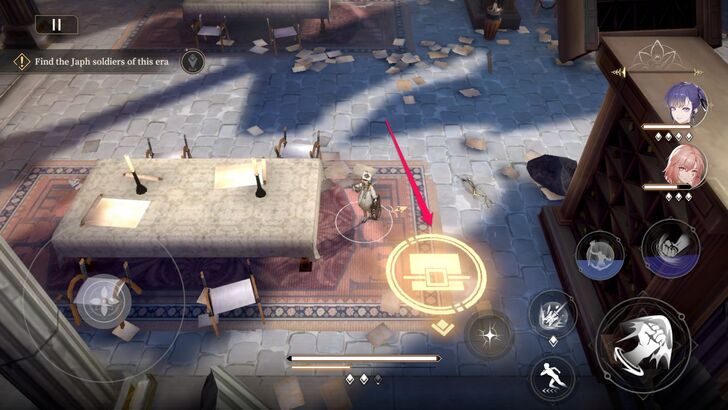 Follow the path. After the first table, you will encounter a treasure chest icon on the floor. |
| 10 | 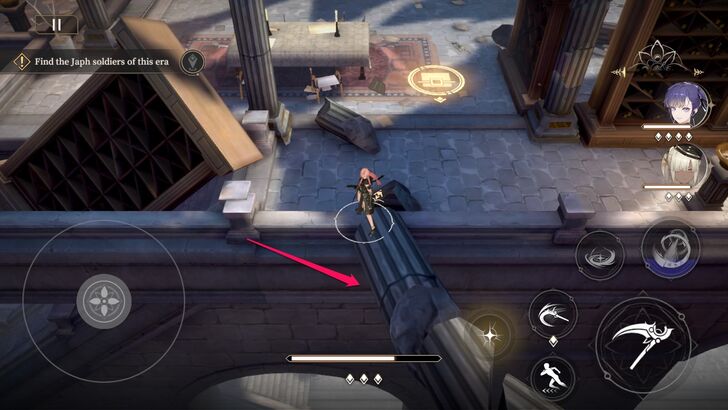 Follow the path marked by the treasure chest and go up the broken pillar. |
| 11 | 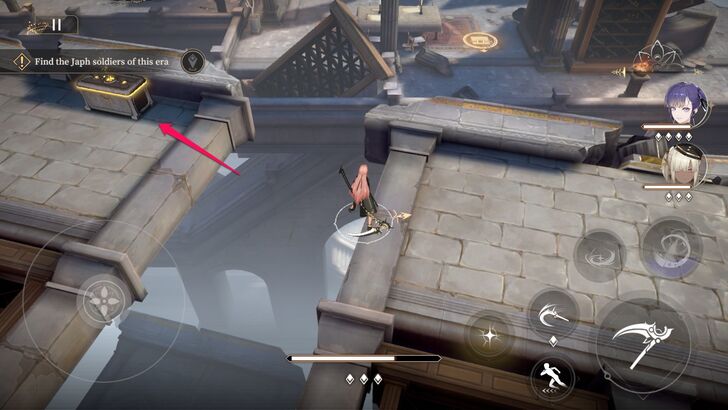 Move west, and you'll find a treasure chest on a destroyed wall platform. Use Ereshan's first skill to reach it. |
| 12 | 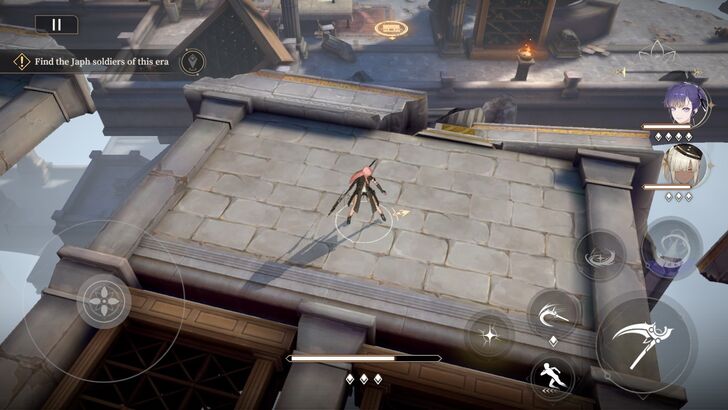 Once done, go back to the platform where the broken pillar leans. |
| 13 | 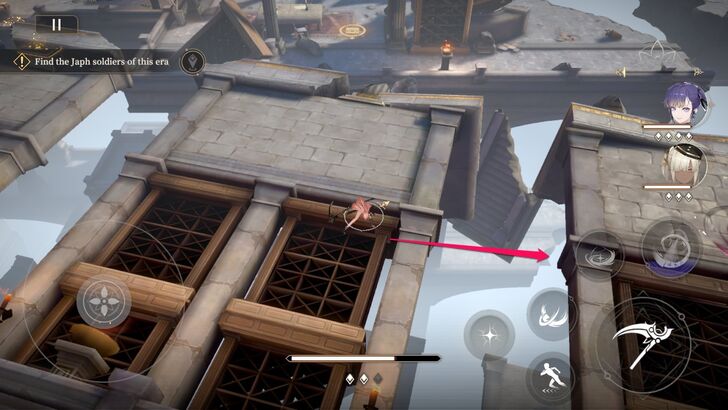 Move east and reach the other platform using Ereshan's first skill. |
| 14 | 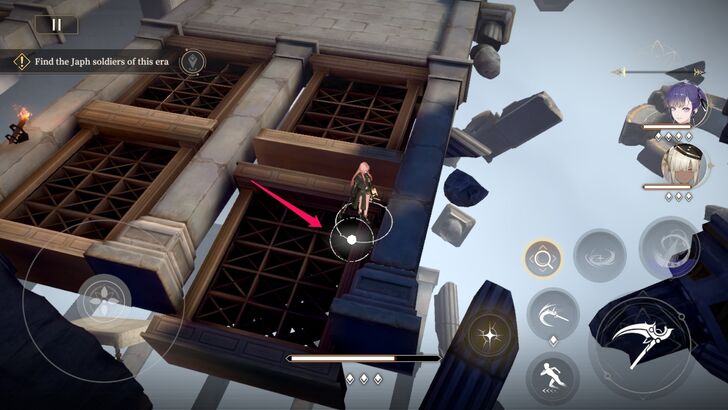 Go to the bottom-right end of the platform and interact with the white glowing object. |
| 15 | 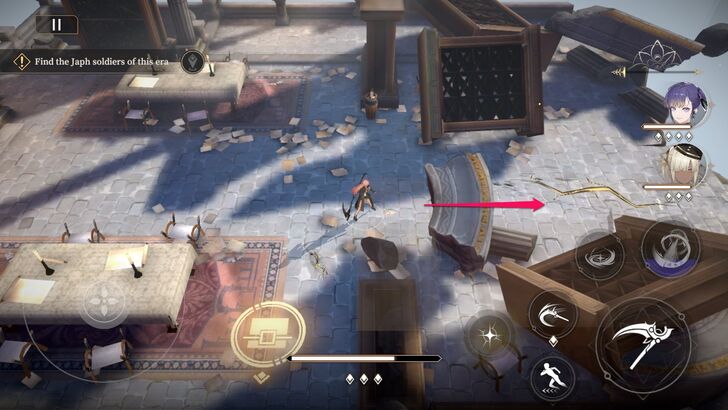 Go back to where the treasure chest icon is and follow the mission path. |
| 16 | 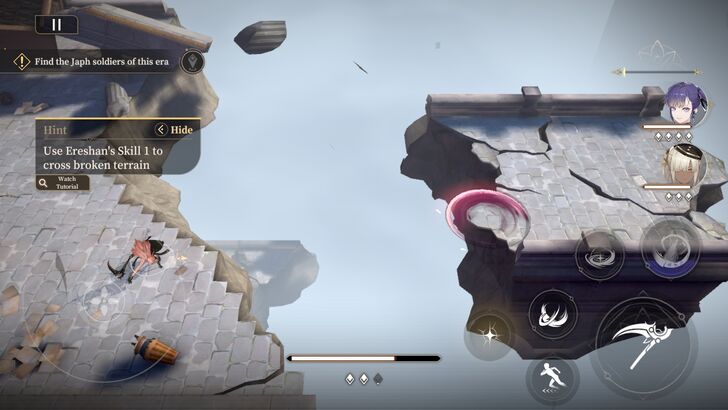 You will encounter a broken bridge again. Use Ereshan's first skill to cross it easily. |
| 17 | 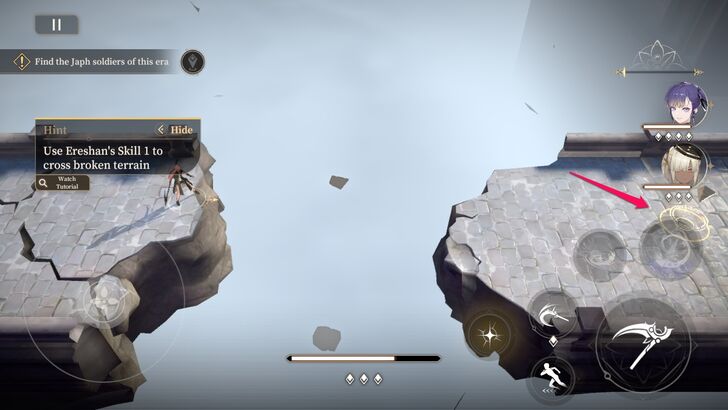 Cross another broken platform to reach the end of the bridge. Run across the bridge to end the level. |
Chapter 2-4 Guide
Overview
|
|
| Japhetic Invaders | |
|---|---|
| Our general is looking for you... | |
| Treasure Chests Available | 1 |
| First-Time Clear Rewards | Rune Shards x 50 Vision x 400 Orelium x 25000 |
Walkthrough
| 1 | 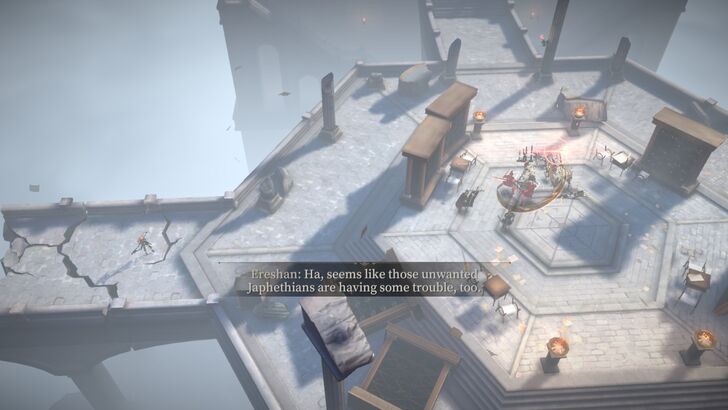 The level starts with a nearby clash between monsters and Japhethian soldiers. |
|---|---|
| 2 | 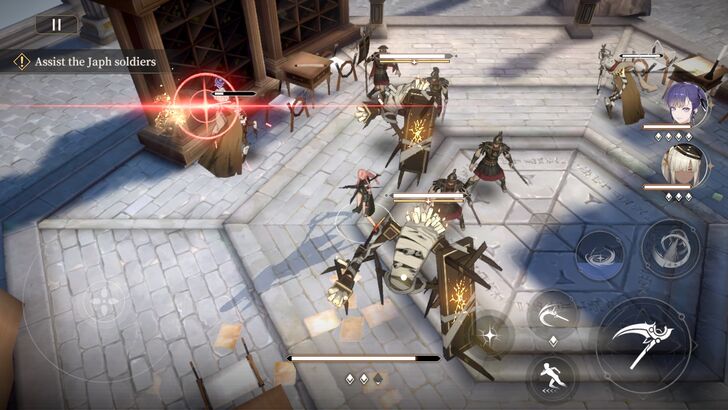 Assist the soldiers and eliminate the anomalies. A conversation with a soldier will play after the fight. |
| 3 | 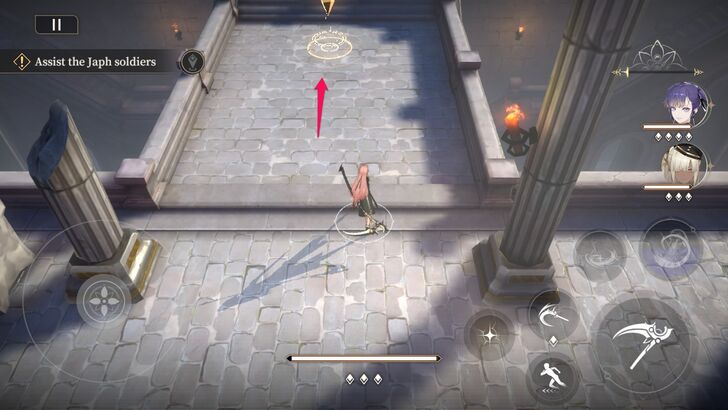 Move north and climb the stairs. |
| 4 | 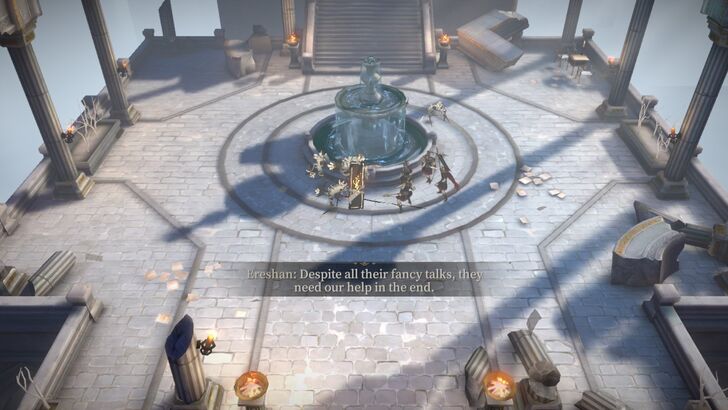 Another clash occurs nearby. Go up the stairs and assist the Japhethian soldiers once again. A conversation with a soldier will play after eliminating the enemies. |
| 5 | 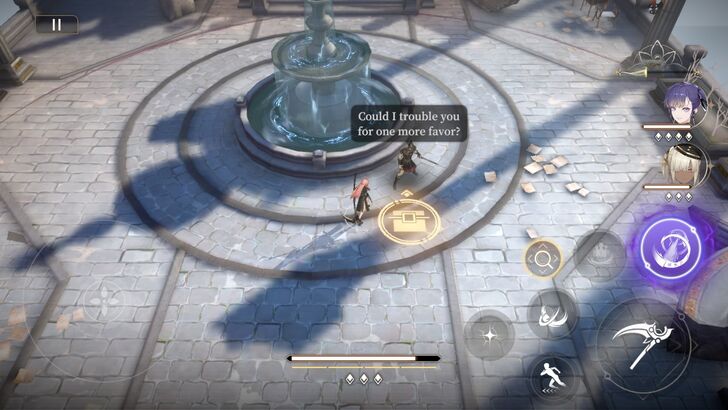 Right beside the water fountain, you'll find a lone soldier. Solve his three riddles to obtain a treasure chest. Here are the answers: First Riddle: Human Who Walks Through Life Second Riddle: The Running Tiberius Third Riddle: Bright Stars |
| 6 | 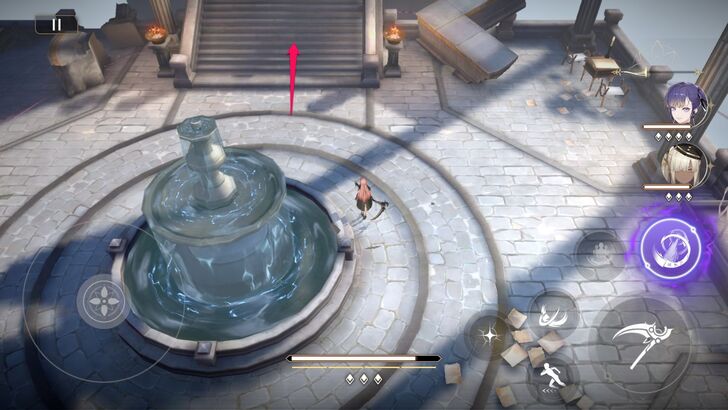 Go past the water fountain and climb the stairs to end the level. |
Chapter 2-5 Guide
Overview
|
|
| Sarvis | |
|---|---|
| I am Sarvis, a senator of Japheth and a general serving His Highness Rubicon. | |
| Treasure Chests Available | 0 |
| First-Time Clear Rewards | Rune Shards x 50 Vision x 400 Proof of Search for Knowledge - Page x 15 Proof of Search for Knowledge - Fragment x 25 |
Walkthrough
| 1 | 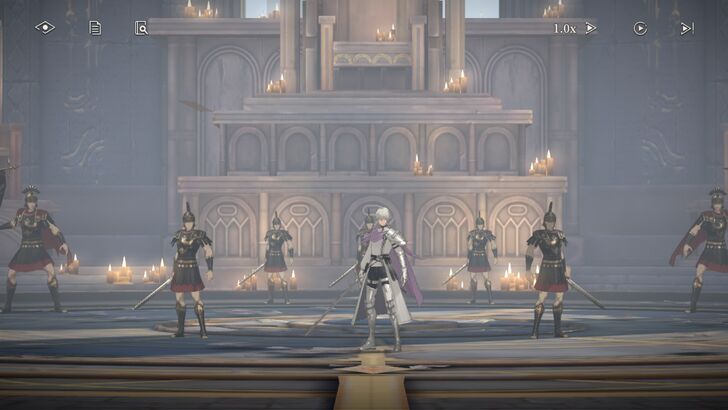 The level starts with a conversation with General Sarvis. |
|---|---|
| 2 | 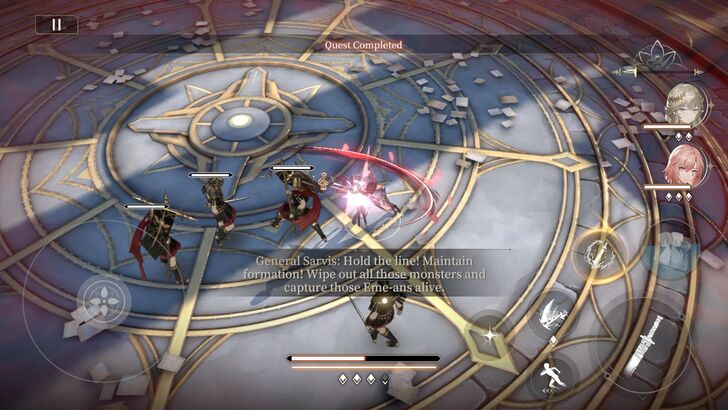 Fight off waves of Japhethian soldiers until Ereshan and Zero ask the Seer to transfer to turn back time. |
| 3 | 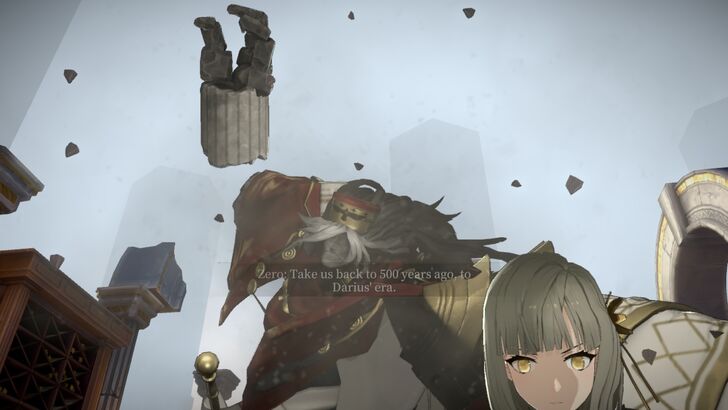 A cutscene will play. You can either let it play or skip it to complete the level. |
Chapter 2-6 Summary
Overview
 |
|
| King Herod | |
|---|---|
| From this moment onward, even the stars shall pale in comparison to the sun I have awakened! |
Prince Rubicon and his companions successfully acquired the sun god. Though Obed surrendered, the prince ordered his troops to besiege the capital and conquer the Babel Tower.
As the sun god was being transported to Javriel, a strange occurrence took place. It mysteriously activated in the middle of the night while its convoy rested in King Herod's dominion, Ephrathah.
Chapter 2-7 Guide
Overview
|
|
| Darius | |
|---|---|
| All the clues we've gathered so far are like scattered leaves from the same tree, and behind each leaf, we catch a glimpse of the blurry figure of Darius. | |
| Treasure Chests Available | 1 |
| First-Time Clear Rewards | Rune Shards x 50 Vision x 400 Fire of Hephae - Medium x 15 Fire of Hephae - Small x 25 |
Walkthrough
| 1 | 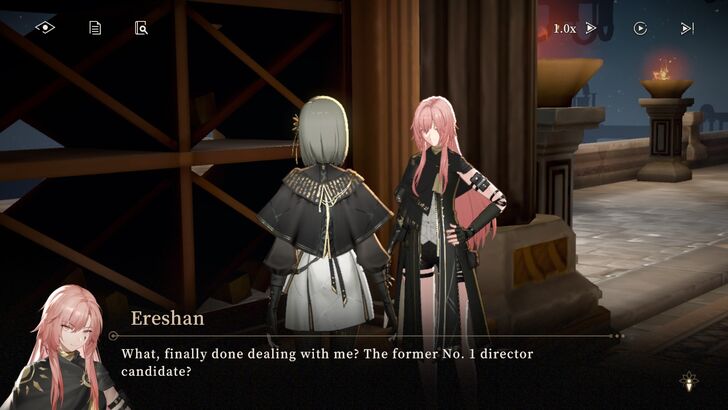 The level starts with a cutscene featuring Zero and Ereshan. |
|---|---|
| 2 | 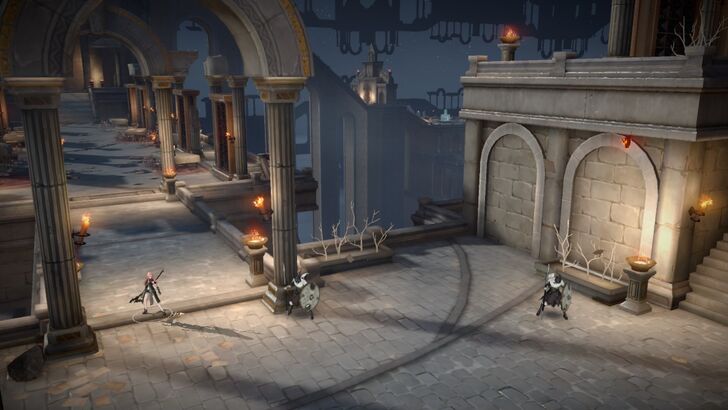 Follow the mission path and run across the bridge to trigger another cutscene. |
| 3 | 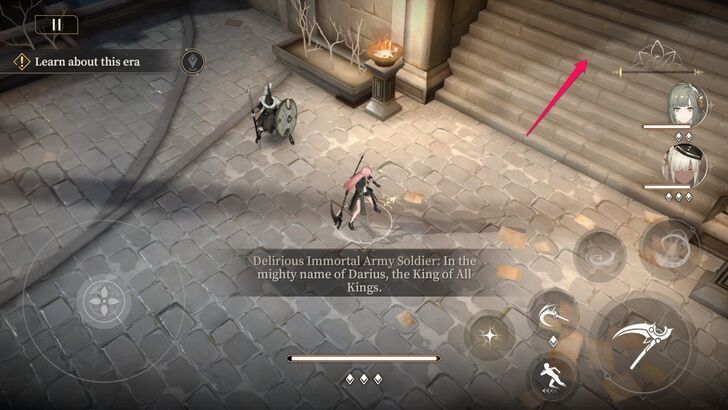 Run past the Immortal Army's soldiers and climb the stairs. |
| 4 | 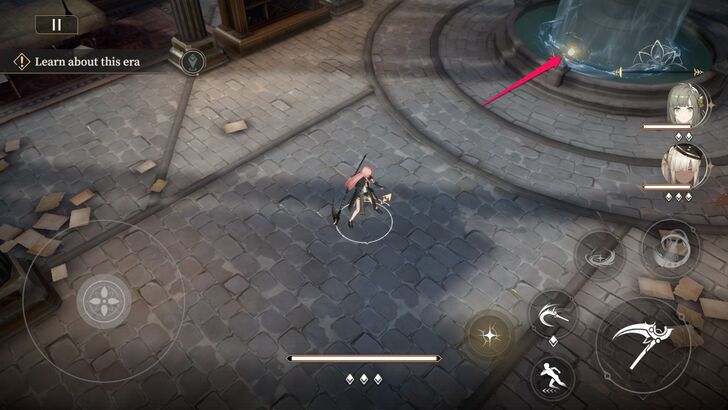 At the top of the stairs, follow the path until you encounter a water fountain. Interact with the glowing object to unlock the fourth Pendant upgrade. |
| 5 | 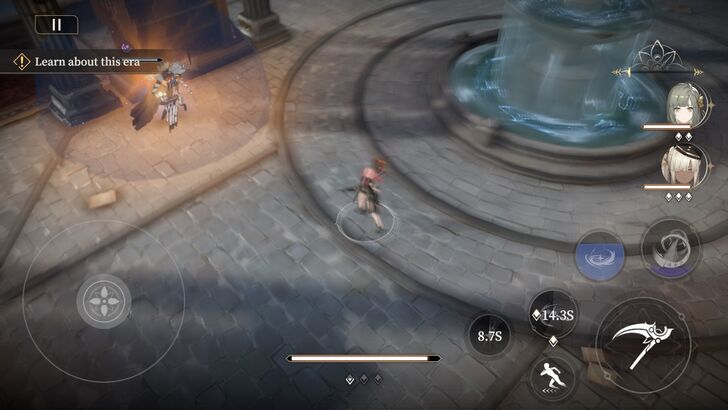 A group of enemies will immediately spawn. Take them out. |
| 6 | 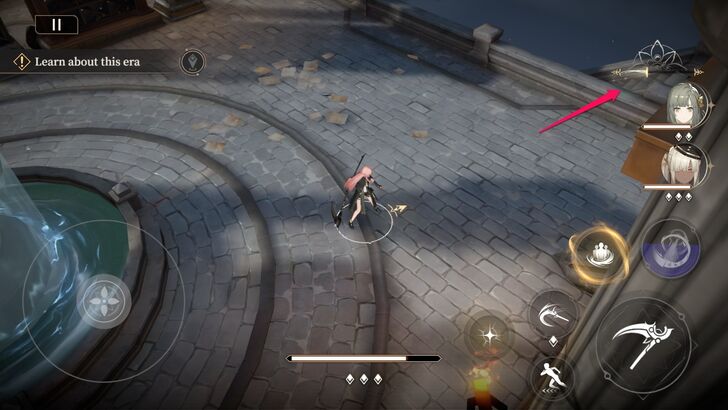 Move past the water fountain until you see stairs leading to the lower levels. |
| 7 | 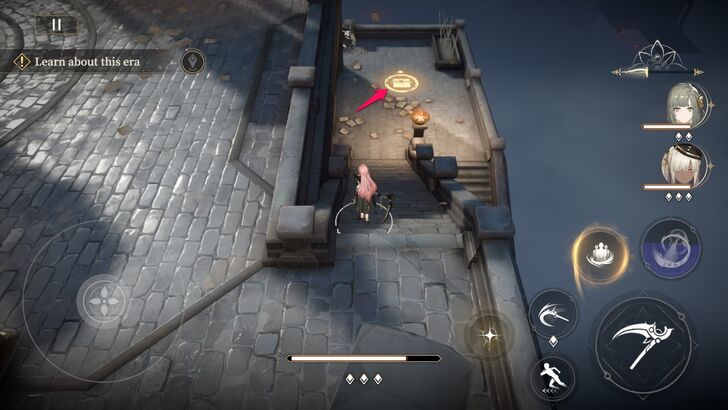 Go down the stairs and move toward the treasure chest icon on the floor. |
| 8 | 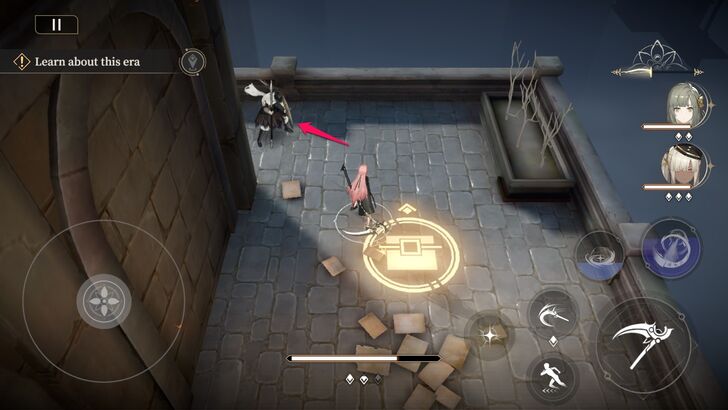 Move past the soldier guarding a hidden path. |
| 9 | 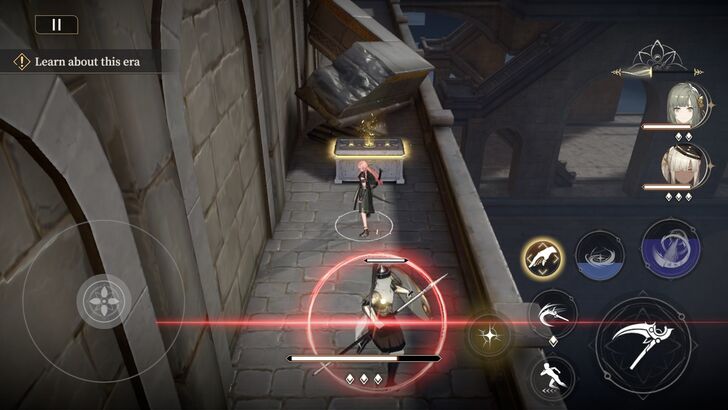 The guard will become hostile once you run past him. Eliminate him quickly and obtain a treasure chest at the end of the hidden corridor. |
| 10 | 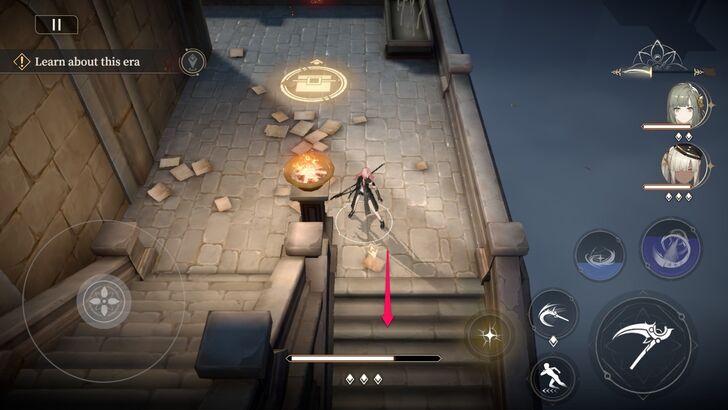 Go back to where you found the treasure chest icon and go down the stairs. |
| 11 | 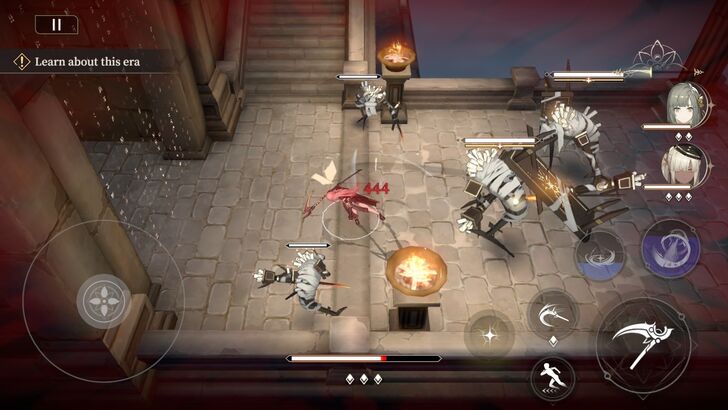 You will encounter a group of enemies at the bottom of the stairs. Take them out. A short conversation between Zero and Ereshan will play immediately after defeating the enemies. |
| 12 | 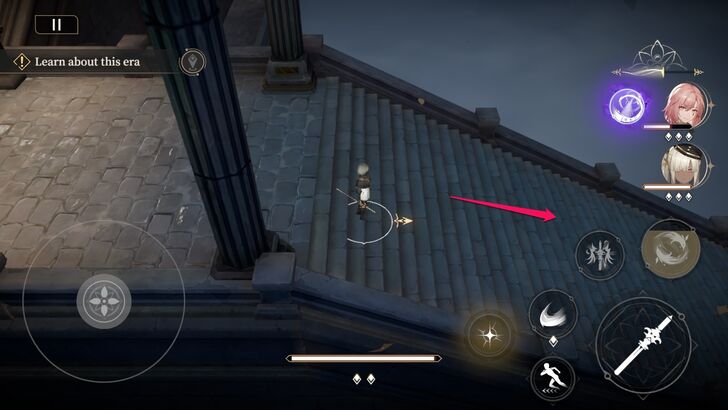 Follow the mission path and descend another set of stairs to complete this level. |
Chapter 2-8 Guide
Overview
 |
|
| Under the Bright Stars | |
|---|---|
| Get up, I will share glory and dreams with all you... and there will eventually come a day when we fill the entire sky with our footprints! |
With the sun god under his domain, Darius commanded the Eme-ans to research and uncover its secrets. However, years passed, and Pythagoras, the Eme-an leader at the time, still had no answers.
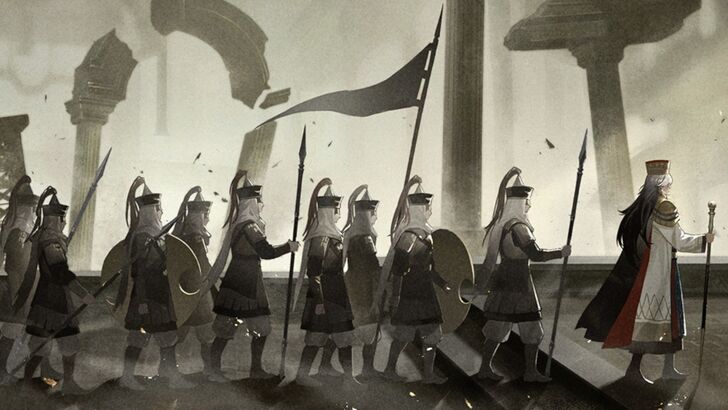
With time running out, Emperor Darius ordered his Immortal Army to seize Library of Babel and learn the truth for himself.
Chapter 2-9 Guide
Overview
|
|
| Farahd | |
|---|---|
| The Immortal Army shall never fail his Majesty... | |
| Treasure Chests Available | 2 |
| First-Time Clear Rewards | Rune Shards x 50 Vision x 400 Orelium x 25000 |
Walkthrough
| 1 | 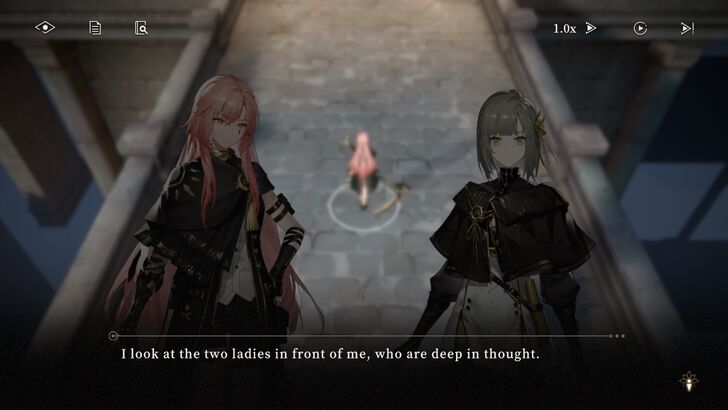 The level starts with a conversation between Zero and Ereshan. |
|---|---|
| 2 | 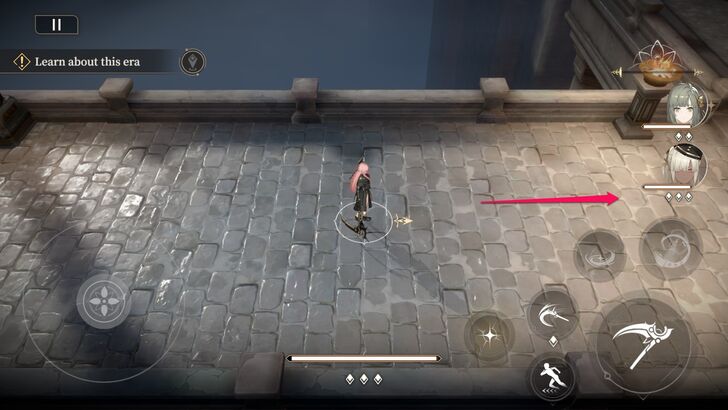 From the starting area, move east. |
| 3 | 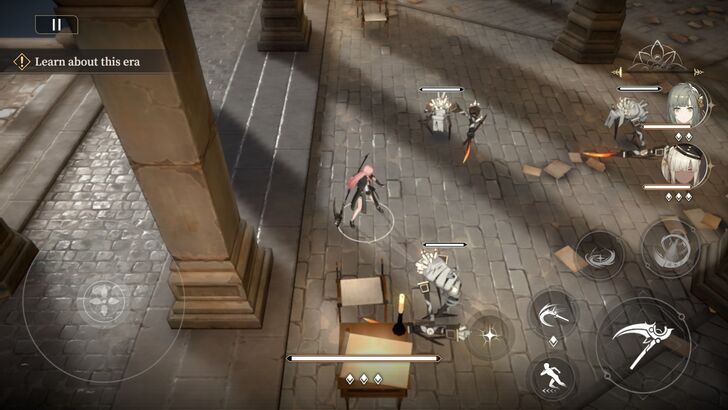 Enemies will spawn as you follow the mission path. Take them out. |
| 4 | 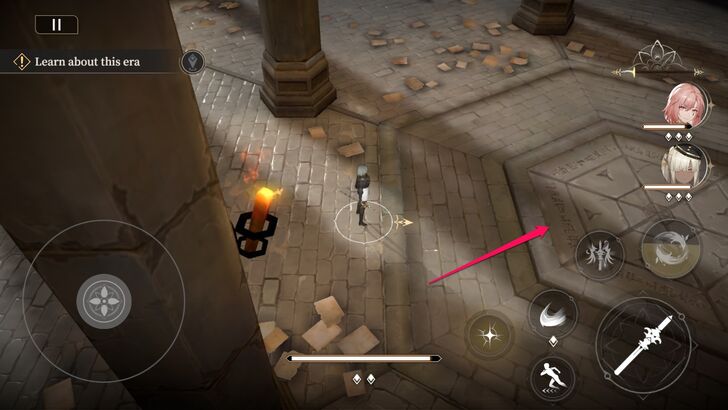 An elevator will descend after the enemies are eliminated. Step onto it to ascend to the upper level. |
| 5 | 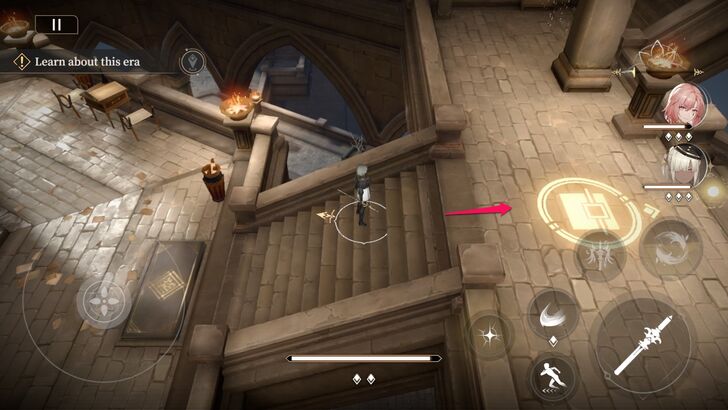 Go up the stairs to the east to find a treasure chest icon on the ground. |
| 6 | 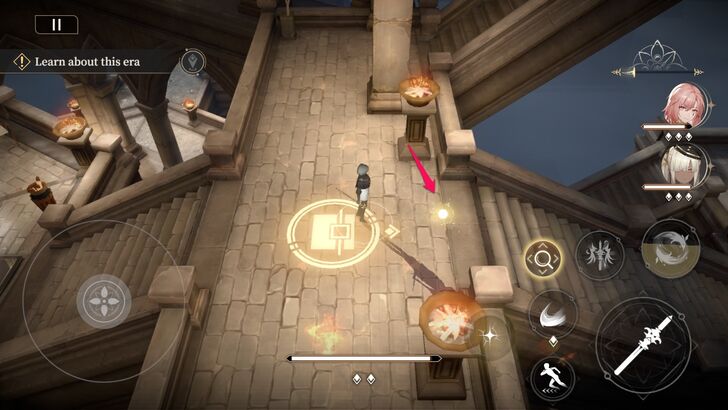 Interact with the glowing object and select "Approach and Negotiate." |
| 7 | 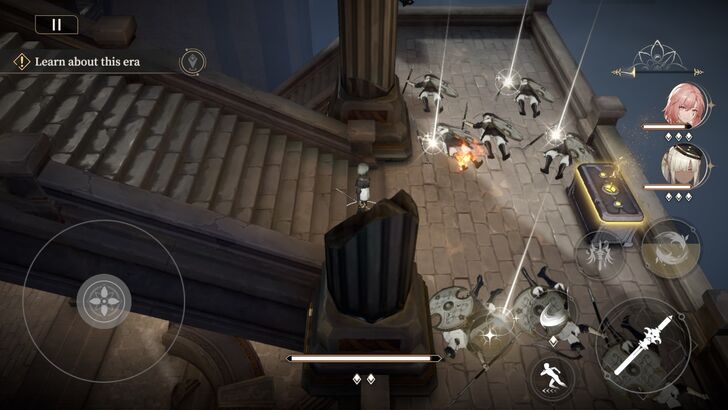 Go down the stairs in front of you and pick up scattered items, including a treasure chest. |
| 8 | 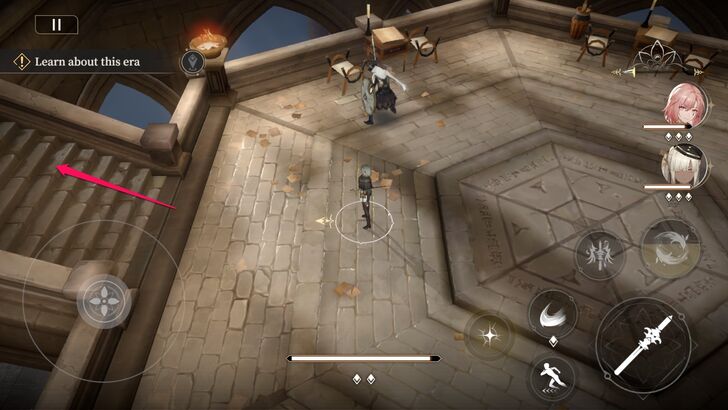 Go back to the elevator, and move west this time. |
| 9 | 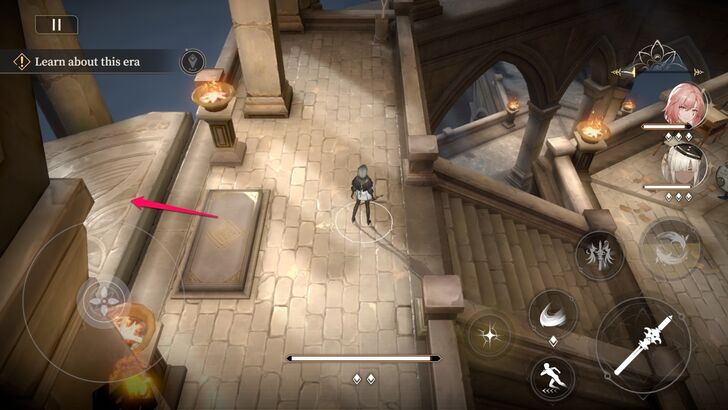 An elevator awaits at the end of the path. Step on it to gain access to the upper level. |
| 10 | 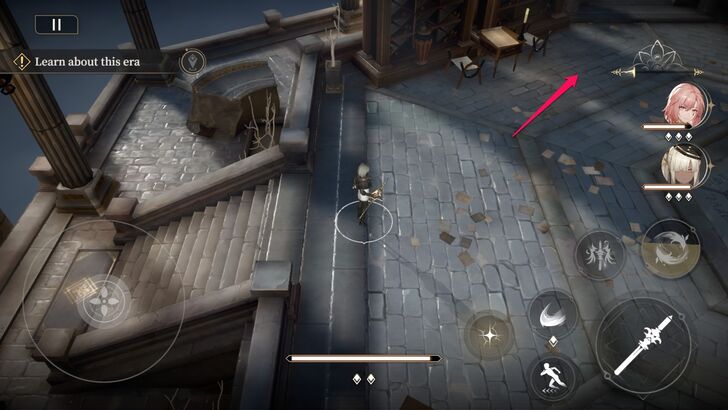 Follow the stairs and go northeast until you found another set of stairs. |
| 11 |  Move north and follow the mission path. |
| 12 | 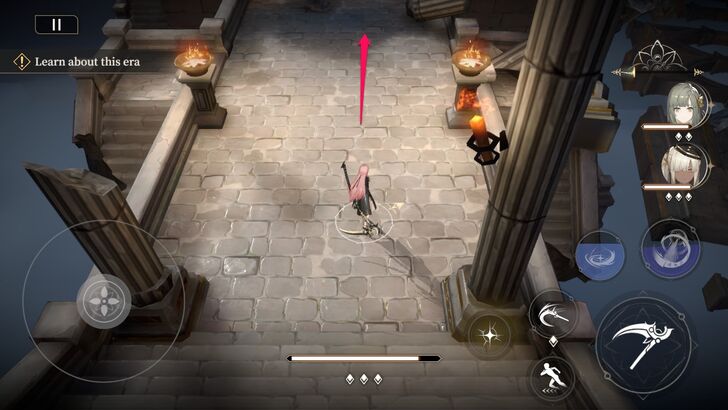 Follow the path, until Zero notifies you that it is blocked. |
| 13 | 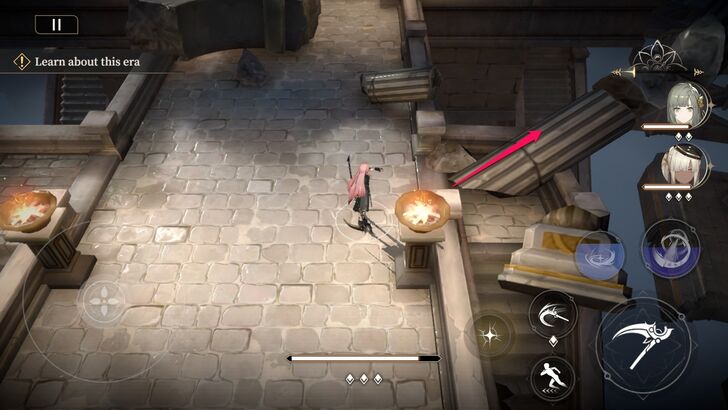 Instead of moving forward, follow the path through the destroyed pillar. |
| 14 | 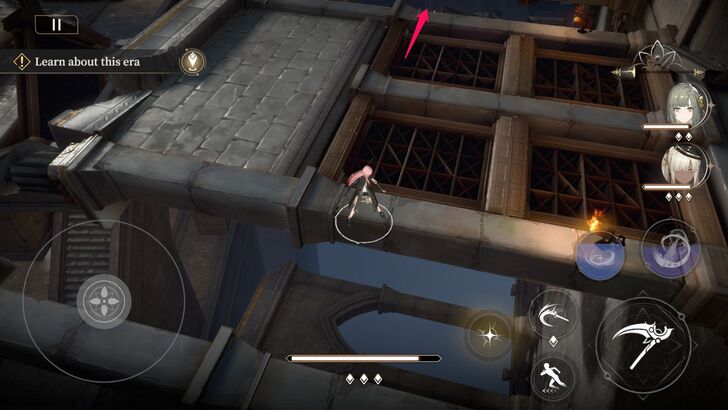 Once you reach the wall platform, head north and use Ereshan's skills to cross another platform. Enemies will spawn on these platforms, so take them out. |
| 15 | 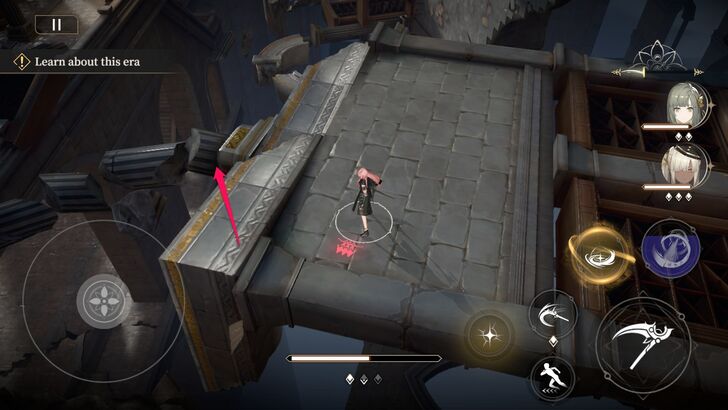 You'll find another broken pillar on the last platform. |
| 16 | 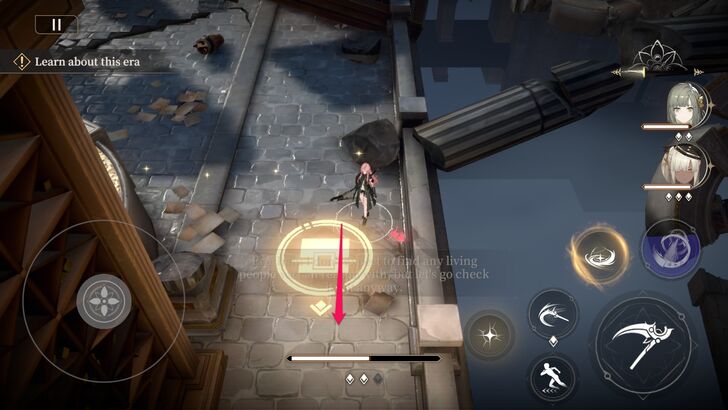 As you go down the broken pillar, you'll be directed to speak to a lone Immortal Army soldier. However, follow the path marked by a treasure chest icon first. |
| 17 | 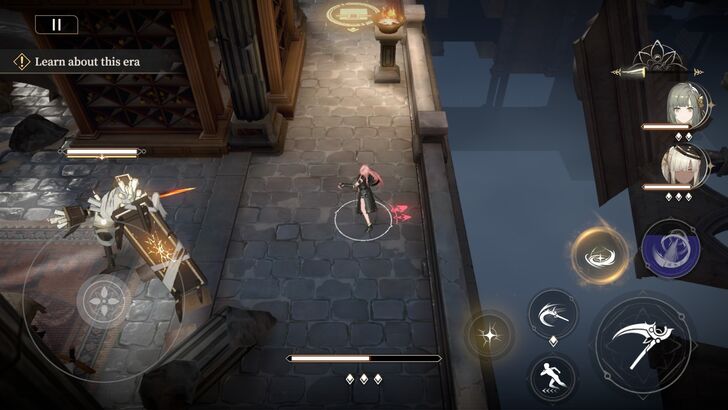 An enemy will spawn at the west part of the area. Take it out. |
| 18 |  Move west until you're character is between the two tables. |
| 19 | 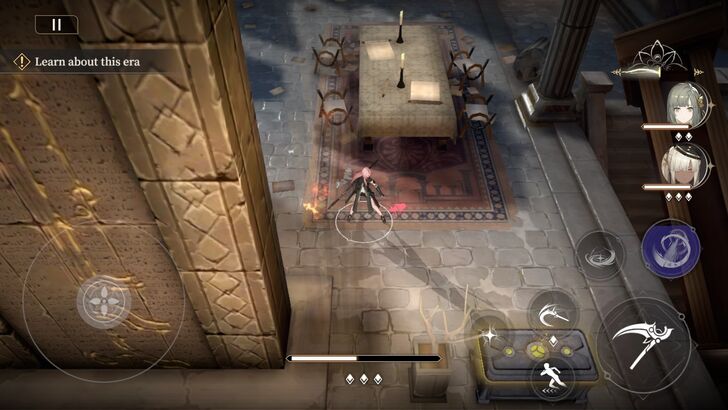 Go south and change the direction to southeast once you run past the tables. Here, you'll find the second treasure chest of this level. |
| 20 | 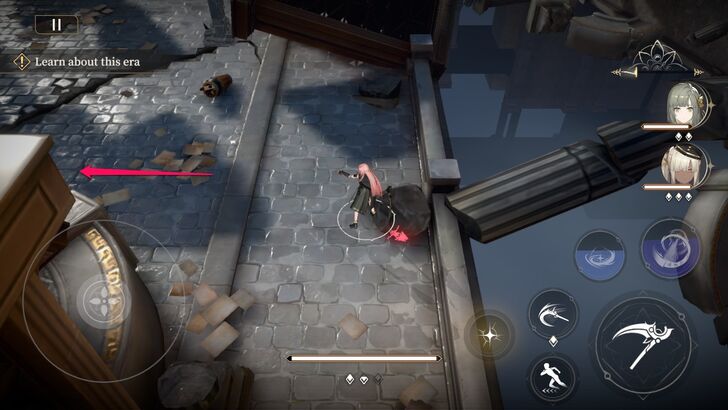 Go back to where you found the treasure chest icon and head west. This level will end after you finish your conversation with Farhad. |
Chapter 2-10 Summary
Overview
|
|
| The King of All Kings | |
|---|---|
| Did I still rule over my vast empire? | |
| Treasure Chests Available | 0 |
| First-Time Clear Rewards | Rune Shards x 50 Vision x 400 Proof of Search for Knowledge - Classic x 4 Proof of Search for Knowledge - Page x 6 |
Walkthrough
| 1 | 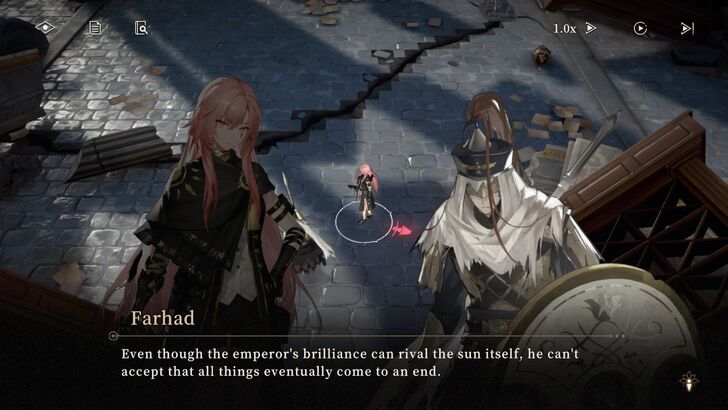 This level starts with a conversation between Farhad and the group. |
|---|---|
| 2 | 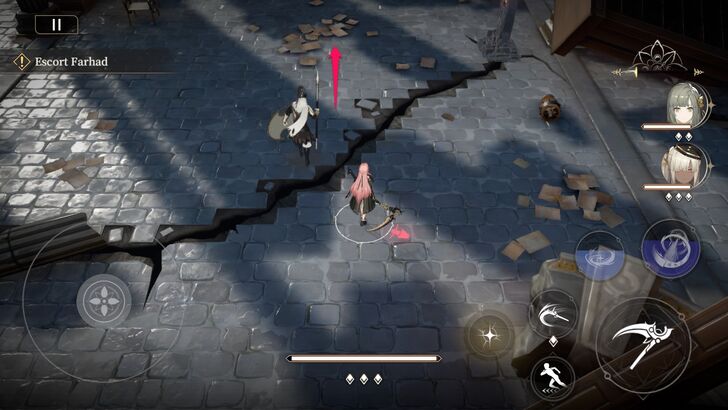 Follow Farhad until he reaches King Darius. There'll be various traps and enemies along the way, so be prepared. |
| 3 | 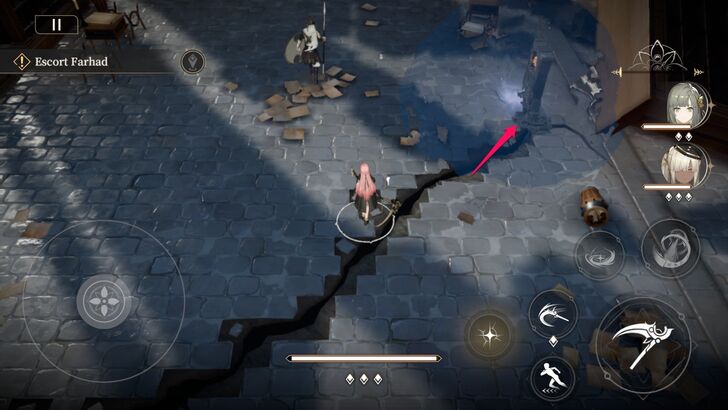 The first trap blocks your way with a laser beam. Use your Pendant skill to disable the trap. |
| 4 | 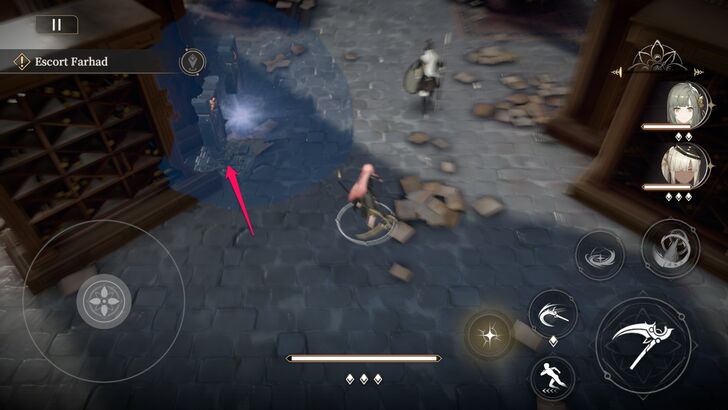 The second trap consists of two contraptions that also emit a laser beam. Just like the first trap, deal with them using your Pendant skill. |
| 5 | 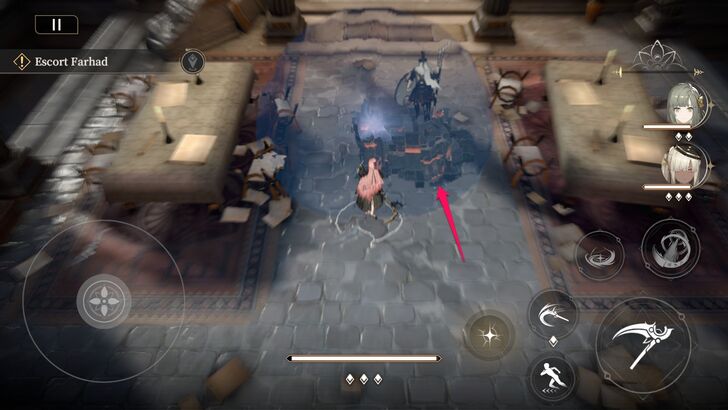 The next trap inflicts damage on anyone who steps on it. Use your Pendant skill to prevent it from damaging Farhad. |
| 6 | 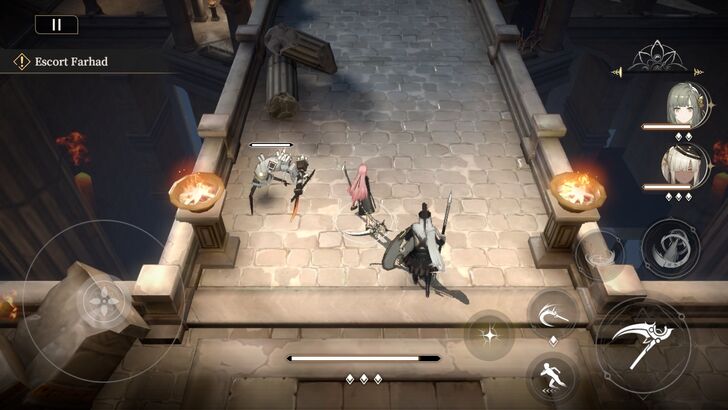 After the traps, you'll come across a bridge. Take out the enemies that spawns on the bridge. |
| 7 | 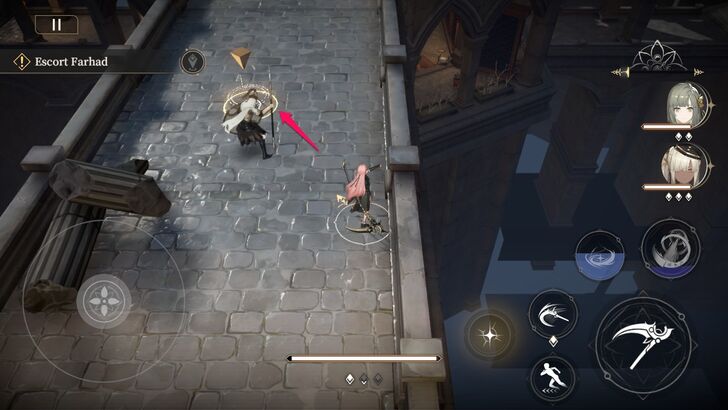 Continue following the path and step on the gold indicator to reach the next area. |
| 8 | 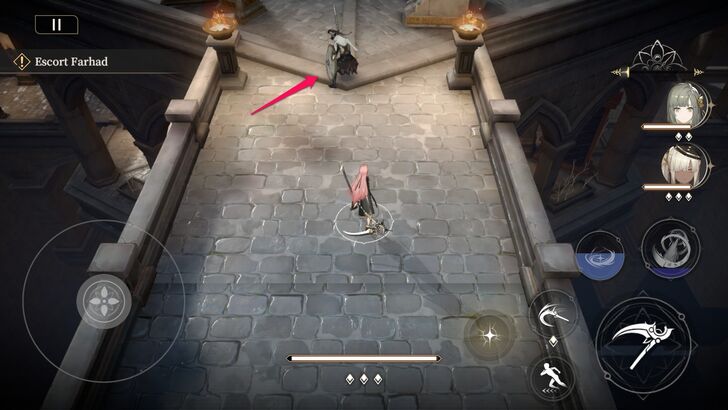 Move north and finish a conversation with Farhad. |
| 9 | 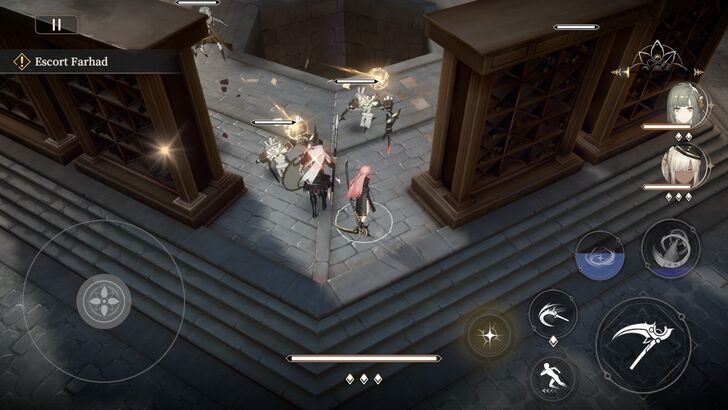 Follow Farhad and protect him from nearby enemies. |
| 10 | 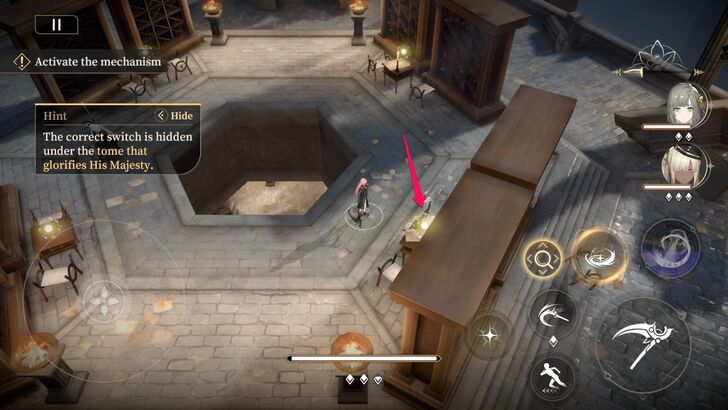 After defeating the enemies, interact with the glowing object on the table to the southeast to activate the elevator and reach the lower level. |
| 11 | 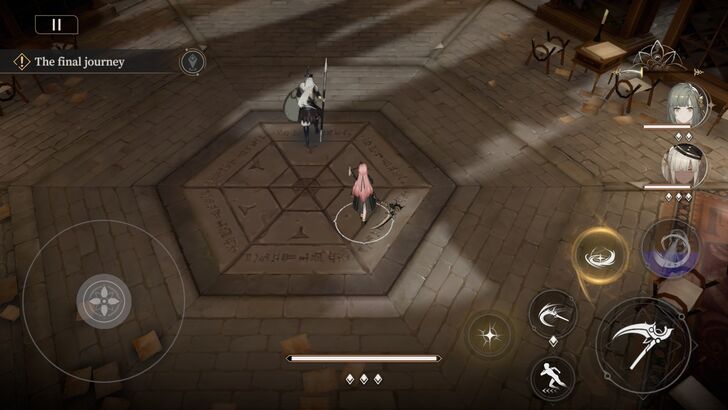 Step on the elevator to reach the lower level floor, and follow Farhad again. |
| 12 | 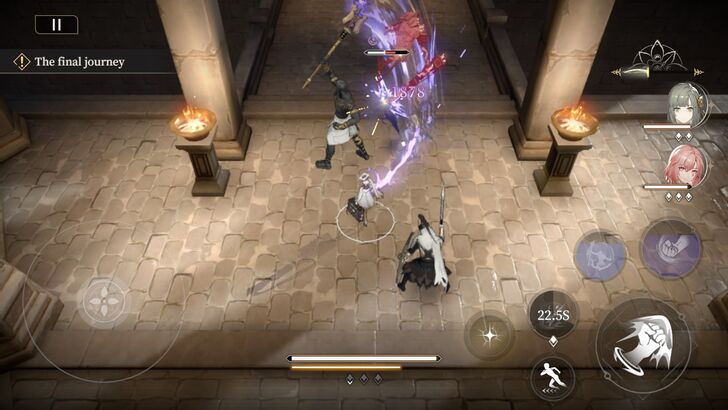 Multiple enemies will spawn near Farhad as he moves north. Take them all out. |
| 13 | 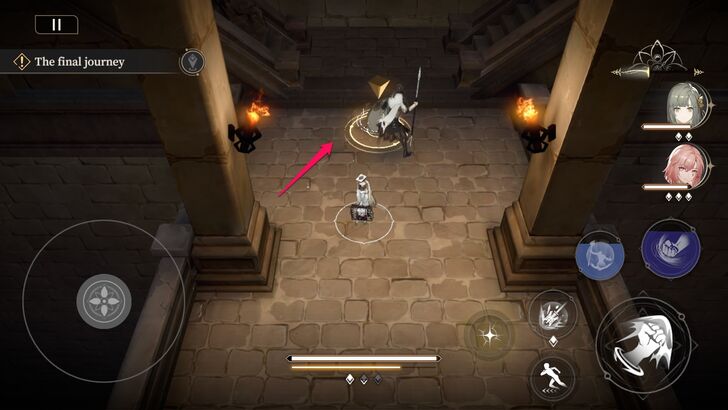 Step onto the golden indicator to reach the next area. |
| 14 | 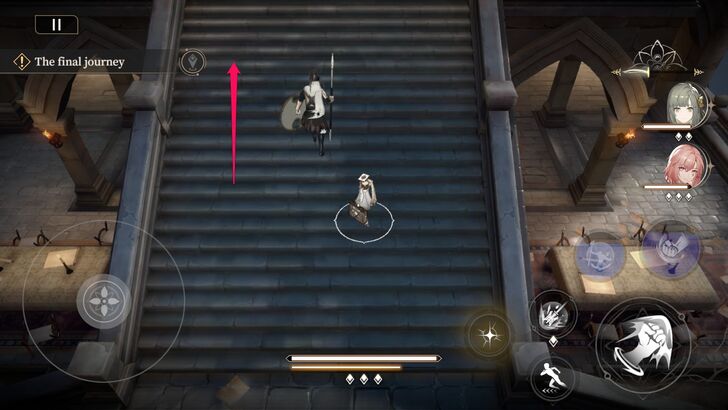 Go up the stairs with Farhad. |
| 15 | 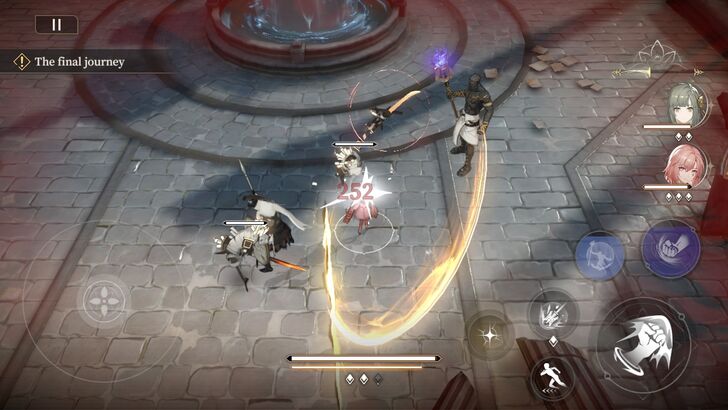 Take out the enemies that spawns near the water fountain. |
| 16 | 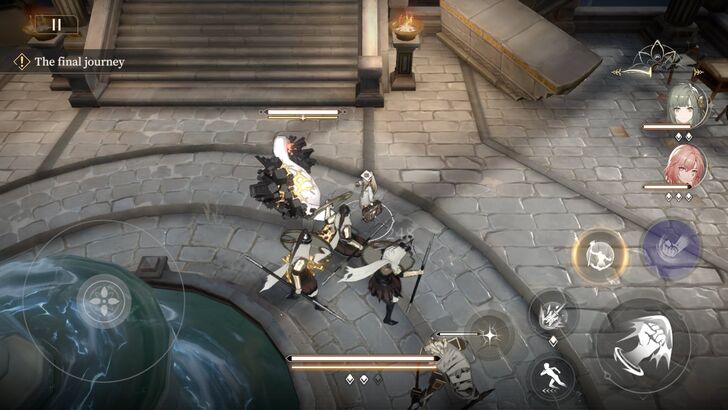 Follow Farhad past the water fountain and multiple enemies will spawn again. Assist the Immortal Army in eliminating them. |
| 17 | 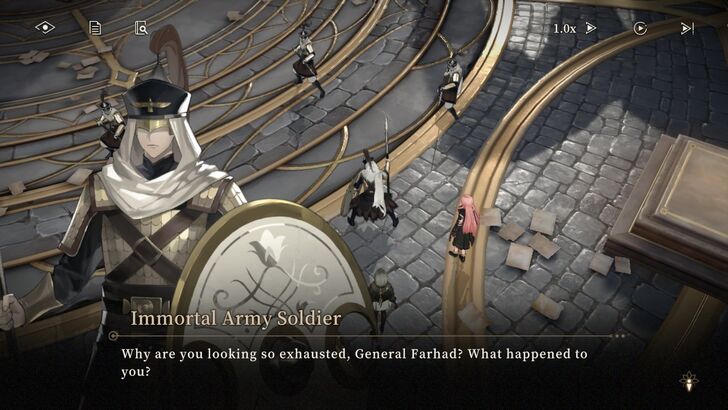 A cutscene will trigger once all enemies are eliminated. This is where the level ends. |
Chapter 2-11 Summary
Overview
 |
|
| The Last Expedition | |
|---|---|
| He will inevitably survive, just as he had survived every war up to now. And he will inevitably survive until the world's end. |
With the fateful meeting between Emperor Darius and your group, he vows to relentlessly hunt you and your group through the maze-like labyrinth of the library.
As the emperor and his Immortal Army scoured the library in search of vengeance, they faced countless trials. Despite their efforts and sacrifices, only Emperor Darius survived. Yet, all that remained was a hollow shell of his former self, navigating the library with only two purposes in mind: to exact vengeance against the deceitful Eme-ans and to attain immortality.
Chapter 2-12 Guide
Overview
|
|
| Returning to 2,000 Years Ago | |
|---|---|
| Cause and effect become one in the Library of Babel. | |
| Treasure Chests Available | 0 |
| First-Time Clear Rewards | Rune Shards x 50 Vision x 400 Fire of Hephae - Large x 3 Fire of Hephae - Mediuml x 5 |
Walkthrough
| 1 |  The level starts with a cutscene. |
|---|---|
| 2 | 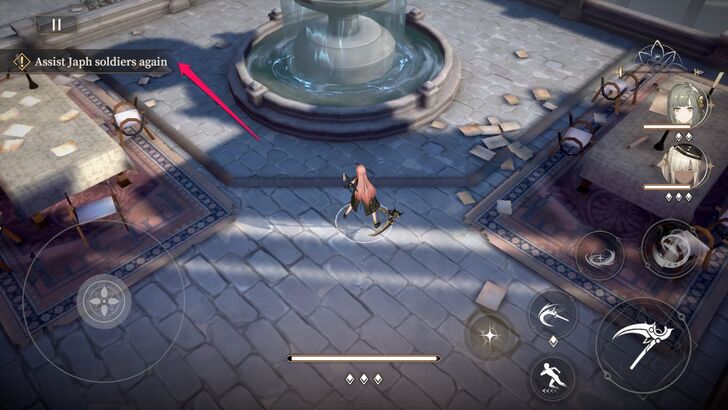 Go west and assist the Japhethian soldiers in their fight. Take all the enemies out. You'll receive the fifth Pendant upgrade after the fight. |
| 3 | 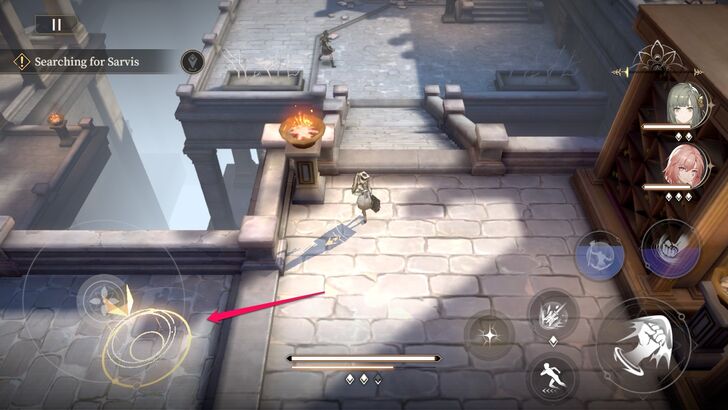 Go to the south of the battlefield and step onto the golden indicator to reach the next area. |
| 4 |  Go up the stairs and eliminate all enemies. The level ends after you defeat them. |
Chapter 2-13 Guide
Overview
|
|
| Searching for Sarvis | |
|---|---|
| Since time is of the essence, let me get straight to the point. Do you know how to shut down the Sun God of Memphis? | |
| Treasure Chests Available | 0 |
| First-Time Clear Rewards | Rune Shards x 50 Vision x 400 Orelium x 35000 |
Walkthrough
| 1 | 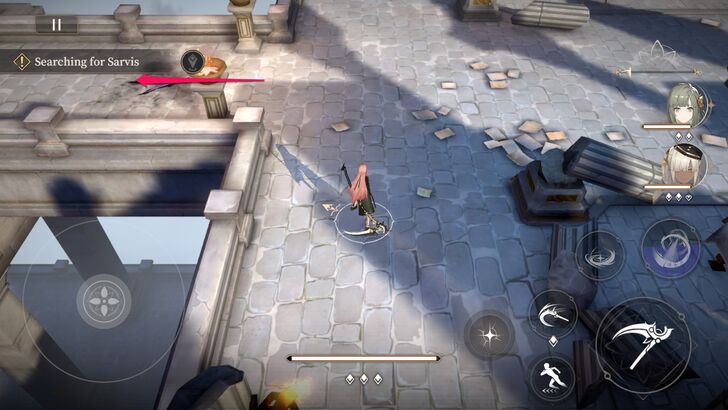 From the starting area, go to the bridge. |
|---|---|
| 2 | 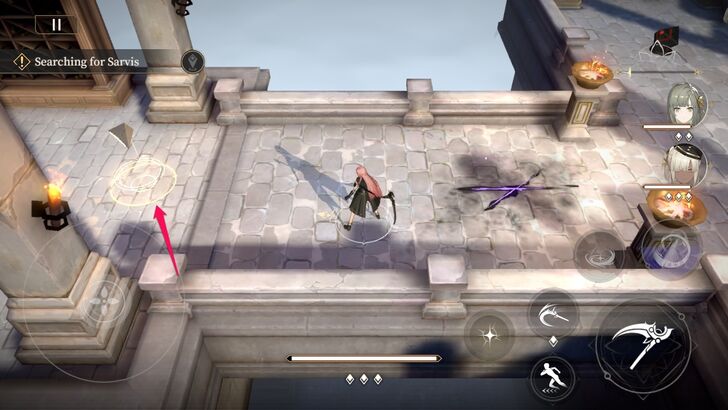 Reach the golden indicator to access the next area. |
| 3 | 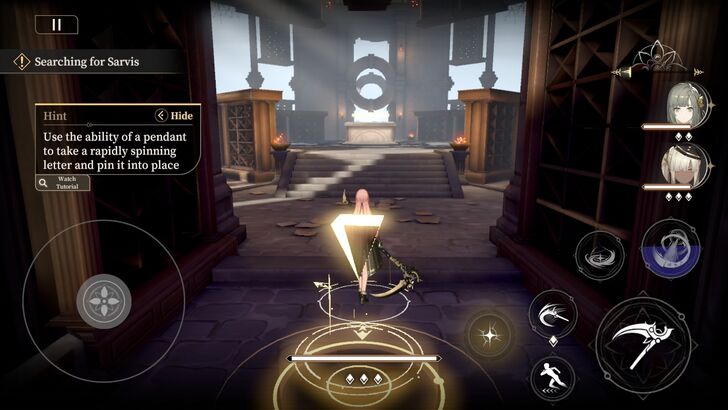 You'll be transported to a puzzle room. Use your Pendant skill to know the correct way to progress. Use your Pendant skill to freeze the spinning glowing circle and interact with it quickly to access the hint. |
| 4 |  The first puzzle can be solved by going through the path with a broken circle. |
| 5 | 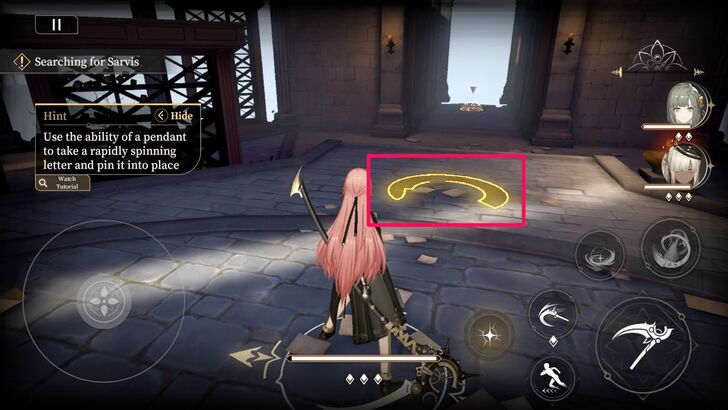 Meanwhile, follow the path with the horseshoe-like mark to solve the second puzzle room. |
| 6 |  To solve the final puzzle room, follow the path where a clock's hand rotates counterclockwise. From your starting point in this room, the correct path is to the west. |
| 7 | 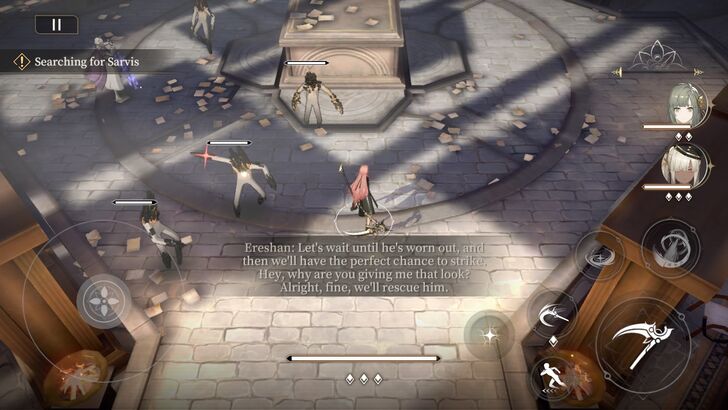 Assist General Sarvis and take out the enemies. The level ends here. |
Chapter 2-14 Guide
Overview
|
|
| The Three Kings | |
|---|---|
| How extraordinary it is to craft a star? | |
| Treasure Chests Available | 0 |
| First-Time Clear Rewards | Rune Shards x 50 Vision x 400 Proof of Search for Knowledge - Classic x 4 Proof of Search for Knowledge - Page x 6 |
Walkthrough
| 1 | 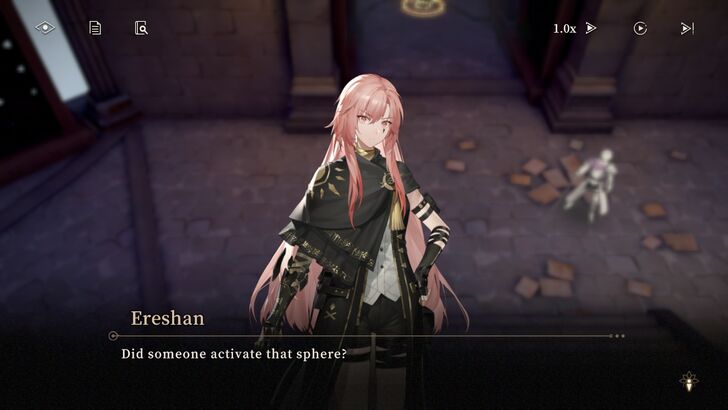 The chapter starts with a conversation between the group and General Sarvis. |
|---|---|
| 2 | 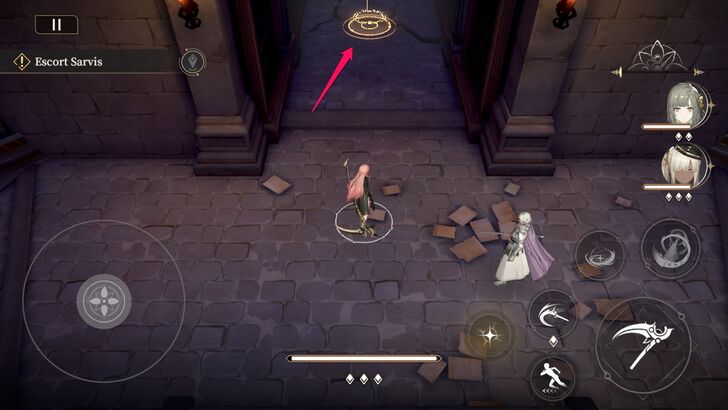 Reach the golden indicator to reach the next area. |
| 3 | 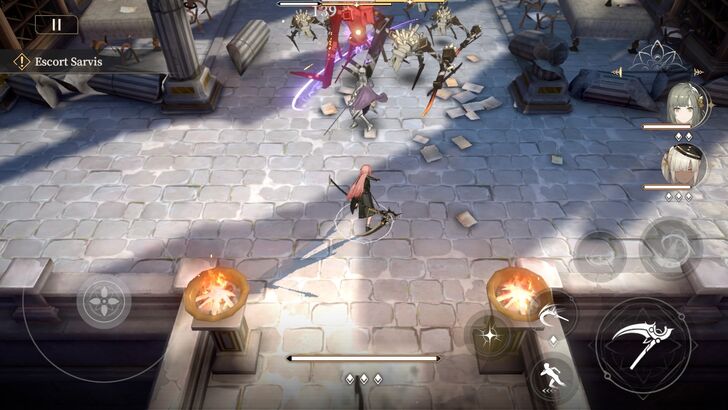 Follow General Sarvis and defeat all enemies. |
| 4 | i 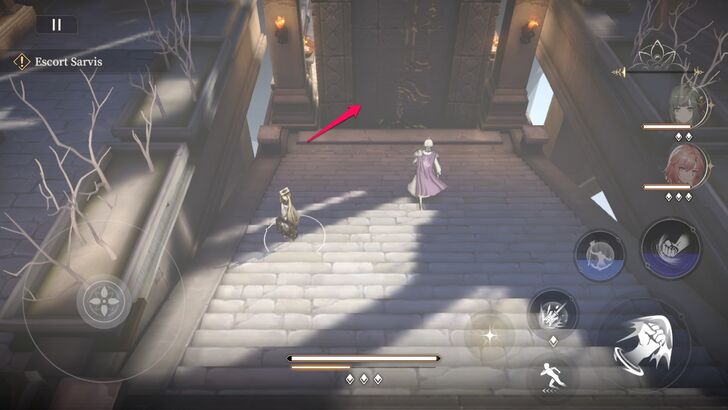 Follow General Sarvis and let him destroy the stone gate. |
| 5 | 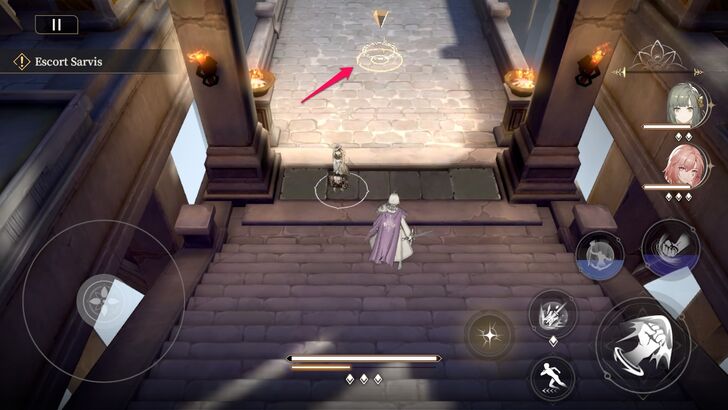 After the gate is destroyed, step onto the golden indicator. |
| 6 | 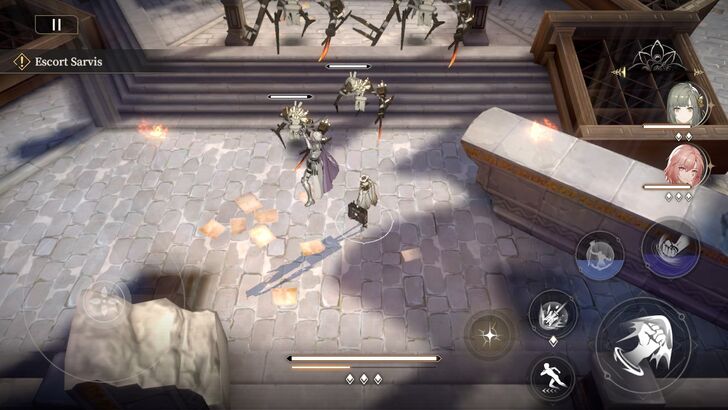 In the next room, enemies will spawn. Eliminate them. |
| 7 |  Once the enemies are dealt with, follow Sarvis to the east. |
| 8 | 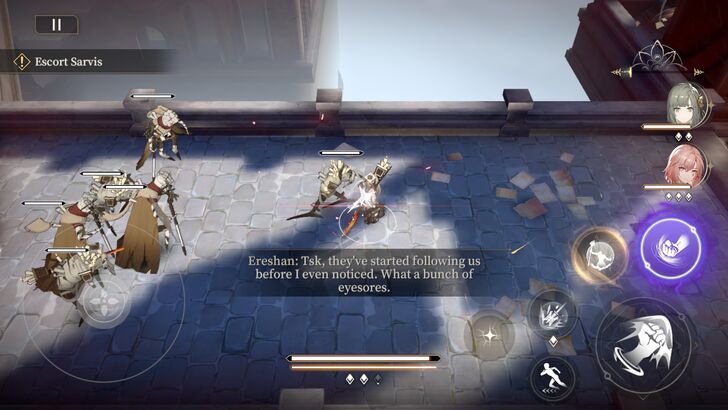 A stone gate blocks your path. First, defeat the waves of enemies while Sarvis rests, then he will destroy the gate. |
| 9 | 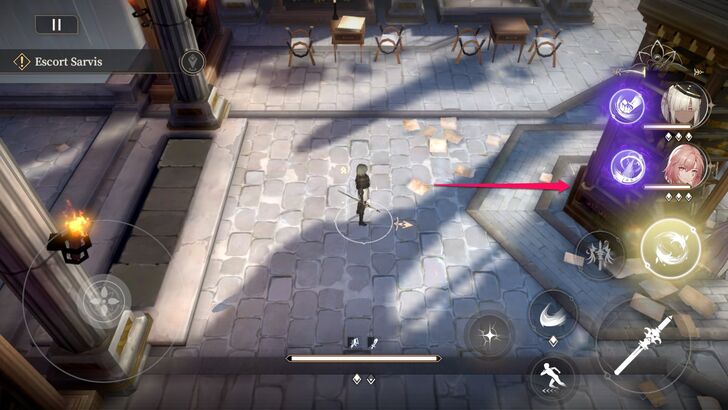 After destroying the gate, follow Sarvis once again. After a brief conversation, the chapter ends. |
Chapter 2-15 Guide
Overview
 |
|
| The Lord of Blossoms | |
|---|---|
| Me, my family, and my descendants...will forever remember this vow, from now until eternity. |
Zero and Ereshan explained the purpose of Eme-an, C.A.V.E., and their enemy, Nemesis. While their faction's goal was to keep mankind safe from mysteriously powerful artifacts like Aten, the sun god, Nemesis sought to expose these relics in order to propel human progress to greater heights.
After turning back the time to the scene where they had been chased out by Darius, Sarvis handed Ereshan the code to deactivate Aten. However, in a twist of fate, Ereshan tore the paper that contains the code, endangering the Library of Babel and the Eme-ans living within it.
Chapter 2-16 Guide
Overview
 |
|
| Wit's End | |
|---|---|
| Once again, I have failed to grasp anything. | |
| Treasure Chests Available | 0 |
| First-Time Clear Rewards | Rune Shards x 50 Vision x 400 Fire of Hephae - Large x 3 Fire of Hephae - Mediuml x 5 |
In this stage, you will face the second boss of the game: Darius. Watch out for its highly damaging attacks, especially the one that can instakill frontline characters. Exploit his elemental weakness to Light and Dark attacks to end this battle quickly.
Chapter 2-17 Guide
Overview
 |
|
| The End of the World | |
|---|---|
| That night, he stood beside the tiny fire counting the flickers of flame and recalling the adventures he had had on his way back from the expedition. And then he saw the starry night sky reflected n the stream beside him. |
As Darius lay dying, he briefly recalled his time with Pythagoras and Farhad. For a fleeting moment, he remembered his former self and the promise to conquer the countless stars scattered across the night sky.
Chapter 2-EX Guide
Overview
|
|
| Never Return | |
|---|---|
| The nameless tyrant initiates its march onward. In the vast expanse of time, it anticipates another encounter with | |
| Treasure Chests Available | 0 |
| First-Time Clear Rewards | Rune Shard x 30 (1-star clear) Rune Shard x 30 (2-star clear) Rune Shard x 30 (3-star clear) |
The EX stage is a rematch against this chapter's boss, Darius, along with a few minor enemies. Employing the tactics used in the previous boss fight is enough to defeat Darius's EX version.
Chapter 2 Rewards
Total Chapter Rewards
| List of Rewards |
|---|
| Information Coming Soon! |
Black Beacon Related Guides

List of All Walkthrough Guides
| All Black Beacon Walkthroughs | ||
|---|---|---|
| Chapter 1 | Chapter 2 | Chapter 3 |
| Chapter 4 | Chapter 5 | Chapter 6 |
Comment
Author

Chapter 2 (Normal) Walkthrough Guide
Rankings
- We could not find the message board you were looking for.
Gaming News


![Monster Hunter Stories 3 Review [First Impressions] | Simply Rejuvenating](https://img.game8.co/4438641/2a31b7702bd70e78ec8efd24661dacda.jpeg/thumb)
Popular Games

Genshin Impact Walkthrough & Guides Wiki
Honkai: Star Rail Walkthrough & Guides Wiki
Umamusume: Pretty Derby Walkthrough & Guides Wiki
Pokemon Pokopia Walkthrough & Guides Wiki
Resident Evil Requiem (RE9) Walkthrough & Guides Wiki
Monster Hunter Wilds Walkthrough & Guides Wiki
Wuthering Waves Walkthrough & Guides Wiki
Arknights: Endfield Walkthrough & Guides Wiki
Pokemon FireRed and LeafGreen (FRLG) Walkthrough & Guides Wiki
Pokemon TCG Pocket (PTCGP) Strategies & Guides Wiki


Recommended Games
Diablo 4: Vessel of Hatred Walkthrough & Guides Wiki
Cyberpunk 2077: Ultimate Edition Walkthrough & Guides Wiki
Fire Emblem Heroes (FEH) Walkthrough & Guides Wiki
Yu-Gi-Oh! Master Duel Walkthrough & Guides Wiki
Super Smash Bros. Ultimate Walkthrough & Guides Wiki
Pokemon Brilliant Diamond and Shining Pearl (BDSP) Walkthrough & Guides Wiki
Elden Ring Shadow of the Erdtree Walkthrough & Guides Wiki
Monster Hunter World Walkthrough & Guides Wiki
The Legend of Zelda: Tears of the Kingdom Walkthrough & Guides Wiki
Persona 3 Reload Walkthrough & Guides Wiki


All rights reserved
Game Copyright©Glohow Holdings Pte. Ltd. & MINGZHOU Technology Co., Ltd. All Rights Reserved
The content we provide on this site were created personally by members of the Game8 editorial department.
We refuse the right to reuse or repost content taken without our permission such as data or images to other sites.
©Glohow Holdings Pte. Ltd. & MINGZHOU Technology Co., Ltd (Provider)