Chapter 3 Walkthrough Guide (Normal)
The Game8 Black Beacon Team has ended coverage as of May 21, 2025. Information on certain pages may not be up-to-date. Thank you for your continued support!
Chapter 3 is a Main Quest chapter in Black Beacon. See the best characters for Chapter 3, as well as a walkthrough on how to complete this chapter and its rewards.
List of Contents
Chapter 3 (Normal) Walkthrough Guide
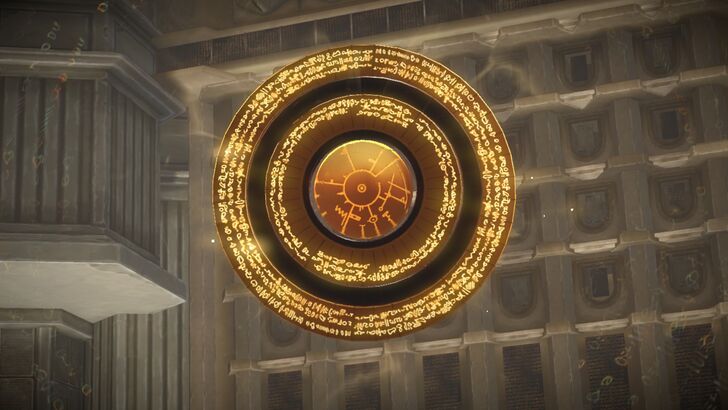
Chapter 3 Overview
 |
|
| God's System | |
|---|---|
| Treasure Chests Available: | 8 |
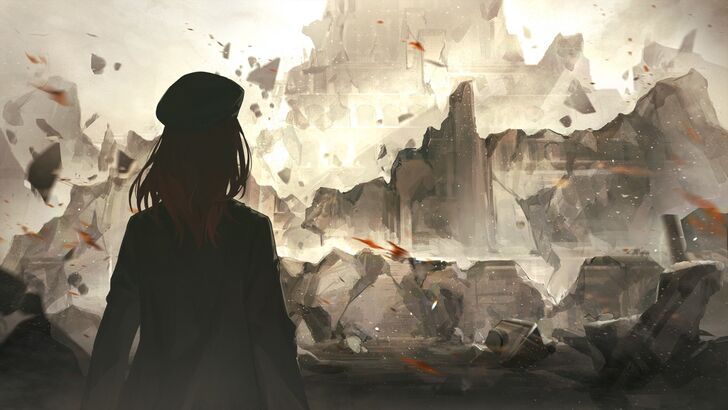
With Ereshan possessing the knowledge to both activate and deactivate Aten, Zero urged the Seer to return to the current timeline and prevent the impending doom of the Library.
Best Characters for Chapter 3
Most Characters Can Clear Chapter 3
| Best Characters for This Chapter | |||
|---|---|---|---|
 Shamash Shamash
|
 Zero Zero
|
 Hephae Hephae
|
 Viola Viola
|
 Ninsar Ninsar
|
 Ming Ming
|
 Logos Logos
|
 Nanna Nanna
|
 Florence Florence
|
 Li Chi Li Chi
|
 Azi Azi
|
|
Chapter 3 welcomes back Zero and her group to the current timeline to stop Ereshan's plan. The anomalies in this chapter are not particularly difficult to handle, especially if your characters are leveled up.
However, we recommend taking advantage of your enemies' elemental weaknesses to make short work of them. As such, prioritize using Light and Fire characters.
Chapter 3 Quest Walkthrough
| Chapter X Walkthrough Directory | ||||
|---|---|---|---|---|
| 3-1 | 3-2 | 3-3 | 3-4 | 3-5 |
| 3-6 | 3-7 | 3-8 | 3-9 | 3-10 |
| 3-11 | 3-12 | 3-13 | 3-14 | 3-15 |
| 3-16 | 3-17 | 3-18 | 3-EX | |
Chapter 3-1 Guide
Overview
 |
|
| The End of the Light | |
|---|---|
| Light determines the optimal path even before embarking on its journey, as it is aware of its ultimate destination. |
As Ereshan falls through the hole in the Library, she remembers Cosmos' mysterious message to her. Gravity suddenly reverses as she accepts her imminent death.
Meanwhile, Nanna and Shamash are searching for ways to uncover Aten's activation code. Having exhausted all possible options, Nanna stares at Cosmos' gift. Perhaps it will come in handy once the prophesied event begins to unfold.
Chapter 3-2 Guide
Overview
 |
|
| Paradoxical Spiral | |
|---|---|
| Because we knew that Aten was about to explode, we set out on this journey to find the words of God in order to prevent this explosion. However, it is precisely because we have found the words of God that Aten is about to explode in the first place. | |
| Treasure Chests Available | 1 |
| First-Time Clear Rewards | Rune Shard x 50 Vision x 450 Proof of Search for Knowledge - Classic x 4 Proof of Search for Knowledge - Page x 6 |
Walkthrough
| 1 |  The level starts with a conversation between you and Zero. |
|---|---|
| 2 | 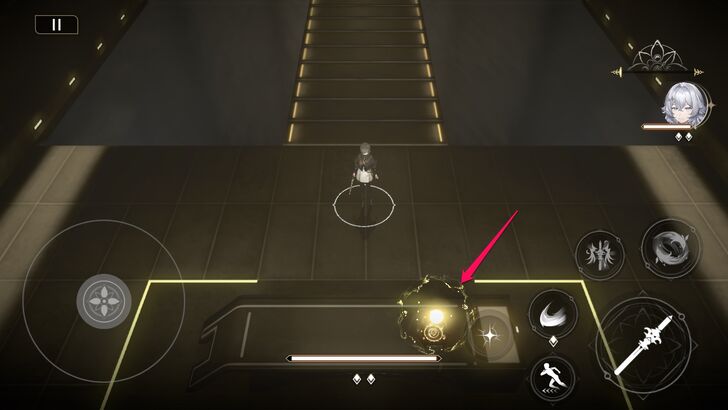 Interact with the glowing object to receive the sixth Pendant Upgrade. |
| 3 | 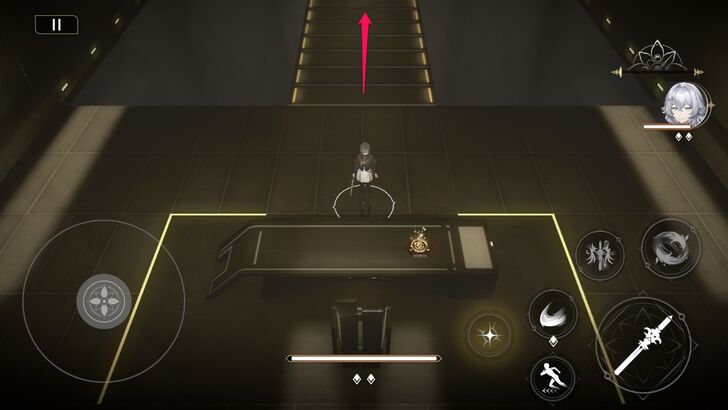 Move north. |
| 4 | 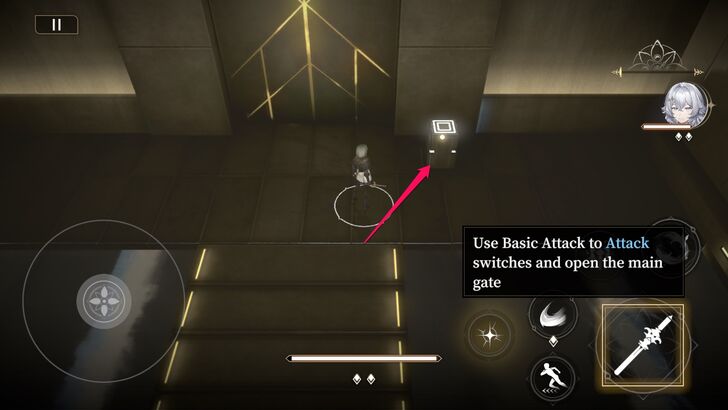 At the end of the path, hit the glowing object to open the door. |
| 5 | 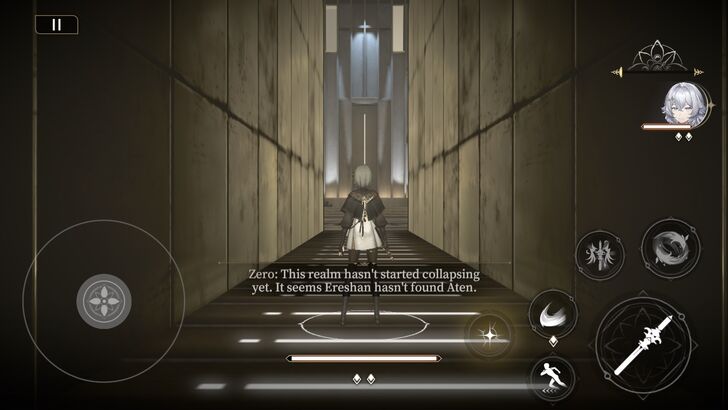 Proceed through the path. |
| 6 | 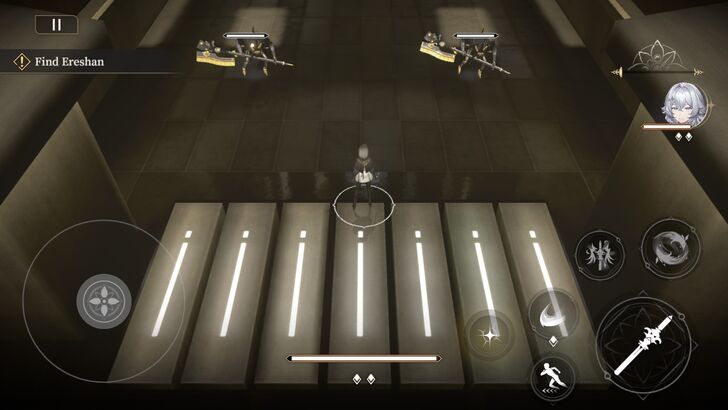 As you are moving, enemies will spawn. Take them out. |
| 7 | 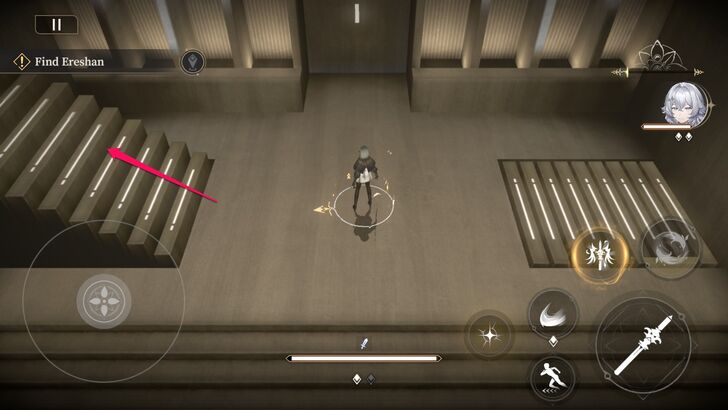 Follow the path and climb the stairs at your left. |
| 8 | 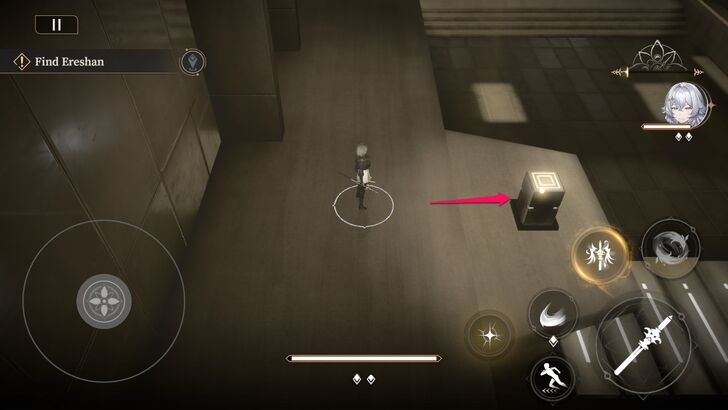 Hit the glowing object to raise a platform. |
| 9 | 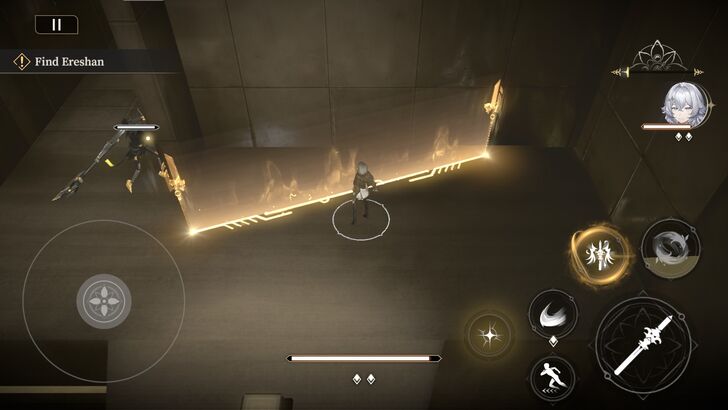 Cross the platform and eliminate the enemies. |
| 10 |  Before moving north, follow the main path for a treasure chest. |
| 11 | 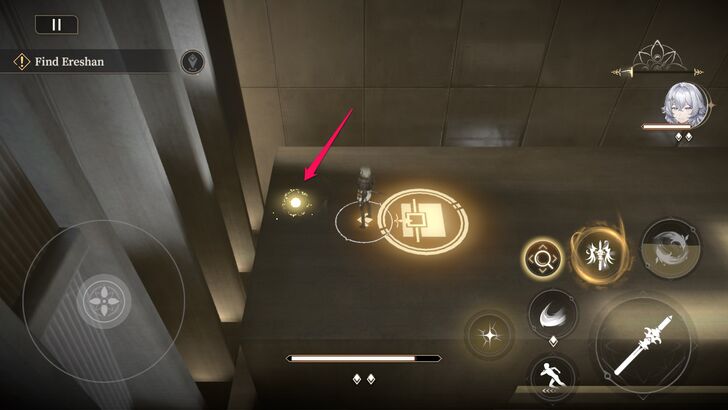 Interact with the glowing object on the floor and select Let's grab the supplies and move on. |
| 12 | 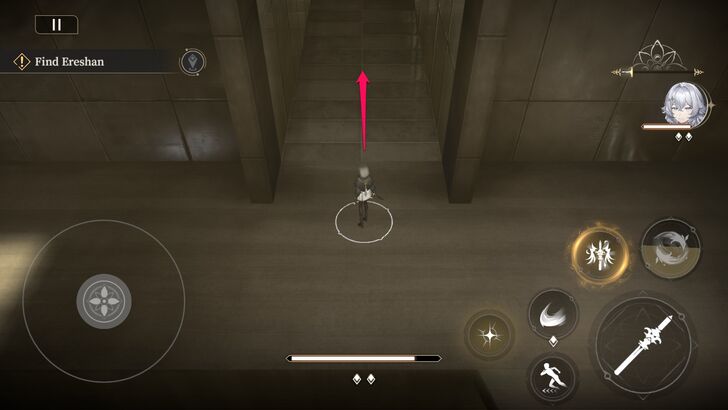 After collecting the treasure chest rewards, and go back to where the paths diverged. Then, head north. |
| 13 | 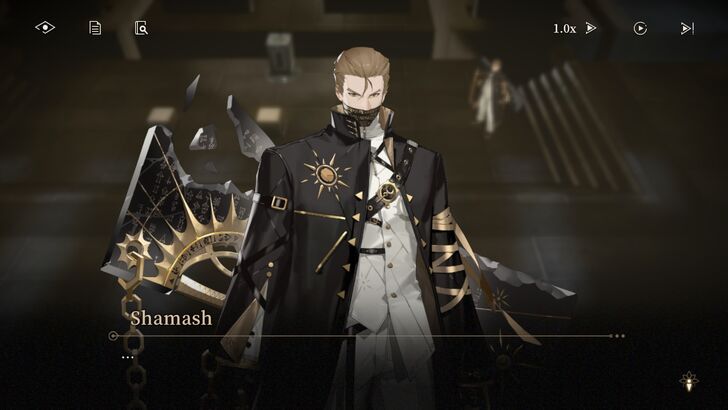 Continue following the path and initiate a conversation with Shamash. The level ends here. |
Chapter 3-3 Guide
Overview
|
|
| A Complete Break | |
|---|---|
| Ereshan has betrayed us. She's the one who activated Aten. | |
| Treasure Chests Available | 0 |
| First-Time Clear Rewards | Rune Shard x 50 Vision x 450 Fire of Hephae - Large x 3 Fire of Hephae - Medium x 5 |
Walkthrough
| 1 | 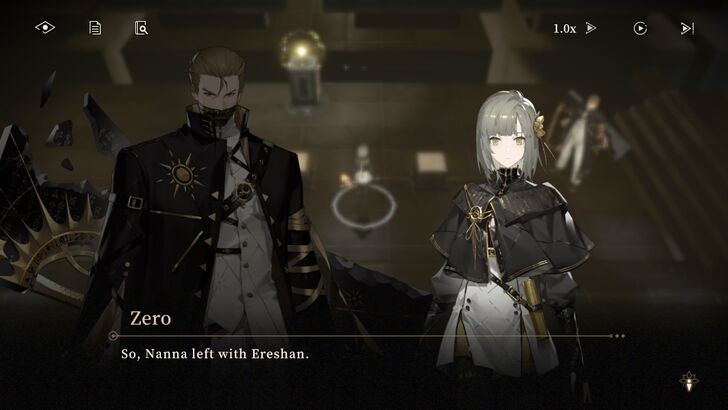 The level starts with a conversation between Shamash and Zero. |
|---|---|
| 2 |  Interact with the glowing object. |
| 3 |  After opening the path, enemies will spawn. Take them out. This will activate a hidden platform. |
| 4 |  Once you eliminated the enemies, move left and go to the newly uncovered platform. |
| 5 |  Switch to Shamash and use his first skill to activate the switch. |
| 6 |  Go down the stairs and move north. |
| 7 |  At the end of the path, there is a stair. Climb it and head to the teleporter. |
| 8 | 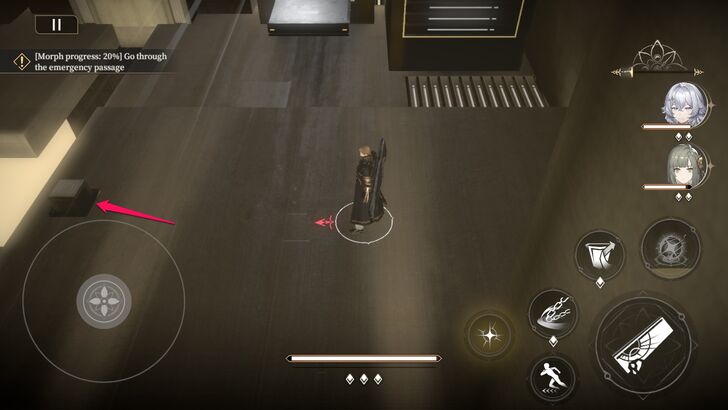 Hit the glowing object. Half of the bridge will appear. Take note there is an enemy on the other side. Use ranged attacks or avoid them for now. |
| 9 | 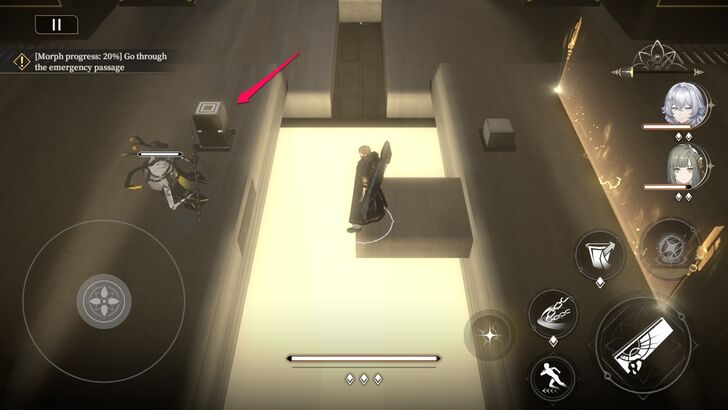 Move your character to the bridge and use Shamash's first skill to activate the second half. |
| 10 |  Once the bridge is complete, defeat all enemies. |
| 11 | 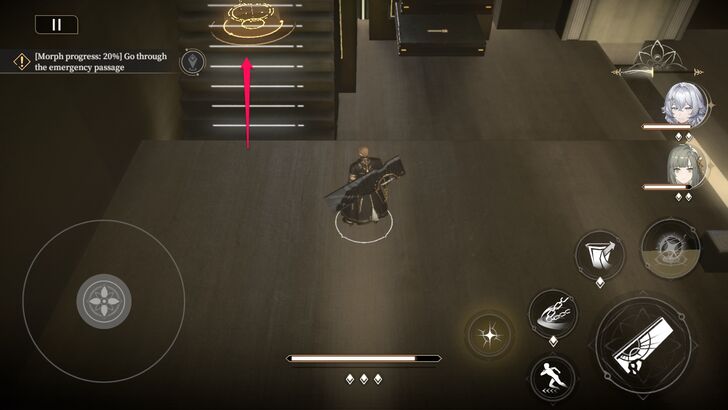 Move to the other side of the bridge and head to the teleporter. |
| 12 | 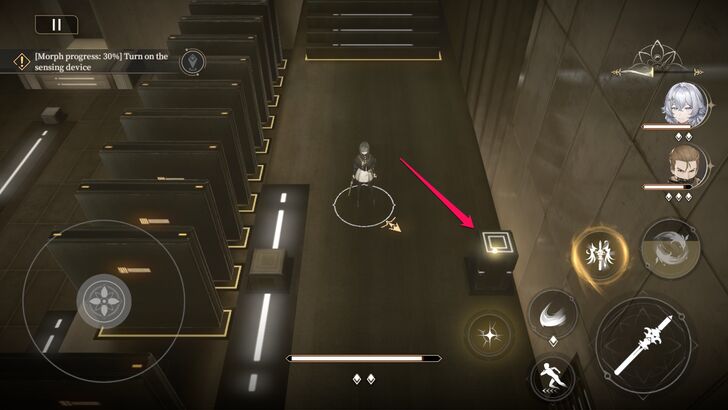 Climb down the stairs and hit the glowing object. |
| 13 | 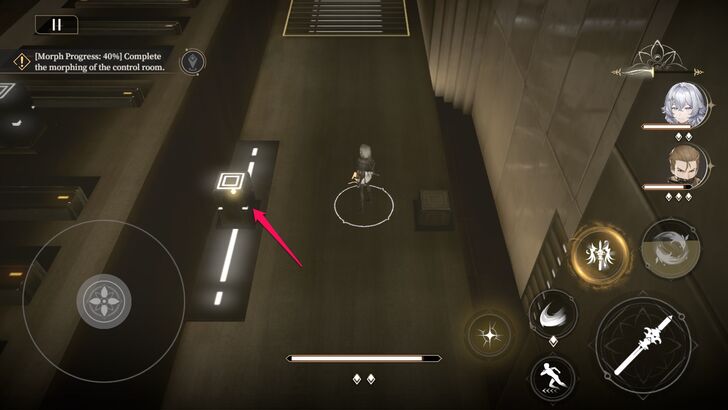 The area will transform. This time, hit the glowing object from the opposite side. |
| 14 | 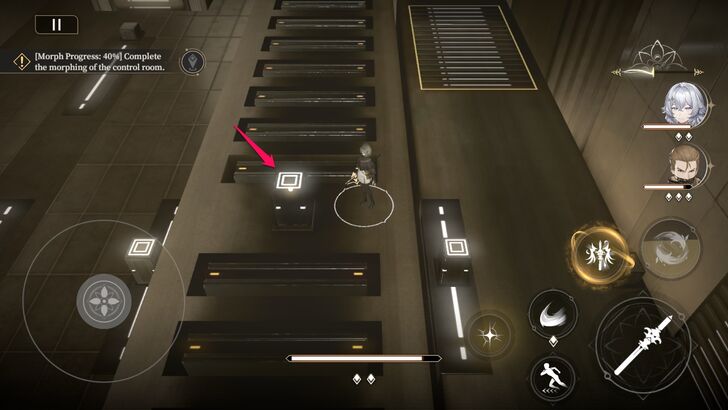 The area will transform again. Move to the other platform and hit another glowing object. |
| 15 | 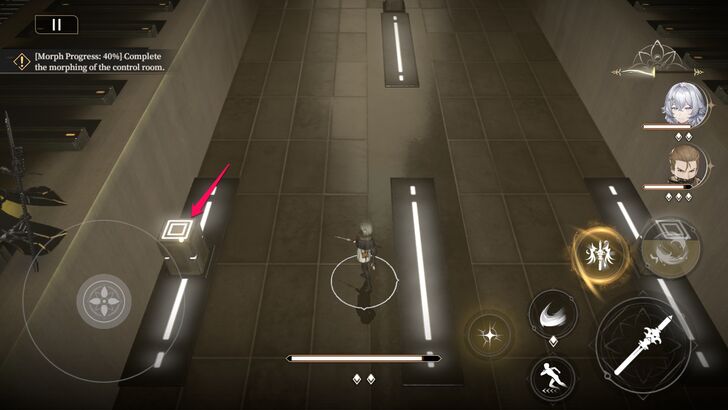 Go left and hit another glowing object. Watch out as an enemy will attack you on the other side of the raised platform. |
| 16 | 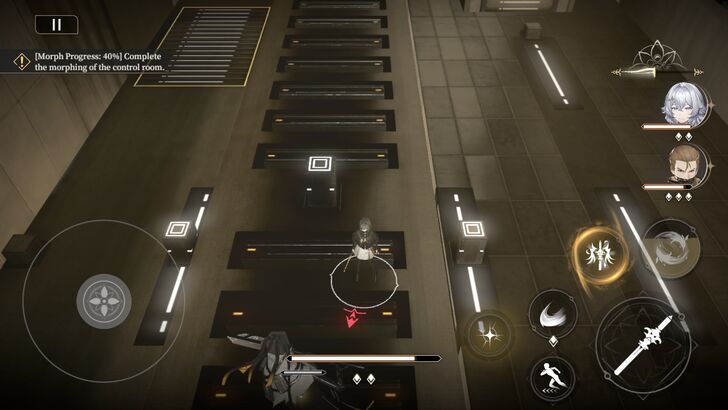 Go left and take out the enemy. |
| 17 | 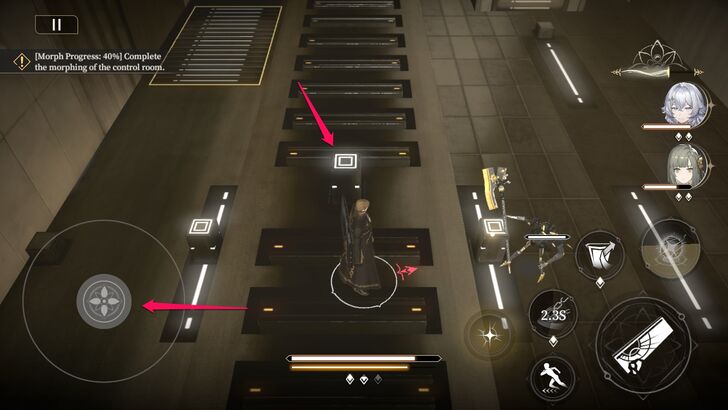 Hit the glowing object to lower down the platform and move left. |
| 18 | 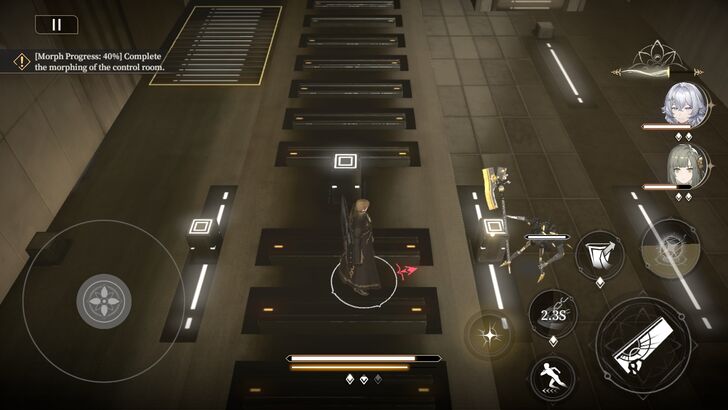 Defeat all enemies. This will activate a console in the middle area. |
| 19 | 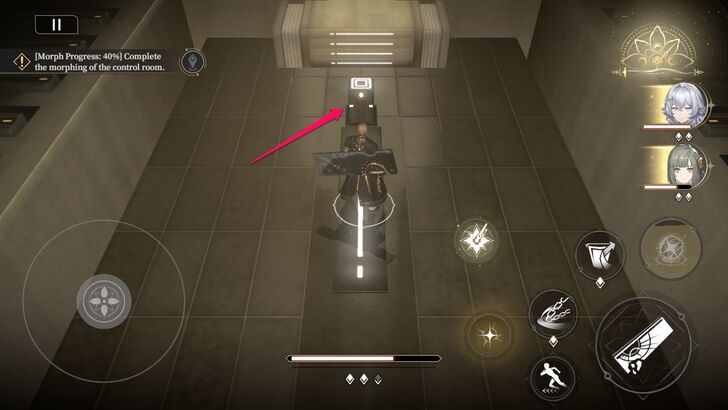 Go to the middle area and hit the console |
| 20 | 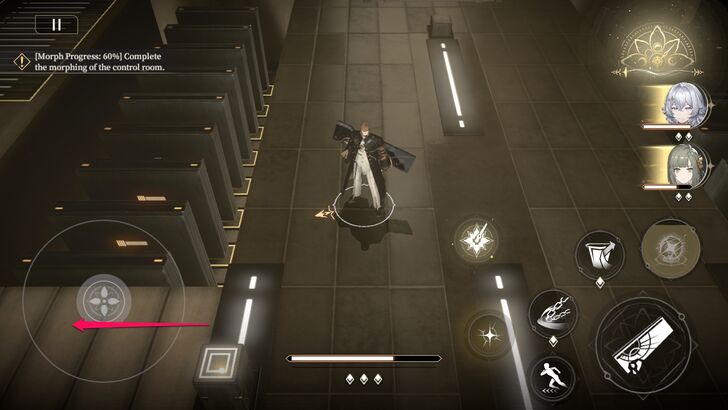 Go down and cross the bridge to the left. |
| 21 | [center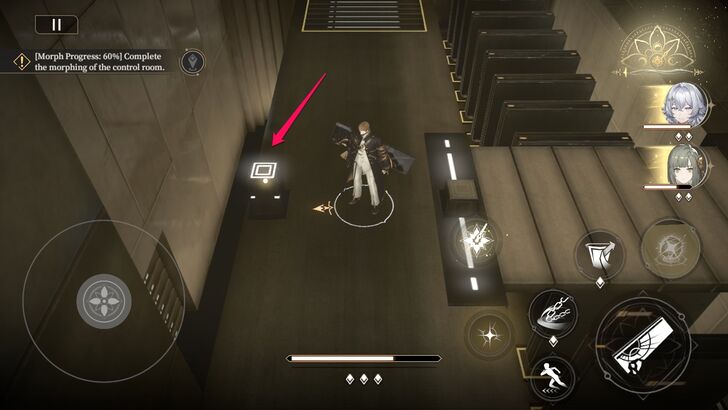 [/center] [/center] Hit the glowing object. |
| 22 | 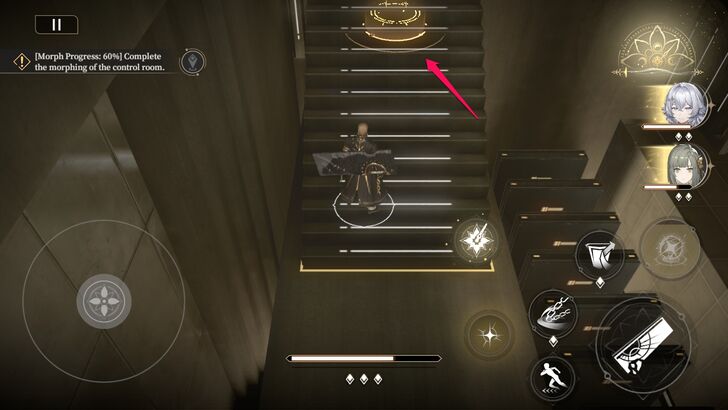 Move up and head to the teleporter. |
| 23 | 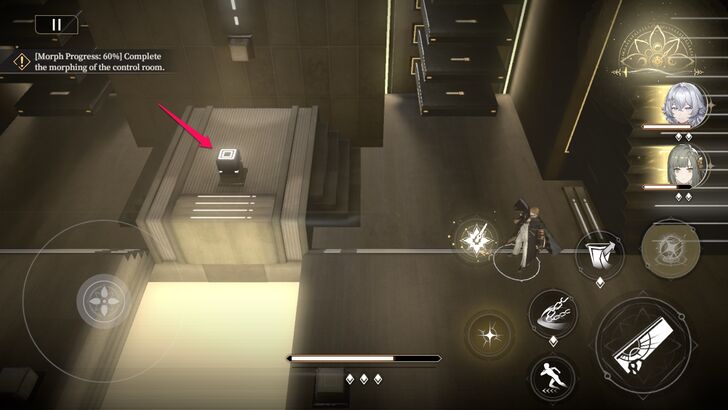 Hit another glowing object in the middle of the area. |
| 24 | 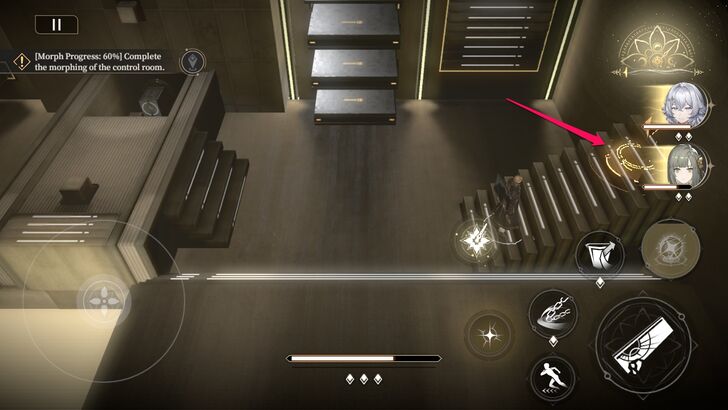 Move right and head to the teleporter. |
| 25 |  Take out all enemies while avoiding a sweeping laser beam. |
| 26 |  After taking them out, go to the teleporter. |
| 27 |  A new path will open and Zero will initiate a conversation. The level ends here. |
Chapter 3-4 Guide
Overview
|
|
| Split Up | |
|---|---|
| Shamash will take this intelligence to Nanna, and we wil... go find Ereshan. | |
| Treasure Chests Available | 1 |
| First-Time Clear Rewards | Rune Shard x 50 Vision x 450 Orelium x 50000 |
Walkthrough
| 1 | 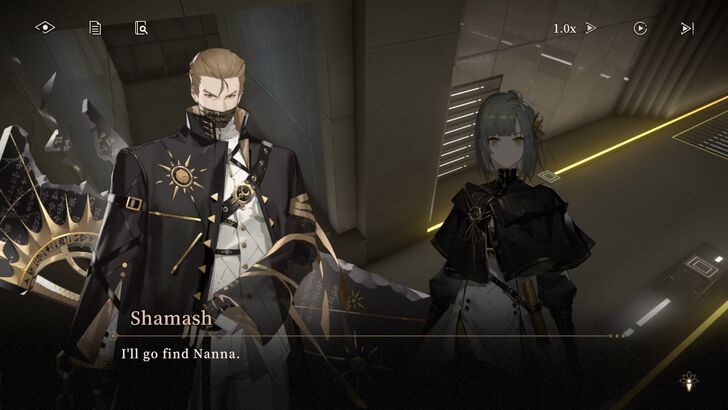 The level starts with Shamash and Zero parting ways. |
|---|---|
| 2 |  Move south first and interact with a glowing object on the floor. Complete the minigame to uncover a treasure chest. |
| 3 |  Go back a bit and climb the stairs. |
| 4 |  You'll enter a room that shoots out multiple beams across the floor. Avoid them. You need to defeat the elite the enemy to progress. |
| 5 |  Head to the teleporter. |
| 6 |  Move north and interact with the object at the end of the path. |
| 7 |  Move southwest and climb the stairs. |
| 8 |  Move to the center of the area and hit the middle console, then the one to the right to align the bridge. |
| 9 |  Follow the bridge's path and head to the teleporter. This will end the level. |
Chapter 3-5 Guide
Overview
|
|
| Farewell | |
|---|---|
| And then, everything is annihilated by the white radiance. | |
| Treasure Chests Available | 0 |
| First-Time Clear Rewards | Rune Shard x 50 Vision x 450 Proof of Search for Knowledge - Classic x 6 Proof of Search for Knowledge - Page x 10 |
Walkthrough
| 1 |  Follow the path forward. |
|---|---|
| 2 | 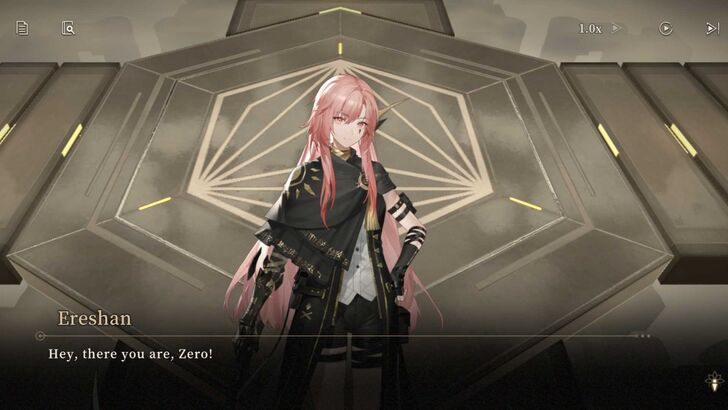 A short conversation between Zero and Ereshan will take place. |
| 3 | 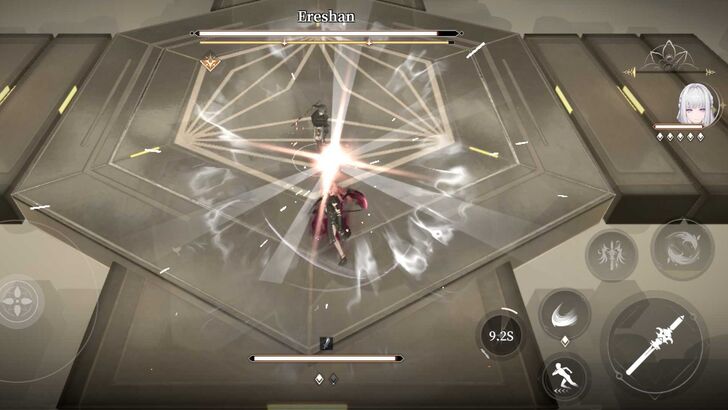 Defeat Ereshan. Make sure to avoid or interrupt her glowing attacks by dodging or using the Pendant Skill. |
| 4 | 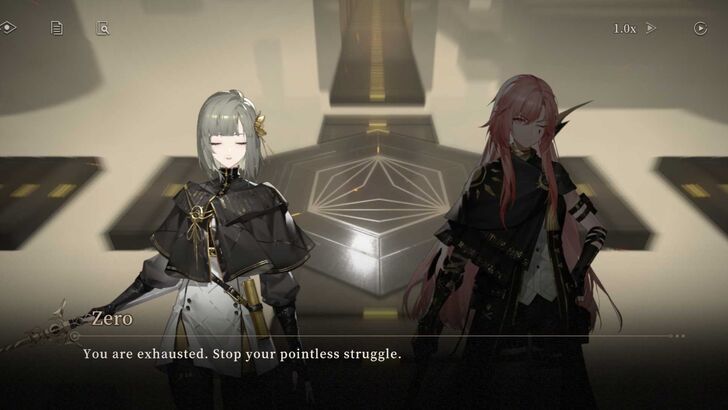 Despite Ereshan’s defeat, Aten has already been activated. This is where the level ends. |
Chapter 3-6 Guide
Overview
 |
|
| Nemesis | |
|---|---|
| All deeds have consequences. All debts must be paid. |
Ereshan stands at the spot where Aten is destined to eradicate all existence within the Library. She laments that it is impossible to fight one's destiny.
In an unknown location, Eme-an's rival, Nemesis, holds a meeting to discuss their plans. It seems Aten's activation is not the only secret they have up their sleeves.
Chapter 3-7 Guide
Overview
|
|
| The Method of Exhaustion | |
|---|---|
| So, we'll combat infinity with infinity. We'll use the Library to achieve trillions of possibilities. | |
| Treasure Chests Available | 2 |
| First-Time Clear Rewards | Rune Shard x 50 Vision x 450 Fire of Hephae - Large x 5 Fire of Hephae - Medium x 7 |
Walkthrough
| 1 | 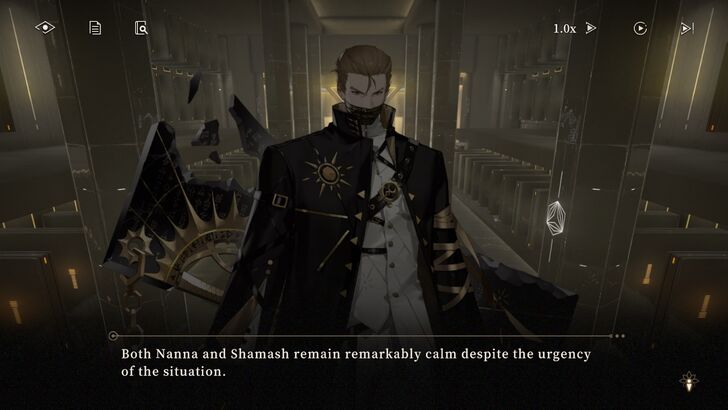 The level starts with Shamash catching up to Nanna. |
|---|---|
| 2 |  Follow the path and take out the enemies. |
| 3 | 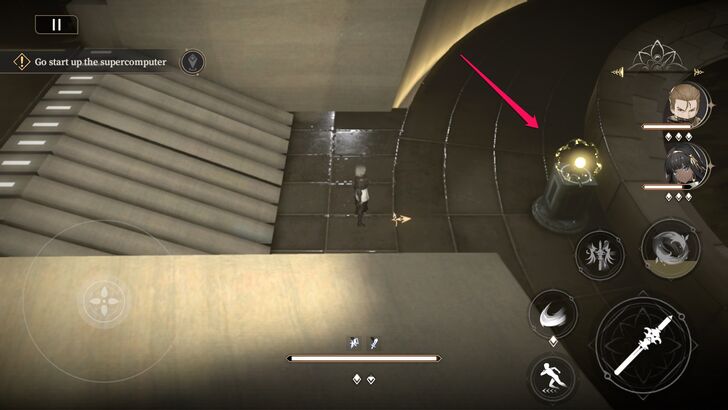 Move further right and interact with the glowing object. |
| 4 | 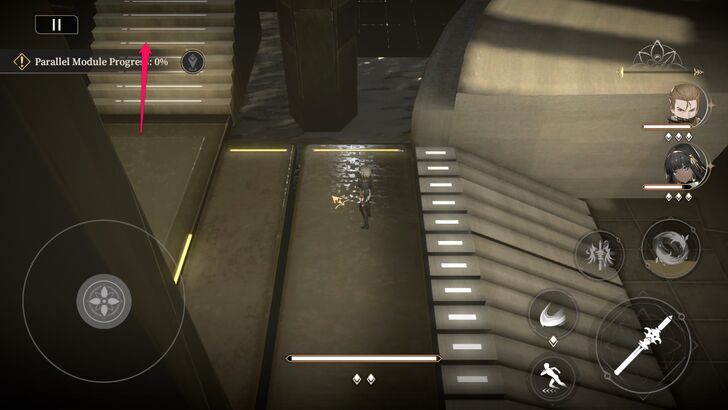 Go back a bit and climb the stairs. |
| 5 | 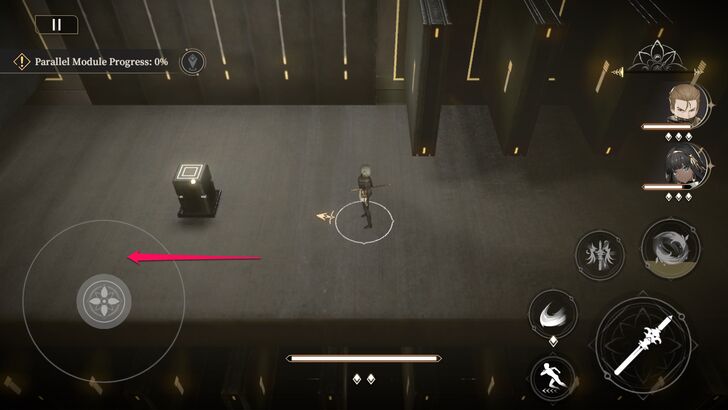 Move past this interactable object to obtain a treasure chest. |
| 6 | 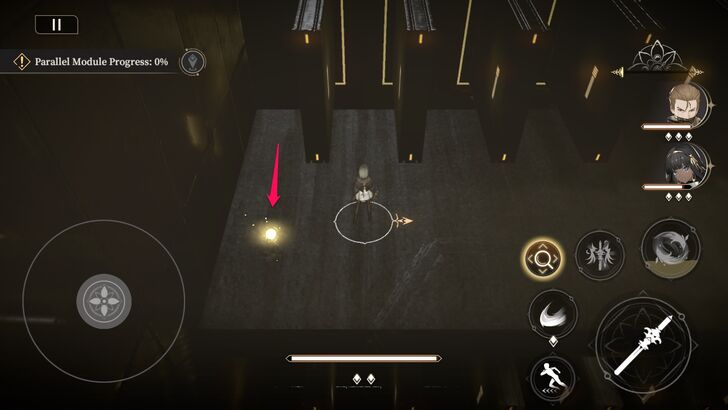 Interact with the glowing object on the floor. |
| 7 | 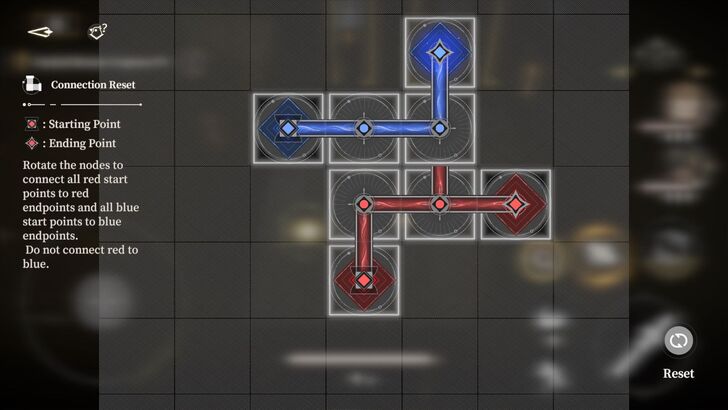 Connect the nodes like this to complete the puzzle and unlock the treasure chest. |
| 8 | 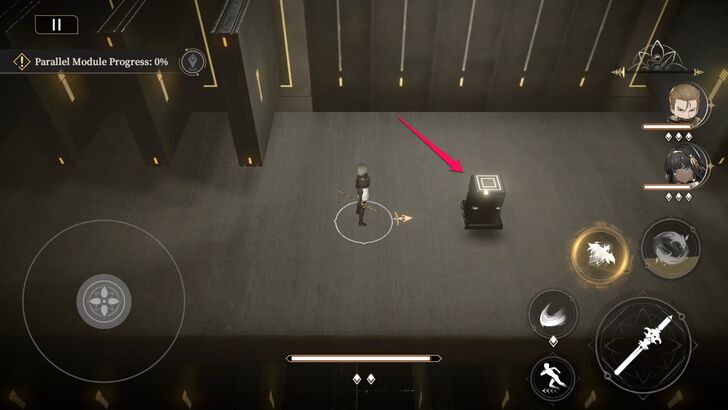 Go back to the interactable object and hit it with a basic attack. |
| 9 | 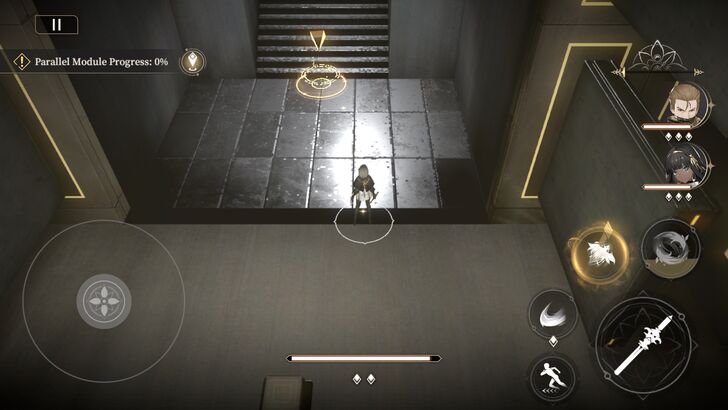 After unlocking the path, head over to the teleporter. |
| 10 | 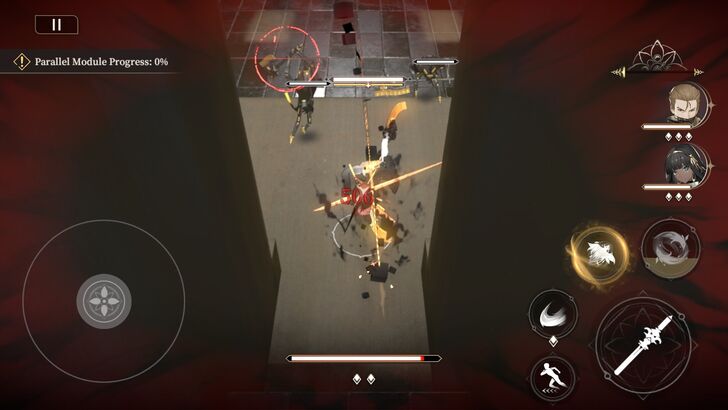 Enemies will spawn in this location. Take them out. |
| 11 |  Climb the stairs to the right. |
| 12 | 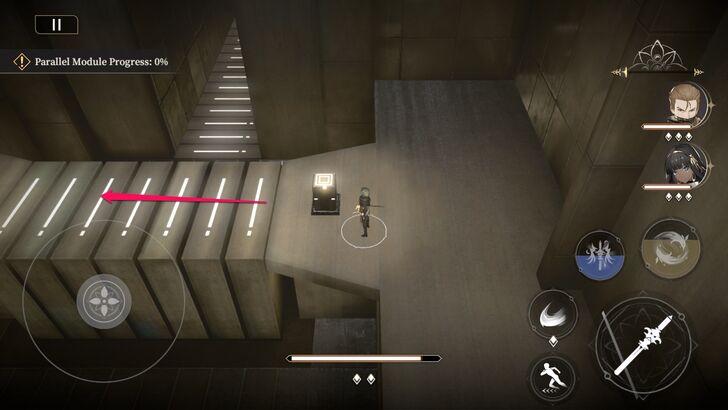 Follow the path and move past the raised platform. |
| 13 | 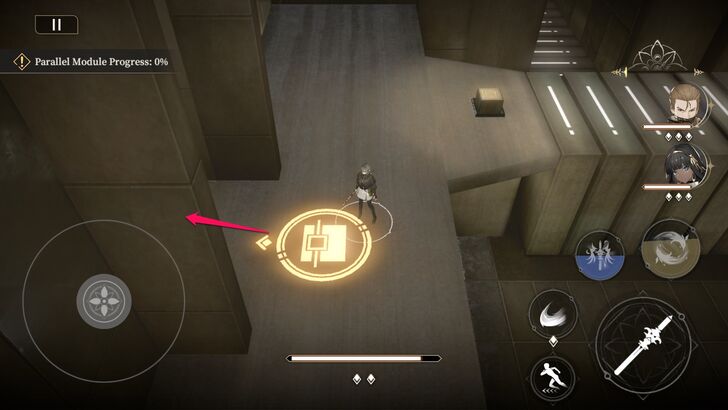 Enter the path to the left to obtain a treasure chest. Be prepared as an elite enemy guards it. |
| 14 | 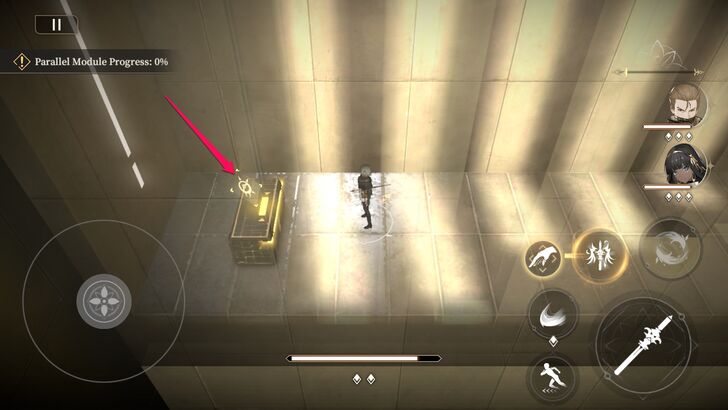 Claim the treasure chest at the end of the path. |
| 15 | 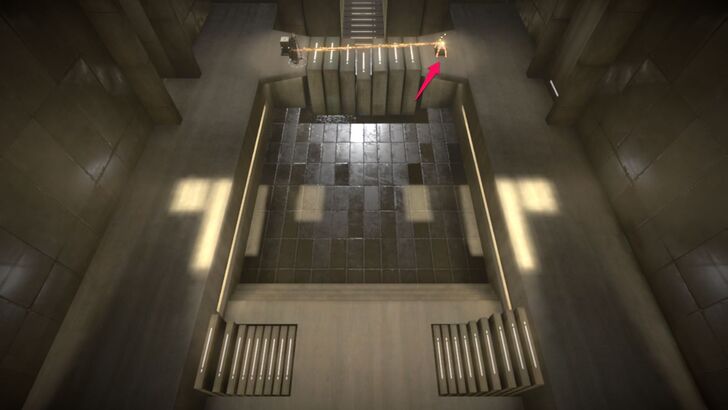 Go back to the raised platform, and use Shamash's first skill to lower it down and raise another set of stairs. |
| 16 | 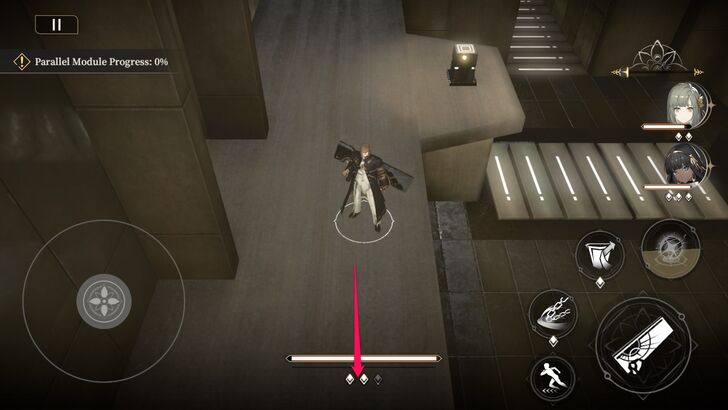 Move south. |
| 17 | 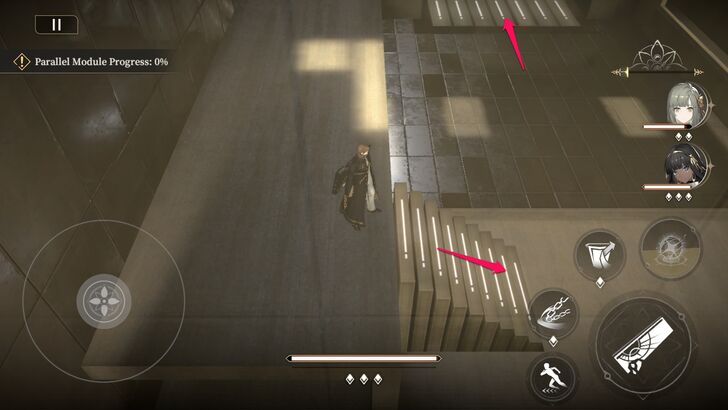 Climb down the stairs and move past the lowered platform. |
| 18 | 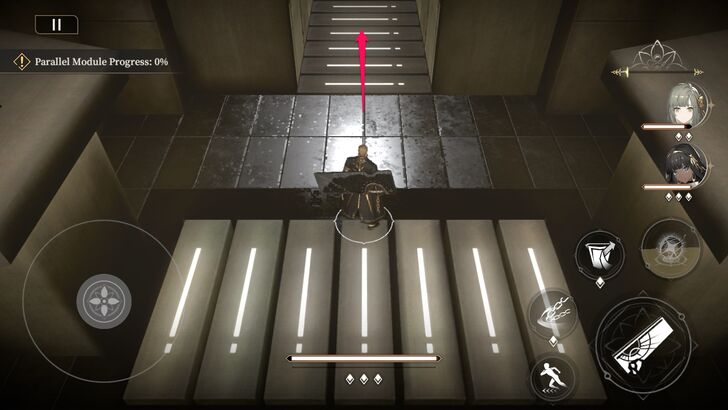 Follow the path beyond the lowered platform. |
| 19 | 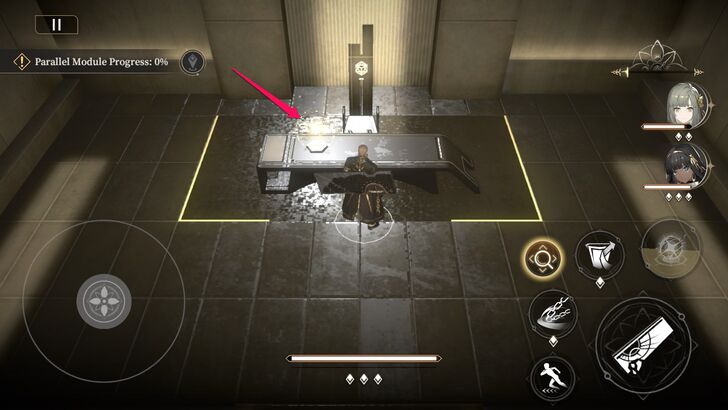 At the end of the path, you'll end up in an office. Interact with the glowing object. The level ends here. |
Chapter 3-8 Guide
Overview
|
|
| In Parallel | |
|---|---|
| Let's continue connecting the computing power modules in parallel. | |
| Treasure Chests Available | 1 |
| First-Time Clear Rewards | Rune Shard x 50 Vision x 450 Orelium x 50000 |
Walkthrough
| 1 | 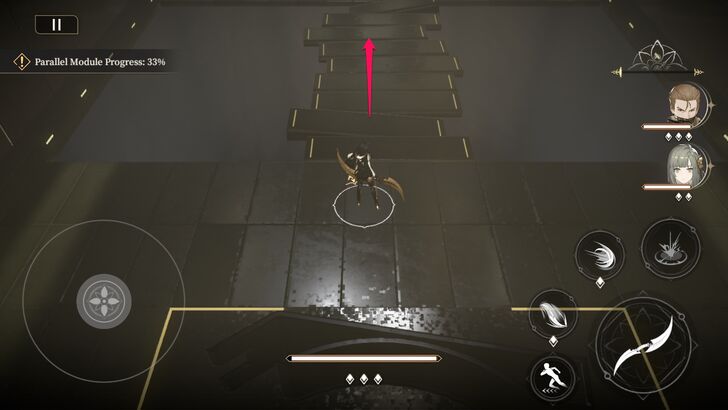 Move north. |
|---|---|
| 2 | 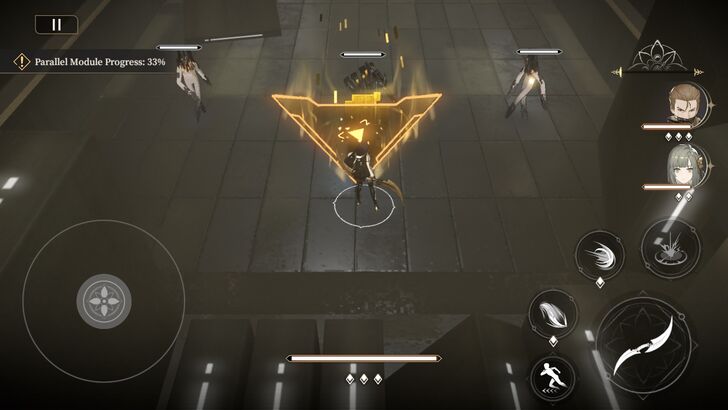 As you move forward, anomalies will spawn. Take them out. |
| 3 | 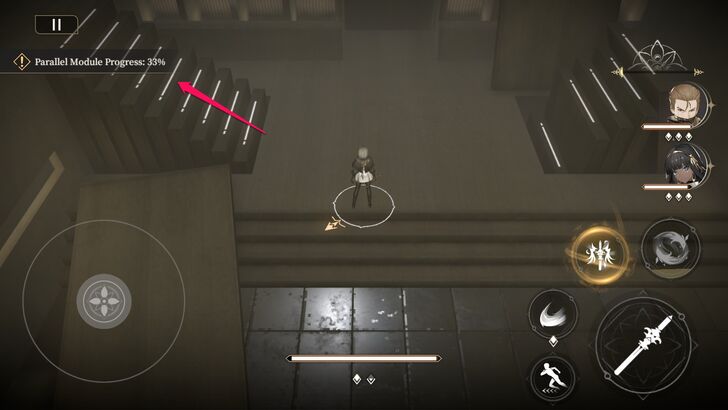 Continue moving forward after eliminating them and take the stairs to the left. |
| 4 | 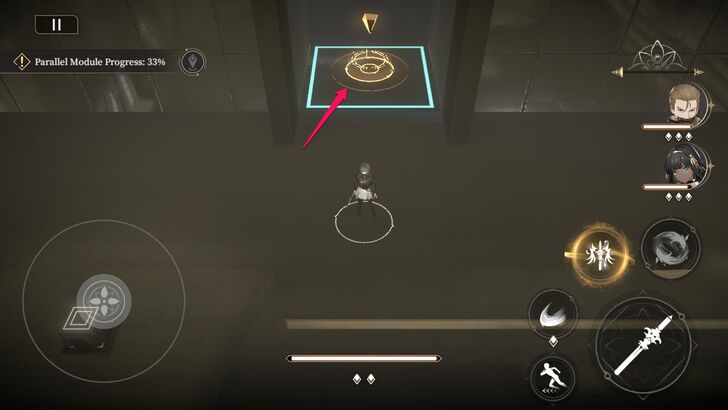 Follow the path and approach the teleporter. |
| 5 | 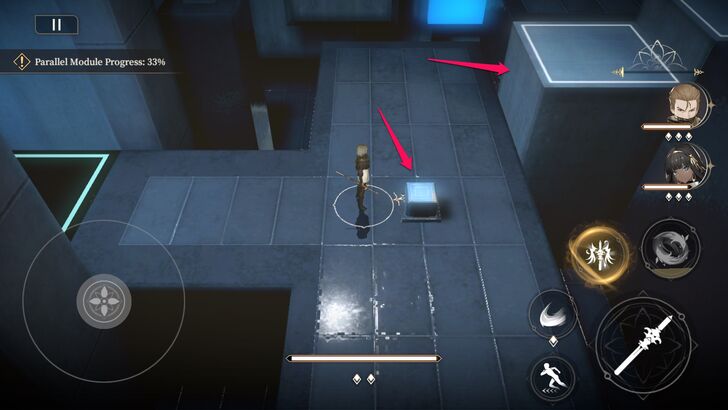 Hit the node to lower down the platform. |
| 6 | 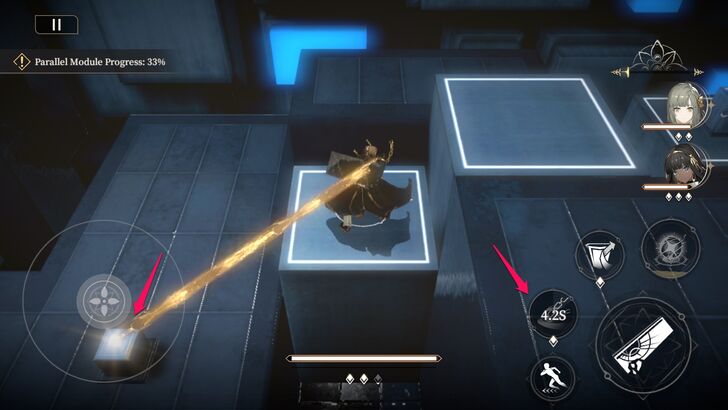 Switch to Shamash and use his first skill on the node to raise the platform again. |
| 7 | 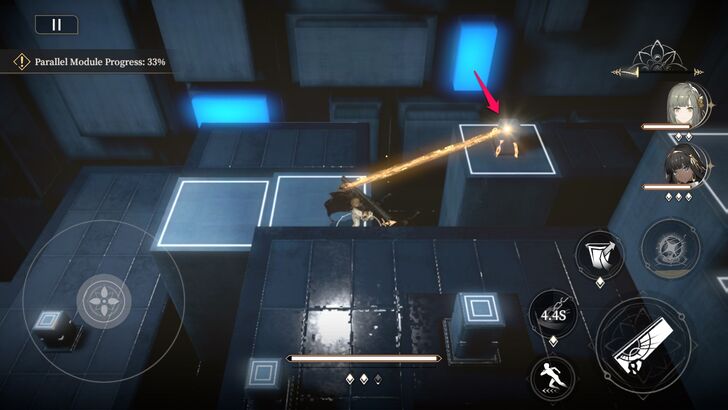 Use his skill again to lower another platform. Stand on the platform and use Shamash's skill again to raise it. |
| 8 | 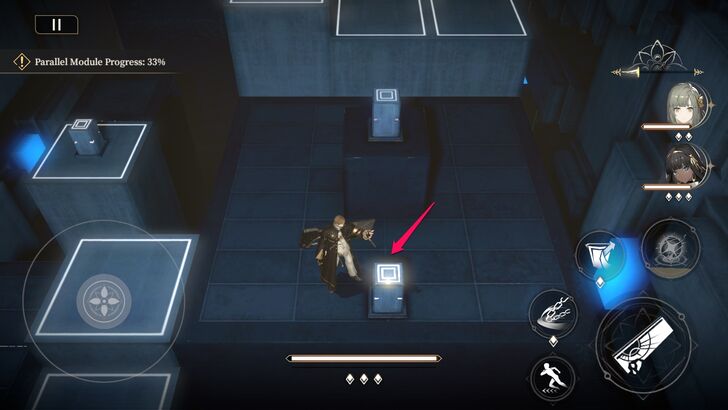 Hit this node to open up a path. |
| 9 | 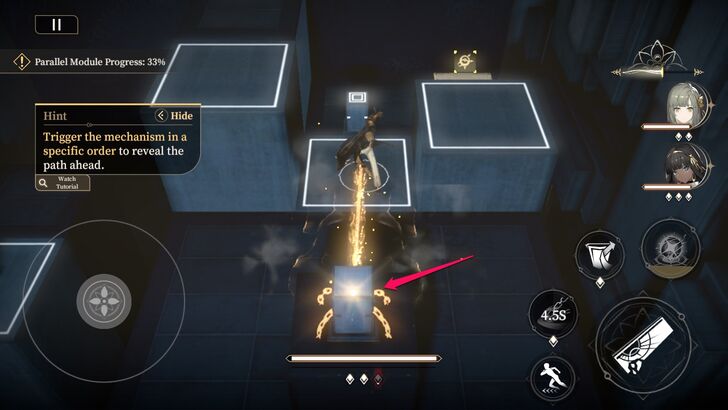 Use Shamash's skill on the central node to lower a platform that blocks a treasure chest. |
| 10 | 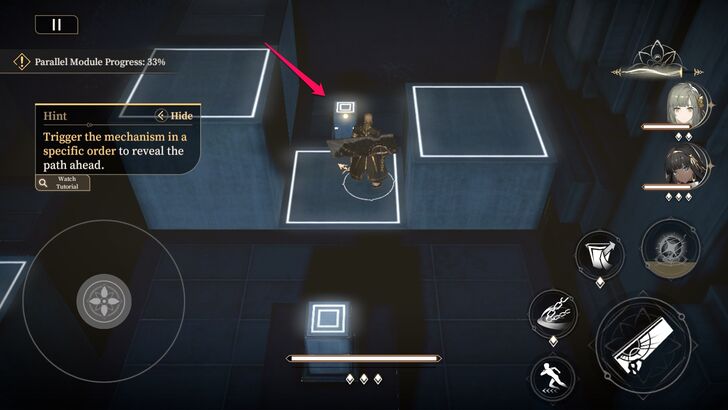 After claiming the treasure chest, hit this node. Make sure you're standing on the central platform. |
| 11 | 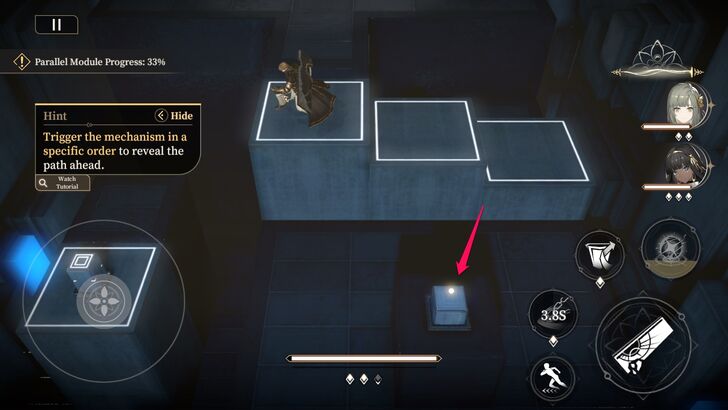 Move to the platform to the left and hit the central node again to raise it. |
| 12 | 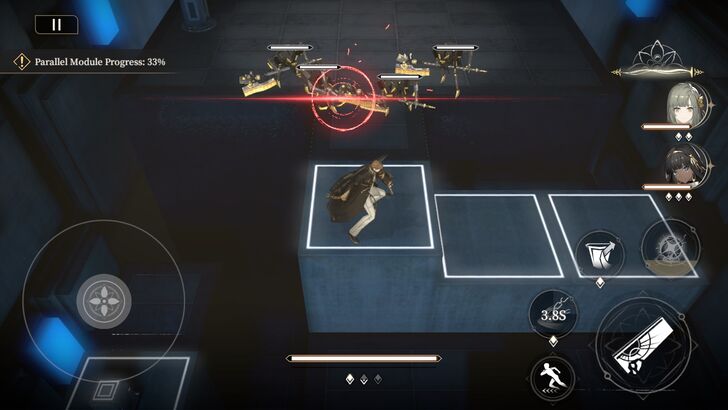 Enemies will spawn right after you reach this area. Defeat them. |
| 13 | 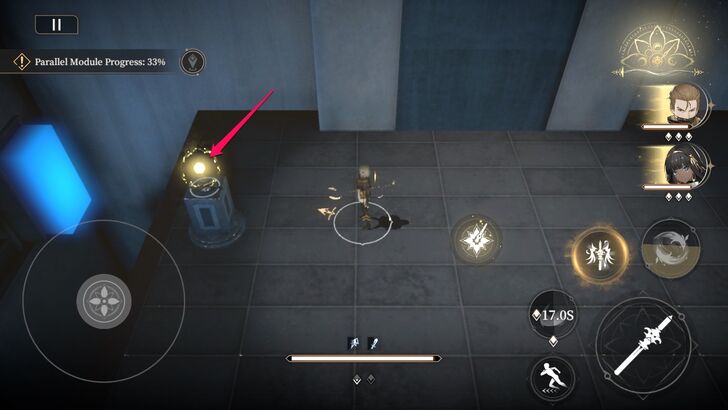 After eliminating them, interact with this glowing object. A short cutscene will play and this marks the end of this level. |
Chapter 3-9 Guide
Overview
|
|
| Final Module | |
|---|---|
| Now we're just missing the final module. | |
| Treasure Chests Available | 0 |
| First-Time Clear Rewards | Rune Shard x 50 Vision x 450 Proof of Search for Knowledge - Classic x 6 Proof of Search for Knowledge - Page x 10 |
Walkthrough
| 1 |  Approach the teleporter. |
|---|---|
| 2 | 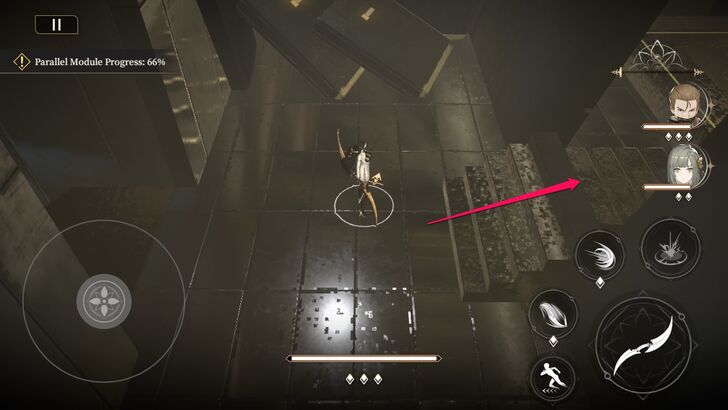 Go to the right until you reach a large area. |
| 3 | 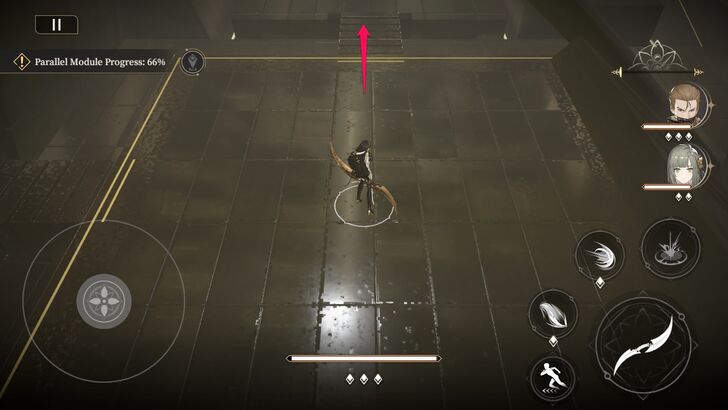 From there, move north. |
| 4 | 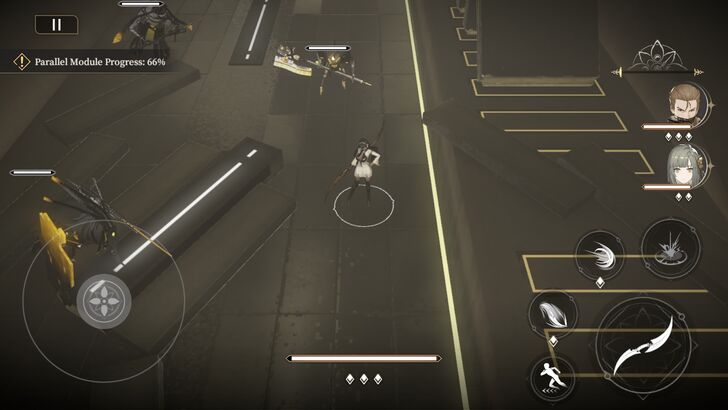 As you follow the path, enemes will appear. Take them all out. |
| 5 | 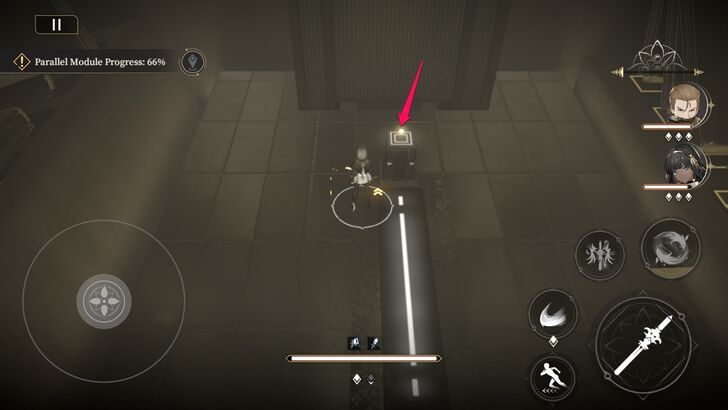 After eliminating them, hit this node. |
| 6 | 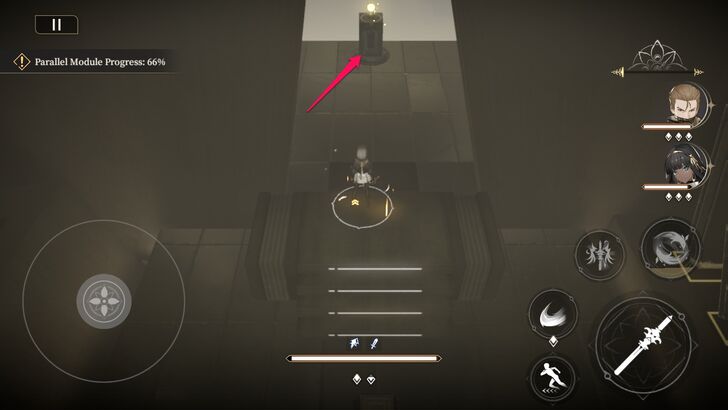 A set of stairs will lower down, climb it and interact with the glowing object. |
| 7 | 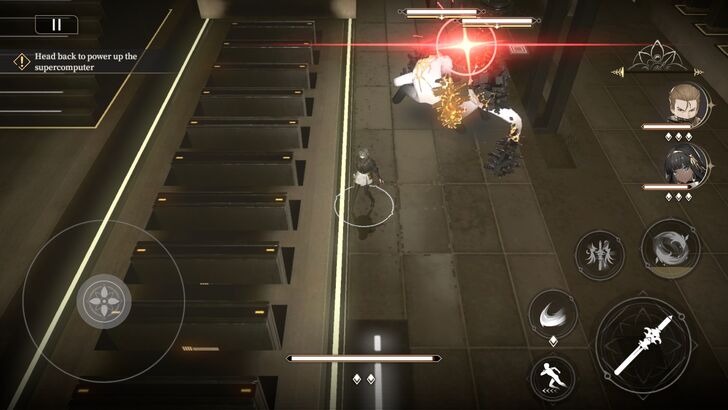 Enemies will spawn after activating the last module. Defeat them. |
| 8 | 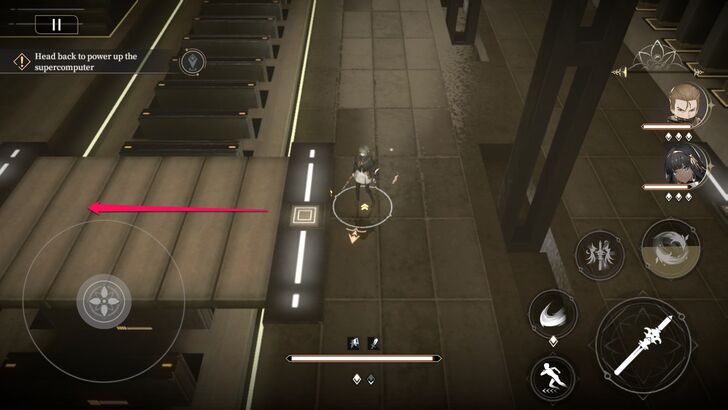 A bridge will appear after eliminating them. Cross it. |
| 9 | 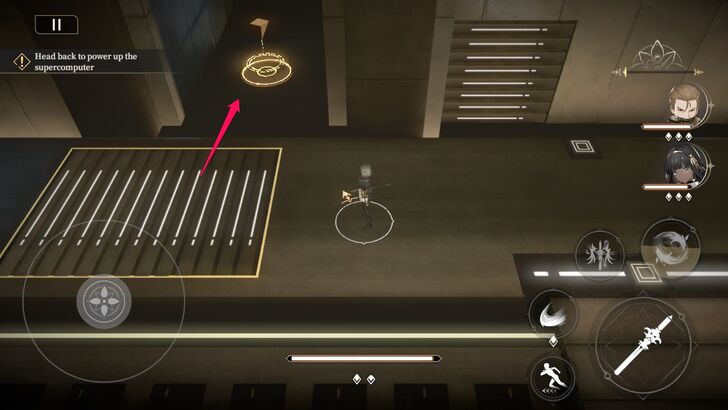 Move south and head to the teleporter. The level ends here. |
Chapter 3-10 Guide
Overview
|
|
| The Final Question | |
|---|---|
| A deluge of possibilities courses through its efficient processing core, much like the ancient people of Memphis chanted in a language they did not comprehend. | |
| Treasure Chests Available | 1 |
| First-Time Clear Rewards | Rune Shard x 50 Vision x 450 Fire of Hephae - Large x 5 Fire of Hephae - Medium x 7 |
Walkthrough
| 1 | 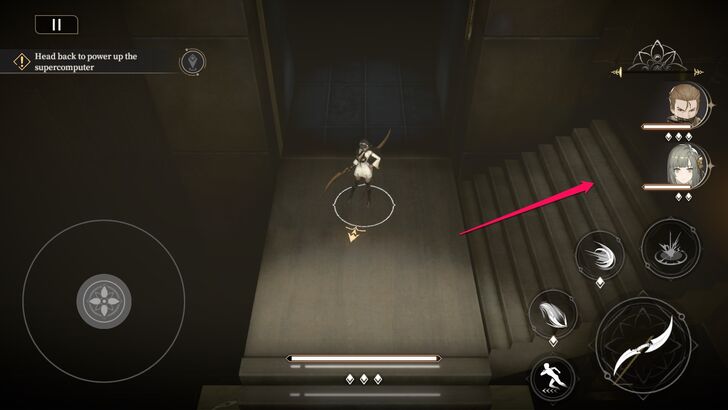 Before following the quest marker to the south, climb the stairs to your right. |
|---|---|
| 2 | 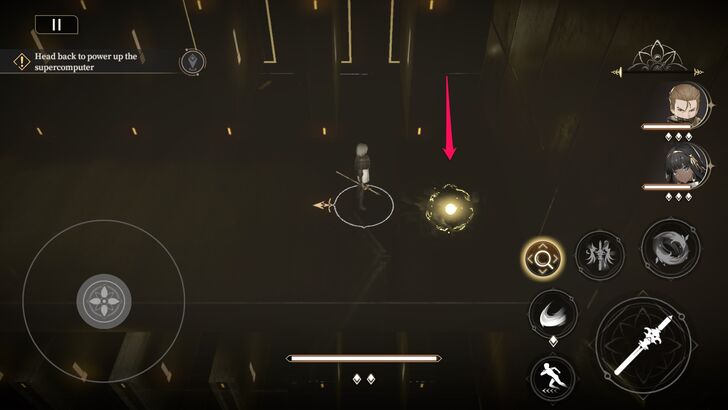 Go right until you reach a glowing object on the floor. Interact with it. |
| 3 | 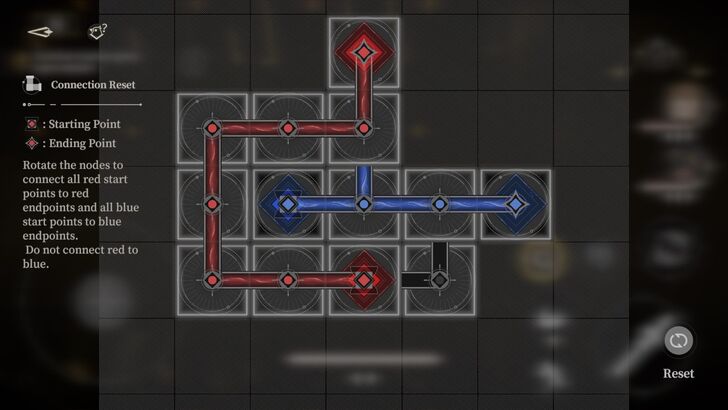 Rotate the nodes like this to unlock a treasure chest. |
| 4 | 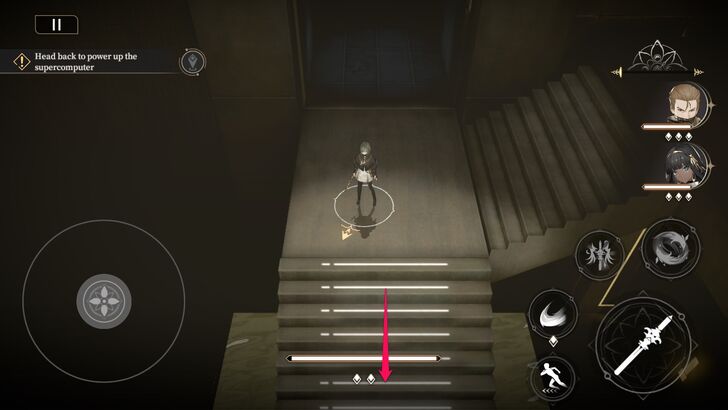 Go back and follow the stairs to the south. |
| 5 | 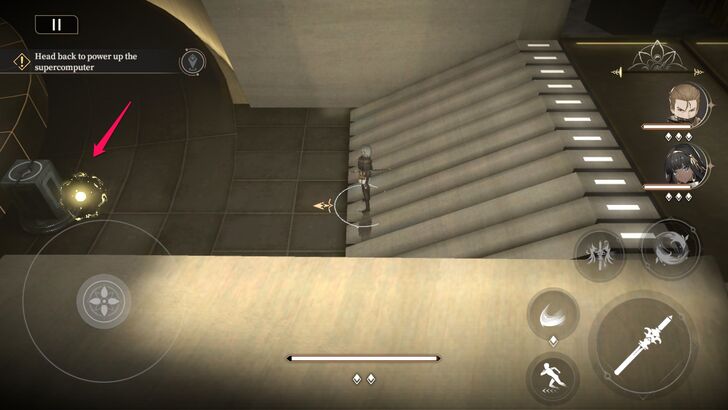 At the end of the stairs, go left and interact with the glowing object. |
| 6 | 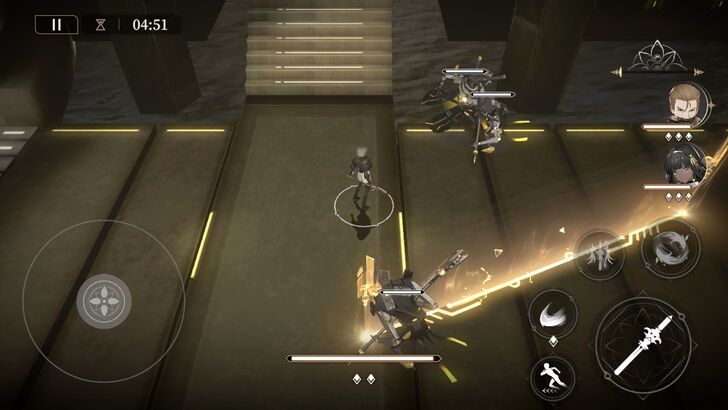 Waves of enemies will appear. Take them all out. |
| 7 | 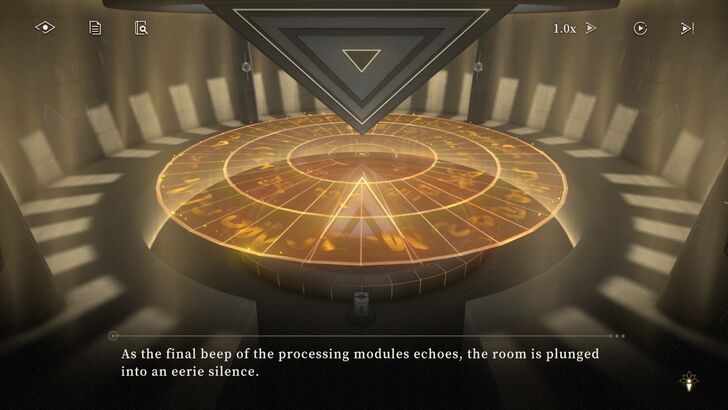 Once defeated, a conversation between Shamash and Nanna will play. Let it play out or skip it to end the level. |
Chapter 3-11 Guide
Overview
 |
|
| Across the Dark Night | |
|---|---|
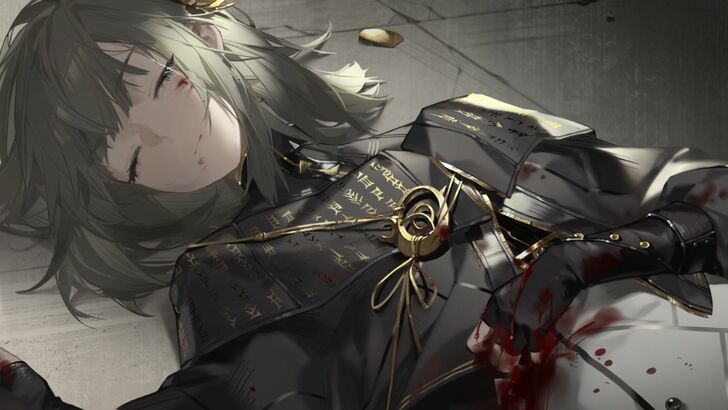
| The sanguine pond spreading from beneath the girl resembles a crimson flower, blooming with her as the center. |
Zero and Anzu exhausted all their powers to survive Aten's onslaught. Though they managed to protect the Seer, Zero did not escape unscathed.
The Seer found Zero lying in a pool of blood, unconscious. With Anzu's guidance, the Seer makes his way to a safe location where Zero can recover.
Chapter 3-12 Guide
Overview
|
|
| The Last Hope | |
|---|---|
| This isn't over yet. Aten hasn't detonated itself... | |
| Treasure Chests Available | 1 |
| First-Time Clear Rewards | Rune Shard x 50 Vision x 450 Orelium x 50000 |
Walkthrough
| 1 | 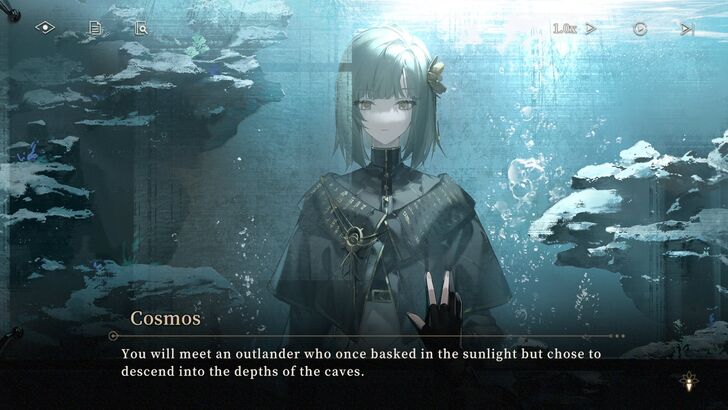 The level starts with Zero dreaming about her conversation with Cosmos. |
|---|---|
| 2 | 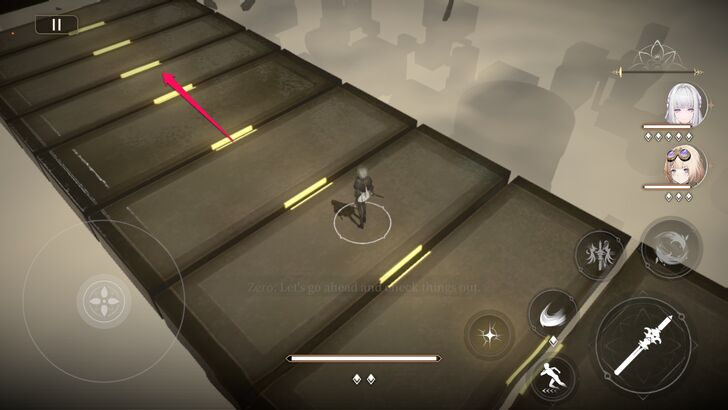 Follow the path forward. |
| 3 | 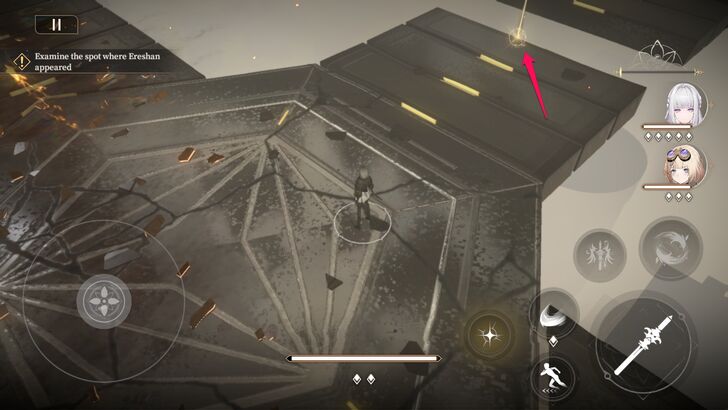 Interact with the glowing object on the floor to receive the seventh Pendant upgrade. |
| 4 | 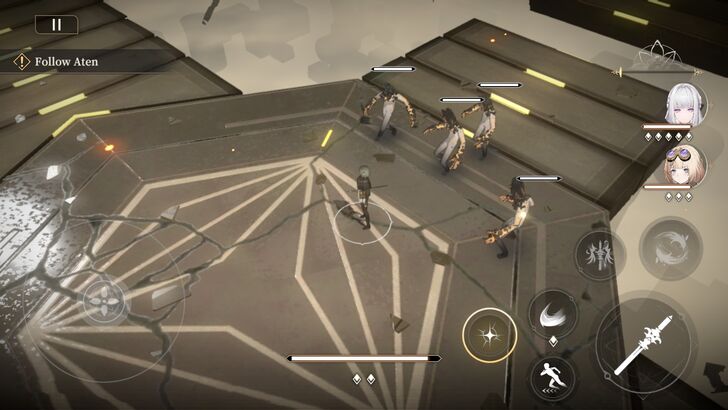 Enemies will spawn after obtaining the upgrade. Eliminate them to progress. |
| 5 | 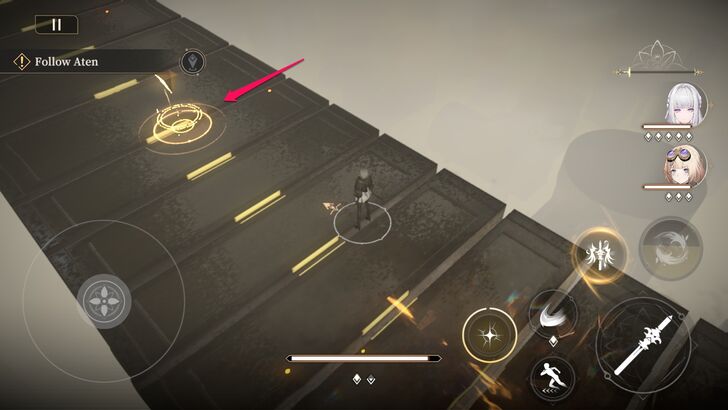 Follow the quest path again and head to the teleporter. |
| 6 | 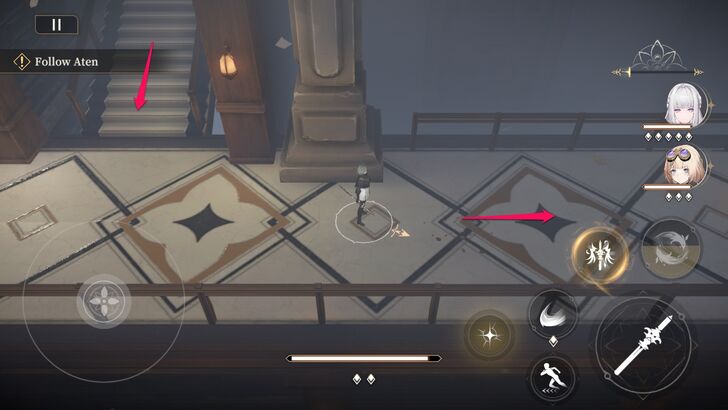 Head down the stairs and go right. |
| 7 | 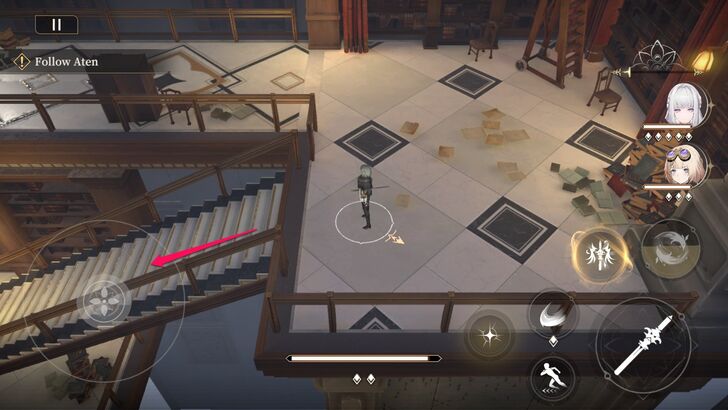 You'll briefly see the treasure chest, but it can't be obtained yet. For now, go down to another set of stairs. |
| 8 | 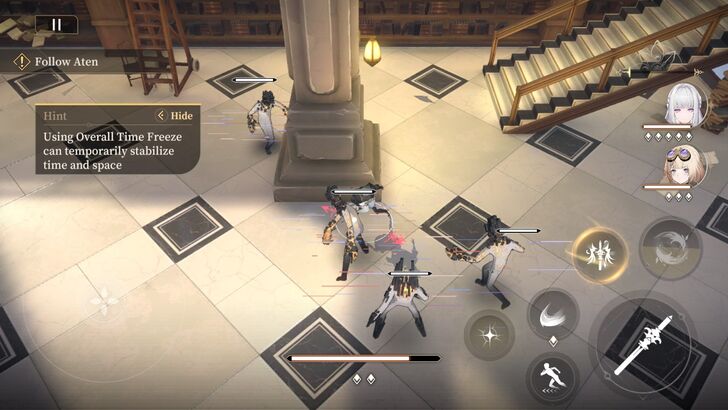 Multiple enemies will appear at the end of the stairs. Take them out. |
| 9 | 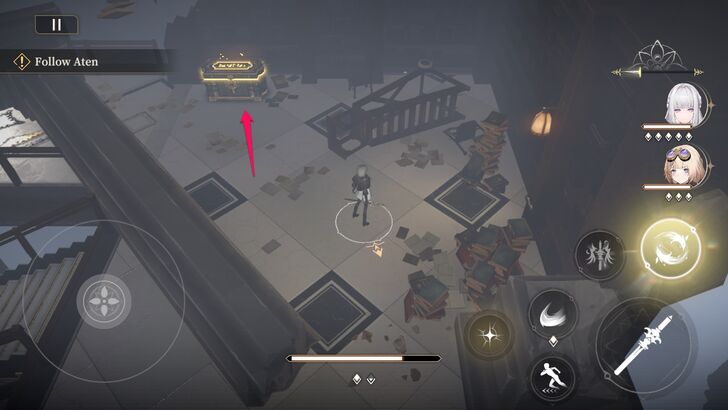 Once defeated, climb the same set of stairs and let time distort where the treasure chest appears. |
| 10 | 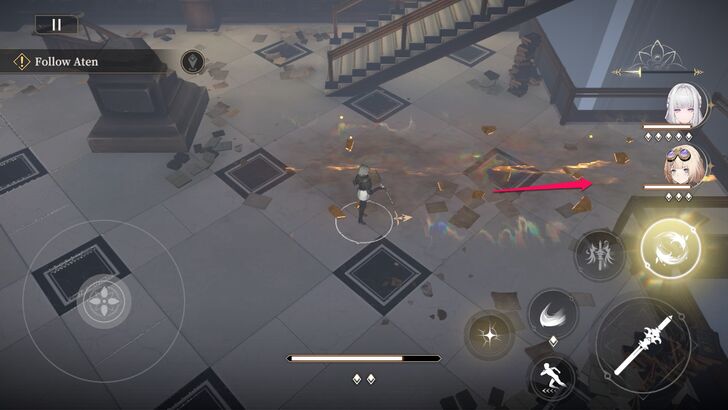 Once the treasure chest is claimed, head down again and go to the right. |
| 11 | 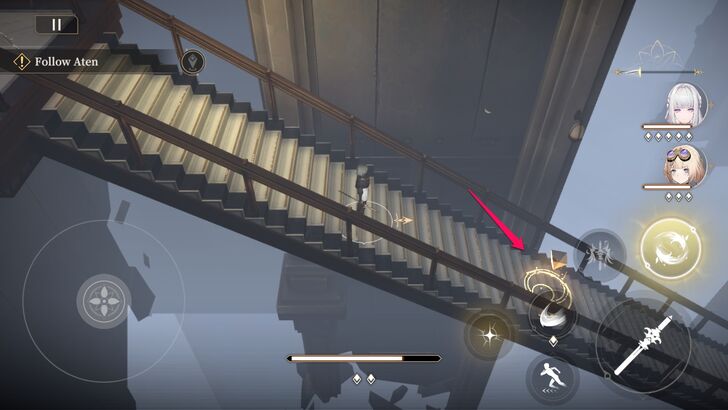 Go down the stairs and approach the teleporter. |
| 12 | 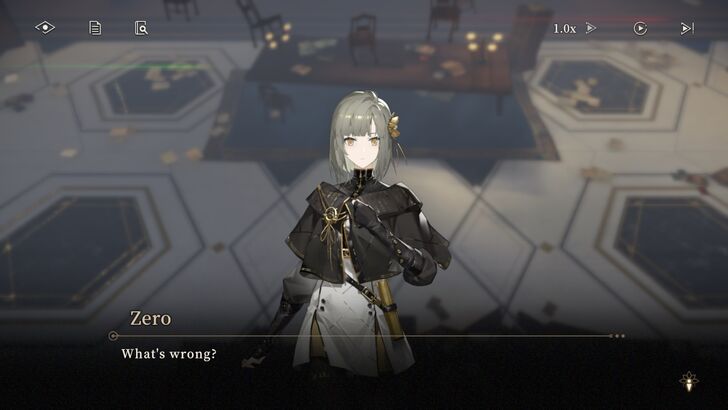 At the next area, head to the center of the room and a short cutscene will play. |
| 13 | 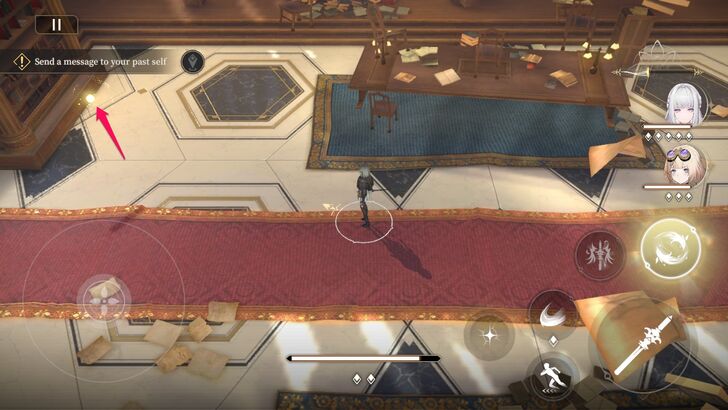 After that, interact with the bookshelf. |
| 14 | 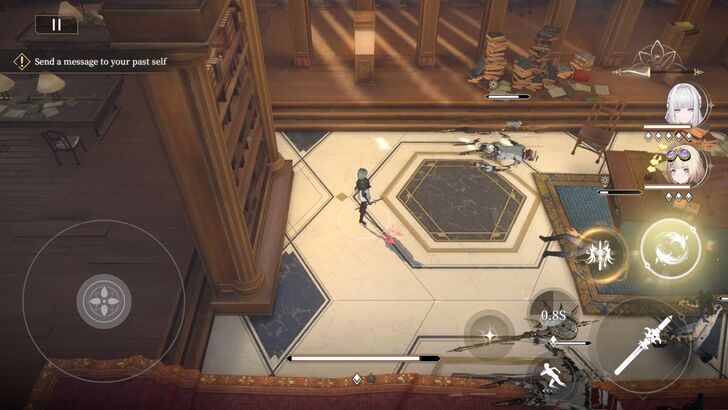 Enemies will spawn after the interaction. Defeat them to end this level. |
Chapter 3-13 Guide
Overview
|
|
| Inside the Cone of Light | |
|---|---|
| Within the cone of light is fate. Even if we could change the past, I'm afraid it would still be fate. | |
| Treasure Chests Available | 1 |
| First-Time Clear Rewards | Rune Shard x 50 Vision x 450 Proof of Search for Knowledge - Classic x 6 Proof of Search for Knowledge - Page x 10 |
Walkthrough
| 1 | 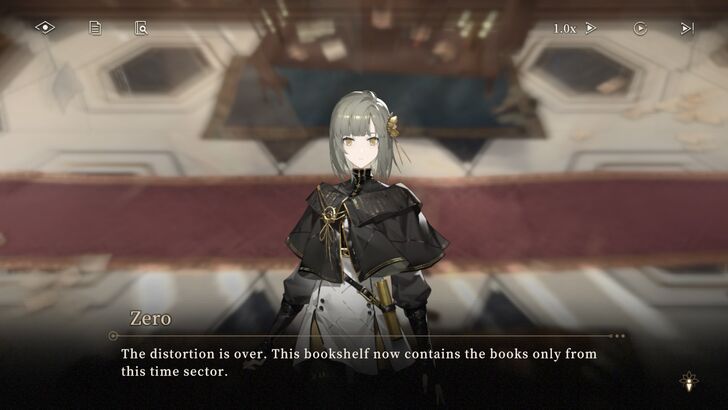 The level starts with a conversation between you and Zero. |
|---|---|
| 2 | 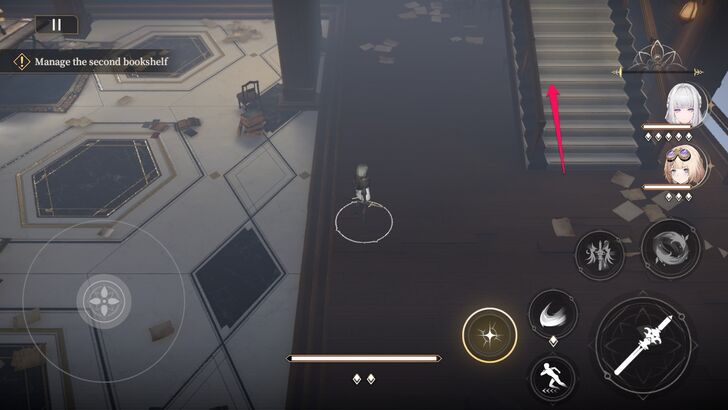 Go to the right and climb up the stairs. |
| 3 | 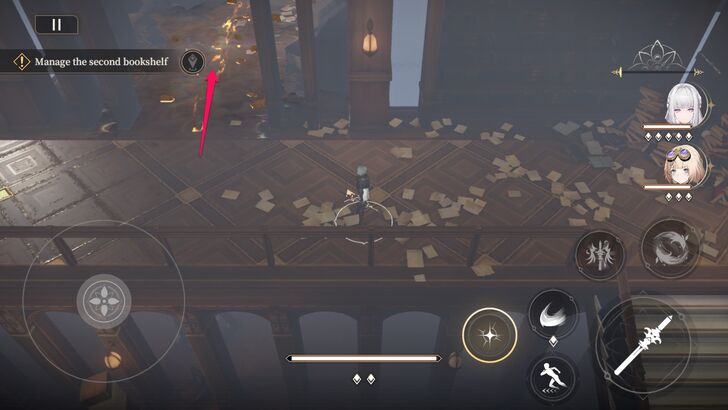 After ascending the stairs, follow the path where Aten left its tracks. |
| 4 | 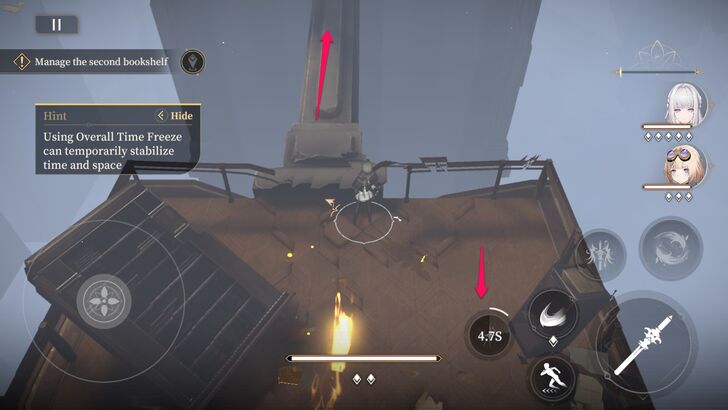 At the end of the path, let the time distort until a broken pillar appears. Use the Pendant skill to freeze the time and safely cross the pillar. |
| 5 | 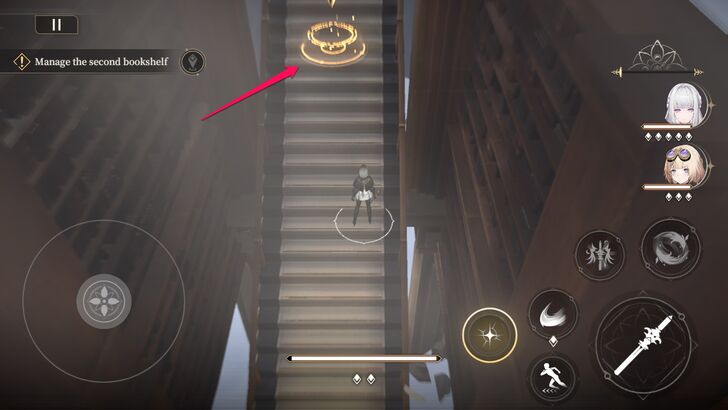 At the end of the pillar, continue moving forward until you reach the teleporter for this stage. |
| 6 | 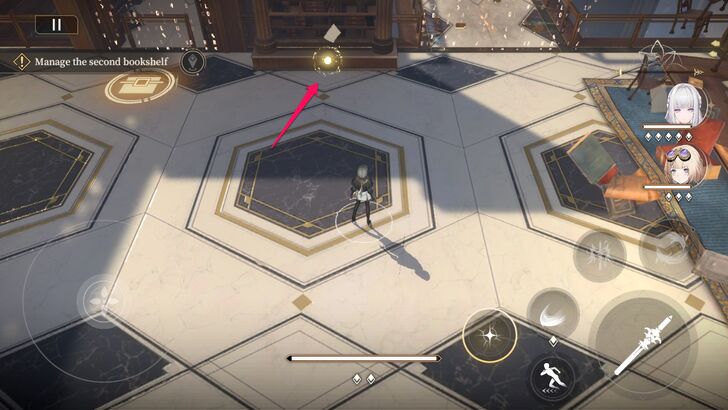 Move forward and wait for the time to distort and interact with the bookshelf. |
| 7 | 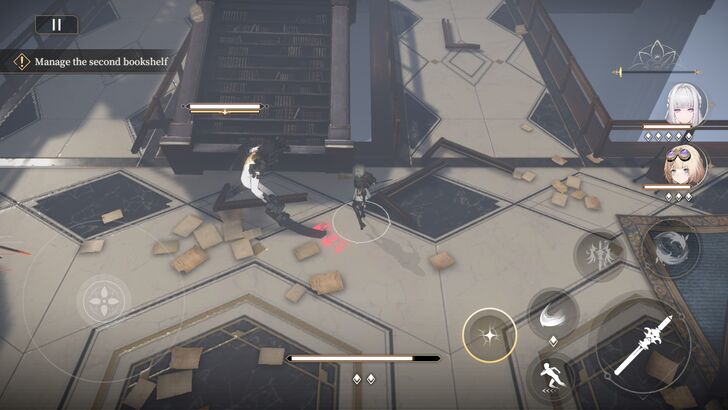 Defeat the enemies that spawn after your interaction with the bookshelf. |
| 8 | 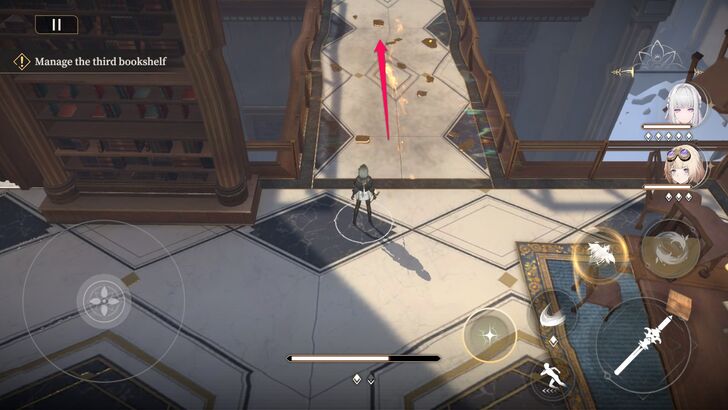 Once defeated, follow Aten's tracks once again. |
| 9 | 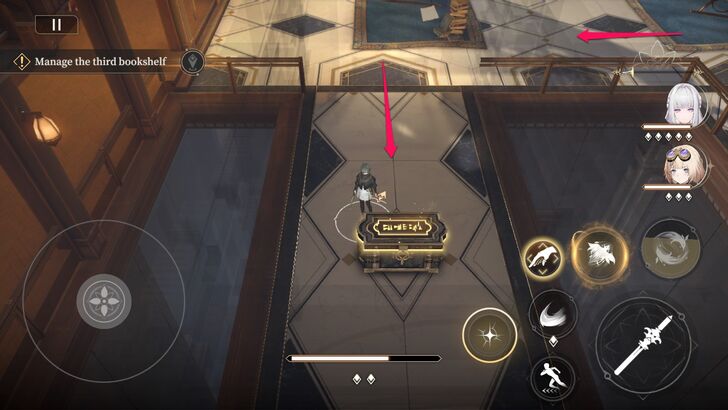 Go to the left and wait for the time to distort where you can pass through another hallway. A treasure chest can be claimed at the end of this short path. |
| 10 | 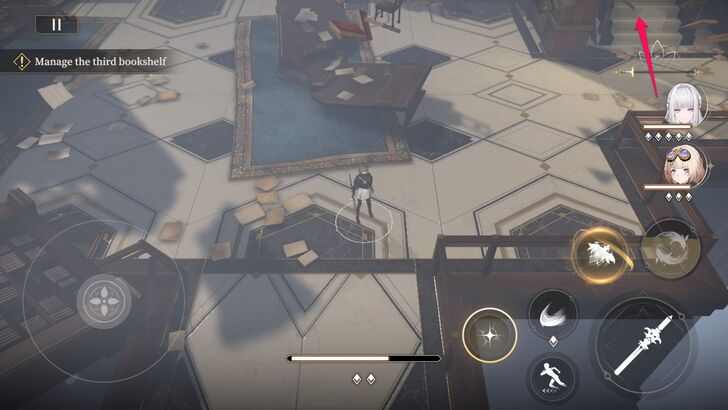 Go back to Aten's tracks and climb the stairs to the right. |
| 11 | 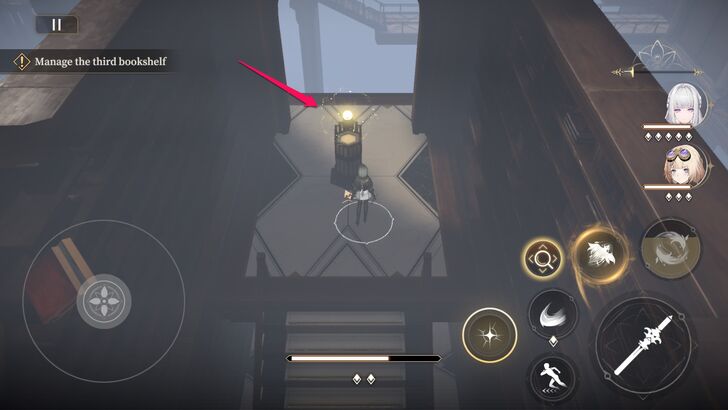 Interact with a glowing object found at the end of the stairs. |
| 12 | 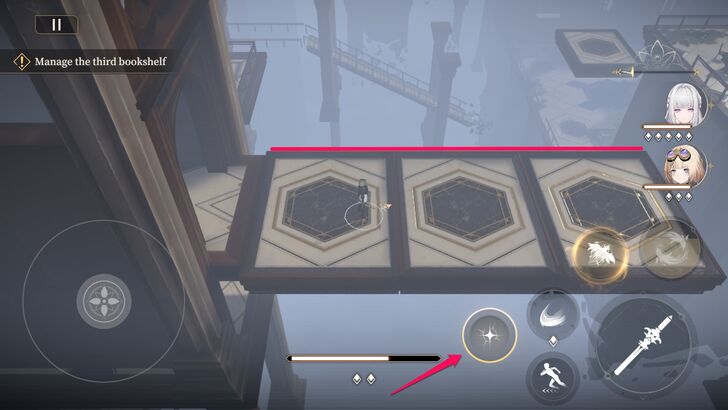 Wait for the three platforms to align and use the Pendant skill to freeze time. |
| 13 | 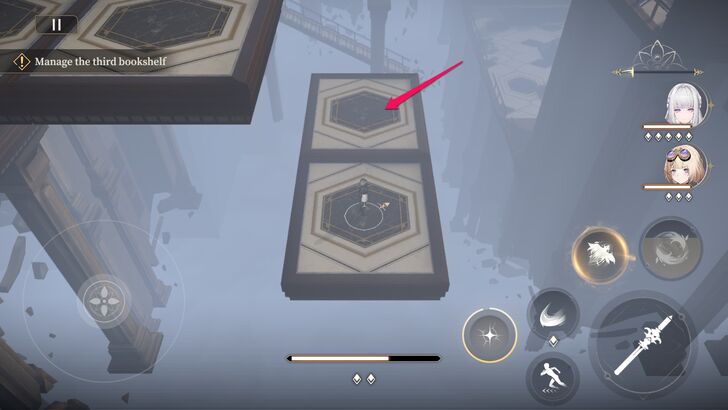 Move your character to the other platform. |
| 14 | 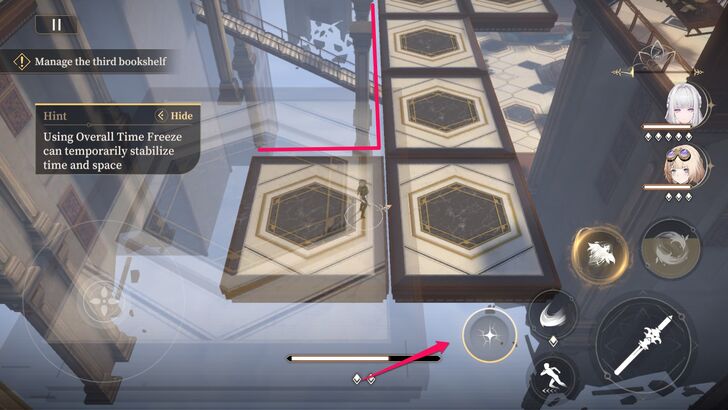 Wait for these platforms to align and use the Pendant skill again to safely reach the final platform. |
| 15 | 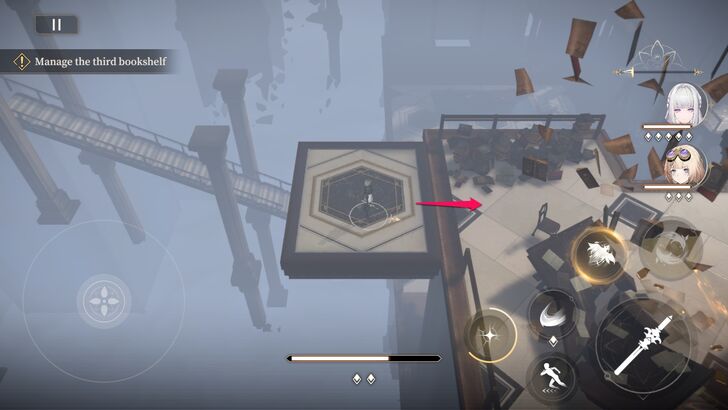 Wait for the final platform to reach the nearby ledge. |
| 16 | 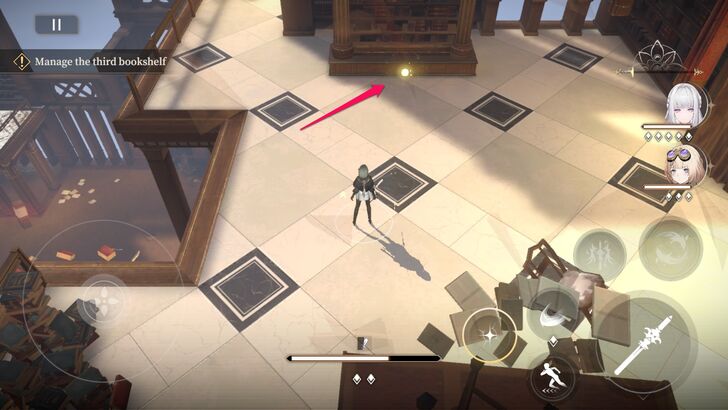 Interact with the bookshelf. |
| 17 | 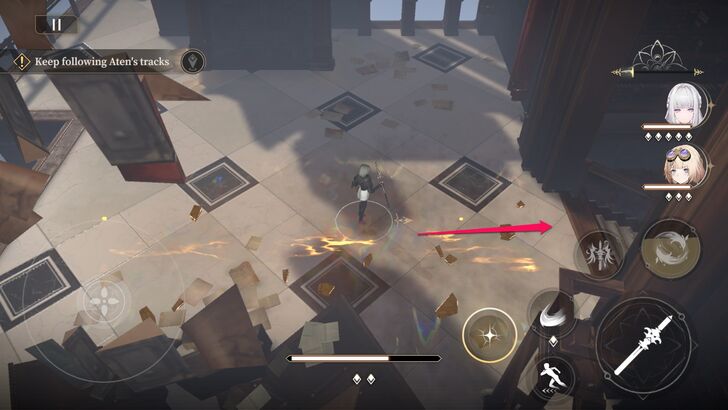 Follow Aten's tracks again. |
| 18 | 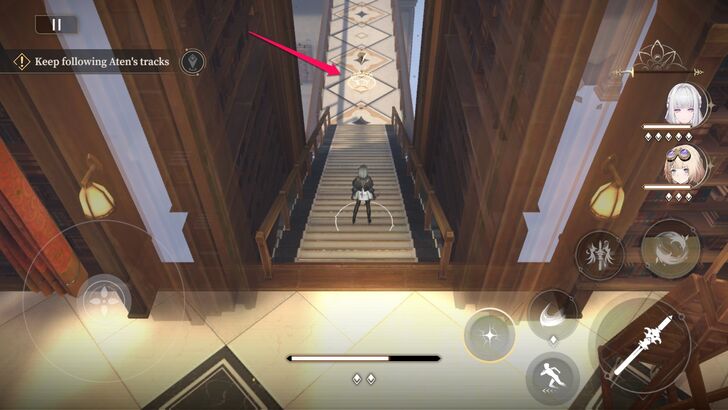 Go down the stairs and approach the teleporter. The level ends here. |
Chapter 3-14 Guide
Overview
|
|
| Fateful Farewell | |
|---|---|
| Deep within ruins, a mutilated yet massive statue slowly rises up. | |
| Treasure Chests Available | 0 |
| First-Time Clear Rewards | Rune Shard x 50 Vision x 450 Fire of Hephae - Large x 5 Fire of Hephae - Medium x 7 |
Walkthrough
| 1 | 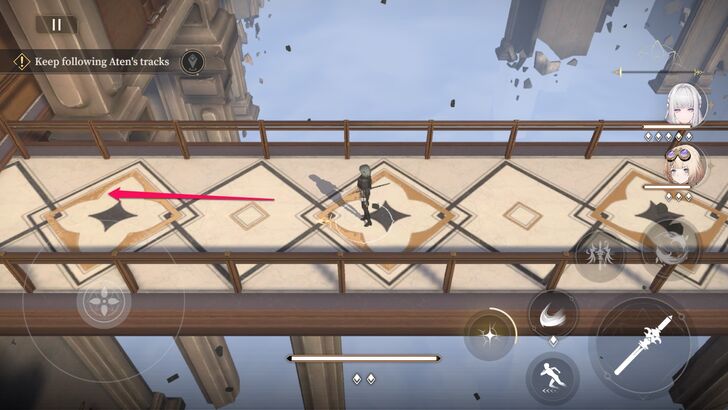 Follow the path west. |
|---|---|
| 2 | 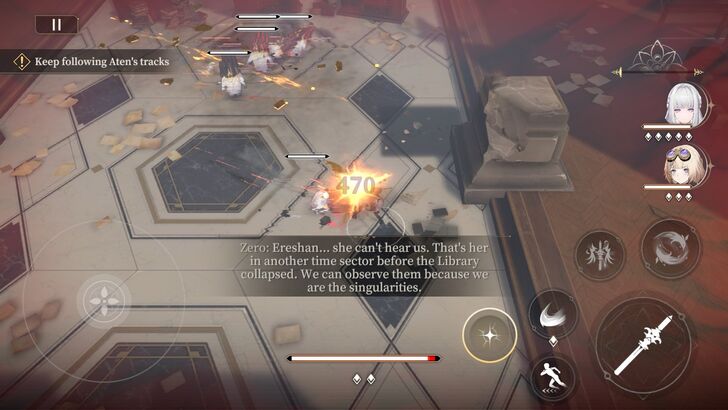 Ereshan and anomalies are fighting in the next room. Take them out. |
| 3 | 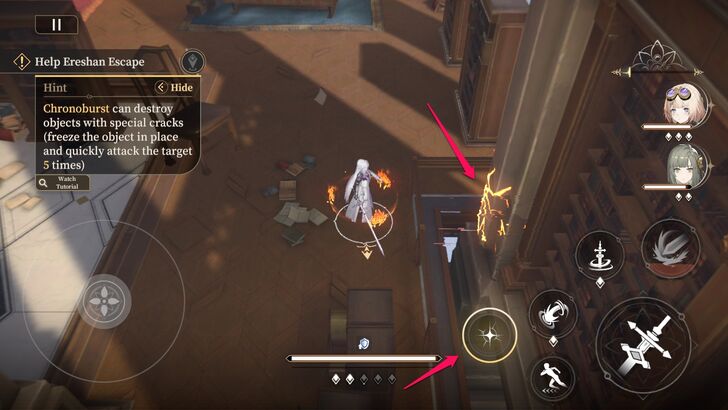 More enemies are pouring from the other side of the door. Use the Pendant skill to destroy the pillar and block the door permanently. |
| 4 | 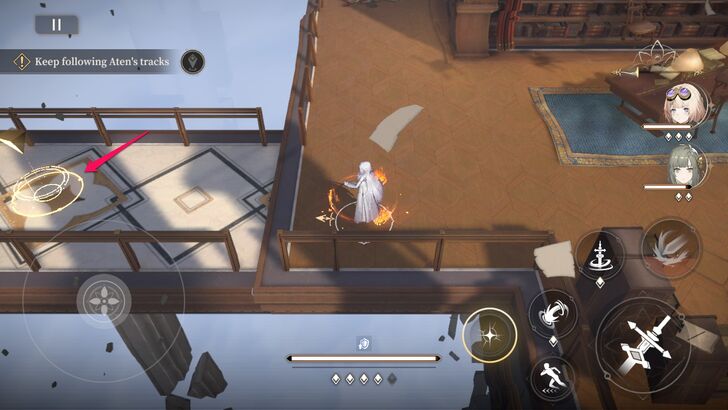 With the enemies out of the way, move to the left and approach the teleporter. |
| 5 | 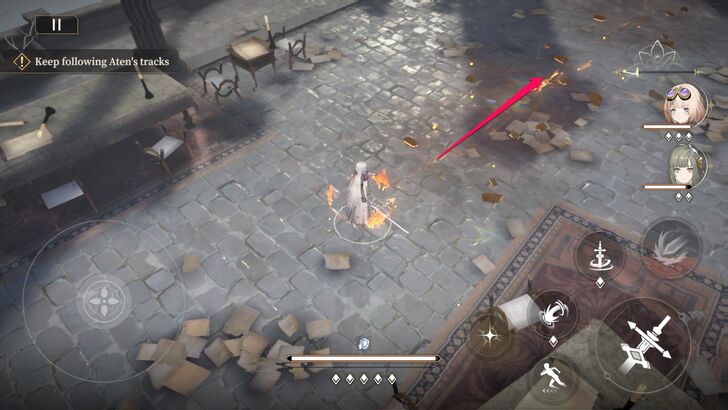 Follow Aten's tracks once again. |
| 6 | 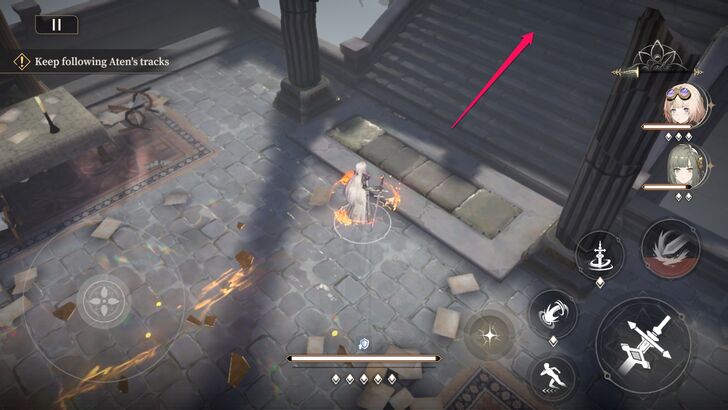 Climb up the stairs. |
| 7 | 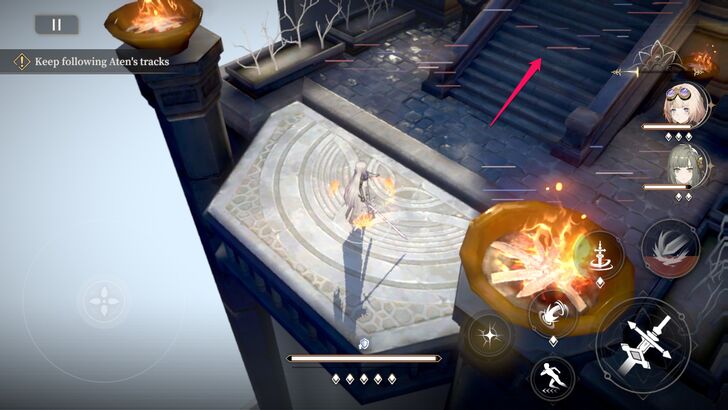 Ride the elevator at the end of the path and climb another set of stairs. |
| 8 | 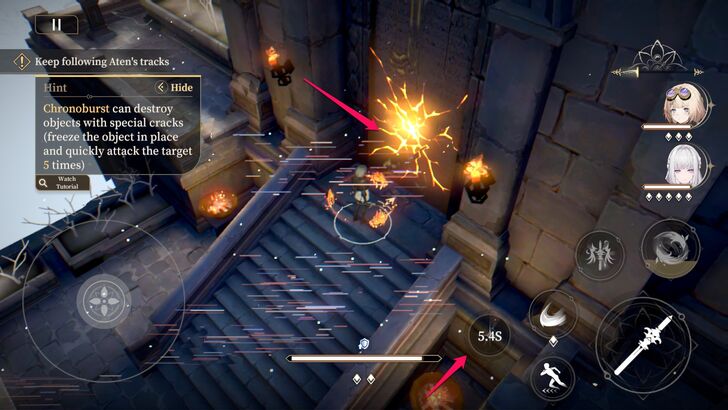 Use the Pendant to destroy the door. |
| 9 | 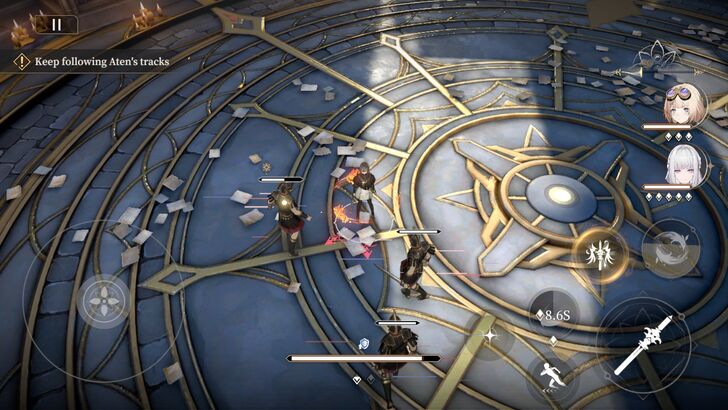 Move towards the area, where you first meet General Sarvis. Take out all the enemies. |
| 10 | 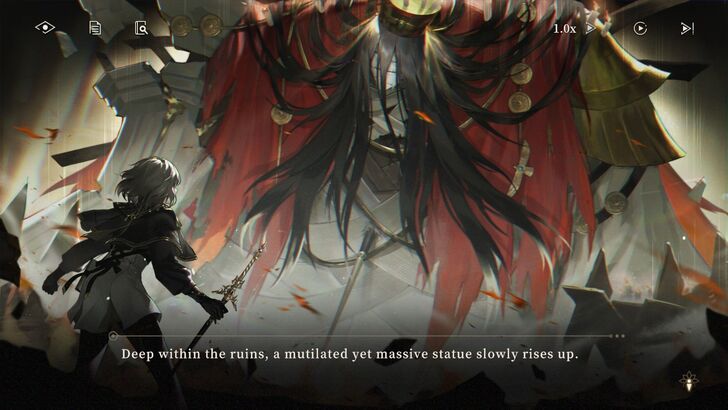 After defeating them, Darius will appear. This is where the level ends. |
Chapter 3-15 Guide
Overview
 |
|
| The Nine Billion Names of God | |
|---|---|
| Overhead, without any fuss, the stars are going out. |
Cosmos' gift transformed into an item that could fit into the processing module. Nanna and Shamash were shocked by how the events unfolded. However, will it be enough to save the Library from its destruction?
Chapter 3-16 Guide
Overview
 |
|
| The Descending Sun | |
|---|---|
| The lines crumble, and the light dissipates. | |
| Treasure Chests Available | 0 |
| First-Time Clear Rewards | Rune Shard x 50 Vision x 450 Orelium x 50000 |
In this stage, you will face Aten. Make sure to keep your distance when Aten performs multi-hit AoE attacks. Aten's attacks will become more powerful and frequent in its second stage, so bring a healer or level up your party to sustain the battle. Take advantage of its elemental weaknesses by using Fire and Light characters.
This boss fight also includes a special stage, where Zero tries to deactivate Aten. Use the Pendant to remove obstacles and her basic attack to parry Aten's projectiles.
Chapter 3-17 Guide
Overview
 |
|
| The Tower Topples | |
|---|---|
| From now on, there will be no God in the universe, no Just Verdict, and therefore no punishment from heaven. |
Having survived both dangerous and prosperous times throughout thousands of years, the Babel Tower now lies in ruin after Aten's most recent activation.
Chapter 3-18 Guide
Overview
 |
|
| Epilogue | |
|---|---|
| The time has come to fulfill the "vow." |
With the Babel Tower in shambles, the news sent shockwaves through Eme-an's allies. Qing of WeiShi suspects something might have happened at the Library in Obed. Meanwhile, Florence, the current Duchess of the Florentine family, believes it is their time to fulfill their promise.
Meanwhile, Enki revealed a surprising truth about the Library's destruction.
Chapter 3-EX Guide
Overview
|
|
| The Real "Sun" | |
|---|---|
| The blazing sun that once razed Ehtaton to the ground, the plague that once set Ephrathah ablaze, lights up once more in the depths of the library of Babel. | |
| Treasure Chests Available | 0 |
| First-Time Clear Rewards | Rune Shard x 30 (1-star clear) Rune Shard x 30 (2-star clear) Rune Shard x 30 (3-star clear) |
This EX chapter is a rematch against Aten. A few minor enemies will appear before facing this boss. Just like the Chapter 3 boss fight, employ the same tactics against Aten.
Chapter 3 Rewards
Total Chapter Rewards
| List of Rewards |
|---|
| Information Coming Soon! |
Black Beacon Related Guides
List of All Walkthrough Guides
| All Black Beacon Walkthroughs | ||
|---|---|---|
| Chapter 1 | Chapter 2 | Chapter 3 |
| Chapter 4 | Chapter 5 | Chapter 6 |
Comment
Author

Chapter 3 Walkthrough Guide (Normal)
Rankings
Gaming News


![Monster Hunter Stories 3 Review [First Impressions] | Simply Rejuvenating](https://img.game8.co/4438641/2a31b7702bd70e78ec8efd24661dacda.jpeg/thumb)
Popular Games

Genshin Impact Walkthrough & Guides Wiki
Honkai: Star Rail Walkthrough & Guides Wiki
Umamusume: Pretty Derby Walkthrough & Guides Wiki
Pokemon Pokopia Walkthrough & Guides Wiki
Resident Evil Requiem (RE9) Walkthrough & Guides Wiki
Monster Hunter Wilds Walkthrough & Guides Wiki
Wuthering Waves Walkthrough & Guides Wiki
Arknights: Endfield Walkthrough & Guides Wiki
Pokemon FireRed and LeafGreen (FRLG) Walkthrough & Guides Wiki
Pokemon TCG Pocket (PTCGP) Strategies & Guides Wiki


Recommended Games
Diablo 4: Vessel of Hatred Walkthrough & Guides Wiki
Cyberpunk 2077: Ultimate Edition Walkthrough & Guides Wiki
Fire Emblem Heroes (FEH) Walkthrough & Guides Wiki
Yu-Gi-Oh! Master Duel Walkthrough & Guides Wiki
Super Smash Bros. Ultimate Walkthrough & Guides Wiki
Pokemon Brilliant Diamond and Shining Pearl (BDSP) Walkthrough & Guides Wiki
Elden Ring Shadow of the Erdtree Walkthrough & Guides Wiki
Monster Hunter World Walkthrough & Guides Wiki
The Legend of Zelda: Tears of the Kingdom Walkthrough & Guides Wiki
Persona 3 Reload Walkthrough & Guides Wiki


All rights reserved
Game Copyright©Glohow Holdings Pte. Ltd. & MINGZHOU Technology Co., Ltd. All Rights Reserved
The content we provide on this site were created personally by members of the Game8 editorial department.
We refuse the right to reuse or repost content taken without our permission such as data or images to other sites.
©Glohow Holdings Pte. Ltd. & MINGZHOU Technology Co., Ltd (Provider)