This survey will take about 1 minute.
Your answers will help us to improve our website.
Warhammer 40K: Space Marine 2
The Best Bulwark Builds
★ Best PvE Classes | Best PvP Classes | Best Weapons
☆ Classes and Builds: Tactical | Assault | Vanguard
┗Bulwark | Sniper | Heavy
★ All Weapons | Armor Customization | Chapters
☆ Mission Lists: Campaign and Operations
★ Locations: Dataslates | Armory Data | Gene-Seeds
Bulwark is one of the six classes available in Warhammer 40K: Space Marine 2. See the best Bulwark builds and loadout, the best weapons and perks, how to pass all Bulwark Trials, as well as how to play this class!
List of Contents
Bulwark Class Overview
Bulwark Class Abilities
| Bulwark Class Information | |
|---|---|
 Bulwark |
|
| Class Perk | Armour Class |
| Chapter Banner | 3 |
| Chapter Banner Description | |
| A placed banner restores Armour to all Squad Members in the area of effect. | |
| PvE Rating | PvP Rating |
|
|
|
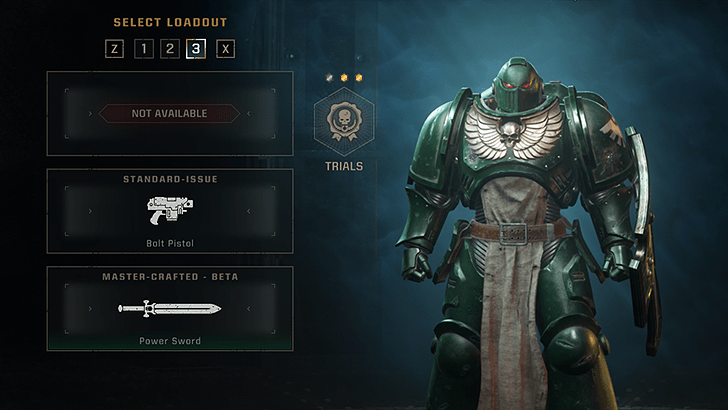
Bulwark Class Builds and Loadout
| Bulwark Builds | |
|---|---|
| Endgame (Power Sword) |
Endgame (Power Fist) |
| Mid-Game | Early Game |
Endgame Bulwark Power Sword Class Build
Class Perk Build
| Bulwark Class Perk Build | |||
|---|---|---|---|
| Core | Forward Momentum | Scrambled Targeting | Armour Reinforcement |
| Team | Advanced Conditioning | ||
| Gear | Focused Strength | Invigorating Icon | Rejuvenating Effect |
| Signature | Defensive Mastery | ||
This build takes perks up to Level 23. The Bulkwark's tankiness shines even better in the late game, as Armour Reinforcement allows him to restore 1 armour segment per non-finisher gun strike. Forward Momentum and Focused Strength allows you to get more out of the Storm Shield, letting you seamlessly transition between crowd control and melee combat.
Invigorating Icon is a highly useful support skill, and will give your teammates a chance to restore their contensted health to the fullest when an enemy is ripe for execution. Defensive Mastery is kept as the best reactive skill of the Bulwark, allowing him to instantly open Extremis enemies to execution on parry when needed.
Weapon Builds
| Bulwark Class Weapon Build | |||
|---|---|---|---|
| Primary Weapon | NOT AVAILABLE FOR THIS CLASS | ||
| Secondary Weapon |
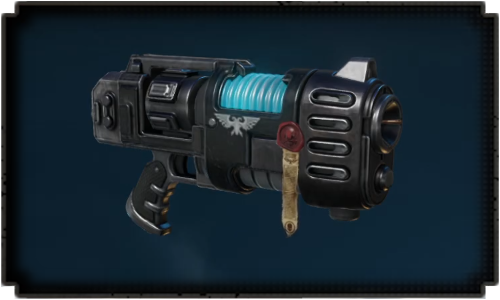
 Plasma Pistol Plasma Pistol (Ophelian Liberation) |
||
| Secondary Weapon Perks |
Standard: Master-Crafted:
• Rampage
Artificer:Relic: |
||
| Melee Weapon |
 Power Sword Power Sword (Gathalamor Crusade) |
||
| Melee Weapon Perks |
Standard: Master-Crafted: Artificer: Relic: |
||
For the late and endgame, the Ophelian Liberation Relic version of the Plasma Pistol with a 120 magazine capacity is our choice pick for a strong, consistent ranged option for the Bulwark. Reach the Relic mastery with the weapon and get the Retaliation weapon perk for a damage buff on perfect dodges.
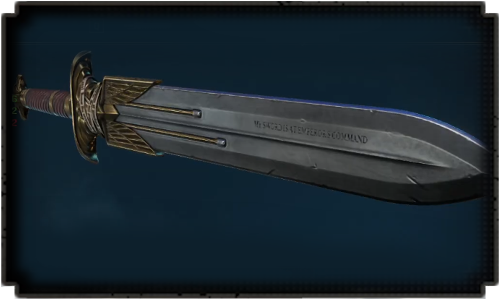
The Gathalamor Crusade with Fencing Defence is the choice Power Sword option for the Bulwark, providing satisfactory damage at 11 Strength with the Speed of 7. This is the quickest Power Sword with the best defence type for both elites and Minoris enemies.
Endgame Bulwark Power Fist Class Build
Class Perk Build
| Bulwark Class Perk Build | |||
|---|---|---|---|
| Core | Forward Momentum | Scrambled Targeting | Armour Reinforcement |
| Team | Advanced Conditioning | ||
| Gear | Focused Strength | Invigorating Icon | Rejuvenating Effect |
| Signature | Defensive Mastery | ||
This build maintains the same class perk setup as the Power Sword Build, with Armour Reinforcement in and making gun strikes one of your primary means of retaining armour.
Invigorating Icon still remains as a highly useful support skill to restore teammates's contensted health back to full on executions Defensive Mastery remains as the best reactive skill for instantly bringing down Majoris and Extremis enemies to execution.
Weapon Builds
| Bulwark Class Weapon Build | |||
|---|---|---|---|
| Primary Weapon | NOT AVAILABLE FOR THIS CLASS | ||
| Secondary Weapon |
Plasma Pistol (Ophelian Liberation) |
||
| Secondary Weapon Perks |
Standard: Master-Crafted:
• Rampage
Artificer:Relic: |
||
| Melee Weapon |
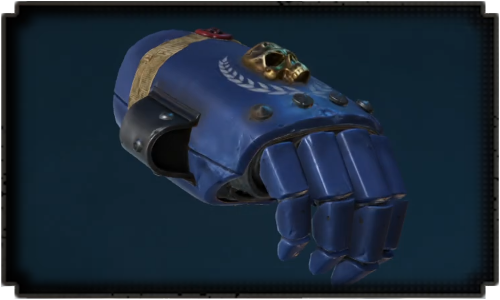
 Power Fist Power Fist (Aggamedes's Gift - Beta) |
||
| Melee Weapon Perks |
Standard: Master-Crafted: Artificer:
• Rally
Relic: |
||
Similar to the Power Sword Build, the Ophelian Liberation Relic version of the Plasma Pistol with a 120 magazine capacity is still our choice ranged option for the Bulwark.
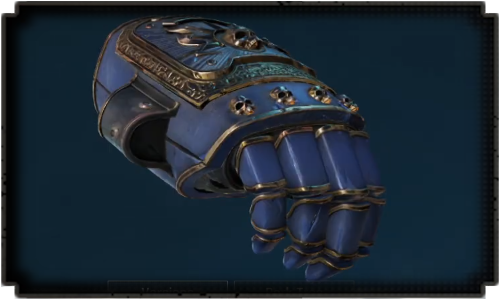
Aggamedes's Gift Beta is a good Relic version of the Power Fist for its Fencing defence stat, making it easier for you to get the most of the Bulwark's parries. It also has the fastest speed of the Power Fists, giving enough time to react to attacks and perform combos.
Mid-Game Bulwark Class Build
Class Perk Build
| Bulwark Class Perk Build | |||
|---|---|---|---|
| Core | Intimidating Aura | Shock and Awe | Defensive Advantage |
| Team | Advanced Conditioning | ||
| Gear | Concussive Force | Merciless Resolve | Rejuvenating Effect |
| Signature | Defensive Mastery | ||
This build takes perks up to Level 17. For building into the mid game, you will want to ease further into mastering parries. Take up parry-based skills such as Defensive Mastery which can help tremenduously in fighting Extremis-level threats like Tyranid Raveners or Lictors.
For you Chapter Banner ability, it would be good to keep its perks versatile. Keep Rejuvenating Effect in for clutch instant revives. Rapid Regeneration is situational and can be put on the side, since while it gives extremely fast shield generation, it will only be up for 5 seconds.
Weapon Builds
| Bulwark Class Weapon Build | |||
|---|---|---|---|
| Primary Weapon | NOT AVAILABLE FOR THIS CLASS | ||
| Secondary Weapon |
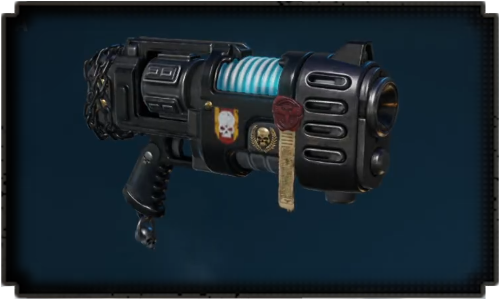 Plasma Pistol Plasma Pistol (Drogos Reclamation - Alpha) |
||
| Secondary Weapon Perks |
Standard: Master-Crafted:
• Rampage
Artificer: |
||
| Melee Weapon |
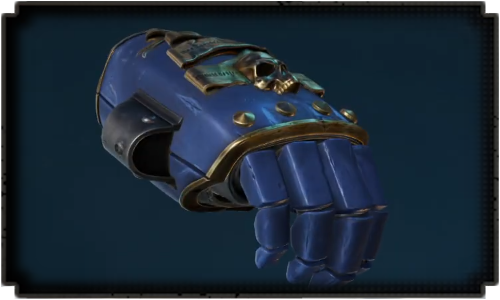 Power Fist Power Fist (Achortan Oath - Alpha) |
||
| Melee Weapon Perks |
Standard: Master-Crafted: Artificer:
• Rally
|
||
In the mid-game, we still keep the reliable Plasma Pistol, upgrading it to the Achortan Oath Alpha version in the Artificer Mastery. Having enough ammo is still the key to having ranged and precision option against swarms of enemies.
For Power Fists in melee, reach the Drogos Reclamation Alpha version in the Artificer Mastery. Make use of its Heavy Attacks buffed by your weapon perks, and use the Cannon Punch as a great gap-closer and evasive attack.
Early Game Bulwark Class Build
Class Perk Build
| Bulwark Class Perk Build | |||
|---|---|---|---|
| Core | Conviction | Armour of Contempt | Defensive Advantage |
| Team | Unyielding Ceramite | ||
| Gear | Concussive Force | Purity of Purpose | Rejuvenating Effect |
| Signature | Emergency Countermeasure | ||
Early game builds are pretty much straight forward for the Bulwark, taking all available perks from Level 1 to Level 9. These will only aim to improve on your overall performance, making it a bit easier to take on Operations.
Weapon Builds
| Bulwark Class Weapon Build | |||
|---|---|---|---|
| Primary Weapon | NOT AVAILABLE FOR THIS CLASS | ||
| Secondary Weapon |
 Plasma Pistol Plasma Pistol (Master-Crafted - Beta) |
||
| Secondary Weapon Perks |
Standard: Master-Crafted:
• Rampage
|
||
| Melee Weapon |
 Power Fist Power Fist (Master-Crafted - Alpha) |
||
| Melee Weapon Perks |
Standard: Master-Crafted: |
||
For early game, we opted for the Power Fist as the Bulwark's melee option for its speed and simplicity. Go for the Master-Crafted Alpha version for higher damage and maintaining Balance defence to still allow Perfect Parries, something you will want to practice before getting Perfect Parry-based class perks at a later stage.
For the Bulwark's ranged option, we chose Plasma Pistol for its capability to charge in addition to its heat management with a perk for bonus damage radius for Charged Shots.
Best Bulwark Weapons
Best Weapons for Bulwark
| Weapon | Explanation |
|---|---|
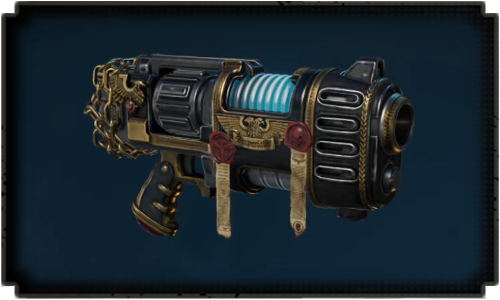
 Plasma Pistol Plasma Pistol
|
The Plasma Pistol offers unparalleled flexibility when facing enemies. It can one shot some enemies with its charge shot and also shoot multiple shots in close range. The only thing you have to worry about is the overheat meter but with the weapon perks that come with it, it should be easy to manage. |
 Power Fist Power Fist
|
Though the Power Sword is a great choice for the Bulwark, the Power Fist by far is the best choice. It has powerful gap closers and charged heavy attacks which is great for tank classes like the Bulwark. |
The two best Bulwark weapons are the Plasma Pistol and the Power Fist. Though the Power Sword is a good option, the mobility offered by the Power Fist is a lot more advantageous in most situations. What more, it has a really good gap closer so you can run and initiate fights for your team.
All Bulwark Primary Weapons
| This class cannot use any weapons of this type. |
All Bulwark Secondary Weapons
 Bolt Pistol Bolt Pistol
|
Plasma Pistol
|
All Bulwark Melee Weapons
 Chainsword Chainsword
|
Power Fist
|
 Power Sword Power Sword
|
Best Bulwark Perks
Best Perks for Bulwark
| Perk | Explanation |
|---|---|
| Forward Momentum | This increases melee damage after a Shield Bash which you will do most of the time. This has a duration of 5s, but can be easily refreshed. |
| Rejuvenating Effect | An emergency revive button for your allies. Allows a quick revive if they are incapacitated. |
| Advanced Conditioning | Contested Health fade is slowed, so the squad can use contested health regen perks more effectively. |
| Defensive Mastery | Useful against bosses so you can open them up for attacks. |
| Armour Reinforcement | Now allows non-finisher Gun Strikes to recover armor. Reinforces the reputation of the Bulwark as a tank! |
| Focused Strength | Works well with Armour Reinforcement as you can get more Gun Strikes with the Shield Bash's knockback effect. Also gives you a longer window to execute said Gun Strike. |
All Bulwark Class Skills
| Level | Class Perk | Effect |
|---|---|---|
| 1 | Chapter Banner | Type: Starting Health increases by 20% |
| 2 | Conviction | Type: Core When your Armour is fully depleted, you take 25% less Health Damage for 5 seconds |
| 3 | Armour of Contempt | Type: Core When you Block a Ranged Attack, enemies within a 10-metre radius take the Damage instead |
| 4 | Defensive Advantage | Type: Core A perfectly timed Parry creates a Shock area for 5 seconds. Cooldown is 30 seconds. |
| 5 | Unyielding Ceramite | Type: Team The delay before Armour begins to passively regenerate is reduced by 5 seconds (base: 25) for all Squad Members |
| 6 | Concussive Force | Type: Gear Shield Bash deals more Damage |
| 7 | Purity of Purpose | Type: Gear The banner deals a small amount of Damage over time to enemies within its area of effect |
| 8 | Rejuvenating Effect | Type: Gear When the banner is activated, it revives Incapacitated Squad Members within its area of effect |
| 9 | Emergency Countermeasure | Type: Signature When your Armour is depleted, a reserve Shock Grenade automatically detonates at your position. Cooldown is 120 seconds. |
| 10 | Intimidating Aura | Type: Core A perfectly timed Parry deals area-of-effect Damage within a 5-metre radius |
| 11 | Shock and Awe | Type: Core Enemies in a Shock area take 25% more Damage |
| 12 | Steel Within | Type: Core When your Health is less than 50%, you take 25% less Health Damage |
| 13 | Advanced Conditioning | Type: Team Contested Health fades 50% more slowly for all Squad Members |
| 14 | Rapid Regeneration | Type: Gear The banner restores Armour 300% faster, but its duration is reduced to 5 seconds |
| 15 | Merciless Resolve | Type: Gear After a Shield Bash, you do not lose control upon taking Heavy Hits and you cannot be knocked back for 5 seconds |
| 16 | Glory's Shield | Type: Gear All Squad Members within the banner's area of effect take 10% less Damage |
| 17 | Defensive Mastery | Type: Signature A perfectly timed Parry instantly Incapacitates a Majoris- or Extremis-level enemy. Cooldown is 120 seconds. |
| 18 | Forward Momentum | Type: Core After a Shield Bash, Melee Damage increases by 25% for 5 seconds |
| 19 | Scrambled Targeting | Type: Core If you are surrounded by 5 or more enemies, you take 20% less Damage from Ranged Attacks |
| 20 | Armour Reinforcement | Type: Core Non-Finisher Gun Strikes also restore Armour |
| 21 | Effective Formation | Type: Team All Squad Members take 20% less Health Damage from Terminus-level enemies |
| 22 | Focused Strength | Type: Gear Shield Bash knocks enemies back and makes them lose control for a longer period of time |
| 23 | Invigorating Icon | Type: Gear When the banner is activated, all Squad Members regain maximum Contested Health |
| 24 | Inspiration | Type: Gear All Squad Members within the banner's area of effect deal 10% more Damage |
| 25 | Armoured Advance | Type: Signature If you have Armour remaining, you do not lose control upon taking Heavy Hits and you cannot be knocked back |
Bulwark Trials Guide
| Jump to a Trial! | ||
|---|---|---|
| Trial 1 | Trial 2 | Trial 3 |
Bulwark Trial 1: Chapter Banner
| Directives |
|---|
| Complete in: 40 seconds |
| Complete in: 50 seconds |
| Protect an ally from Incapacitation |
Complete all three (3) to get the full rewards.
Throw Your Grenades into the Hordes at the Start
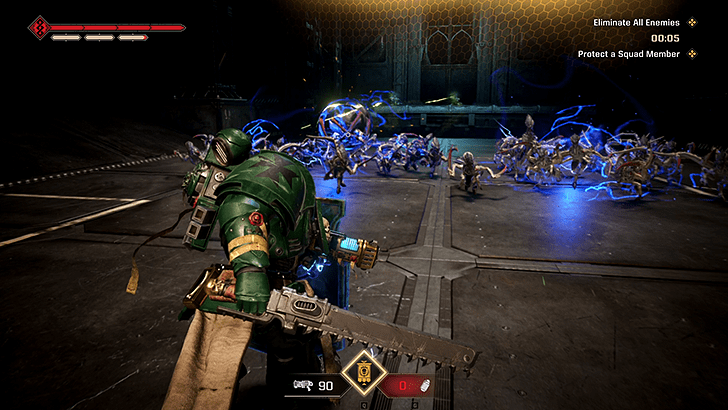
At the start of the trial, two hordes of Hormagaunts will appear in front of you, chuck your two Shock Grenades at each horde to eliminate the Hormagaunts immediately and quicken the completion of the trial.
Parry, Gun Strike, and Execute the Tyranid Warrior
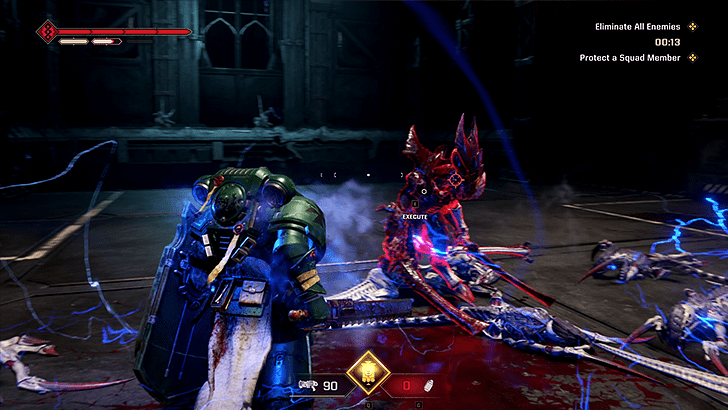
After dealing with the Hormagaunts, parry the attacks of the lone Tyranid Warrior to get it to execution level. Defeat the Tyranid Warrior, then focus on the Termagaunts in the distance.
Charge Shot the Faraway Termagants with the Plasma Pistol
Use the Plasma Pistol's charged shots to immediately kill the faraway Termagants and complete the trial.
Bulwark Trial 2: Make Your Stand
| Directives |
|---|
| Complete in: 150 seconds |
| Complete in: 120 seconds |
| Hit 10 enemies with Shield Bash |
Complete all three (3) to get the full rewards.
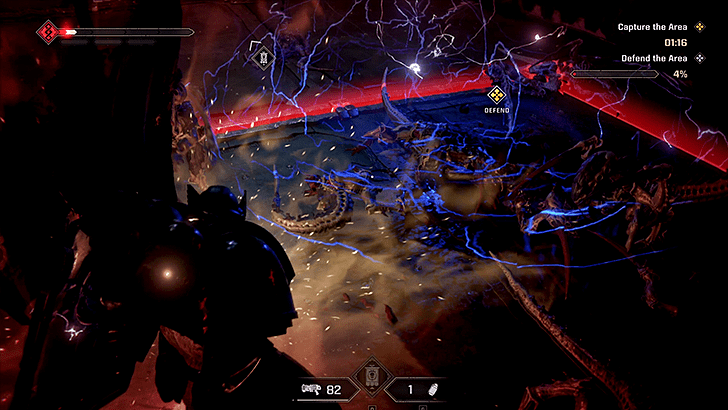
Stay Within the Objective Zone
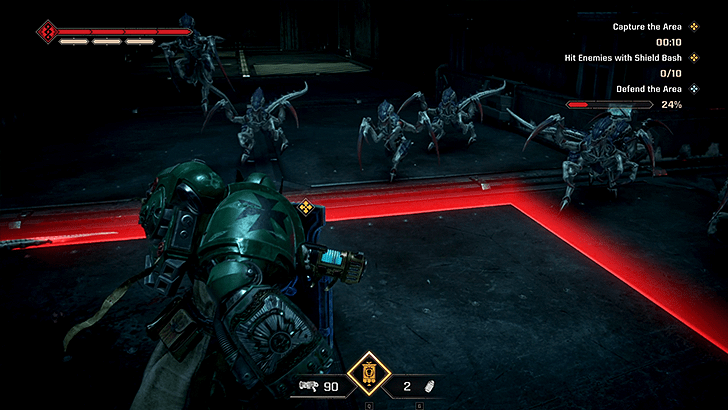
As soon as the trial starts, run towards the objective zone and keep your shield up. Stay within the zone and capture them since that is the only way to progres the trial objectives.
Kill Hormagaunts to make defending easier but note that you do not need to kill all of them. You only need to secure the area by staying in one until the next.
Hold Out by Guarding and Using Shield Bash
Hold up your Storm Shield to a guard stance by holding down the Parry button. Then maneuvre around the Hormagaunts within the objective zone to keep yourself protected and to keep the zone capture in progress.
Catch Hormagaunts Leaping Towards You for Restoring Armor
Parry-catch Hormagaunts leaping towards you to for free I-frames (via execution) and for restore some of your armor. You know that a leap is coming when there is a sound cue and a blue parry glow.
If you have your shield up, you can release momentarily and tap the parry button to catch the leaping Hormagaunt.
Save Your Grenades, Ammo, and Chapter Banner for Last
Lastly, you will want to save using any of your other gear as a last resort to keep enemies away from you. Use the Plasma Pistol for taking out enemies quickly when too many come around and throw grenades to slow down groups.
Use the Chapter Banner when you are low on health and need to keep your survivability up.
Bulwark Trial 3: Shield of the Imperium
| Directives |
|---|
| Complete in: 120 seconds |
| Hit 10 enemies with Shield Bash |
| Protect an ally from Incapacitation |
Complete all three (3) to get the full rewards.
Shield Bash the Hormagaunts First
The Hormagaunts will come toward you in groups, so focus first on Shield Bashing them to complete the related objective. You can then focus on killing them after.
Charge Shot the Faraway Tyranid Warior or Let Your Ally Handle It
You can Charge Shot the Tyranid Warrior in the distance right away so that you do not have to deal with any ranged attacks. But you can also let your ally (a Sniper) take care of it. Just make sure to keep them protected.
Place the Chapter Banner Near Your Ally
You and your ally will be both overwhelmed, so do not forget to use your Chapter Banner. You can use it once the entire horde has closed in on your ally. But you can also save it later for the Ravener fight.
Expect and Parry the Ravener
After the whole of Hormagaunts, a Ravener will appear from below and attack either you or your ally. Attack it to bring its attention to you, then patiently wait for an opening for a parry and a gun strike. Execute the Ravener whenever the option becomes available.
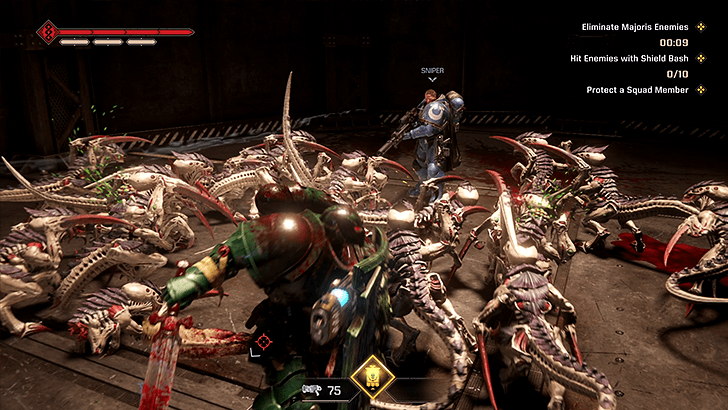
How to Play Bulwark Class
- Use the Shield for Blocks and Crowd Control
- Shield Cancel for Faster Offense and Defense
- Provide Armor with the Chapter Banner
- Primarily A Melee Class
- Change Styles with the Power Sword
- Combo with the Power Fist
Use the Shield for Blocks and Crowd Control

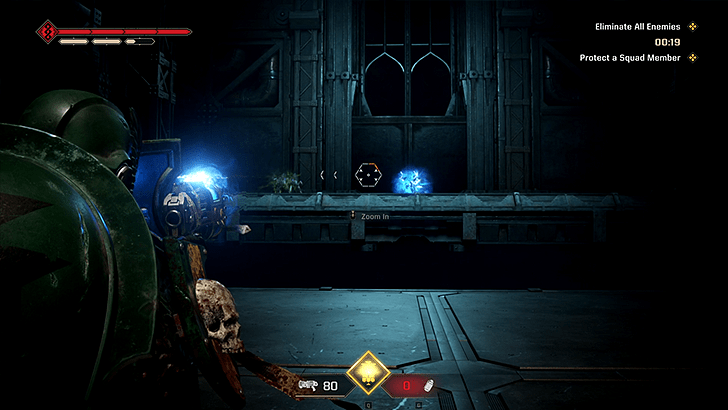
Bulwarks can negate or reduce damage from enemy strikes and ranged attacks by raising their Storm Shield when holding the Parry button or sprinting. This is excellent for blocking multiple frontal attacks and drawing attention of enemies, but be cautious since you can still be attacked from the side, rear, or by red glowing unblockable attacks.
The Storm Shield also serves as an excellent attack interrupt or flinch via its Shield Bash done by holding the Parry button and doing a light attack. Use this to quickly go in, damage and interrupt an enemy, and get back on your guard.
Shield Cancel for Faster Offense and Defense
The Bulwark's attacks (including charged heavy attacks) can be cancelled with a shield guard by holding the parry button during the attack animation. This will override the attack animation and put you into a guard stance immediately. Do note to hold the button, as tapping can accidentally lock you into a parry animation instead.
This opens up you up to fast combo techniques, such as spamming the Power Fist's Cannon Punch quickly by shield cancelling as soon as the attack connects with the target. This works for any melee weapon used by the Bulwark.
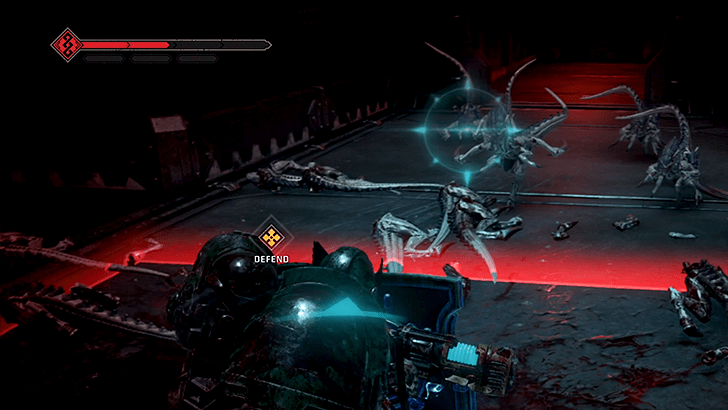
Provide Armor with the Chapter Banner
Bulwarks are also great at providing defensive support, as they can place their Chapter Banner and regenerate yours and any teammate's armor within the vicinity of the banner up to the maximum armour class excluding bonus armour from Armour Boost in a mission.
The Chapter Banner is most useful when you are in a situation of being overwhelmed by strong enemies, as it allows you to tank any damage you take when you are surrounded.
Chapter Banners Can Provide Additional Support
In addition to providing armor to allies, the Chapter Banner can also provide some additional support buffs and effects to whoever is within the AoE of the banner. Players may choose to either get the capability to revive teammates, provide damage mitigation, or damage buff depending on the Perks your Bullwark may be running.
Primarily A Melee Class
Bulwarks are primarily a melee class, capable using either the Power Sword, Chain Sword, or a Power Fist. They are limited in ranged options, only being able to hold a pistol in exchange for being able to block with the shield.
This setup lets the player focus on a tank style that can both push and defend against hordes, as well as providing significant support to other allies nearby.
Change Styles with the Power Sword
| Style | Description | Best Use |
|---|---|---|
| Speed Style | Fast attack combo with great reach. | Best for gap-closing, singular targets. |
| Power Style | Slow, wide swings. | Best against swarms and groups. |
When using the Power Sword, you can make use of its style change mechanic done by holding the melee button. Doing so will cause the Bulwark to lift the sword outward, changing the blue charge effect of the weapon. A strong blue glow symbolizes the Power Style, while the thin, lighter glow symbolizes the Speed Style.
Use the Speed Style for gap-closing and quickly dispacting single targets, and the Power Style for dealing with mobs.
Power Sword Versions, Perks, and Stats
Combo with the Power Fist
The Power Fist is a strong weapon to use when moving through groups of enemies. It incorporates light attack combos with charged heavy attacks that can blast through swarms.
It also has a powerful gap-closer called Cannon Punch (done by using a light attack during a dodge) that is best used for pushing against groups or as a reaction after a dodge.
Power Fist Versions, Perks, and Stats
Warhammer 40K: Space Marine 2 Related Guides

All Space Marine 2 Classes
| All Space Marines 2 Classes | ||
|---|---|---|
 Tactical Tactical |
 Assault Assault |
 Vanguard Vanguard |
| Bulwark |
 Sniper Sniper |
 Heavy Heavy |
Comment
3  Jack about 1 year
Is this gonna get updated since the big update we got?
Author

The Best Bulwark Builds
Please participate in our site
improvement survey
03/2026
improvement survey
03/2026
Would you assist in
improving Game8's site?
improving Game8's site?

×
We are listening to our users' valuable opinions and discussing how to act on them.
The information collected through this survey will be used for the purpose of improving our services. In addition, the information will only be disclosed a part of a statistic in a format that will not allow identification of personal information.
Begin Survey
Not Now
×
Please rate each item regarding Game8.co's Advertisements.
Amount of Ads
Very Dissatisfied
Somewhat Dissatisfied
Fine
Somewhat Satisfied
Highly Satisfied
Placement of Ads
Timing of Ad Display
Ad Loading Speed
Safeness of Ads
Content of Ads
×
Please rate each item regarding Game8.co's Quality of Articles.
Amount of information
Very Dissatisfied
Somewhat Dissatisfied
Fine
Somewhat Satisfied
Highly Satisfied
Frequency of updates
Speed of new information
Accuracy of articles
Understandibility of articles
Readability of sentences
×
Please rate each item regarding Game8.co's Usability of the Site.
Ease of finding information
Very Dissatisfied
Somewhat Dissatisfied
Fine
Somewhat Satisfied
Highly Satisfied
Loading Speed
Use of Color
Font Size
Visibility of Images
Easy to Understand Layout
×
Please rate each item regarding Game8.co's Message Boards, Comments.
Ease of Writing
Very Dissatisfied
Somewhat Dissatisfied
Fine
Somewhat Satisfied
Highly Satisfied
Readability
Ease in Finding Information
Comment Quality
Comment Quantity
Admin Response
×
Please rate each item regarding Game8.co's Site's new design.
Please rate our site's new design
Very Dissatisfied
Somewhat Dissatisfied
Fine
Somewhat Satisfied
Highly Satisfied
Do you think that the website's design change makes the site easier to use?
Has the new design made it easier for you to find information on the site?
Has the new design improved the overall visual appeal of the site?
How would you rate your overall satisfaction with the new design of the site?
×
How likely are you to recommend Game8 to someone you know?
Very Unlikely
0
1
2
3
4
5
6
7
8
9
10
Very Likely
If you have other opinions regarding potential improvement to the website, please share them with us. We would appreciate your honest opinion.
Note: This is a free response section, so you can proceed without entering anything.
Note: Please be sure not to enter any kind of personal information into your response.
Note: Please be sure not to enter any kind of personal information into your response.
×
Thank You
×
Thank you for participating in our survey! Your answers will help us to improve the quality of our website and services.
We hope you continue to make use of Game8.
We hope you continue to make use of Game8.
Close
Rankings
- We could not find the message board you were looking for.
Gaming News


![Monster Hunter Stories 3 Review [First Impressions] | Simply Rejuvenating](https://img.game8.co/4438641/2a31b7702bd70e78ec8efd24661dacda.jpeg/thumb)
Popular Games

Genshin Impact Walkthrough & Guides Wiki
Honkai: Star Rail Walkthrough & Guides Wiki
Umamusume: Pretty Derby Walkthrough & Guides Wiki
Pokemon Pokopia Walkthrough & Guides Wiki
Resident Evil Requiem (RE9) Walkthrough & Guides Wiki
Monster Hunter Wilds Walkthrough & Guides Wiki
Wuthering Waves Walkthrough & Guides Wiki
Arknights: Endfield Walkthrough & Guides Wiki
Pokemon FireRed and LeafGreen (FRLG) Walkthrough & Guides Wiki
Pokemon TCG Pocket (PTCGP) Strategies & Guides Wiki


Recommended Games
Diablo 4: Vessel of Hatred Walkthrough & Guides Wiki
Cyberpunk 2077: Ultimate Edition Walkthrough & Guides Wiki
Fire Emblem Heroes (FEH) Walkthrough & Guides Wiki
Yu-Gi-Oh! Master Duel Walkthrough & Guides Wiki
Super Smash Bros. Ultimate Walkthrough & Guides Wiki
Pokemon Brilliant Diamond and Shining Pearl (BDSP) Walkthrough & Guides Wiki
Elden Ring Shadow of the Erdtree Walkthrough & Guides Wiki
Monster Hunter World Walkthrough & Guides Wiki
The Legend of Zelda: Tears of the Kingdom Walkthrough & Guides Wiki
Persona 3 Reload Walkthrough & Guides Wiki


All rights reserved
© Saber Interactive and Focus Entertainment. Games are the property of their respective owners.
The copyrights of videos of games used in our content and other intellectual property rights belong to the provider of the game.
The contents we provide on this site were created personally by members of the Game8 editorial department.
We refuse the right to reuse or repost content taken without our permission such as data or images to other sites.
Will this be updated for 6.0? This has been updated in the last few uodates