Cincinnati Bengals Offensive Playbook
★ Season of BOOM Launched
★ Beginner's Guide
★ The Basics: Attributes | Positions | Formations
★ All Player Ratings
★ Modes: Franchise | Superstar | Ultimate
Here is the Offensive Playbook for the Cincinnati Bengals in Madden NFL 25. See all the offense plays for Cincinnati Bengals and all the formations they use!
List of Contents
Cincinnati Bengals Offensive Playbook
Here are all the formations and plays for the Cincinnati Bengals. You can use the navigation table below for each section to get to your desired formation quickly!
Goal Line Offense Formation and Plays
| Click to Jump to a Section | ||
|---|---|---|
| Goal Line Offense | Shotgun | Singleback |
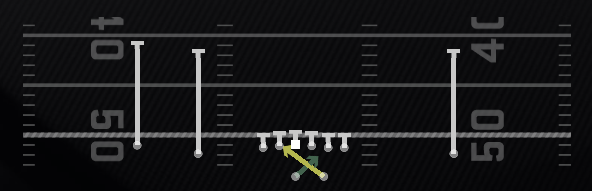
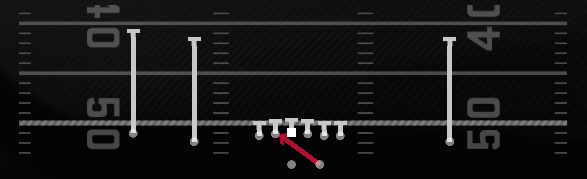
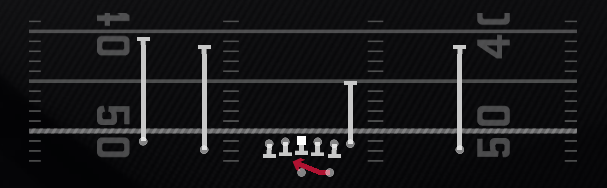
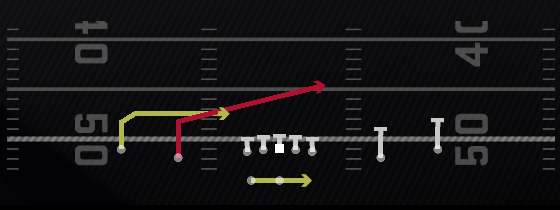
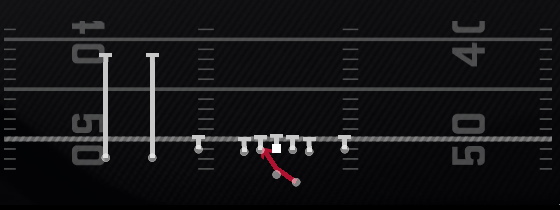
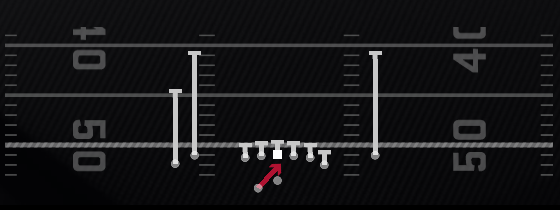
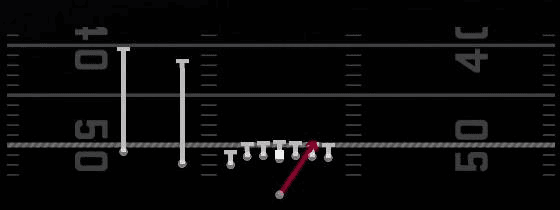
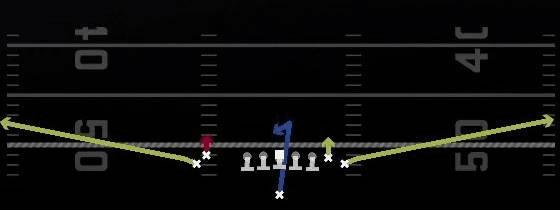
Normal
 |
 |
 |
 |
 |
 |
 |
 |
 |
 |
Shotgun Formation and Plays
| Click to Jump to a Section | |||
|---|---|---|---|
| Goal Line Offense | Shotgun | Singleback | - |
Shotgun Formation and When to Use
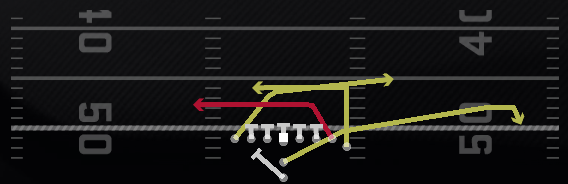
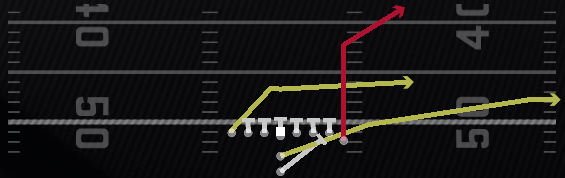
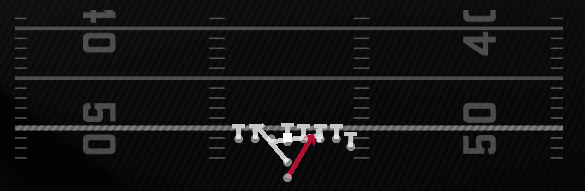
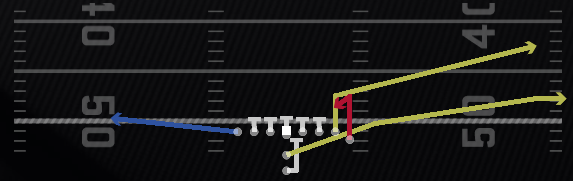
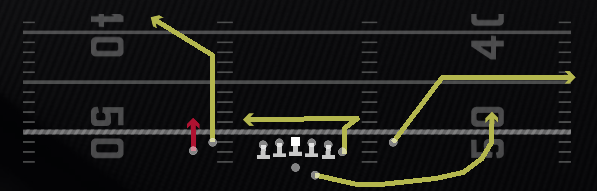
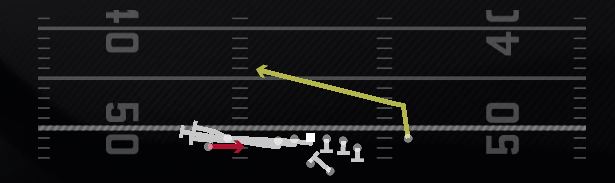
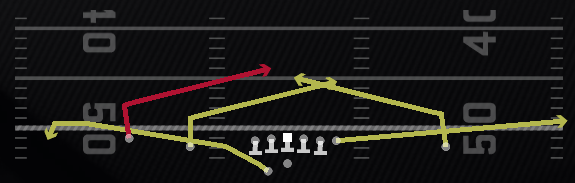
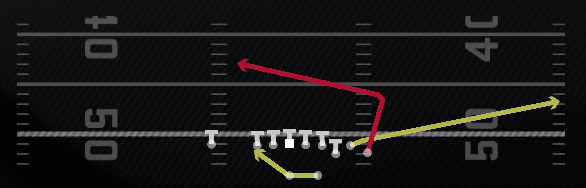
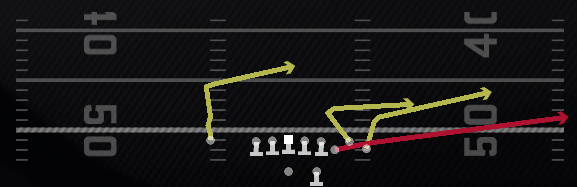
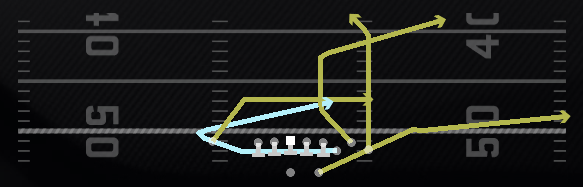
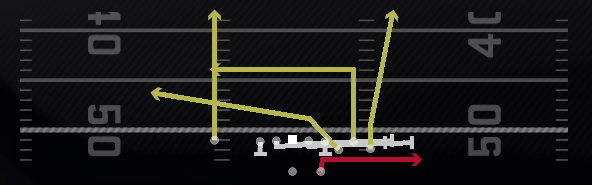
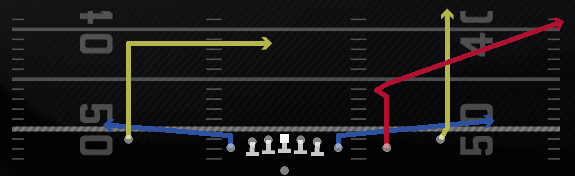
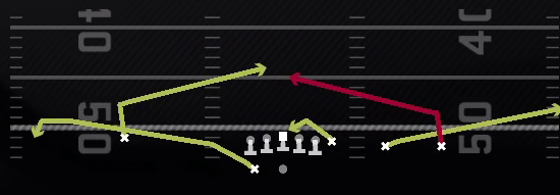
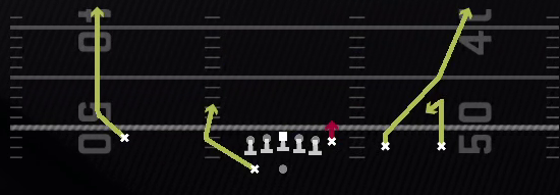
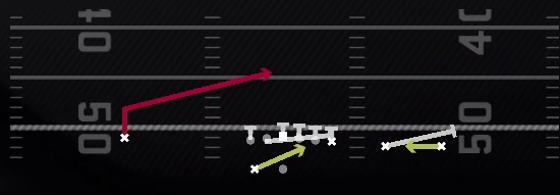
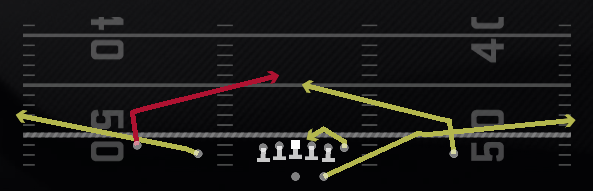
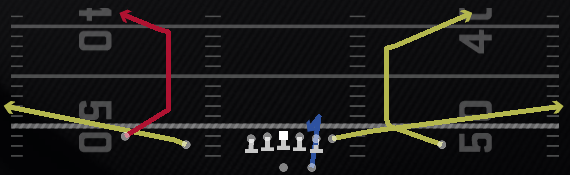
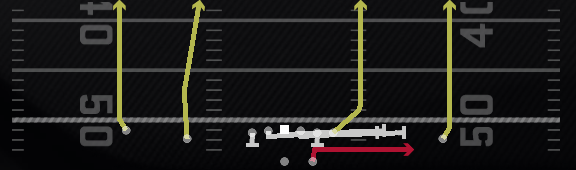
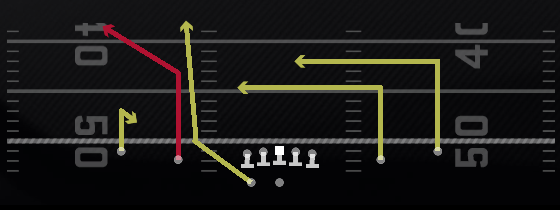
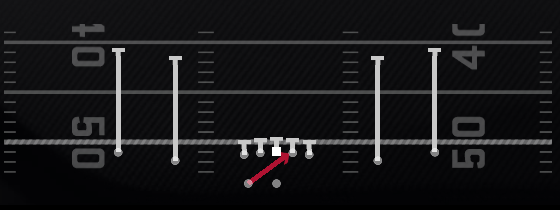
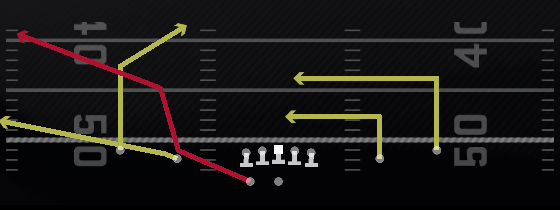
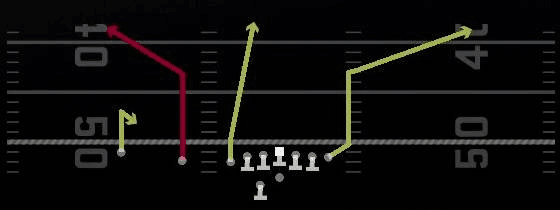
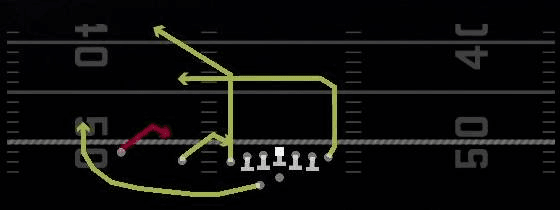
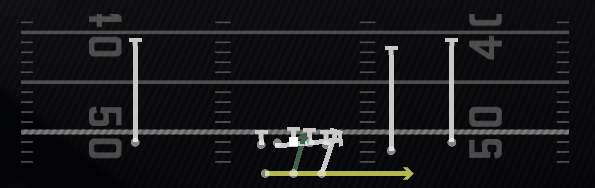
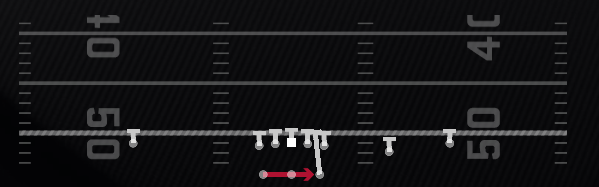
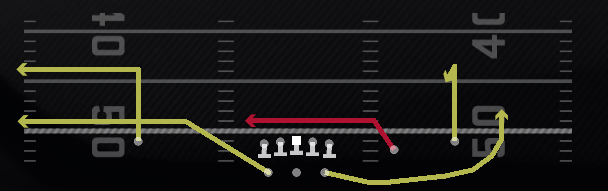
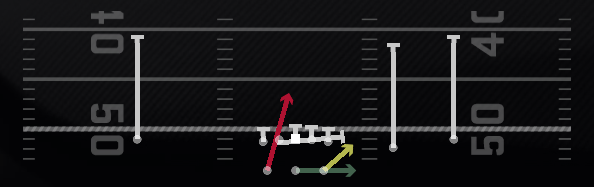
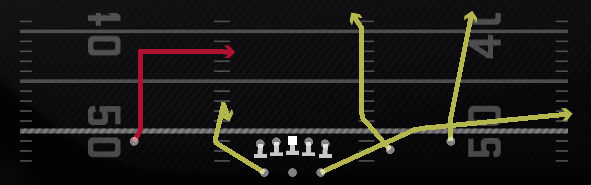
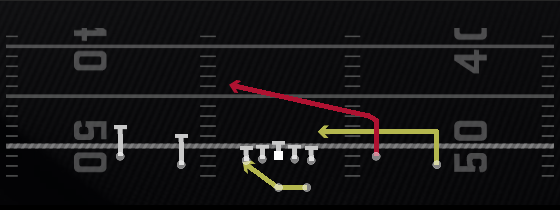
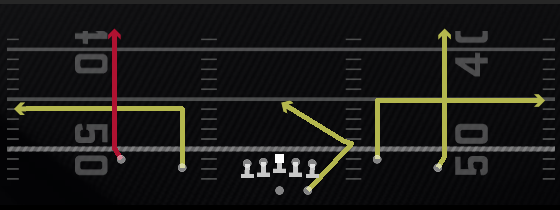
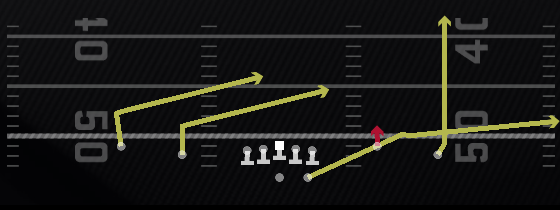
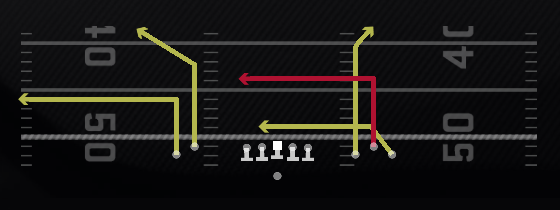
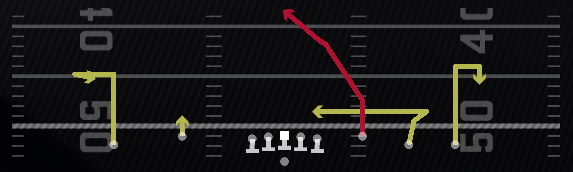
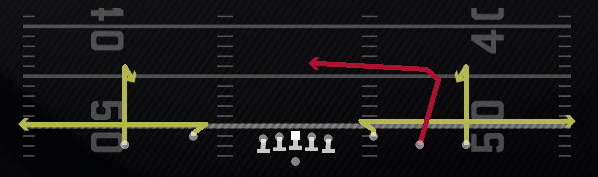
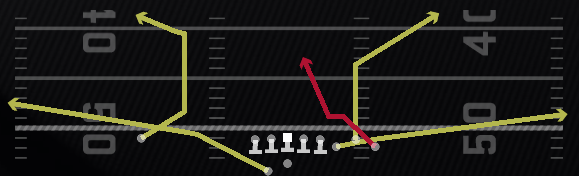
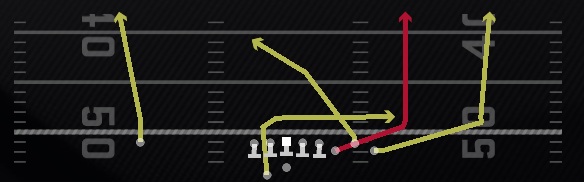
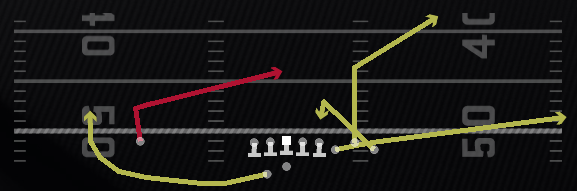
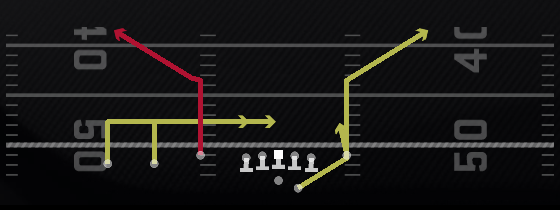
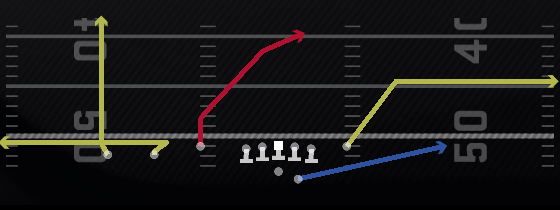
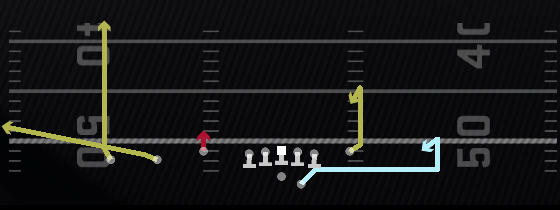
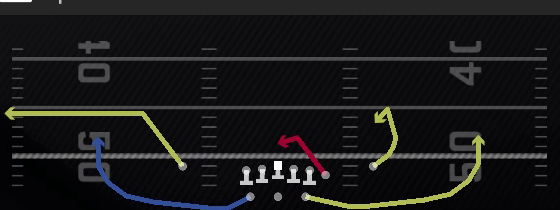
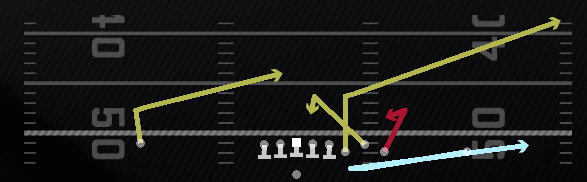
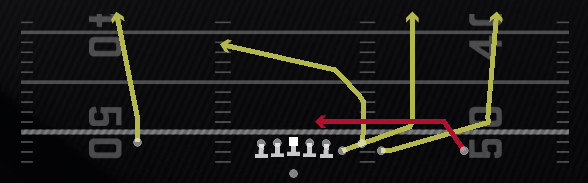
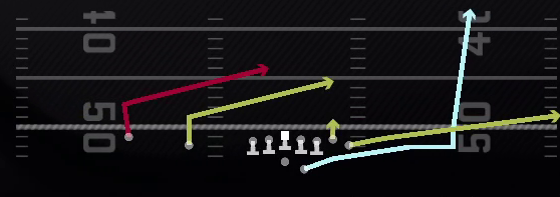
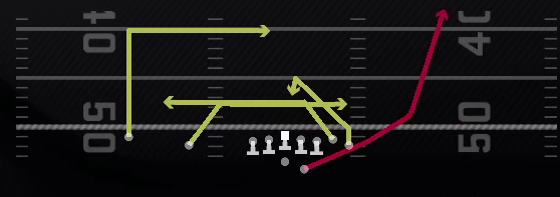
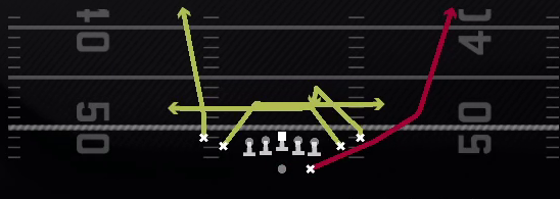
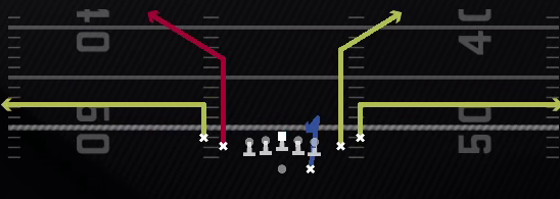
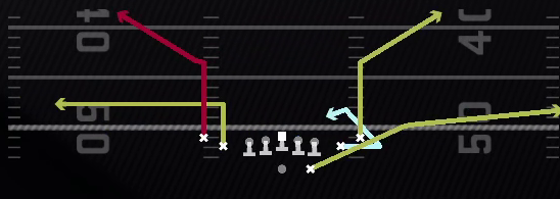
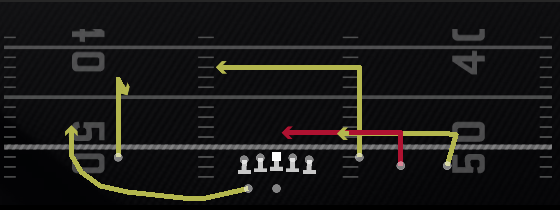
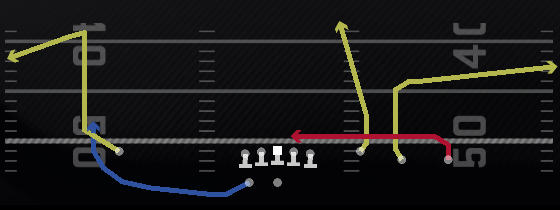
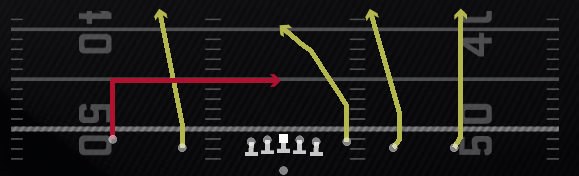
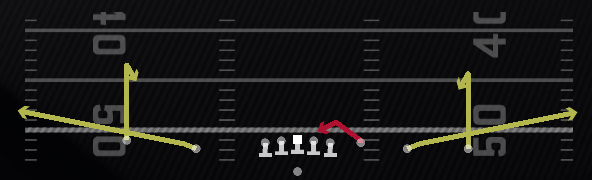
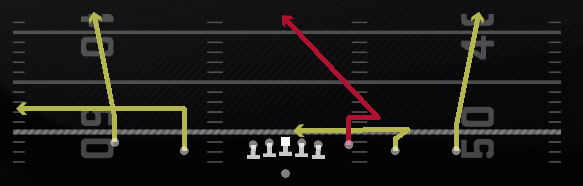
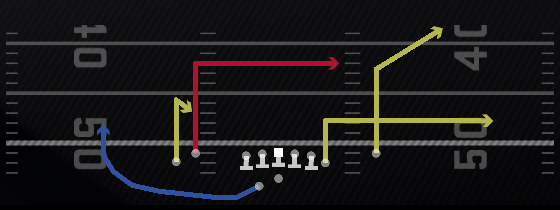
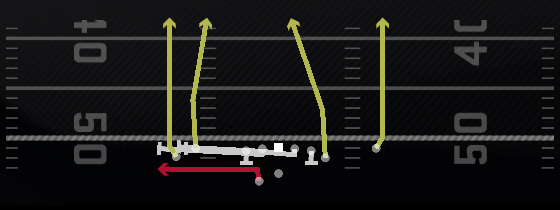
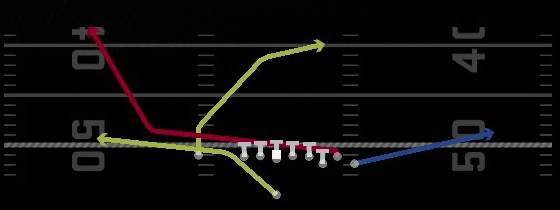
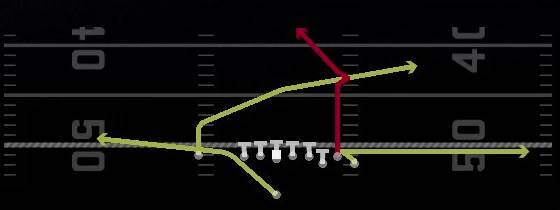
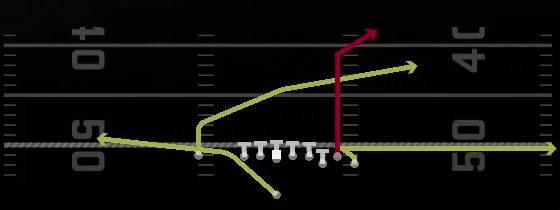
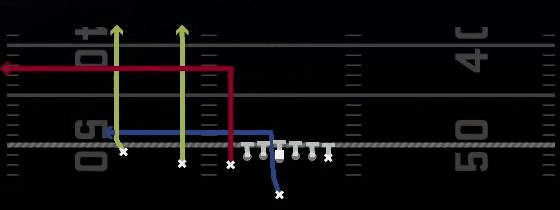
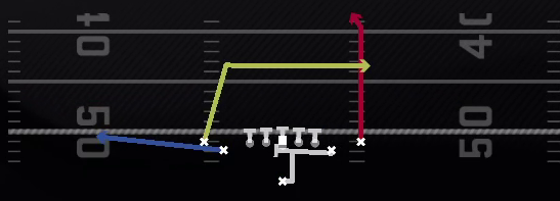
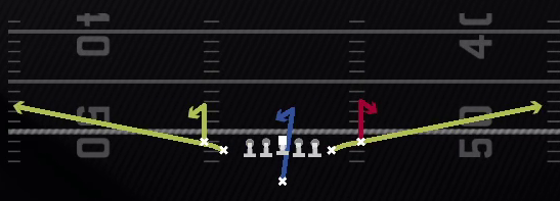
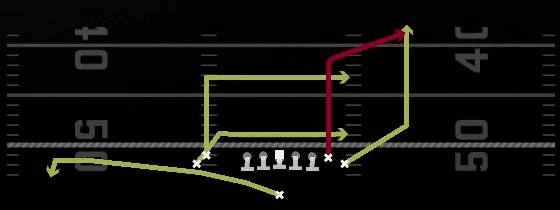
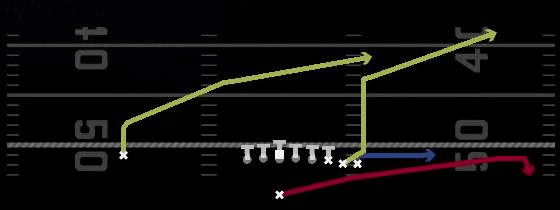
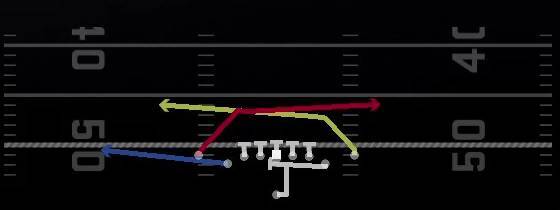
Tight Y Off
 |
|
 |
 |
 |
 |
 |
|
 |
 |
 |
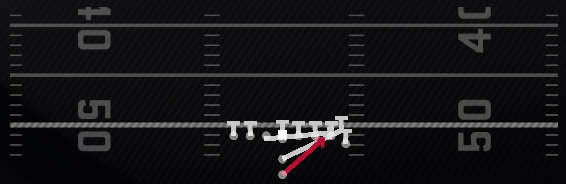
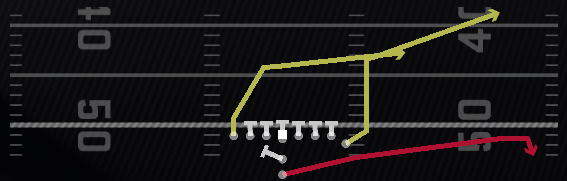
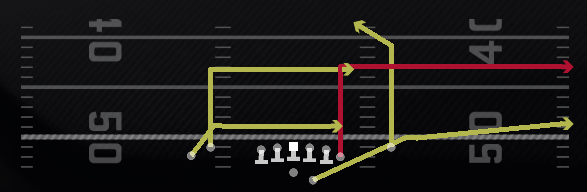
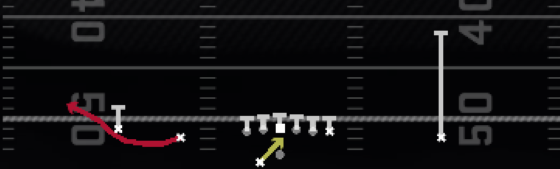
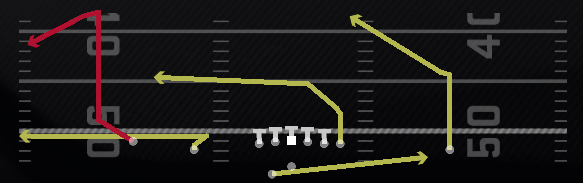
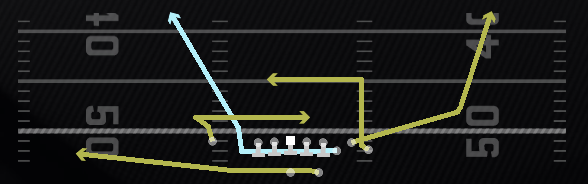
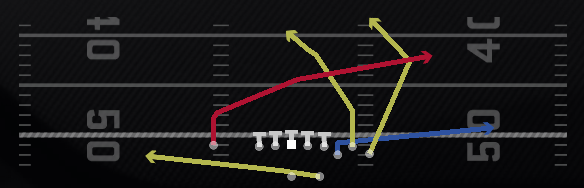
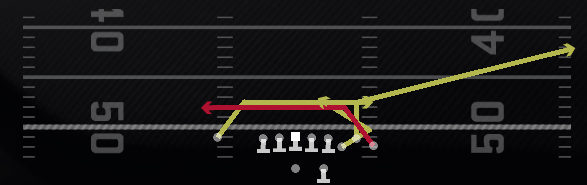
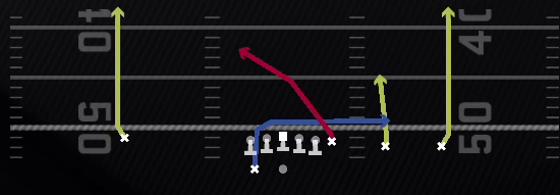
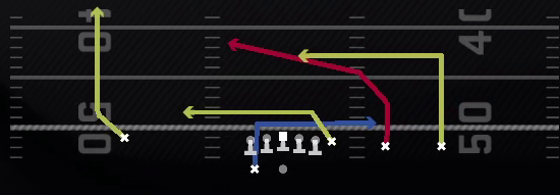
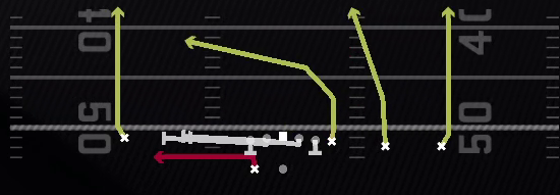
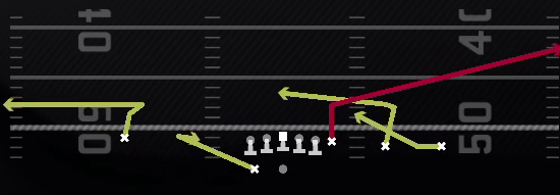
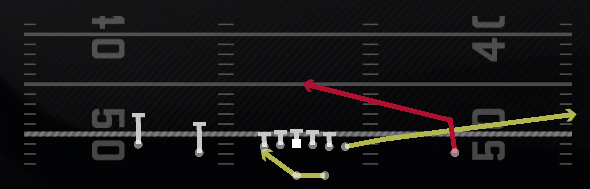
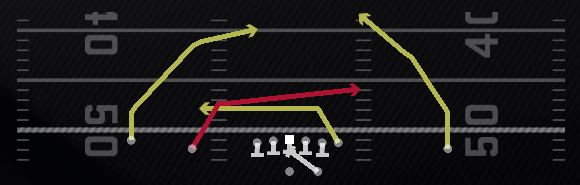
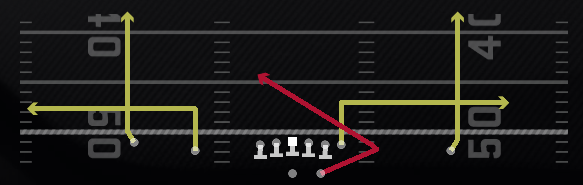
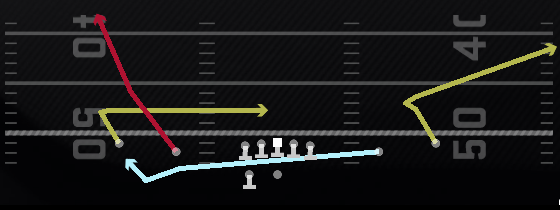
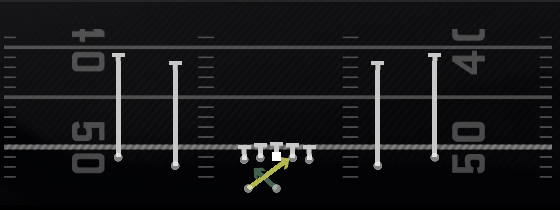
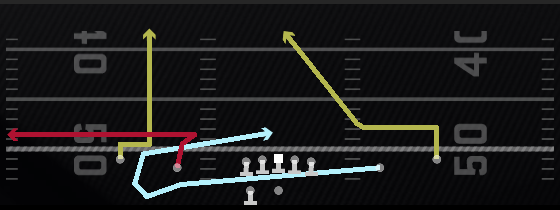
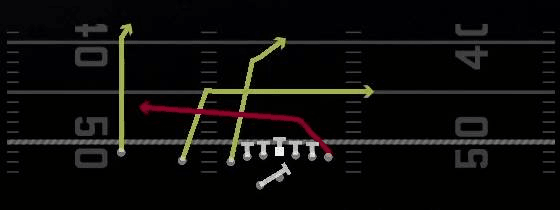
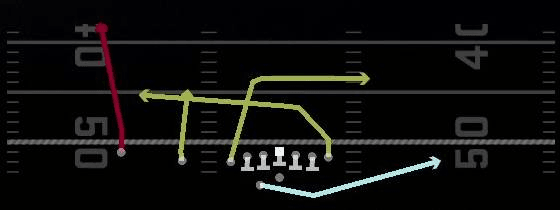
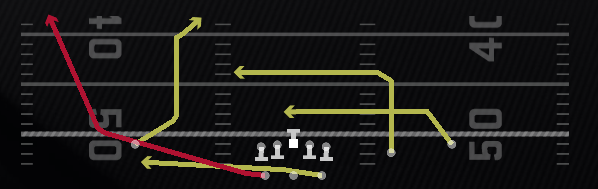
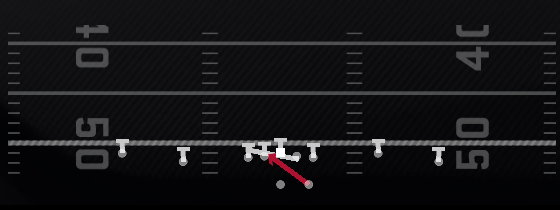
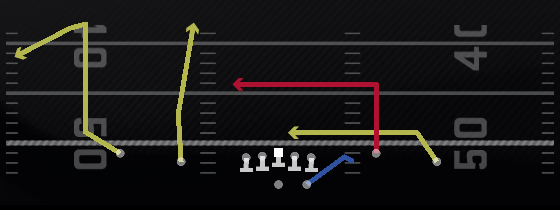
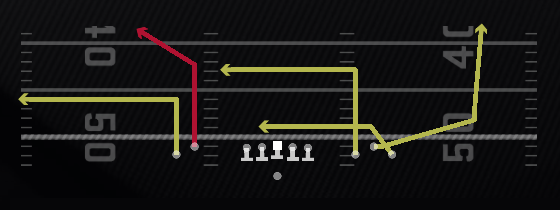
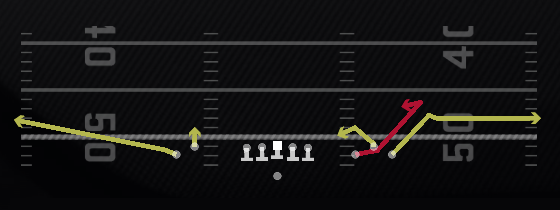
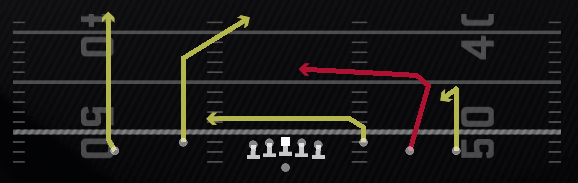
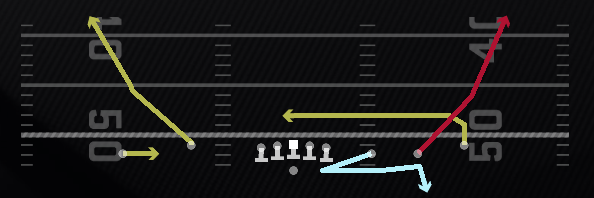
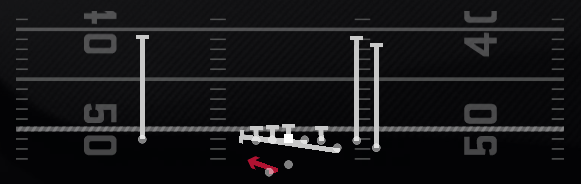
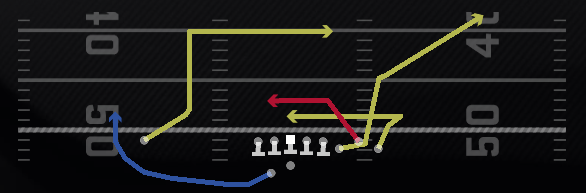
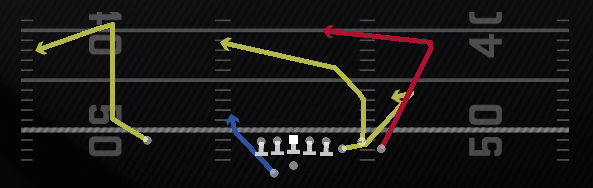
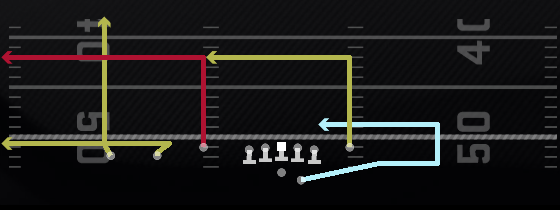
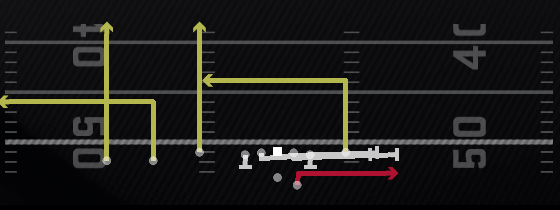
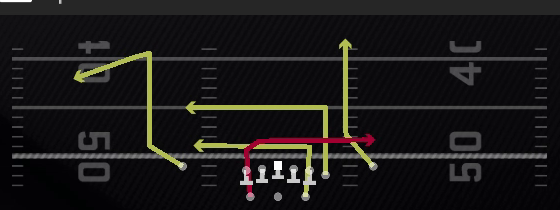
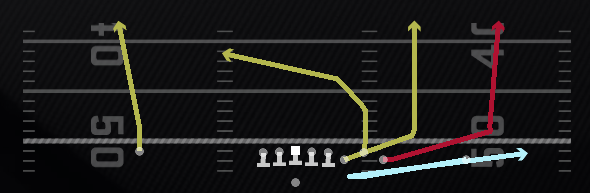
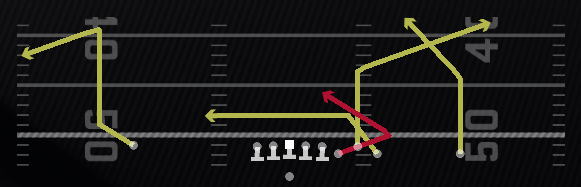
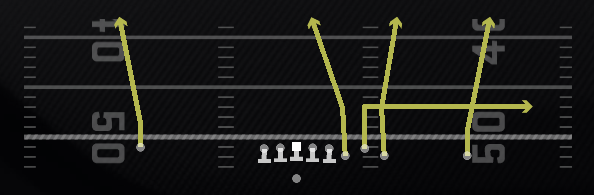
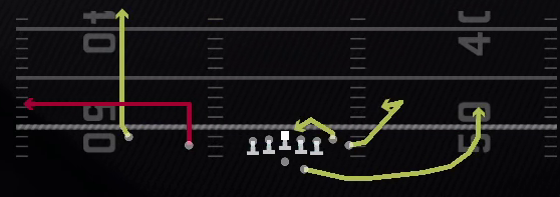
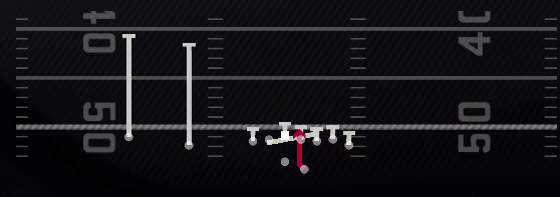
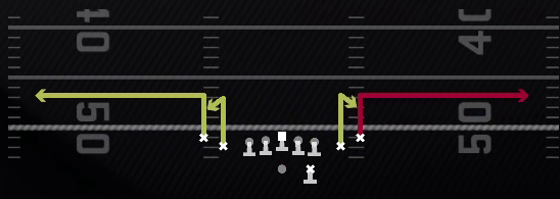
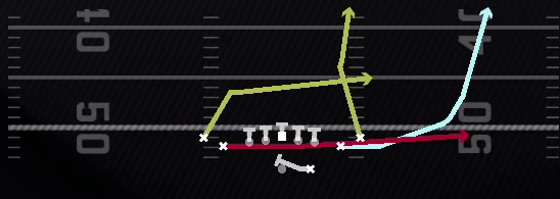
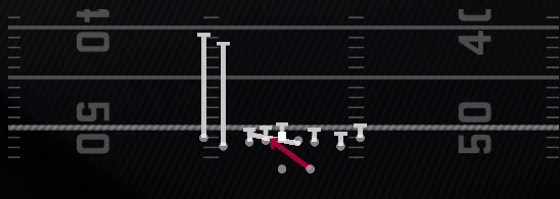
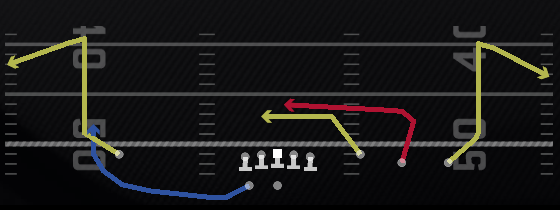
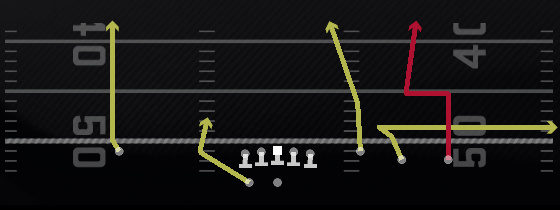
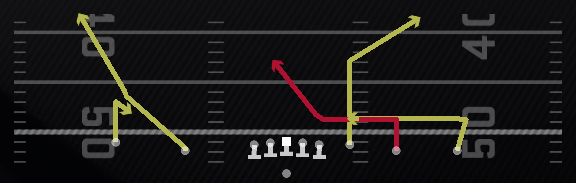
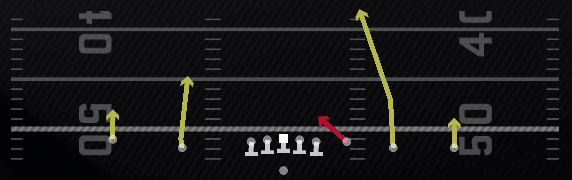
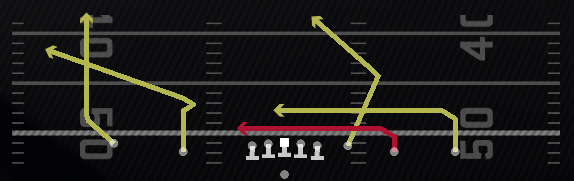
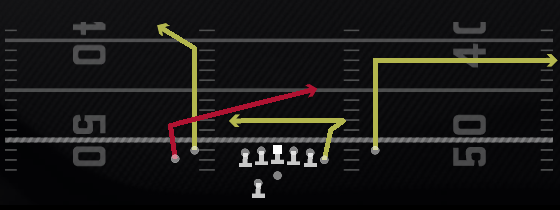
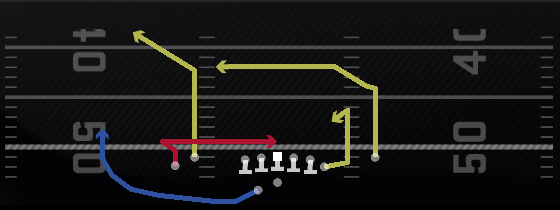
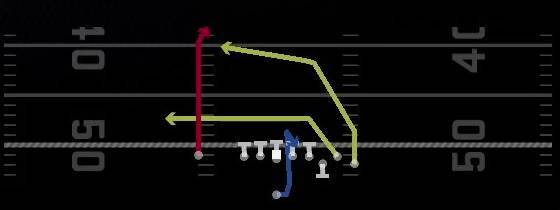
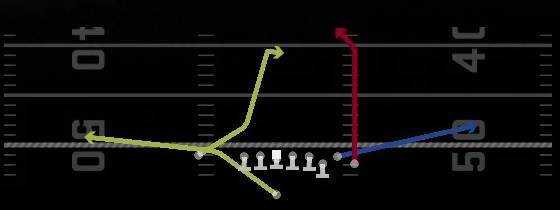
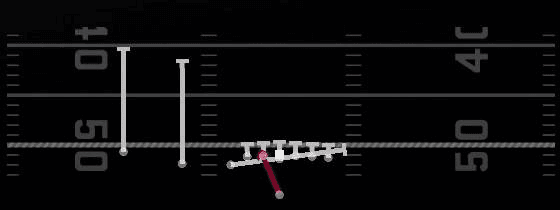
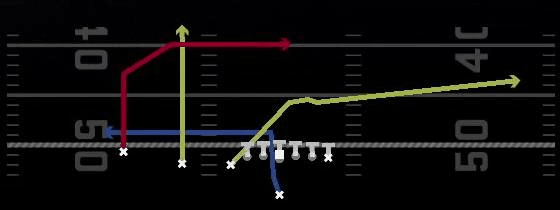
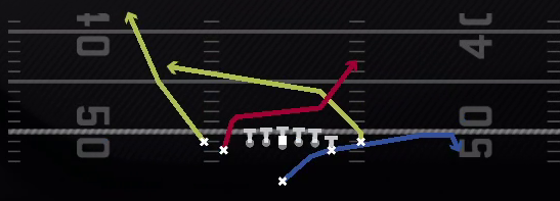
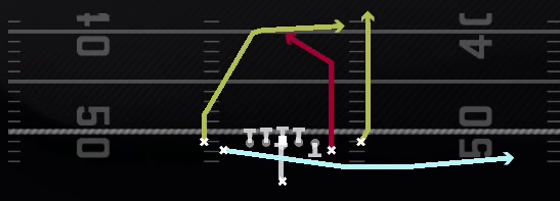
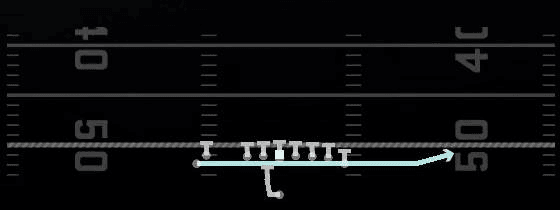
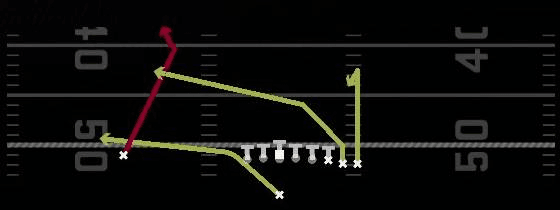
Doubles Offset Wk
 |
 |
 |
 |
 |
 |
 |
 |
 |
 |
 |
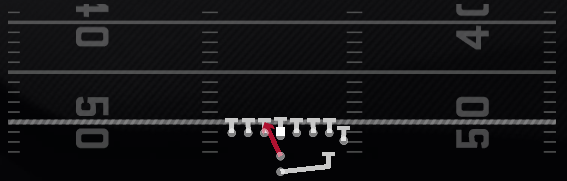
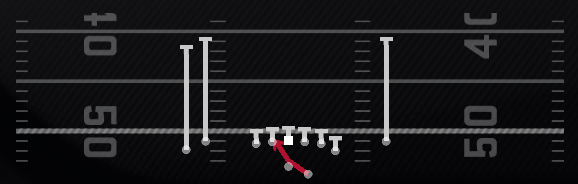
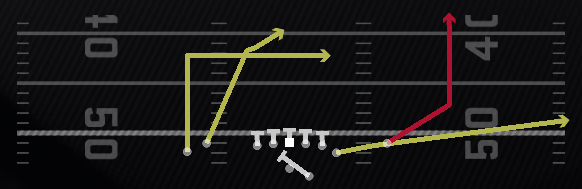
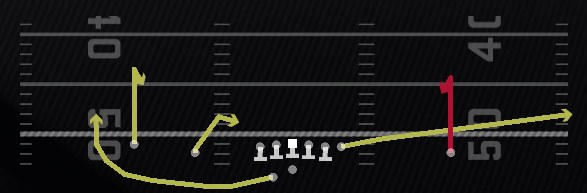
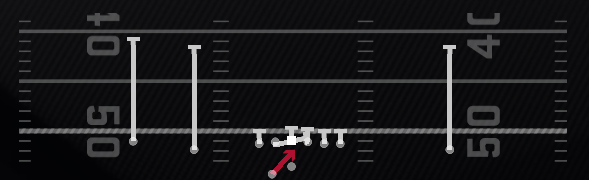
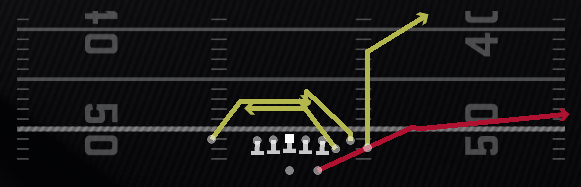
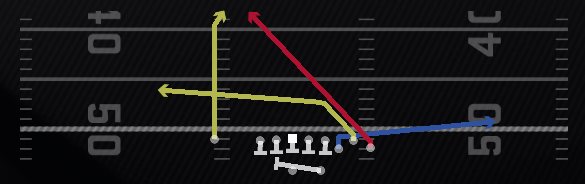
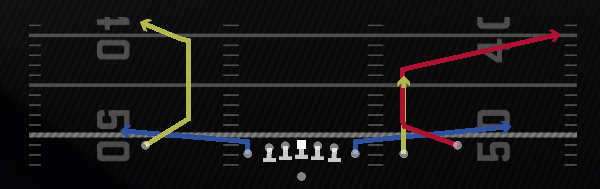
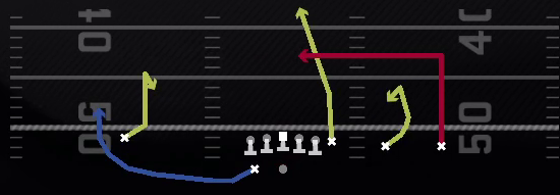
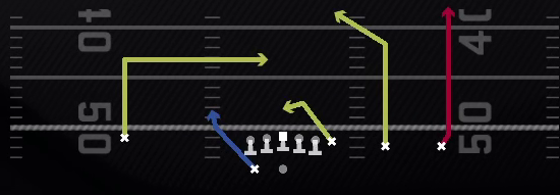
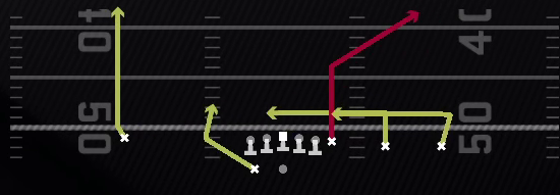
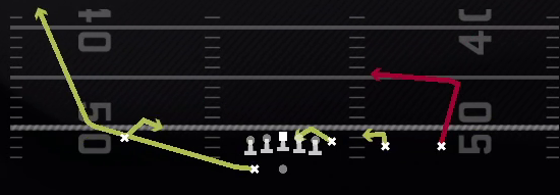
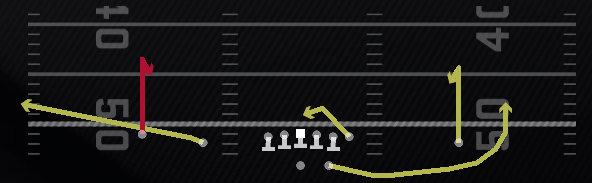
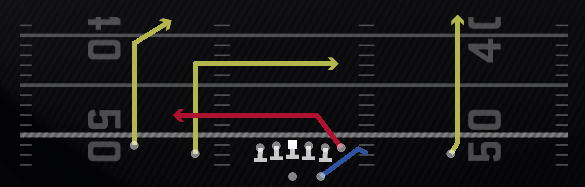
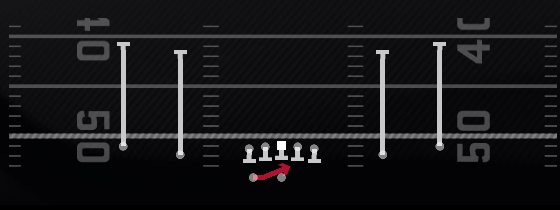
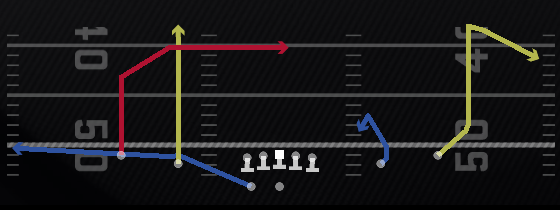
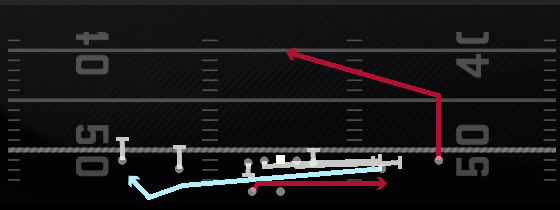
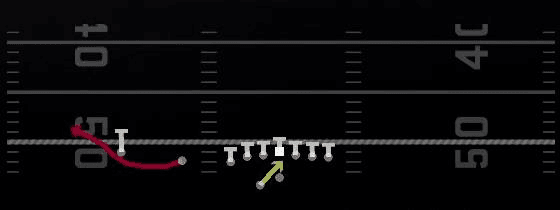
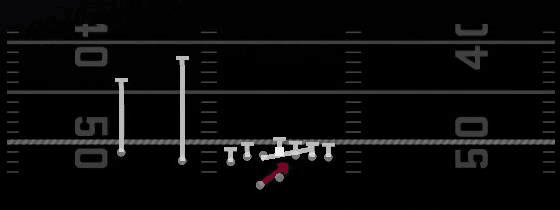
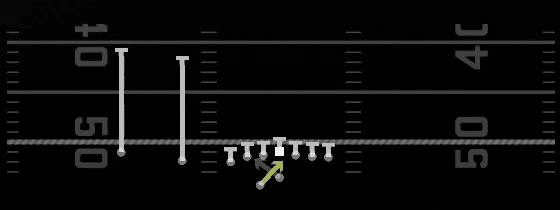
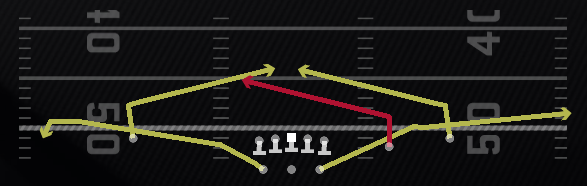
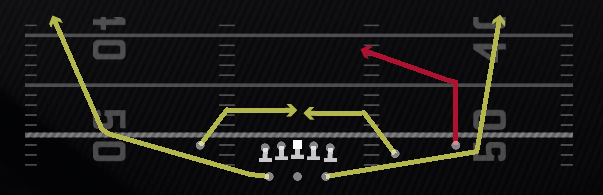
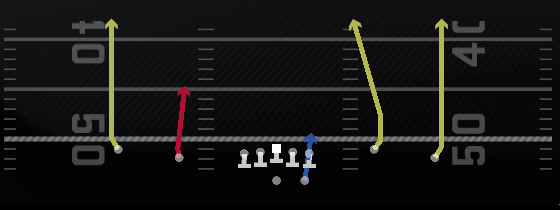
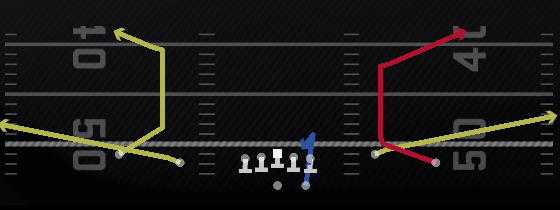
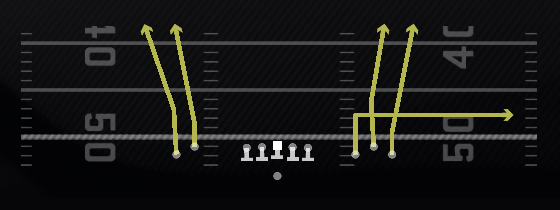
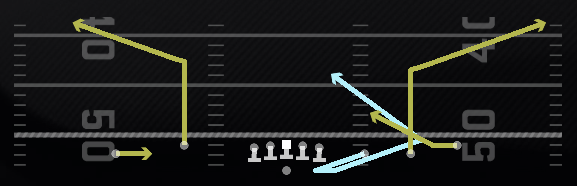
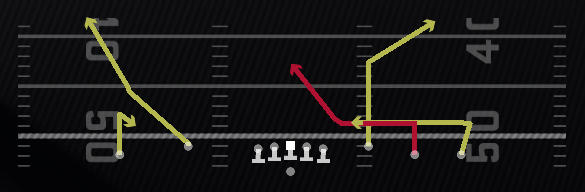
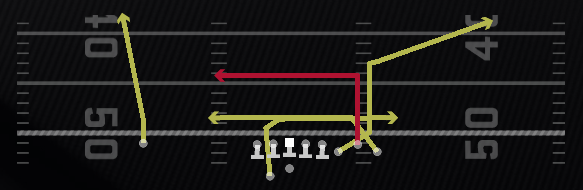
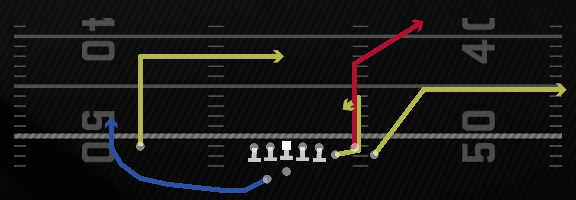
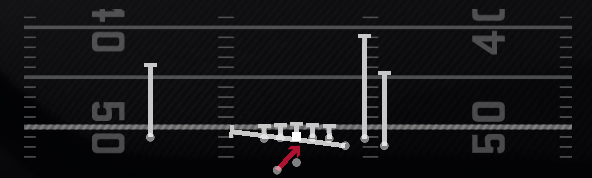
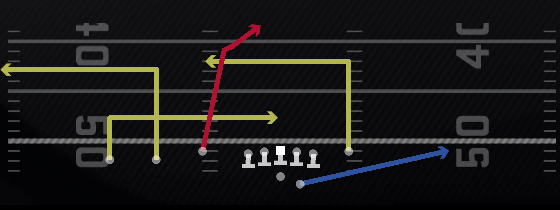
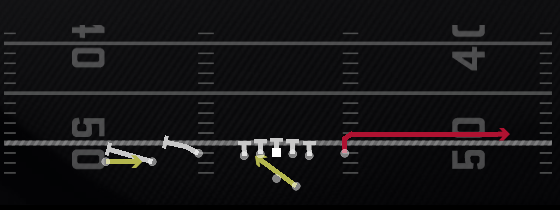
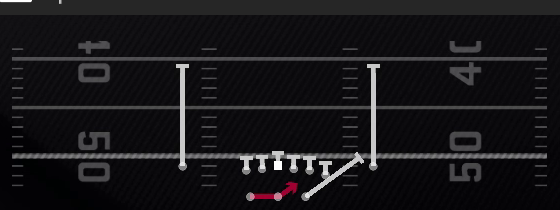
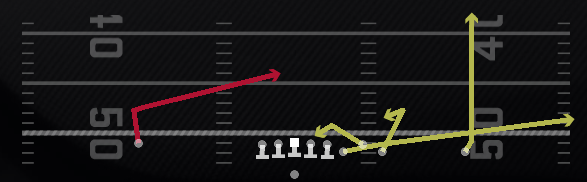
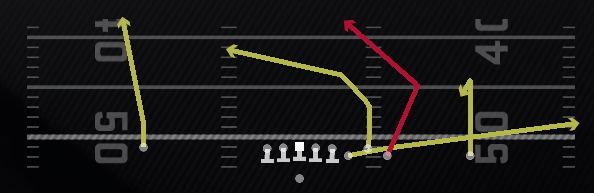
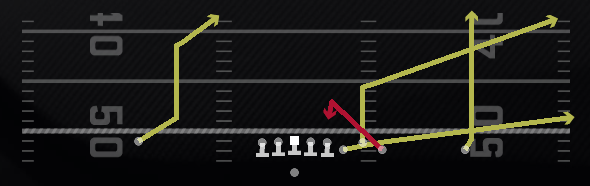
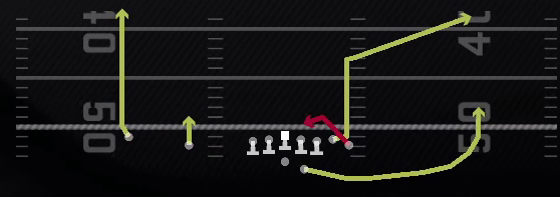
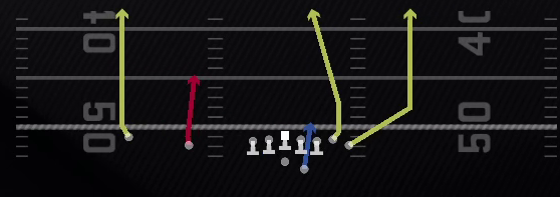
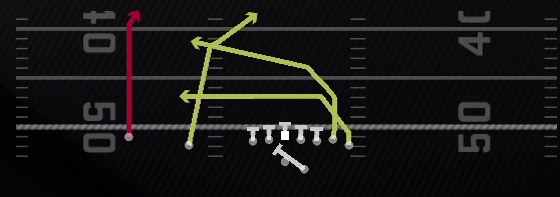
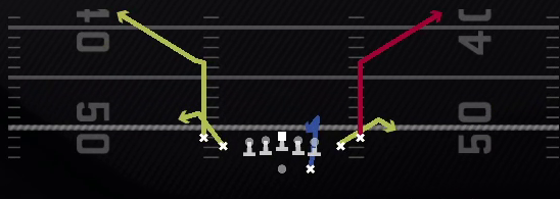
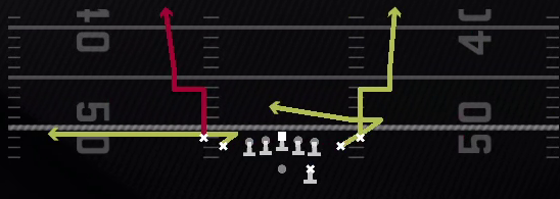
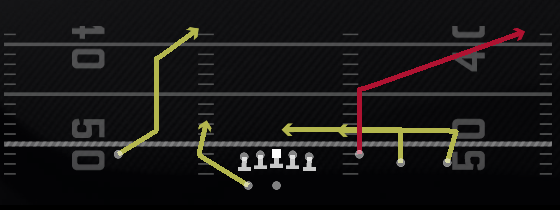
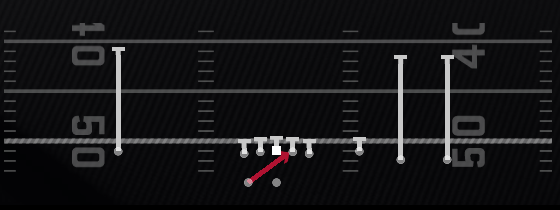
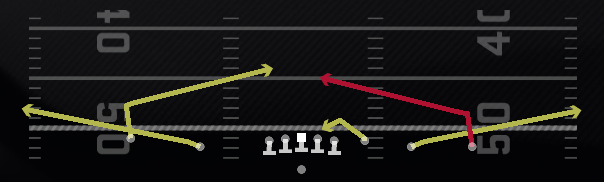
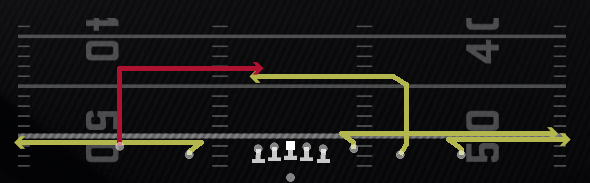
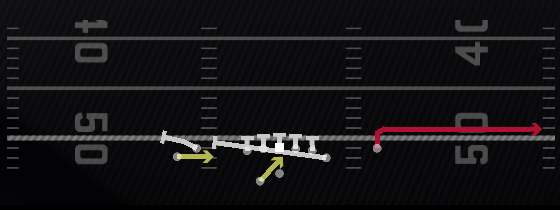
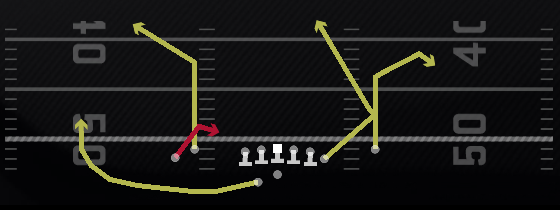
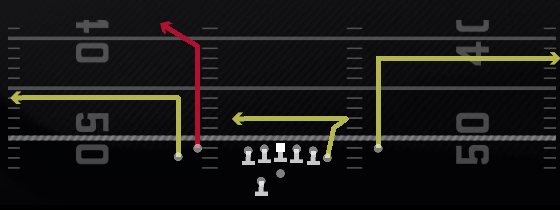
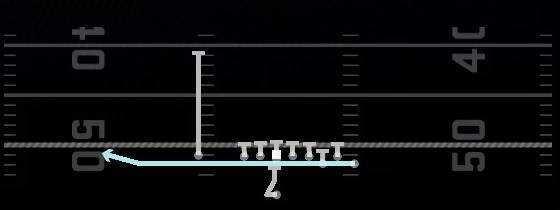
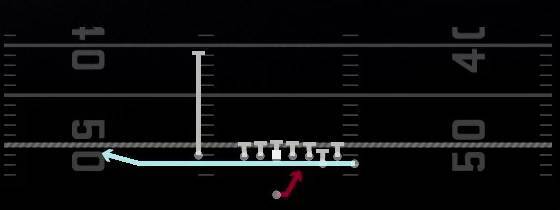
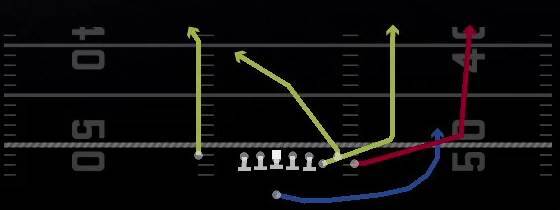
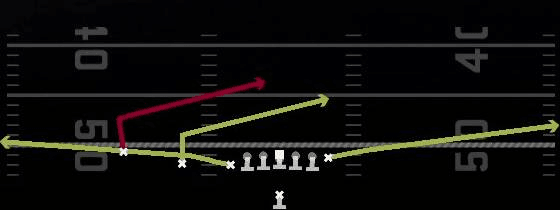
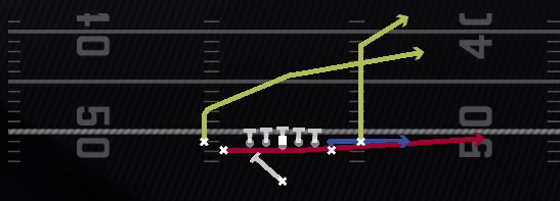
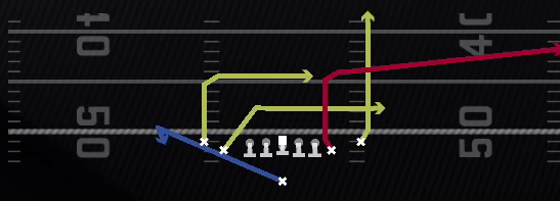
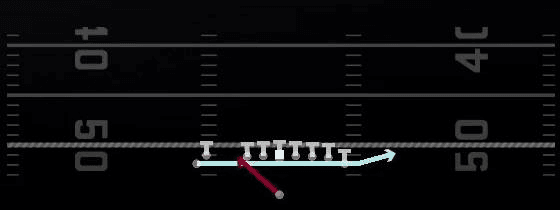
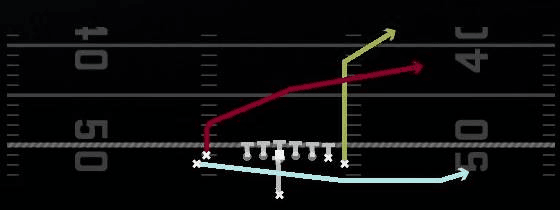
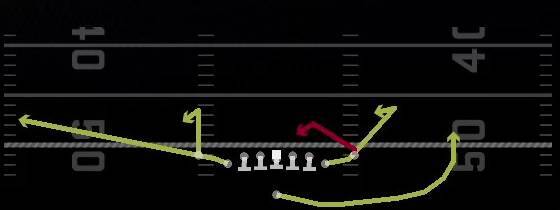
Bunch Str Nasty
 |
 |
 |
 |
|
 |
 |
 |
 |
 |
 |
 |
 |
 |
 |
 |
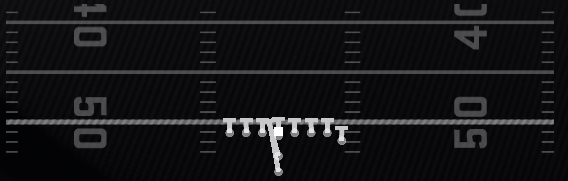
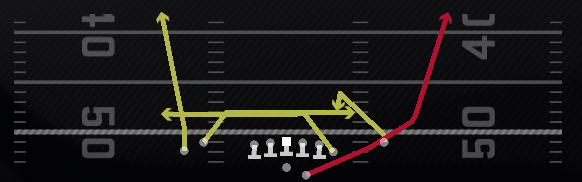
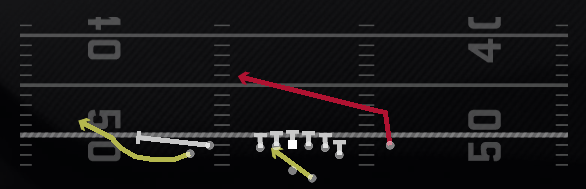
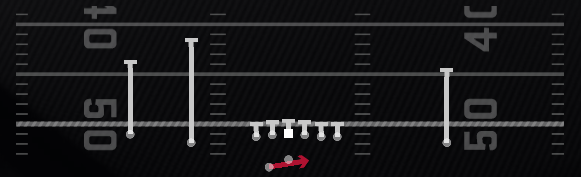
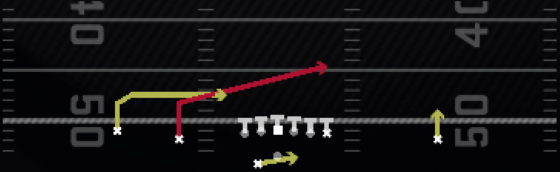
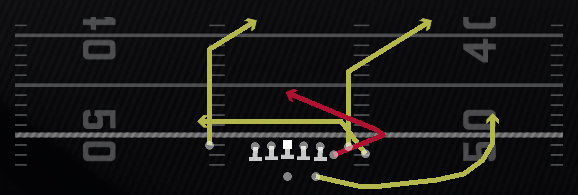
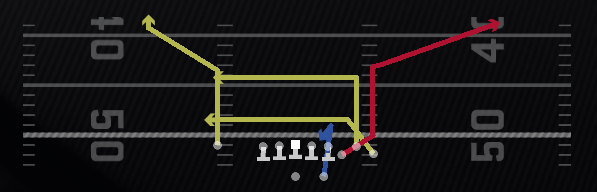
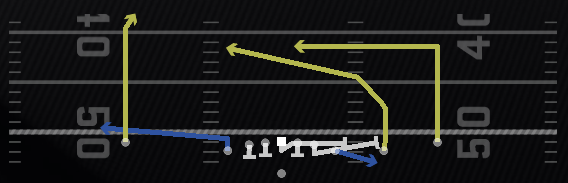
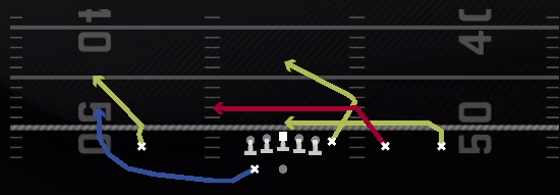
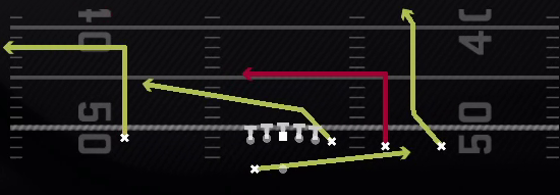
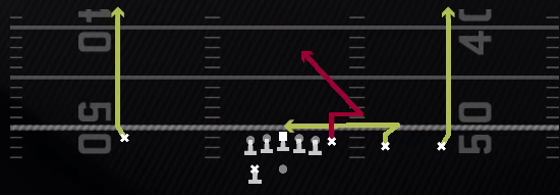
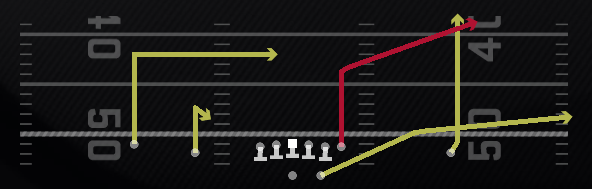
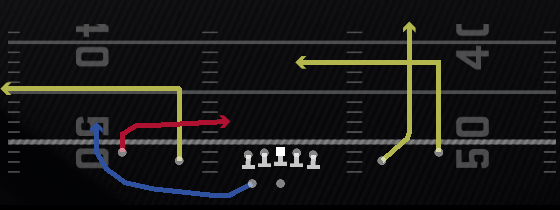
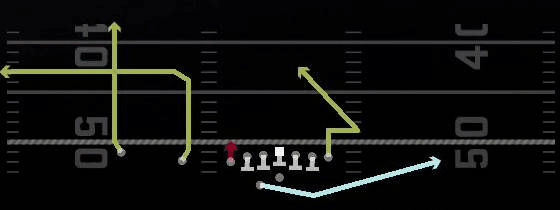
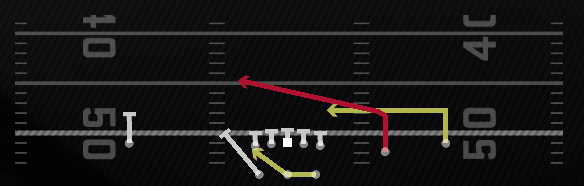
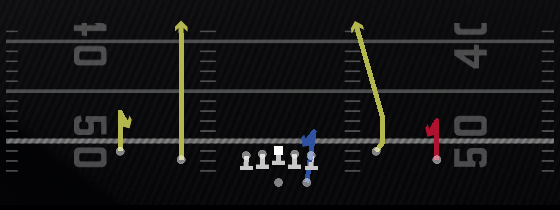
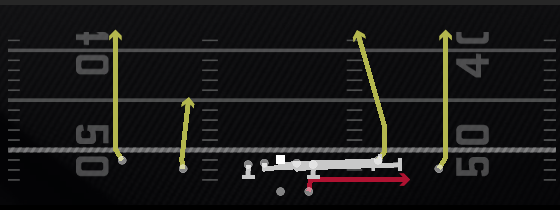
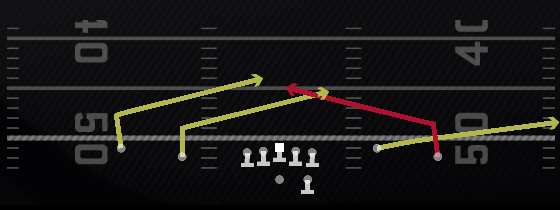
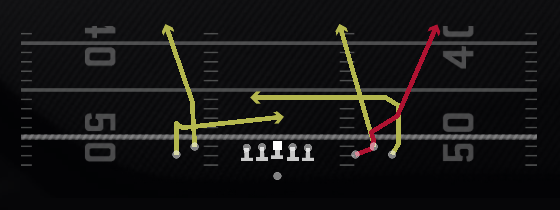
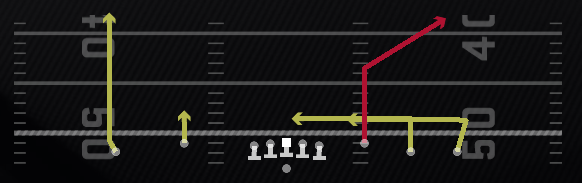
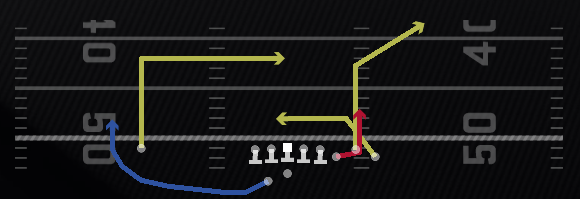
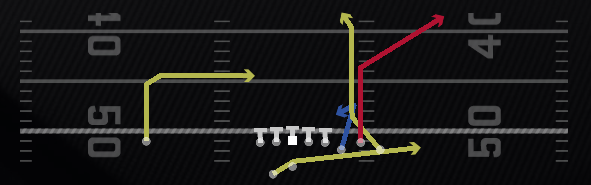
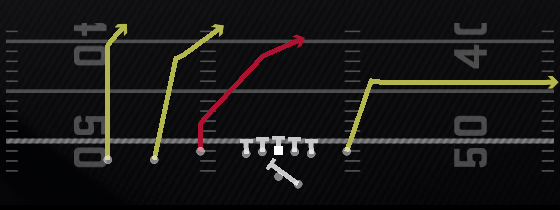
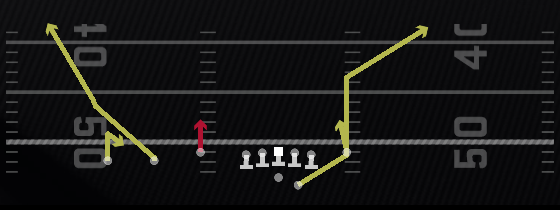
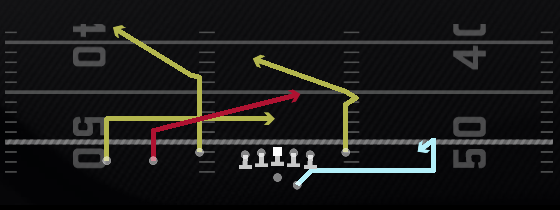
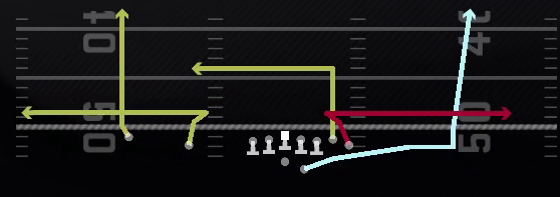
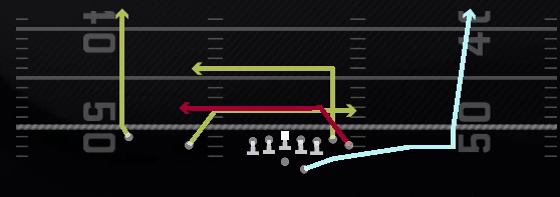
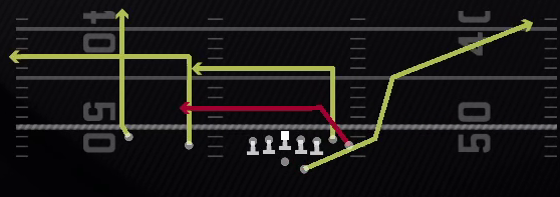
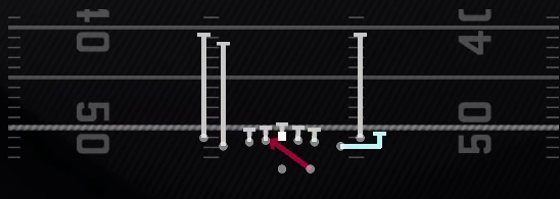
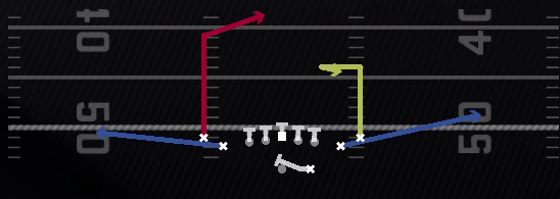
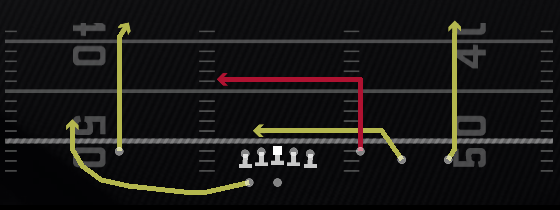
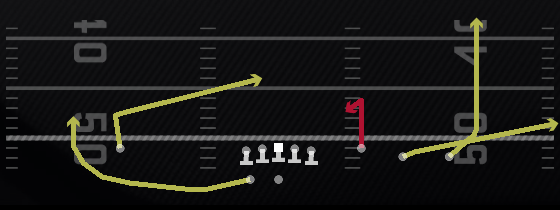
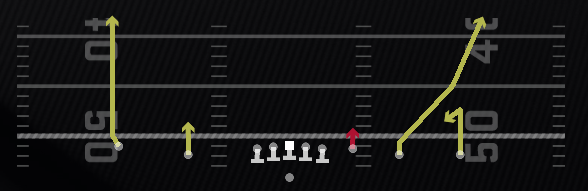
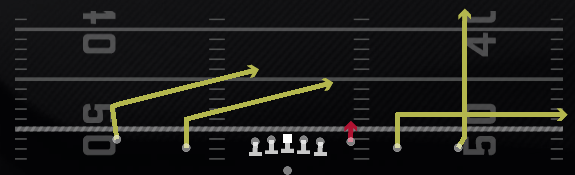
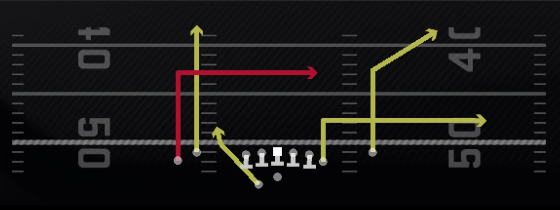
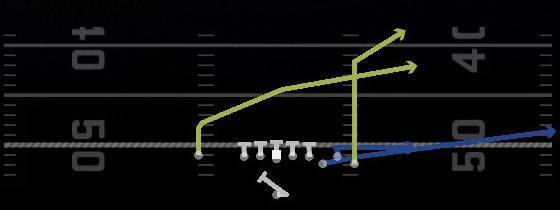
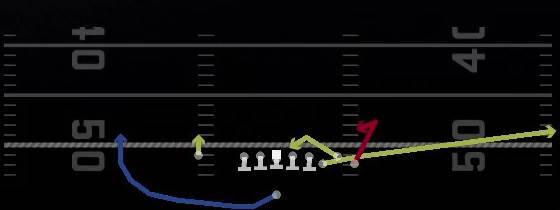
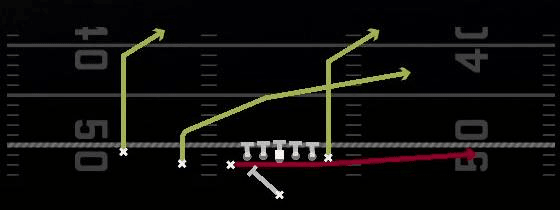
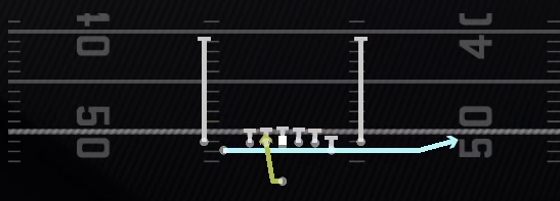
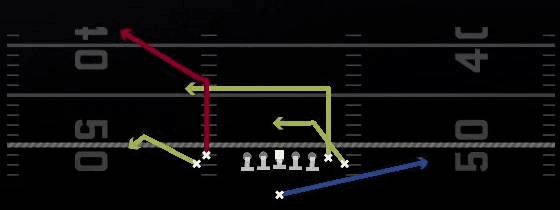
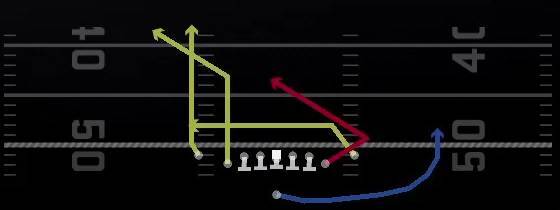
Empty Chips
 |
 |
 |
Y Trips Wk
 |
 |
 |
 |
 |
 |
 |
 |
 |
 |
 |
 |
 |
 |
 |
 |
 |
 |
Doubles
 |
 |
 |
 |
 |
 |
 |
 |
 |
 |
 |
 |
 |
 |
Spread Y-Slot Wk
 |
 |
 |
|
|
 |
 |
 |
|
 |
 |
 |
|
 |
 |
 |
|
|
 |
 |
U Off Trips Wk
 |
 |
 |
 |
 |
 |
 |
 |
 |
 |
 |
 |
Split Slot Open
 |
 |
 |
 |
 |
 |
 |
 |
 |
 |
 |
 |
Spread Y-Flex
 |
 |
 |
 |
 |
 |
 |
 |
 |
 |
 |
 |
 |
 |
Empty Bunch Wide
 |
 |
 |
 |
 |
 |
 |
 |
 |
Empty Trips Speed
 |
|
|
 |
 |
 |
 |
 |
 |
 |
 |
 |
 |
 |
 |
 |
 |
Bunch Offset
 |
 |
 |
 |
 |
 |
 |
 |
 |
 |
 |
 |
 |
 |
 |
Trey Y-Flex
 |
 |
 |
 |
 |
 |
 |
 |
 |
 |
 |
 |
 |
 |
Split Y Off
 |
 |
 |
 |
 |
 |
|
|
Bunch Quads
 |
 |
 |
 |
 |
 |
 |
 |
 |
Wing Slot Offset
 |
 |
 |
 |
 |
 |
 |
 |
 |
 |
 |
 |
Tight Slots
 |
 |
 |
 |
 |
 |
 |
 |
 |
 |
 |
 |
Trey Open
 |
 |
 |
|
|
 |
 |
 |
 |
 |
 |
 |
 |
 |
 |
 |
Empty HB Wide
 |
 |
 |
 |
 |
 |
 |
 |
 |
 |
 |
 |
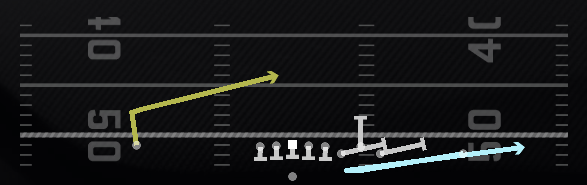
Tight Y Off Wk
 |
 |
 |
 |
 |
 |
 |
|
 |
 |
 |
 |
Singleback Formation and Plays
| Click to Jump to a Section | ||
|---|---|---|
| Goal Line Offense | Shotgun | Singleback |
Singleback Formation and When to Use
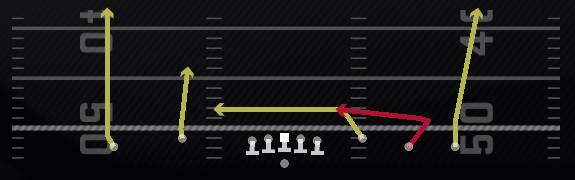
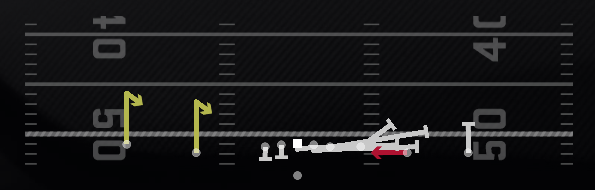
Bunch X Nasty
 |
 |
 |
 |
 |
 |
 |
 |
 |
 |
 |
 |
 |
 |
 |
 |
 |
 |
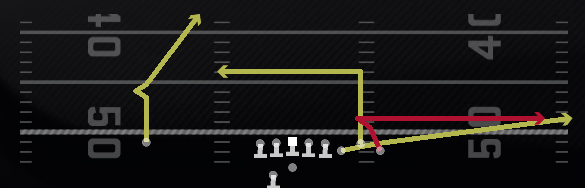
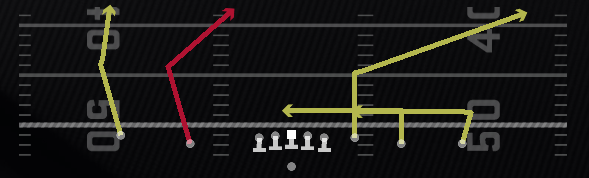
U Off Trips
 |
 |
 |
 |
 |
 |
 |
 |
 |
Tight Y Off
 |
 |
 |
 |
|
 |
 |
 |
 |
 |
 |
 |
Wing Flex Close
 |
 |
 |
 |
 |
 |
 |
 |
 |
 |
 |
 |
|
|
Wing Pair
 |
 |
 |
 |
Deuce Close
 |
 |
 |
 |
Wing Tight Z
Madden NFL 25 Related Guides

All Team Playbooks
 Arizona Cardinals
 Atlanta Falcons
 Baltimore Ravens
 Buffalo Bills
 Carolina Panthers
 Chicago Bears
 Cincinatti Bengals
 Cleveland Browns
 Dallas Cowboys
 Denver Broncos
 Detroit Lions
 Green Bay Packers
 Houston Texans
 Indianapolis Colts
 Jacksonville Jaguars
 Kansas City Chiefs
 Los Angeles Chargers
 Los Angeles Rams
 Las Vegas Raiders
 Miami Dolphins
 Minnesota Vikings
 New England Patriots
 New Orleans Saints
 NY Giants
 NY Jets
 Philadelphia Eagles
 Pittsburgh Steelers
 San Francisco 49ers
 Seattle Seahawks
 Tampa Bay Buccaneers
 Tennessee Titans
 Washington Commanders
Offensive Formations
| Far | Full House | Goal Line (Offense) |
| Shotgun | Near | I Form |
| Singleback | Pistol | Power I |
| Strong I | Weak I | Wildcat |
Defensive Formations
| 46 | 3-4 | 3-3-5 |
| 4-3 | 4-4 | 5-2 |
| Big Nickel | Dime | Goal Line (Defense) |
| Dollar | Nickel | Prevent |
| Quarter | - | - |
Comment
Author

Cincinnati Bengals Offensive Playbook
Rankings
- We could not find the message board you were looking for.
Gaming News


Popular Games

Genshin Impact Walkthrough & Guides Wiki
Honkai: Star Rail Walkthrough & Guides Wiki
Arknights: Endfield Walkthrough & Guides Wiki
Umamusume: Pretty Derby Walkthrough & Guides Wiki
Wuthering Waves Walkthrough & Guides Wiki
Pokemon TCG Pocket (PTCGP) Strategies & Guides Wiki
Abyss Walkthrough & Guides Wiki
Zenless Zone Zero Walkthrough & Guides Wiki
Digimon Story: Time Stranger Walkthrough & Guides Wiki
Clair Obscur: Expedition 33 Walkthrough & Guides Wiki


Recommended Games
Fire Emblem Heroes (FEH) Walkthrough & Guides Wiki
Pokemon Brilliant Diamond and Shining Pearl (BDSP) Walkthrough & Guides Wiki
Diablo 4: Vessel of Hatred Walkthrough & Guides Wiki
Super Smash Bros. Ultimate Walkthrough & Guides Wiki
Yu-Gi-Oh! Master Duel Walkthrough & Guides Wiki
Elden Ring Shadow of the Erdtree Walkthrough & Guides Wiki
Monster Hunter World Walkthrough & Guides Wiki
The Legend of Zelda: Tears of the Kingdom Walkthrough & Guides Wiki
Persona 3 Reload Walkthrough & Guides Wiki
Cyberpunk 2077: Ultimate Edition Walkthrough & Guides Wiki


All rights reserved
© 2024 Electronic Arts Inc. Electronic Arts, EA SPORTS, FieldSENSE, and Ultimate Team are trademarks of Electronic Arts Inc. The mark “John Madden” and the name, likeness and other attributes of John Madden reproduced on this product are trademarks or other intellectual property of Red Bear, Inc. or John Madden, are subject to license to Electronic Arts Inc., and may not be otherwise used in whole or in part without the prior written consent of Red Bear or John Madden. All rights reserved. Officially Licensed Product of NFL PLAYERS INC. and NFLPA.COM. Officially Licensed Product of the National Football League.
The copyrights of videos of games used in our content and other intellectual property rights belong to the provider of the game.
The contents we provide on this site were created personally by members of the Game8 editorial department.
We refuse the right to reuse or repost content taken without our permission such as data or images to other sites.