Ultimate Cup Z Guide: Boss List and Recommended Abilities
This guide shows you the list of bosses you face at the Ultimate Cup Z in Kirby and the Forgotten Land, including the final secret boss, Chaos Elfilis. Read on to learn which recommended Copy Abilities to use for each boss, Ultimate Cup Z rewards, and more!
List of Contents
Ultimate Cup Z List of Bosses
Rounds 1-9
| The first nine bosses will appear in random order. In addition, two mid-bosses appear back to back in a single boss fight. |
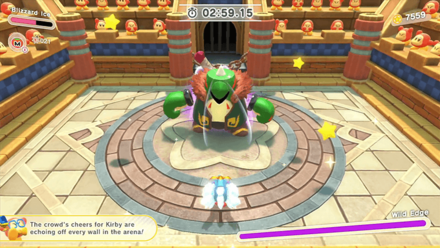 Wild Edge Wild Edge 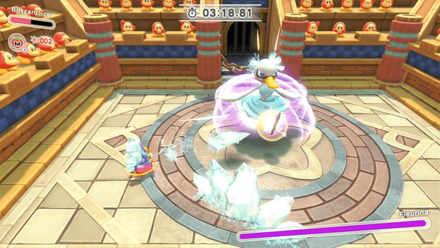 Fleurina Fleurina |
When defeated, Fleurina appears. ・Uses close-range attacks. ・Uses a shield to block frontal attacks. |
|---|---|
| Appears immediately after defeating Wild Edge. ・ Uses long-range attacks. ・Can summon and surround itself with tornadoes. |
|
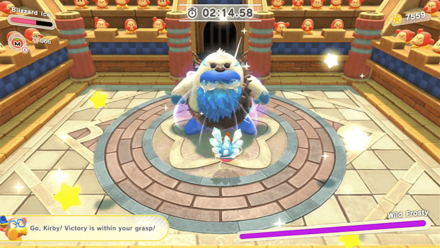 Wild Frosty Wild Frosty 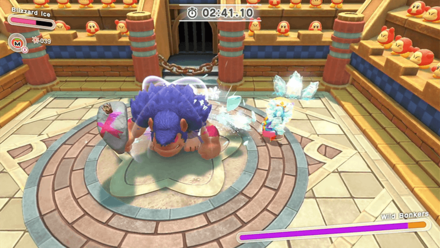 Wild Bonkers Wild Bonkers |
When defeated, Wild Bonkers appears. ・ Uses rushing attacks. ・Can throw small and large snowballs that roll around the arena. |
| Appears immediately after defeating Wild Frosty. ・ Has slow attack speed. ・Throws fruit bombs at long-range. |
|
 Phantom Gorimondo Phantom Gorimondo |
・Uses close-range attacks. ・Uses a stomp attack that produces shockwaves. ・Run from his spinning attack. |
 Phantom Tropic Woods Phantom Tropic Woods |
・The boss does not move at all, making it easy to hit. ・Stay in the middle of the arena to avoid the roots. |
 Phantom Clawroline Phantom Clawroline |
・Has fast attack speed. ・Hover to avoid the close-range attacks. |
 Phantom Meta Knight Phantom Meta Knight |
・Has fast attack speed. ・Has a rushing attack that cannot be guarded. ・ Summons multiple boulders from above when his health is low. |
 Phantom King Dedede Phantom King Dedede |
・Uses a rushing slam attack that can be dodged. ・Avoid the cracked spots when he uses the column to slam the ground. |
 Phantom Sillydillo Phantom Sillydillo |
・Use a jump attack when he chases you with the cage. ・Uses a rolling attack and spinning attack at the second phase of the fight. |
 Phantom Forgo Dedede Phantom Forgo Dedede |
・Uses a hammer combo attack to summon fire tornadoes. ・Stay clear of the lava surrounding the stage. |
Rounds 10-12
| 10 | 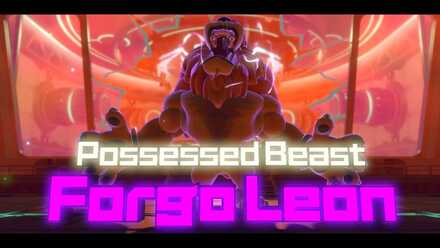 Forgo Leon Forgo Leon |
・Hover or dodge the shockwave attack. ・Dash at the corner of the stage to avoid Soul Forgo's large shockwave attack. ・Dodge his attacks at the right time to counterattack. |
|---|---|---|
| 11 | 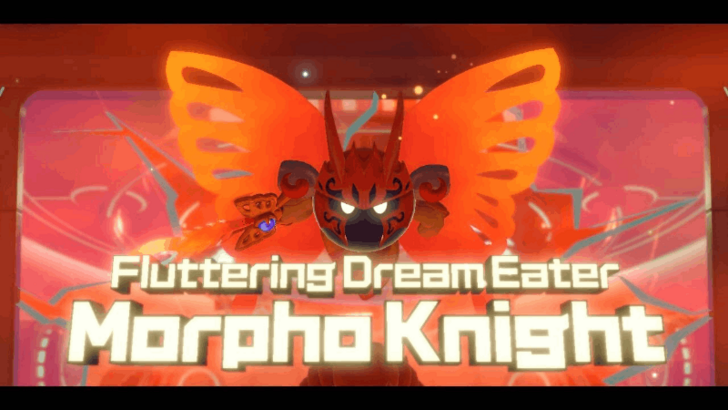 Morpho Knight Morpho Knight |
・Dodge to avoid the giant flaming sword attack. ・Attack Morpho Knight whenever he summons copies of Soul Forgo. ・Attack after he uses the wing flap combo. |
| 12 | 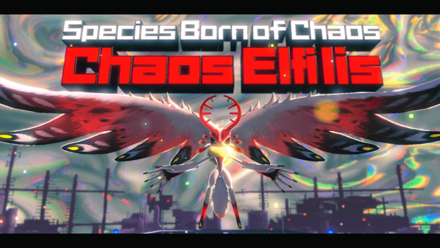 Chaos Elfilis (First Form) Chaos Elfilis (First Form) |
When defeated, a blob appears and absorbs the boss, starting the second phase. ・Dodge its spear attacks at the right time to counterattack. ・Summons projectiles that can be dodged. ・Attack its original form once it tries to heal itself. |
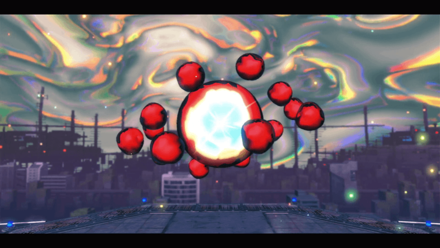 Chaos Elfilis (Second Form) Chaos Elfilis (Second Form) |
Appears after defeating Chaos Elifilis on the first phase. ・Run away from the black hole at the start of the fight. ・Dodge towards the boss when it performs the dual laser attack. ・ Climb up the pillars and hover to avoid the meteor attack. |
|
Final Secret Boss Chaos Elfilis

Chaos Elfilis is the the last boss you need to fight in the Ultimate Z Cup and is the true form of Fecto Eflilis, the final boss of the main story of the game. Because the Ultimate Z Cup is only unlocked after completing Isolated Isles, Chaos Elflicis is the true final boss in the entire game.
Ultimate Cup Z Recommended Copy Abilities
| First Clear |
 Morpho Knight Sword Morpho Knight Sword
|
|---|
Use Morpho Knight Sword to Complete the Tournament
 Morpho Knight Sword Morpho Knight Sword
|
Morpho Knight Sword allows you to defeat the mid-bosses in one or two hits, saving you time and energy for the more difficult bosses. In addition, you can use its combo attacks to restore health each time the attack lands on the opponents.
The copy ability's dodge is enhanced, allowing you to vanish and travel for a short distance to avoid attacks. You can use this to dodge and perform a counterattack to fast-moving bosses.
Avoid using the charged attacks towards fast-moving bosses as this will leave you open to their attacks.
How to Beat Phantom Meta Knight

|
|
You Can Ignore the Sword at the Start
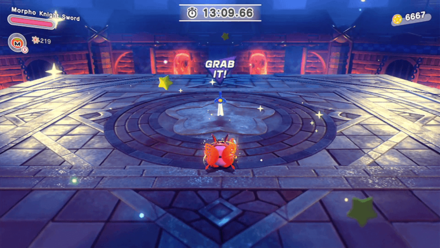
Before starting the boss fight with Phantom Meta Knight, you can pick up the sword in the middle of the arena to get its copy ability. However, you can choose to ignore it by attacking the sword. This allows you to use your existing copy ability to fight Phantom Meta Knight.
Hover to Avoid the Giant Sword Beam
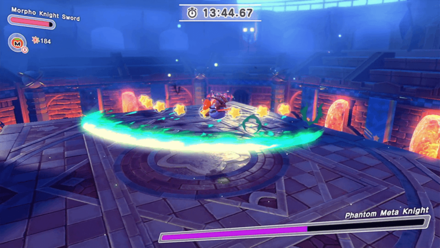
Phantom Meta Knight will charge his sword before unleashing a large green sword beam followed by a smaller beam. You can hover above ground or dodge to the side to avoid this attack.
Run Away from the Green Fire Attack
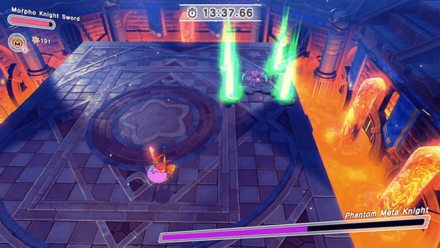
Phantom Meta Knight will jump down and stab the ground, causing four green flames to appear and move towards Kirby. You can dodge or run away to avoid this attack.
If the boss' health is low, he will perform a stronger version of the attack, summoning multiple flames that travel around the arena. You can move to the corners of the arena to avoid getting hit.
Check the Shadows on the Floor to Avoid the Boulders

When Phantom Meta Knight's health is at 40% or less, he will fly up in the air and summon multiple boulders. When the camera switches to a top-down view, run towards the areas with no shadows to avoid getting squished by the boulders.
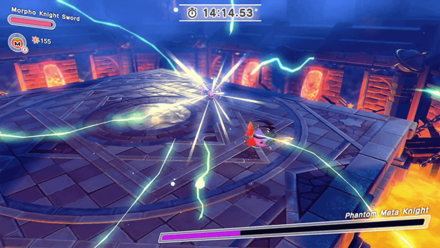
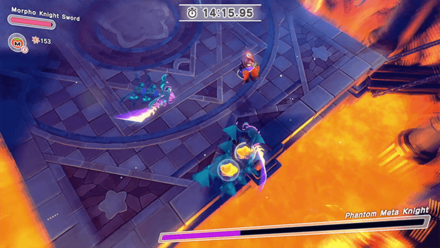
Avoid Phantom Meta Knight's Rushing Attack
 |
 |
Hover to Avoid the Short Purple Beams
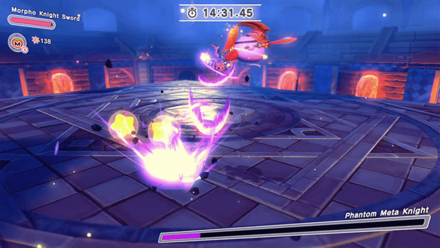
Phantom Meta Knight will hover and slash the air multiple times, creating short purple sword beams that travel towards your direction. You can hover away or run to the sides to avoid this attack.
How to Beat Chaos Elfilis

| First Form |
|---|
|
|
| Second Form |
|
Chaos Elfilis Attack Patterns
First Form
| Phase 1 |
|---|
| Phase 2 |
Second Form
| Phase 1 |
|---|
| Phase 2 |
Dodge the Spear Lunging Attack

At the start of the boss fight, Chaos Elfilis will fly in the air and lunge towards you with its spear. This is one of the boss' attacks that you can counterattack by dodging to the side as soon as it lands on the ground.
Hover and Drop Down to Avoid the White Swords
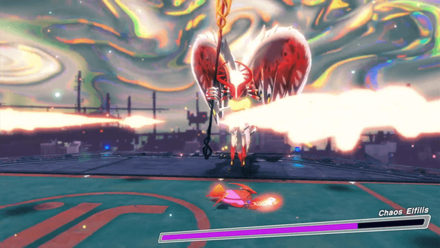
When Chaos Elfilis waves its spear from side to side, it will summon multiple swords that encircle Kirby. You can hover to keep the projectiles floating above and drop down as soon as the swords rotate in place.
Watch Chaos Elflis' Right Hand to Avoid Its Horizontal Swing Attacks
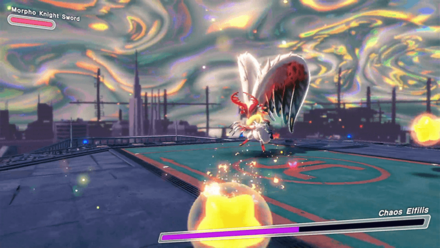
Whenever Chaos Eliflis performs a horizontal swing attack, it will move its right arm away from itself before striking. You can use this as a cue to dodge at the right time and counterattack in between its moves.
Run and Hover to Avoid the Shockwaves
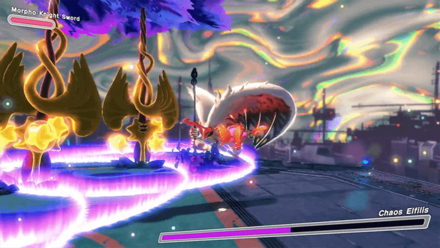
Avoid the white spotlight that appears from above to avoid getting hit by the giant spears that will appear. In addition, the attack produces multiple shockwaves, so be sure to hover to avoid them.
You can also dodge the shockwaves and move towards Chaos Elfilis to attack it.
Attack the Original Chaos Eliflis to Stop It from Healing
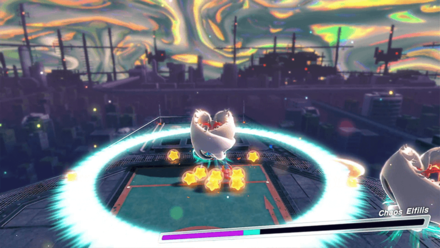
Attacking Chaso Elifilis while it's healing will still deal damage to the boss. The clones disappear when you attack them, so use this clue to find the true form.
Watch out for the blue-green ring that closes in on the true form as it will deal damage and remove your copy ability if you get hit.
Dodge Towards the Lasers to Avoid the Last Laser
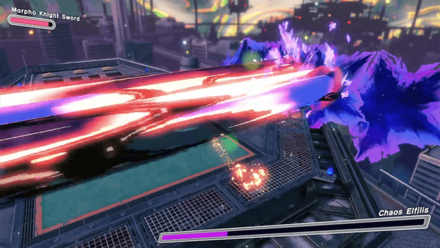
You can use the Morpho Knight Sword's enchanced dodge to move towards the lasers to avoid getting hit by the last laser that will fire at the end of the attack.
The lasers will fire a brief light before attacking, so you can use this as an indicator to move without getting hit.
Attack Chaos Elfilis While It's Standing Around
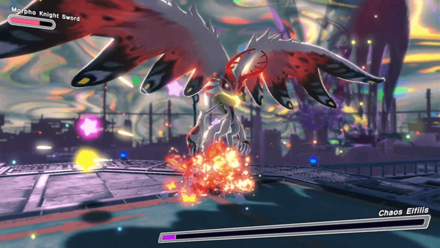
When Chaos Elfilis' health is low, it will summon white swords and the giant shadowy version at the background. After summoning, it will stand around for a short period of time before teleporting away.
Use this opportunity to hit it with combo attacks before it teleports away. Watch out for the giant version at the background as it will immediately perform a swing attack.
Run Away from the Black Hole Attack
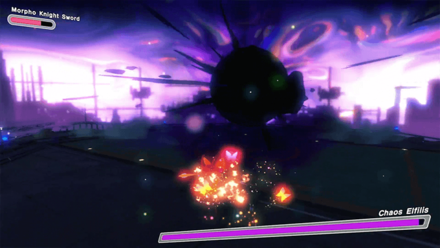
At the start of the second part of the boss fight, Chaos Elfilis will transform into a black hole that will suck in Kirby. Run to the opposite direction to avoid getting sucked in by this attack.
Attack After It Finishes Each Move
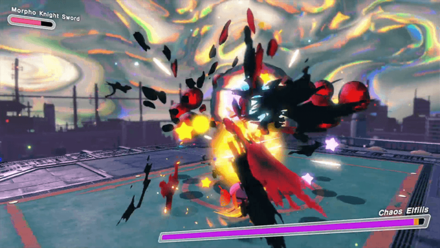
Whenever Chaos Elfilis finishes attacking, it will leave itself vulnerable for a short period of time before performing another attack. Use this opportunity to perform the Morpho Knight Sword's jump attack to remove the smaller circles surrounding the boss.
Doing so, stops the boss from firing multiple lasers depending on the number of circles you hit.
Dodge Towards the X-Shaped Laser Attack
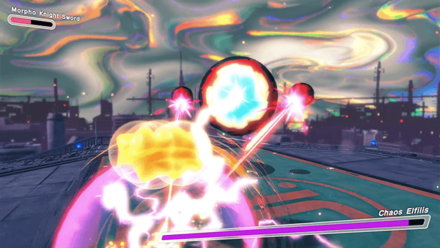
When Chaos Elfilis starts attacking using x-shaped lasers, you can dodge towards it to perform a counterattack and reduce a portion of its health.
Dodge Towards the Boss When It Uses the Boomerangs
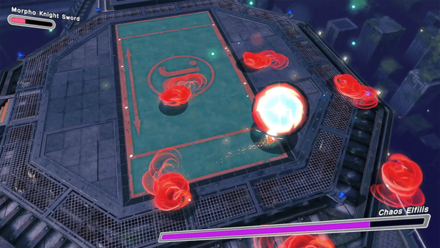
When the camera shifts to a top-down view, Chaos Elfilis will teleport around and unleash six boomerangs that attack its surroundings. You can dodge towards the boss to avoid the attack and perform a counterattack.
You can also stay underneath the boss to prevent you from getting hit by the boomerangs.
Avoid Standing Under the Shadows

After depleting Chaos Elfilis' health, it will transform into a fiery ball and slam toward a meteor, causing falling boulders to appear from above. Stick close to the center of the arena and avoid standing under the shadows.
Climb the Pillars and Hover to Avoid the Meteor Attack

The falling boulders will eventually form a pillar that you can climb to avoid Chaos Elfilis's meteor attack. The boss will perform this move two times, so be sure to stick to the center of the arena to avoid running towards the newly formed pillars.
Dodge the Shockwaves
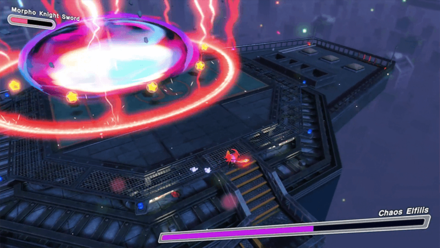
Chaos Elfilis will transform into a bouncing ball that will land on the arena, causing a large red shockwave. You can dodge towards the shockwave to avoid getting hit by the attack.
It is not recommended to hover as the shockwave has vertical lightning bolts that move quickly around the circle.
Ultimate Cup Z Tips
Have a Maxim Tomato on the Item Slot
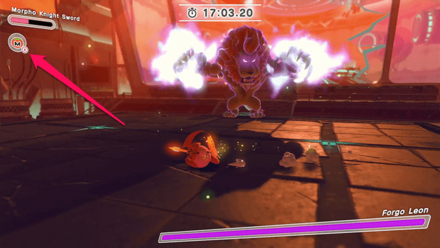
Before entering the Ultimate Cup Z, purchase a Maxim Tomato from the Waddle Dee Cafe to have it on the item slot. This comes in handy if you have low health during a boss fight or if you ran out of oranges in between the fights.
Waddle Dee Cafe: How to Unlock and Item List
Save Three Oranges for the Last Three Fights

At the end of each fight, you can pick up the oranges at the sides of the area to restore a portion of your health. It is recommended to save at least three oranges once you face the last three bosses in the tournament.
Note that the oranges will not respawn once you return to the area after a boss fight.
Price for Retrying Gradually Increases
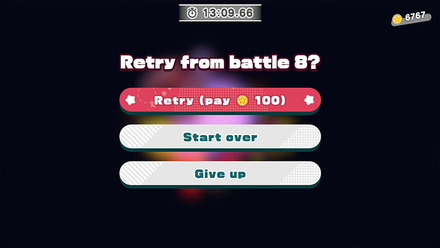
When you lose a battle, you have the option to retry, start over, or give up. Choosing to retry and pay the fee puts you back at the start of the battle with your health fully restored.
Note that the amount you need to pay doubles each time you lose. This means that if you lose for the second and third time, the payment increases to 200 star coins and 400 star coins, respectively.
Star Coin Farming Guide and Where to Use
Power Up Your Copy Ability to Increase Damage
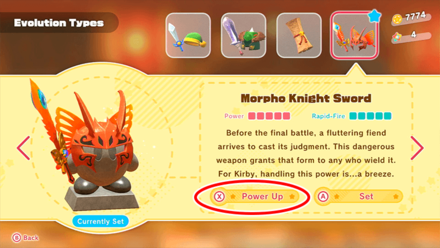
You can power up your copy ability three times at Waddle Dee's Weapon Shop. This upgrades its damage stat, allowing you to defeat the bosses faster.
Waddle Dee's Weapon Shop: How to Unlock and Things to Do
Play in Co-Op Mode for an Easier Experience
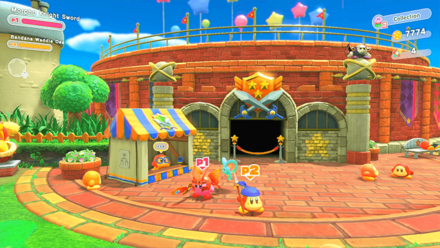
Playing in Co-Op mode allows you to fight the bosses with two characters instead of just Kirby, allowing for an easier experience overall.
While Bandana Waddle Dee does not have Kirby's copy ability, his attack power will match Kirby's copy ability. This means that Bandana Waddle Dee can have the same attack power as the Morpho Knight Sword if Kirby is using it.
Note that if you complete the Ultimate Cup Z in Co-Op mode, your record time will appear under the "Best Co-op Times" section of the tournament selection screen.
How to Unlock and Play Co-Op With 2 Players
Use All Item Buffs Before Entering the Tournament
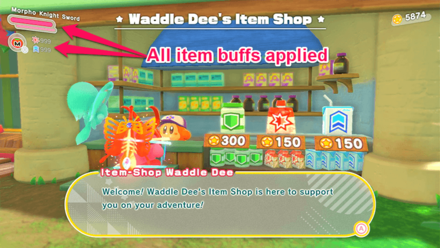
If you have Waddle Dee's Item Shop at the town, you can buy the item boosters that they sell to gain an advantage at the Ultimate Cup Z. In addition, these items can be stacked up to five times to increase their item effect.
It is recommended to use five Attack Boosts and Speed Boosts to increase your damage and speed for at least sixteen minutes. You can also buy the Life Up to double your health and ensure survivability in the tournament.
If you use any of the item buffs, they will show up in your record at the end of the tournament, although this has no negative impact.
Waddle Dee's Item Shop: How to Unlock and Item List
Change the Difficulty to Spring-Breeze Mode If Having Trouble

If you are having a difficult time completing the Ultimate Cup Z, you can change the difficulty to Spring-Breeze Mode. This mode lets you have more health, allowing to you to take more damage from the bosses.
Ultimate Cup Z Rewards
Chaos Elfilis Figure
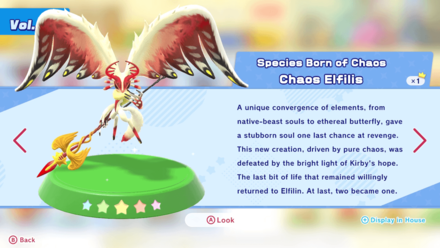
Completing the Ultimate Cup for the first time rewards you with the Species Born of Chaos: Chaos Elfilis Figure.
2500 Star Coins and 3 Rare Stones

You also receive 2500 Star Coins and three Rare Stone as fixed rewards upon completing the Ultimate Cup Z.
Commentator Waddle Dee Figure
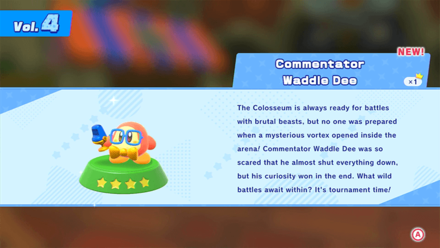
You also receive the Commentator Waddle Dee Figure upon completing all of the tournaments at the Colosseum.
Trader Waddle Dee
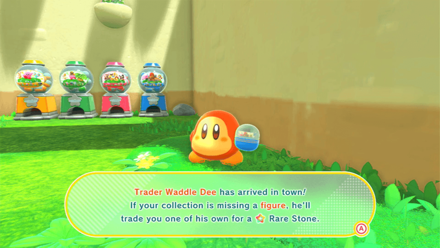
Trader Waddle Dee appears at the town as a reward for completing the Ultimate Cup Z. He lets you trade missing figures in exchange for a Rare Store.
Trader Waddle Dee: How to Unlock and Things to Do
Photo at Kirby's House
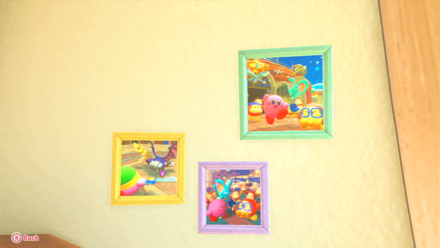
Completing the Ultimate Cup Z adds a new photo inside Kirby's House.
Kirby's House: How to Unlock and Activity List
Kirby and the Forgotten Land Related Guides
All Colosseum Guides
| List of Guides | |
|---|---|
 Meta Knight Cup Meta Knight Cup |
 The Ultimate Cup The Ultimate Cup |
 The Ultimate Cup Z The Ultimate Cup Z |
 The Ultimate Cup Z EX The Ultimate Cup Z EX |
Comment
Totally hard at first, I almost gave up at the game. But when I used Morpho sword max upgrade, it was super easy. To dodge the black hole, just keep using the Morpho sword teleport-dodge until it stops.
Author
Ultimate Cup Z Guide: Boss List and Recommended Abilities
improvement survey
03/2026
improving Game8's site?

Your answers will help us to improve our website.
Note: Please be sure not to enter any kind of personal information into your response.

We hope you continue to make use of Game8.
Rankings
- We could not find the message board you were looking for.
Gaming News
Popular Games

Genshin Impact Walkthrough & Guides Wiki

Honkai: Star Rail Walkthrough & Guides Wiki

Umamusume: Pretty Derby Walkthrough & Guides Wiki

Pokemon Pokopia Walkthrough & Guides Wiki

Resident Evil Requiem (RE9) Walkthrough & Guides Wiki

Monster Hunter Wilds Walkthrough & Guides Wiki

Wuthering Waves Walkthrough & Guides Wiki

Arknights: Endfield Walkthrough & Guides Wiki

Pokemon FireRed and LeafGreen (FRLG) Walkthrough & Guides Wiki

Pokemon TCG Pocket (PTCGP) Strategies & Guides Wiki
Recommended Games

Diablo 4: Vessel of Hatred Walkthrough & Guides Wiki

Fire Emblem Heroes (FEH) Walkthrough & Guides Wiki

Yu-Gi-Oh! Master Duel Walkthrough & Guides Wiki

Super Smash Bros. Ultimate Walkthrough & Guides Wiki

Pokemon Brilliant Diamond and Shining Pearl (BDSP) Walkthrough & Guides Wiki

Elden Ring Shadow of the Erdtree Walkthrough & Guides Wiki

Monster Hunter World Walkthrough & Guides Wiki

The Legend of Zelda: Tears of the Kingdom Walkthrough & Guides Wiki

Persona 3 Reload Walkthrough & Guides Wiki

Cyberpunk 2077: Ultimate Edition Walkthrough & Guides Wiki
All rights reserved
© HAL Laboratory, Inc. / Nintendo
The copyrights of videos of games used in our content and other intellectual property rights belong to the provider of the game.
The contents we provide on this site were created personally by members of the Game8 editorial department.
We refuse the right to reuse or repost content taken without our permission such as data or images to other sites.


![Everwind Review [Early Access] | The Shaky First Step to A Very Long Journey](https://img.game8.co/4440226/ab079b1153298a042633dd1ef51e878e.png/thumb)

![Monster Hunter Stories 3 Review [First Impressions] | Simply Rejuvenating](https://img.game8.co/4438641/2a31b7702bd70e78ec8efd24661dacda.jpeg/thumb)


Climb the tallest boulder pillar, then instead of hovering, ATTACK. You will not take damage(for some reason).