Forgo Horns Leon's Soul Locations and Walkthrough
This is a walkthrough for the Forgo Horns stage in Kirby and the Forgotten Land. Read on to see the location for all Leon's Souls, as well as a guide for how to beat the boss Phantom King Dedede, and more!
| Previous Stage | Next Stage |
|---|---|
| Forgo Park | Forgo Wasteland |
List of Contents
Forgo Horns All Leon's Souls
Leon's Souls Per Area
| Area 1 | 12 Leon's Souls |
|---|---|
| Area 2 | 8 Leon's Souls |
| Area 3 | 10 Leon's Souls |
| Area 4 | 6 Leon's Souls |
| Area 5 | 8 Leon's Souls |
| Boss | 5 Leon's Souls |
| Total | 51 Leon's Souls |
Forgo Horns Area 1 Soul Locations
1: Dig the First Hole in the Area
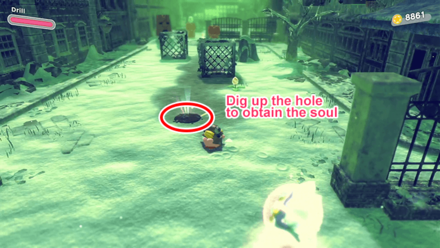
Inhale the driller enemy to obtain its ability and dig under the brown spot to pick up the soul underneath it.
2: Use Quake Surge to Open the Soul Inside the Cage

Use the Driller's Quake Surge to force open the brown spot inside the cage to retrieve the soul.
How to use quake surge
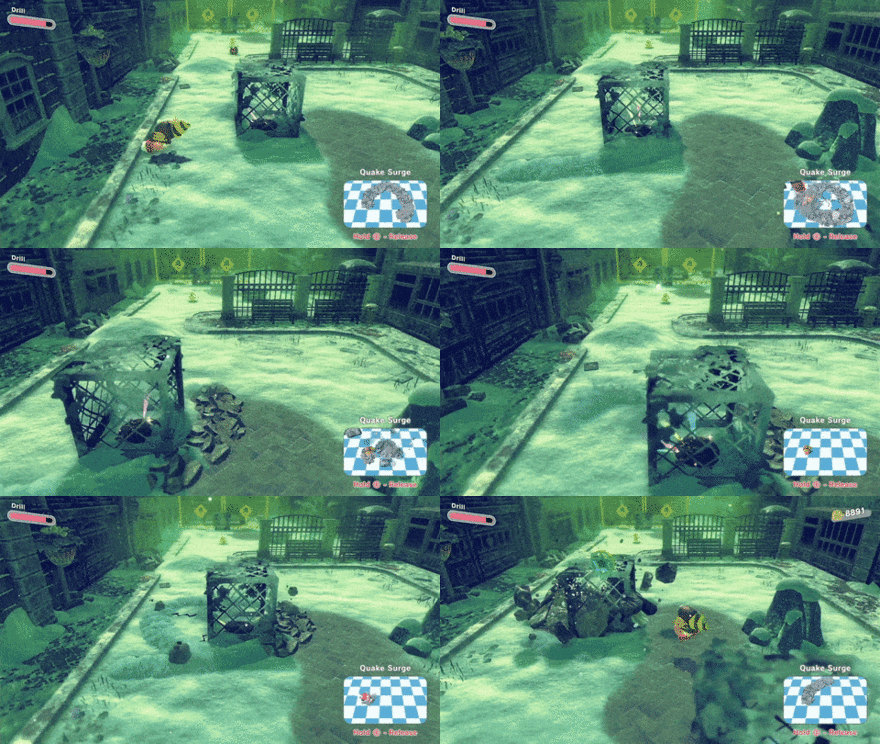
Press and hold the B Button to dig underground. Make a circle around the cage to perform a Quake Surge.
3: Use Quake Surge on the Cage With Barricades
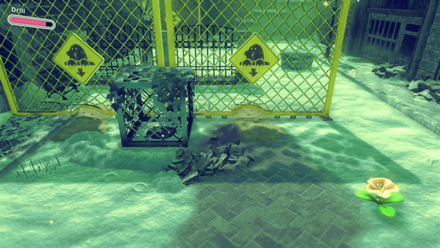
Look for the cage that has two yellow barricades and use the Quake Surge to pick up the soul underneath the brown spot.
4: Hidden Alleyway Left of the Area with the Yellow Barricades

Head south of the yellow barricades and go through the small passage. Pick up the soul in the area.
5: Use Quake Surge on the Mound of Snow
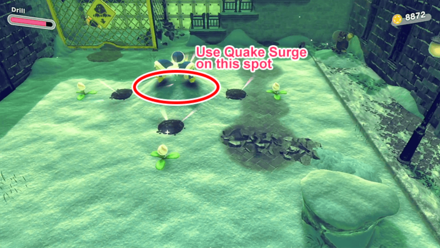
Defeat the bomb-throwing enemies and use Quake Surge around the mound of snow to pick up the soul.
6: Destroy the Bomb Block Behind the Yellow Barricade
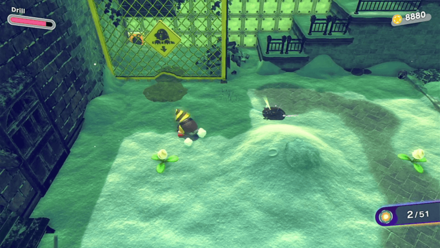
Dig under the yellow barricade and destroy the bomb block. Head up the steps to retrieve the soul from the previously blocked area.
7: Below the Hole on the Left Side of the Area

Head up to the upper area and go to the left side. Hover down to the hole to pick up the soul.
8: Touch the Sparkling Spot Near the Pillar
 |
 |
9: On the Bottom-Left Corner of the Icy Path

Head to the left side of the icy path to find the soul floating on a corner.
10-12: Destroy the White Blocks on the Right Side Near the End of the Stage
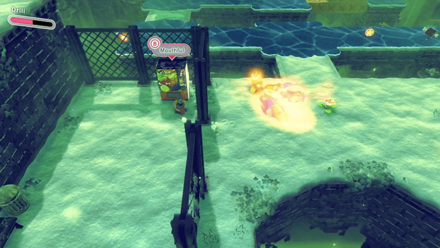 |
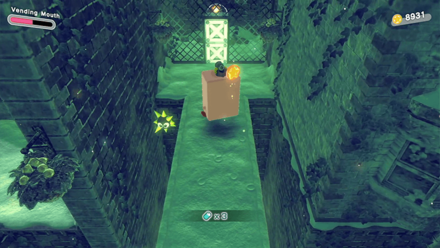 |
Forgo Horns Area 2 Soul Locations
13: Surrounded by the Traffic Barriers
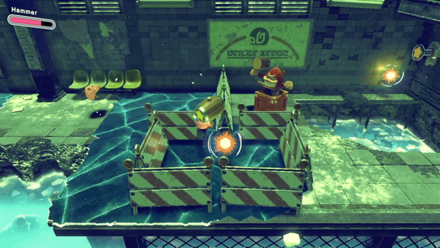
You can find the first soul surrounded by the traffic barriers at the beginning of the area.
14: Near the Nail on the Wall
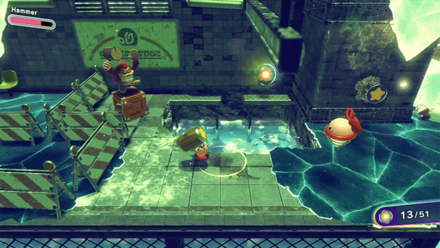
Pick up the soul floating in front of the nail on the wall.
15: Hit the First Set of Three Nails on the Wall

Inhale the hammer-wielding monkey enemy and hit the three nails on the surrounding area. To melt down the ice surrounding the third nail, press and hold the B button to charge the hammer and use fire damage against it.
Head inside the newly opened area to pick up the soul.
16: Hit the Second Set of Three Nails on the Wall

Move to the next area to find a second set of nails on the wall. In order to hit the third nail, charge your hammer first before climbing on the brown blocks.
17: In the Middle of the Falling Structures
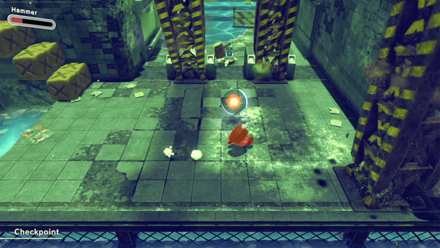
Pick up the soul in the middle of the three falling structures. Check the shadows on the floor to avoid getting squished.
18: At the Secret Passage on the Right
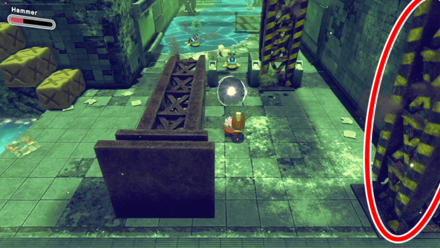 |
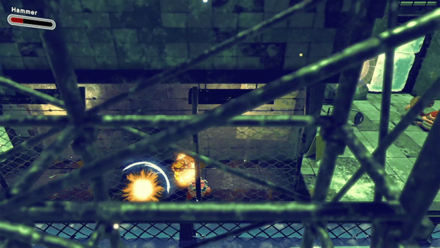 Head to the passage and hover towards the soul to pick it up. Head to the passage and hover towards the soul to pick it up. |
19: Melt Down the Ice Inside the Secret Passage Area
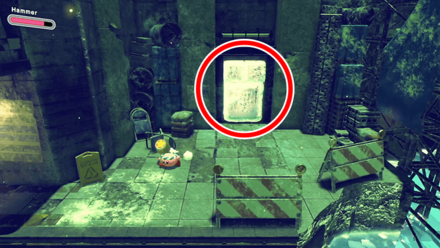
Press and hold the B button to charge your hammer to melt down the ice at the secret passage area and pick up the soul behind it.
20: Hit the Nail on the Elevated Platform
 |
 |
Forgo Horns Area 3 Soul Locations
21: Near the Cannon

The soul can be found in front of the cannon at the beginning of the stage. Watch out for the strong winds to avoid falling into the water.
22: Activate the Blue Switch

Activate the blue switch on the metal platform and pick up the soul that appears near the turtle enemy.
23: On a Small Pillar

Make your way to the roofs and hover towards the soul on the small pillar.
24: On the Balcony Near the Caterpillar Enemy

Look for the yellow caterpillar enemy to find the soul floating on a metal platform.
25: In Between the Two Giant Cannons
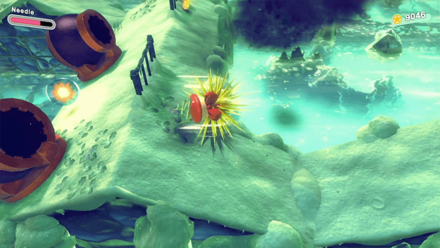
Move to the next area and pick up the soul in between the two cannons. Use the Needle's attack to avoid getting pushed by the strong winds.
26: Destroy the White Block
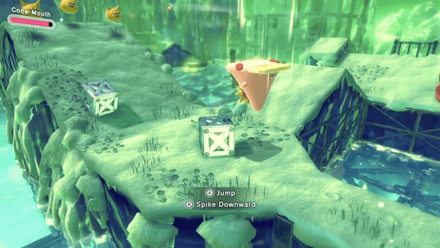
Head south of the white block to find the cone. Inhale it and break the white block to retrieve the soul inside.
27-29: Destroy the White Blocks Blocking the Small Space

Head north and break open the pipe. Use the water spout to jump towards the brown blocks to reach the area with the pile of white blocks. Destroy the blocks to find the soul behind the small opening.
30: Break Open the Pipe and Jump Towards the Soul
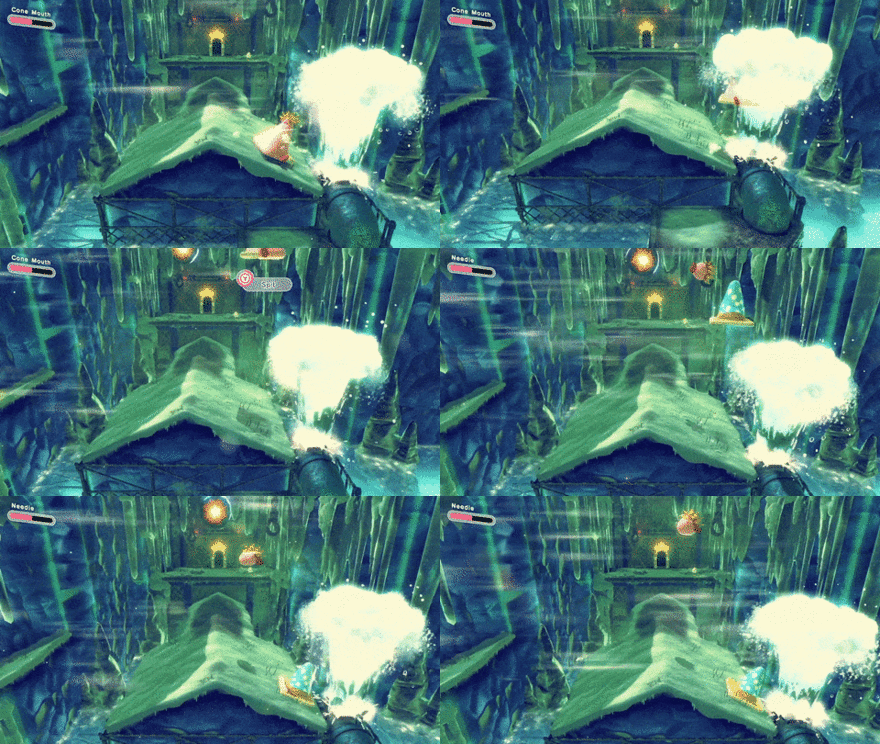
Move to the last area and break open the pipe. While still using the Cone Mouth, ride the water spout and spit the cone mid-jump to reach the soul floating on top of the area.
Forgo Horns Area 4 Soul Locations
31: On the Collapsed Part of the Bridge
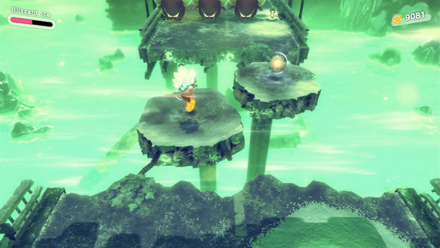
You can find the first soul on the collapsed part of the bridge at the beginning of the area.
32: Defeat the Shadowy Enemy
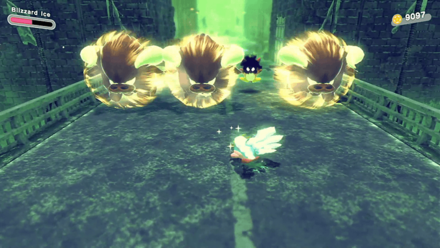
Defeat the shadowy enemy in between the running buffalo to obtain the soul from it.
33: Touch the Sparkling Spot on the Wall
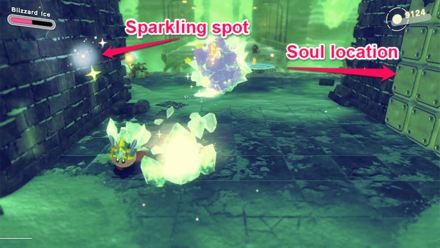
After the area with the multiple buffalo, touch the sparkling spot on the left side of the bridge to activate the white blocks on the right. Head to the newly opened area to pick up the soul inside.
34: Behind the Bernard Enemy
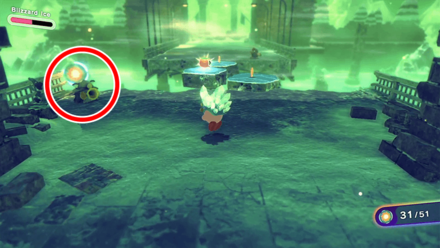
Defeat the Bernard enemy on the left side and pick up the soul behind it.
35-37: Pick Up the Five Diamonds While Fighting the Bosses
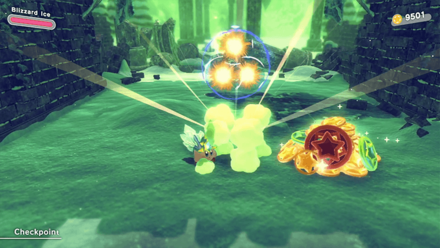
Move to the open area to start a fight between four bosses. Look carefully at the left and right sides of the arena to find and retrieve the five diamonds.
Note that the diamonds will not reappear once they pass through the arena, so you need to pick them up as soon as they appear.
All diamond locations
| All Diamond Locations | |
|---|---|
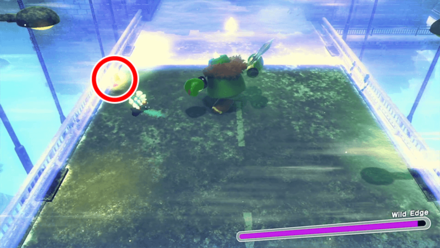 |
The first diamond appears from the upper-left side of the area. |
 |
The second diamond appears from the bottom-right side of the area. |
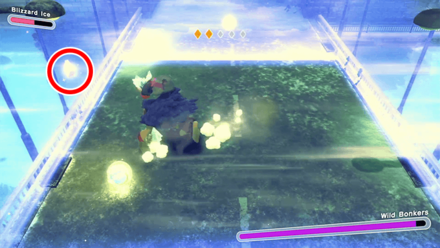 |
The third diamond appears from the upper-left side of the area. |
 |
The fourth diamond appears from the bottom-right side of the area. |
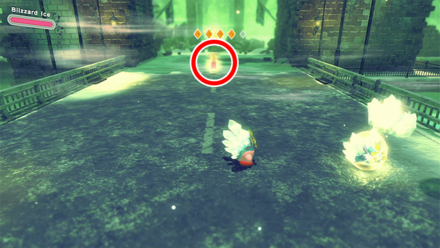 |
The fifth diamond is in the middle of the area after defeating all the bosses. |
Forgo Horns Area 5 Soul Locations
38: On the Left Side of the Starting Area
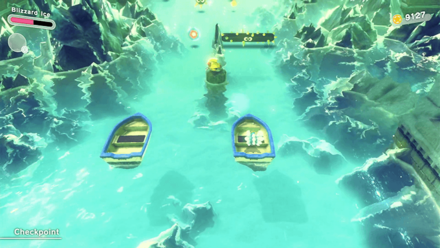
Move to the boat on the left to pick up the soul ahead of you.
39: Near the Moving Spike Enemies
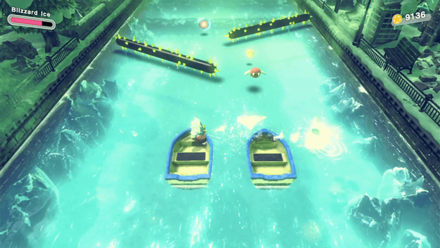
Wait for the boat to reach the spike before jumping over and picking up the soul ahead.
40: Jump Over the Spike on the Right Corner

Head to the right corner of the path and use Blast Boost to defeat the crocodile enemy and jump over the spike to retrieve the soul.
41: Jump Over the Spike Enemy
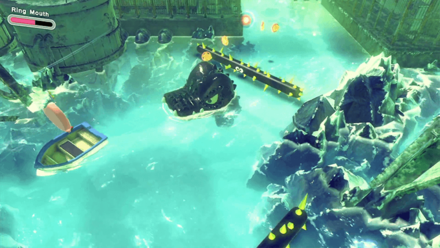
Continue to the next path on the left side of the area. Use Blast Boost to defeat the crocodile enemy and jump over the spike to obtain the soul.
42: On Top of the Sinking Platform
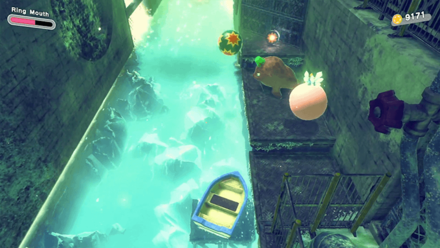
Stick to the right side until you reach a metal platform. Jump towards it and make your way to the top to obtain the soul before the platform starts to sink.
43: Jump Over the Three Spike Enemies
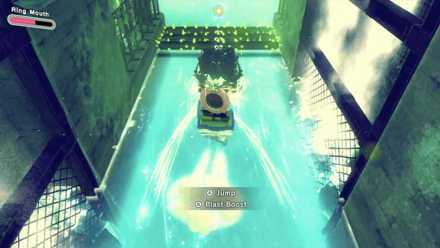
Make your way north and use Blast Boost to defeat the crocodile enemy and jump over three spikes to obtain the soul.
44-46: Activate the Fan at the End of the Area
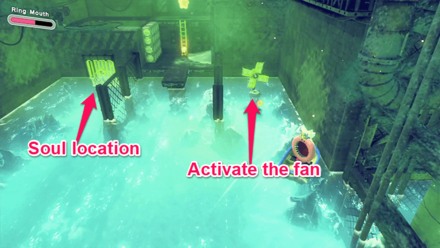
At the end of the area, use Blast Boost to activate the fan on the right side to open the locked gate. Head over to the newly opened area to find the three souls inside.
Forgo Horns Rare Stone Location
Right Side of the Bridge After Defeating the Bosses
 |
 Defeat the Bernard enemy and destroy the brown blocks to find the Rare Stone inside the small area. Defeat the Bernard enemy and destroy the brown blocks to find the Rare Stone inside the small area. |
Forgo Horns Figure Location
Inside the Secret Passage on the Second Area

In the second area, head to the area with the three falling structures. Move to the hidden passage and pick up the figure near the chairs.
How to Beat Phantom King Dedede

Recommended Ability
 Ice Ice
|
Ice will allow you to deal heavy damage via freezing
The Ice copy ability allows you to freeze Phantom King Dedede over time, causing massive damage to his health. In addition, you can guard against almost all of his attacks and inflict damage at the same time.
You can pick up the Ice copy ability in the boss area before facing Phantom King Dedede.
Attack Patterns
| Phantom King Dedede Moveset |
|---|
Use the Ice Copy Ability's Guard to Avoid Taking Damage
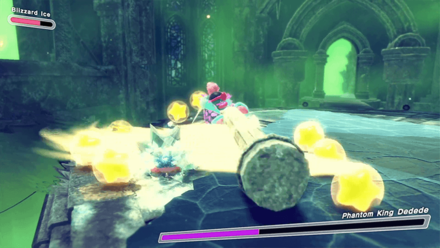
You can use the Ice copy ability's enhanced guard to avoid taking damage from most of Phantom Dedede's attacks. It is recommended to use this to protect yourself from the boss' close-range attacks during the first and second phases of the fight.
Run and Hover to Avoid the Body Slam Attacks
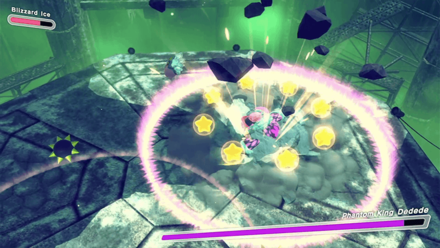
In the first phase of the fight, Phantom Dedede will perform a three consecutive body slam attack from above that causes a large shockwave. You can avoid this move by running away and hovering away from the shadow on the ground.
Hover to Avoid the Icicles that Appear from the Ground

When Phantom Dedede's health is at 40%, he will start throwing spikes and use the column to slam the ground, causing icicles to appear from it. Hover to a safe area to avoid getting hit by this attack.
Kirby and the Forgotten Land Related Guides

Isolated Isles: Forgo Dreams Walkthrough and Stage List
| List of Stages | |
|---|---|
 Forgo Plains Forgo Plains
|
 Forgo Bay Forgo Bay
|
 Forgo Park Forgo Park
|
 Forgo Horns Forgo Horns
|
 Forgo Wasteland Forgo Wasteland
|
 Forgo Zone Forgo Zone
|
 Forgo Land Forgo Land
|
|
Comment
Author
Forgo Horns Leon's Soul Locations and Walkthrough
improvement survey
03/2026
improving Game8's site?

Your answers will help us to improve our website.
Note: Please be sure not to enter any kind of personal information into your response.

We hope you continue to make use of Game8.
Rankings
- We could not find the message board you were looking for.
Gaming News
Popular Games

Genshin Impact Walkthrough & Guides Wiki

Honkai: Star Rail Walkthrough & Guides Wiki

Umamusume: Pretty Derby Walkthrough & Guides Wiki

Pokemon Pokopia Walkthrough & Guides Wiki

Resident Evil Requiem (RE9) Walkthrough & Guides Wiki

Monster Hunter Wilds Walkthrough & Guides Wiki

Wuthering Waves Walkthrough & Guides Wiki

Arknights: Endfield Walkthrough & Guides Wiki

Pokemon FireRed and LeafGreen (FRLG) Walkthrough & Guides Wiki

Pokemon TCG Pocket (PTCGP) Strategies & Guides Wiki
Recommended Games

Fire Emblem Heroes (FEH) Walkthrough & Guides Wiki

Diablo 4: Vessel of Hatred Walkthrough & Guides Wiki

Yu-Gi-Oh! Master Duel Walkthrough & Guides Wiki

Super Smash Bros. Ultimate Walkthrough & Guides Wiki

Pokemon Brilliant Diamond and Shining Pearl (BDSP) Walkthrough & Guides Wiki

Elden Ring Shadow of the Erdtree Walkthrough & Guides Wiki

Monster Hunter World Walkthrough & Guides Wiki

The Legend of Zelda: Tears of the Kingdom Walkthrough & Guides Wiki

Persona 3 Reload Walkthrough & Guides Wiki

Cyberpunk 2077: Ultimate Edition Walkthrough & Guides Wiki
All rights reserved
© HAL Laboratory, Inc. / Nintendo
The copyrights of videos of games used in our content and other intellectual property rights belong to the provider of the game.
The contents we provide on this site were created personally by members of the Game8 editorial department.
We refuse the right to reuse or repost content taken without our permission such as data or images to other sites.





![Slay the Spire 2 Review [Early Access] | Still the Deckbuilder to Beat](https://img.game8.co/4433115/44e19e1fb0b4755466b9e516ec7ffb1e.png/thumb)

![Resident Evil Village Review [Switch 2] | Almost Flawless Port](https://img.game8.co/4432790/e1859f64830960ce4248d898f8cd38d9.jpeg/thumb)


