Through the Tunnel Waddle Dee Locations and Missions Walkthrough

This is a walkthrough for the Through the Tunnel stage in Kirby and the Forgotten Land. Read on to learn how to clear all Through the Tunnel stage missions, see Waddle Dee and Figure locations, Enemy Information, and more!
| Previous Stage | Next Stage |
|---|---|
| Downtown Grassland | Rocky Rollin' Road |
List of Contents
Through the Tunnel Walkthrough Video
Through the Tunnel Missions and Abilities
Missions List
| Mission | Waddle Dees |
|---|---|
| 3 | |
| 4 | |
| 1 | |
| 1 | |
| 1 |
Waddle Dee Locations for All Missions
Copy Abilities
 Cutter Cutter
|
 Fire Fire
|
Through the Tunnel Mission Completion Order
This stage has a total of five areas, each of them divided by passageways. Follow the table below to clear each mission in order.
Area 1
| Area 1 Missions | ||
|---|---|---|
| 1 | 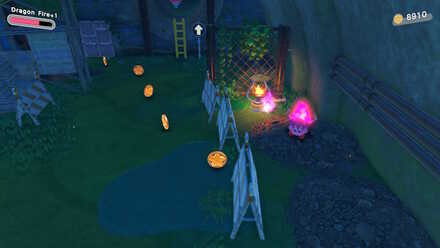 |
Light the first Lantern Switch |
| 2 | 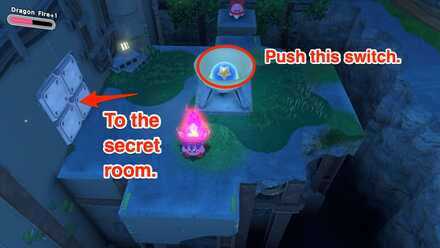 |
Find the Secret Room |
| 3 | 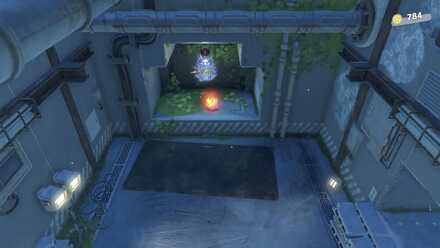 |
Rescue the 1st hidden Waddle Dee |
Area 2
| Area 2 Missions | ||
|---|---|---|
| 4 | 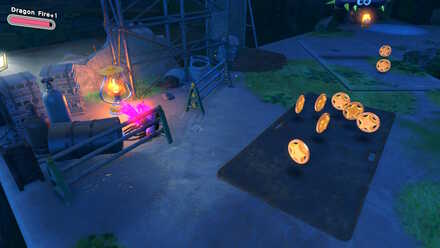 |
Light the 2nd Lantern Switch |
| 5 | 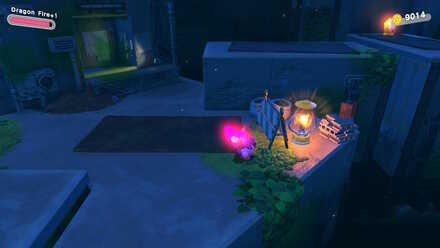 |
Light the 3rd Lantern Switch |
| 6 | 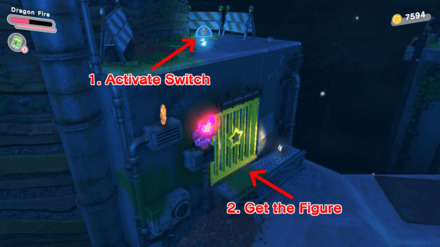 |
Grab the 1st figure |
| 7 | 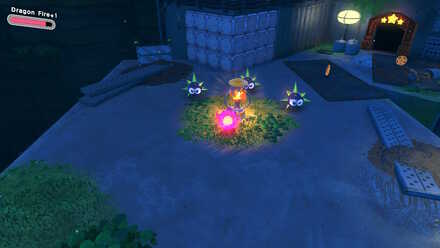 |
Light the 4th Lantern Switch |
| 8 | 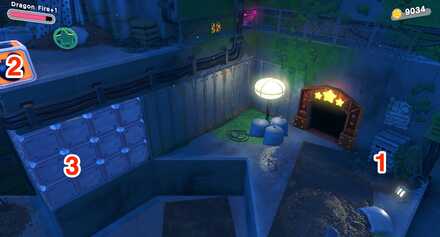 |
Rescue the 2nd hidden Waddle Dee |
Area 3
| Area 3 Missions | ||
|---|---|---|
| 9 | 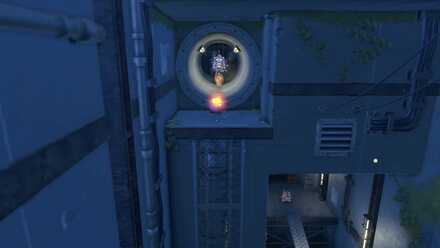 |
Rescue the 3rd hidden Waddle Dee |
Area 4
| Area 4 Missions | ||
|---|---|---|
| 10 | 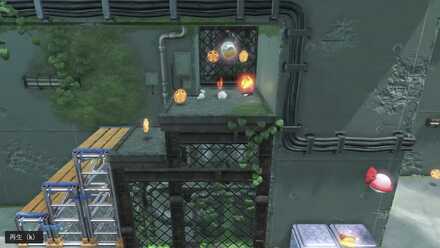 |
Grab the 2nd figure |
| 11 | 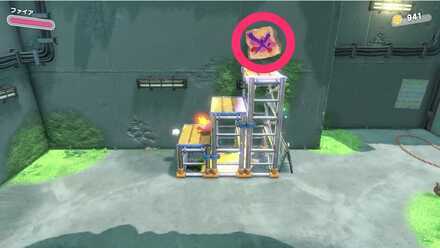 |
Remove the wanted poster |
| 12 | 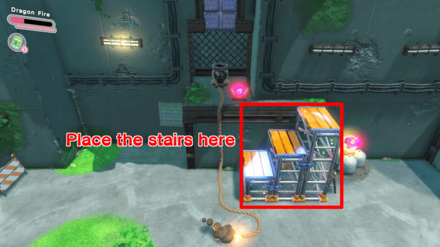 |
Rescue the 4th Waddle Dee |
Area 5
| Area 5 Missions | ||
|---|---|---|
| 13 | 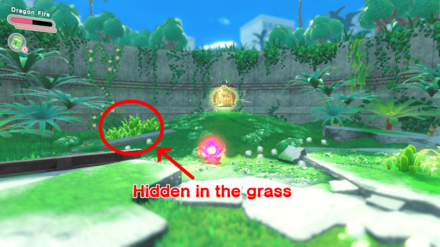 |
Grab the 3rd figure |
Through the Tunnel Hidden Waddle Dee Locations
1: Uncover the Switch in the Dome to Find a Hidden Room

Using Mouthful Mode on the Dome you find in the 2nd area will uncover a switch that reveals a hidden area when you press it. Open the chest in this area to find the hidden Waddle Dee.
2: Hidden Behind the Blocks before the Next Area

After riding the rising and falling platforms in the 3rd area, light the Lantern Switch near the exit to reveal coins that lead you to a higher path. If you ignite the bomb block on top, the resulting explosion will reveal the hidden Waddle Dee.
How to Rescue the Waddle Dee
| 1 | From (1) in the image, jump to climb upward. |
|---|---|
| 2 | Use your copy ability to break the bomb block marked at (2). |
| 3 | Save the Waddle Dee, found at (3). |
3: Hidden Path Opened with the Cannon

Lighting the fuse of the cannon and entering it before it fires will launch you to a secret area where you will find the next Hidden Waddle Dee.
4: Use the Final Cannon to Find the Last Waddle Dee
 |
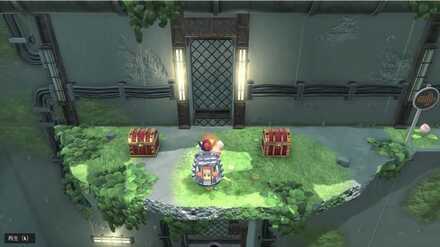 |
The final area also has a cannon that will launch you into a secret area when you light the fuse. Make sure that you place the staircase away from the fuse so that the fire will reach the cannon without being put out.
Through the Tunnel Secret Room Location
Use Dome Mouth to Reveal the Switch

Using Mouthful Mode on the Dome you find in the second area reveals a switch that opens the secret room, completing the Find the secret room mission.
Through the Tunnel Lantern Switch Locations
1: On the Right Side in the 1st Area

Before you enter the tunnel to the next area, use the Fire Copy Ability to light the Lantern Switch on the right side near the opening.
2: On the Left Side Near the Entrance of the 2rd Area

The second Lantern Switch can be seen immediately upon entering the 3rd area. Light it before proceeding.
3: In the Corner Opposite of the Yellow Cage

You will eventually come across a yellow cage containing a figure in the 3rd area. The 3rd Lantern Switch is in the corner to the right of this cage.
4: On a Platform Surrounded by Gordos

In the final part of the third area, you will come across a platform with the final Lantern Switch surrounded by Gordos. Gordos are impervious to damage, so be careful when lighting the switch.
Through the Tunnel Wanted Poster Location
On the Wall in the 4th Area Before the Cannon

While in Stairs Mouth mode, you will come across a wall with a Wanted Poster, located right before the cannon. Spit out the stairs to climb up and destroy it.
Through the Tunnel Figure Locations
1: Behind the Yellow Cage

Lighting the 3rd Lantern Switch will reveal a path of coins that will lead you to the ledge above the cage. Pushing the switch on the ledge will raise the cage, allowing you to get the Figure.
2: Behind Blocks in the 4th Area

Spit out the Stairs near the bomb block that you find in the 5th area to reveal a hidden space containing a Figure capsule.
3: Hidden in the Grass in the Final Area

Before you save the Waddle Dees and finish the stage, use the Fire Copy Ability to burn the patch of grass on the left, revealing the final figure.
Kirby and the Forgotten Land Related Guides

Natural Plains Walkthrough and Stage List
| List of Stages | |
|---|---|
 Point of Arrival Point of Arrival
|
 Downtown Grassland Downtown Grassland
|
 Through the Tunnel Through the Tunnel
|
 Rocky Rollin' Road Rocky Rollin' Road
|
 A Trip to Alivel Mall A Trip to Alivel Mall
|
 The Brawl at the Mall The Brawl at the Mall
|
Comment
Author
Through the Tunnel Waddle Dee Locations and Missions Walkthrough
improvement survey
04/2026
improving Game8's site?

Your answers will help us to improve our website.
Note: Please be sure not to enter any kind of personal information into your response.

We hope you continue to make use of Game8.
Rankings
- We could not find the message board you were looking for.
Gaming News
Popular Games

Genshin Impact Walkthrough & Guides Wiki

Crimson Desert Walkthrough & Guides Wiki

Umamusume: Pretty Derby Walkthrough & Guides Wiki

Honkai: Star Rail Walkthrough & Guides Wiki

Monster Hunter Stories 3: Twisted Reflection Walkthrough & Guides Wiki

Wuthering Waves Walkthrough & Guides Wiki

The Seven Deadly Sins: Origin Walkthrough & Guides Wiki

Pokemon TCG Pocket (PTCGP) Strategies & Guides Wiki

Pokemon Pokopia Walkthrough & Guides Wiki

Zenless Zone Zero Walkthrough & Guides Wiki
Recommended Games

Monster Hunter World Walkthrough & Guides Wiki

Fire Emblem Heroes (FEH) Walkthrough & Guides Wiki

Pokemon Brilliant Diamond and Shining Pearl (BDSP) Walkthrough & Guides Wiki

Super Smash Bros. Ultimate Walkthrough & Guides Wiki

Diablo 4: Vessel of Hatred Walkthrough & Guides Wiki

Cyberpunk 2077: Ultimate Edition Walkthrough & Guides Wiki

Yu-Gi-Oh! Master Duel Walkthrough & Guides Wiki

Elden Ring Shadow of the Erdtree Walkthrough & Guides Wiki

The Legend of Zelda: Tears of the Kingdom Walkthrough & Guides Wiki

Persona 3 Reload Walkthrough & Guides Wiki
All rights reserved
© HAL Laboratory, Inc. / Nintendo
The copyrights of videos of games used in our content and other intellectual property rights belong to the provider of the game.
The contents we provide on this site were created personally by members of the Game8 editorial department.
We refuse the right to reuse or repost content taken without our permission such as data or images to other sites.




![Forza Horizon 6 Review [Preview] | Beautiful Roads With a Whole Lot of Oversteer](https://img.game8.co/4460981/a7254c24945c43fbdf6ad9bea52b5ce9.png/show)


![Forza Horizon 6 Review [Preview] | Beautiful Roads With a Whole Lot of Oversteer](https://img.game8.co/4460981/a7254c24945c43fbdf6ad9bea52b5ce9.png/thumb)


