Forgo Plains Leon's Soul Locations and Walkthrough
This is a walkthrough for the Forgo Plains stage in Kirby and the Forgotten Land. Read on to see the location for all of Leon's Souls, as well as a guide on how to beat the boss Phantom Gorimondo, and more!
| Previous Stage | Next Stage |
|---|---|
| Lab Discovera | Forgo Bay |
List of Contents
Forgo Plains Walkthrough Video
Forgo Plains All Leon's Souls
Leon's Souls Per Area
| Area 1 | 14 Leon's Souls |
|---|---|
| Area 2 | 7 Leon's Souls |
| Area 3 | 8 Leon's Souls |
| Area 4 | 9 Leon's Souls |
| Area 5 | 7 Leon's Souls |
| Boss | 5 Leon's Souls |
| Total | 50 Leon's Souls |
Copy Abilities
 Sleep Sleep
|
 Tornado Tornado
|
 Hammer Hammer
|
 Needle Needle
|
 Bomb Bomb
|
 Sword Sword
|
 Cutter Cutter
|
 Ice Ice
|
 Ranger Ranger
|
Forgo Plains Area 1 Soul Locations
1: On Top of the Platform

You can find the first soul floating above the platform at the start of the stage.
2: Destroy the Bomb Block Below the Log
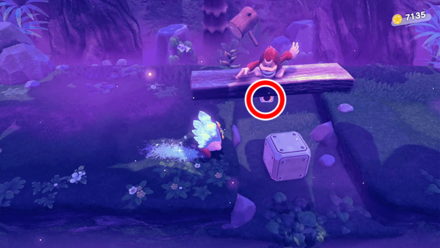
Head right and destroy the bomb block under the log to activate the metal block south of it to reveal the soul.
3: Behind the Tree

The third soul is hidden behind the tree on the right corner of the stage.
4: Hit the Three Nails on the Narrow Passageway
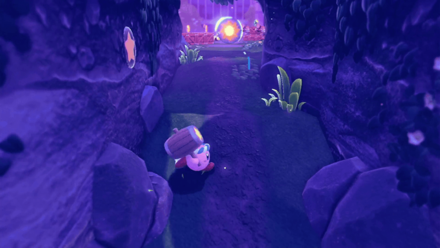
Pick up the Hammer copy ability from the monkey enemy and hit the three nails on the narrow passageway to reveal the soul at the end of the path.
5: On Top of the Wooden Blocks
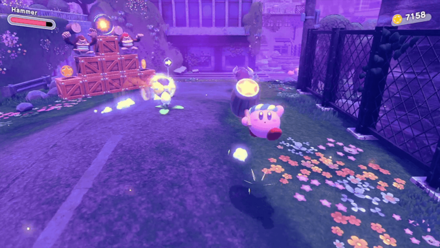
The fifth soul can be found on top of the wooden blocks surrounded by the hammer-throwing monkey enemies.
6-8: Collect the 5 Diamonds
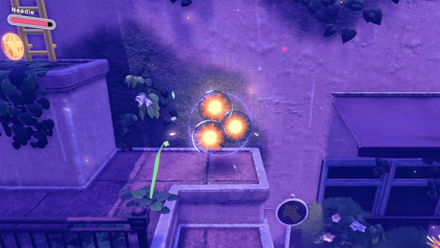
The three souls only appear once you have collected the five green diamonds in the surrounding area.
All diamond locations
| All Diamond Locations | |
|---|---|
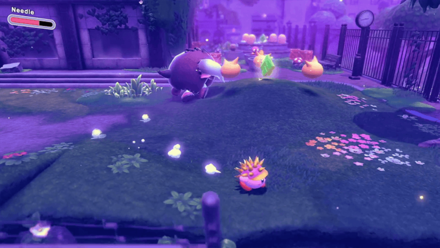 |
Surrounded by the three Scarfy enemies. |
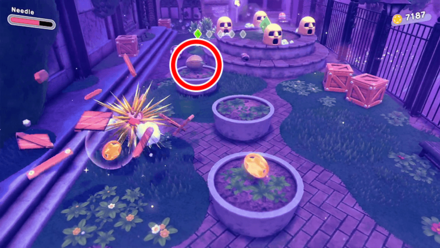 |
Crack open the Knock-Knock Nut. |
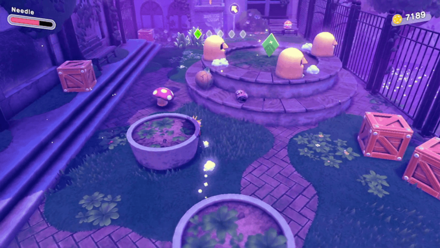 |
Surrounded by the four Kabu enemies. |
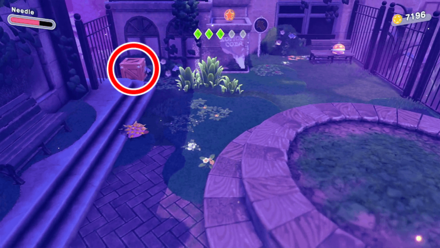 |
Destroy the wooden block on the left corner of the area. |
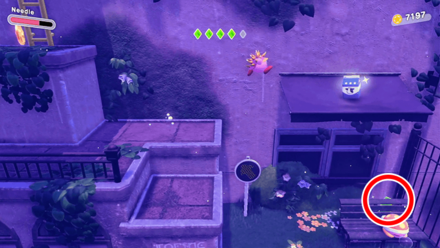 |
Behind the sleeping enemy sitting on the bench. |
9: Defeat the Shadowy Bernard Enemy
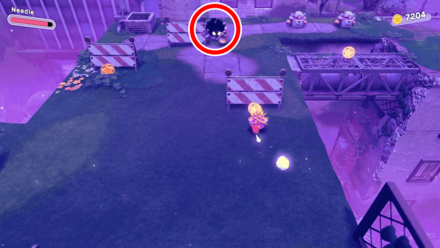
Defeat the shadowy enemy in the area to pick up Leon's soul from it.
10: Hit the Blue Switch Below the Ledge
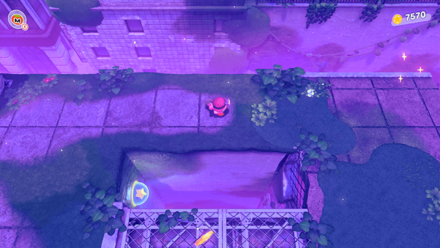
Head north of the metal pathway to find a blue switch on the left corner of the hole. Hit it to reveal a soul nearby.
11: Destroy the Large Star Block
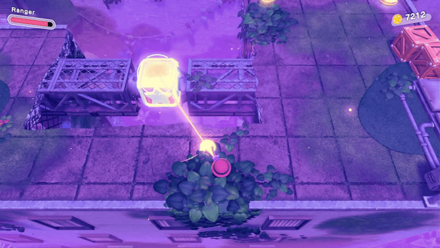
Continue along the path and destroy the large star block in between the metal pathway for a soul to appear.
12-14: Pick up the Souls After Defeating Wild Bonkers
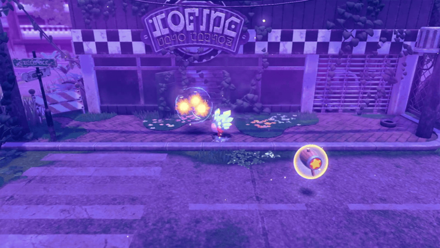
Defeat the mid-boss Wild Bonkers and collect the three souls floating in front of the closed building.
Forgo Plains Area 2 Soul Locations
15: Floating Above the Platform with the Kabu Enemy
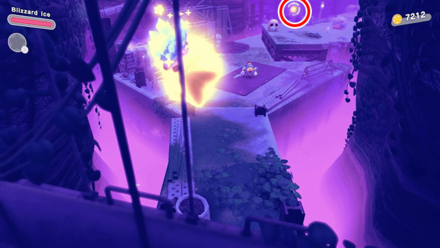
You can find the first soul on the moving platform as soon as you arrive in the area.
16: Floating Above the Elevated Platform
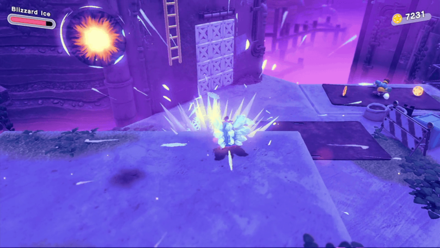
Jump on the moving platform near the yellow ladder and head to the bottom-left corner to find the soul floating above.
17: Behind the White Blocks
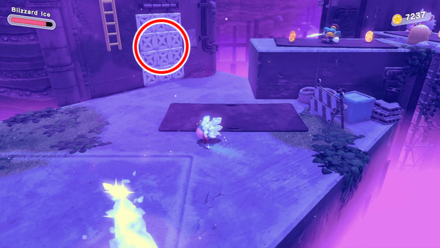 |
 |
18: Destroy the White Block on the Right Corner
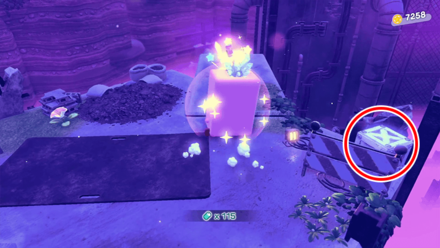
Continue along the path until you find the single white block hidden by the roadblock signages. Destroy the block to reveal the soul inside.
19-21: Hit the Blue Switch and Destroy the White Blocks
 |
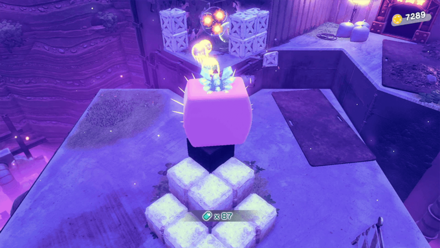 |
Forgo Plains Area 3 Soul Locations
22: Hit the Bomb Block to Collect the Soul
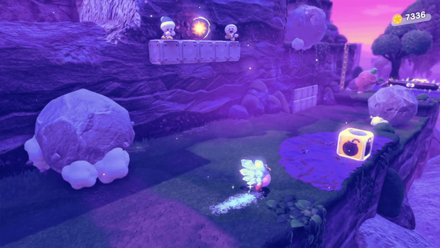
Destroy the bomb block surrounded by poison for the metal platform nearby to disappear and pick up the soul on the ground.
23: Hit the Bomb Block Next to the Tree
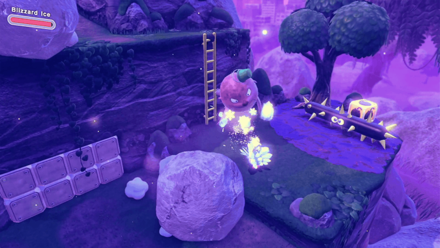 |
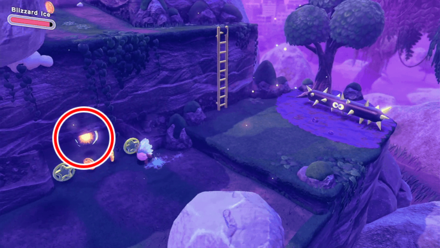 |
24: Right Corner in the Area with Falling Boulders
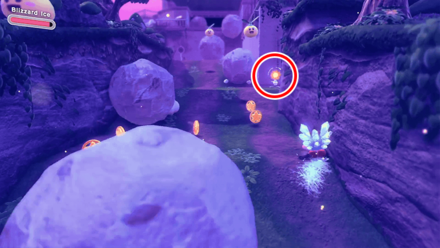
Climb up the path while avoiding the falling boulders. Head to the small space on the right corner to pick up the soul.
25: Hit the Three Red Switches
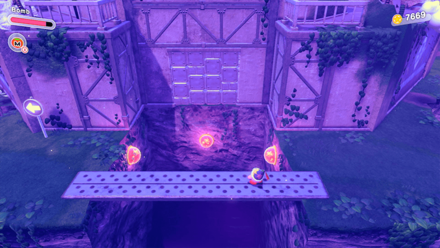
Hit the three red switches at the same time for the white blocks to disappear and reveal a path leading to the soul. You can use the Bomb or Ranger copy ability to easily activate the switches.
26-28: Hit the Two Red Switches at the End of the Boulder Chase
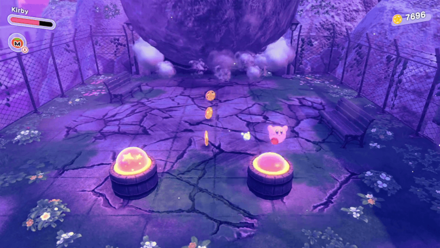
At the near end of the boulder chase sequence, jump on the two red switches to activate a cutscene showing three souls appearing on the bench.
29: Under the Top-Right Corner of the Hole
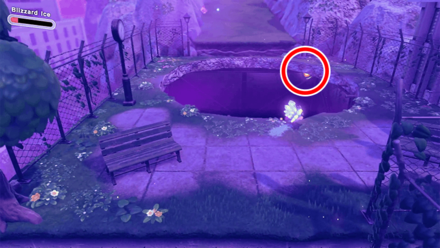
Head back to the hole that the boulder has created and hover towards the top-right corner to pick up the soul.
Forgo Plains Area 4 Soul Locations
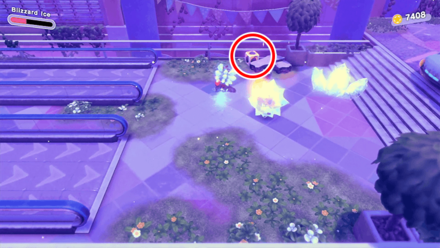
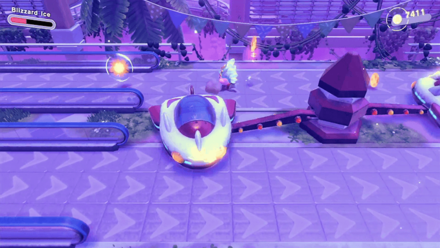
30: Hit the Small Bomb Block and Follow the Coin Trail
 |
 |
31: On the Bottom-Right Corner of the Rocket Ride
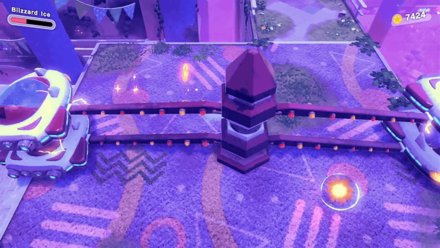
Continue along the path until you find the two sets of the rocket ride. Head to the bottom-right corner of this area to pick up the soul.
32: Behind the Single Rocket Ride
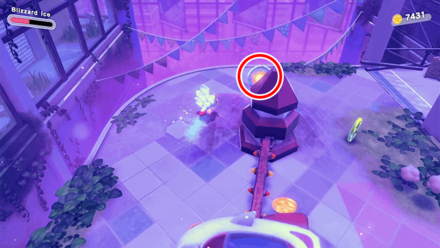
Proceed to the next area until you find the fast-moving single rocket ride. Head to the back part of the ride to pick up the soul.
33: Destroy the Bomb Block and Pick Up the Soul on the Conveyor Belt
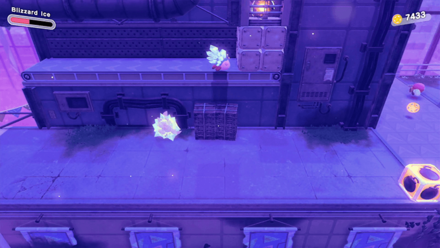
Destroy the bomb block on the bottom-right corner of the area and make your way up to the conveyor belt to pick up the soul before it falls down to the bottomless pit.
You can use the Bomb or Ranger copy ability to hit the bomb block from a distance, making it easy to retrieve the soul.
34: Below the Moving Floor
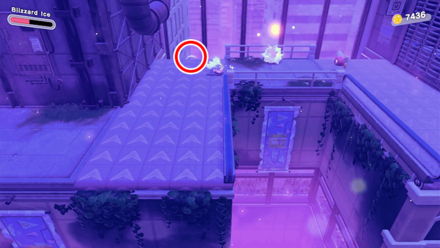
Continue to the next area after the conveyor belt to find a series of moving floors. Hover down to the first moving floor to pick up the hidden soul.
35: Defeat the Shadowy Hammer Throwing Enemy

Make your way to the next area and defeat the shadowy hammer-throwing enemy surrounded by the recovery items to retrieve the soul from it.
36-38: Collect the 5 Diamonds
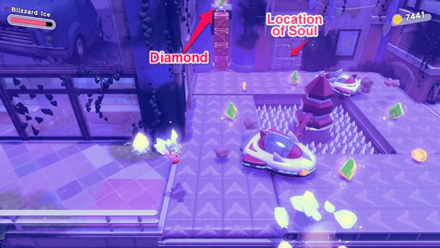
You can find the four diamonds in the area with the moving floors and the two rocket rides. The last one is located in the top-left corner of the area blocked by the four wooden blocks.
Picking up all five diamonds reveals the location of the soul within the area.
Forgo Plains Area 5 Soul Locations
39: Destroy the White Blocks on the Right Corner
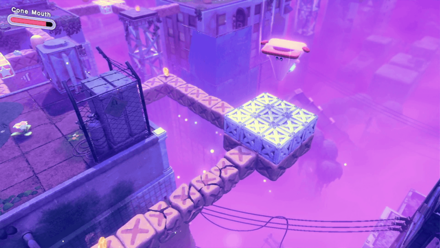
Use the Cone Mouth and walk on the falling blocks and jump on top of the white blocks. Break them open to reveal the soul hiding inside.
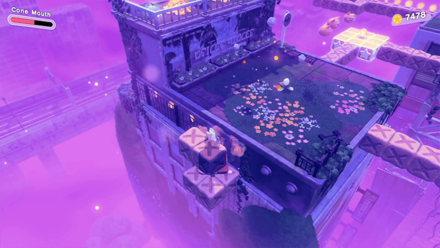
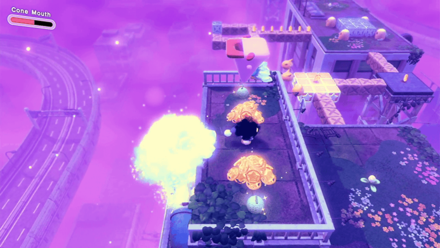
40: Defeat the Shadowy Bomb Throwing Enemy
 |
 |
41: On the Bottom of the Signboard
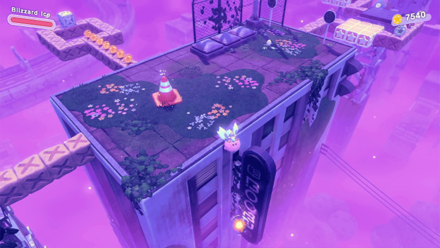
Move to the next building and spit out the cone. Hover down to the bottom of the signboard to pick up the soul.
If your health is low, you can destroy the white blocks in the middle of the area to pick up the ice cream recovery item.
42: Destroy the White Block on the Left Side of the Area
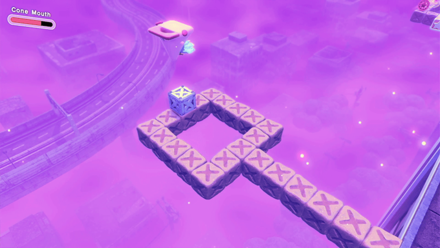
Inhale the cone and walk all the way to the white block. Jump and break open the white block to pick up the soul inside.
43-45: Destroy the White Block on the Bottom Part of the Brown Block Paths
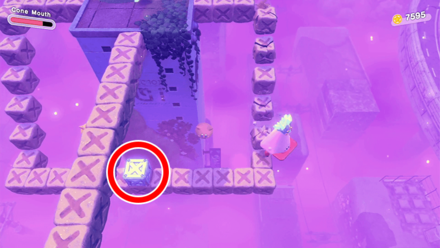
Proceed to the next area and walk on the falling blocks that extend down to the bottom of the building. Destroy the white block in the middle to pick up three souls.
Forgo Plains Rare Stone Location
Floating Above the Brown Blocks at the Fifth Area
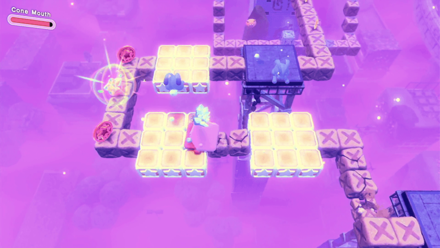
You can find the Rare Stone on the path with the jumping rabbit enemies. If you are using the Cone Mouth, avoid attacking the enemies as you will fall to the bottomless pit in the process.
How to Get Rare Stones Quickly
Forgo Plains Figure Location
At the End of the Third Area
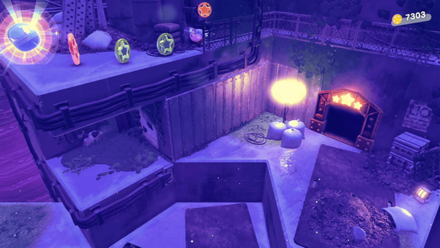
You can find the figure above the three-star door at the end of the third area. Climb up the platforms on the right side of the door to reach the upper area and follow the star coins to obtain the figure.
How to Beat Phantom Gorimondo

Recommended Abilites
 Blizzard Ice Blizzard Ice
|
 Dragon Fire Dragon Fire
|
Blizzard Ice allows you to deal heavy damage via freezing
Using the Ice copy ability allows you to freeze Phantom Gorimondo, causing massive damage to his health. You can also guard against most attacks, which comes in handy if you find dodging the attacks too difficult.
Dragon Fire allows you to inflict burn damage
If you prefer an offensive playstyle, the Fire copy ability allows you to use a jump attack to evade Phantom Gorimondo and inflict damage at the same time. The copy ability's attack also inflicts passive burn damage over time.
Attack Patterns
| Phantom Gorimondo Moveset |
|---|
Watch Out When Phantom Gorimondo Extends His Right Arm
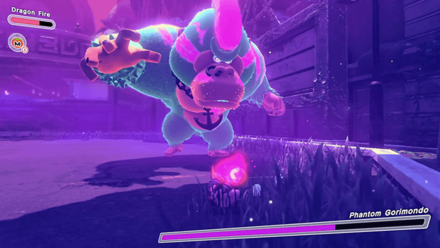
When Phantom Gorimondo approaches you with an extended right arm, you can either run or hover as soon as he grabs you. If you get caught, you need to move the left joystick to free
Hover to Avoid the Slapping Attacks

You can hover to avoid Phantom Gorimondo's three consecutive slapping attacks. If you are using the Fire copy ability, you can use the jump attack to move away from the boss quickly.
Jump to Avoid the Stomping Attack
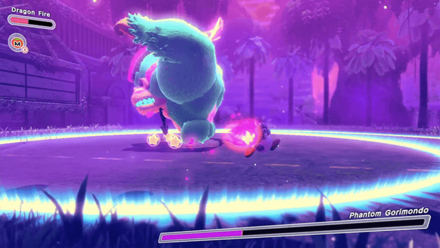
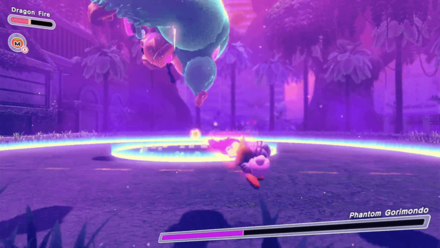
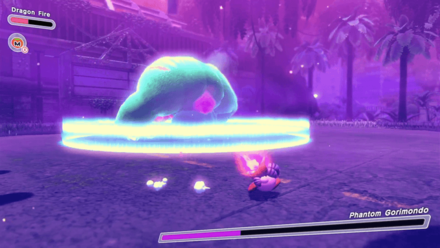
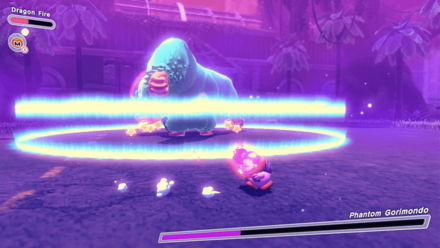
Phantom Gorimondo has a set pattern that he uses whenever he performs the stomping attack. The shockwave that appears after the stomp moves fast so be sure to time your jumps to avoid getting hit.
Stomping attack pattern
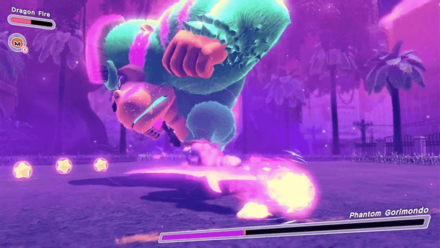 |
Phantom Gorimondo stomps with one leg causing one shockwave. |
 |
The attack follows up with another stomp. |
|
Phantom Gorimondo stomps with both legs causing one shockwave. |
 |
Phantom Gorimondo spins around and stomps with both legs causing two layers of shockwave. Jump and hover to avoid this attack. |
 |
Phantom Gorimondo spins multiple around and stomps with both legs causing two layers of shockwave. Lightly press the jump button to pass in between the two shockwaves. |
Run Away from the Spinning Attack
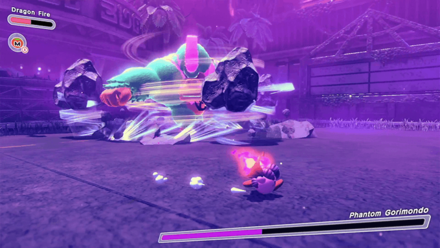
Once Phantom Gorimondo's health is at 40%, he will perform a spinning attack that creates tornadoes. He will pause briefly after this attack, so if you manage to keep a safe distance, you safely can rush in and attack.
Kirby and the Forgotten Land Related Guides

Isolated Isles: Forgo Dreams Walkthrough and Stage List
| List of Stages | |
|---|---|
 Forgo Plains Forgo Plains
|
 Forgo Bay Forgo Bay
|
 Forgo Park Forgo Park
|
 Forgo Horns Forgo Horns
|
 Forgo Wasteland Forgo Wasteland
|
 Forgo Zone Forgo Zone
|
 Forgo Land Forgo Land
|
|
Comment
Might want to rethink the ability recommendations. I don’t know if it’s random or what but the only ability options I got were Ranger and Hammer, not Ice or Fire.
Author
Forgo Plains Leon's Soul Locations and Walkthrough
improvement survey
03/2026
improving Game8's site?

Your answers will help us to improve our website.
Note: Please be sure not to enter any kind of personal information into your response.

We hope you continue to make use of Game8.
Rankings
- We could not find the message board you were looking for.
Gaming News
Popular Games

Genshin Impact Walkthrough & Guides Wiki

Honkai: Star Rail Walkthrough & Guides Wiki

Umamusume: Pretty Derby Walkthrough & Guides Wiki

Pokemon Pokopia Walkthrough & Guides Wiki

Resident Evil Requiem (RE9) Walkthrough & Guides Wiki

Monster Hunter Wilds Walkthrough & Guides Wiki

Wuthering Waves Walkthrough & Guides Wiki

Arknights: Endfield Walkthrough & Guides Wiki

Pokemon FireRed and LeafGreen (FRLG) Walkthrough & Guides Wiki

Pokemon TCG Pocket (PTCGP) Strategies & Guides Wiki
Recommended Games

Fire Emblem Heroes (FEH) Walkthrough & Guides Wiki

Diablo 4: Vessel of Hatred Walkthrough & Guides Wiki

Yu-Gi-Oh! Master Duel Walkthrough & Guides Wiki

Super Smash Bros. Ultimate Walkthrough & Guides Wiki

Pokemon Brilliant Diamond and Shining Pearl (BDSP) Walkthrough & Guides Wiki

Elden Ring Shadow of the Erdtree Walkthrough & Guides Wiki

Monster Hunter World Walkthrough & Guides Wiki

The Legend of Zelda: Tears of the Kingdom Walkthrough & Guides Wiki

Persona 3 Reload Walkthrough & Guides Wiki

Cyberpunk 2077: Ultimate Edition Walkthrough & Guides Wiki
All rights reserved
© HAL Laboratory, Inc. / Nintendo
The copyrights of videos of games used in our content and other intellectual property rights belong to the provider of the game.
The contents we provide on this site were created personally by members of the Game8 editorial department.
We refuse the right to reuse or repost content taken without our permission such as data or images to other sites.





![Slay the Spire 2 Review [Early Access] | Still the Deckbuilder to Beat](https://img.game8.co/4433115/44e19e1fb0b4755466b9e516ec7ffb1e.png/thumb)

![Resident Evil Village Review [Switch 2] | Almost Flawless Port](https://img.game8.co/4432790/e1859f64830960ce4248d898f8cd38d9.jpeg/thumb)


You can select your ability and then go into the stage.